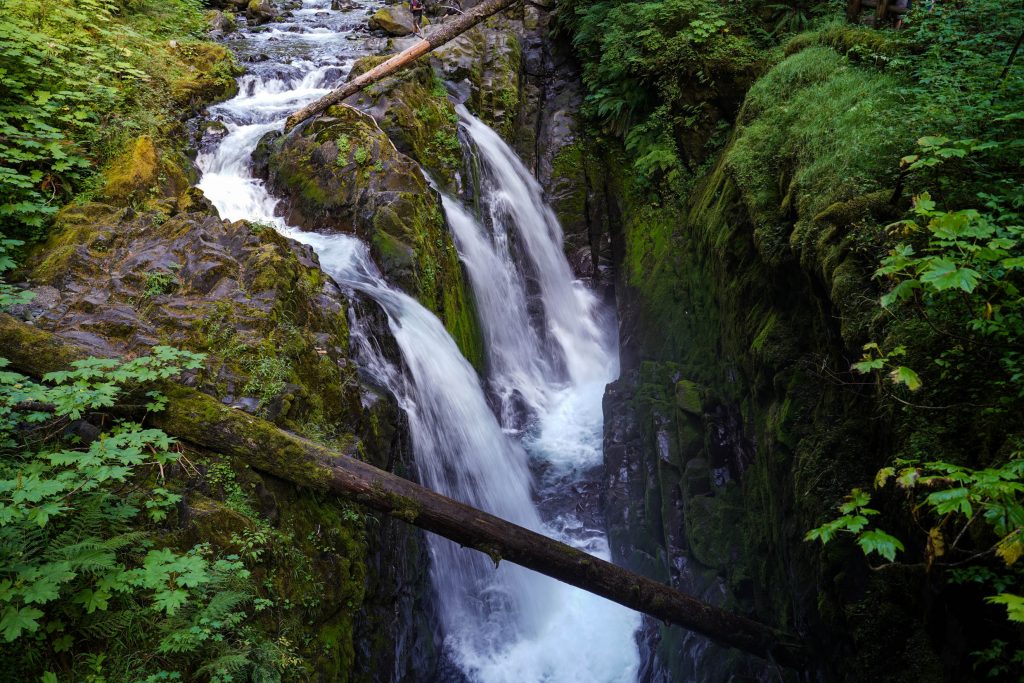
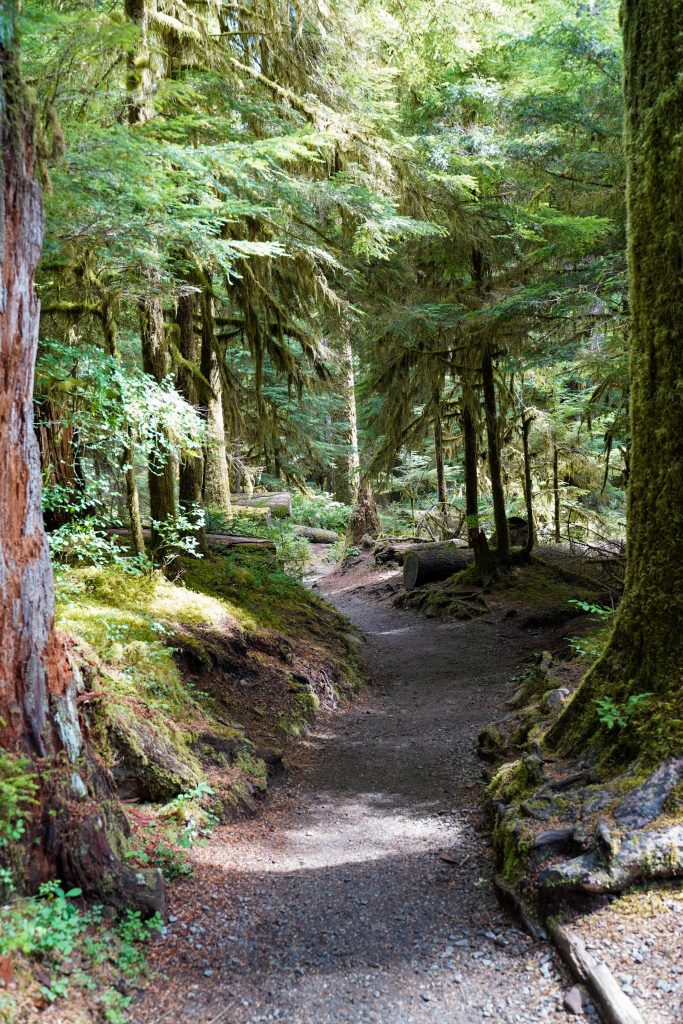
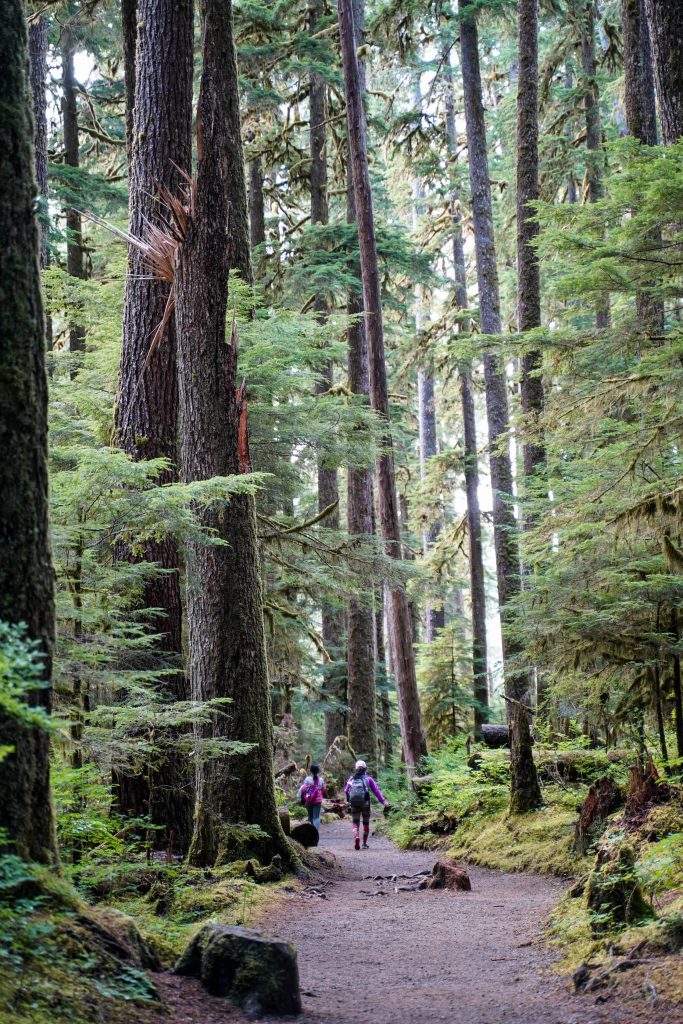
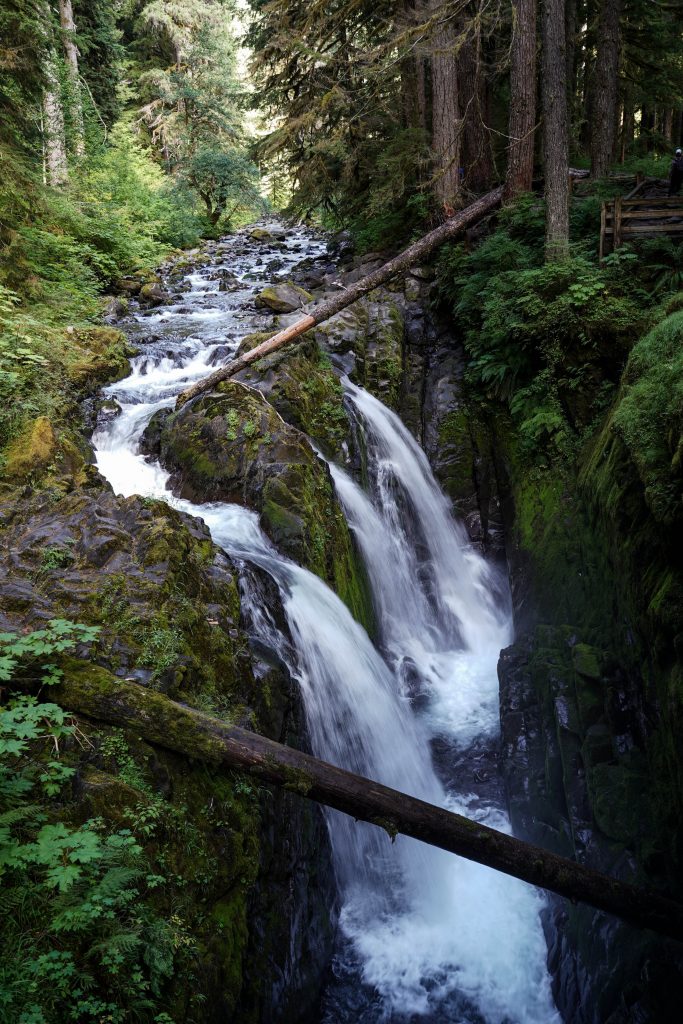
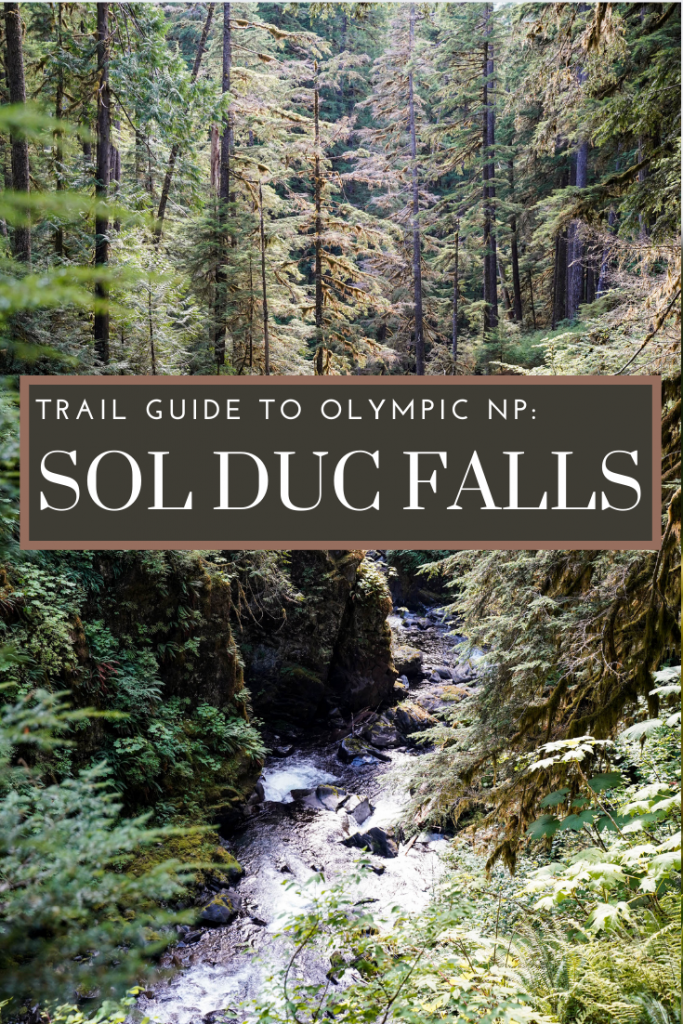
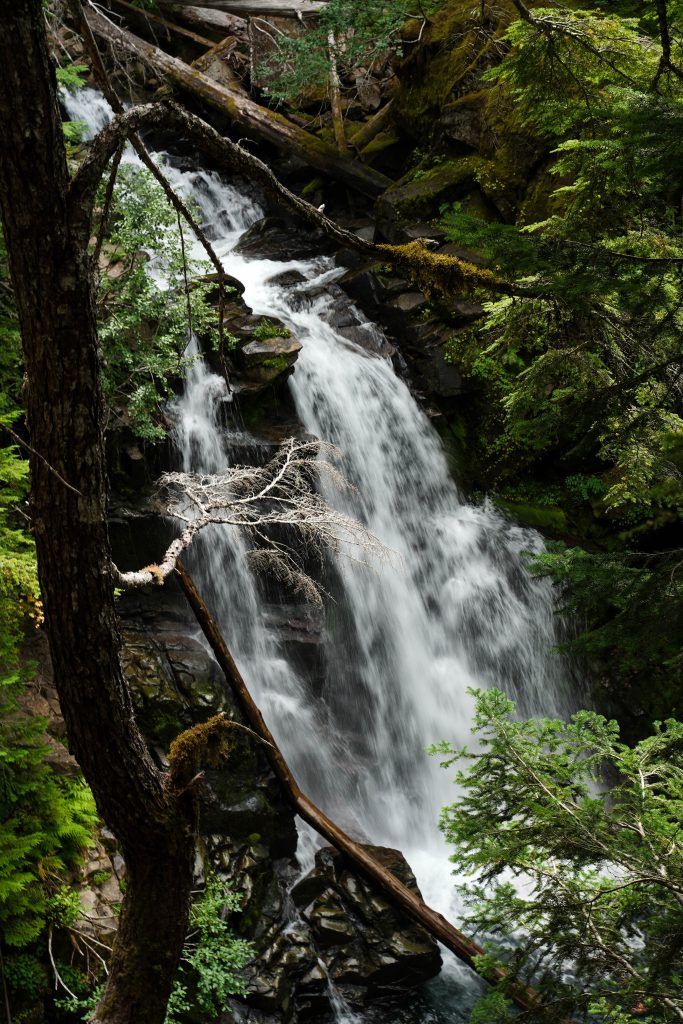
Olympic National Park is brimming with beautiful and accessible hikes with Sol Duc falls as the piece de resistance. It’s a short, relatively flat trail through the towering forests that the national park is well known for. The falls are thunderous and a beautiful. With a trail as easy as this one, families and adventurers alike will enjoy this trail making it a must do for anyone in the Lake Crescent/ Port Angeles area.
Sol Duc Falls Trail Details:
Distance: 1.85 miles RT Elevation Gain: 210 feet (easy) Time: 1 hour Fees: Sol Duc Falls is within the Sol Duc Valley fee area for Olympic National Park. A week pass to the park is $30 or included with a National Park pass.
Trailhead directions:
Take hwy 101 and turn left onto Sol Duc-Hot Springs Rd if coming from Port Angeles. Follow the road 13.8 miles passing the hot springs and Salmon run on the right until the road dead ends at the trailhead. The parking lot is huge and offers facilities/ trash. The trailhead also serves a number of other great trails in the area including Lover’s Lane which is a 6 mile loop that includes a stop at the falls.
Sol Duc Falls trail description:
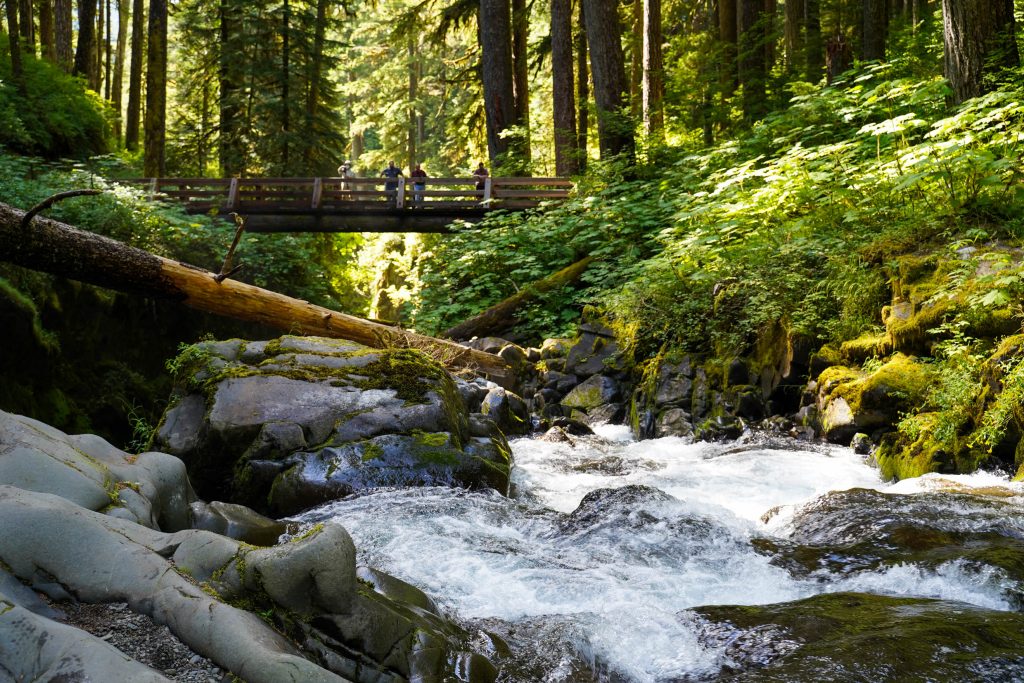
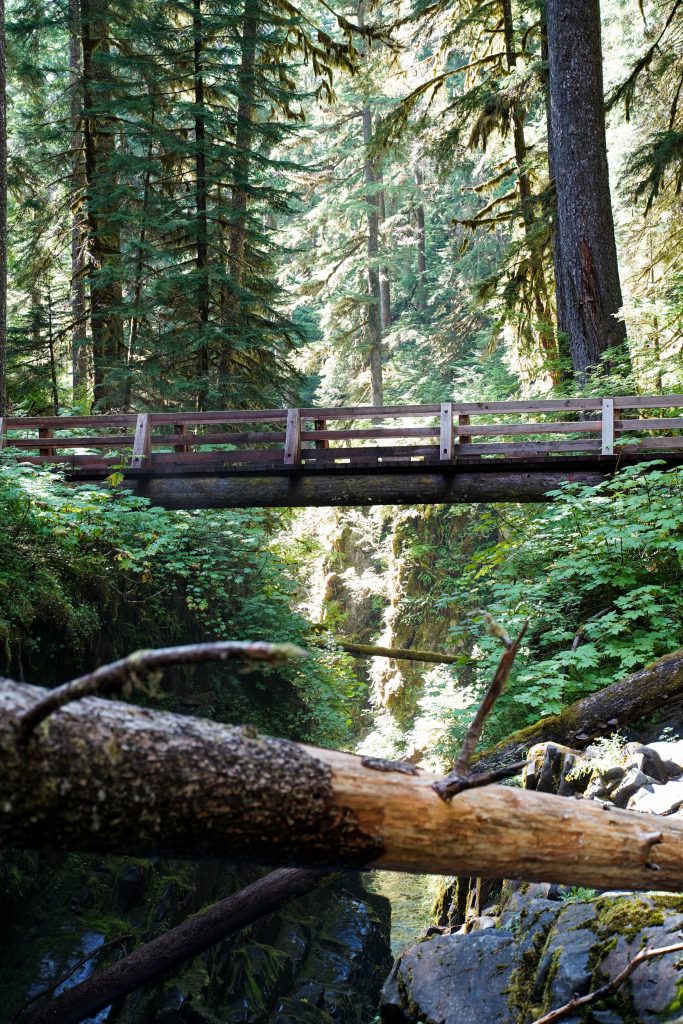
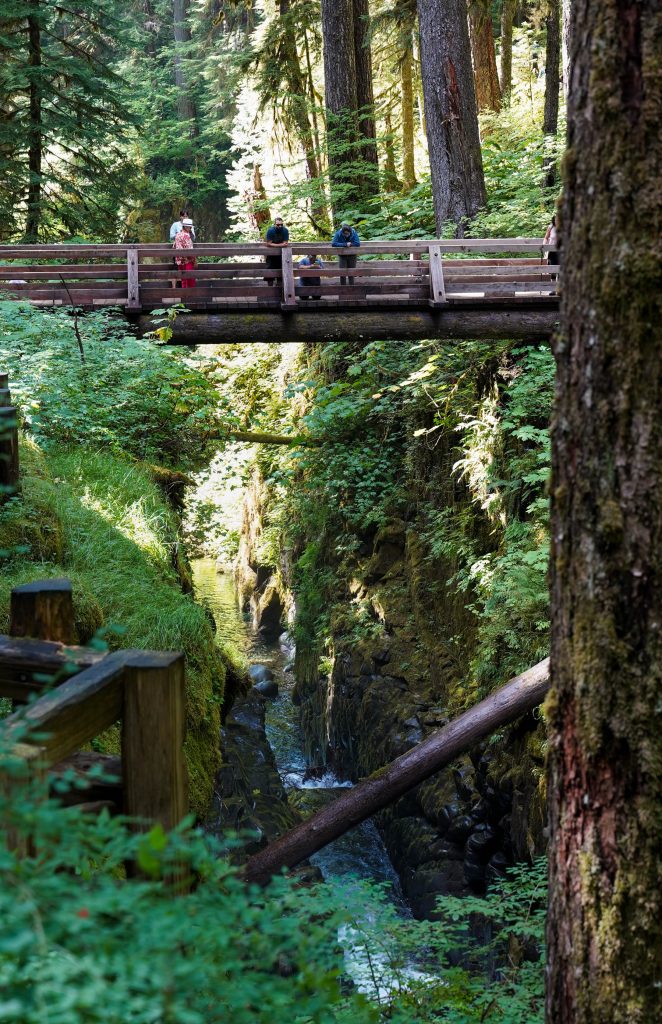
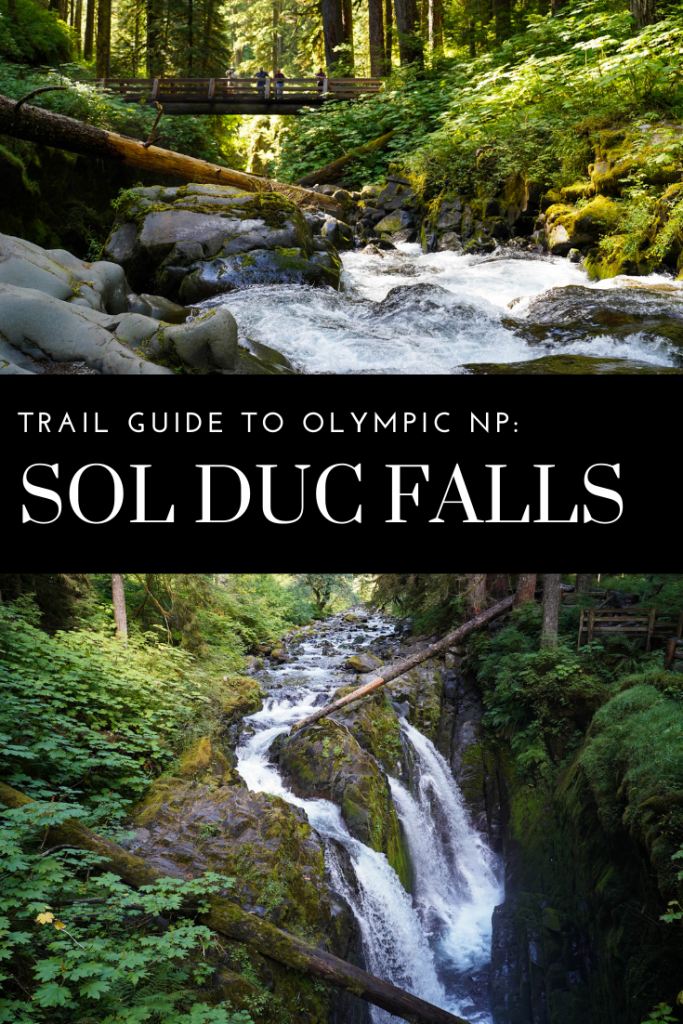
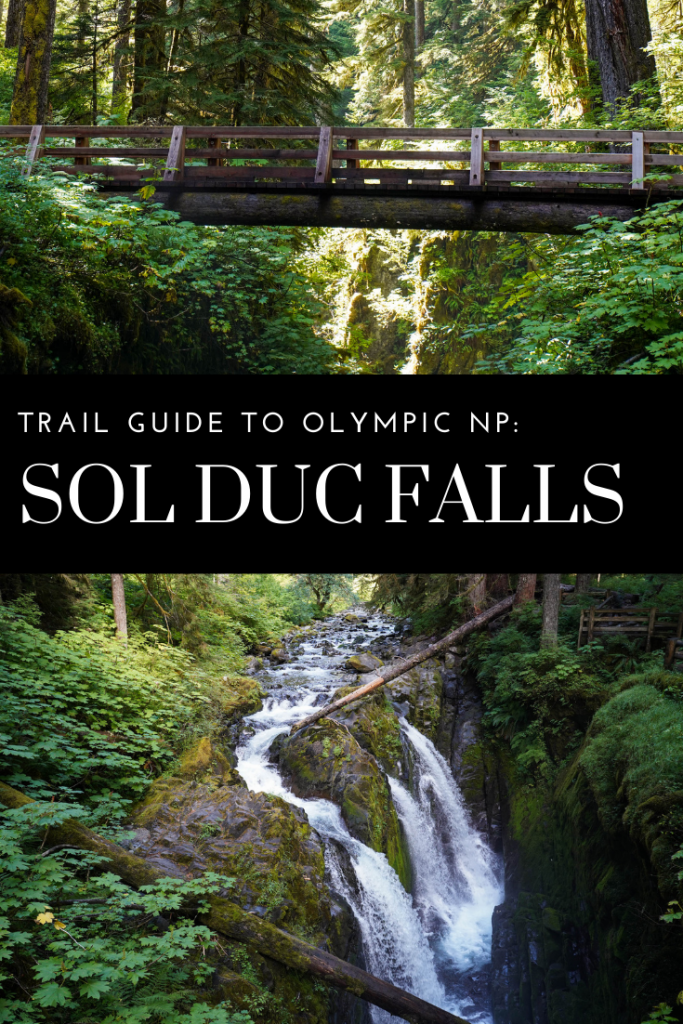
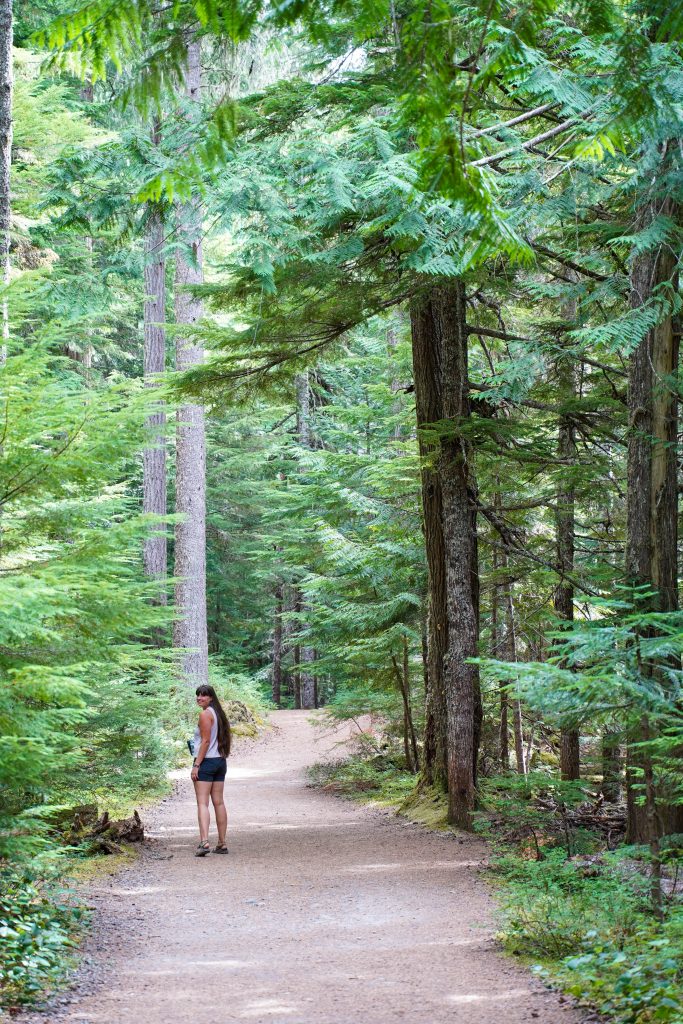
The trail starts at the far end of the parking lot from the road, straight from where you came in. Shortly after the trail starts, there is a trail split to the right, stay left (or straight in this case) following signs for Sol Duc Falls. Just before you reach the falls around 0.75 miles in there is another trail split. Keep right (again straight) and follow the trail as it crosses the bridge and gives you the best view of the falls.
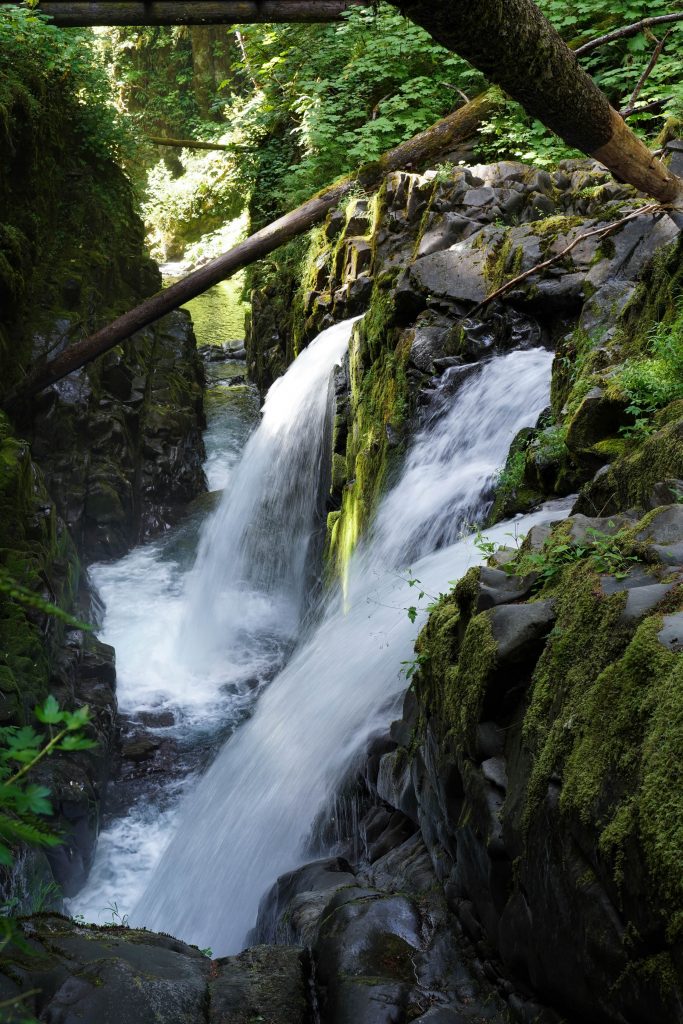
The best photos are from the bridge!
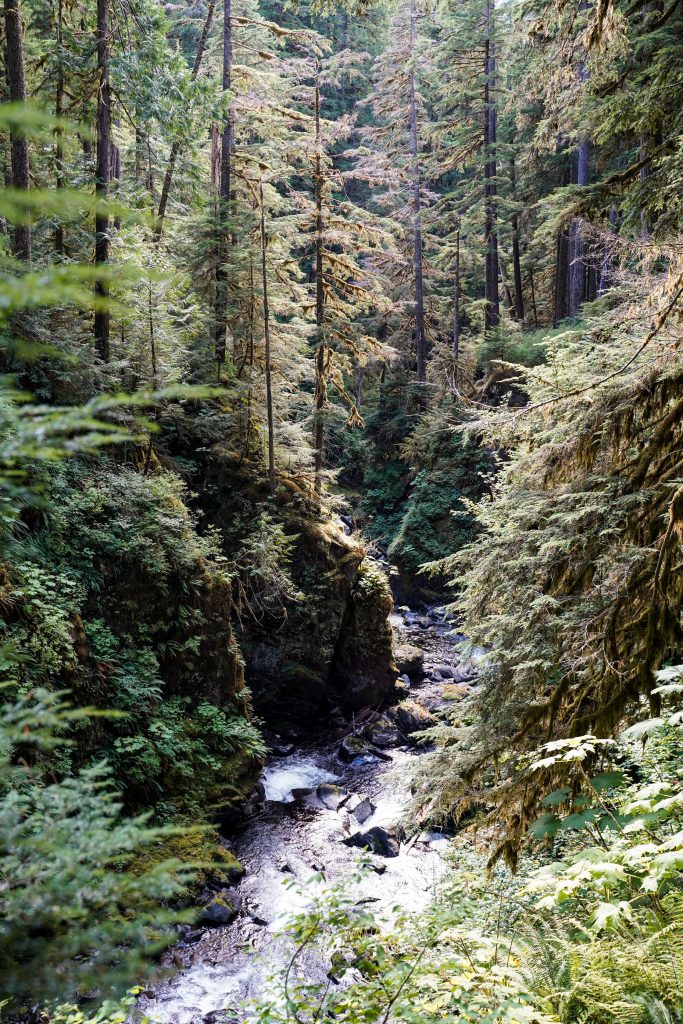
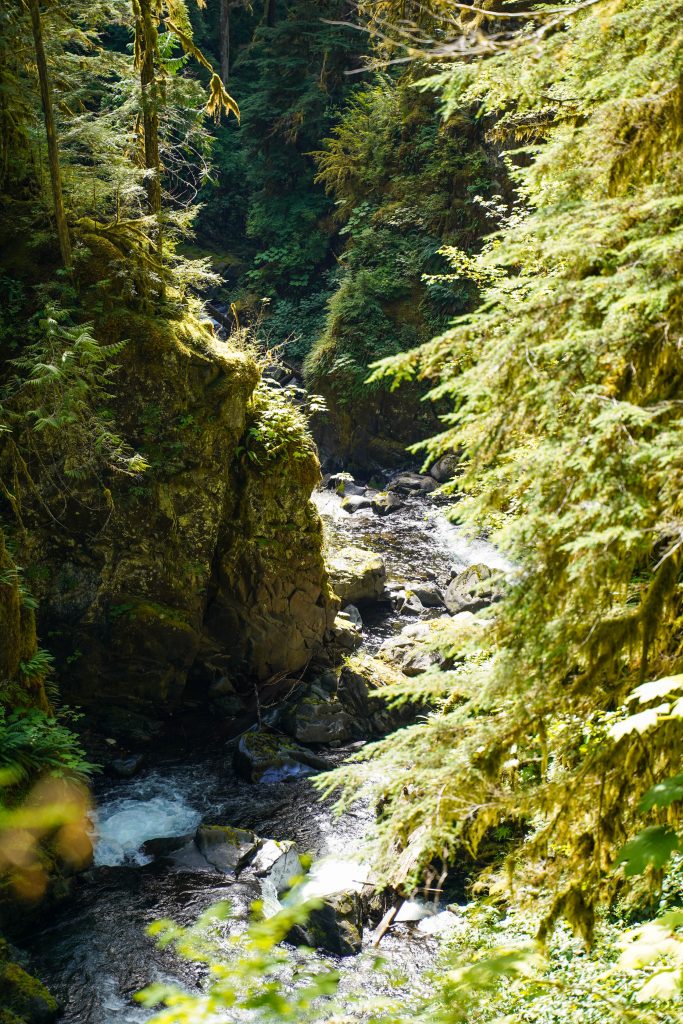
The falls are located in a deep scenic gorge which is unfortunately inaccessible at the bottom so you can only view the falls from above.
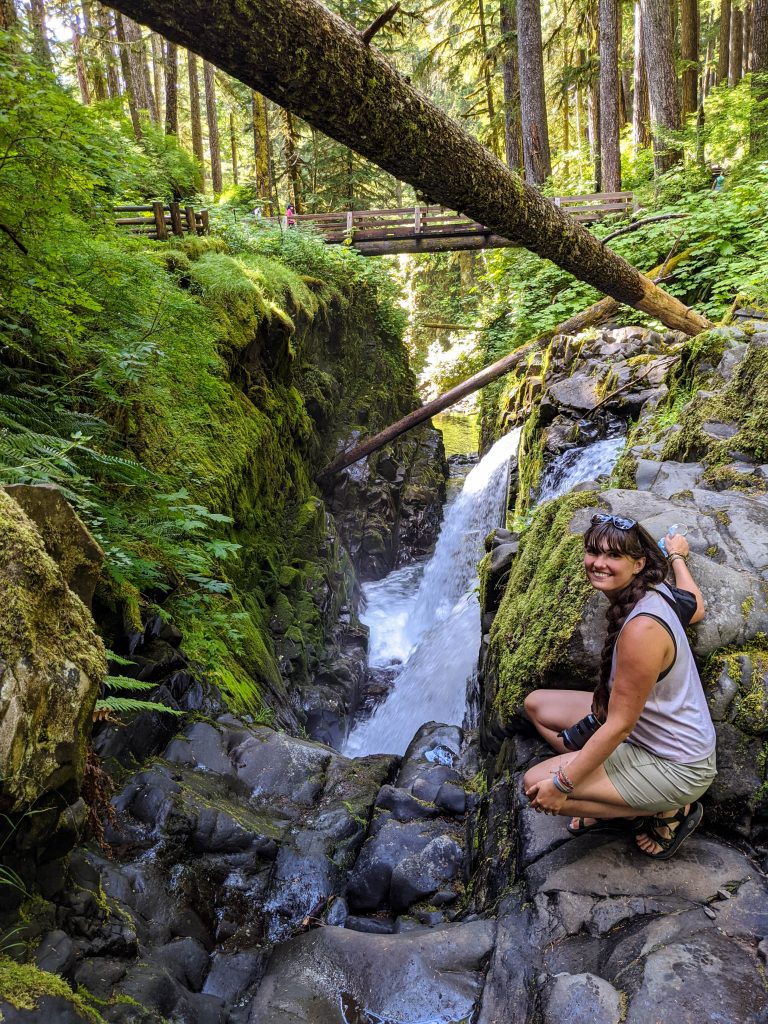
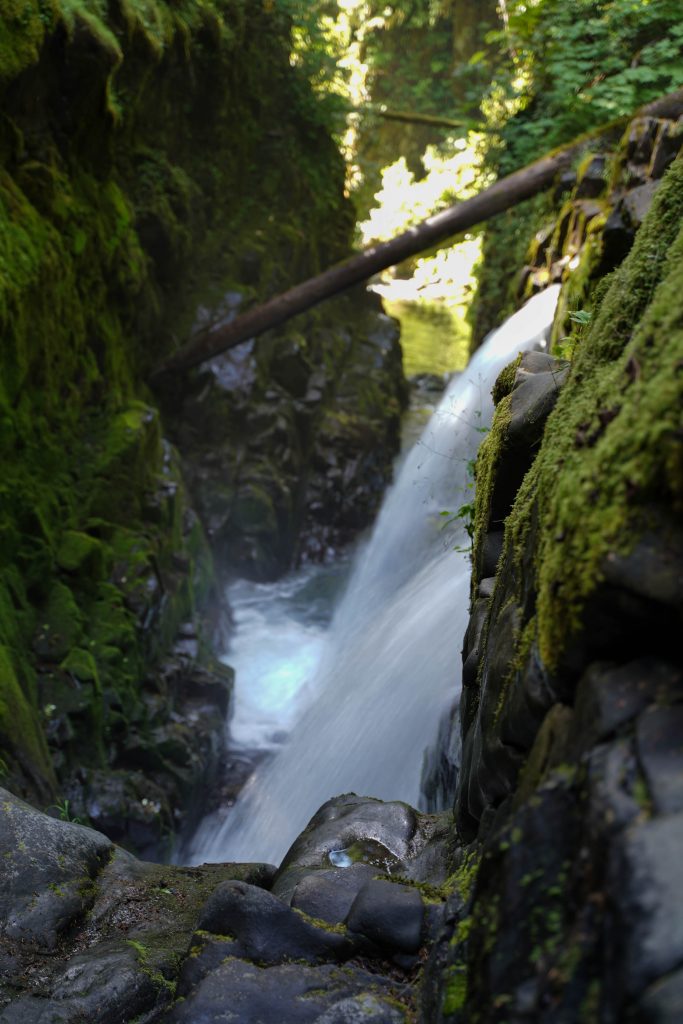
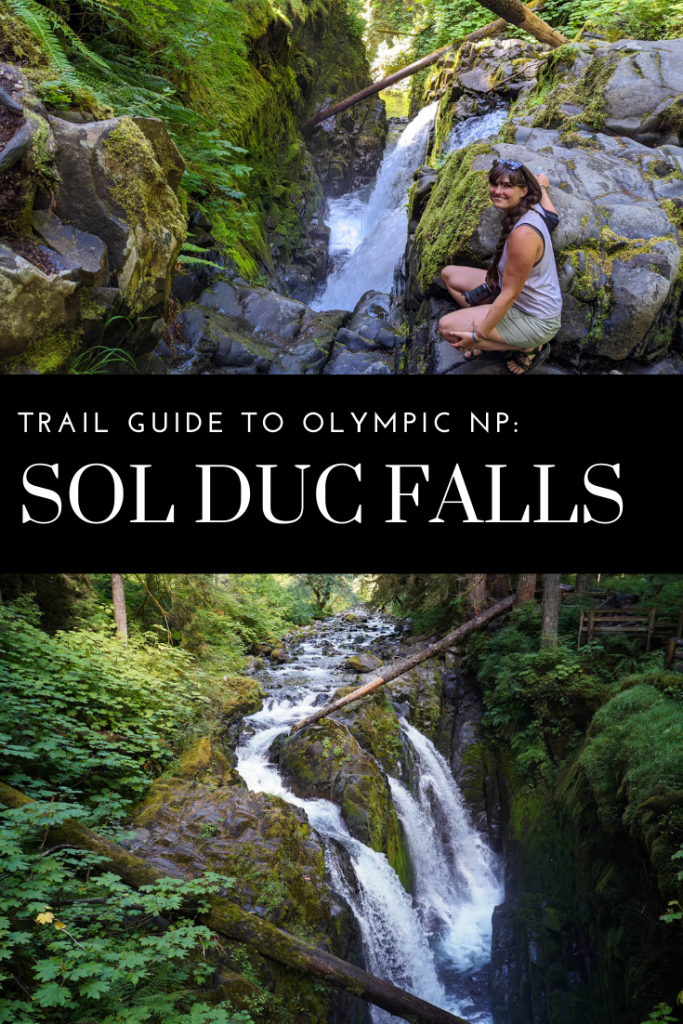
If you cross the bridge you will find many small paths down to the water to get different angles of the falls. Use caution especially as you near any edges of the falls.
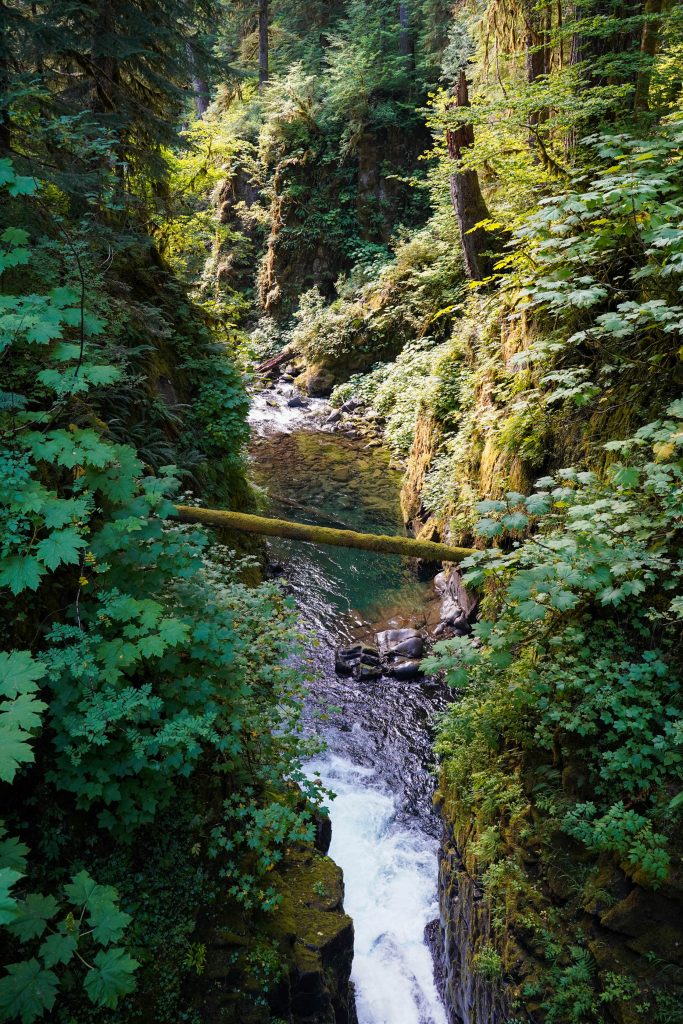
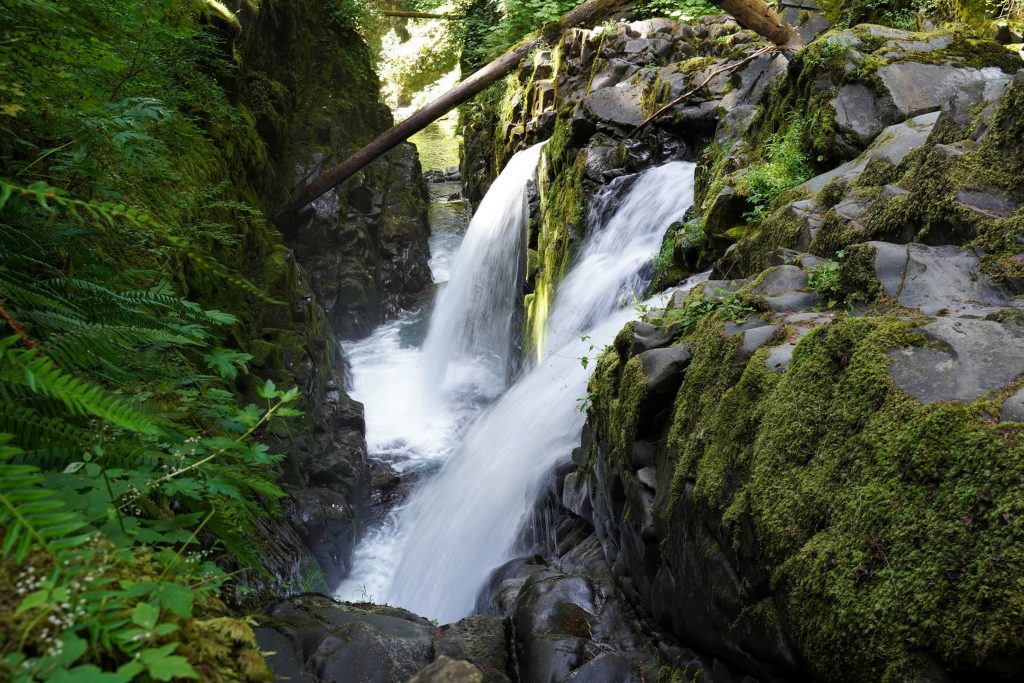
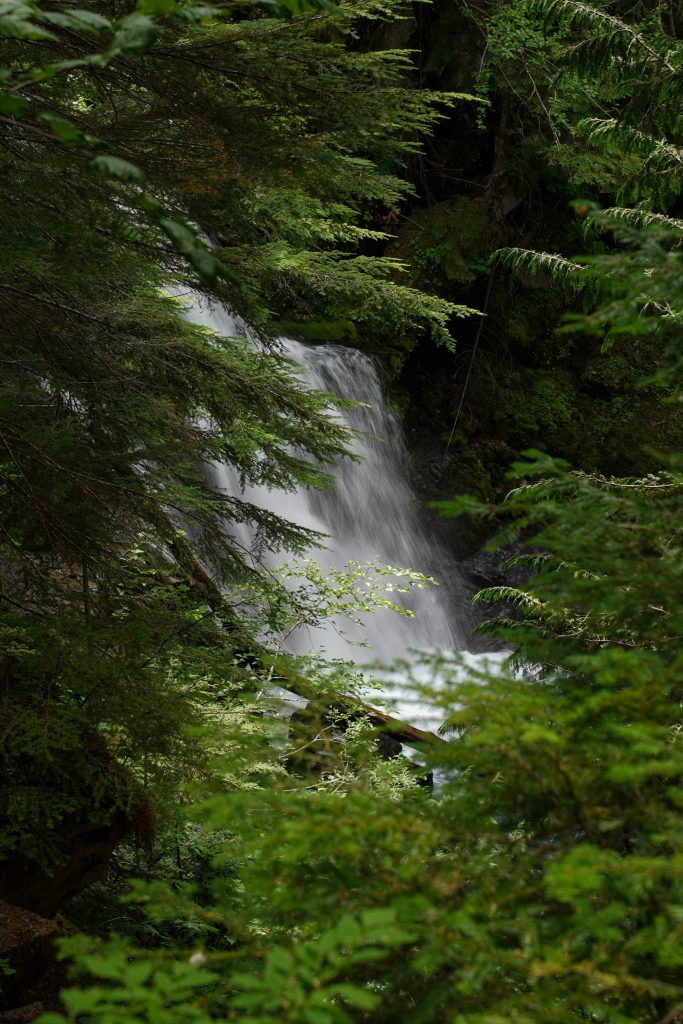
View of the falls from the other direction
Return back down the same trail for the short version or take the Lover’s Lane trail all the way down to the hot springs resort.
Beautiful views abound in all directions from the destination on this trail
Nearby: The Salmon run cascades
*Make sure to stop by the Salmon run cascades as well for a glimpse of salmon and trout swimming up river. The fall will bring more viewing possibilities, but even in August I watched at least 10 fish make the 6 foot jump up the cascades in about 30 minutes.
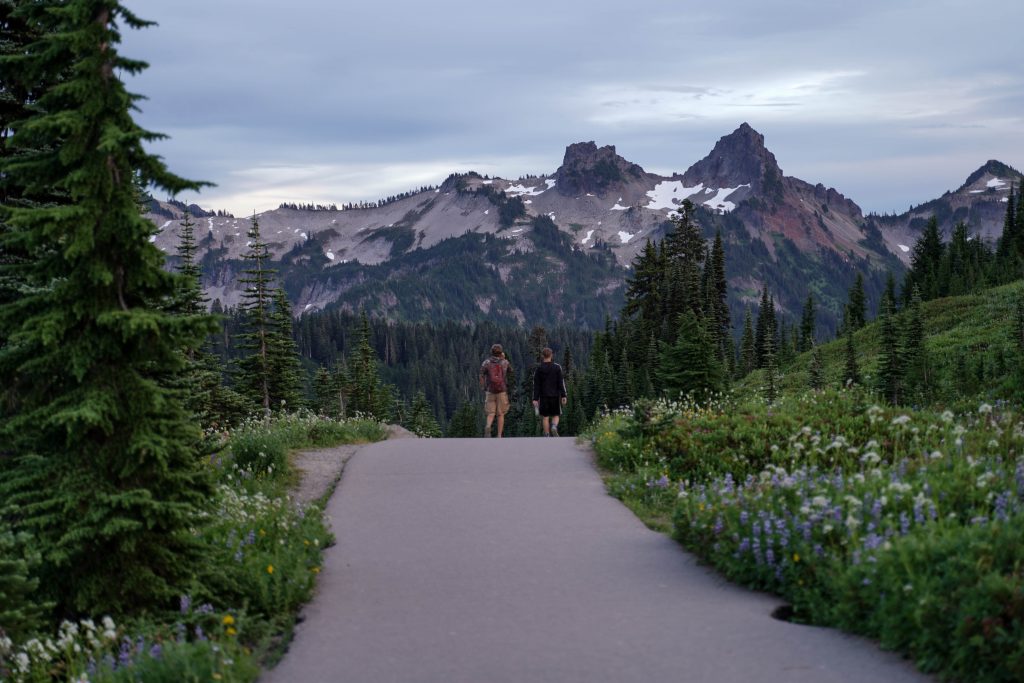
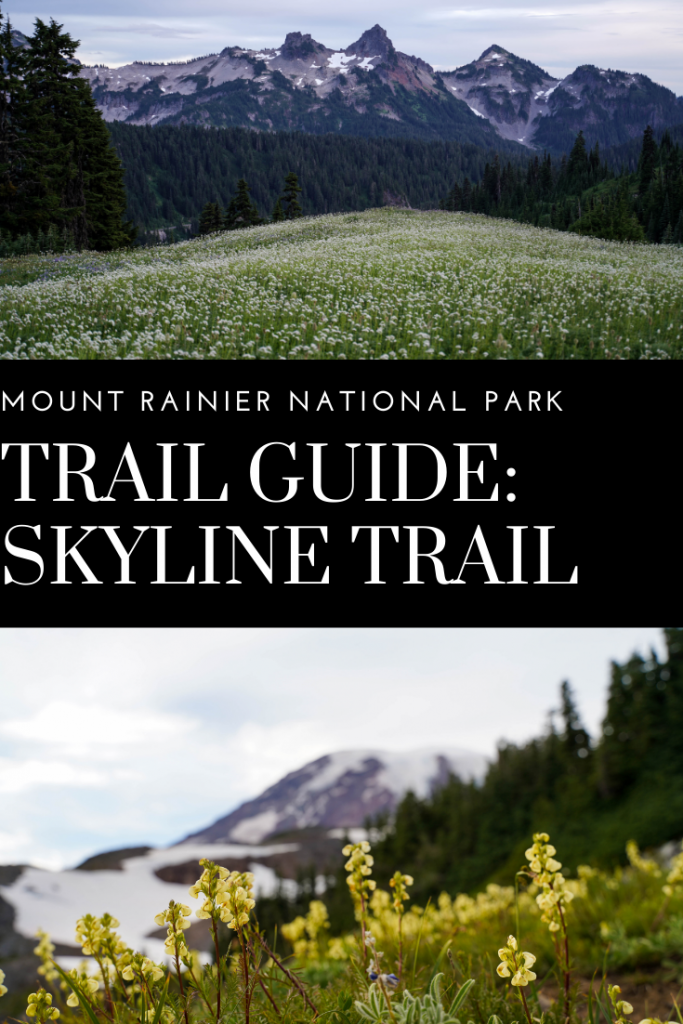
When we visited Mount Rainier we were certain we’d end up with at least a day or 2 of rain (after all, why would you name a place Rainier) and so I knew in order to see the Skyline trail in its full glory, I’d give it the best chance possible with… a couple days visit. It turned out that our first day driving down from North Cascades NP was the best weather we were going to get- So we hit the Skyline trail the very first evening in town. Our second day was rainy (not surprised) and overcast with almost no views of the mountain. So the challenge was- where to hike?
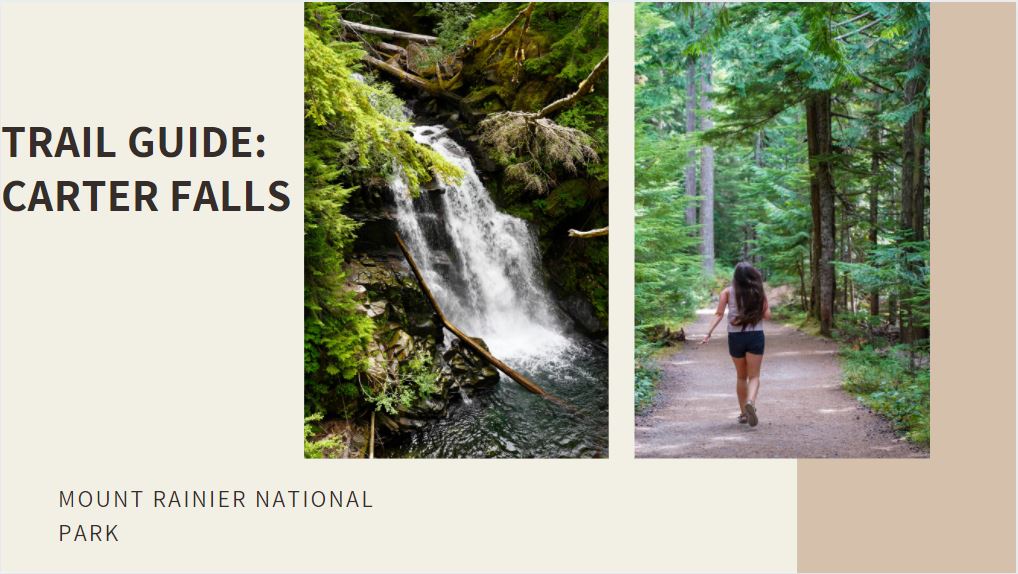
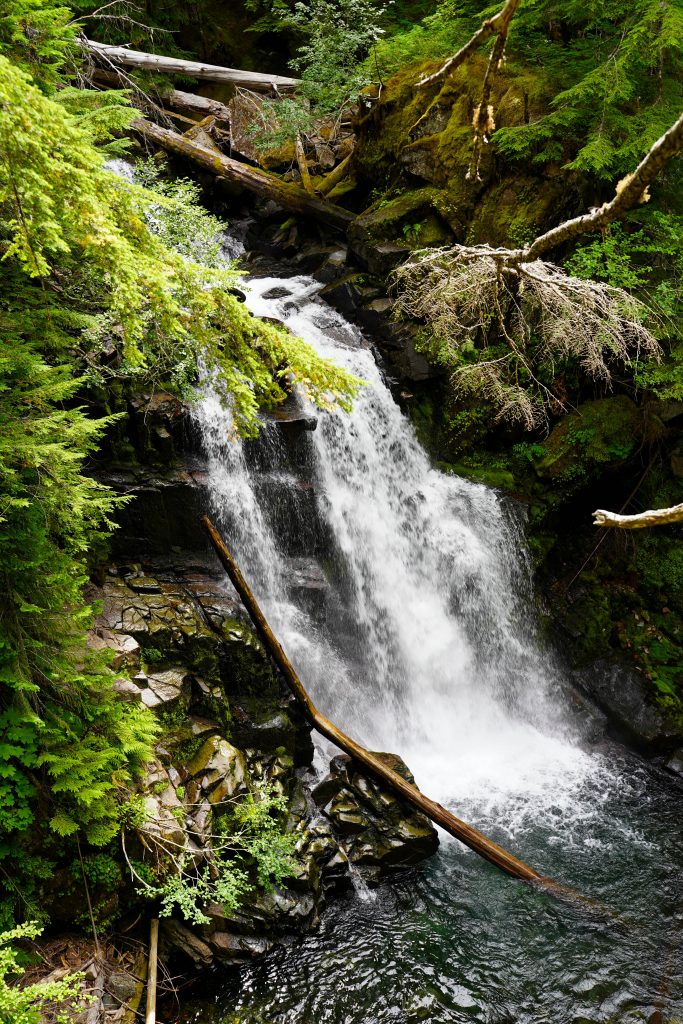
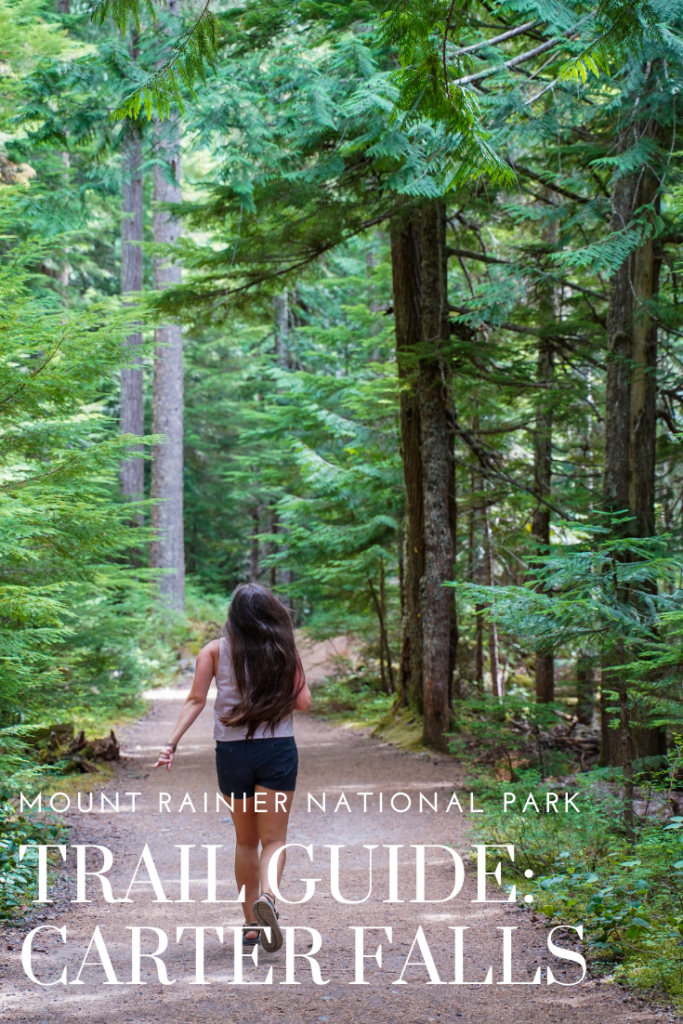
Mount Rainier has a number of amazing shorter day hikes and site seeing spots with the hike to Carter falls being just one of them. The hike was longer than we thought it would be but with almost an entire day to burn, we happily plodded along a winding trail through beautiful forest and ending at a secret cool little waterfall. Bonus points- we get to say we hiked a section of the famous 93 miles long Wonderland trail.
Fees: The trailhead is after the Mount Rainier NP fee booth. Fees for the park are $25/car or included with an American the Beautiful (National Park) Pass
Trailhead directions:
The trail starts from a large pullout on the right off the Paradise Road 8.4 miles from the Nisqually Entrance to Mount Rainier NP. The pullout is just before Cougar Rock Campground which will be on the left so if you see that campground you just missed it.
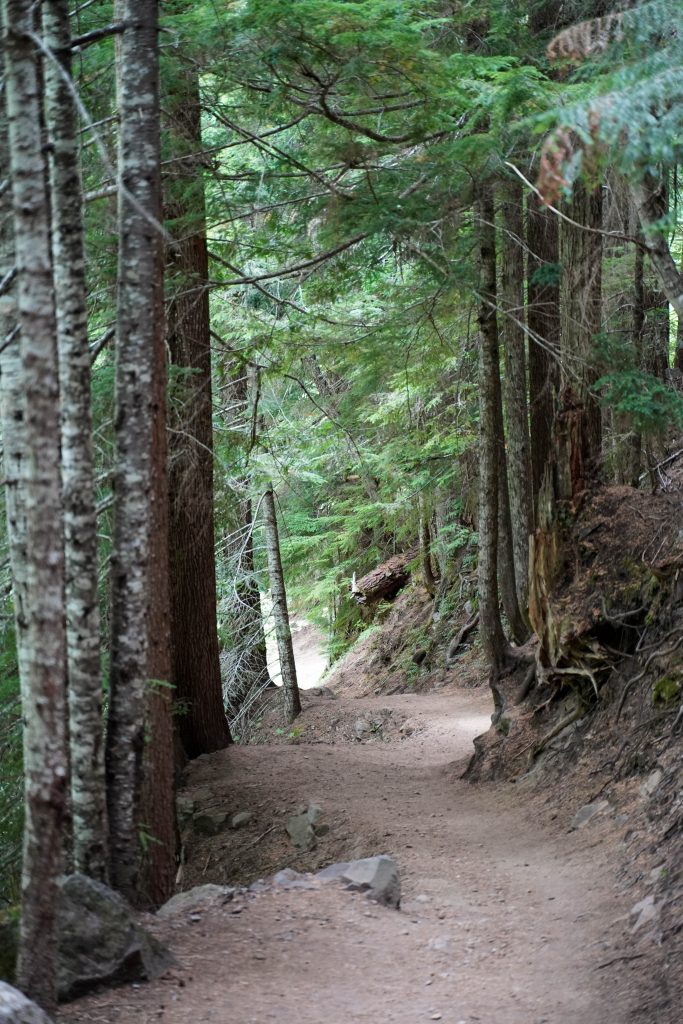
Trail description:
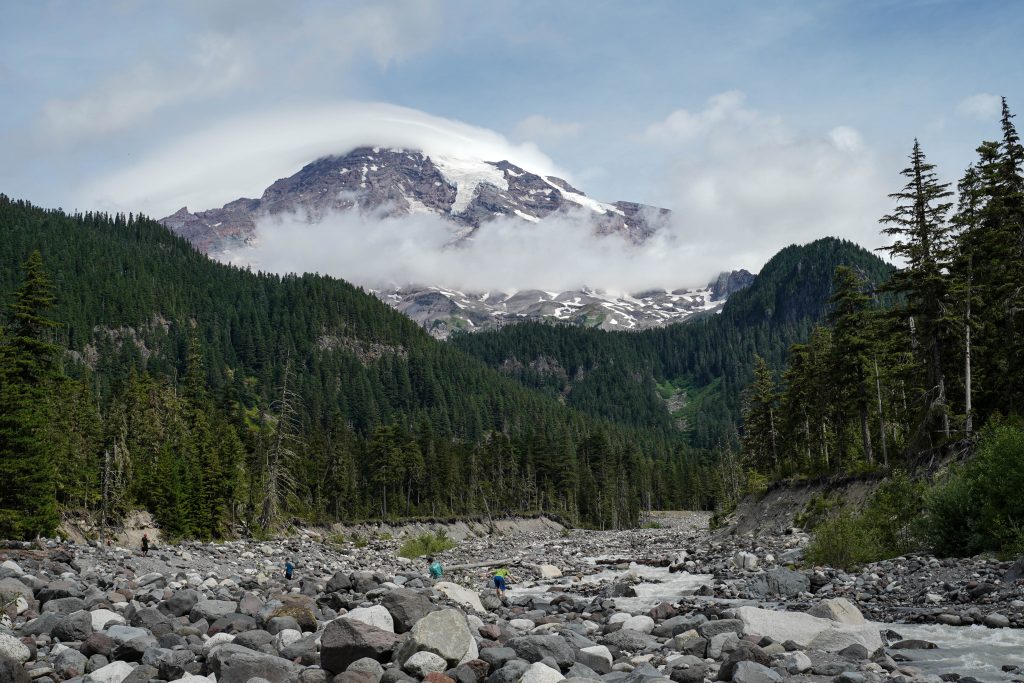
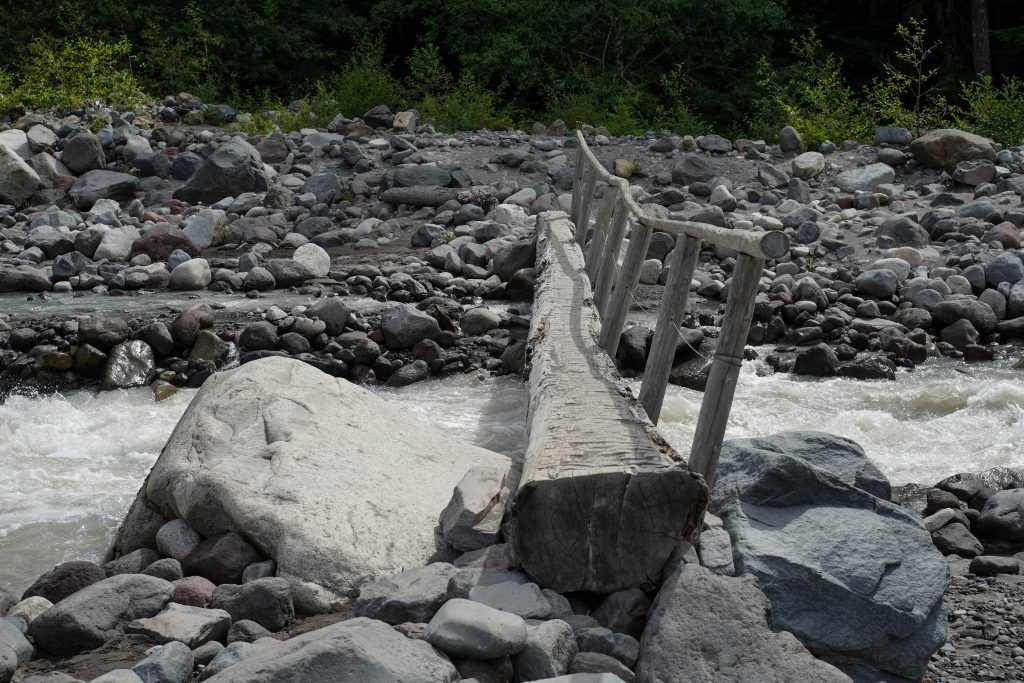
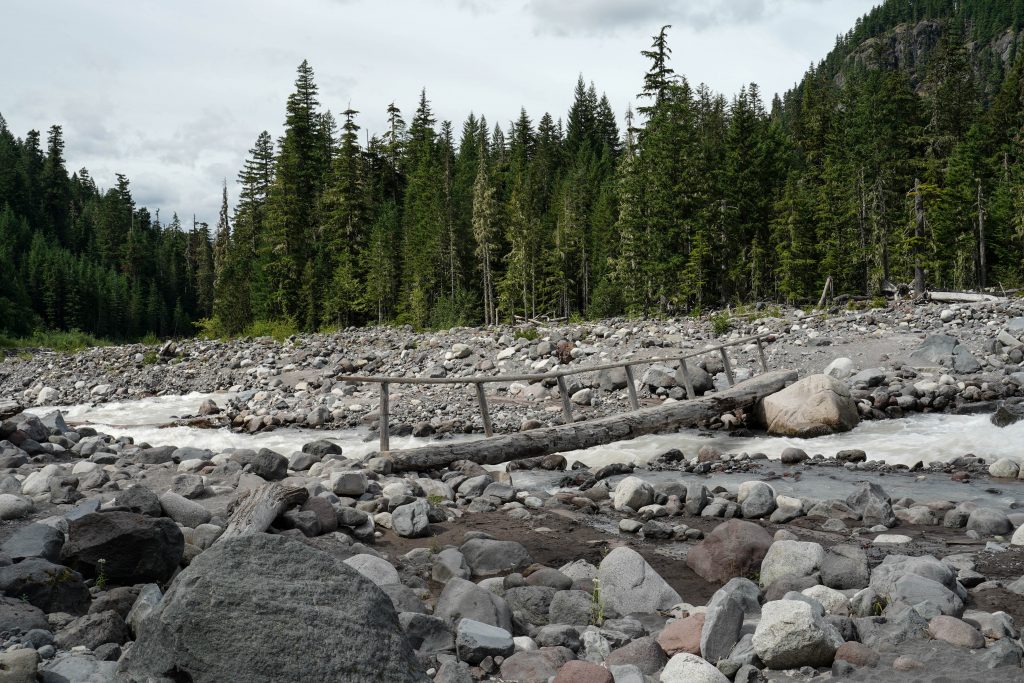
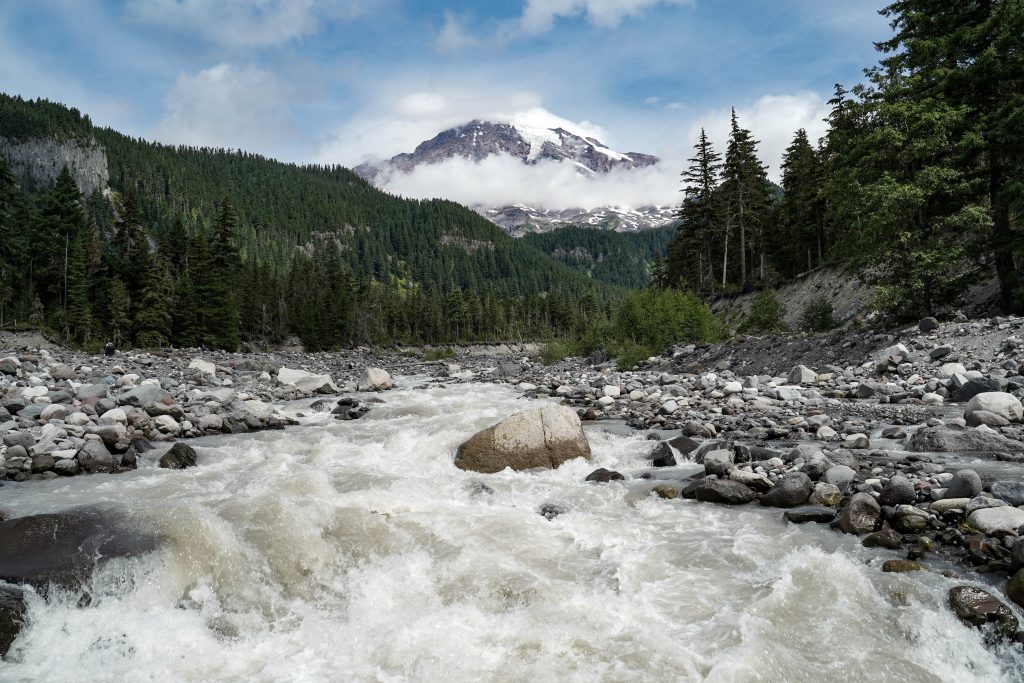
The trail starts from a pretty non-descript trailhead and descends down a steep bank onto the Nisqually River bed. Here is the best view of the mountain from the trail (if it isn’t overcast). Cross over the many small rocks and locate the bridge that will bring you across the water channel.
The trail continues along the famous Wonderland Trail route which is great bragging rights to say you hiked some of it.
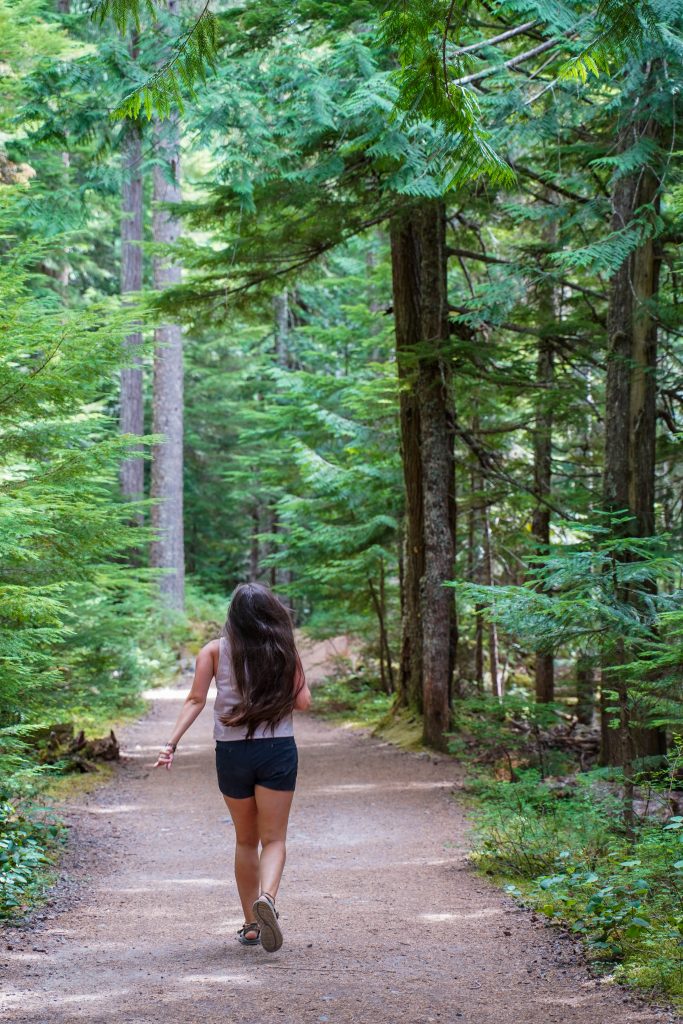
After crossing the Nisqually river, the trail will start a slow climb up towards the falls. Most of the trail follows the Paradise River (smaller flow) with a few access points you could stop in to cool off on a hot day or let kids play. While the trail sign at the start claims only 1 mile each way, don’t be deceived. That 1 mile mark will come and go with no signs of getting any closer to the falls.
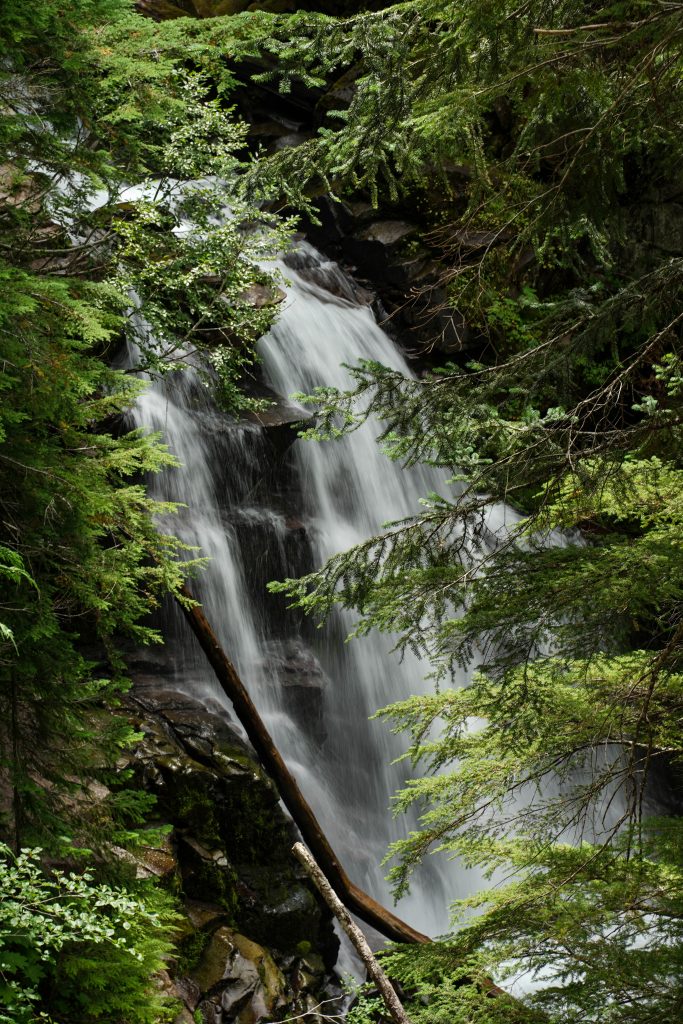
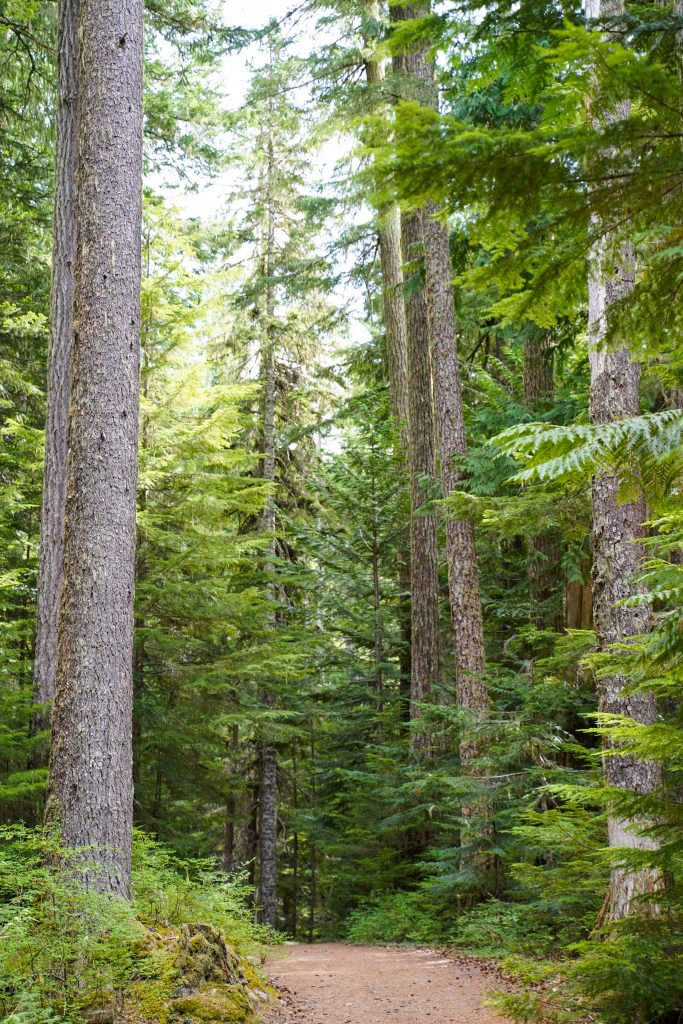
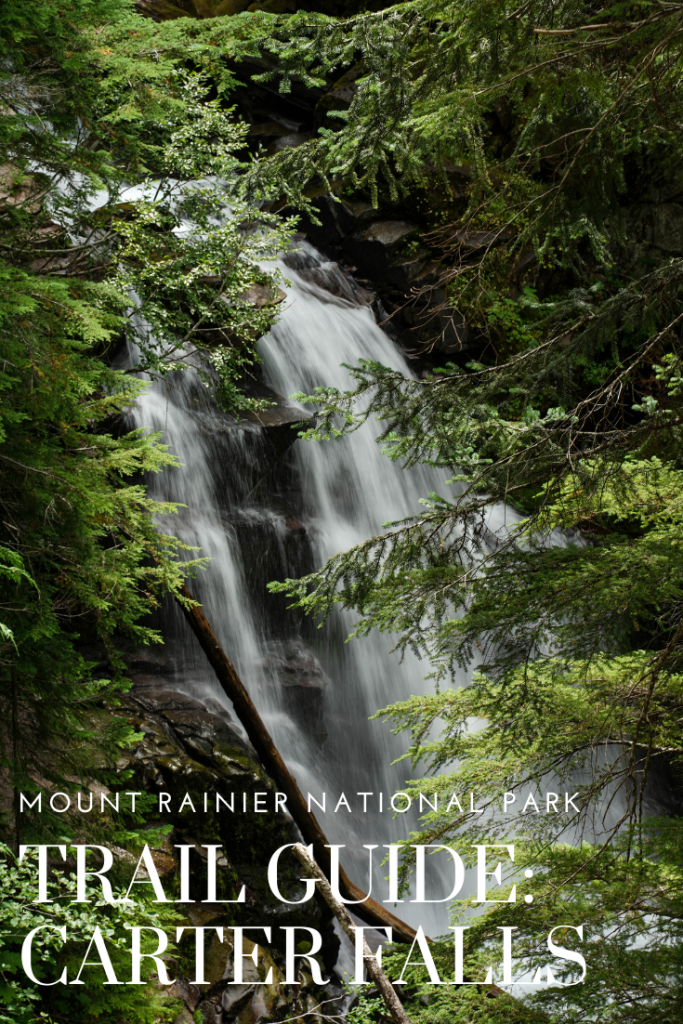
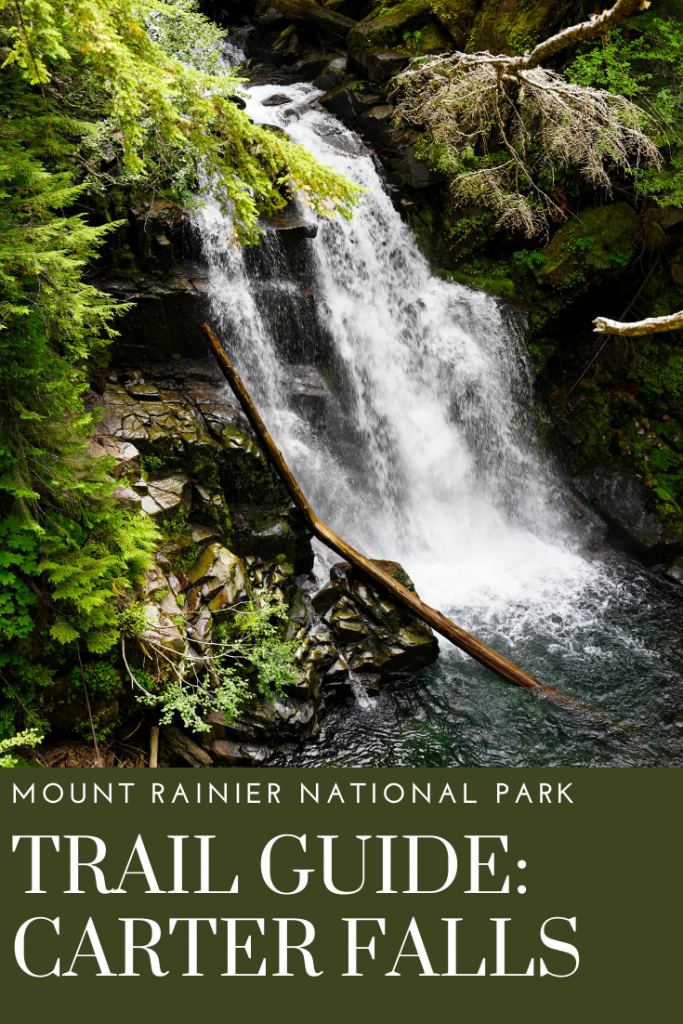
If you keep plodding along though as we did, there’s plenty to enjoy along the trail with beautiful flora and views of the Paradise River. Eventually you’ll hear the falls and arrive at a fenced overlook of them.
They are a little obscure to see but the lighting through the trees makes for great photos. While they aren’t the most impressive falls in Mount Rainier National Park they are far less visited even on a busy day and a great trek with less than amazing weather. After spending some time enjoying the falls, head back down the trail the same way you came or continue another 1.5 miles or so to Narada Falls.
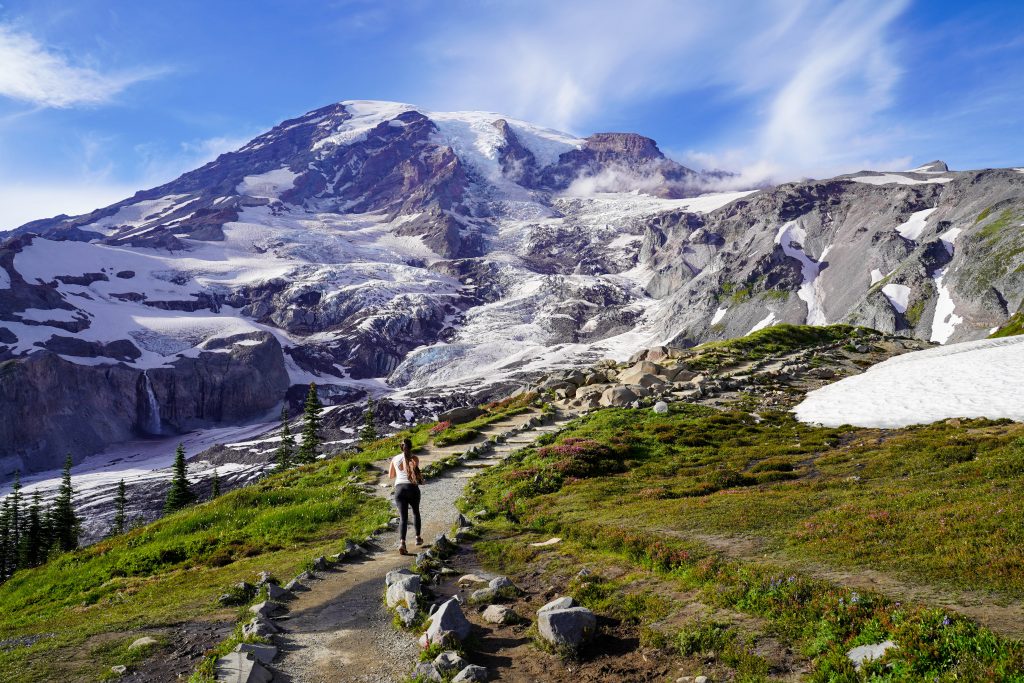
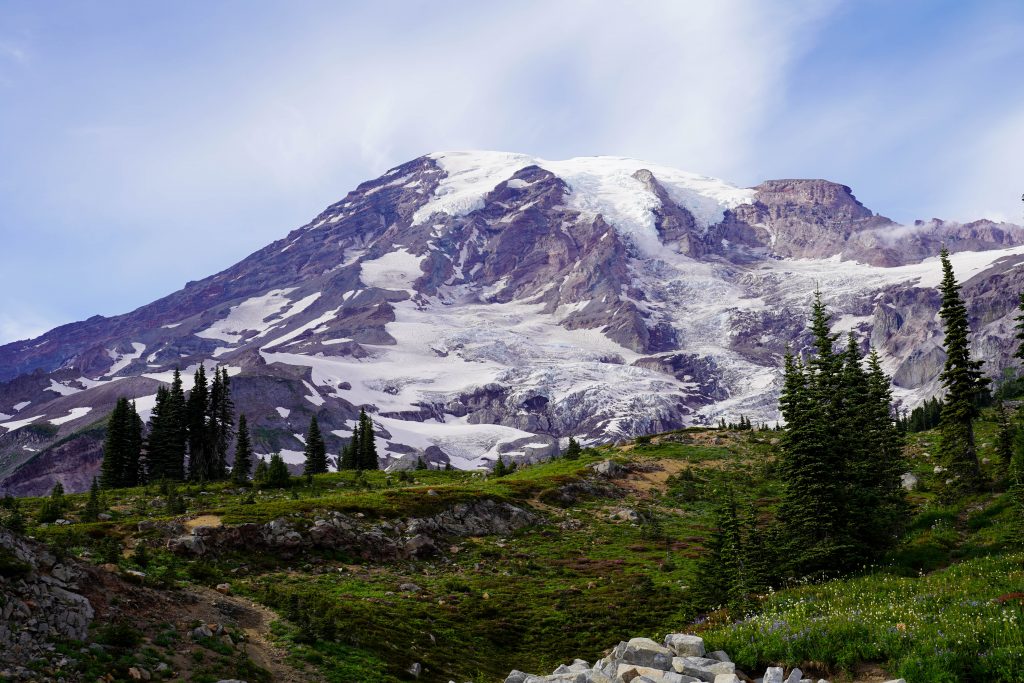
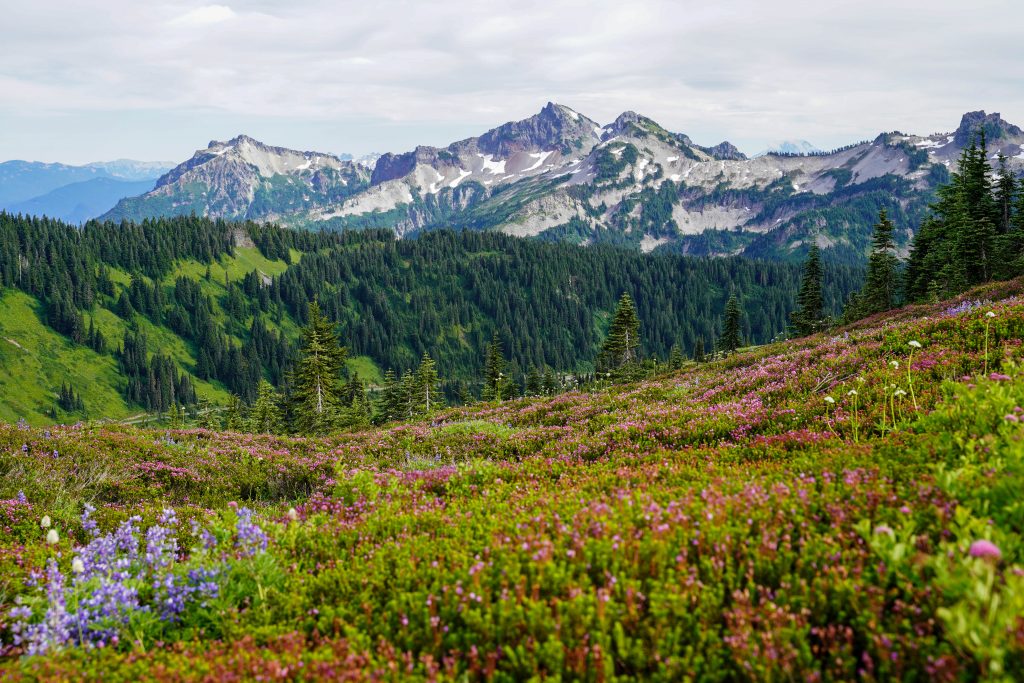
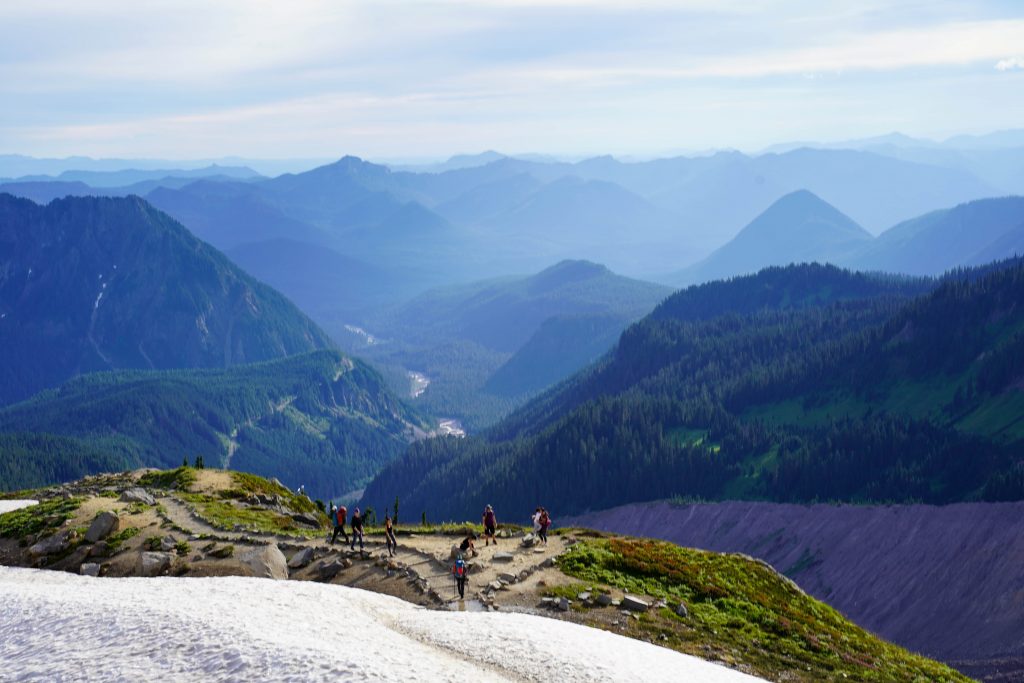
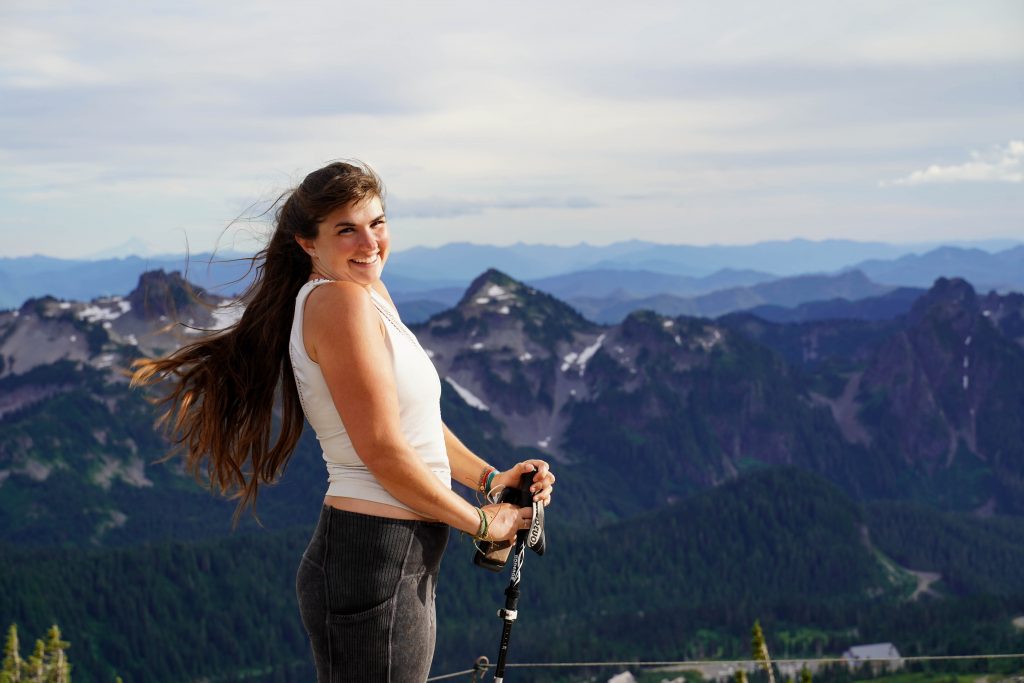
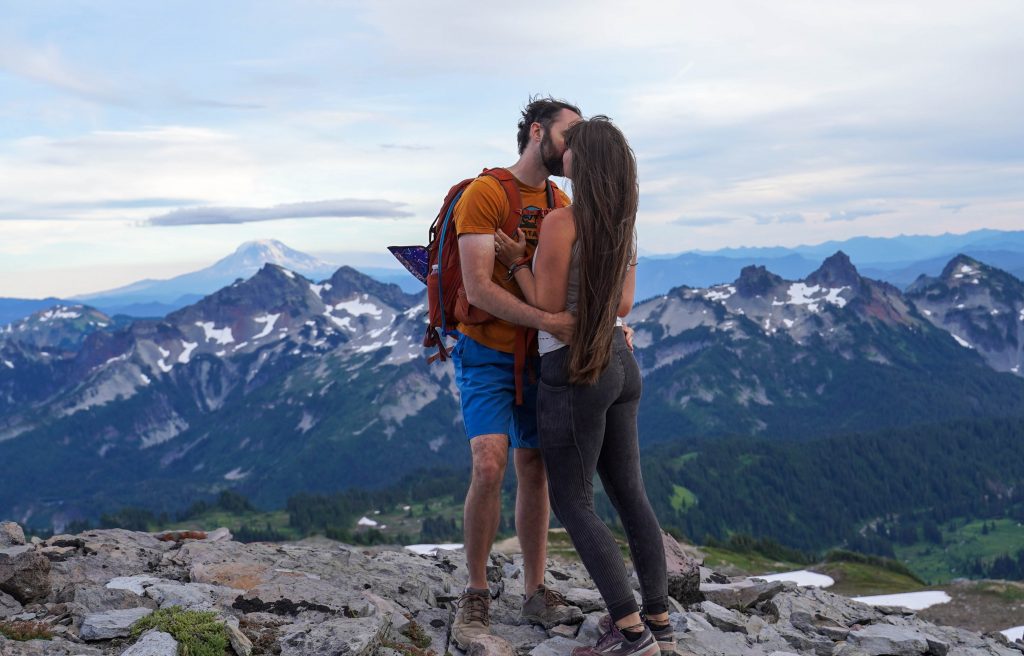
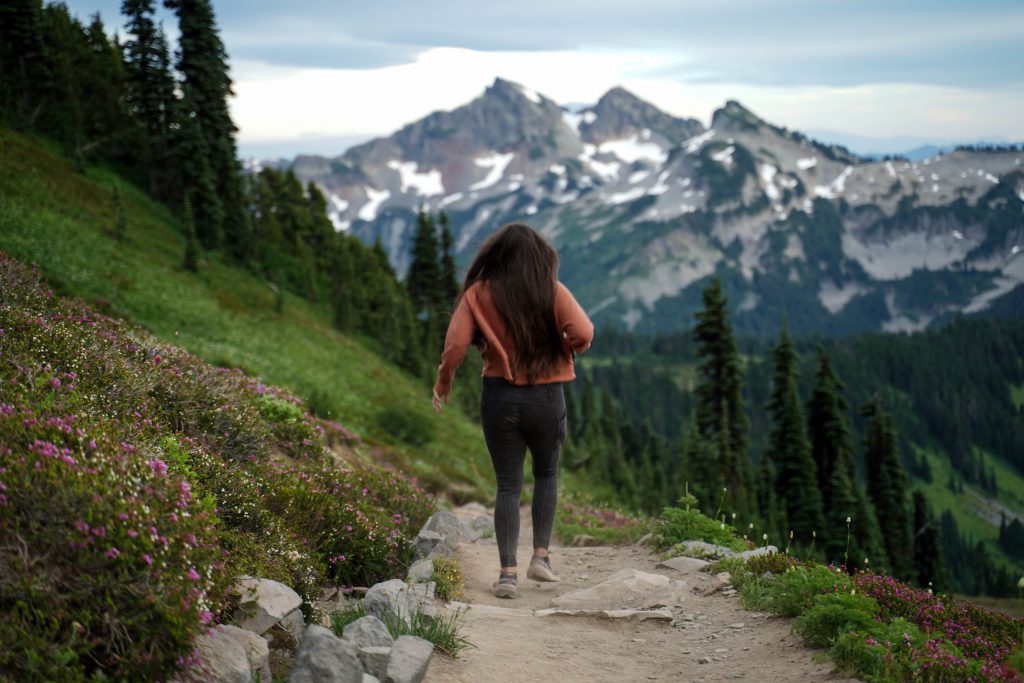
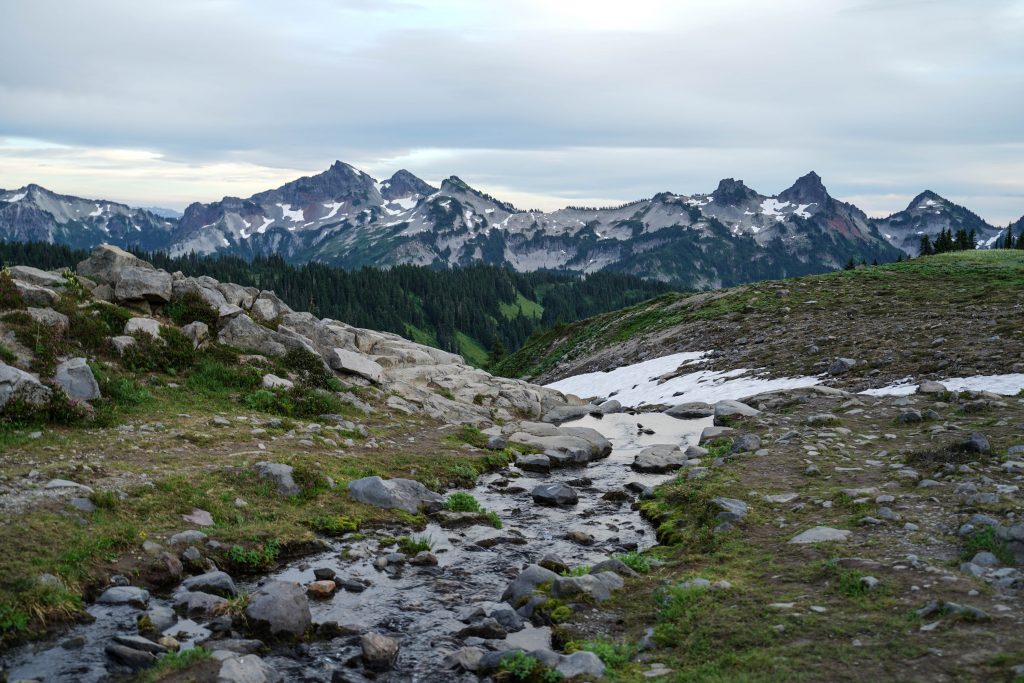
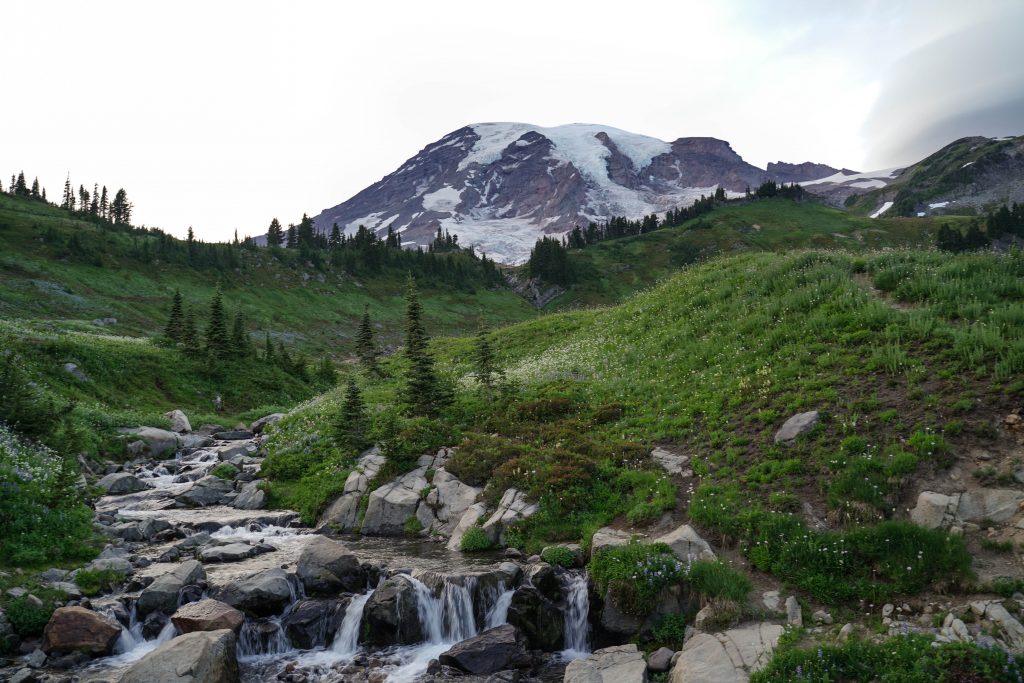
This trail is hands down the best trail we hiked in 2020 and one of the top trails I’d say I’ve ever hiked. Very few views bring tears to my eyes and this trail did just that. From 10 minutes into the hike until the very end I couldn’t believe my eyes. There were at least 5x more wildflowers covering this mountain side than I’ve seen anywhere even come close to, soaring mountain ridges and peaks as far as you can see, 300+ foot waterfalls gushing from glaciers, marmots for miles, and of course the imposing Mount Rainier itself looming over you as you climb. If you only have time for one hike in Rainier National Park or hell if you only do one hike in Washington state, go for this one.
Trail Details:
Distance: 5-6 mile loop Elevation gain: 1,680 feet Difficulty: moderate Time: 3 hours Fees: The fee for Mt. Ranier NP is $30 or included with a National Park Pass. Facilities: Bathrooms at the visitor center (at TH) and at Panorama Point
When to hike the Skyline Trail:
Early August through September/ early October. This trail takes a VERY long time to thaw and in fact the lower skyline trail was still closed due to sketchy ice crossings so we had to take the high skyline trail (not a problem anyways). If possible, plan your trip for August so that the entire loop is open and safe and the wildflowers are at their peak.
*Special tip: go in the evening for less crowds and absolutely stunning lighting. We started at around 4:30 PM and the beginning of the trail was a little crowded (still not bad for a NP) and there weren’t many people at all along the rest of the loop.
Trailhead directions:
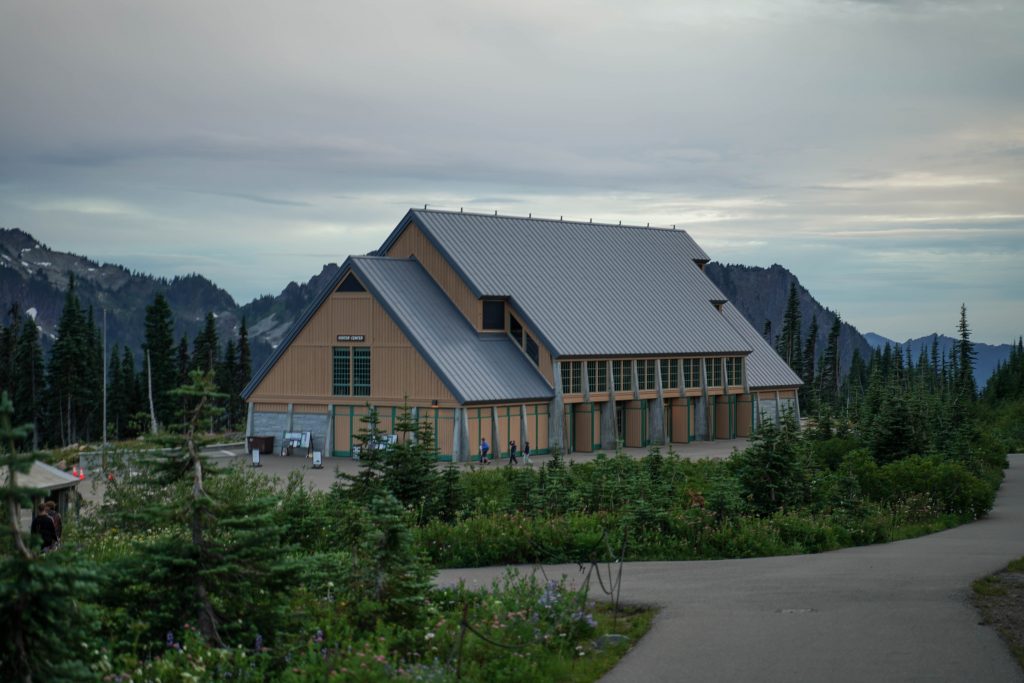
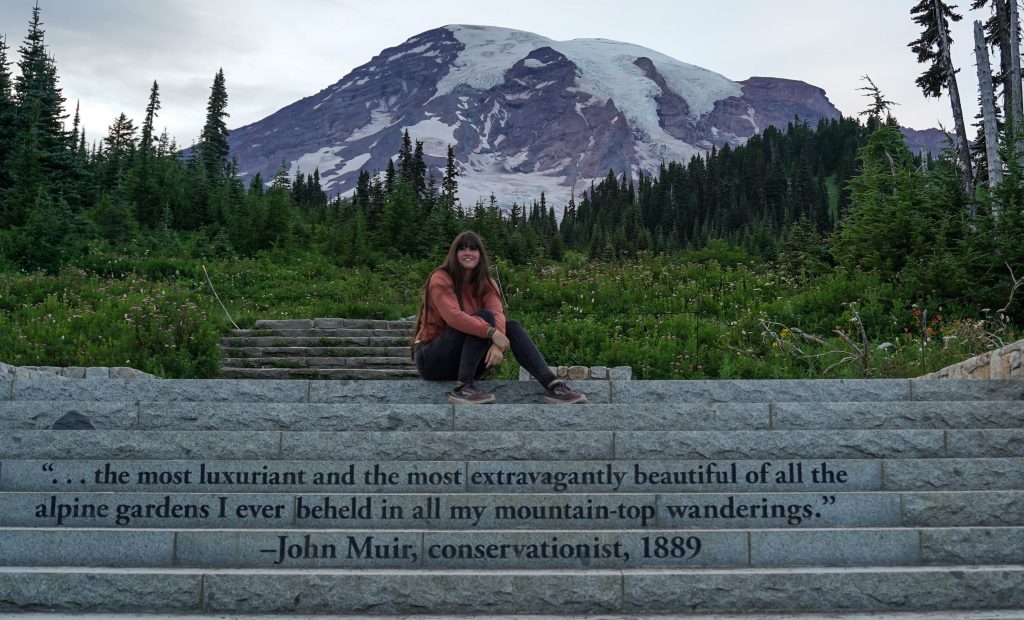
The trail starts behind the Paradise NP Visitor Center and is easy to find. From Ashford, WA, drive and park anywhere in the massive lot for the visitor center. Take the John Muir quoted stairs up and head to the left following signs for Skyline. I highly recommend hiking this loop in the clockwise direction so follow signs left instead of right. The first portion of the trail is STEEP but paved and is shared by multiple trails so don’t fret if it feels very busy.
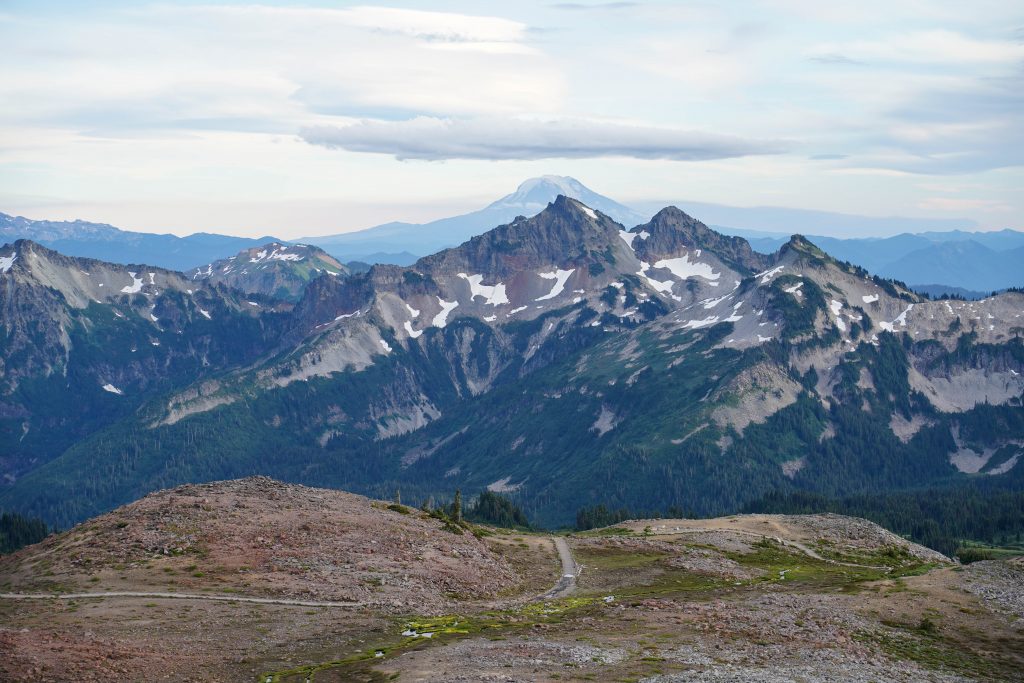
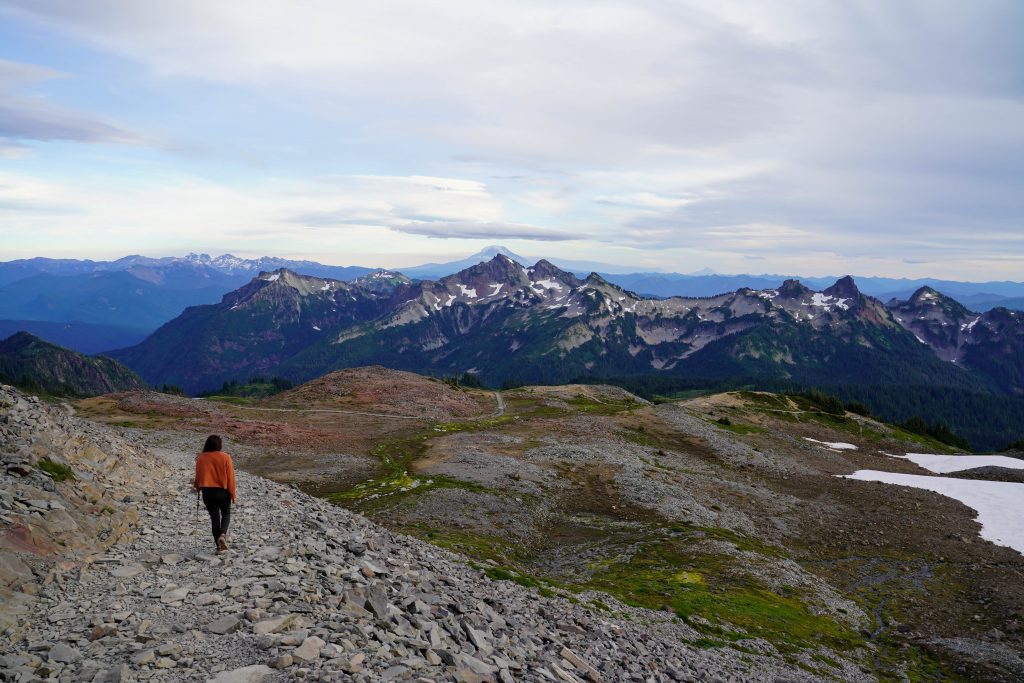
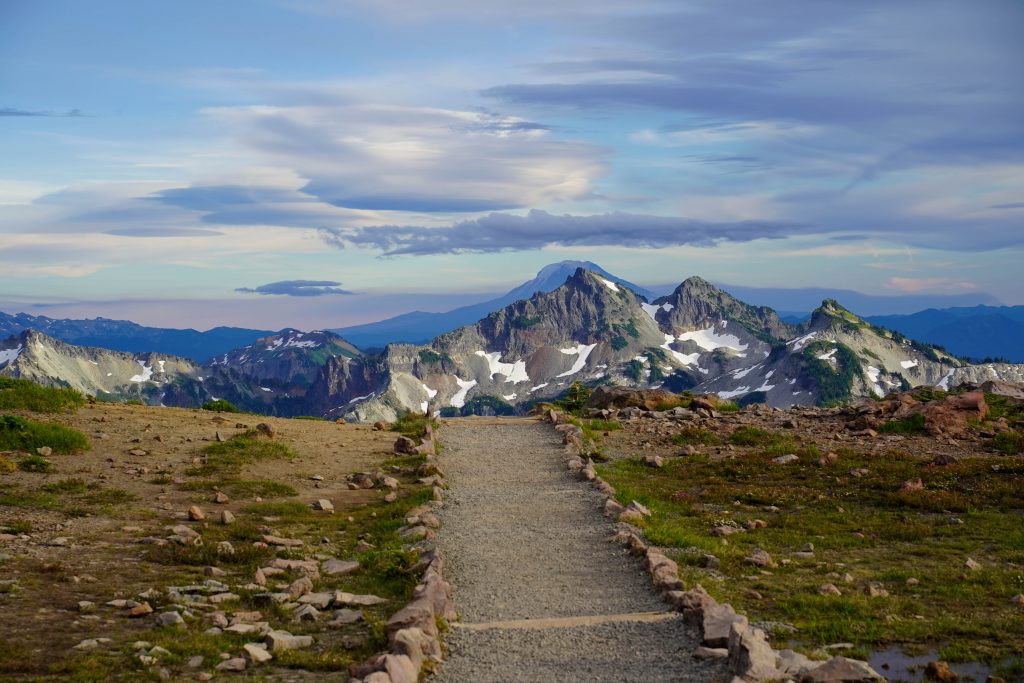
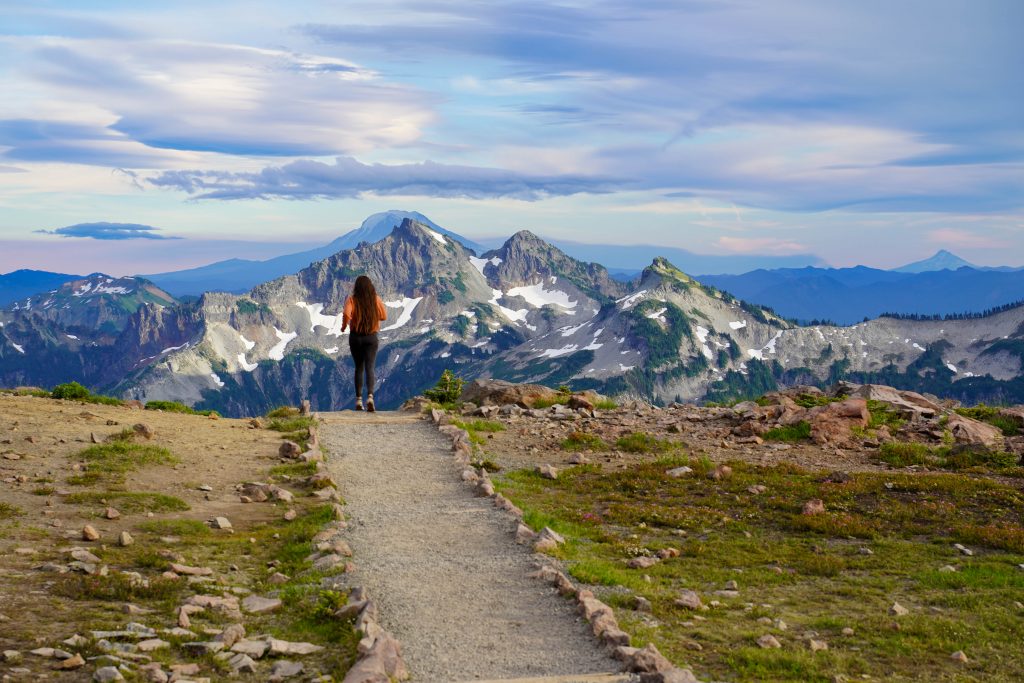
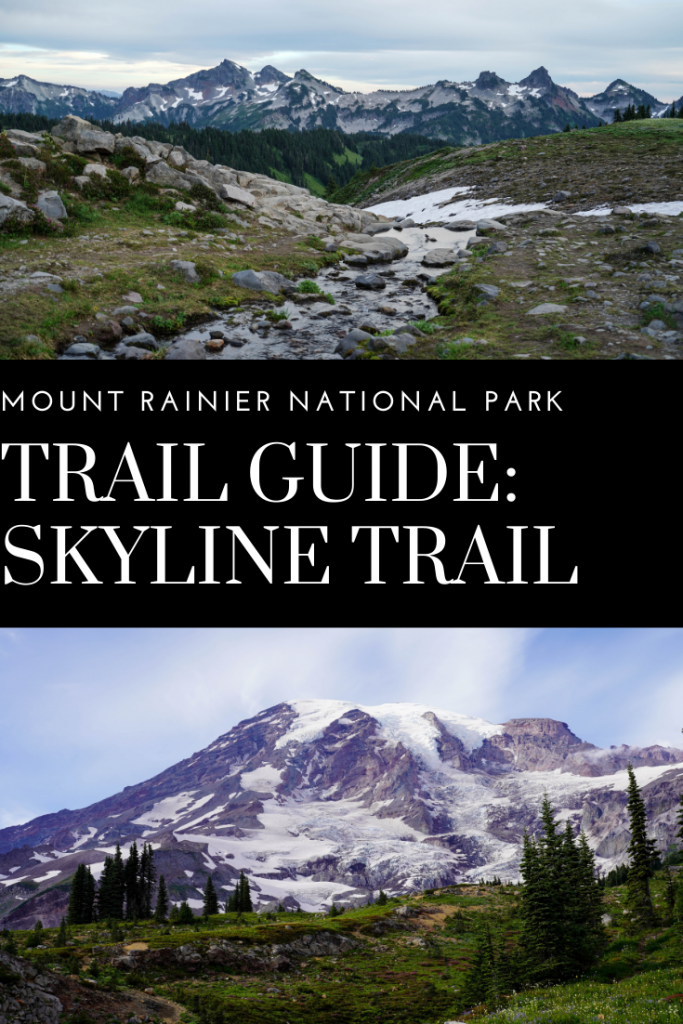
If you hike clockwise (recommended) you’ll be hiking towards the best views of Mount Rainier itself, with the mountain dramatically revealing itself with every foot of elevation you climb. Then on the hike down you get rewarded with astounding views of the surrounding mountain ranges and volcanic fields. Clockwise is best.
Skyline Trail description:
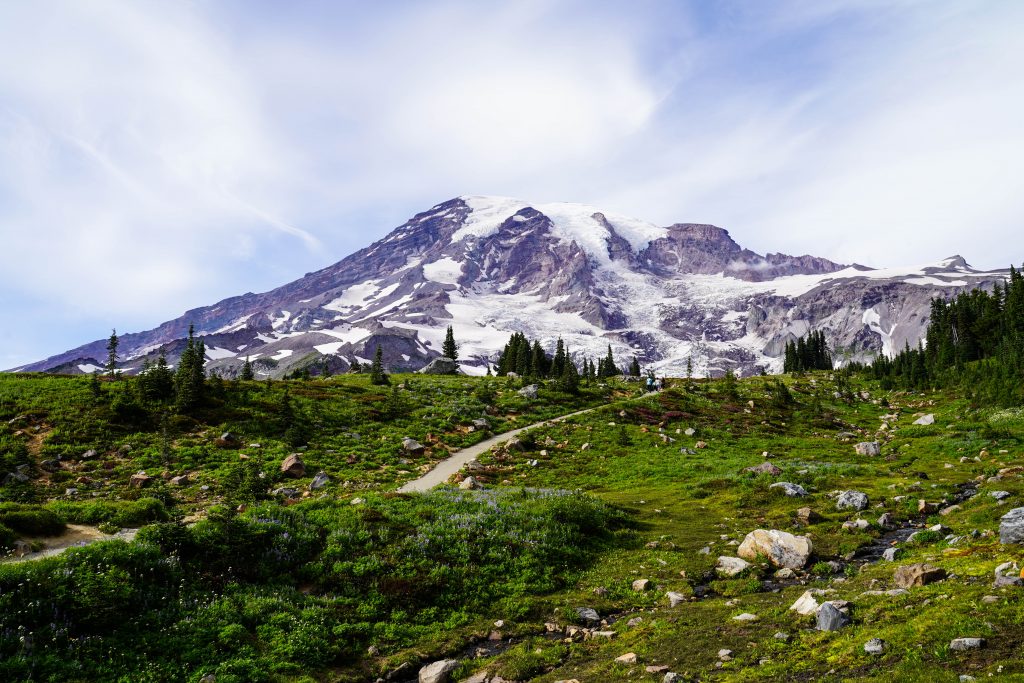
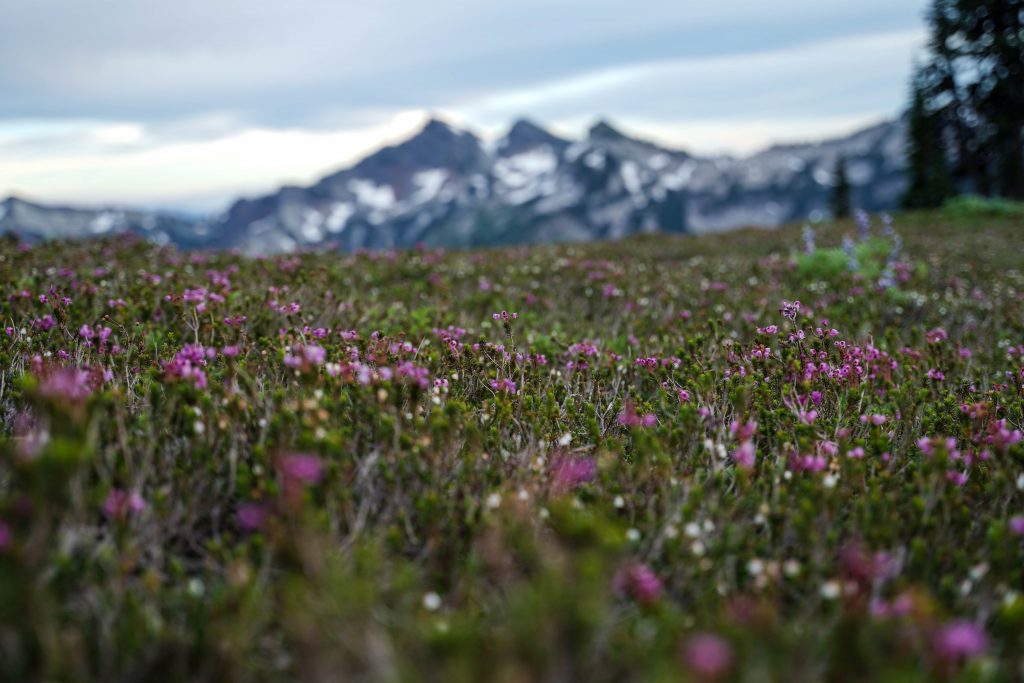
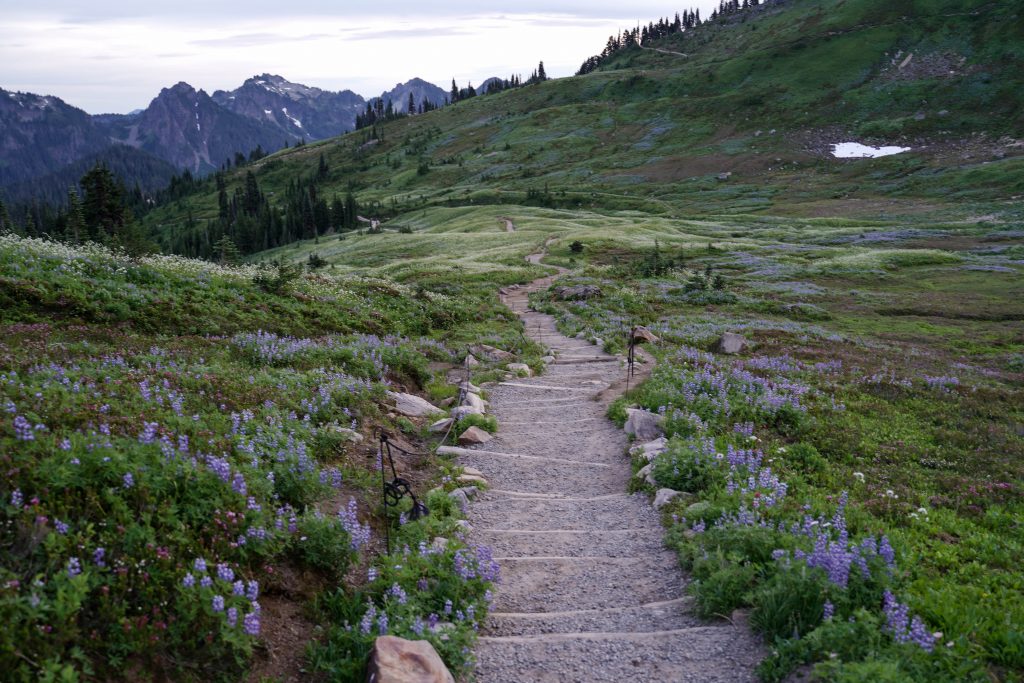
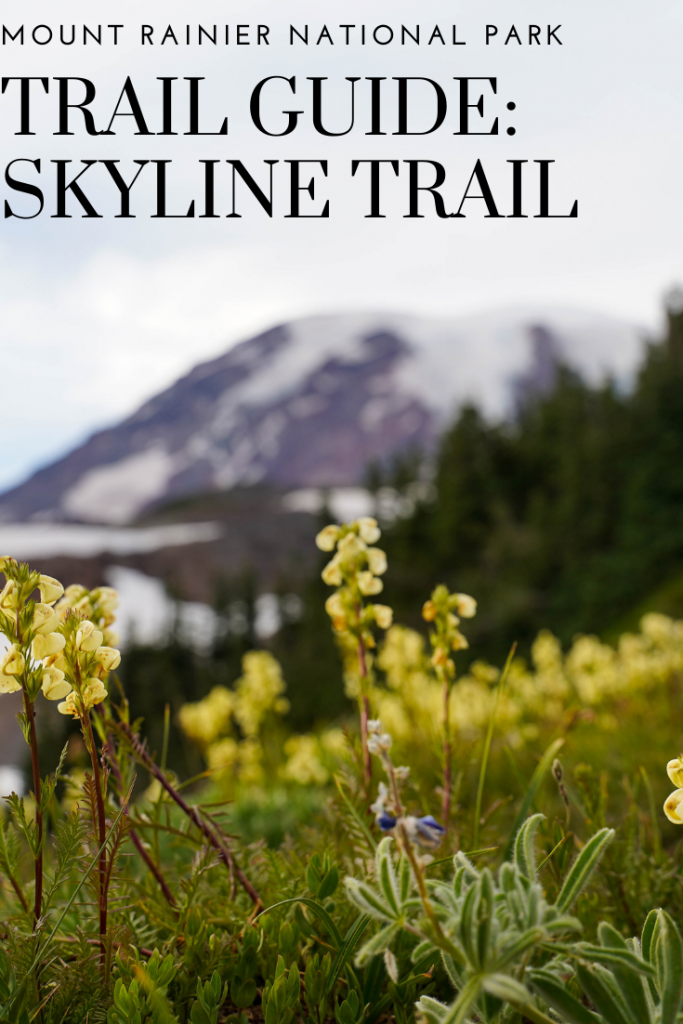
The first 0.5 mile or so is paved and steep. Don’t worry though. While your heart rate and sweat rate maybe high, you will be amazed at the blanket of wildflowers surrounding every trail bend and the views of Rainier only get more impressive as you climb. Eventually other trails like Glacier View will branch off to the left. Keep right and the pavement will turn to dirt as you start up the skyline trail. The wildflowers continue to amaze as you climb and you’ll start catching glimpses of dozens of waterfalls cascading from the glaciers on the mountain.
Top left if the the Nisqually Glacier view trail splitting off (keep right on the paved track). Make sure to take in the incredible fields of wildflowers as your climb but remember to stay on the path!
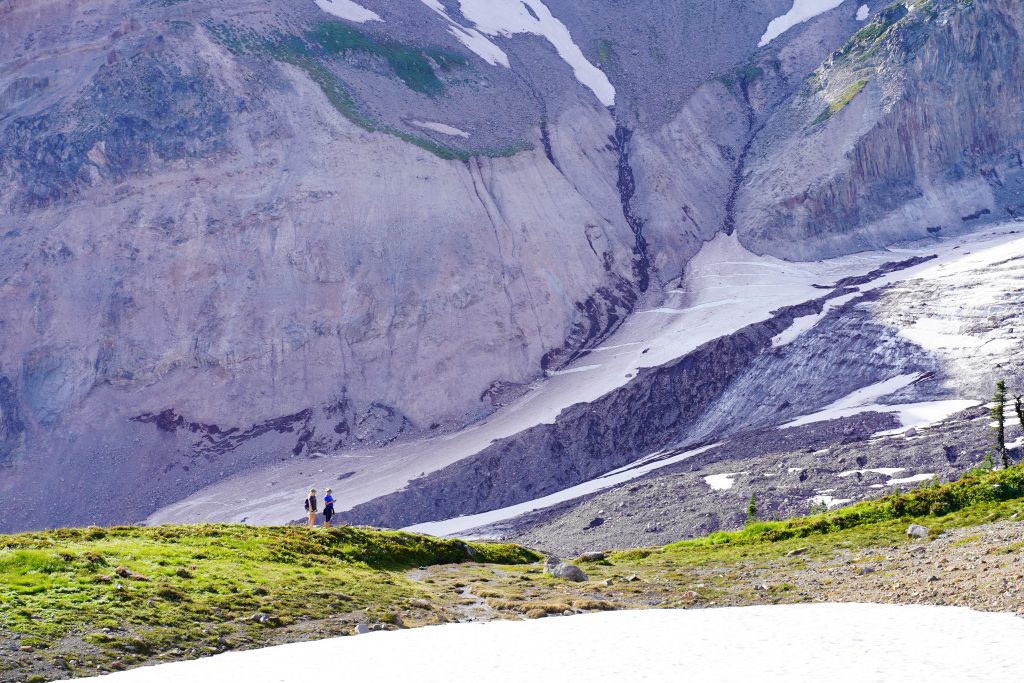
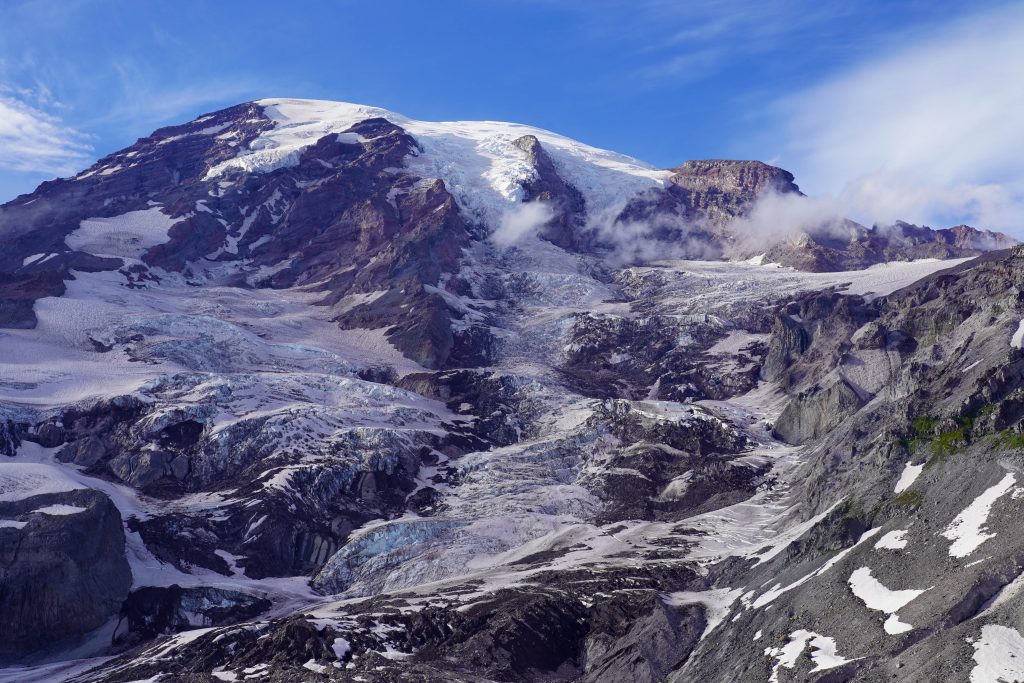
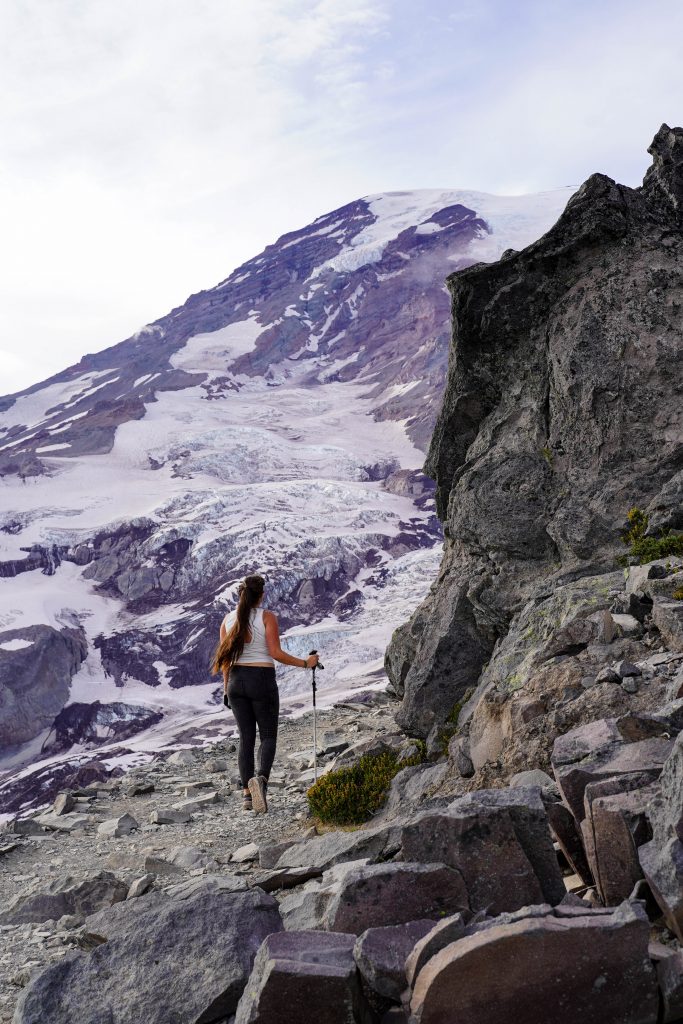
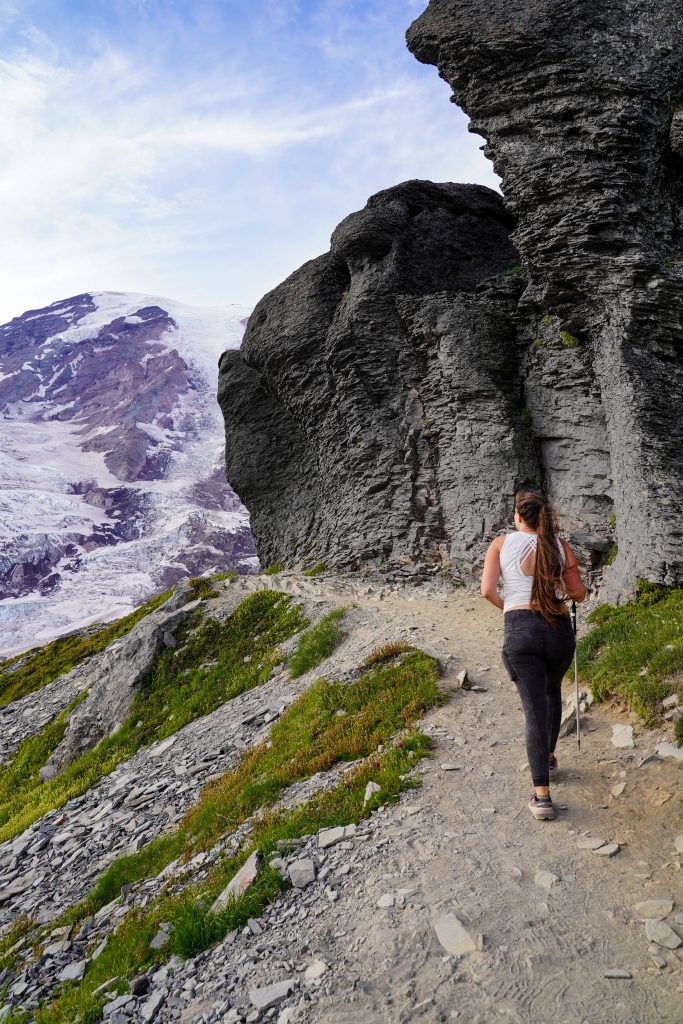
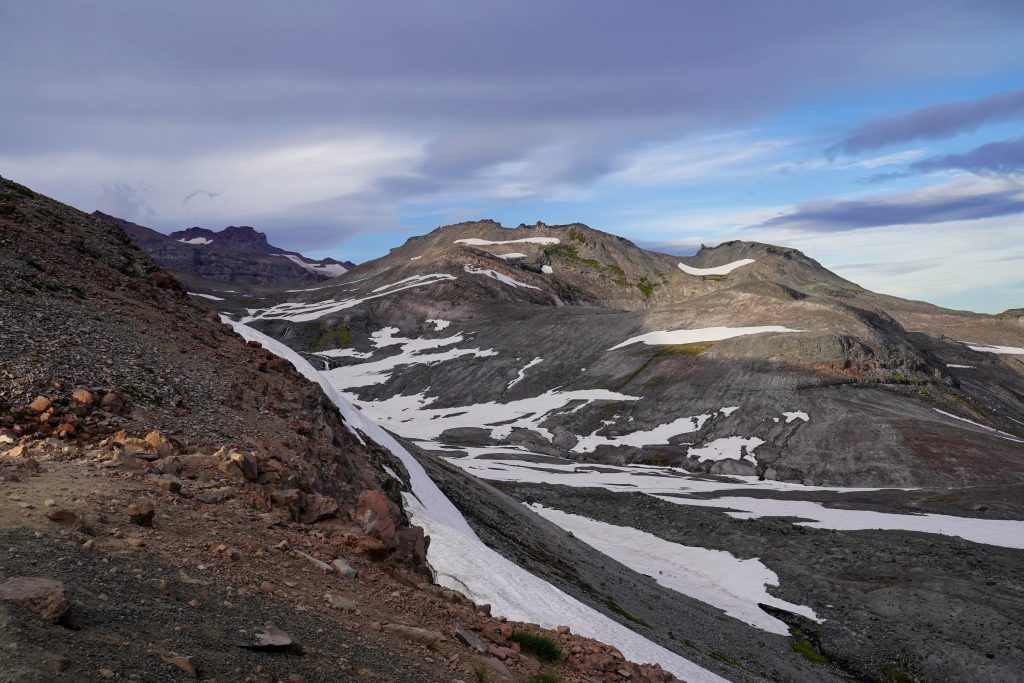
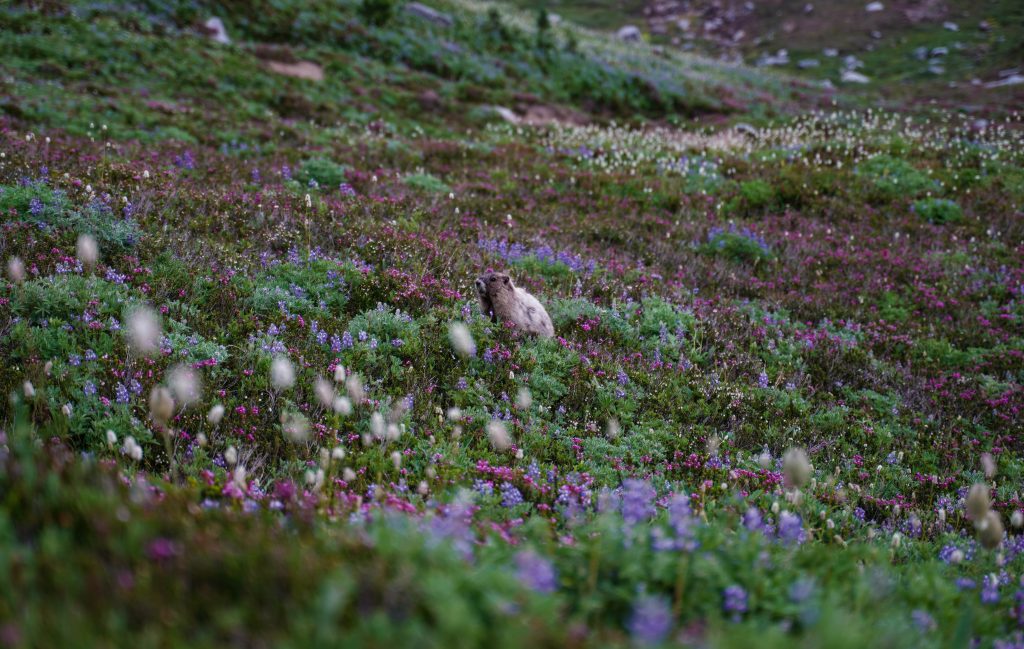
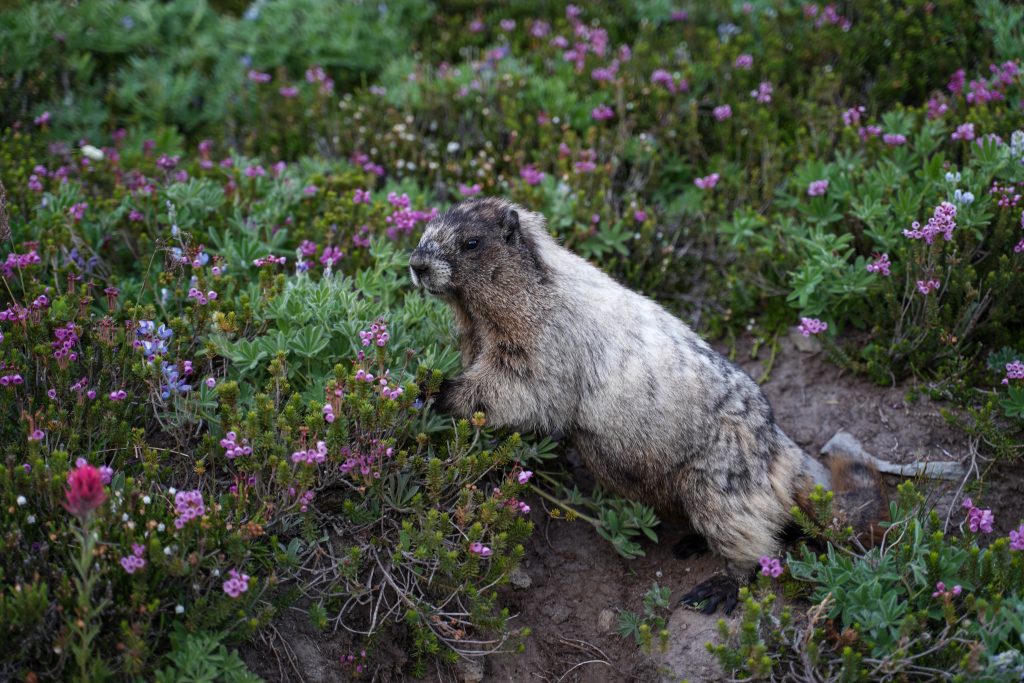
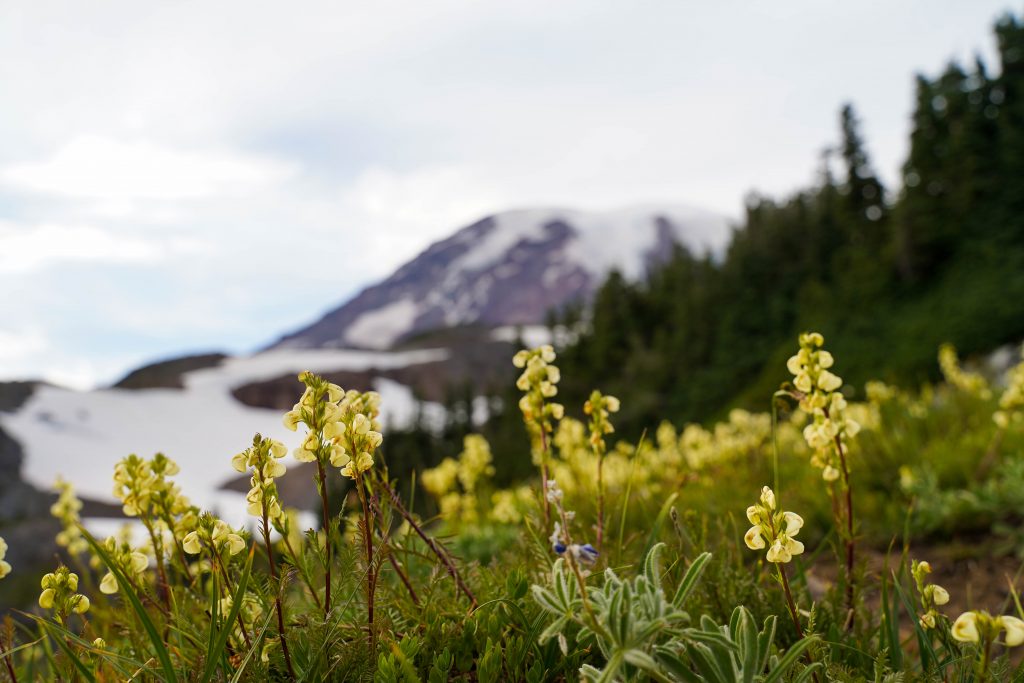
Keep an eye out as well for the mischievous marmot. They. were. everywhere. You’ll be able to see where the glacier view trail ends and the glacier begins as you readily climb above that glacier terminus. Here the views of the mountain are the most incredible. While all the glaciers we saw in the N. Cascades were undoubtedly impressive, nothing really compared to how close you come to the glaciers along the Skyline Trail.
The hike post Nisqually Glacier turn off
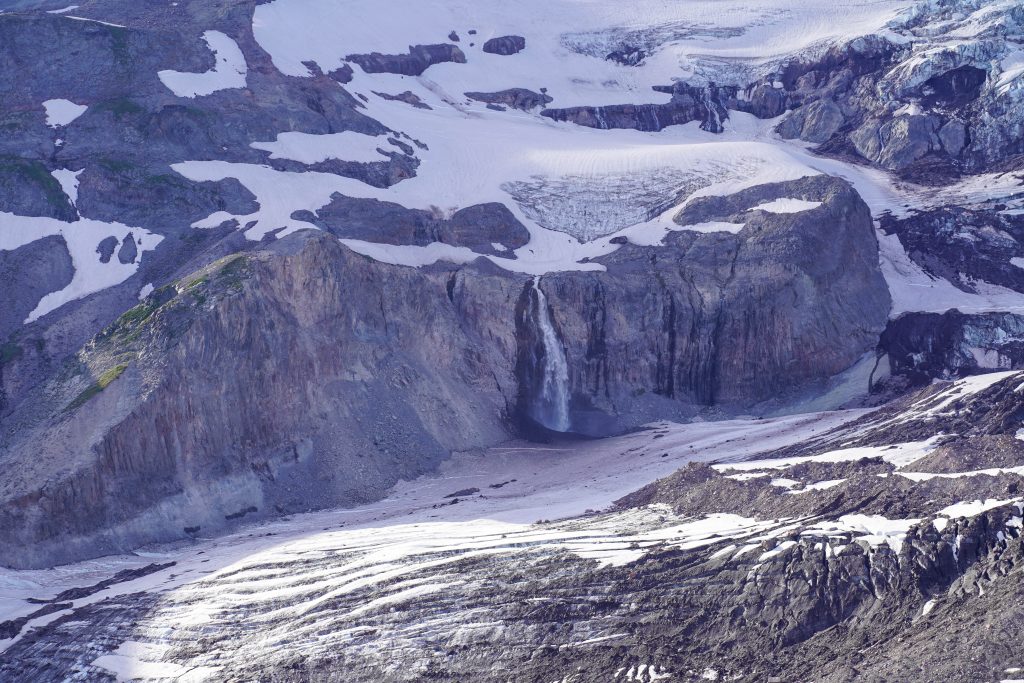
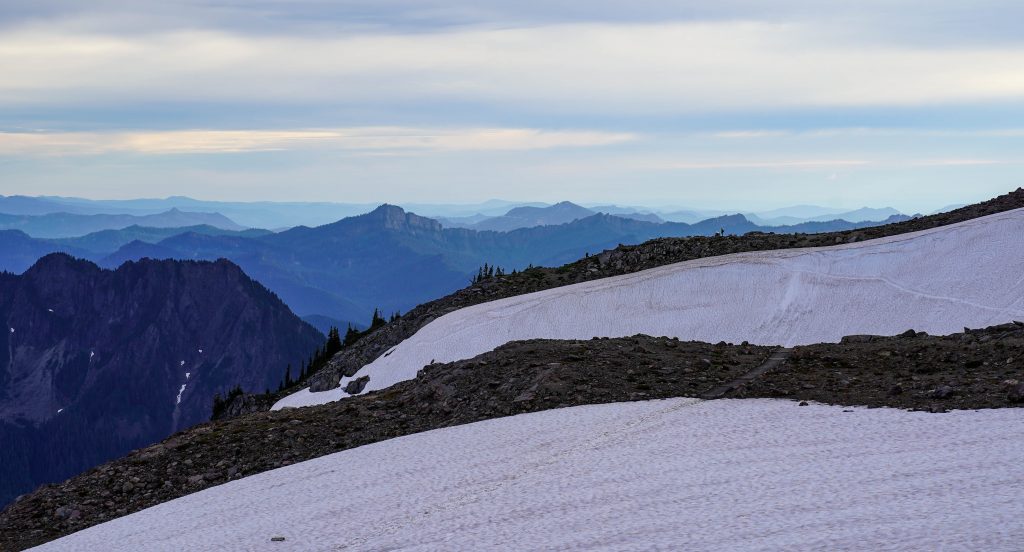
In the not so far distance you can see (and hear) the incredible Wilson Falls which are just over 300 feet tall falling from the glacier of the same name. The trail will give you a short break from the climb and turn you away from the mountain towards the other impressive view and what I actually think of as the skyline.
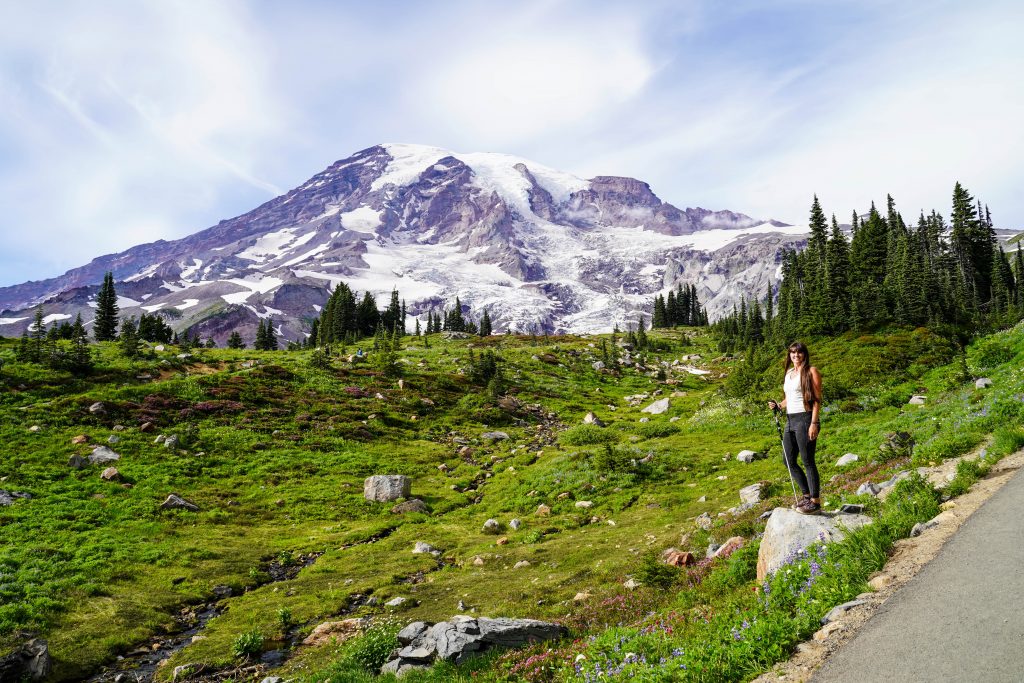
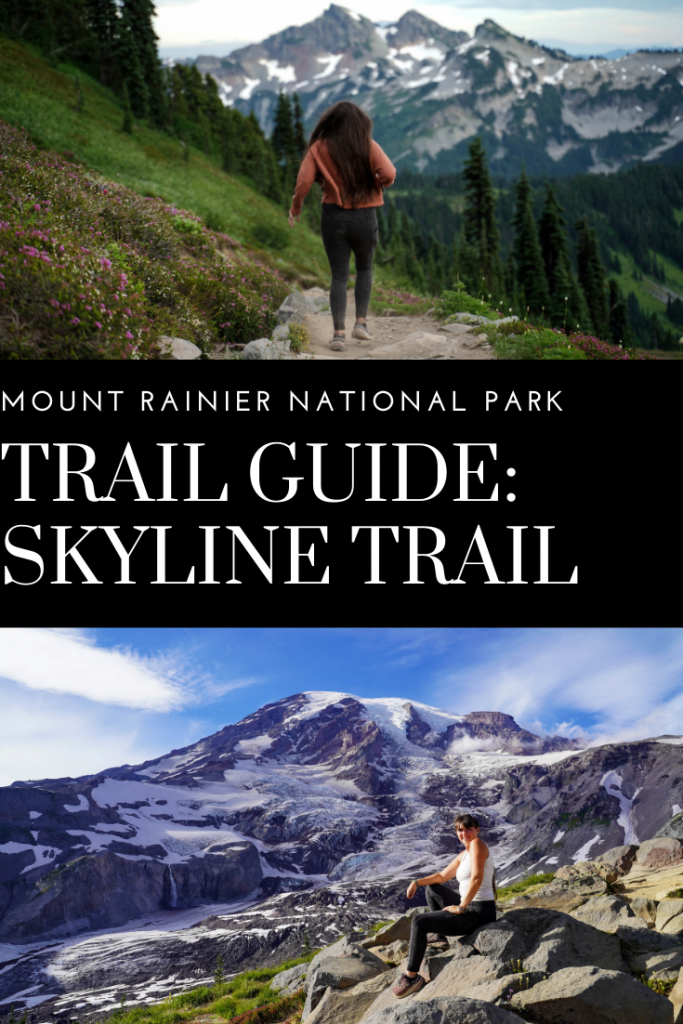
Nothing really compares to how close to the mountain you feel. It’s giant and incredible and yet there you are standing beneath it and feeling more and more empowered as you hike. There’s few hikes that really do that for me.
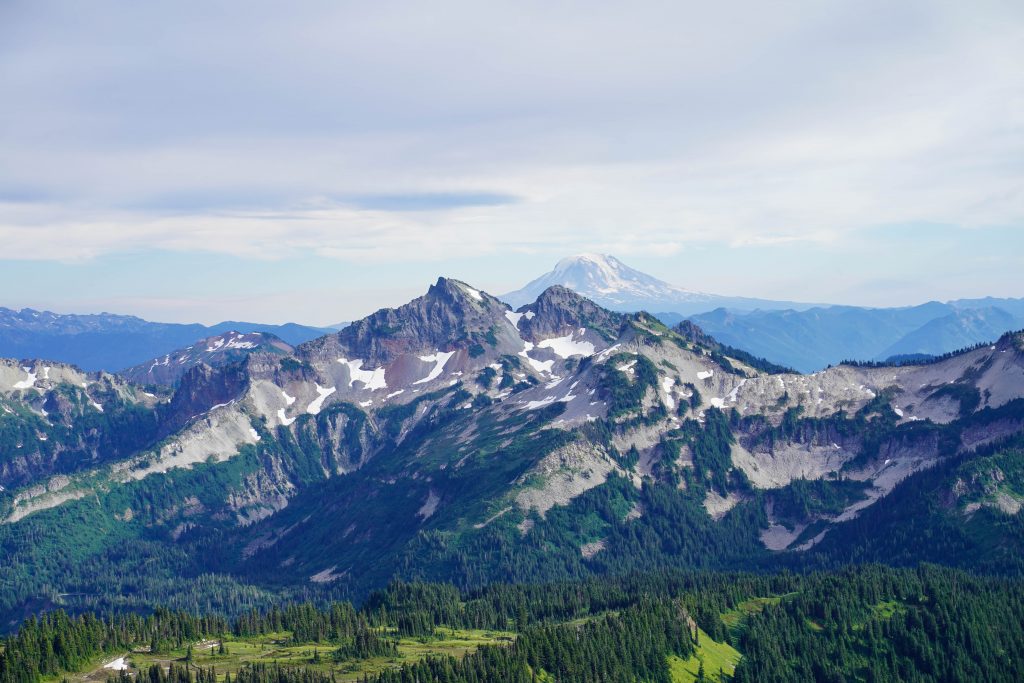
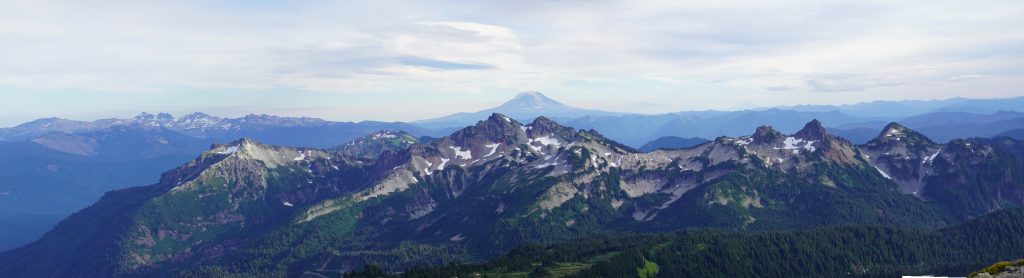
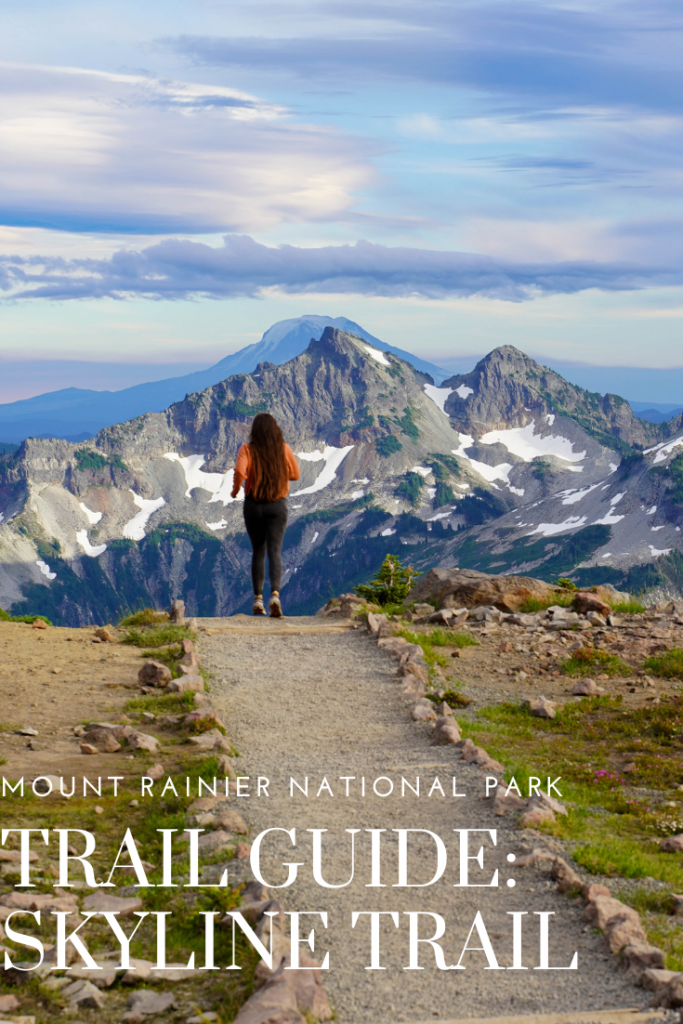
There are conical mountain peaks in all directions and incredible shaped ridges just across the way. A small trail will branch off on the left but continue straight as the trail takes a couple stairs and starts climbing again.
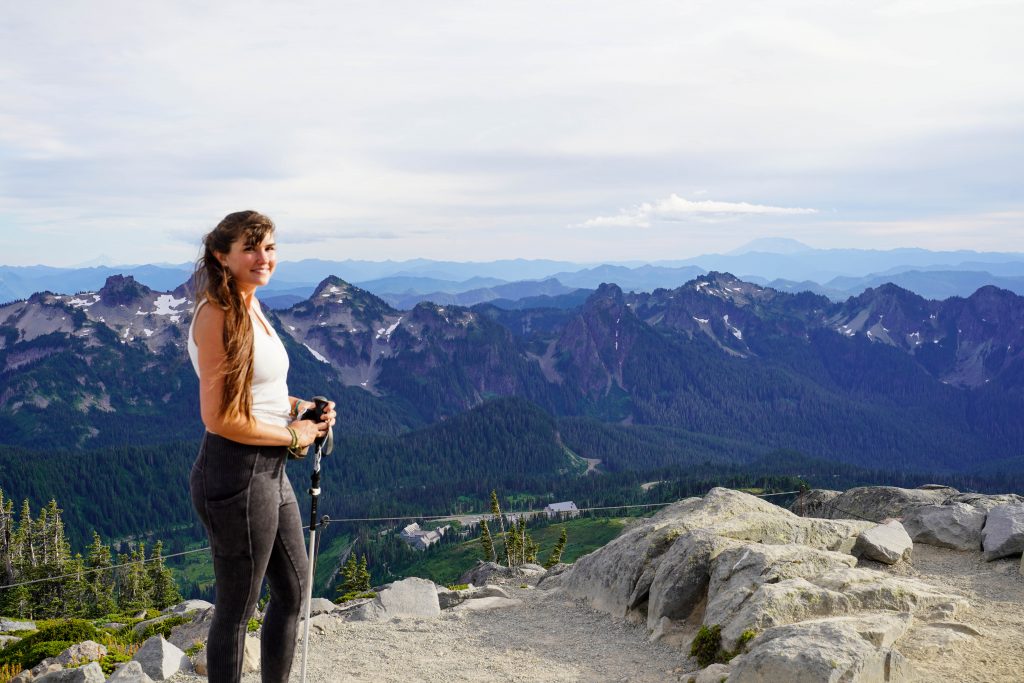
Just after the iconic (but short) stairs section of the hike you’ll reach Panorama Point. Again this is one of the most beautiful views I’ve ever seen in fact I may just have cried a little bit at this spot as I just couldn’t take it all in. (I’m pretty sure Braden got sick of hearing “I can’t handle this’ and “I can’t even”)
Panorama Point
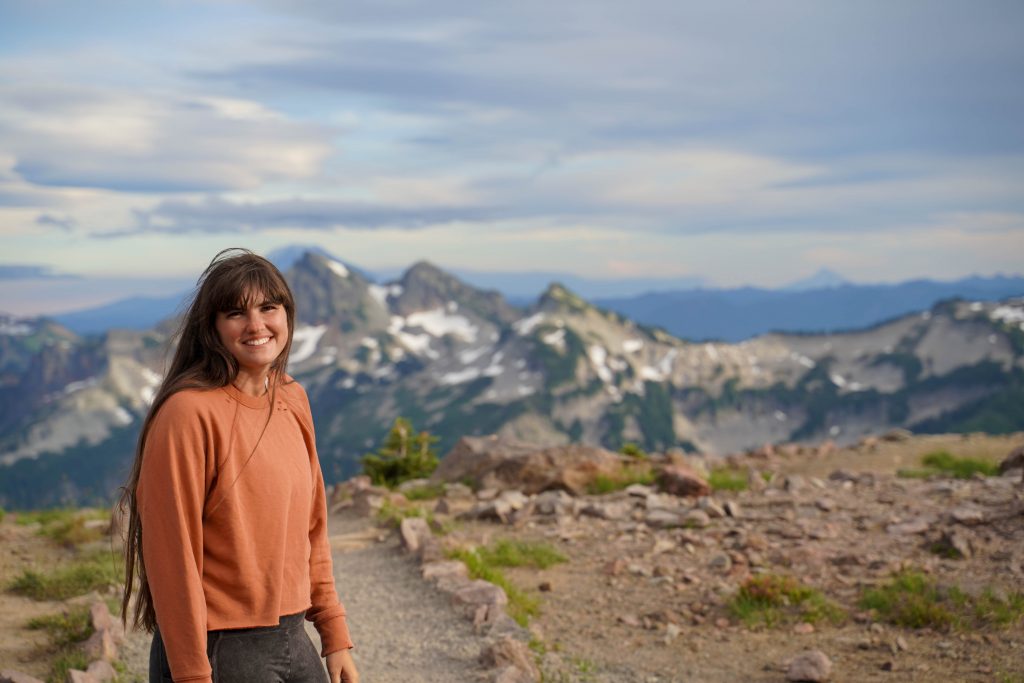
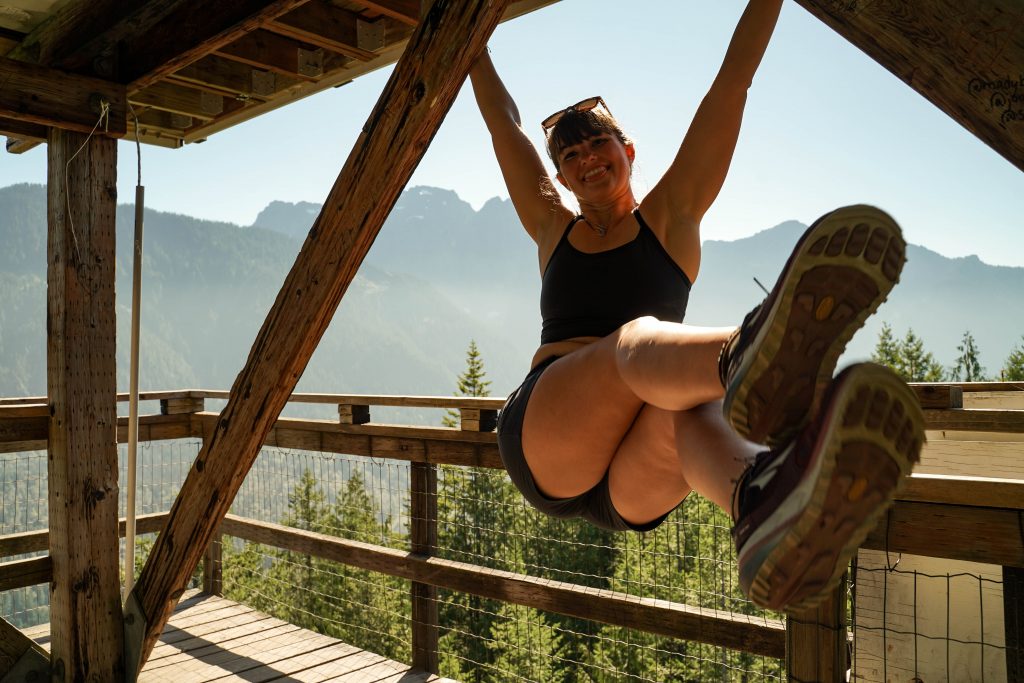
Views like this, I mean come on! Photos below of me trying to handle my feelings about this hike.
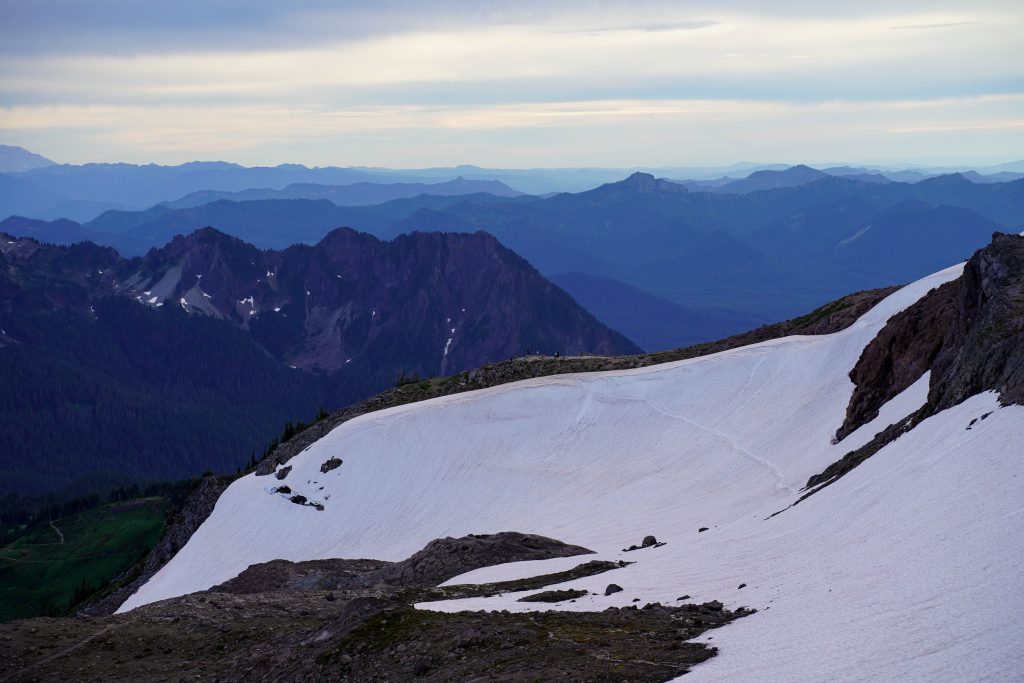
At panaroma point, you will sometimes have options. There is a trail that cuts right across to where you start descending; however this trail sometimes never thaws and the snowy trail can disguise many hazardous conditions such as unstable ice and glacier river ice bridges. If the trail says closed, believe it. It is only another 200-300 foot climb until you are done climbing and the next uphill section is pretty cool.
This is taken from the other side looking at Panorama Point and you can see a “trail” in the snow. It is very hazardous and should not be attempted in these conditions.
At this point you likewise “might not even” and could be skipping up the trail like I was….. so what is 300 more feet of climbing. In fact I never wanted to go down, instead I wanted to bask in the beauty that was 360 all around me.
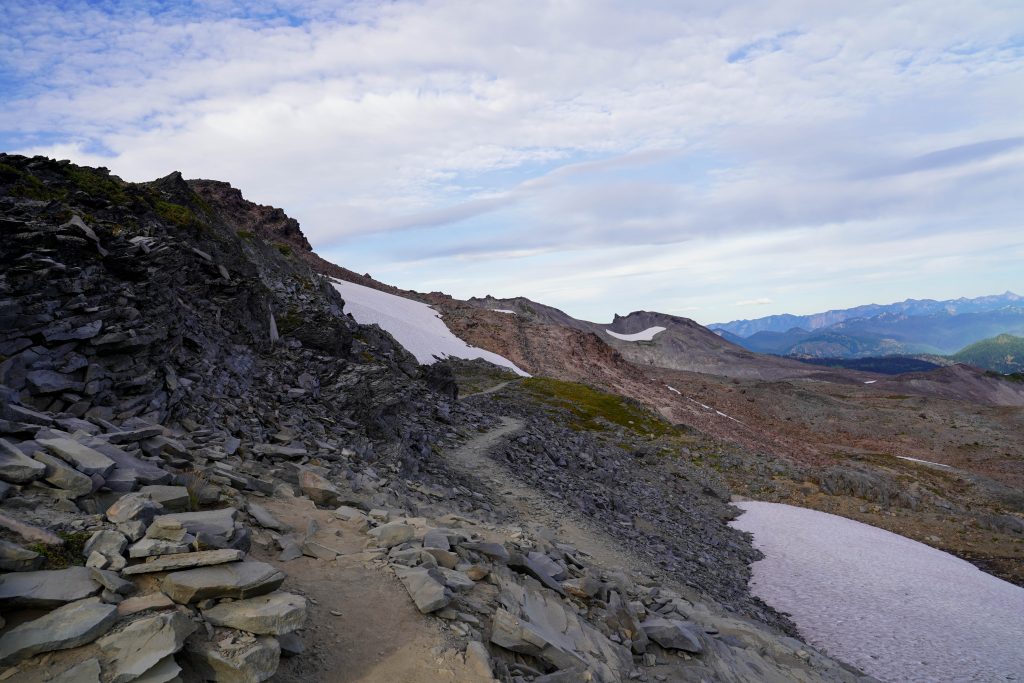
The next little bit of climb also introduces you nicely to the volcanic terrain. The terrain becomes less dusty and dirty and turns to black rocks and cliffs (surrounded by ever present snow fields which make quite the contrast)
The return hike
Now you will have finally reached the end of the climb and can start descending. You can just about see the entire trail down from the vantage points up there. After 30 minutes or so of descent you’ll reach another trail option.
You can take the Golden Gate trail (a more direct and steep but beautiful trail.) Or you can take the full skyline route which goes near the Paradise Glacier hike turn off and adds about 1 mile. We were running out of daylight so we opted for the shorter Golden Gate trail. ZERO regrets.
The Golden Gate Trail
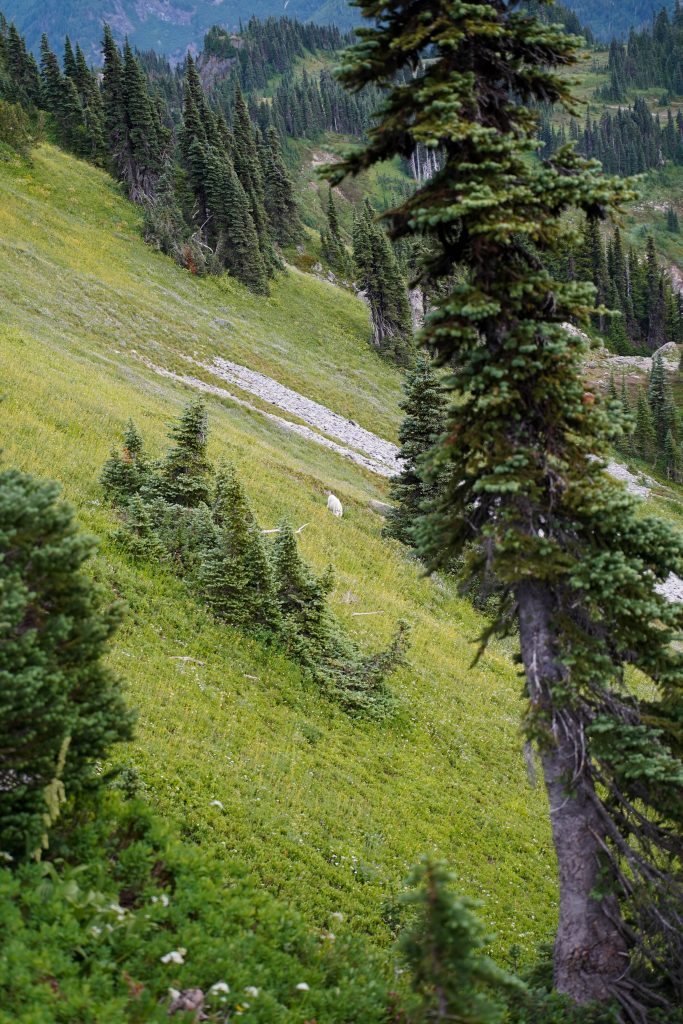
The trail switchbacks down in even more glorious series of wildflower meadows than you start out in and has 2-3 visible waterfalls the entire way. We only saw a few people but saw at least 20 marmots and 1 billy goat. It. was. glorious.
The marmots unfortunately target my favorite wild flower- Indian Paintbrush but there were still plenty of flowers to go around. Again I was positively skipping when normally at this point in a “moderate” trail I’d be ready to be done.
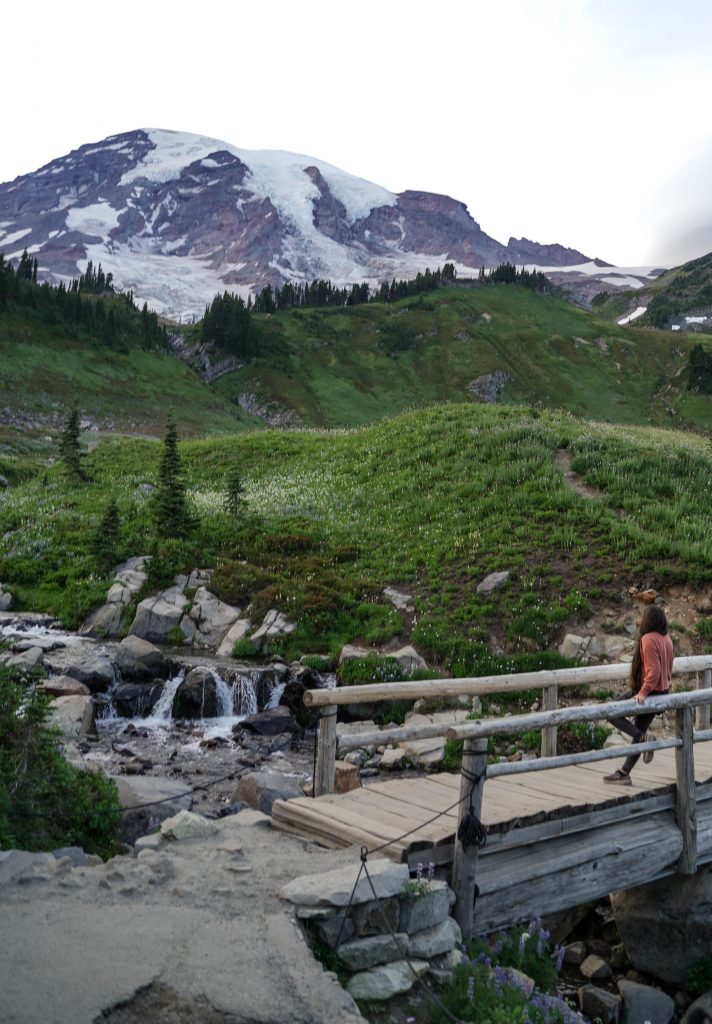
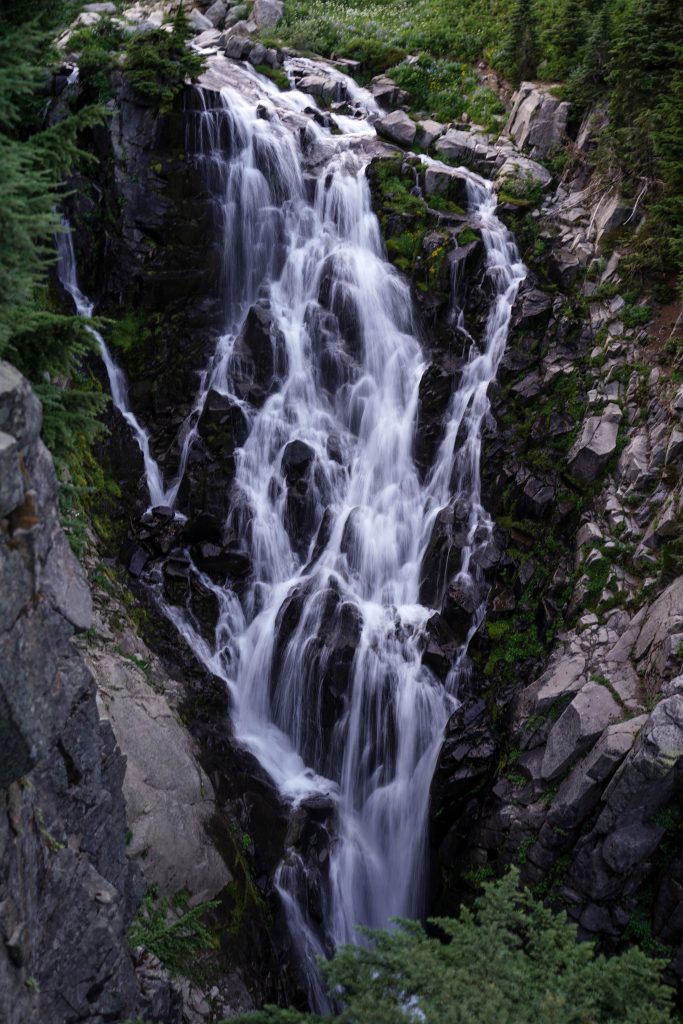
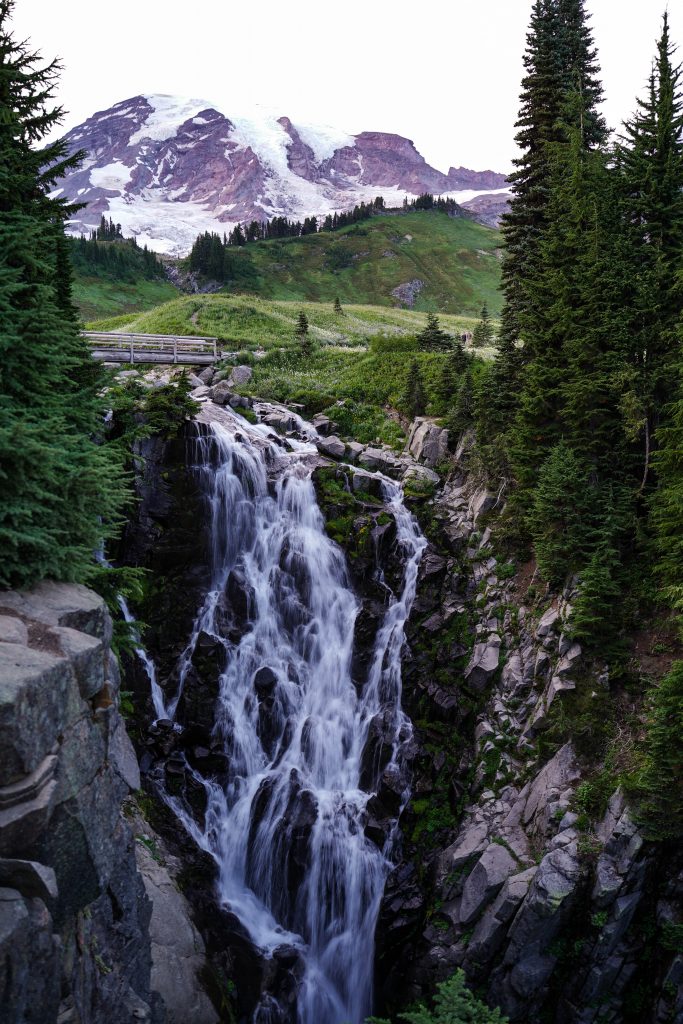
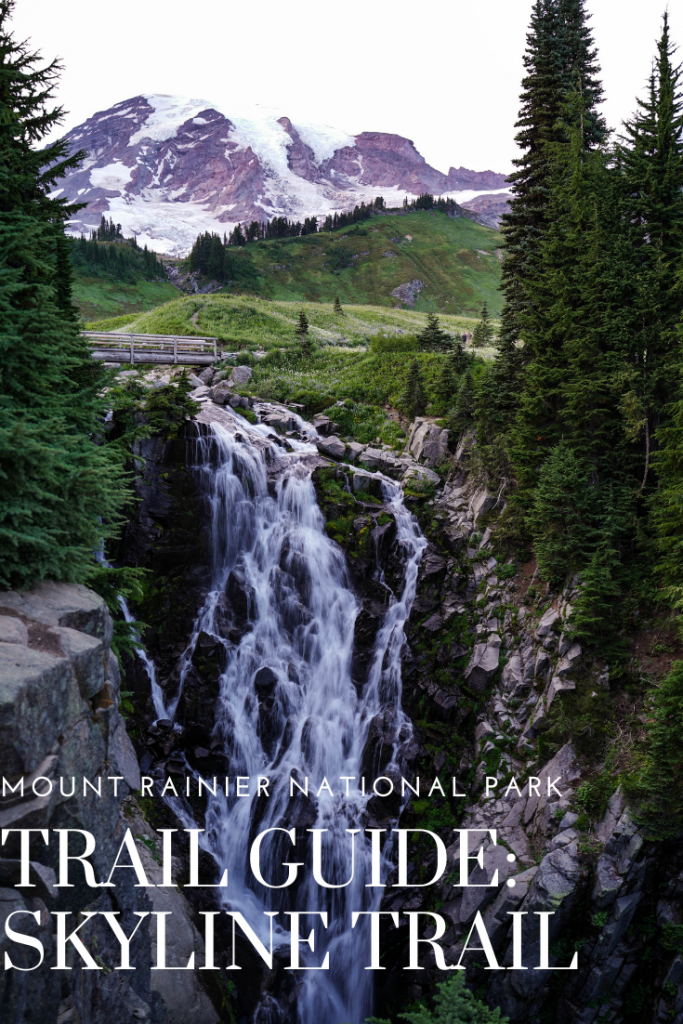
Myrtle Falls
I still wasn’t ready to be done and I maybe never will be. (take me back!) After the short switchbacks the trail mellows out and crosses a bridge which looks down on the stunning Myrtle Falls and UP at the incredible Mt. Rainier. The trail once again changes to pavement here and I highly recommend going down the short little detour to the Myrtle Falls overlook.
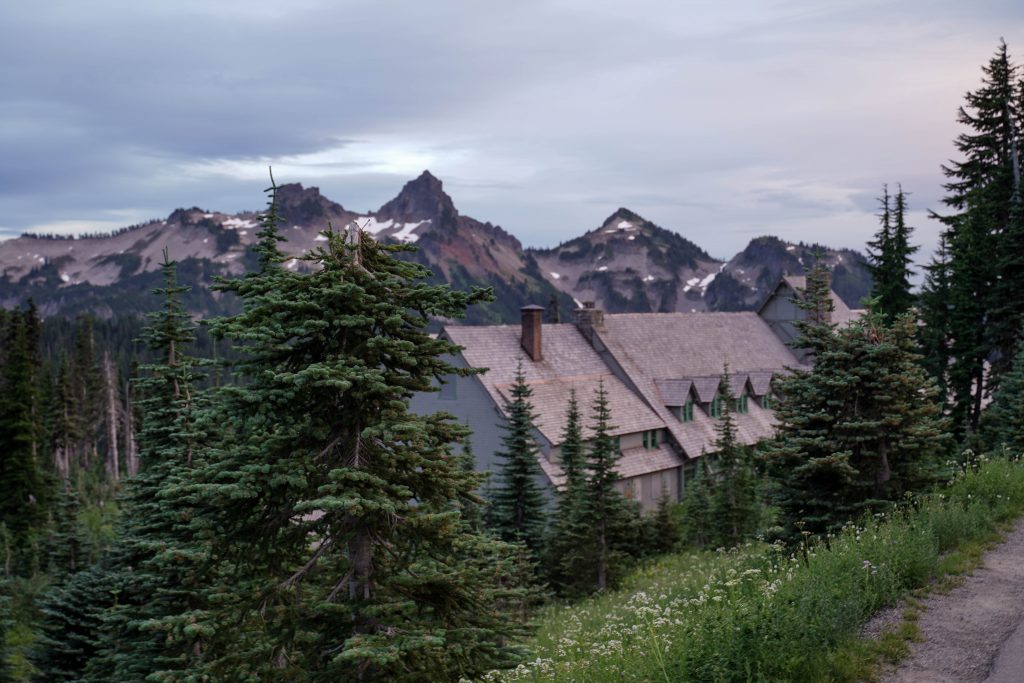
After the falls, you continue straight along the paved trail eventually catching glimpses of the National Park Inn and then the visitor center. The loop completes right at the same Muir stairs you started from.
If you are driving to the Enchantments area or heading out to chill around the charming town Leavenworth, this little hike to Heybrook lookout is a very worthy stop. It’s short (albeit pretty steep), has incredible views along with a historic lookout to explore, and will break up the drive from Seattle nicely. Bonus is how close it is to river fun so you can hike in the morning and tube or soak by the river in the warmer afternoon.
Trail Details:
Distance: 2.5 miles RT Elevation Gain: 900 feet Difficulty: Easy- Moderate Time: 1-2 hours Fees: FREE Facilities: None at the TH. There is a pit toilet down the ridge from the lookout at the end of the hike. Bring your own TP. Bring your own water.
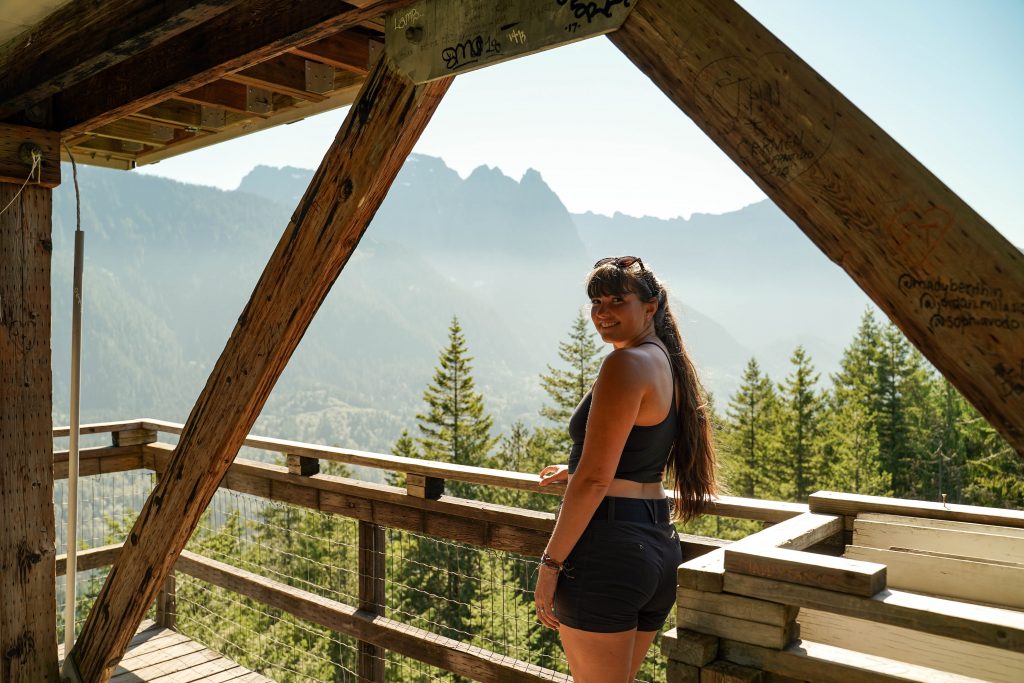
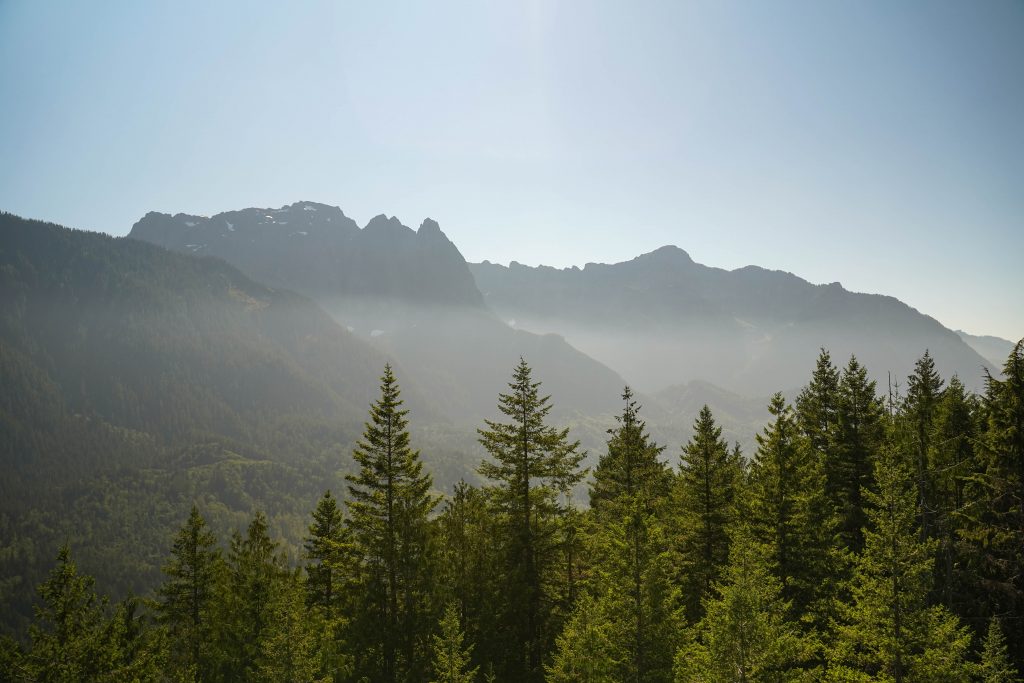
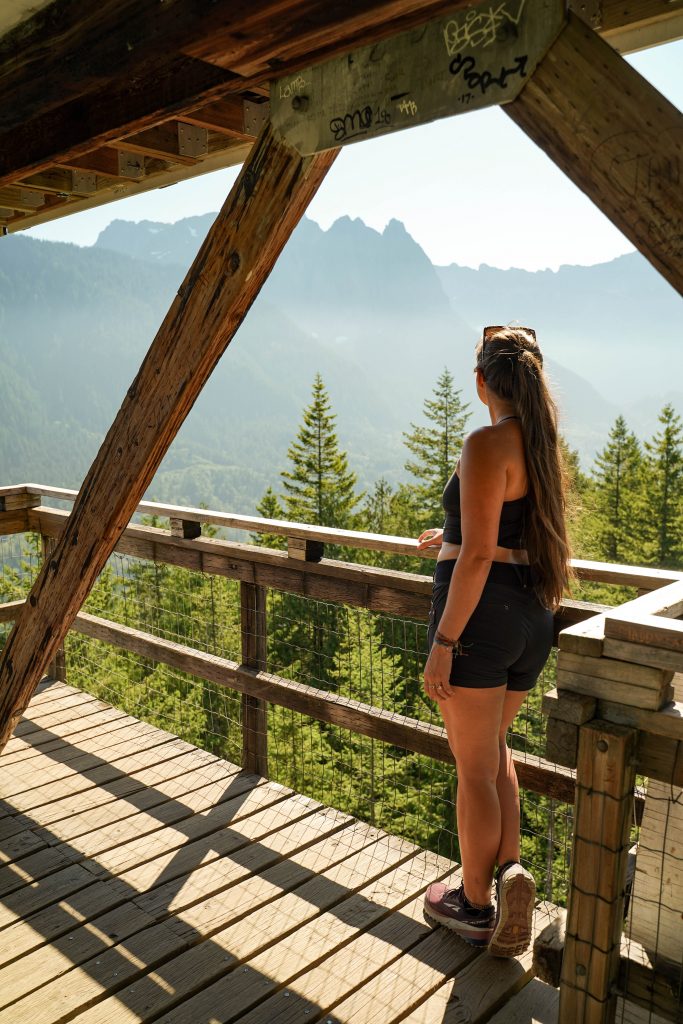
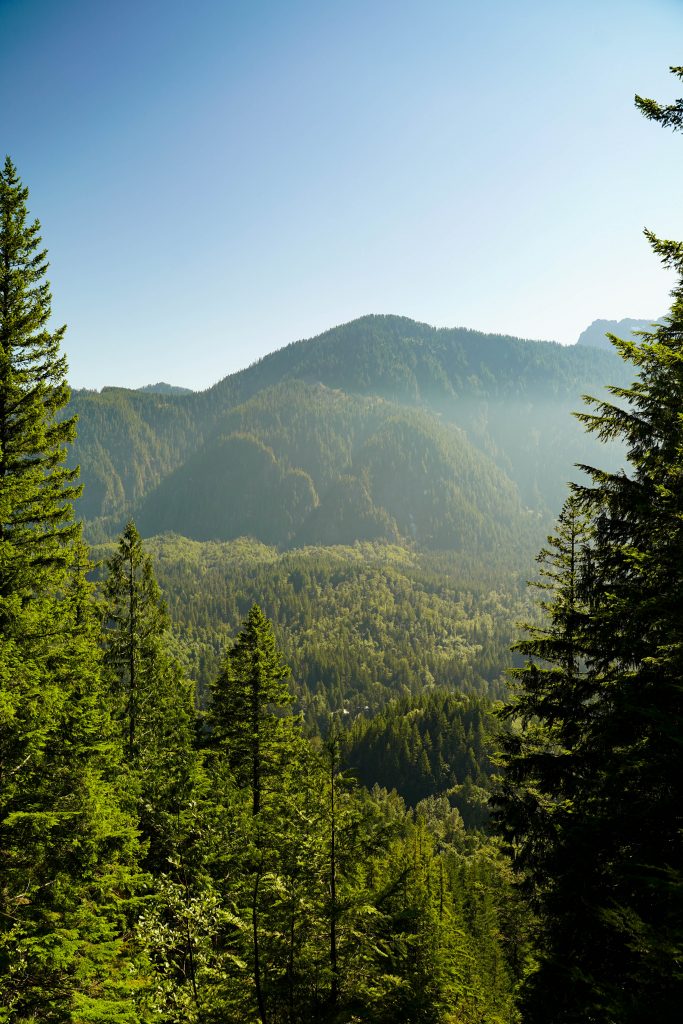
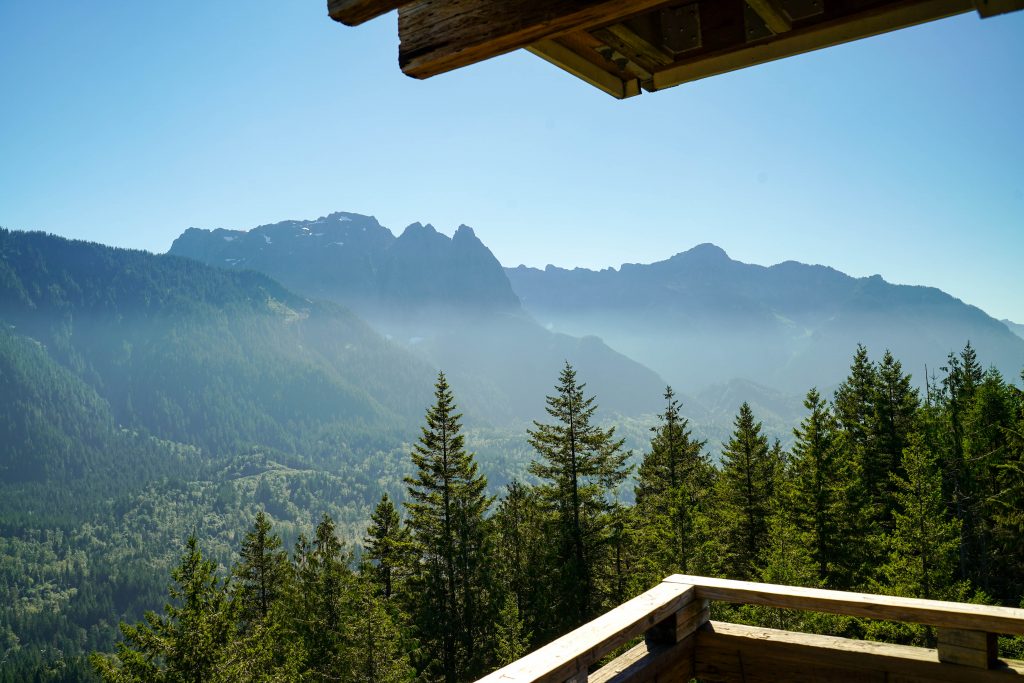
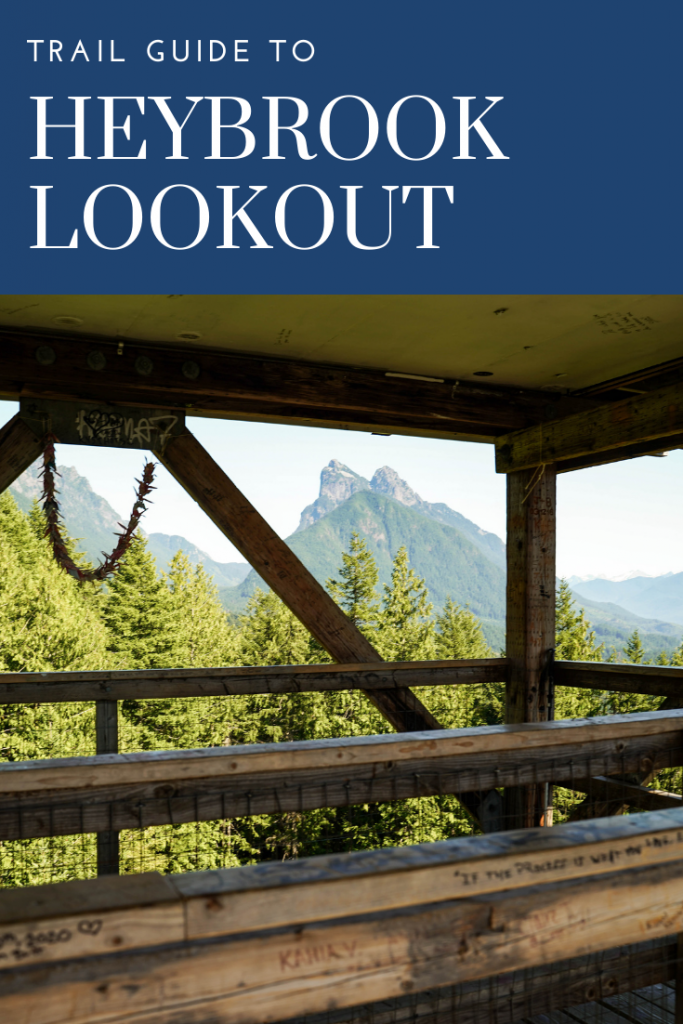
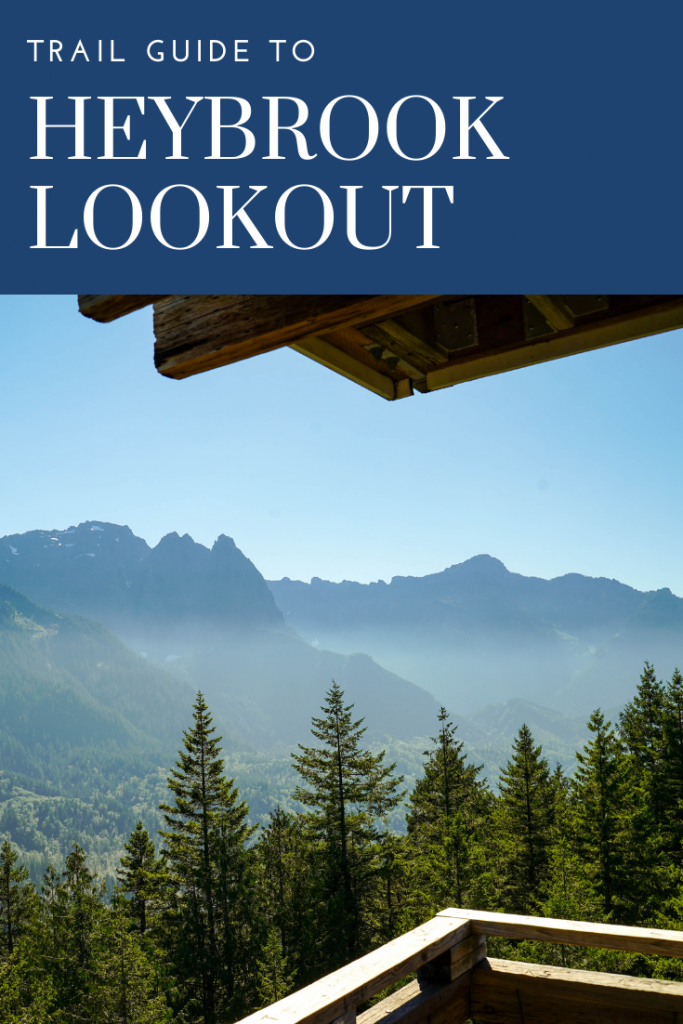
Awesome views of nearby mountains from the Heybrook lookout
Trail head directions:
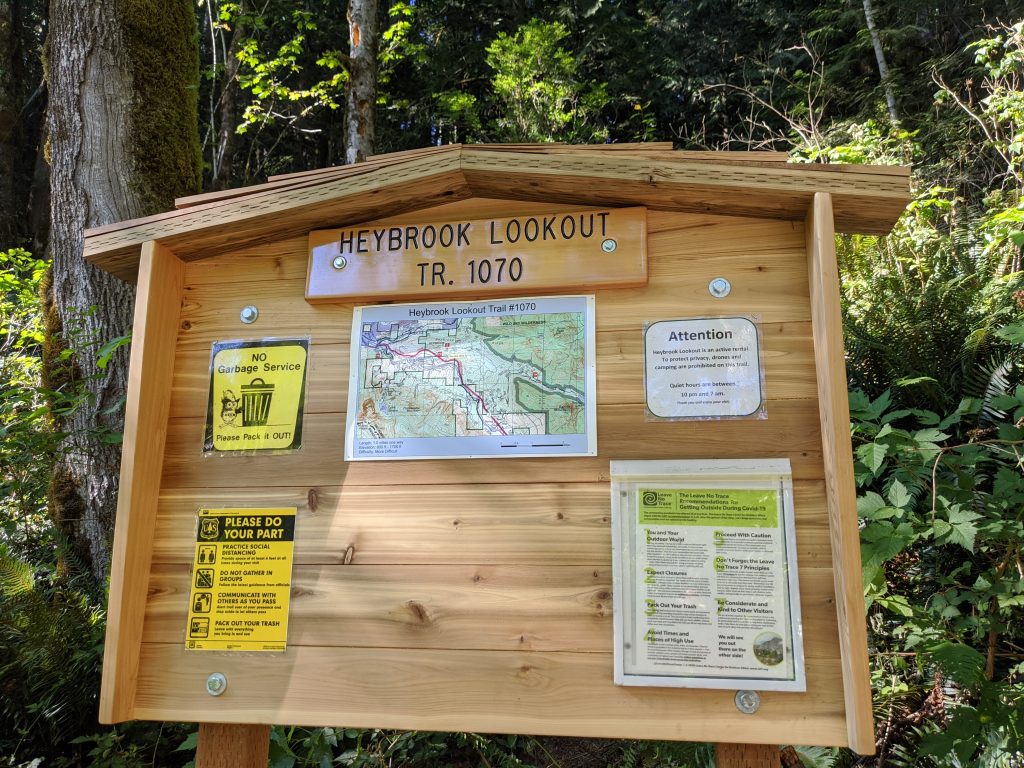
The trail head is right highway 2 just past the small town Gold Bar,WA. If you are heading East, the parking area will be on your left and is a small gravel area just wide enough for cars to park directly in (vs parallel parking on the shoulder). The actual trail start is on the West side of the parking area and is marked with a small trail sign a few feet back into the trees. There are NO facilities at this trail head so plan your pit stop prior.
About Heybrook lookout
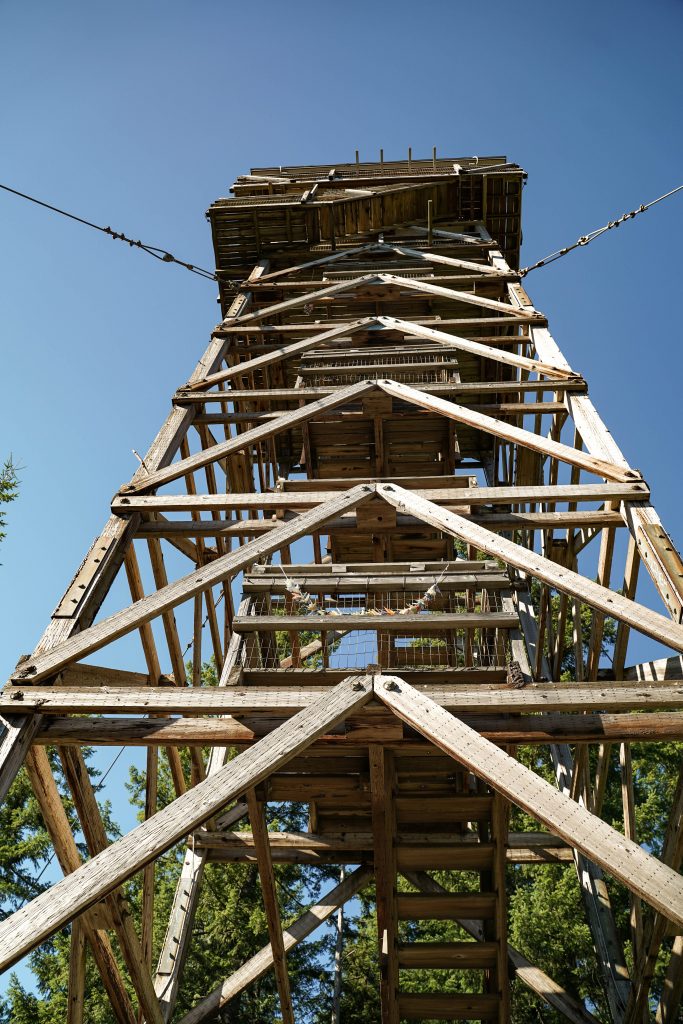
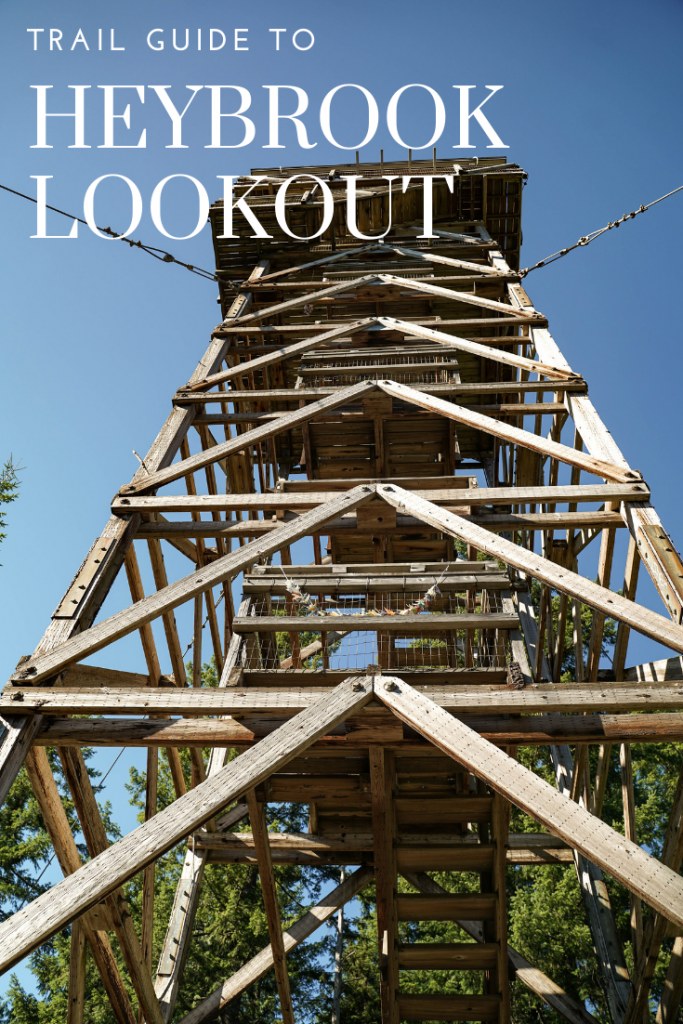
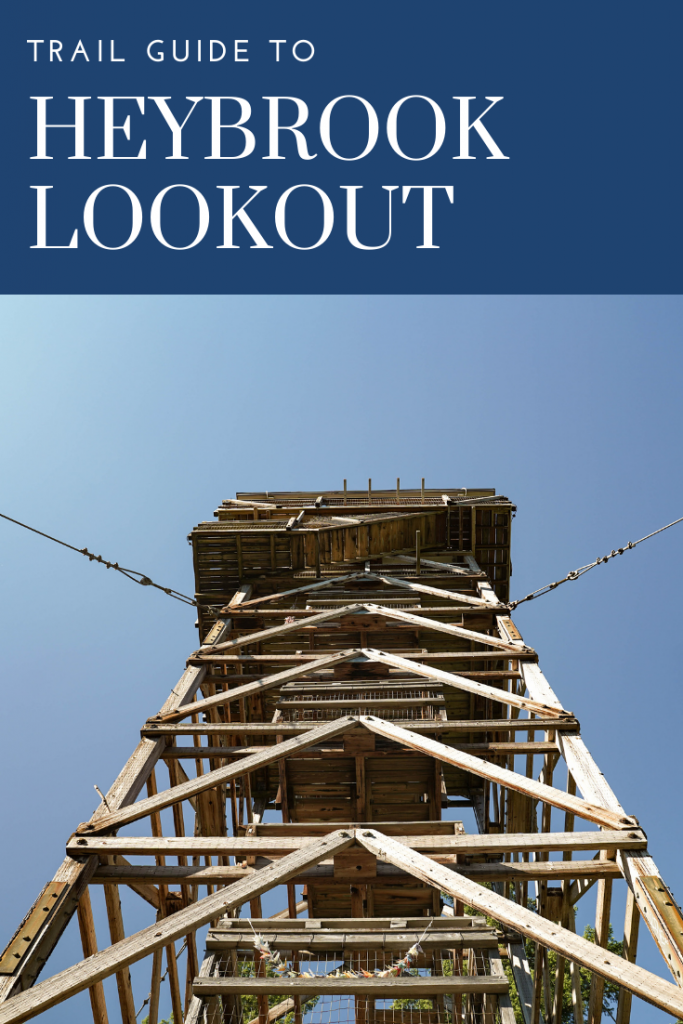
The lookout is one of the last lookouts in WA, (106 remain) and one of the few that can both be entered and reserved for sleeping in! It’s situated on a scenic ridge with outstanding views of the surrounding valleys and nearby Mount Persis and Mount Index. There have actually been a number of lookouts in this location prior to the current Heybrook lookout. Each time the lookouts were built a little taller with the current lookout finished with construction in 1965. The present lookout is around 67 feet tall and is open to the public up to the observation deck- 89 steps up.
Spend the night in the lookout:
Heybrook lookout is one of the few Washington lookouts you can actually reserve for the night! It was unfortunately booked out for our trip but it looks beautifully renovated and is quite private as the rest of the public hikers can only hike to the deck below the lookout’s rooms. (You get a key from the forest service before you start hiking) The lookout reserves quickly and is released on a rolling 6 month basis. Check here for more information or to check for availability.
We wish we could’be spent the night or “hungout” longer at the lookout
About our hike:
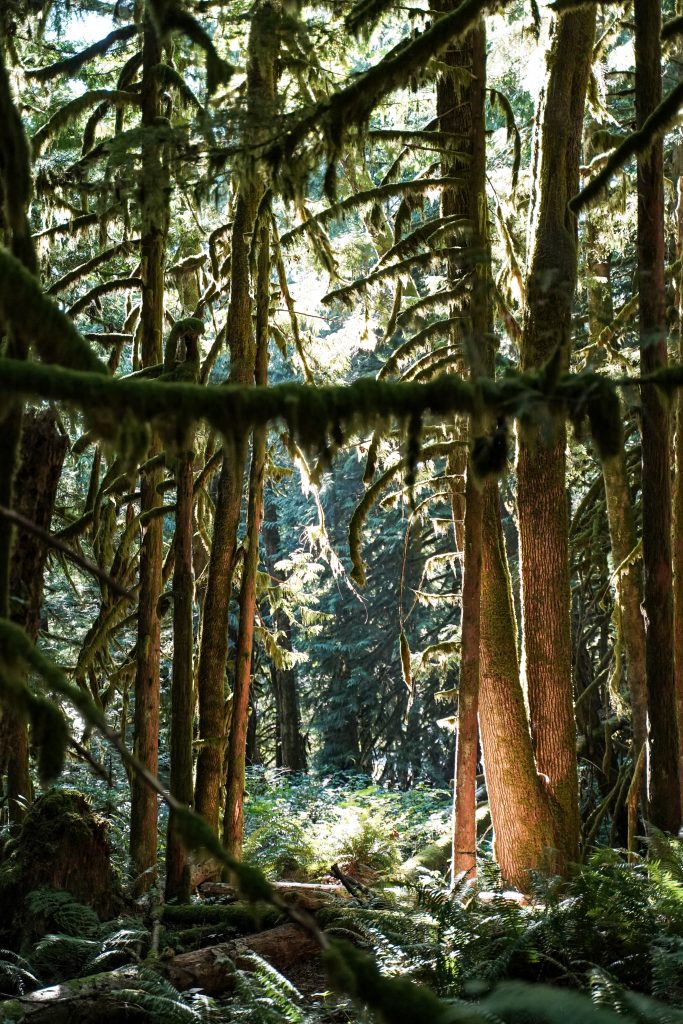
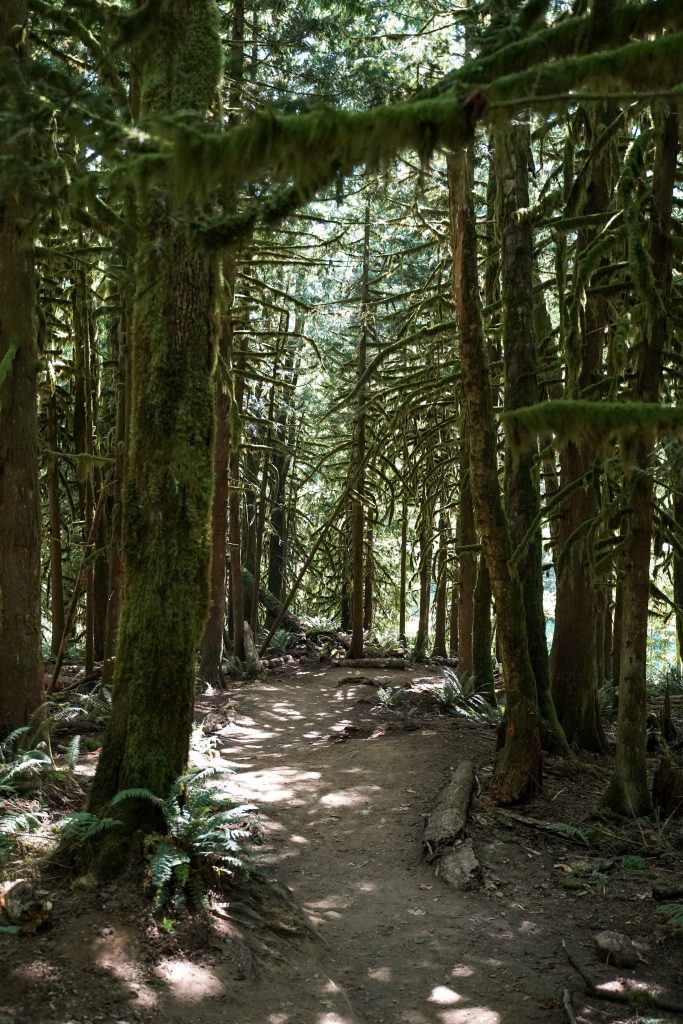
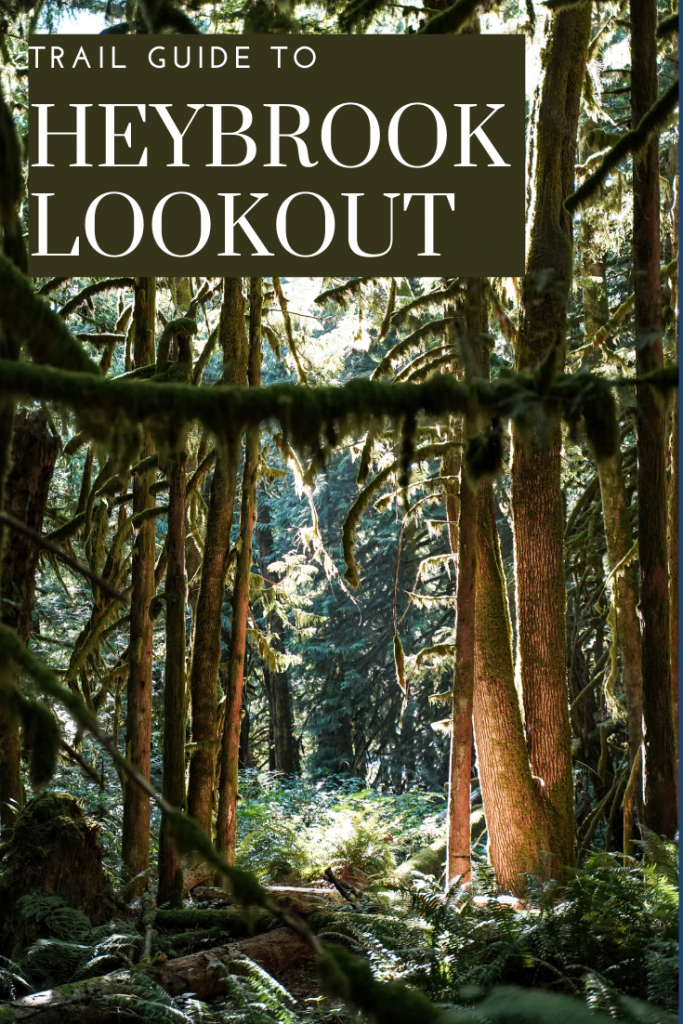
We started our hike in the late afternoon on a Saturday in August. There were only 5-6 cars parked in the parking area and for a weekend and easy hike, we didn’t think the trail was very busy at all. It parallels the the road for a brief moment before turning sharply and heading up the hill in a series of switchbacks. While you can hear the road for the first 10-15 minutes or so you eventually leave it all behind and find yourself in a mossy forest with little bits of sunlight trickling through.
I learned quick on this, our first hike in WA, the sunscreen I bought was going to go to waste or just coming home with us. (foreshadowing: almost all the hikes we did were in the trees 80% of the way)
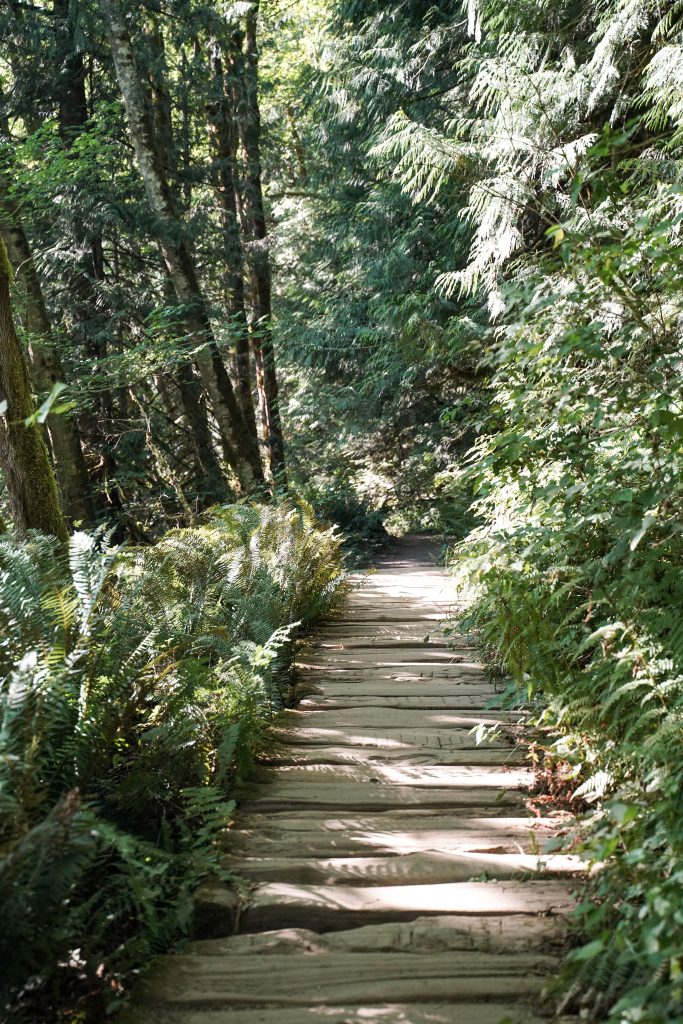
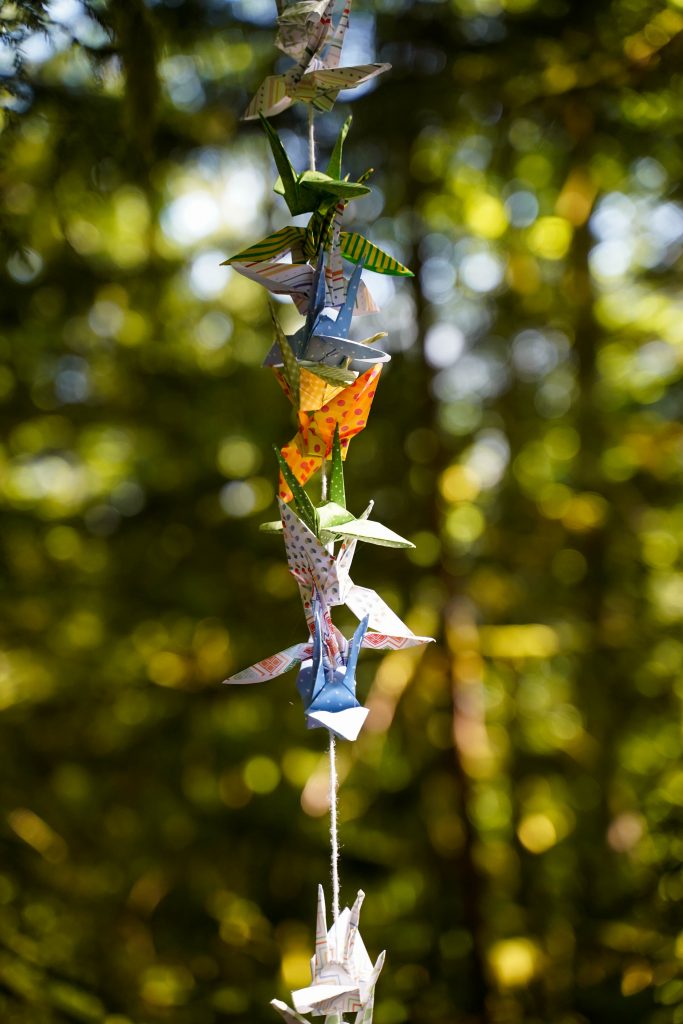
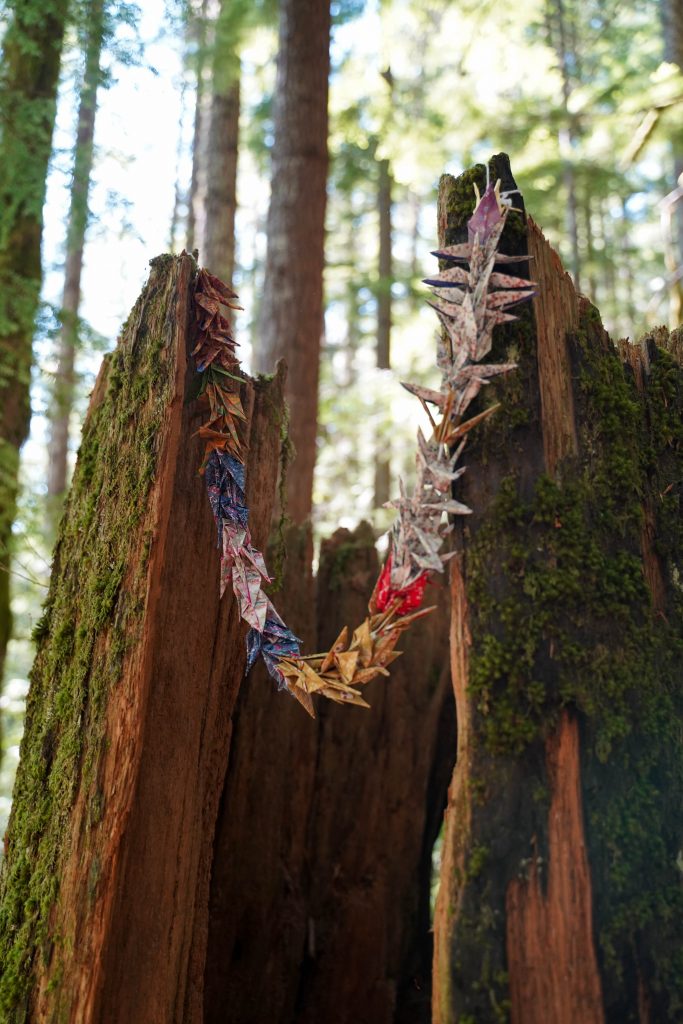
The trail is made up of a couple long switchbacks and overall very well graded. It’s a good workout, but never felt too challenging like you might lose your footing and slip. We had bonus origami cranes to amuse us as well on the climb as someone had hung strands of them every 0.25 mile or so.
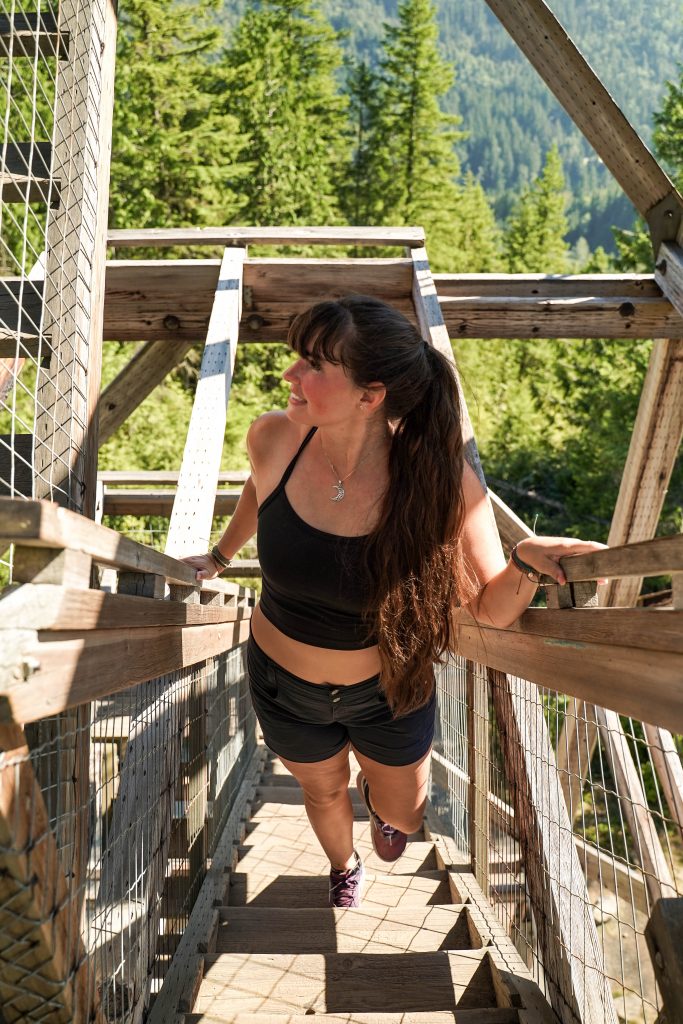
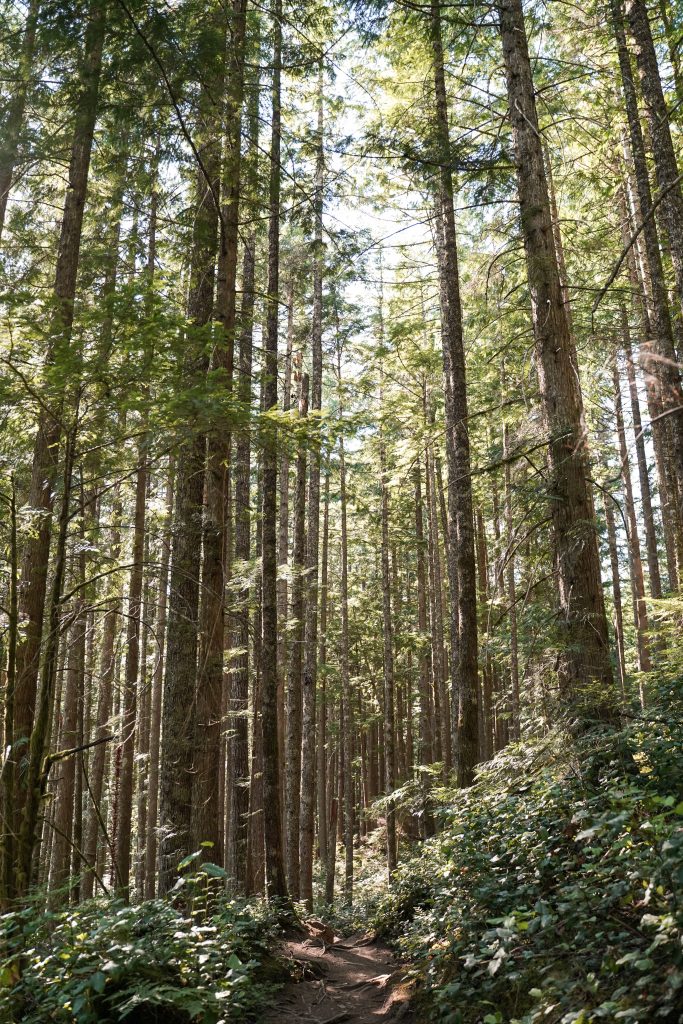
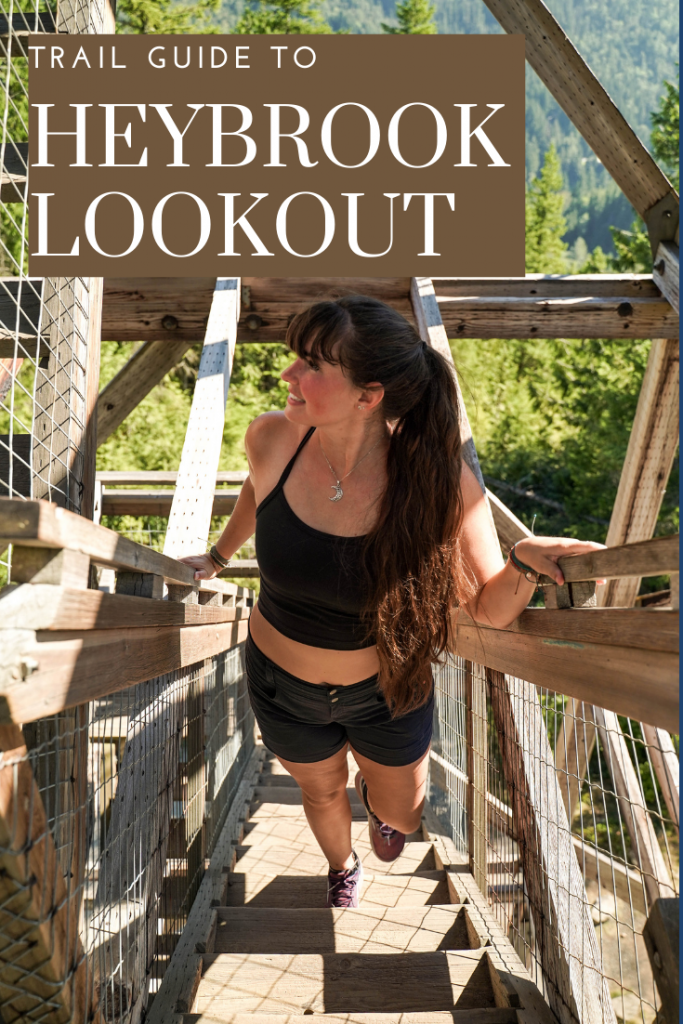
It isn’t too long before you reach your first big break in the trees and get a reward of a nice open view. BUT if you turn and look up you’ll actually see the lookout right above you at that same moment- you made it! While it may have felt challenging on the climb up, you realize just how quick a hike it is and excitement replaces tiredness for up 89 steps you’ll be ready to go.
The closer you get to the top the taller and skinnier the trees also get so watch out for that! And when you see the break in the trees on your right (middle picture) then look up and you’ll see the crowning glory of the hike. You made it!
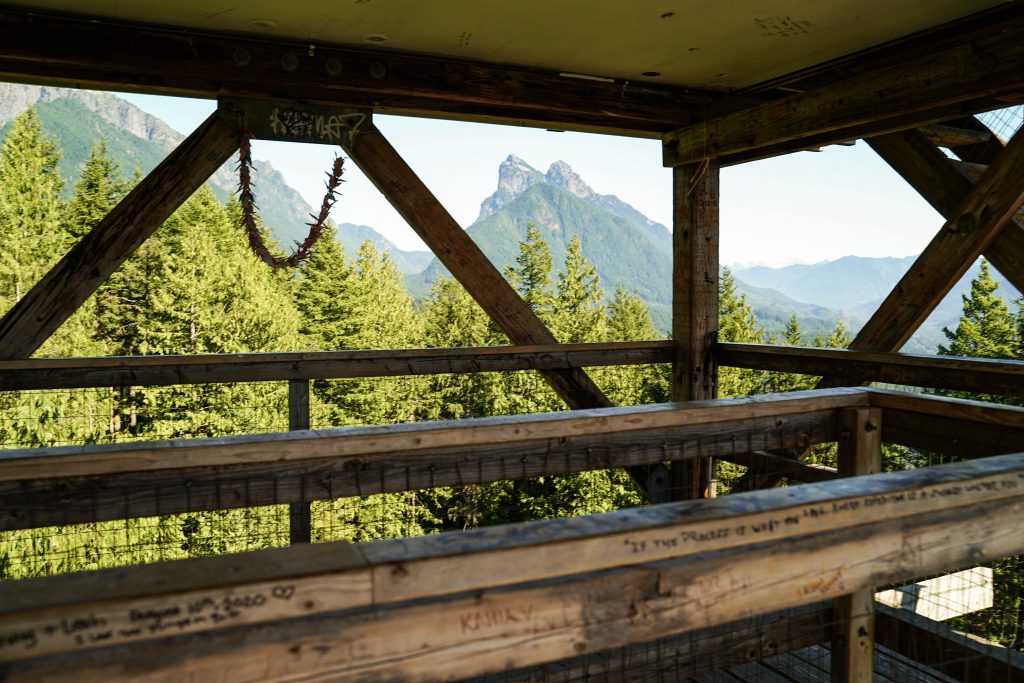
At the top
When we got there we waited a couple minutes for a group to come down as the stairs and landings are pretty narrow and small. (Thanks Covid for making it even harder) Once we started climbing, we went straight to the observatory deck in case anyone else was waiting to come up or go down. The view from the top is just breath taking and I bet it is even better at sunset or sunrise. As it was in the afternoon, our views were pretty hazy and backlit but I can still appreciate the incredible mountains all around and a unique (tall!!) wooden structure bearing the brunt of weather and time since 1965. It is seriously impressive to stand up there and think about.
After a couple minutes we actually got the lookout to ourselves for 30+ minutes as the previous occupants all headed out. On our way down we passed another 3 or 4 groups heading up, but again… really not that busy for a Saturday afternoon!
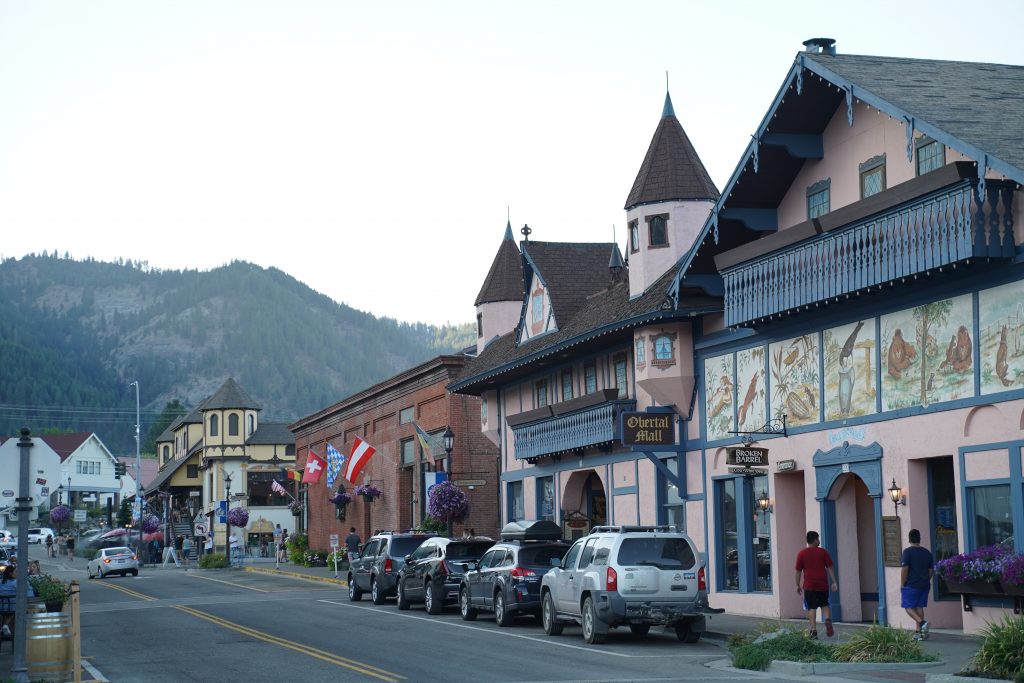
Stop in Leavenworth for victory meal!
After finishing our hike we carried on our way to the adorable Bavarian modeled town of Leavenworth. This is a great stop for exploring the nearby Alpine Lakes Wilderness, continuing onto other destinations in the Cascades, or enjoying some fine Bavarian cuisine and beer. I highly recommend a stop in Leavenworth (short or long) after your excursion to Heybrook lookout.
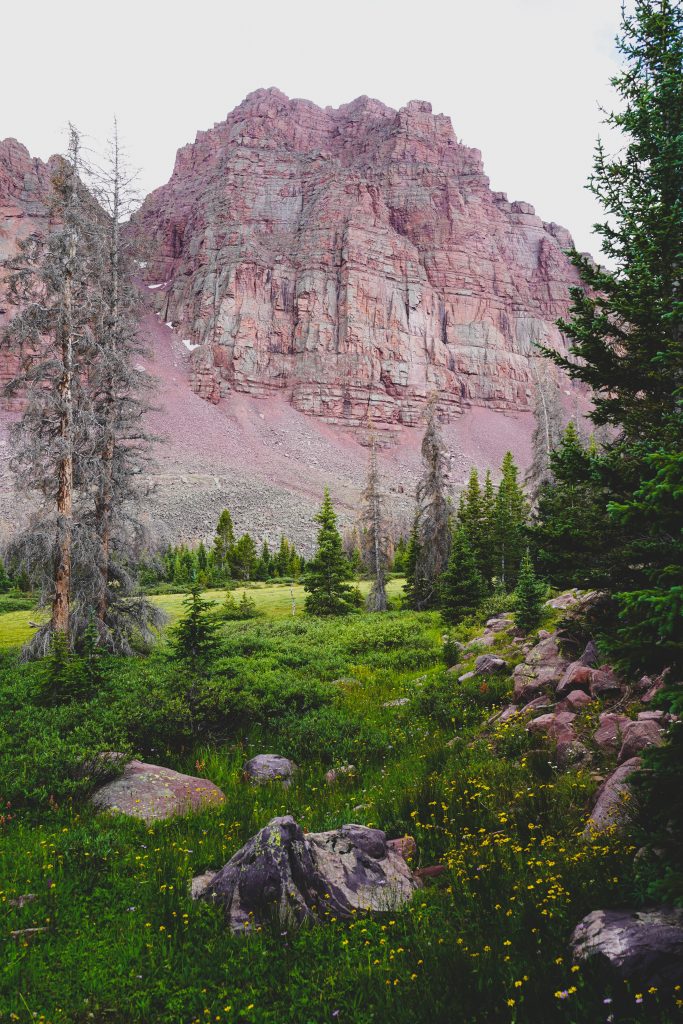
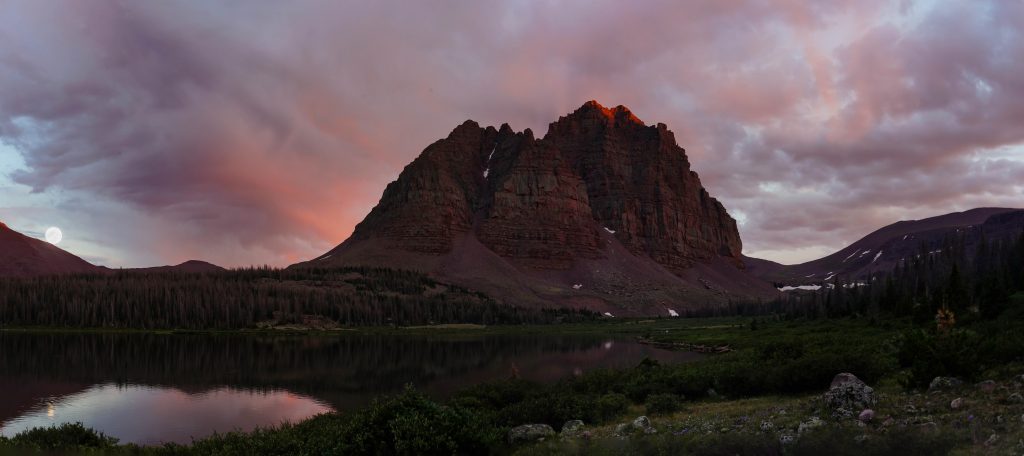
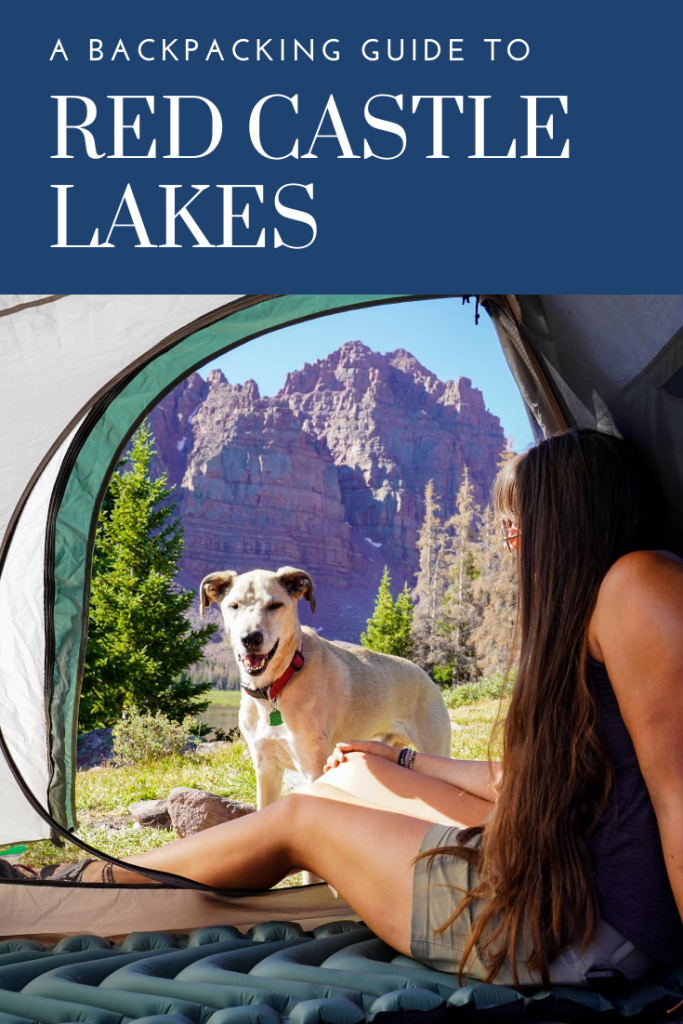
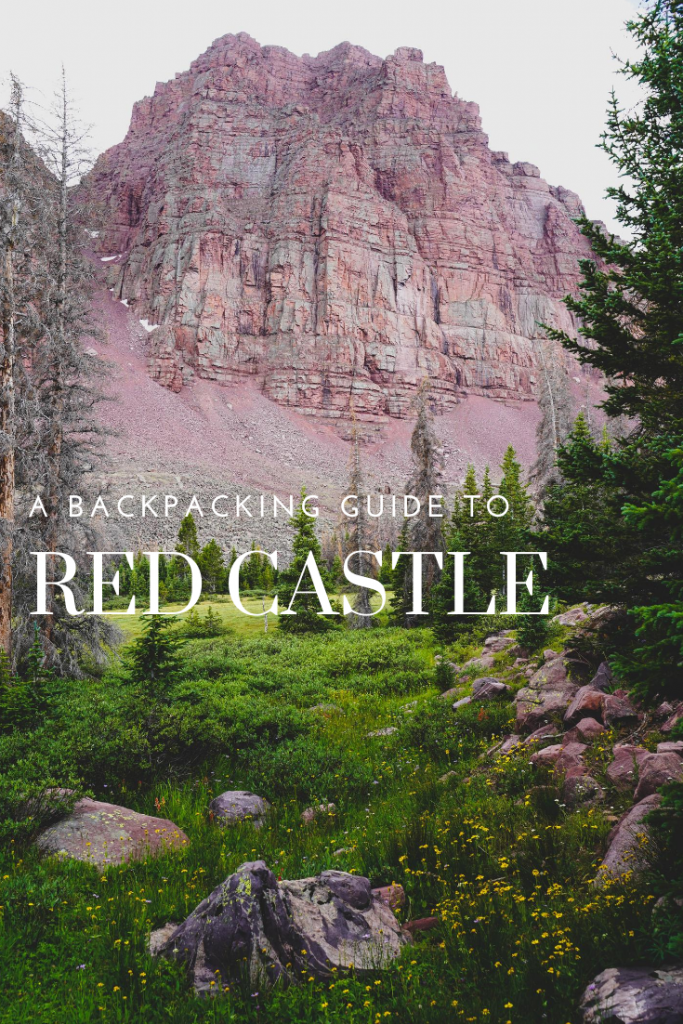
While almost everyone knows Kings Peak is “the” backpacking trip to do in the Uintas, Red Castle isn’t quite as largely known (though that continues to change with each passing year) I first heard about it and had a trip planned in 2016 but the trip was cancelled due to weather. Each year after I’ve tossed around the idea of going but something always came up! So this year was the year and all the hype from the last 4 years did NOT disapoint.
Red Castle, which just happens to be one major drainage over from Henry Fork (trail to Kings Peak), is not just an incredible destination but a stunningly beautiful hike as well. Now that I’ve hiked both Kings Peak and Red Castle, I’d say the trail to Red Castle is more graded and overall more enjoyable. (could be my PTSD from Kings though, that was a bit of a rough trip) So with that here’s the deets:
Trail Information:
Total Distance: 26 miles RT to Red Castle Lake Distance to camps: 20-24 miles RT depending on where you want to setup Elevation: ~2,000 feet Time:~5 hours to Lower Red Castle Lake (camp) each way Fees: The parking lot is $5/day and recreation passes are NOT accepted. If you have more than 1 vehicle you can pay “additional vehicle” charges which is +$4/ car/ day so if you have 2 cars it would be $9/day instead of $10. This fee is CASH ONLY. Come prepared so you aren’t ticketed while out in the backcountry.
Trailhead:
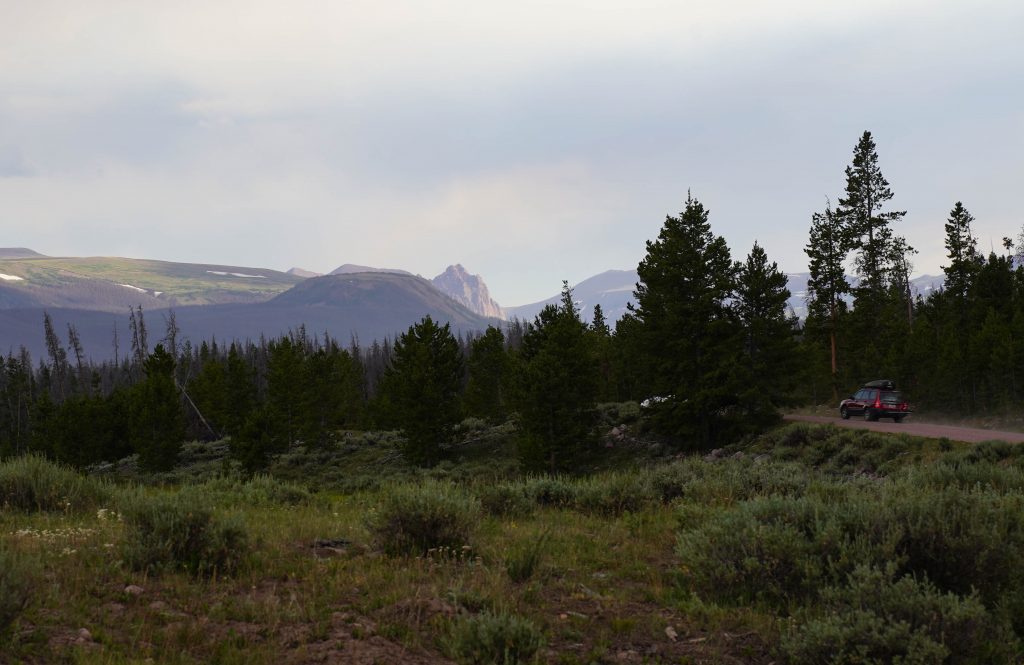
While all trails connect and there are various ways to actually hike into Red Castle, China Meadows is the most popular route. The trail starts from the trailhead campground at the far end of all the campground loops. To get there, take exit 34 off I-80 and follow WY-410 E as it become Co Rd 283 and FR072 to FR125. Most of the roads are unpaved but still decent with only the last couple miles being a little more rough. As you pass China Meadows Campground and start the far loop, keep an eye out for a large parking lot.
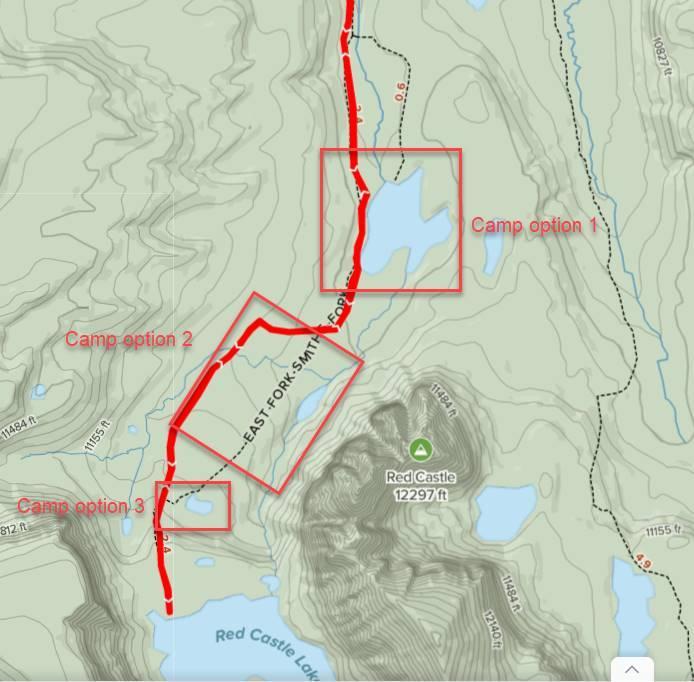
Camping spot options:
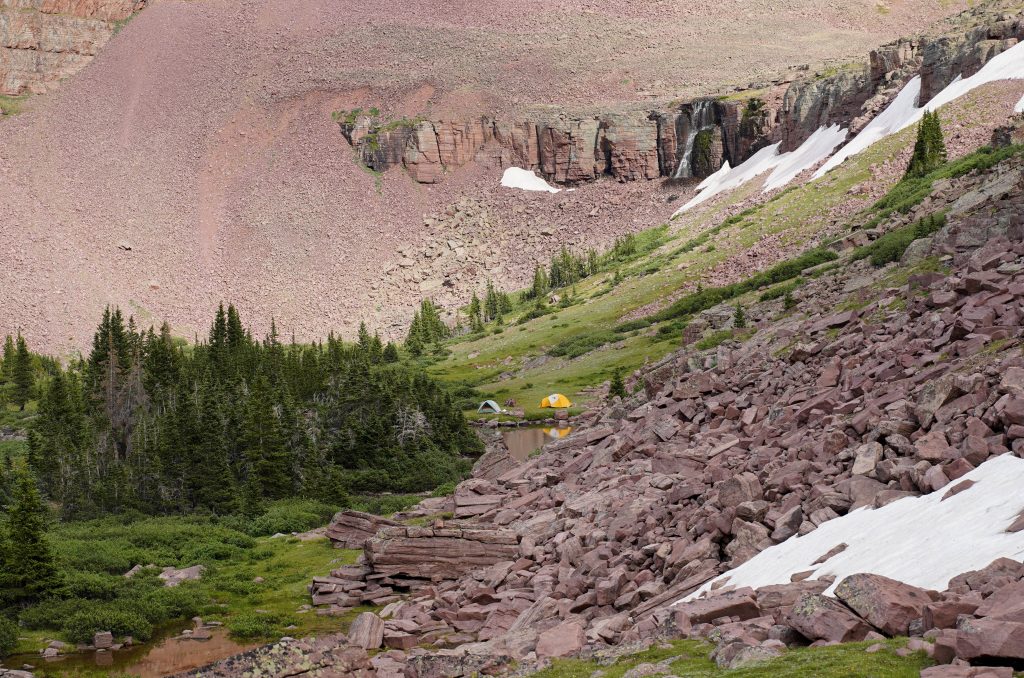
Red Castle is not a terribly difficult hike but it is a LONG hike. It can done as an overnight but would be much more enjoyable with 2 nights. We actually worked most of the day Friday, drove to the trail head, and started hiking in at 6:30 PM. Just getting halfway in made our 2nd day that much more enjoyable. Once near Red Castle, the camping options abound:
Option 1- Camp at Lower Red Castle Lake
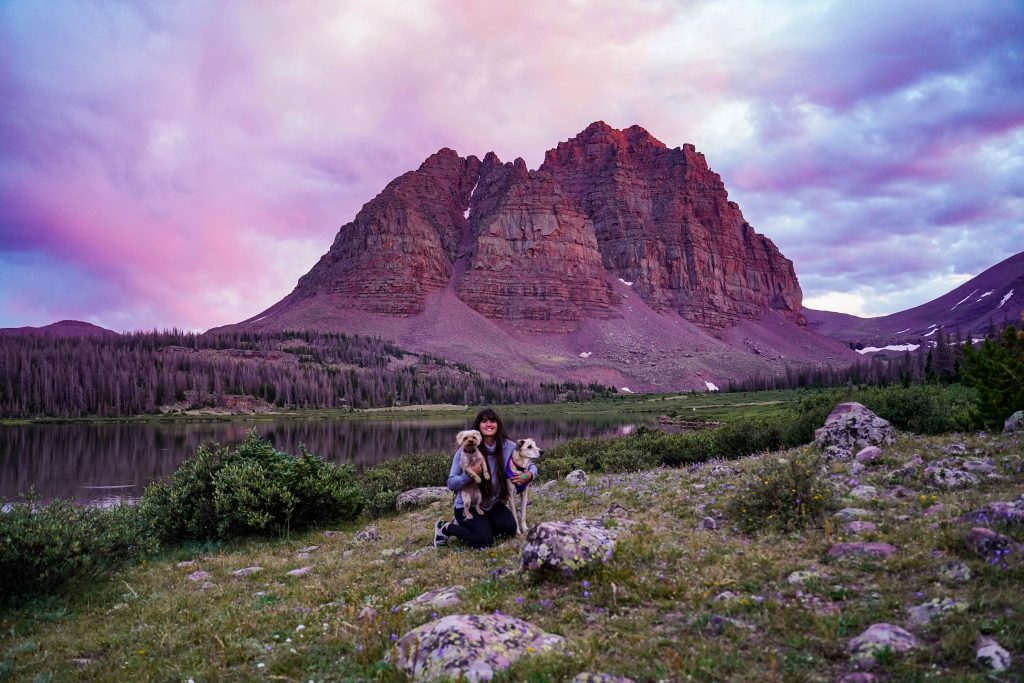
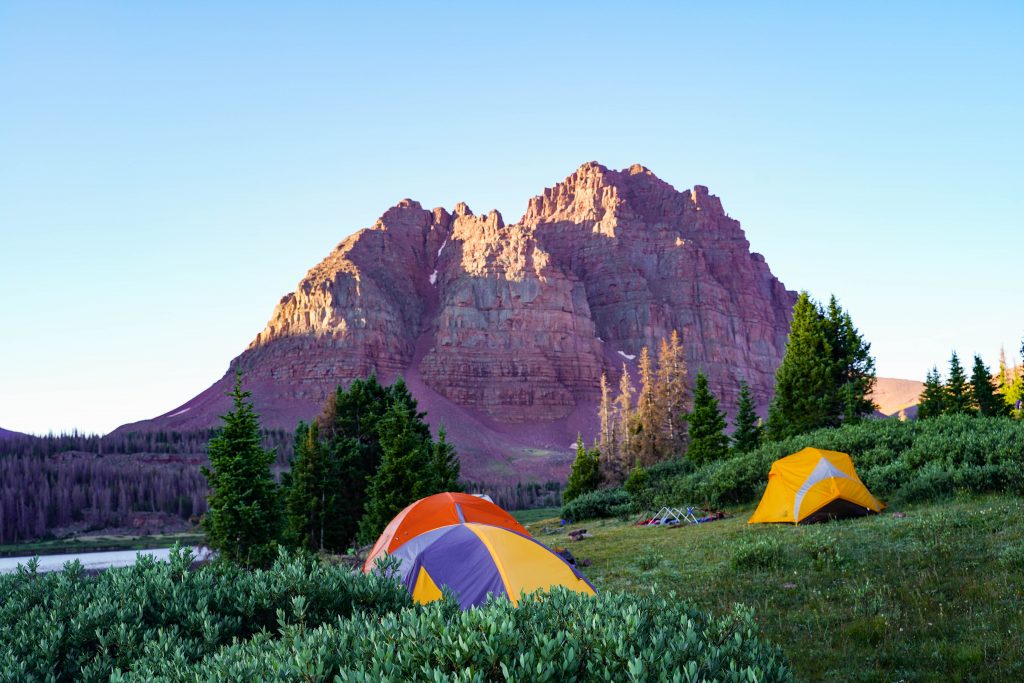
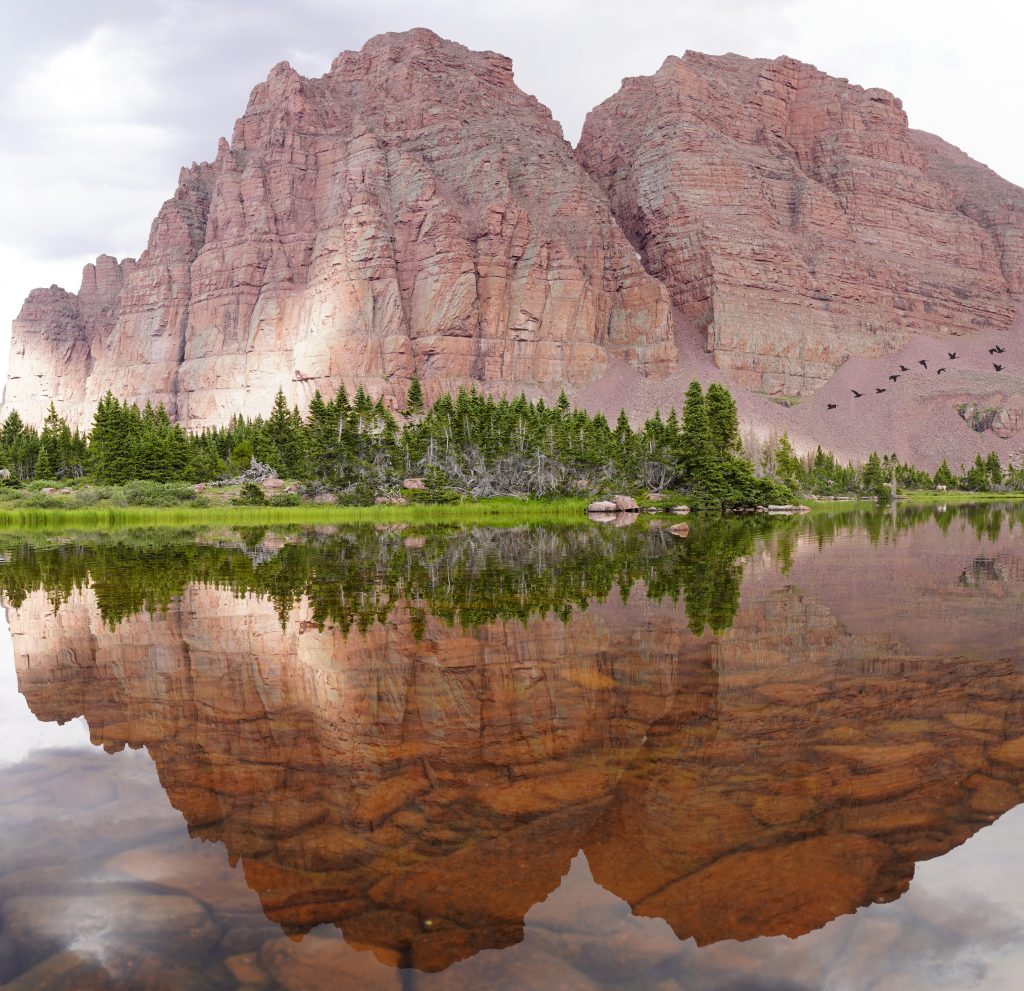
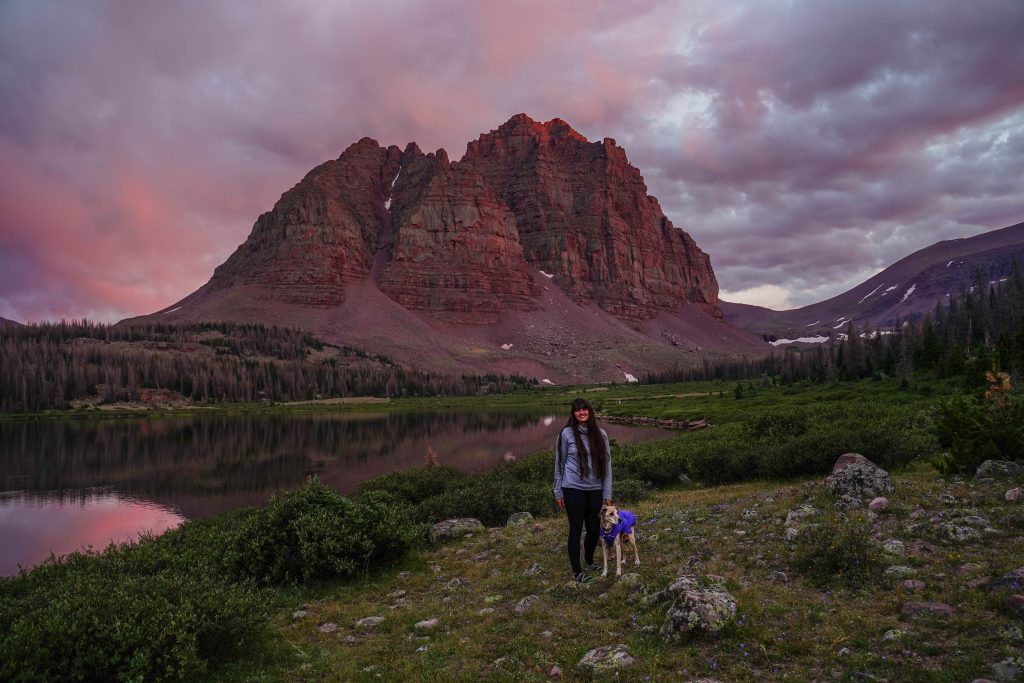
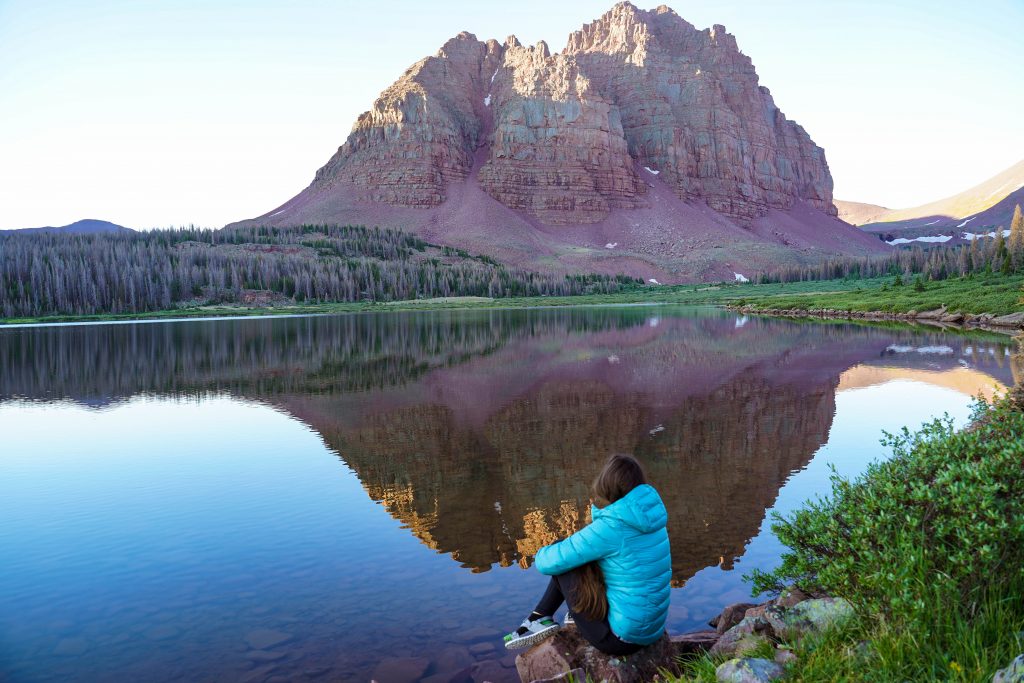
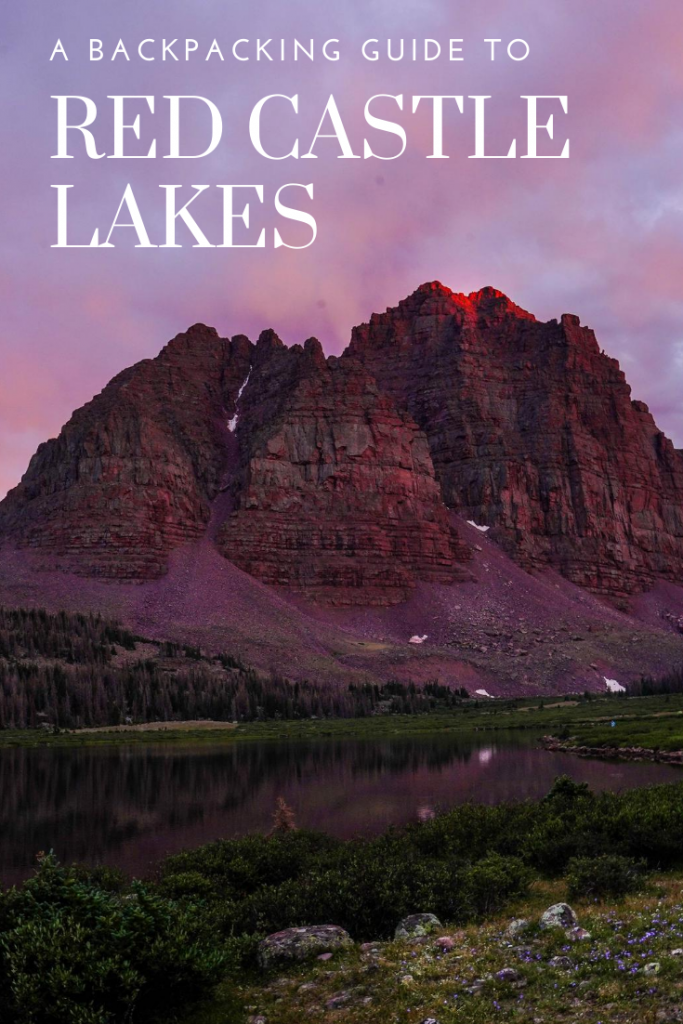
If you want that classic reflection of Red Castle on the lake and want the shortest hike with a pack possible, than camping around the lower lake is for you. (and for us) There are loads of places to setup all around the lake depending on the shore access and views you want. We got there Saturday afternoon and while it was busy we managed to still snag a great spot with some measure of privacy. (Just remember to camp 200 feet from water sources)
Option 2- Camp between lakes
As you head up from the lower lake there’s lots of beautiful forested areas to camp in near streams for water filtering and with Red Castle peaking out through the trees. If you have hammock sleepers, finding a spot in this stretch would be your best bet. This area will also provide more options for privacy and getting away from other campers however we did still see a lot of people camping along this stretch of trail. So while this may be the least crowded option, they area all pretty comparable.
Option 3- Camp at the pond just below Red Castle Lake
So, the main Red Castle Lake is huge and barren. It has no trees around it to break wind, hang water filters, or offer any privacy. (so I don’t recommend camping there). However there is a small lake un-named just below the basin for Red Castle Lake that offers plenty of shelter, water for filtering, and pretty gorgeous views to boot. This would mean you carry your pack 12.5 miles each way with about 1700 feet of gain so a longer harder hike, but definitely another worthy location to look for camp.
All 3 options are great options with superb views and about equal levels of crowds. Just know if you don’t find a spot where you had your heart set on, you very well could find an even more brilliant spot just down the trail. *It took us about 30 minutes of wandering along the side of Lower Red Castle lake to find our spot. We passed several already snagged spots that looked AWESOME but we were just as happy with where end ended up. Don’t lose hope.
Packing list:
Gear:
Lightweight Tent
Sleeping bag
Sleeping pad + pillow
Jetboil or light stove
Long spoon and coffee cup
water filter
Solid backpack with rain cover
String for hanging packs when out hiking or at night
GOOD bugspray and sunscreen
luxury item: lightweight chair
Clothes
Puffy coat
Rain jacket
1x shorts
1 leggings/ light sweats
1x fleece/ sweater
Socks and other underthings
*The weather can be super bipolar in the Uintas meaning you’ll want a full summer wardrobe during the day when it is hot, and warm winter gear for at night. In August we had a high of 70 (felt at least 75 in the sun) and low of 40 at night. Afternoon thunderstorms are common as well so rain gear is always a must.
Food- For a 2 night trip here is what we packed per person:
2x oatmeal cups (no dishes needed, just cook in the cup and pack out trash)
3x flavored tuna packets + several handfuls of crackers for lunch
3x larabars
several handfuls of goldfish for snacking
2x hot chocolate packets for colder evenings
Trail Description:
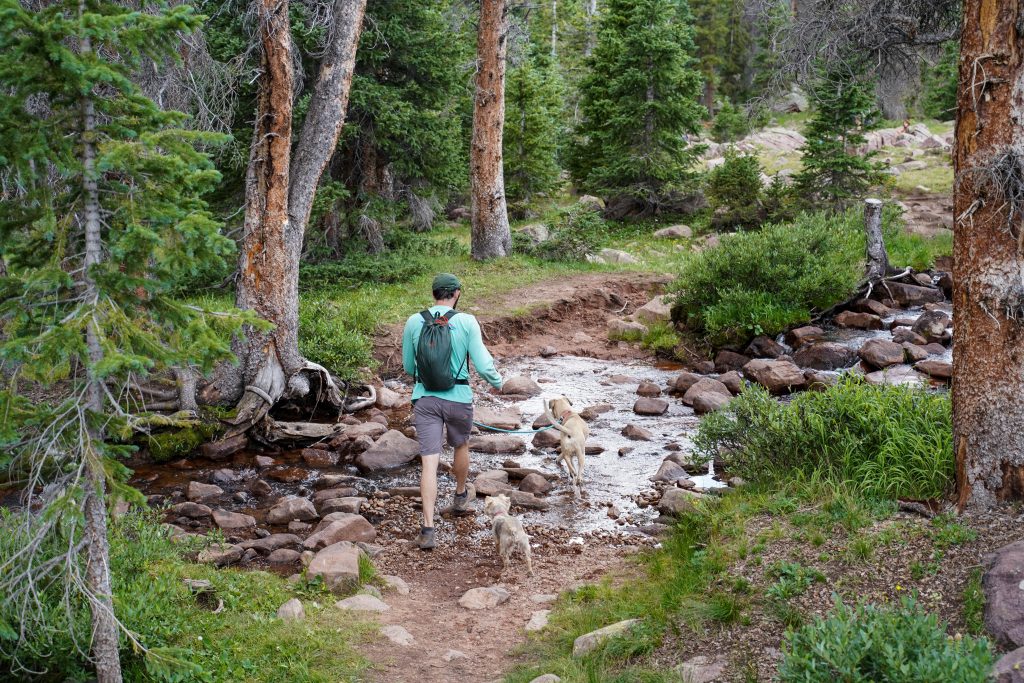
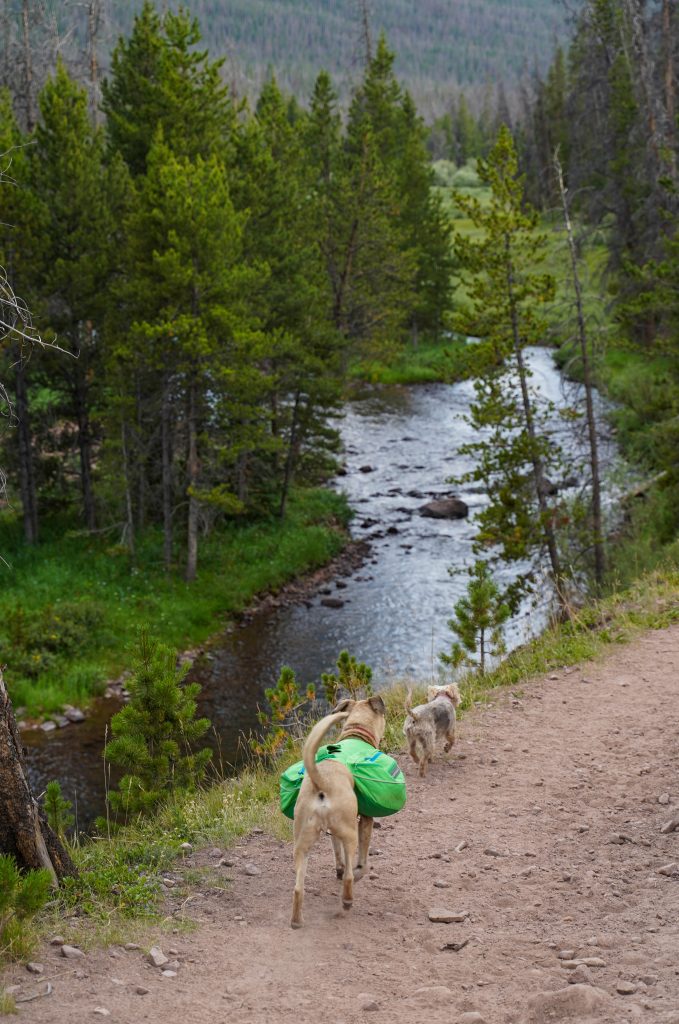
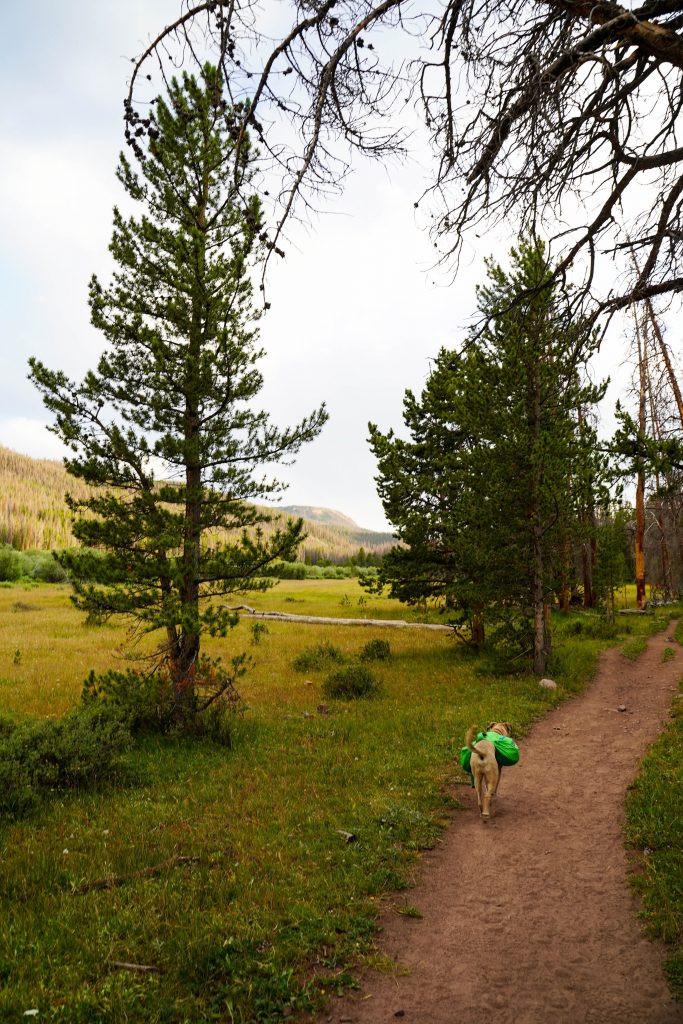
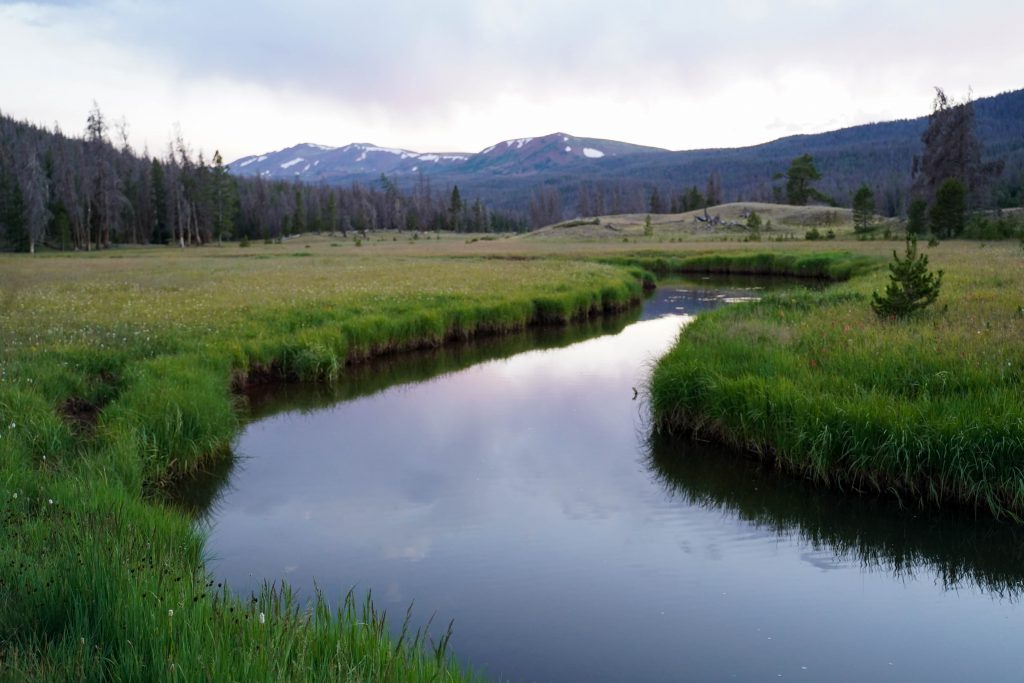
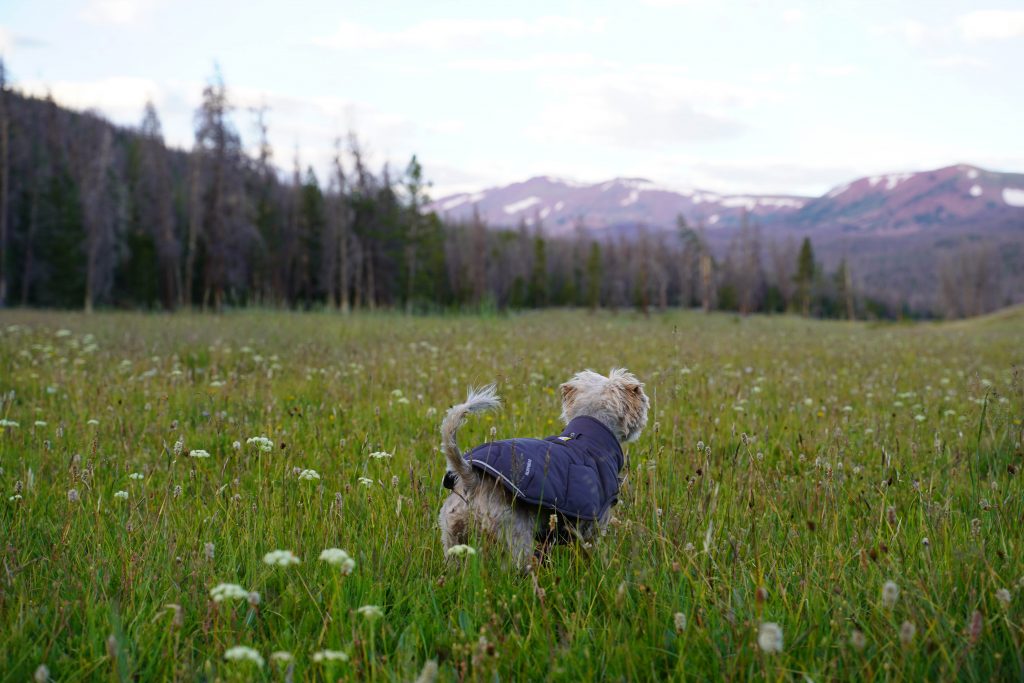
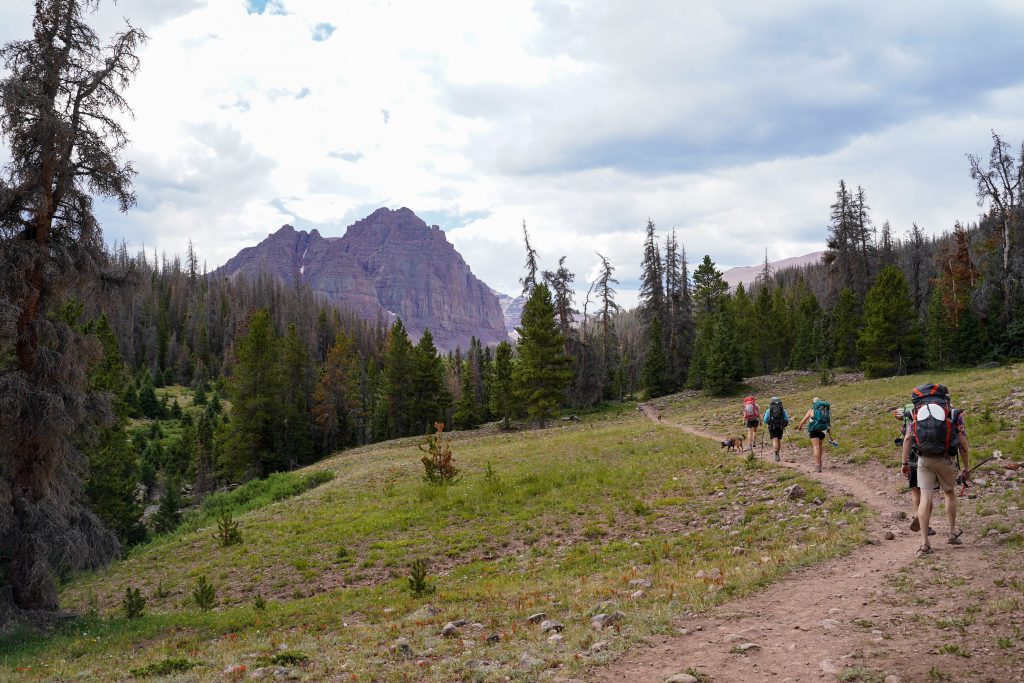
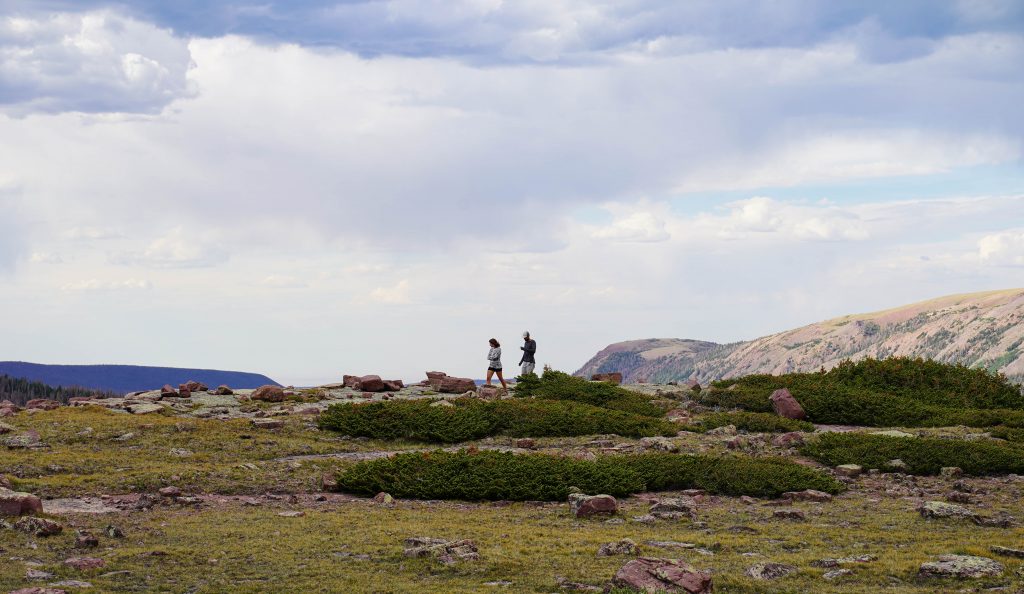
As previously noted we started in the evening on a Friday and just planned on hiking in as far as we could make it (which was several miles) The start of the trail is really easy, with the first almost 7 miles having little to no noticeable elevation gain. It wasn’t too rocky and was pretty easy going with our 2 dogs. Bonus- starting later we had the trail to ourselves.
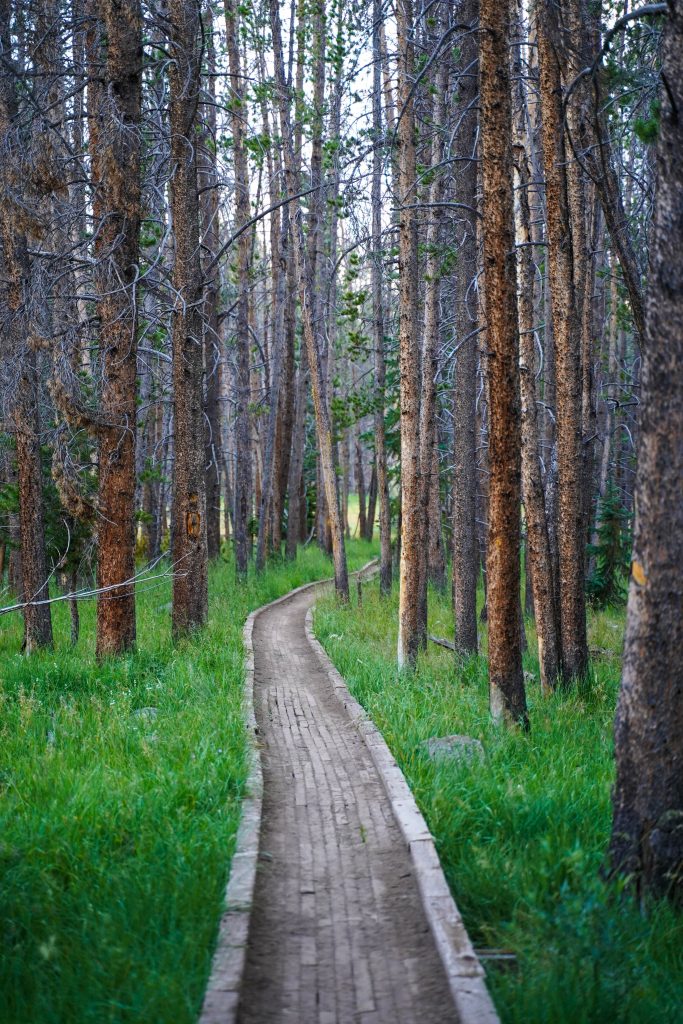
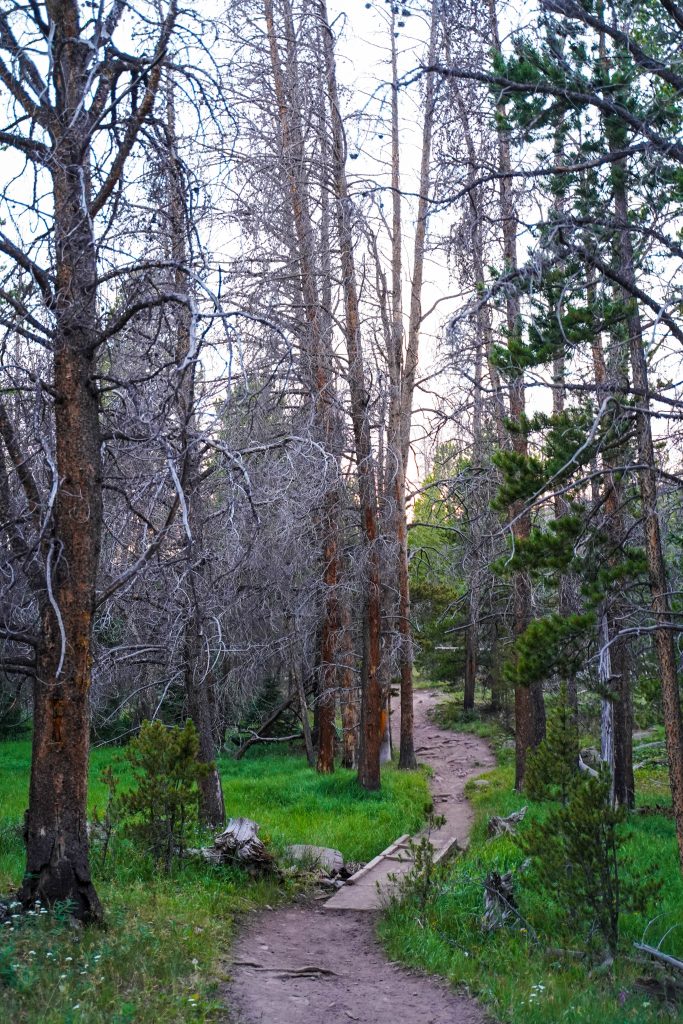
Right at the beginning there is a beautiful river view and then you spend some time in the trees and crossing fun little boardwalks.
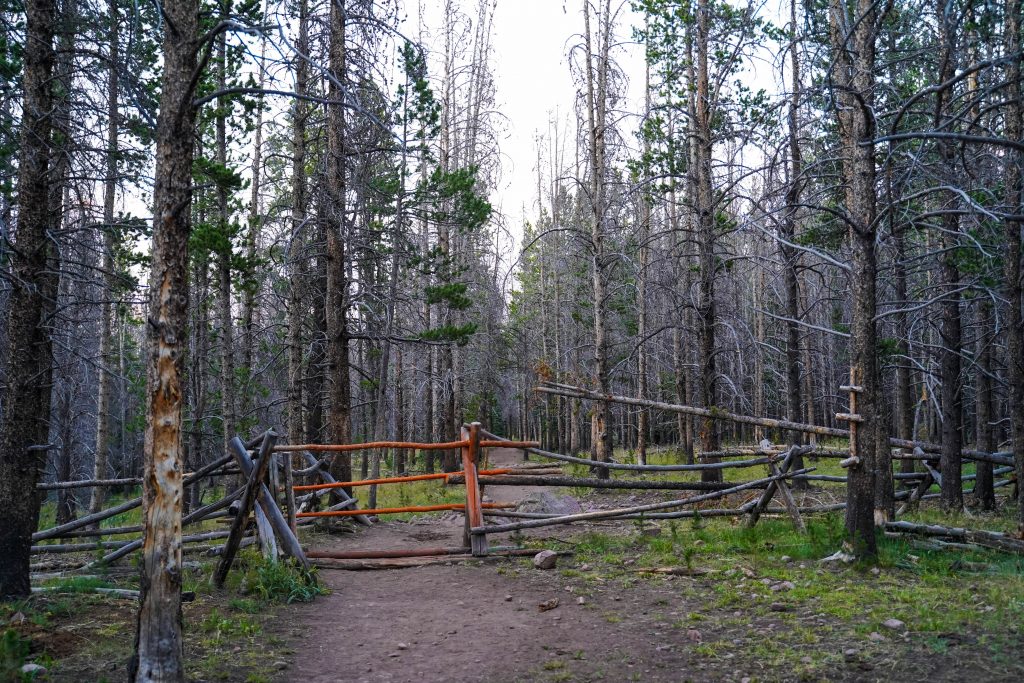
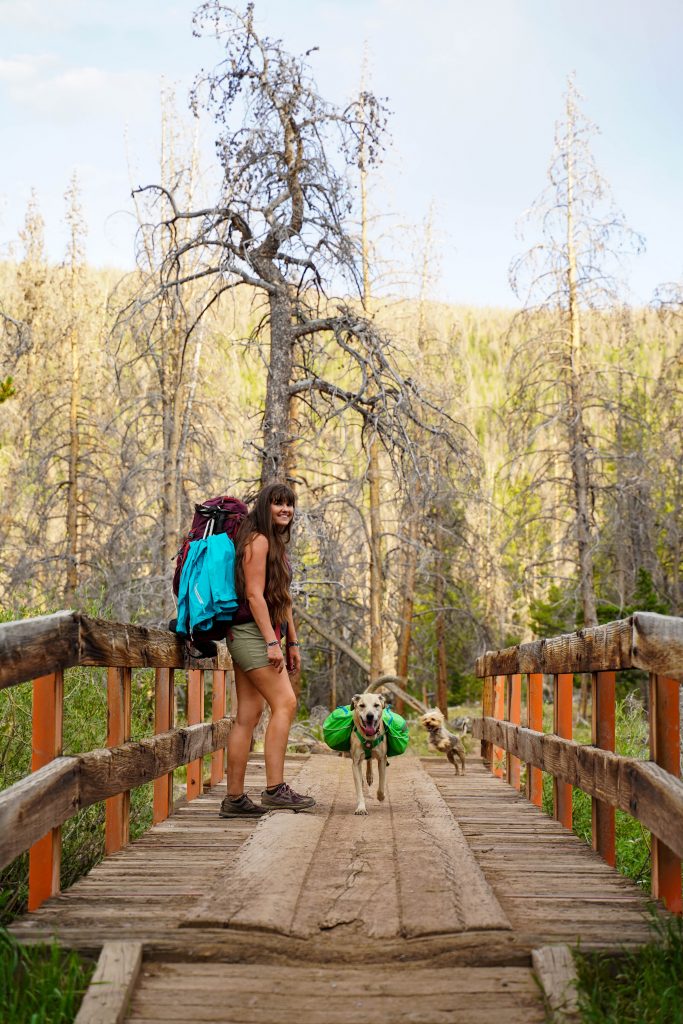
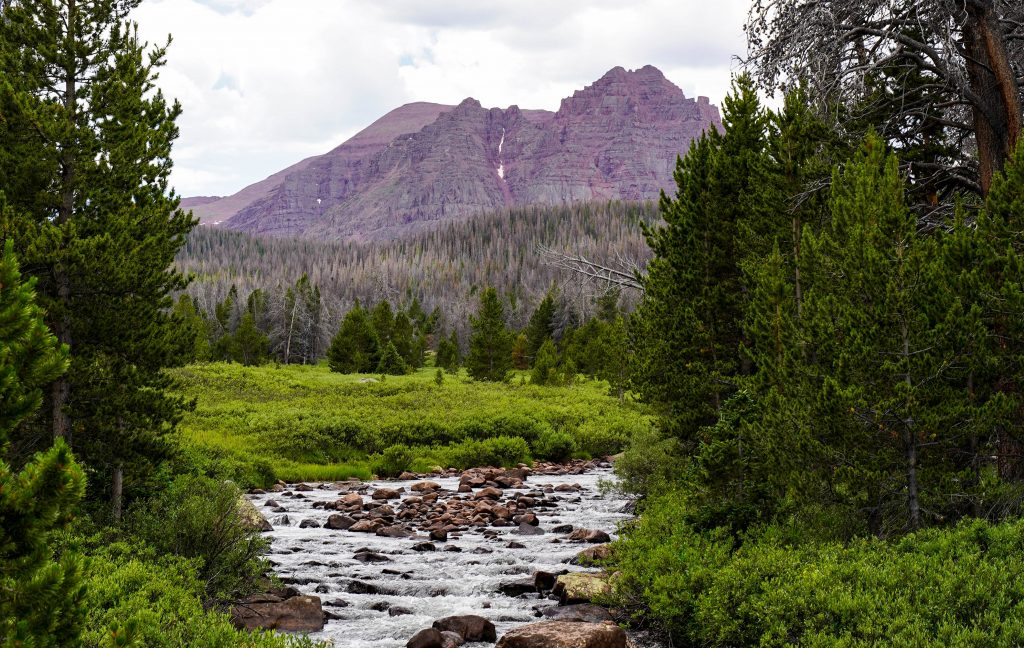
There’s a beautiful bridge 2 miles in and a random fence that you have to move logs out of the way about 3 miles in. After that you may notice some trail splits but they are all signed making the trail very easy to follow. You’ll just keep on the trail to Red Castle lakes.
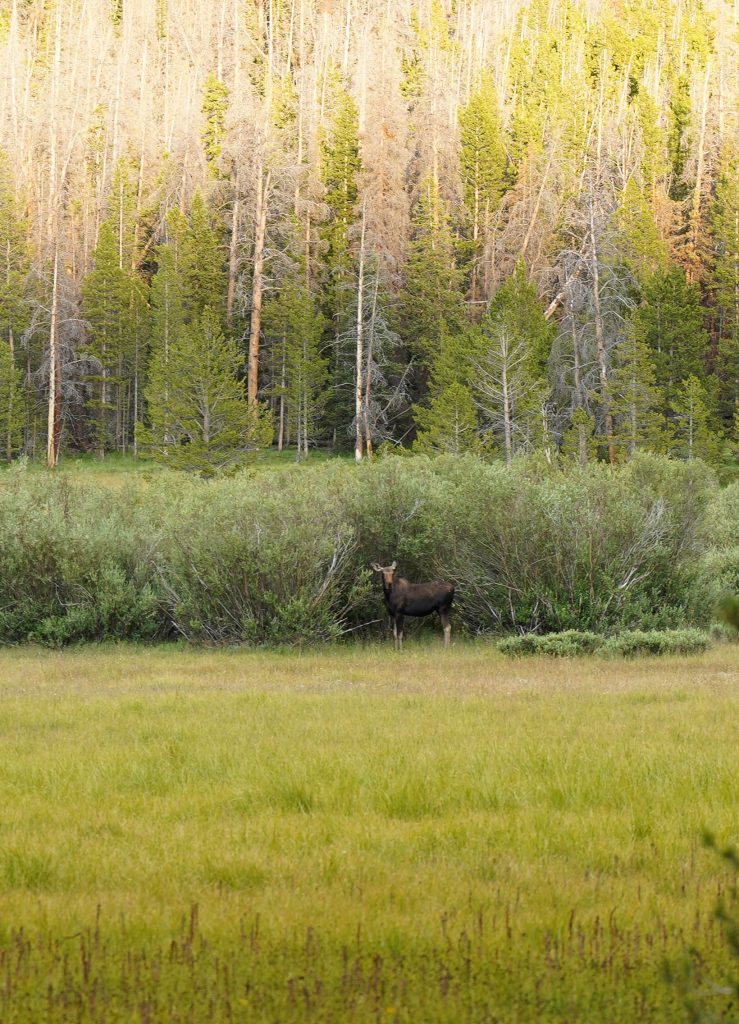
Beautiful views along the trail
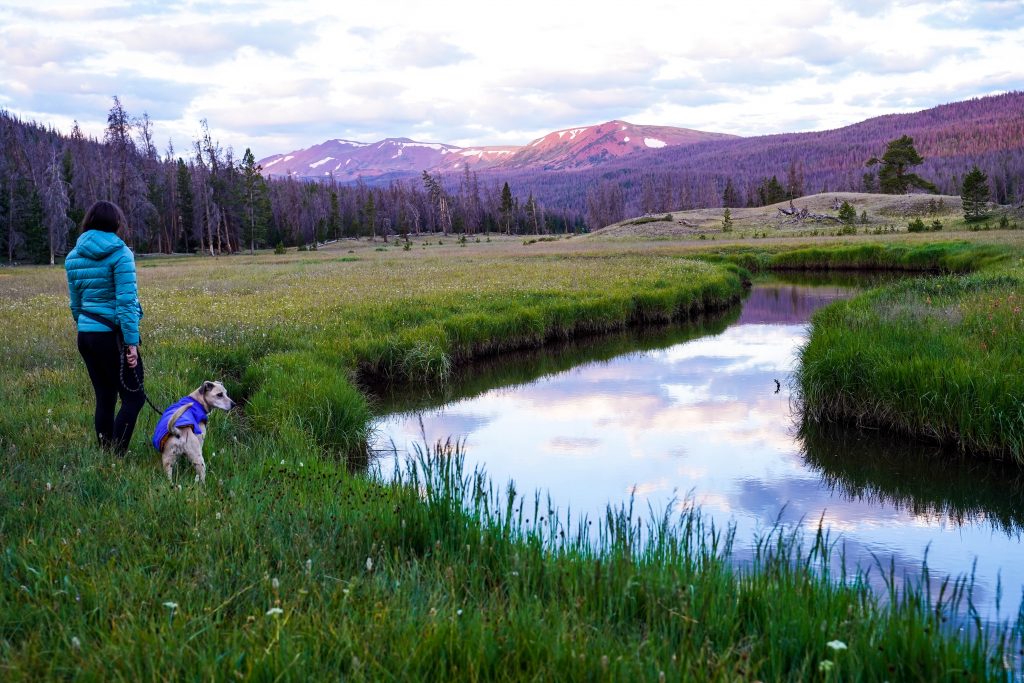
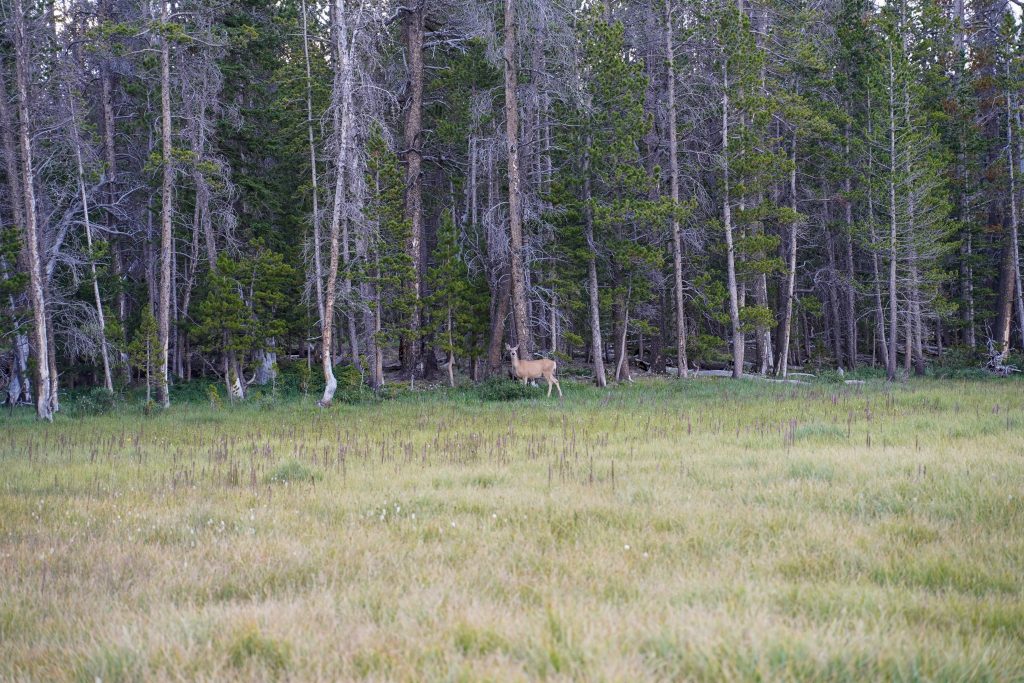
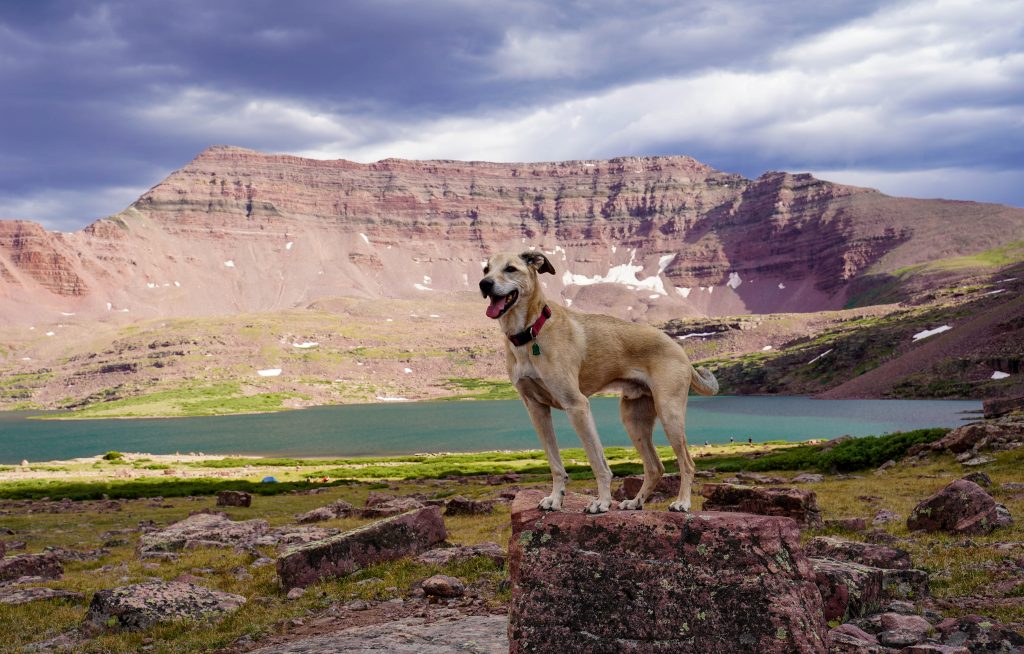
Be weary of wildlife, especially if you have your dogs off leash. Luckily miss moose was a ways off trail so we saw her and leashed up our dogs before it could even become an issue. We saw loads of deer in the beginning of the trail as well as a moose hiking in AND hiking out mid day.
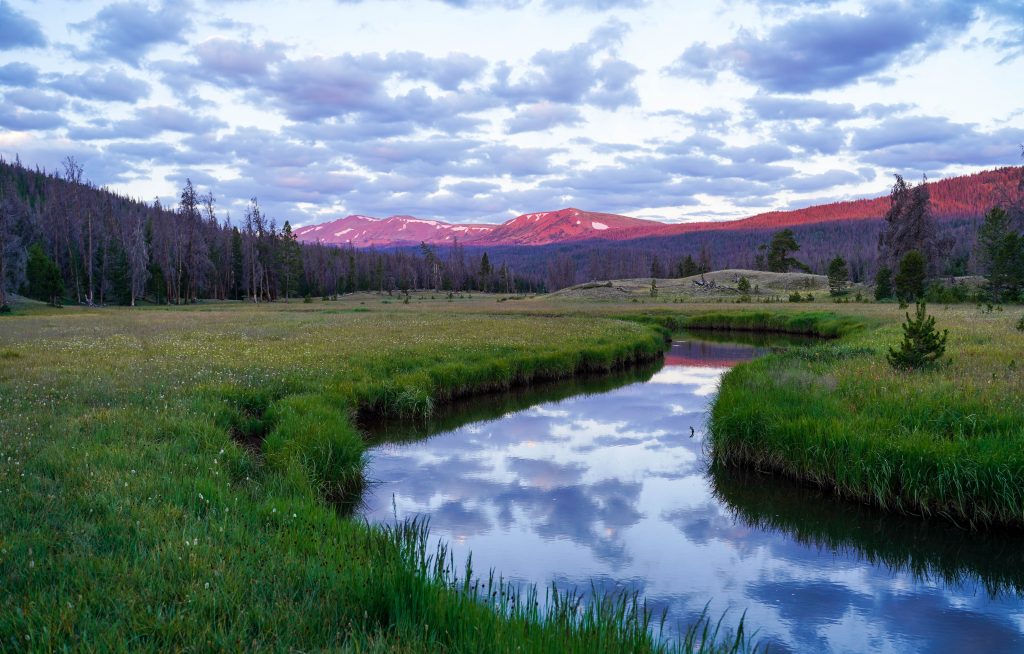
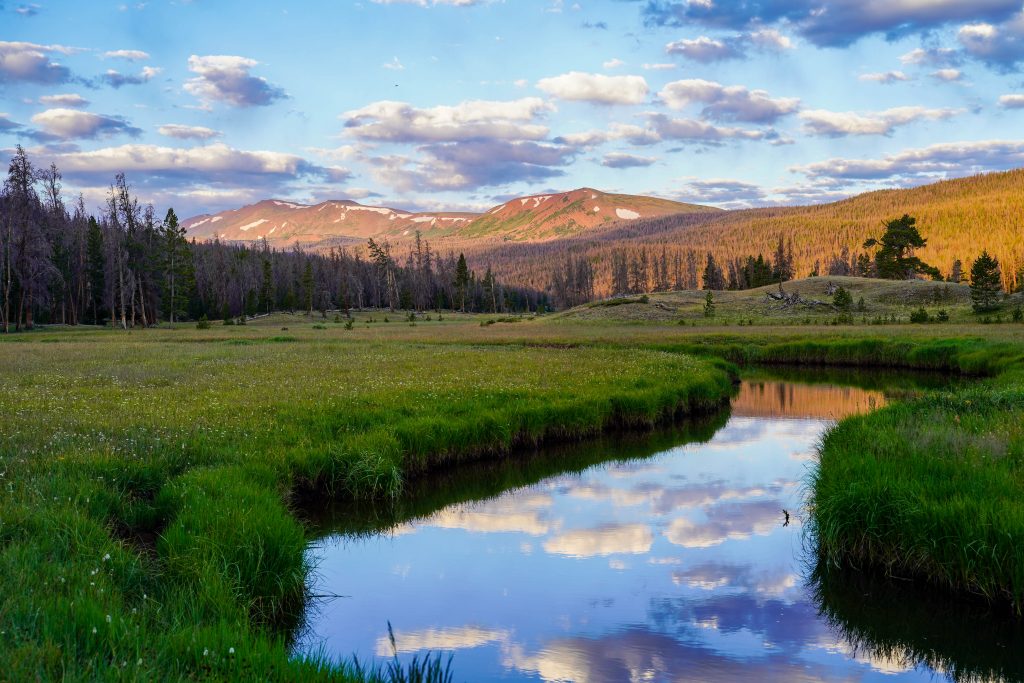
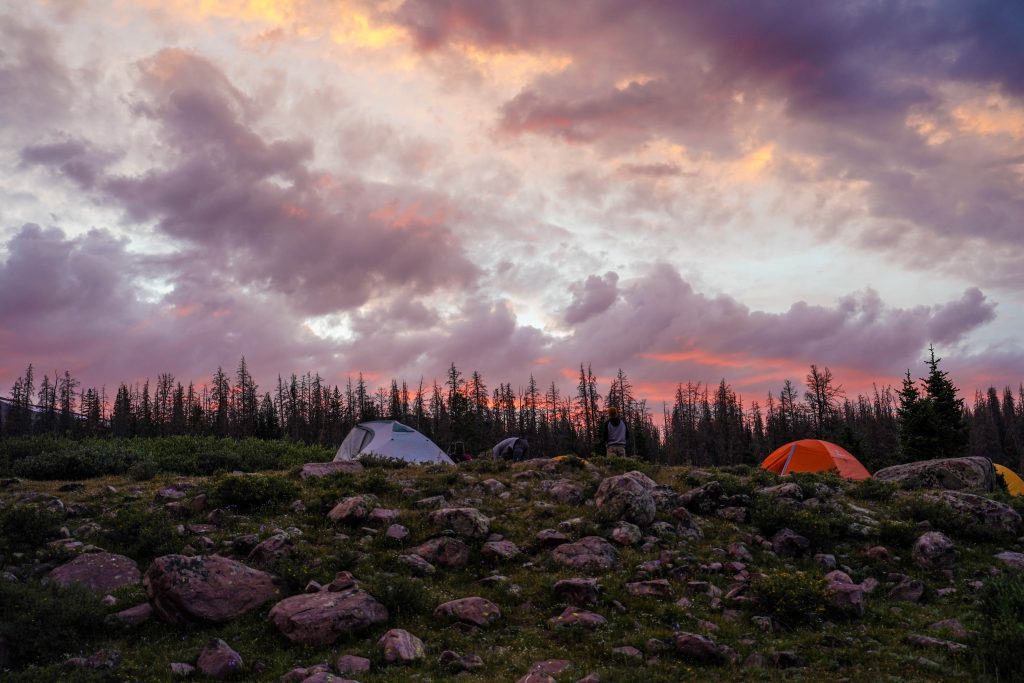
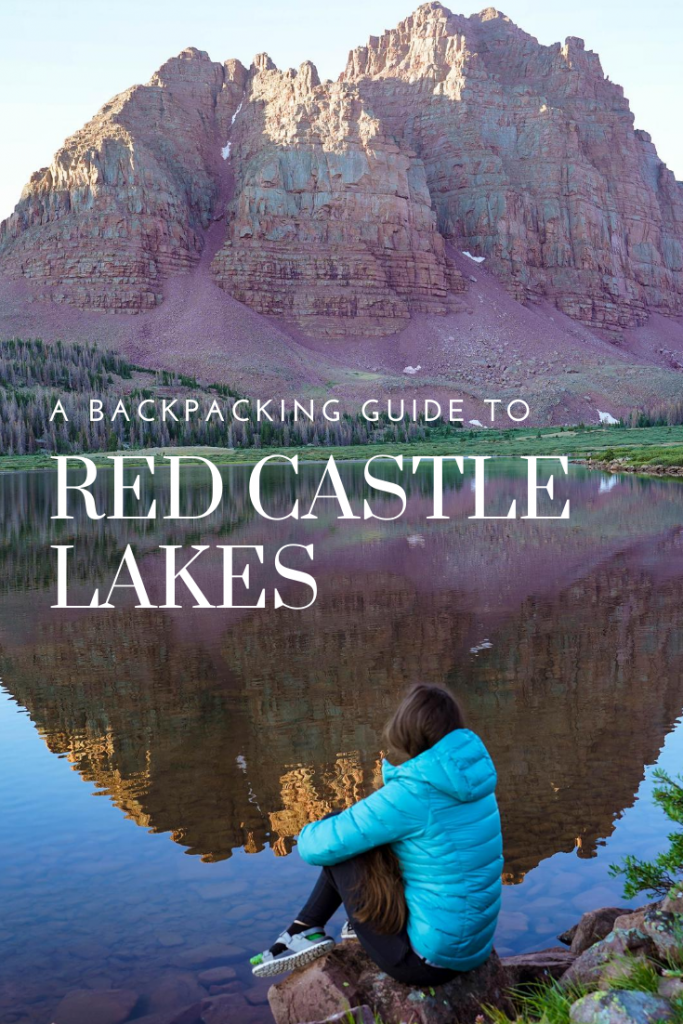
Around 8:30 we found a great little camp spot that even already had a fire ring so we called it a night and waited for our friends who started hiking even later than us. We were right near a stunning section of creek which made amazing sunset and sunrise photos and provided a very convenient spot to filter water from.
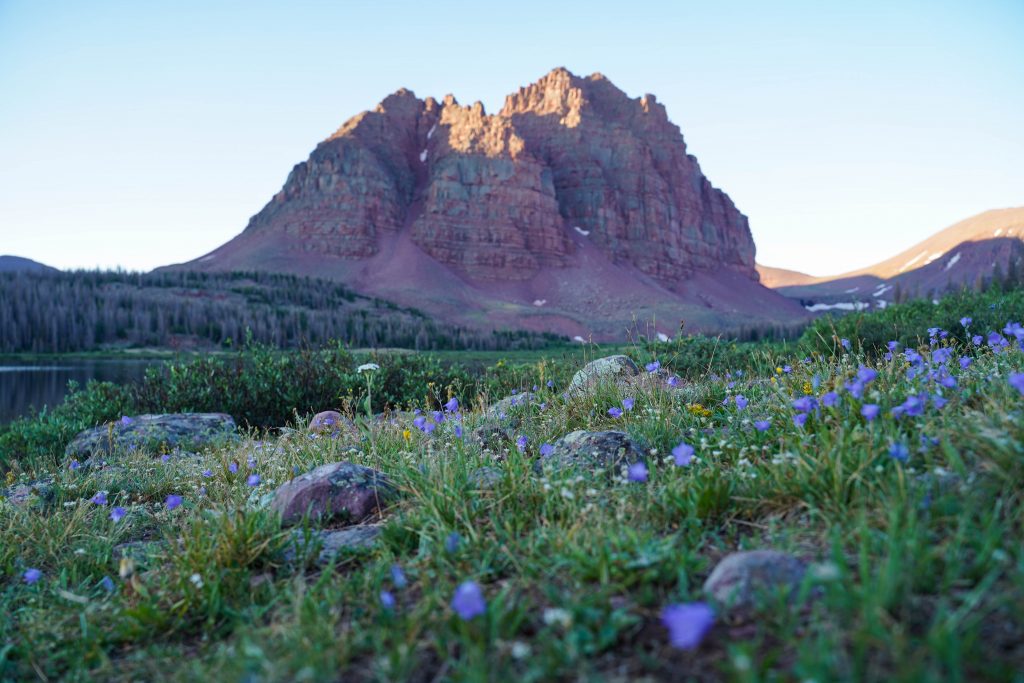
Beautiful views around sunset
And even more insane of views at sunrise. Also a couple deer popped out of the trees to say hello as we greeted the sun so again… make sure your dogs are on leash or well trained.
Day 2
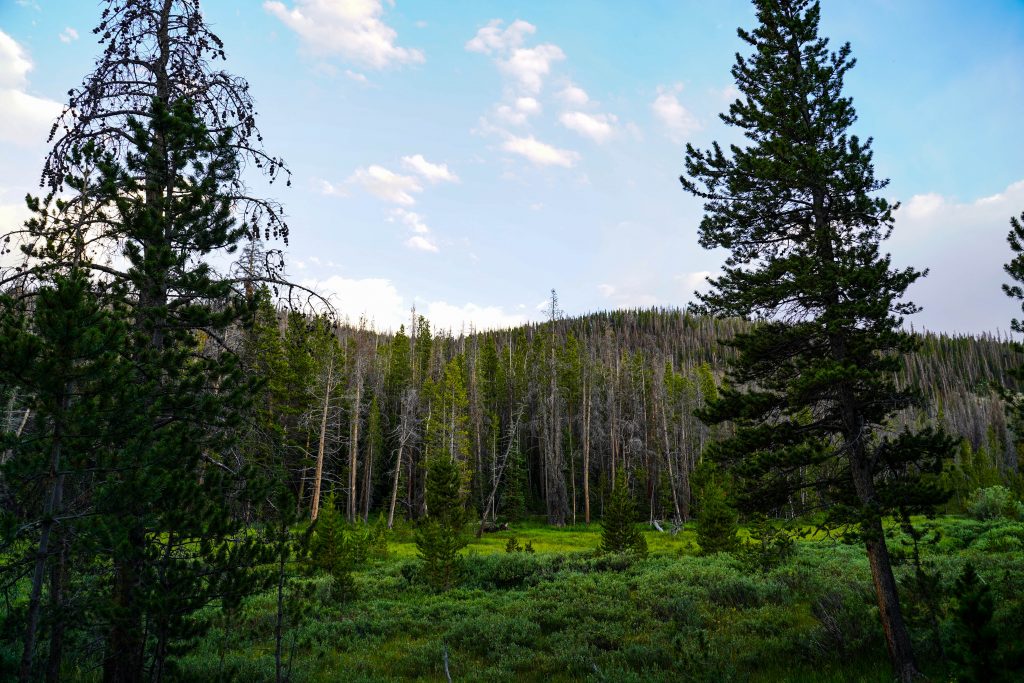
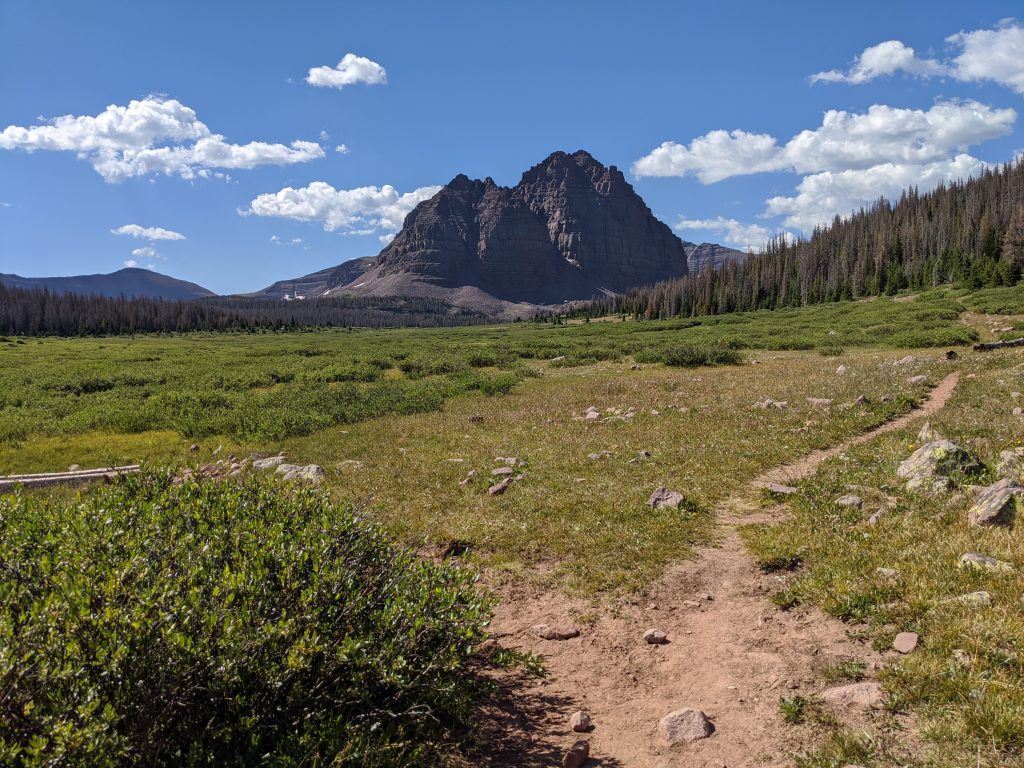
Starting in the morning we got a later start (around 9:30) and already noticed several groups hiking by as we cleaned up our camp. (so note Saturday a lot of people start hiking in) The trail again was pretty nice starting out moving between open meadows and trees (usually the climbs in elevation happen in the trees)
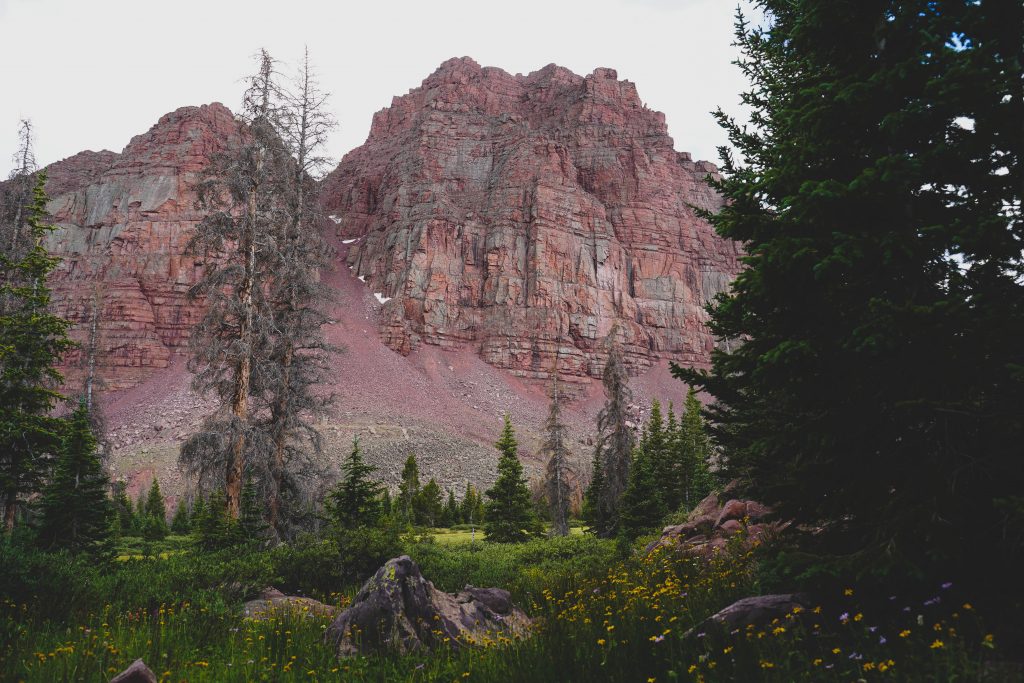
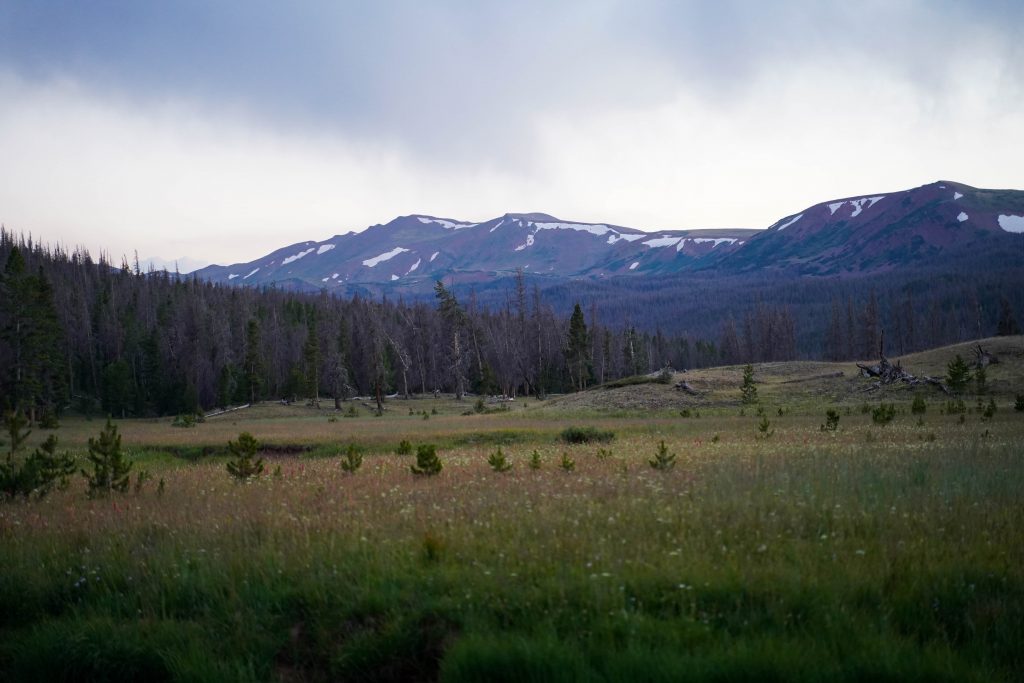
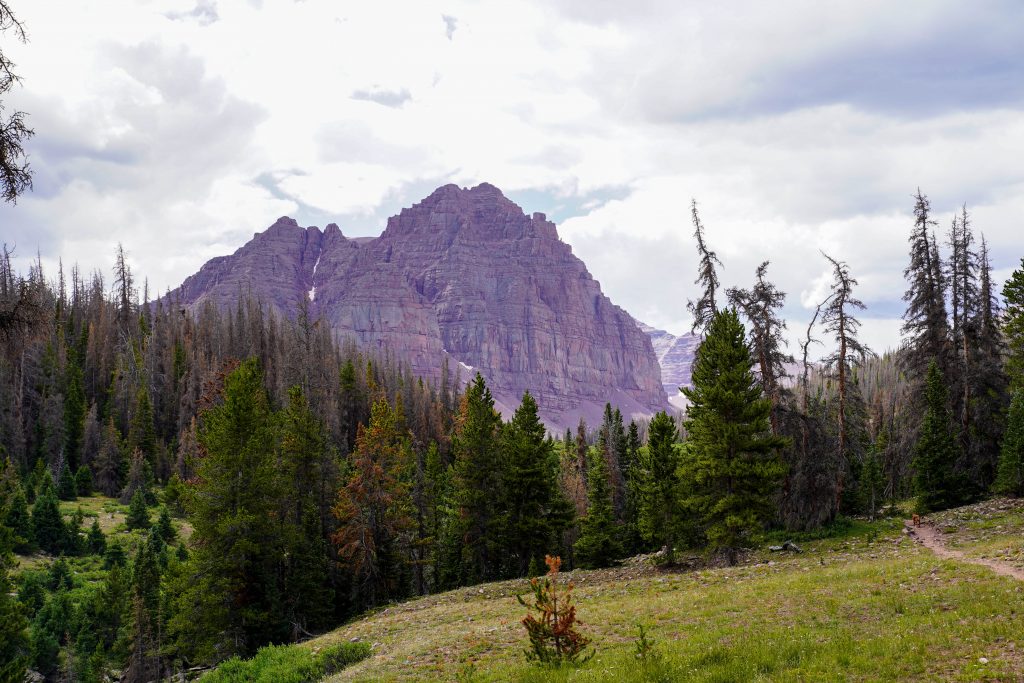
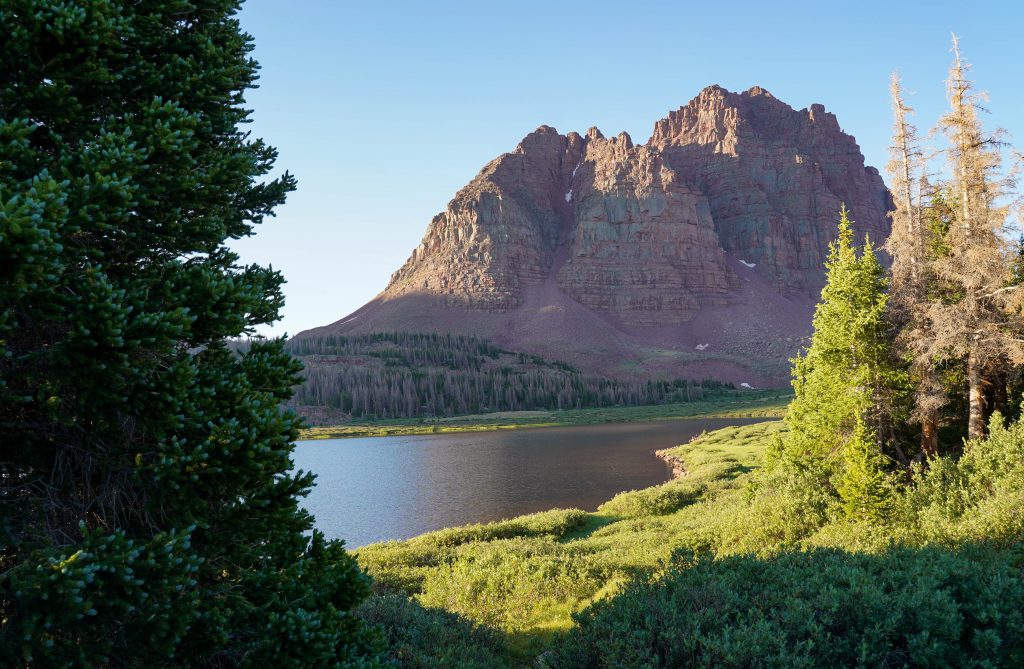
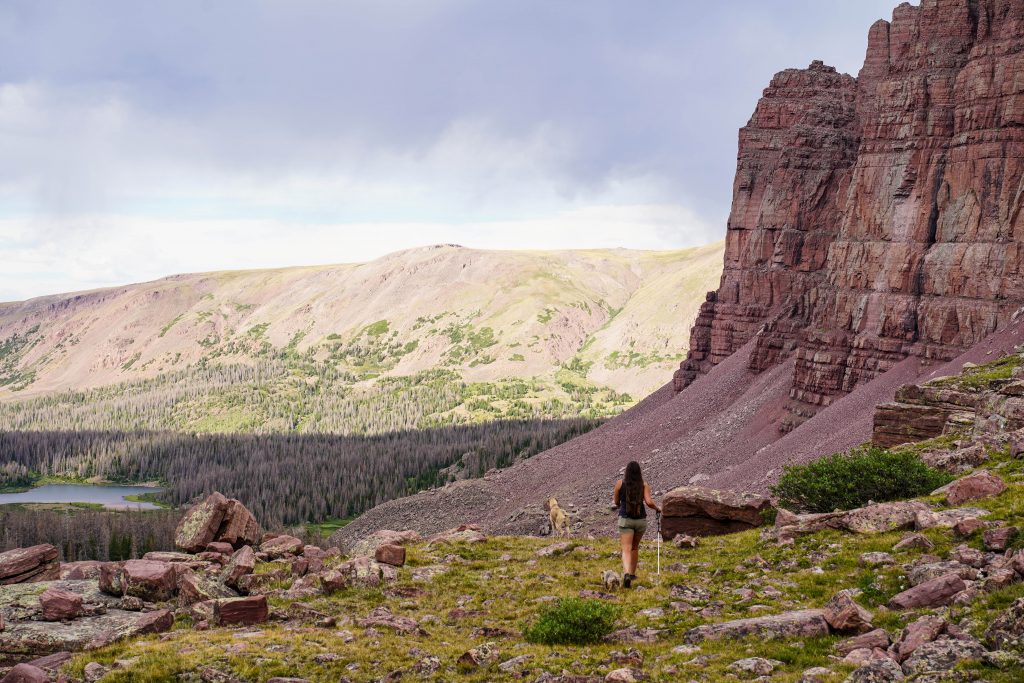
At about 8 miles in you get your first look of Red Castle as you cross your 2nd solid bridge of the hike. Then you’ll reach the switchbacks – which normally would strike fear in the hearts of people not wanting to go uphill- fear not, these are pretty mild.
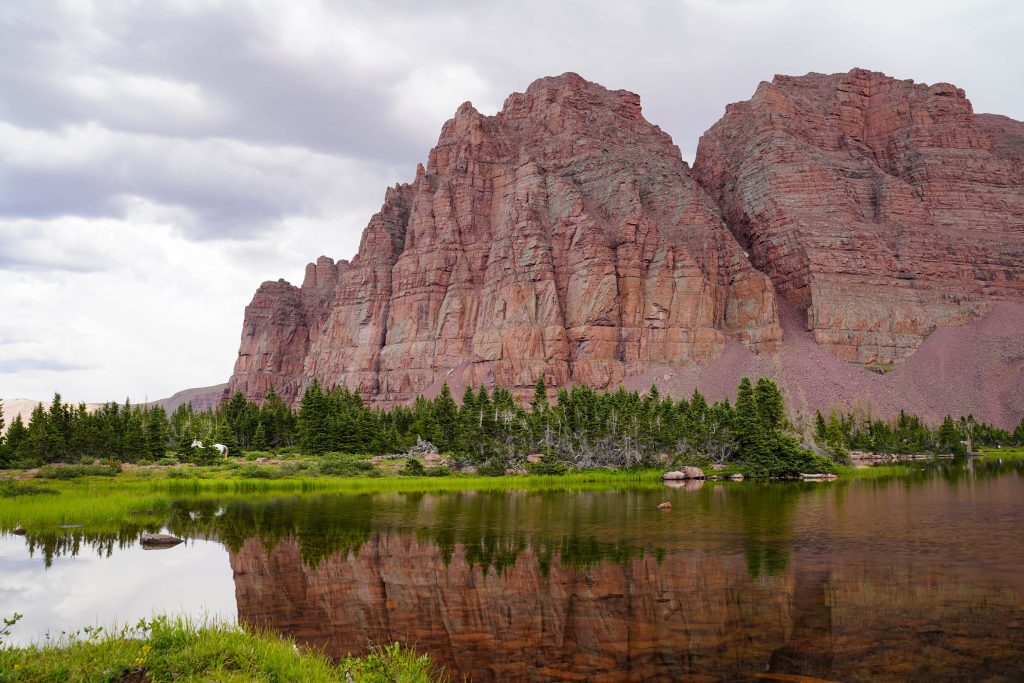
After finishing the switchbacks the trail opens back up with really nice views of Red Castle as you hike towards it. We were enjoying beautiful weather however it was HOT. The water along the way was very tempting to hop into.
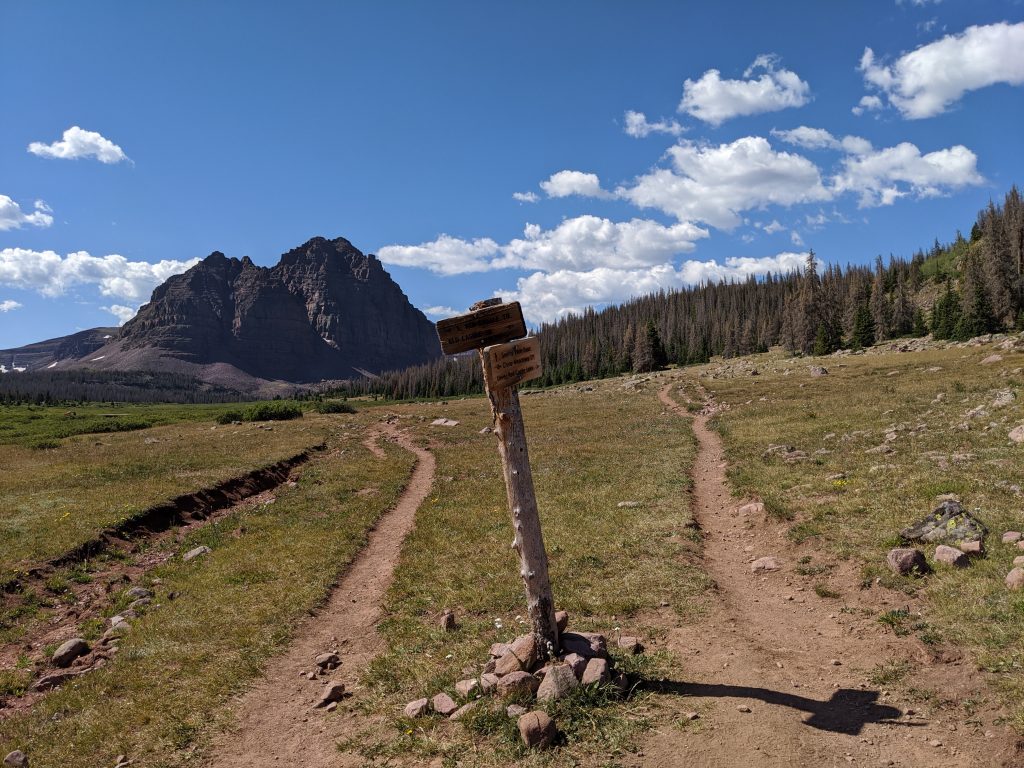
Time to pick a camp spot
After the switchbacks you’ll reach a fork in the trail. This is where you decide where you are going to try to setup camp. If you want to camp by the lower lake, take the left fork which will go a couple yards and then at the unsigned fork you’ll go right. The trail crosses several streams but eventually leads you right to the lower lake where you can start scouting a good spot. This will be about 10 miles in.
Otherwise take the right fork to climb up a hill that will take you around (and quite above) the lower lake. You can pick you way through some unmarked areas to this trail from the lower lake at later points- but it can be very muddy and overgrown. If you take the right fork, you will look down on the lower lake and hike on by where you’ll then come to some beautiful wooded meadows with creeks to filter water from. (camping option 2 about 11-12 miles in)
Continuing on past the lower lake you will start to notice quite a bit more elevation gain through the trees until you reach a beautiful unnamed lake with a waterfall and nice reflections of the side of Red Castle about 12.5 miles in. (camping option 3) This lake is the LAST viable camping option as from here on out you will be above tree line and subject to wind/ lack of privacy.
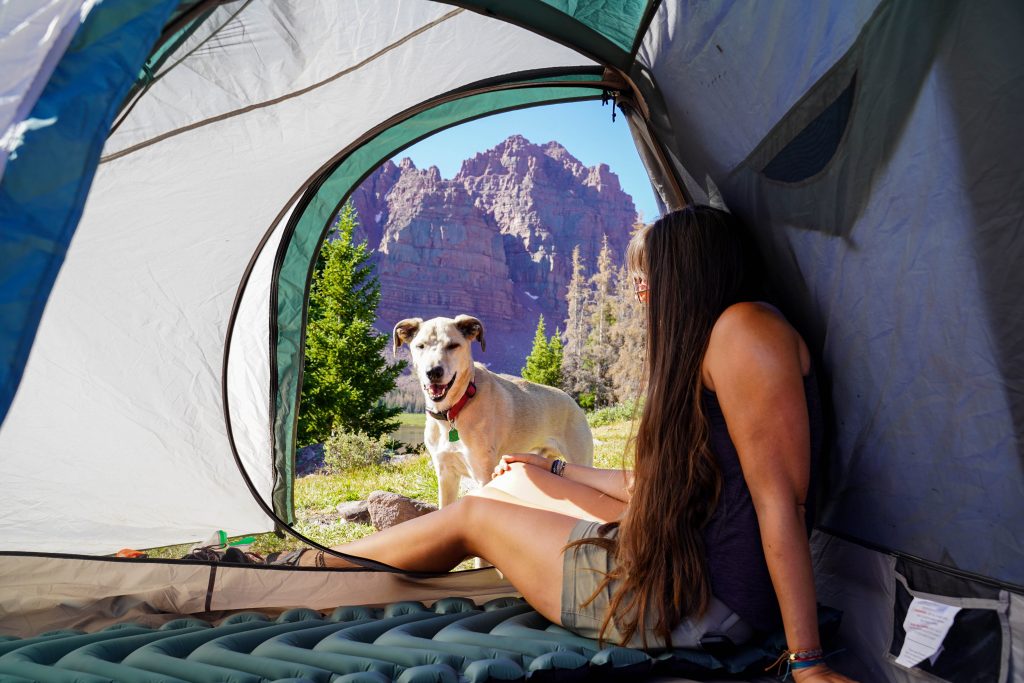
I still can’t believe we had THESE views from our campsite
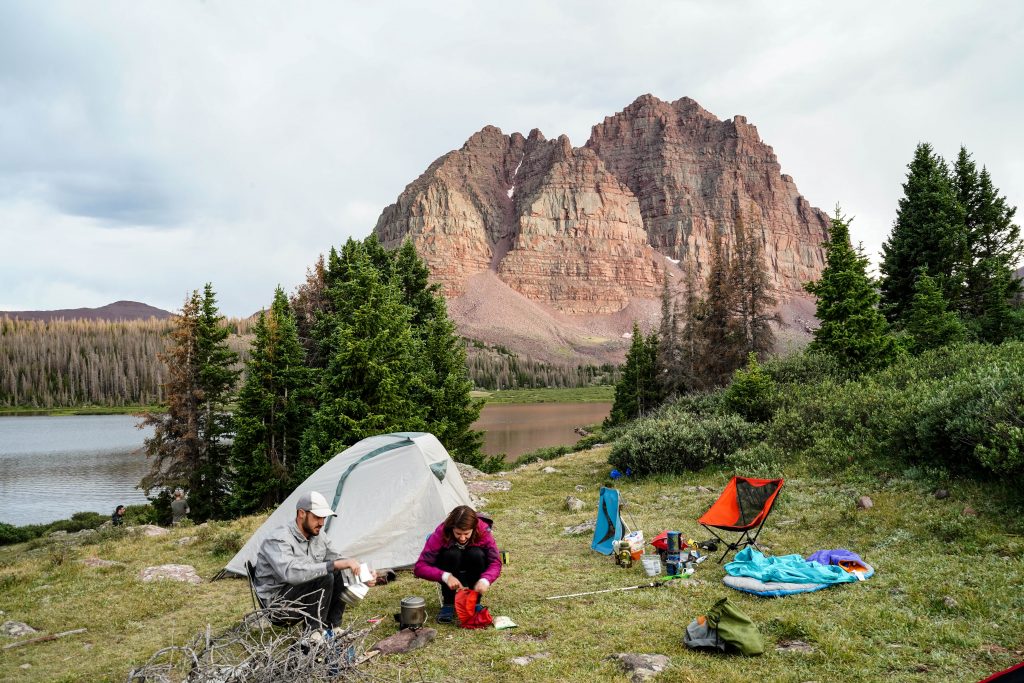
My experience
We dropped our stuff at the lower lake, had lunch and a dip in the lake, followed by a little nap and were ready to hike to main Red Castle lake. We started up about 4:30 PM and it took about an hour each way. (It was SO nice being free of our packs) We noticed as we hiked up that almost all the camping options felt about the same level of crowded… so really it just comes down to what kind of a view you want.
It was heaven being so close to the lake for swimming and just general views. Zero regrets about where we chose to camp around the Lower Red Castle Lake.
Beautiful reflections of Red Castle at the small lake JUST before the main Red Castle lake. The water was also SO clear.
Excuse the photo dump- this is just one of the most beautiful places I’ve probably ever been and the conditions were perfect.
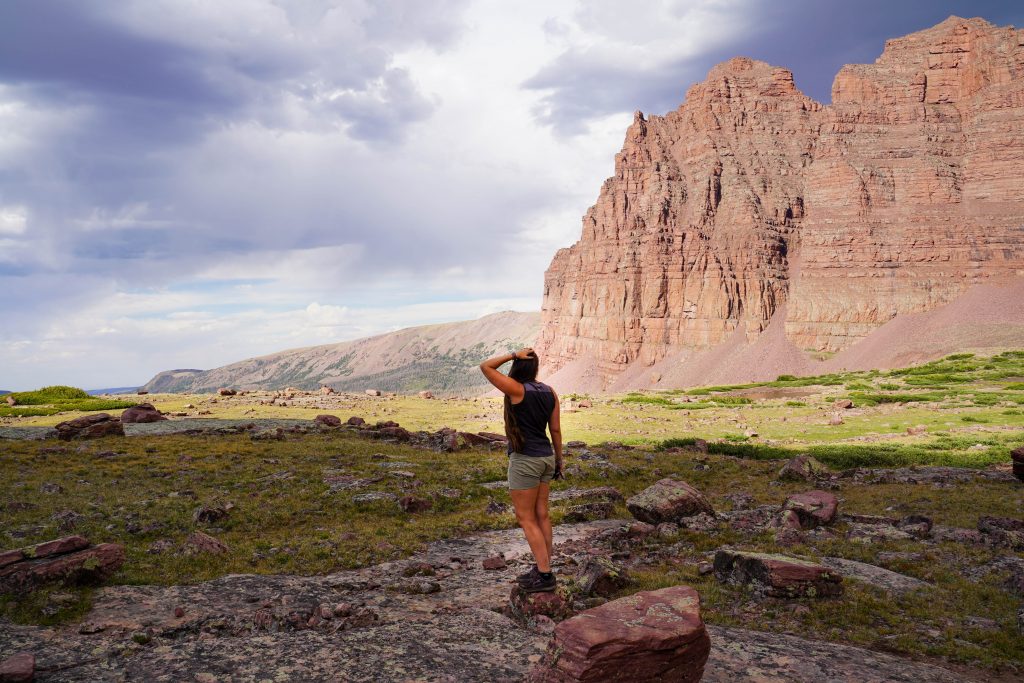
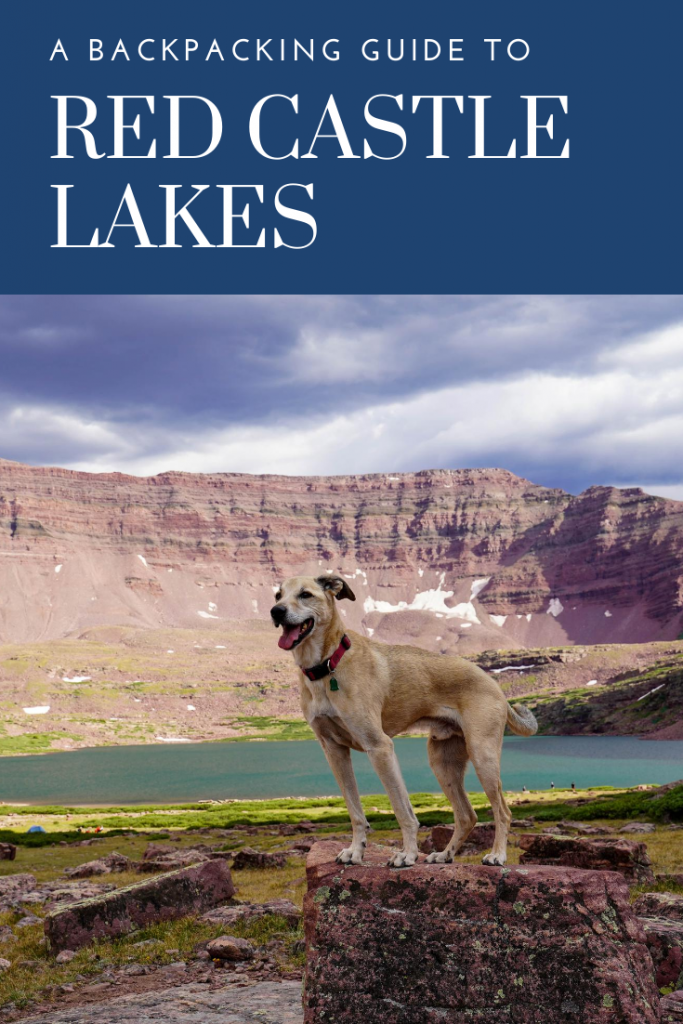
The views only get better the higher you climb. The body of water on the left is lower Red Castle Lake.
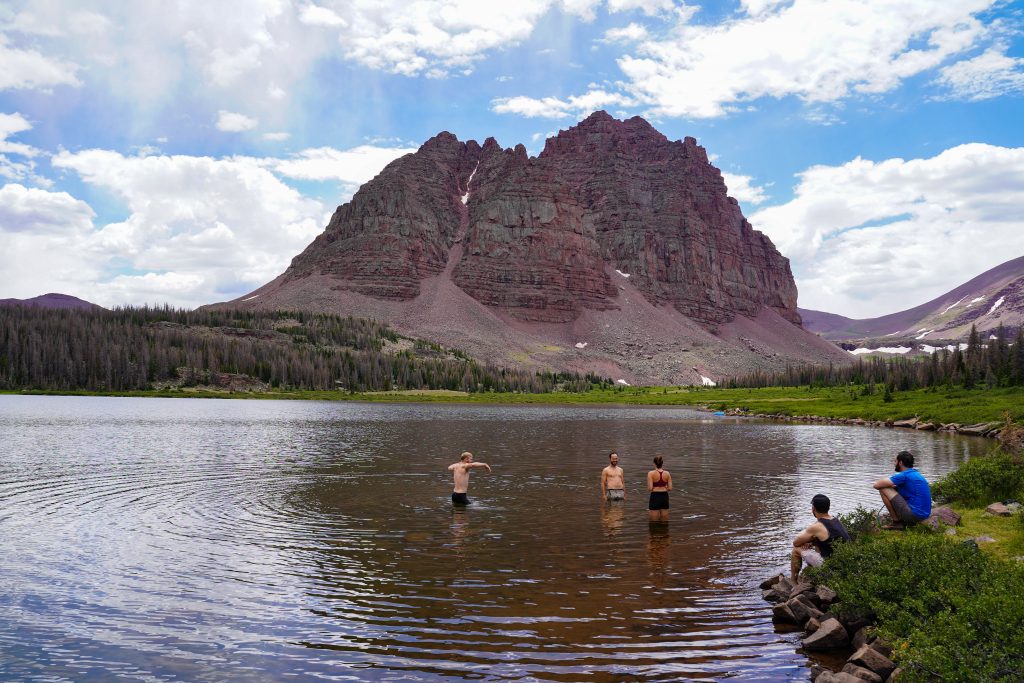
The views from the very large and in charge (main) Red Castle Lake- the end of the maintained trail
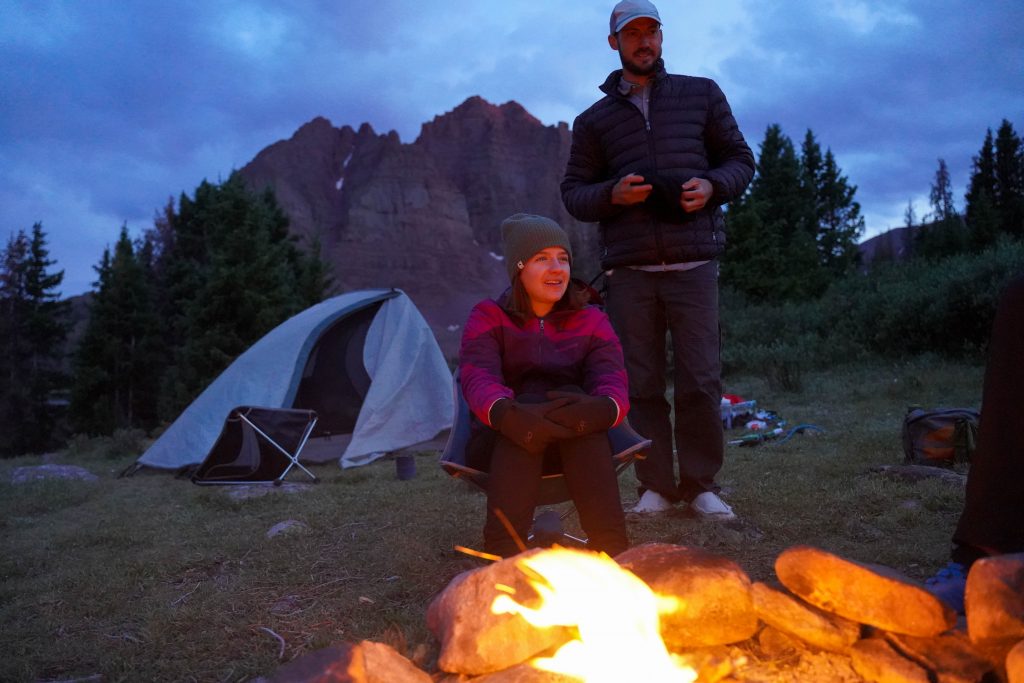
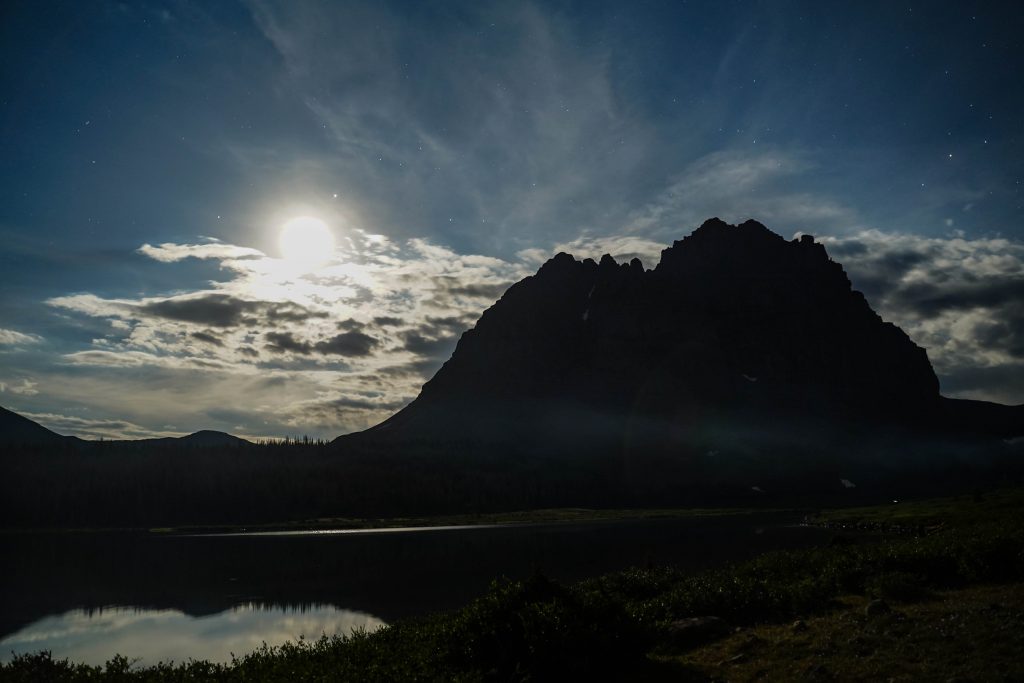
Again we had pretty incredible weather (if a little hot) After taking photos at the upper lakes, we headed back down for our dinner and sunset views from our own campsite (which were pretty unparalleled in my opinion) We collected fallen dead wood again (do NOT collect wood from live trees) for a small fire and had a nice evening before hitting the tents under a nice full moon.
*Be aware of fire restrictions in the areas you are camping. Some don’t allow fires close to the water and some don’t allow fires at all. It may also be seasonal- be fire aware.
*The bugs were AWFUL- since we had such nice weather without wind, they were all over for several hours in the evening. Make sure you bring GOOD bugspray (100% deet)
The hike out:
We had an easy going morning again, leaving camp around 10. It took us about 4.5 hours hiking back with about a 30 minute break. The hike back was nice as we noticed a lot of the groups left earlier so we had the trail to ourselves again. One of the great things about how long this trail is that people really get spread out along it. There may be a lot of people recreating in the area, but it never really felt all that crowded. Which is awesome for a weekend around here!
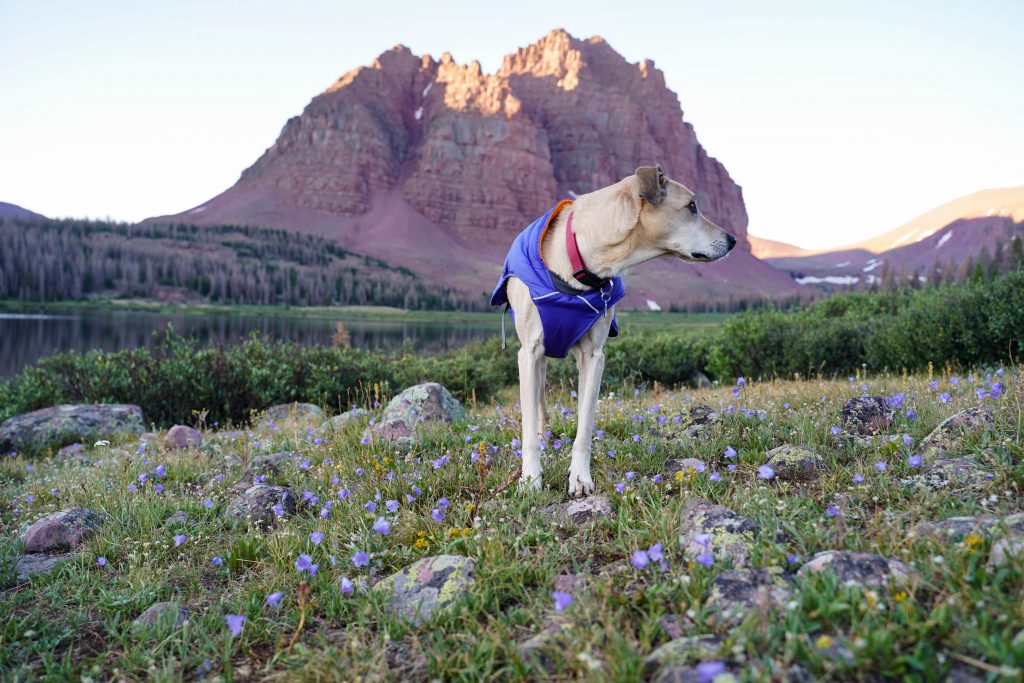
A beautiful sunrise to round out our trip before our 5 hour hike back to the cars.
Wrap up:
This backpacking trip is a total MUST DO. It is so incredibly scenic all along the trail with a breathtaking destination. Plan at least 2 nights so you can really enjoy the area and come prepared! Leave no trace as well so everyone can continue to enjoy the spot for years to come.
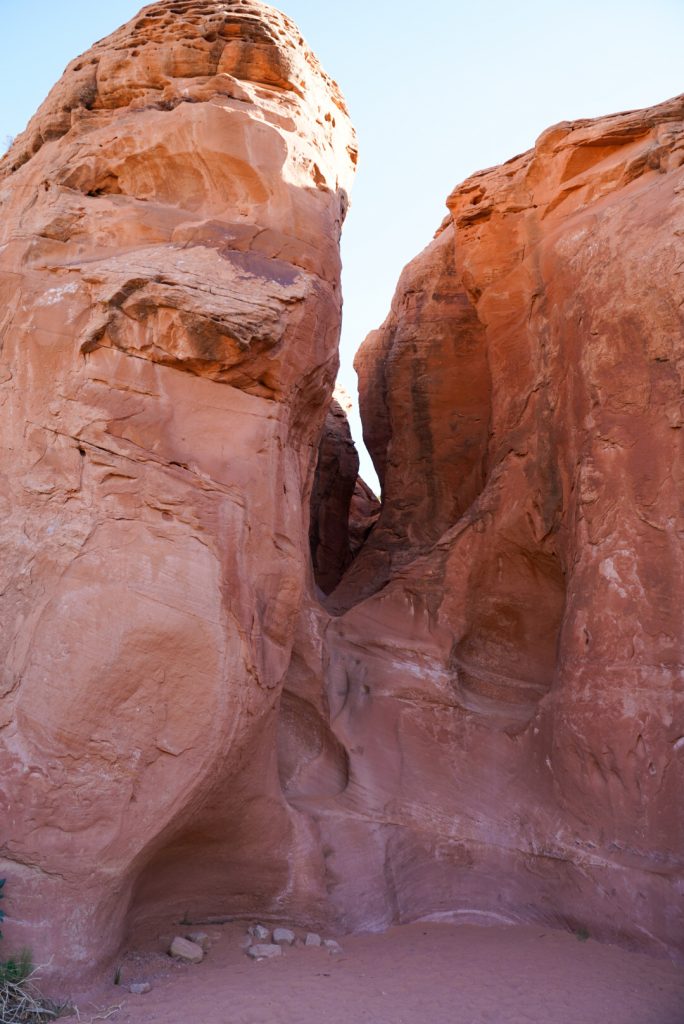
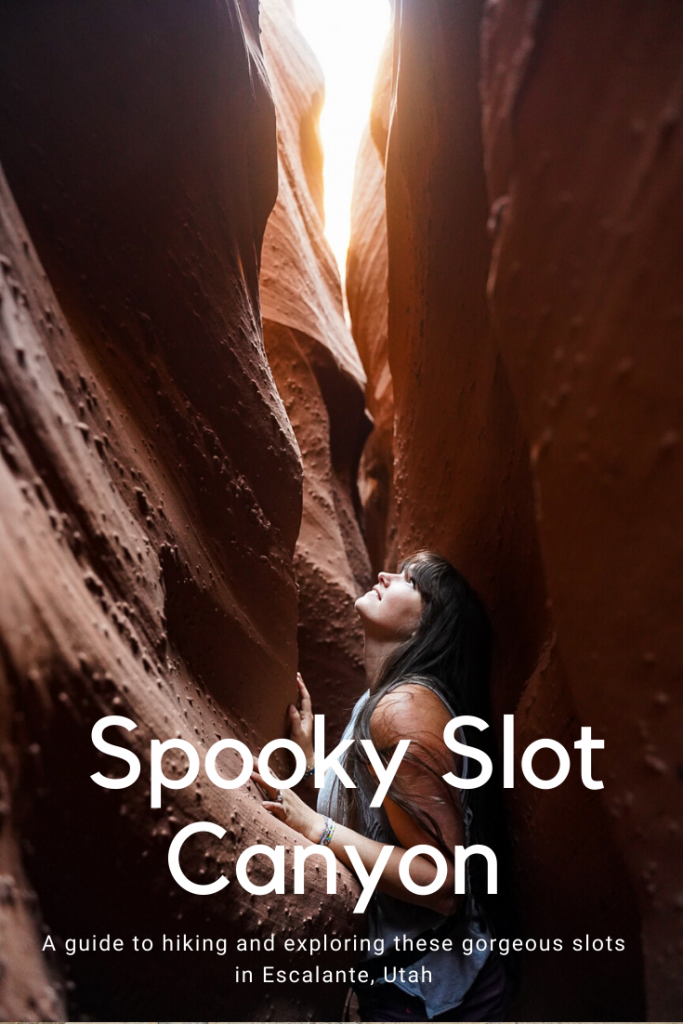
These 2 slots are not only some of the most photogenic non-technical slots you can hike to, but they are also the first slot canyons I ever explored (and my first hikes in Escalante to boot!) While once upon a time they were relatively unknown and less accessible due to the dirt road from hell, now you’ll find a full parking lot by late morning on any weekend. They are a MUST do for anyone wanting to experience scenic slot canyons and visiting the Escalante area.
Trail details:
Distance: 6 miles RT Elevation Gain: 700 feet throughout the hike (you only really notice it on your hike out to your car) Time: 3-5 hours Difficulty: Easy- Moderate Pets?: Allowed but NOT recommended especially for big dogs Fees: Free
Trailhead Directions:
From HWY 12, turn onto Hole in the Rock Road and drive for 26 miles where you’ll see a left turn onto BLM Rd 252. Drive another mile to where the road ends in a loop parking area with pit toilets and a trail sign.
While this road is definitely not pleasant (read washboard bumps and large gravel for over an hour) any car can make it as long as the road conditions are dry. Just drive slow and take your time if you have lower clearance and DO NOT attempt to drive down Hole in the Rock road if rain is in the forecast or if the road is wet/ snowy.
Tips for the best hiking experience
Start as early as you can- preferably by 8 AM. Not only will this allow you to miss most if not all the crowds but it will help you beat the heat. It gets VERY hot out there.
Pack lots of water… but in as small a bag as you can. These canyons are tight and you don’t want to lug a big pack through them.
Don’t wear your nicest hiking clothes or bring your brand new hiking pack. The sandstone walls are TOUGH on gear and clothes.
Hike up Peekaboo and down Spooky. Not only does this help with the flow of traffic (it is very difficult to pass people in these canyons) but the climbing sections are easiest this direction.
Pre-load the trail map in all trails or download it if you have pro. The loop can be challenging between the 2 canyons so it helps to have the trail map to ensure you are on the right path.
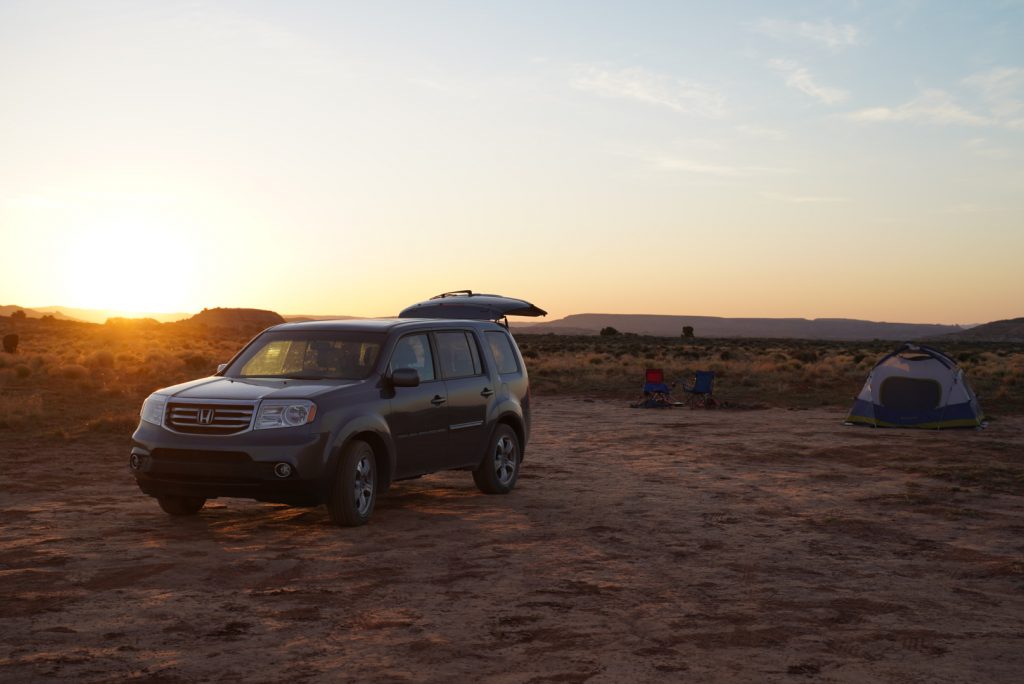
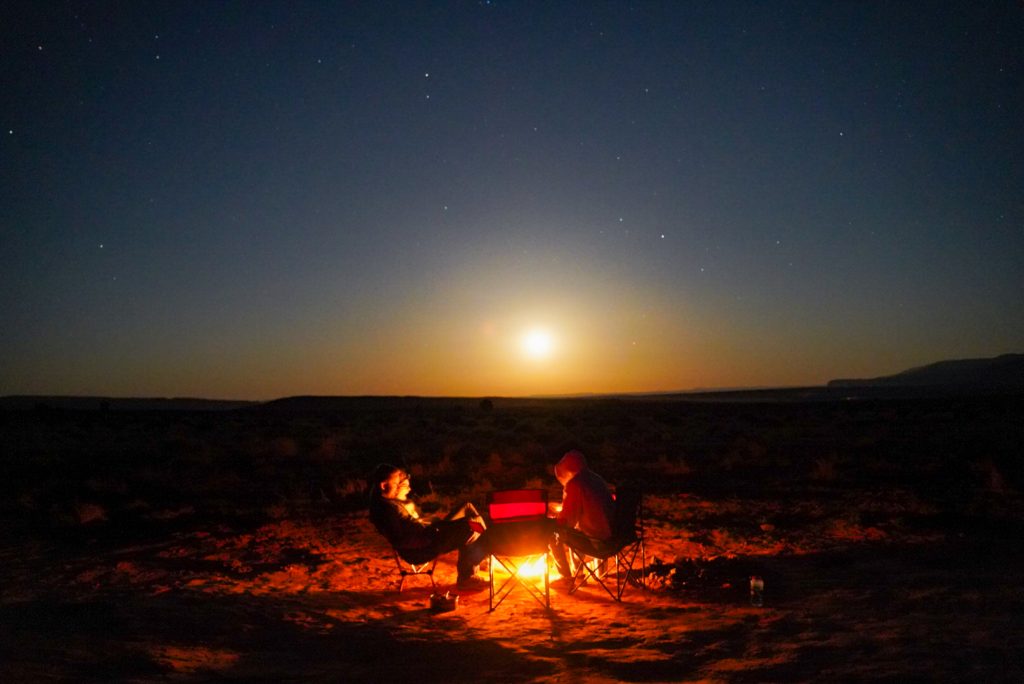
There’s nothing like a desert sunset and night under the stars… or in our case a full moon
Where to stay nearby:
Primitive camping/ boondocking is allowed anywhere off Hole in the Rock Road and is free. The most popular spot is about 0.5 miles from HWY 12 where there is a lot of flat space to bring trailers/ RVs/ other rigs out to park. There’s also a dumpster for trash at this lot but no restrooms. Otherwise you can camp anywhere there is a pullout big enough for you to get off the road without trampling plants. We camped at the overflow parking for the TH which is a huge area only 0.25 miles from the TH. (You can’t camp AT the TH) Remember pack out what you pack in including all trash, ESPECIALLY TP.
There’s also not much to rival a desert sunrise
If camping isn’t your thing, there’s a Motel and excellent RV park in Escalante that has cabins at a great price called Canyons of Escalante RV park. I’ve stayed there many times and have always had a fantastic stay.
Our experience on the hike
Since we camped nearby we were on the trail by 8 AM and were the 3rd car/ group to start. (This was on a Saturday morning so timing was important) The beginning of the trail is about 1 mile of flat hiking following the rim below the parking area. The views are expansive of MANY canyons in the area and is beautiful but exposed with no shade. (this is one place I’d hate to hike in the late afternoon)
The steep slickrock climbs in and out. This only shows maybe 1/4 of the total elevation. It gets VERY hot on this section.
After about 1 mile we descended the steep slickrock down to the canyons base. Be careful in your route finding down the slick rock and watch for cairns to guide you.
Once down, we saw the trail to the Dry Fork Narrows on the left but decided to skip for now as our goal was to beat the crowds. Once we passed the dry fork narrows, we immediately saw the 10 ft. climb up into Peekaboo. We found it to be pretty easy with the small steps ground into the climb but it could be challenging for little kids who can’t reach each step.
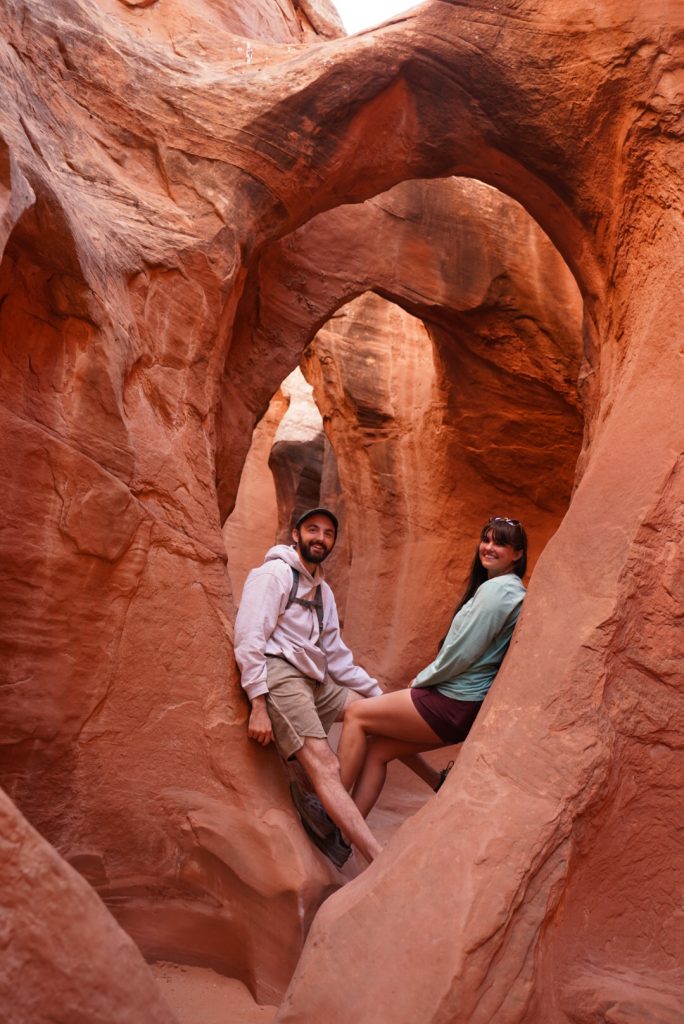
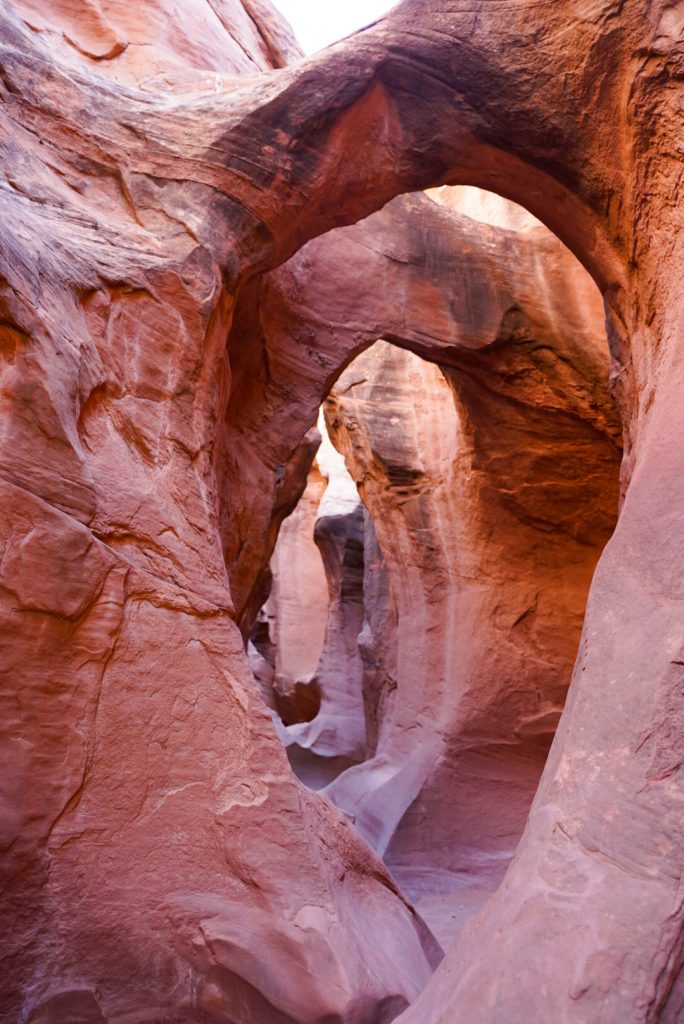
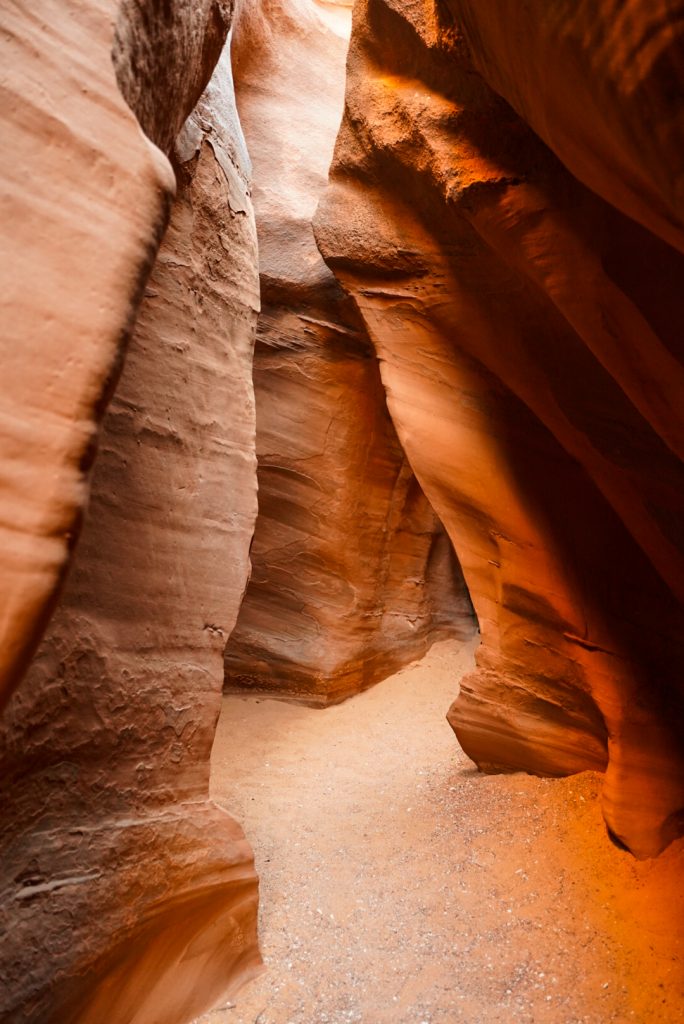
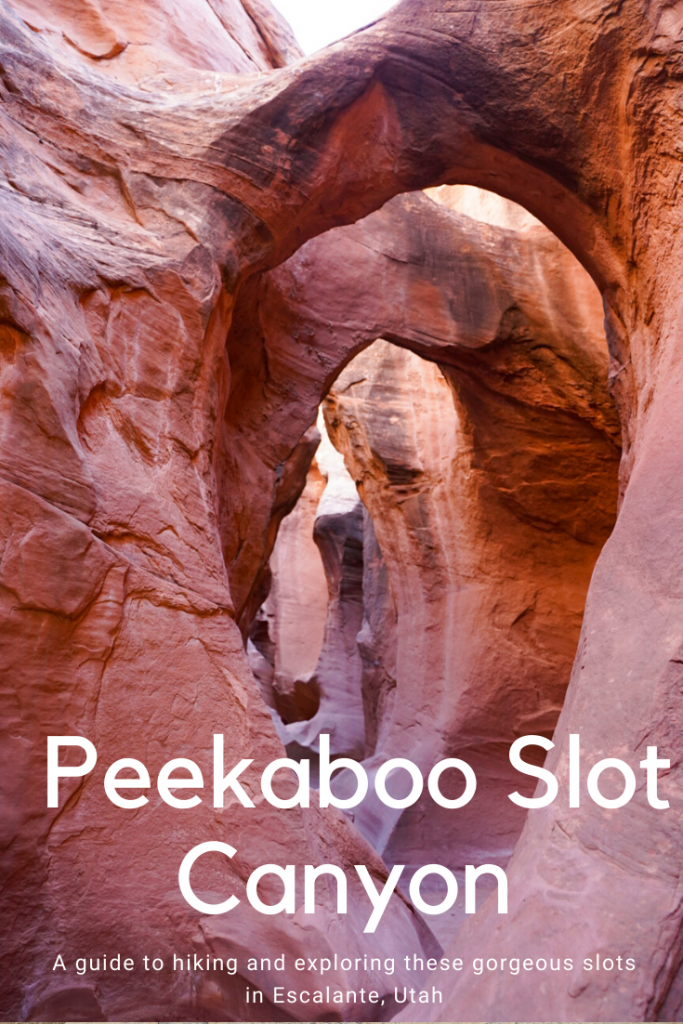
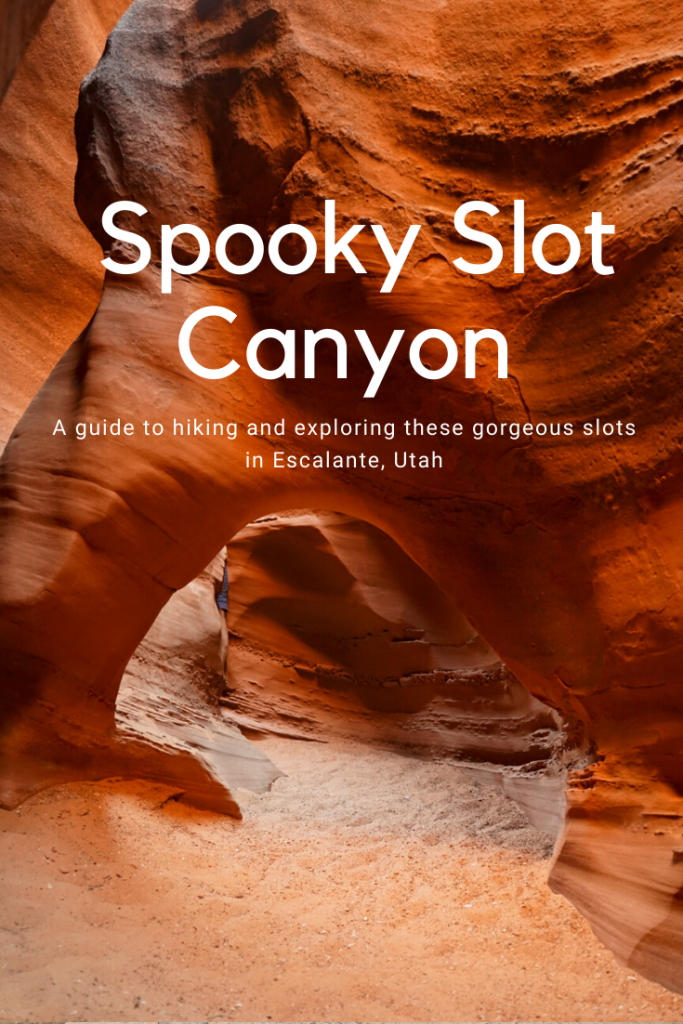
Peekaboo Canyon
Once up the climb into Peekaboo is the most iconic section of this whole trail with the double arch. We only saw 1 trail runner in this section who passed us otherwise we took our time taking lots of photos in this section.
The Peekaboo slot is very short so after the iconic arches, the trail slots up into a skinny shallow canyon, widens, then slots again for another 10 minute stretch before ending at a tree where the canyon is gone and you’ll see a large wash. We initially missed the turn off to go on the loop here and headed up the wash 5 minutes before I checked the map and realized we’d missed our turn. Back at the tree, there’s come cairns that lead you up and over the hill and cut across sandy dunes. This is the other miserable section in the sun since the sand is soft and hot.
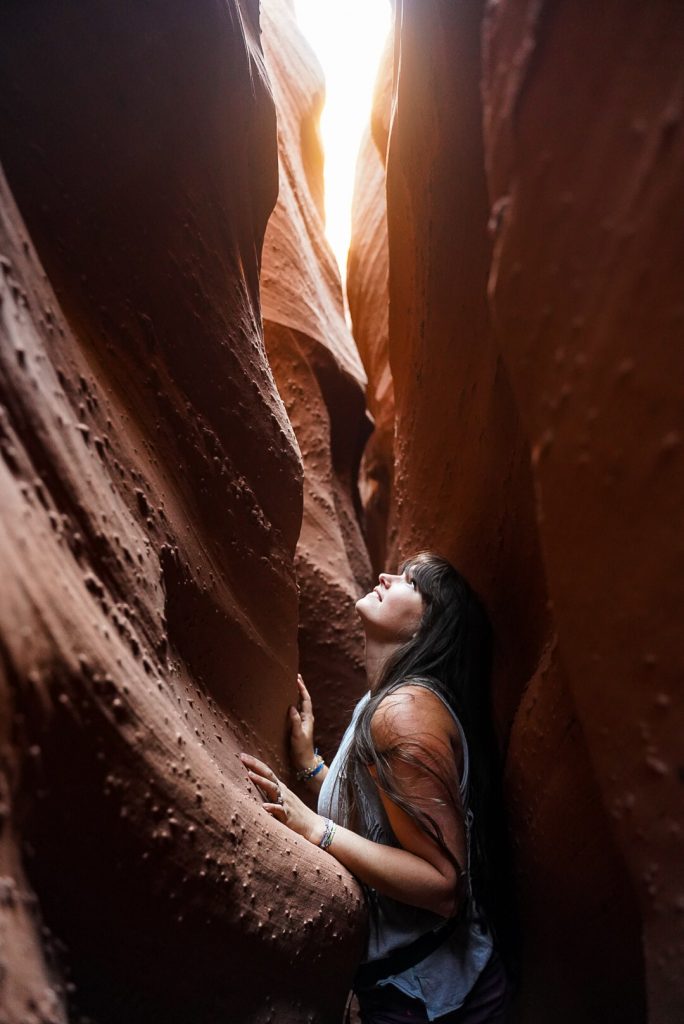
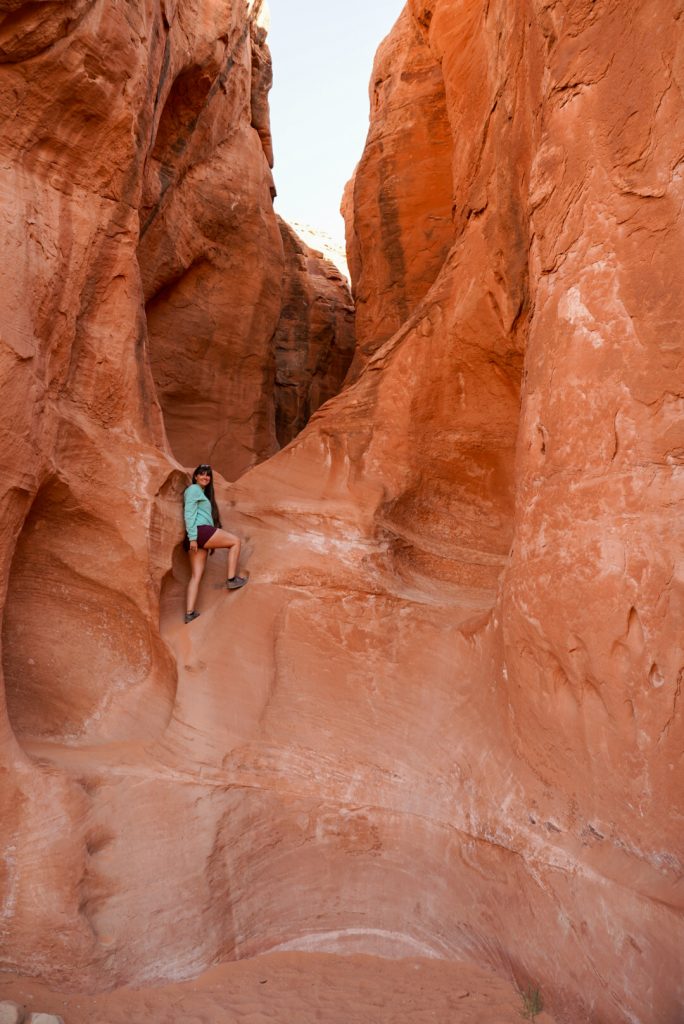
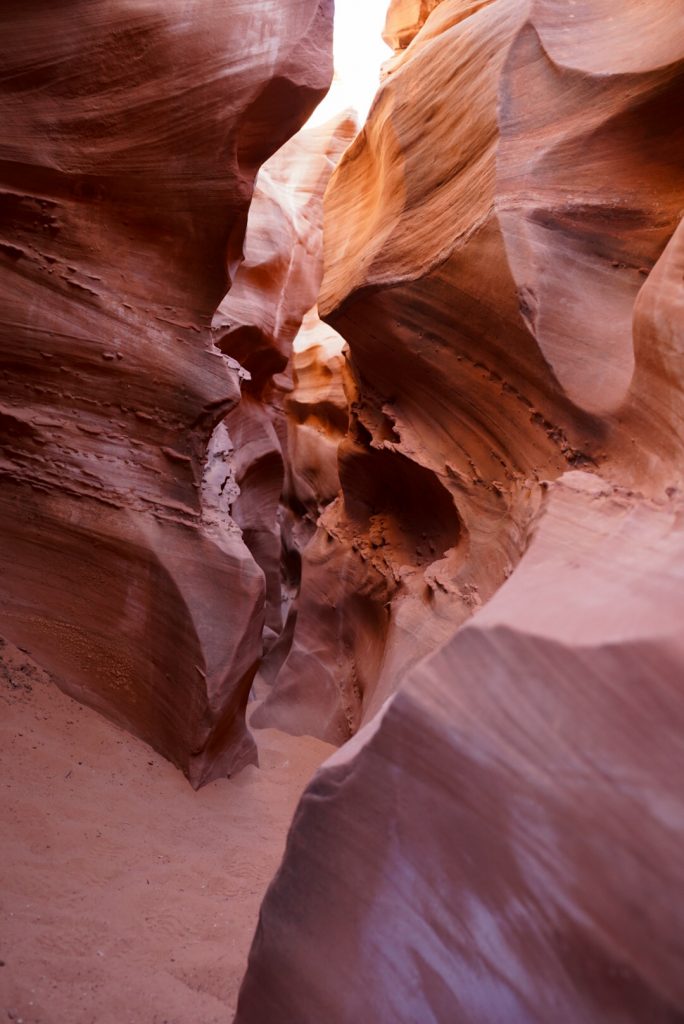
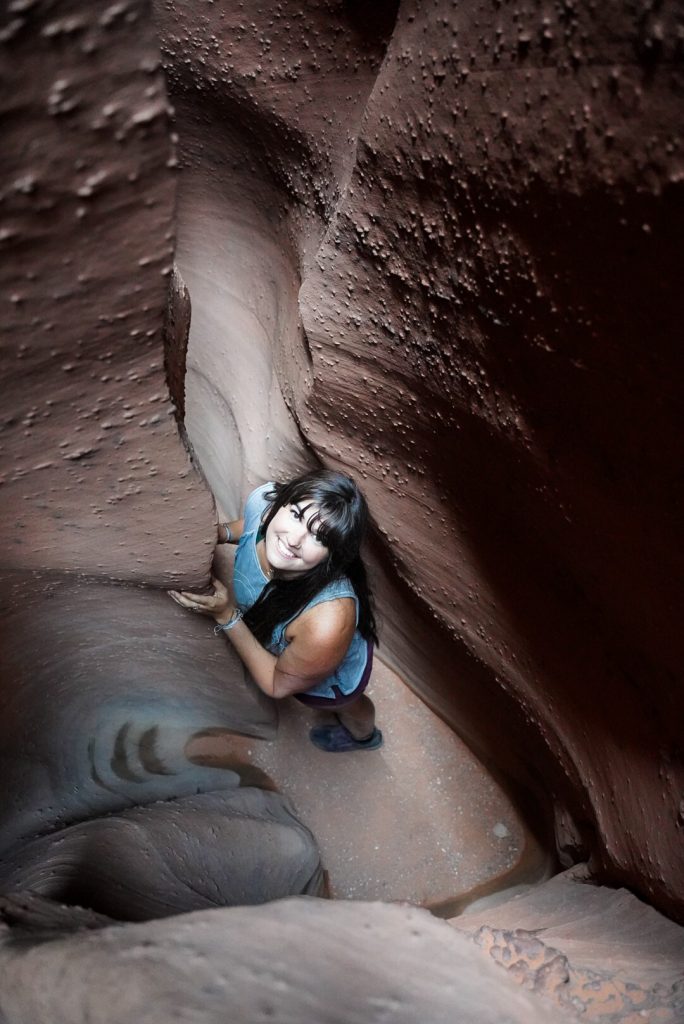
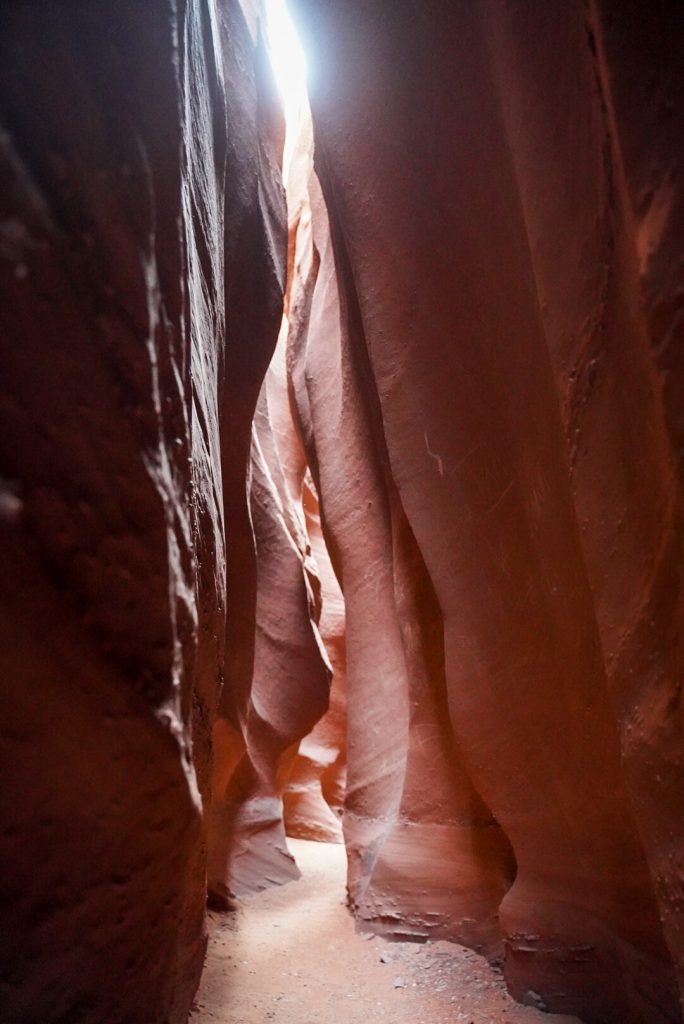
Spooky Canyon
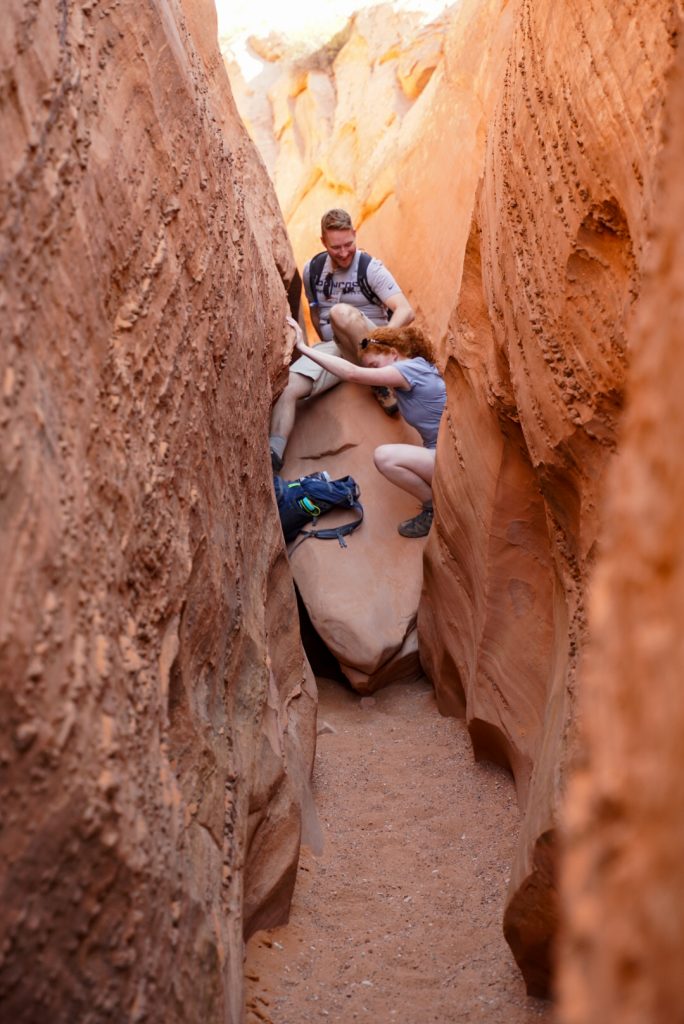
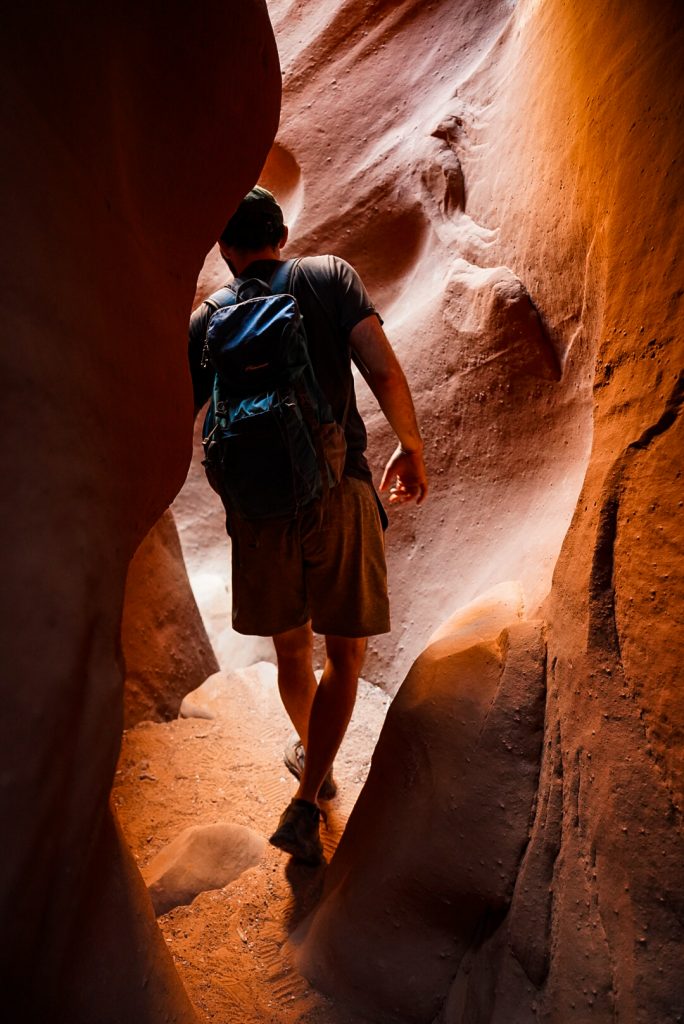
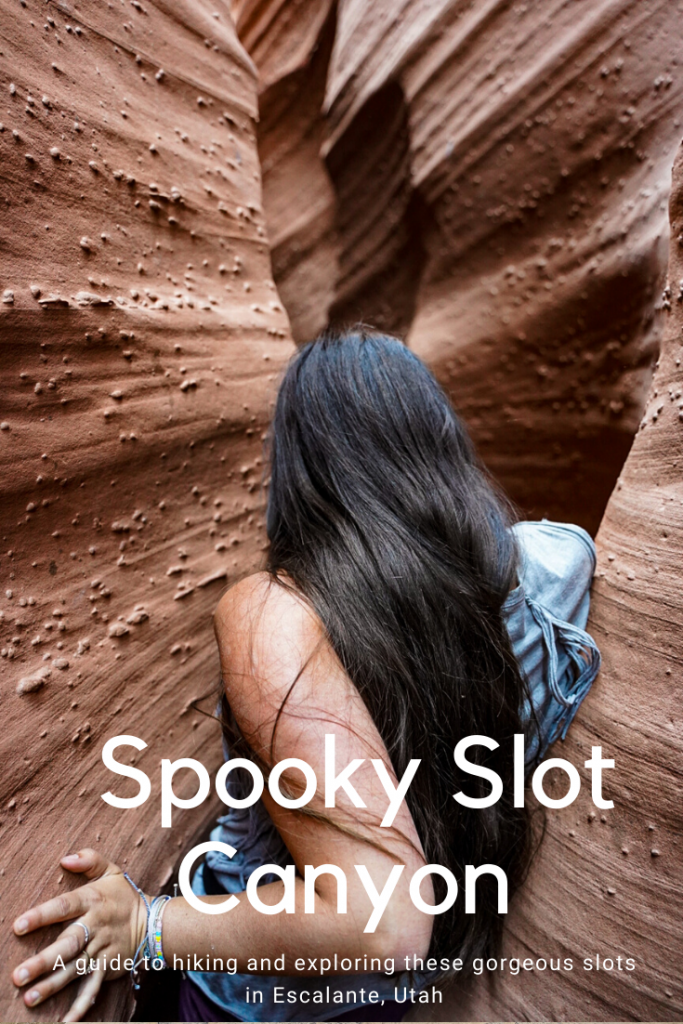
After about 20 minutes we were down and at the top of Spooky ready to descend. Spooky is at least twice the length of Peekaboo and MUCH skinnier with little curvy down climbs where you’ll need to watch your step. For most of Spooky you’ll have to have your pack slung over one shoulder or off to the side.
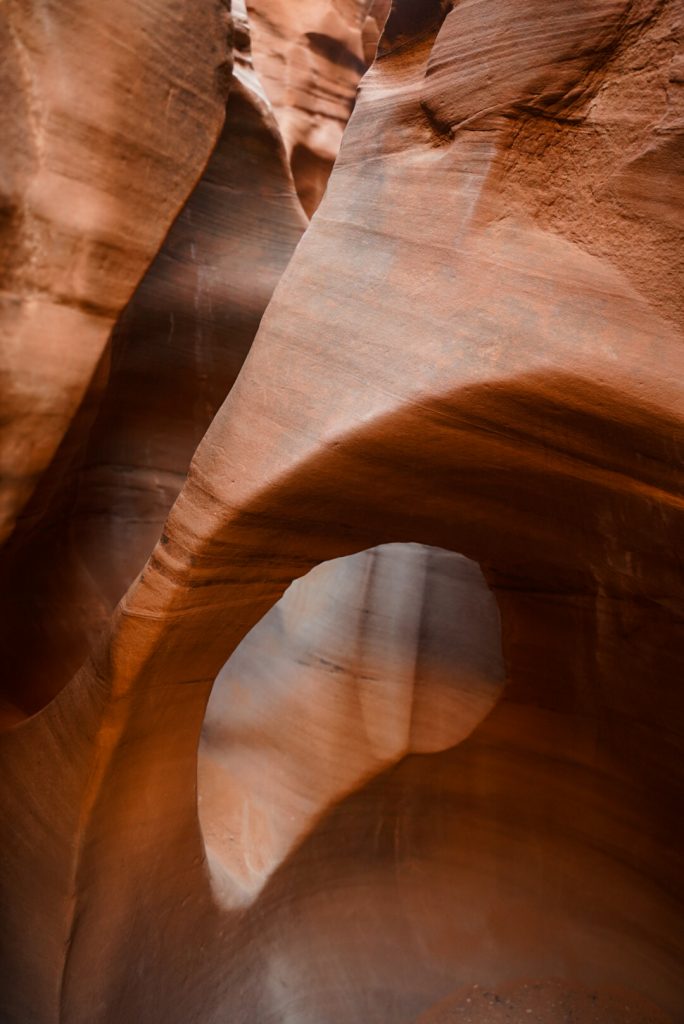
The beginning of Spooky has a couple awkward climbs only a foot or 2 down. Apart from how beautiful this canyon is, the climbing makes it fun!
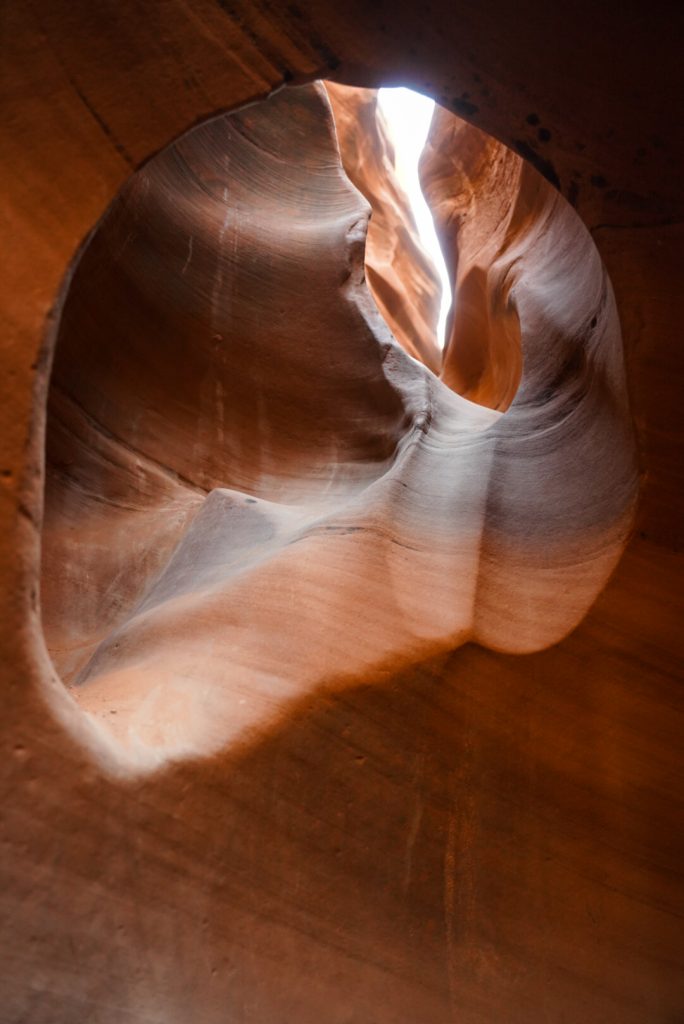
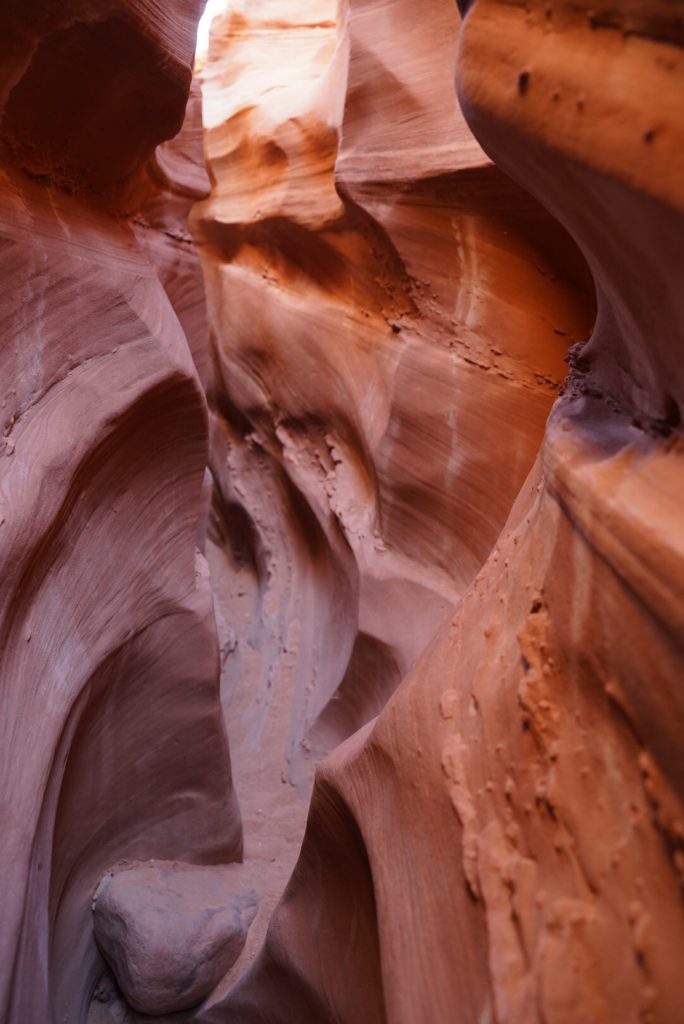
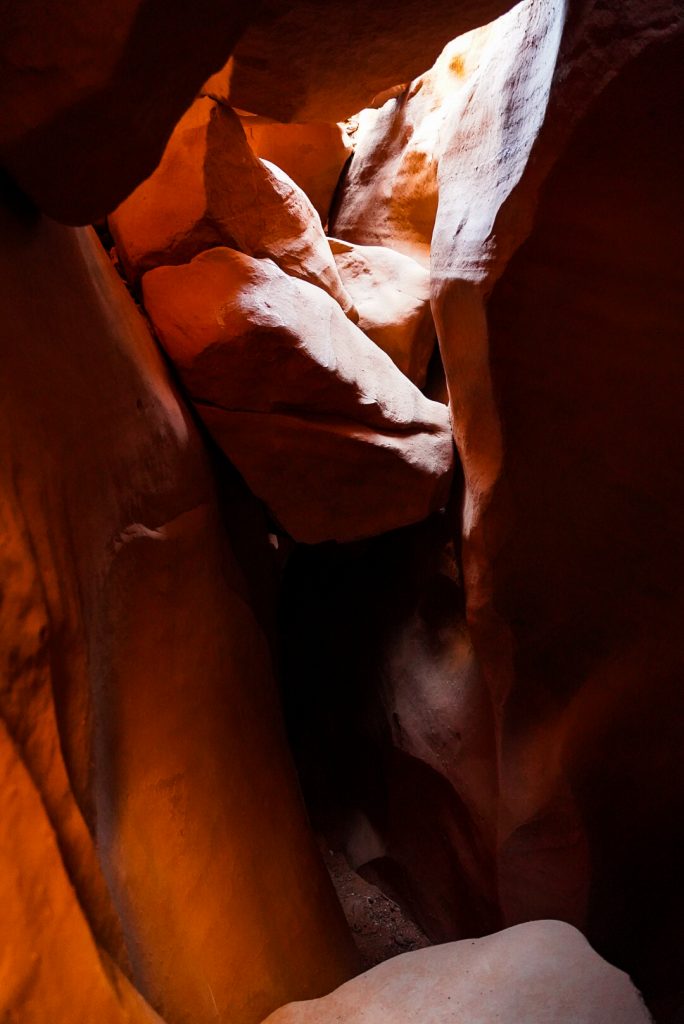
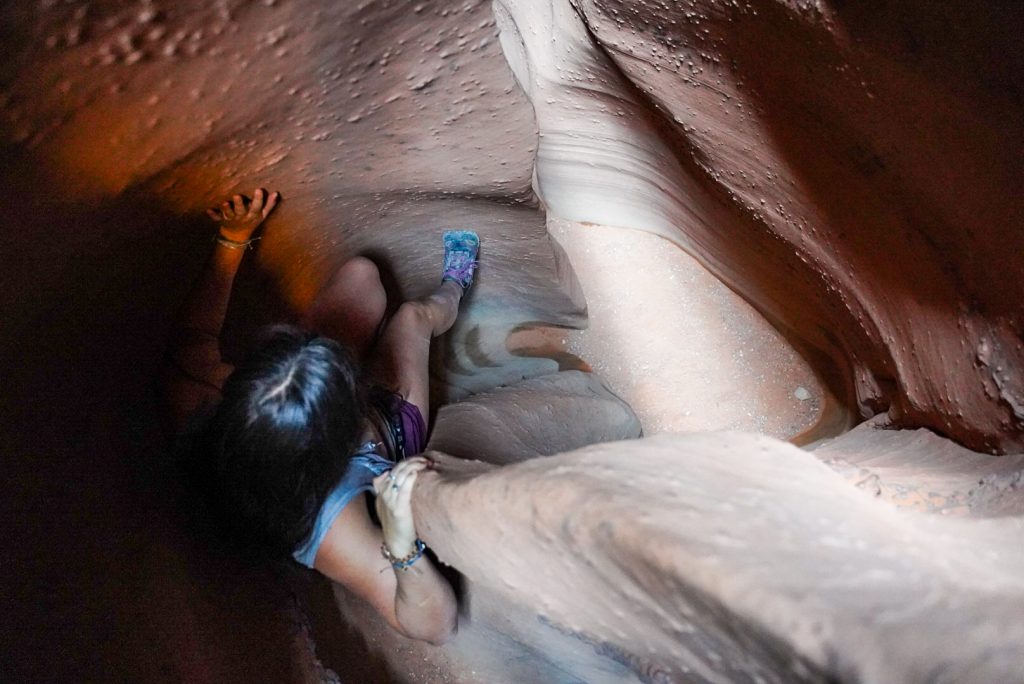
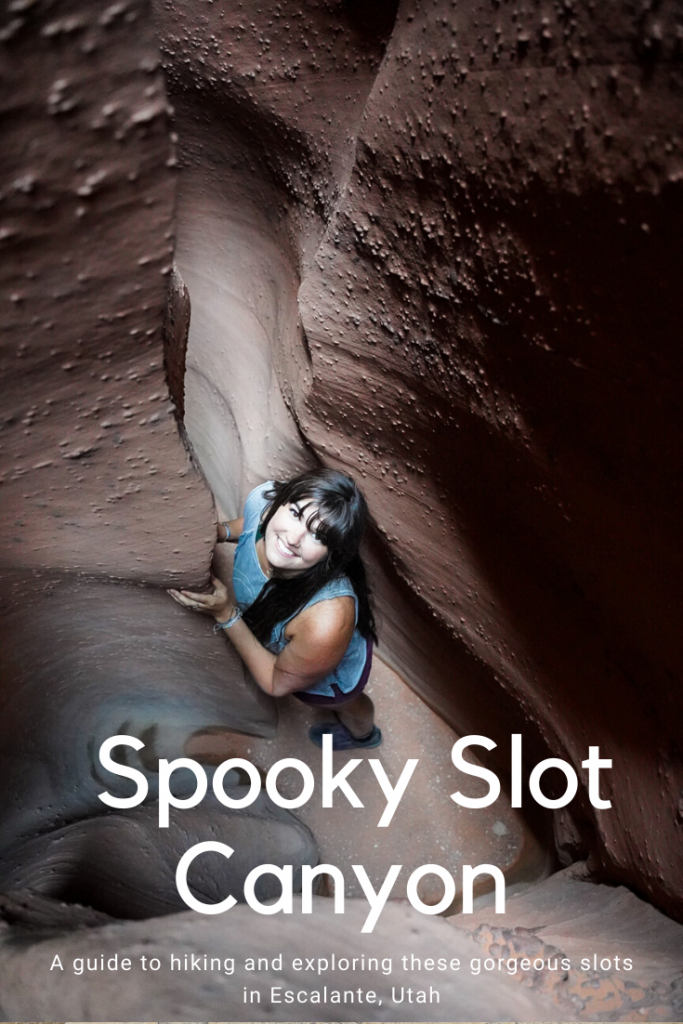
A couple minutes in there’s another little arch great for taking pictures under and then about 5 minutes later the major obstacle in Spooky. The top makes it look like a series of boulders, but the boulders are all about 10 feet above the canyon floor. Aim left to a 4 foot hop down or chimney down climb. From the top of that boulder, turn around to face “up” canyon and you’ll see a small, dark tunnel cut into the boulders. This is a smaller step down and crawl through that will get you to the canyon bottom the safest.
A view looking up into the boulders from below and showing how you can climb back through the rocks and come down through the bottom.
Sometimes there’s a rope to help people down, but I wouldn’t count on it being there. If you aren’t comfortable with what I just described, bring some webbing or a rope just in case- or skip this hike.
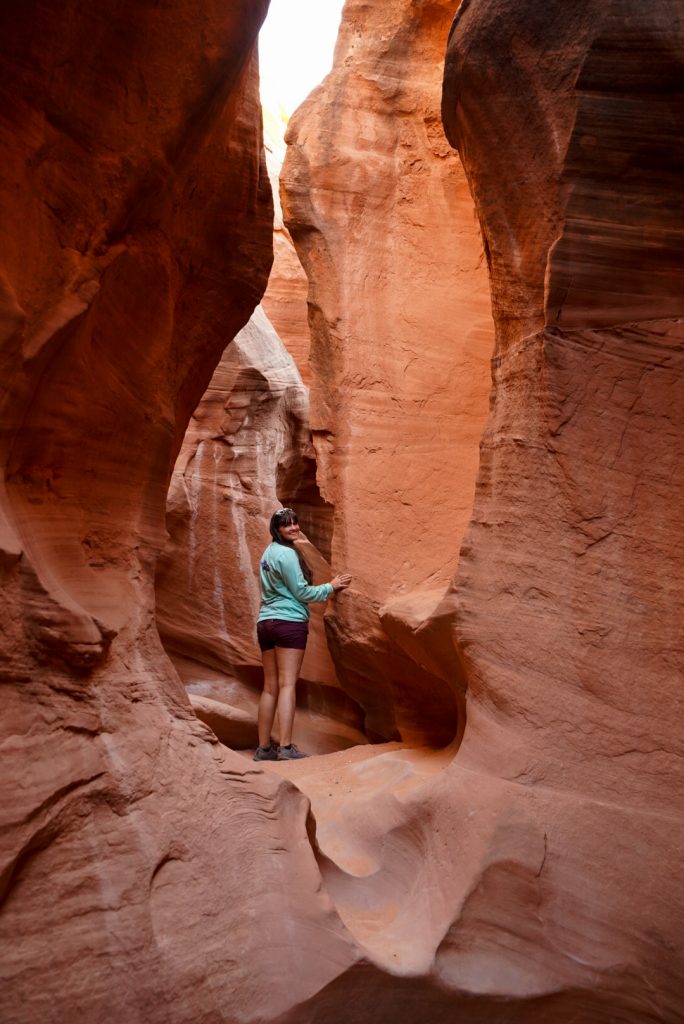
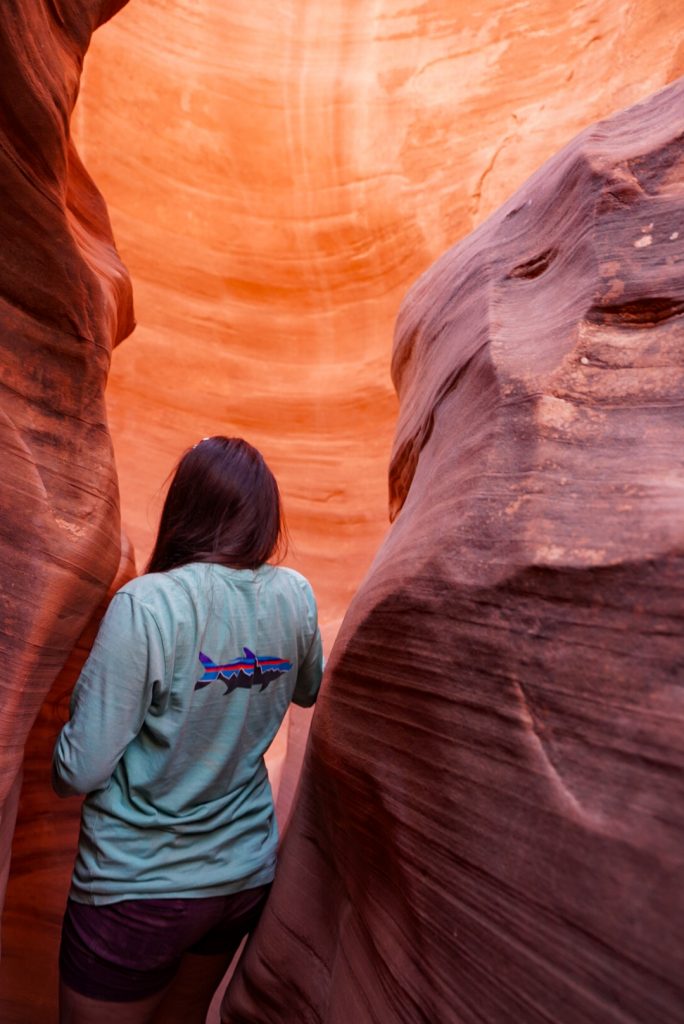
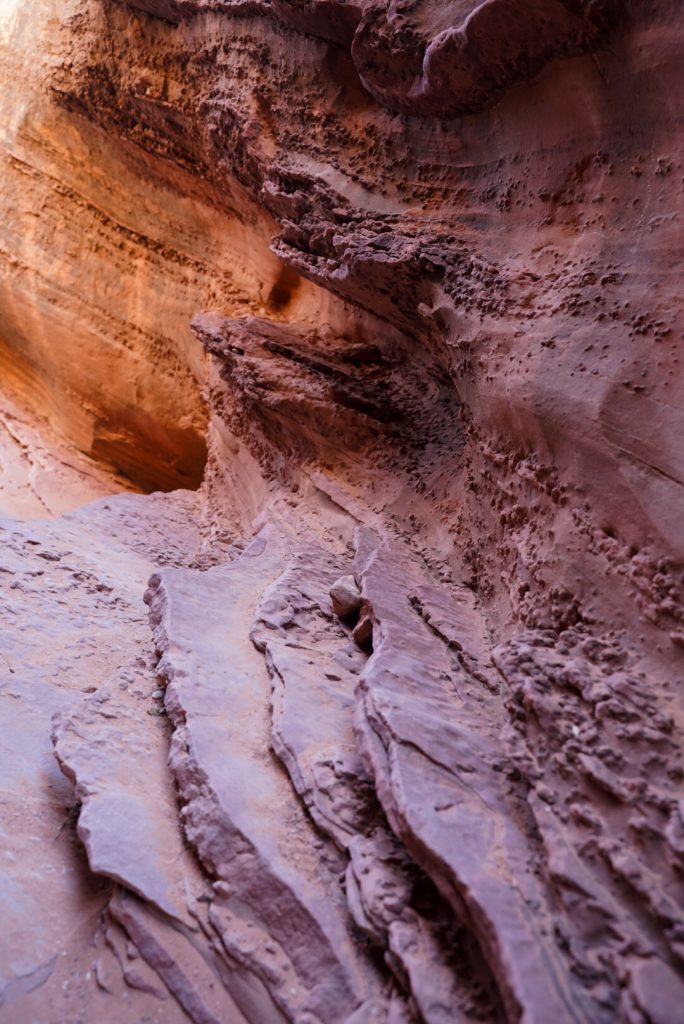
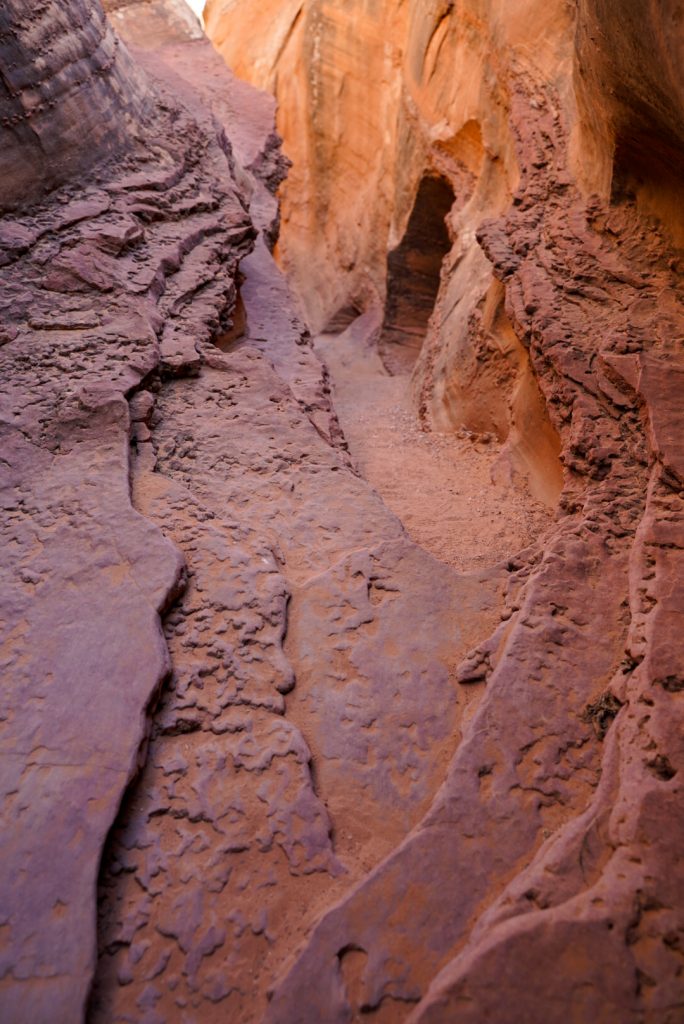
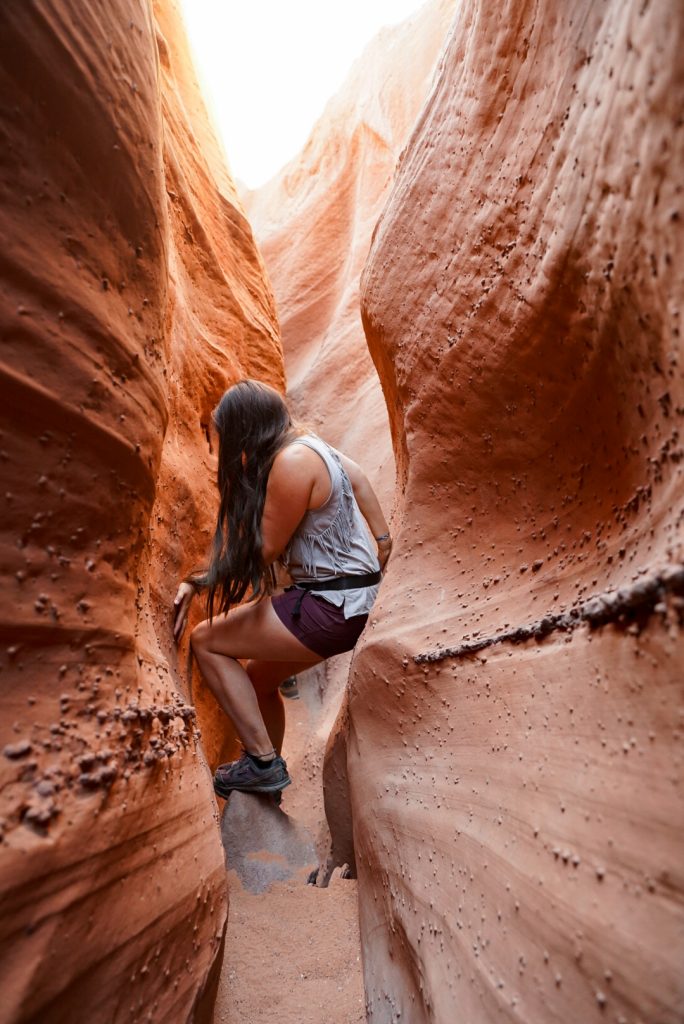
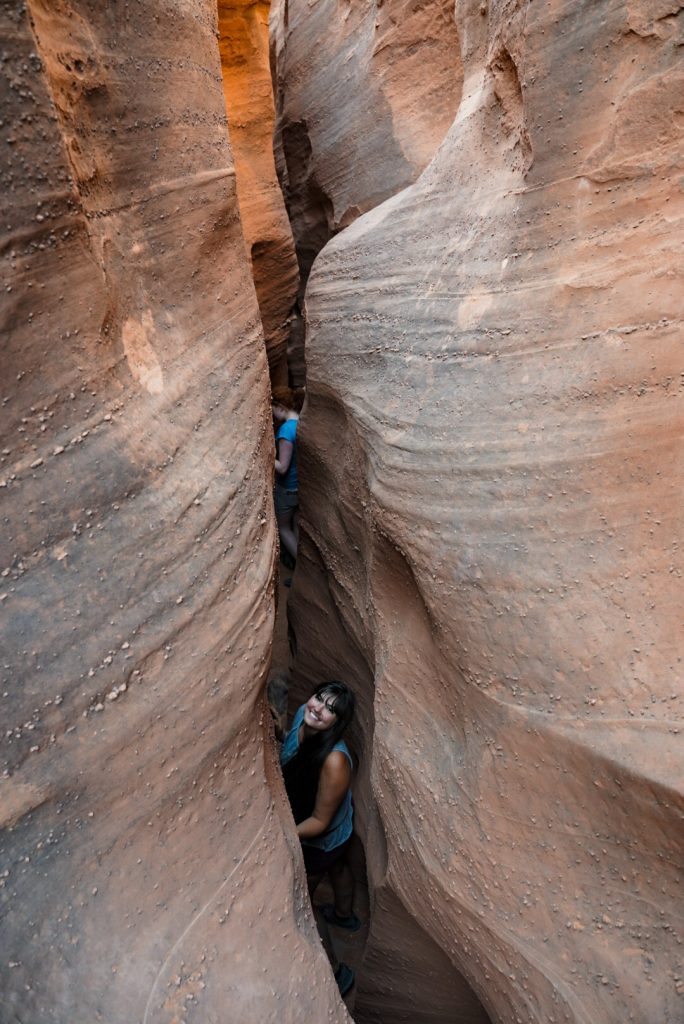
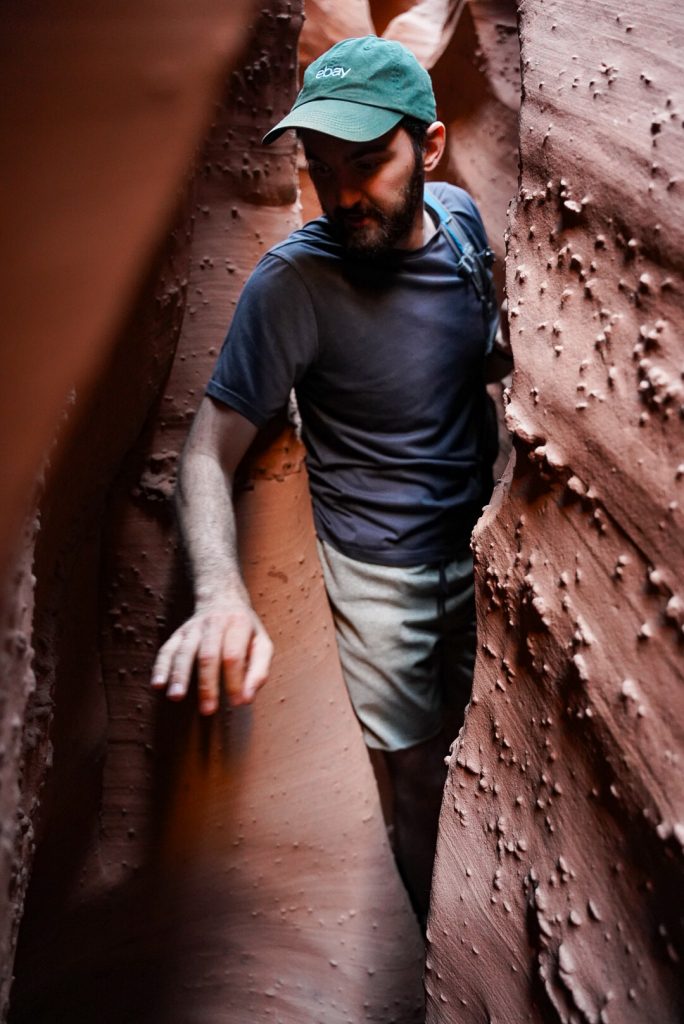
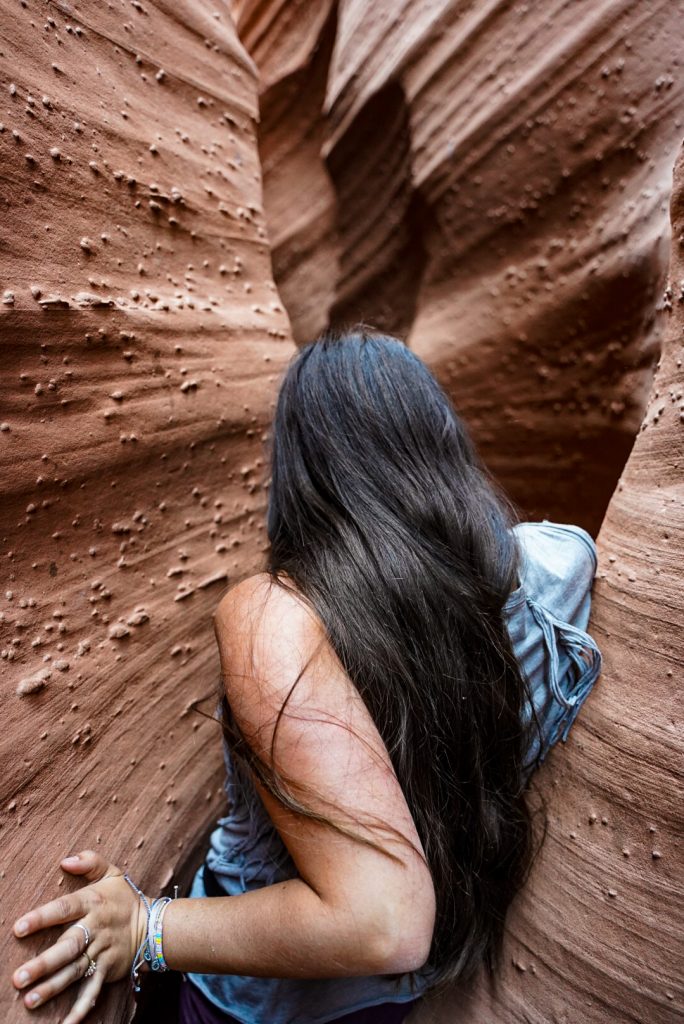
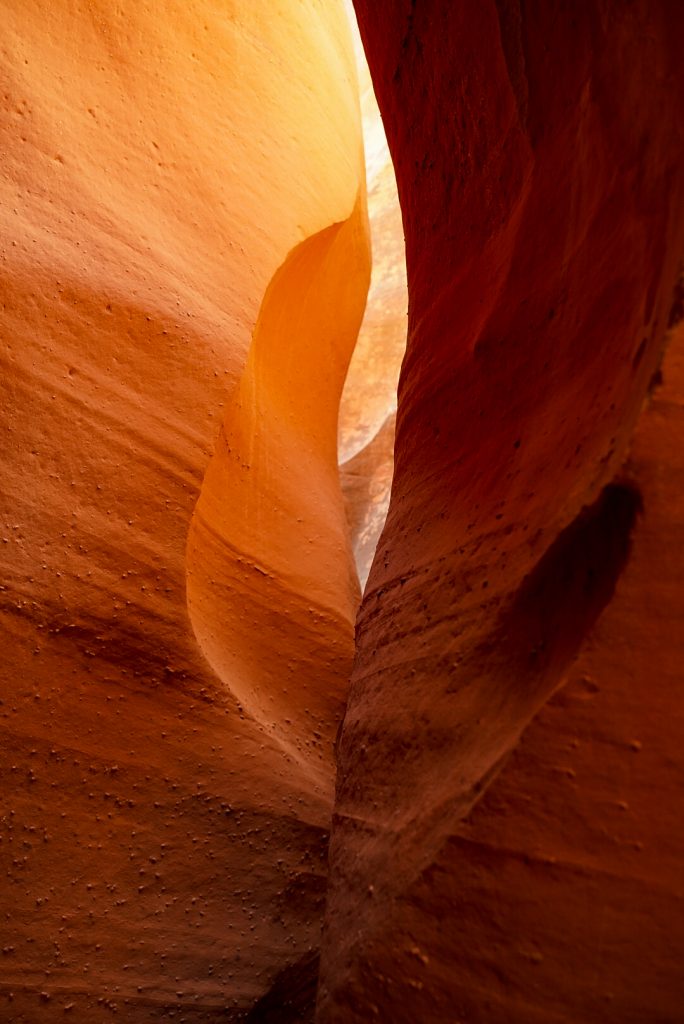
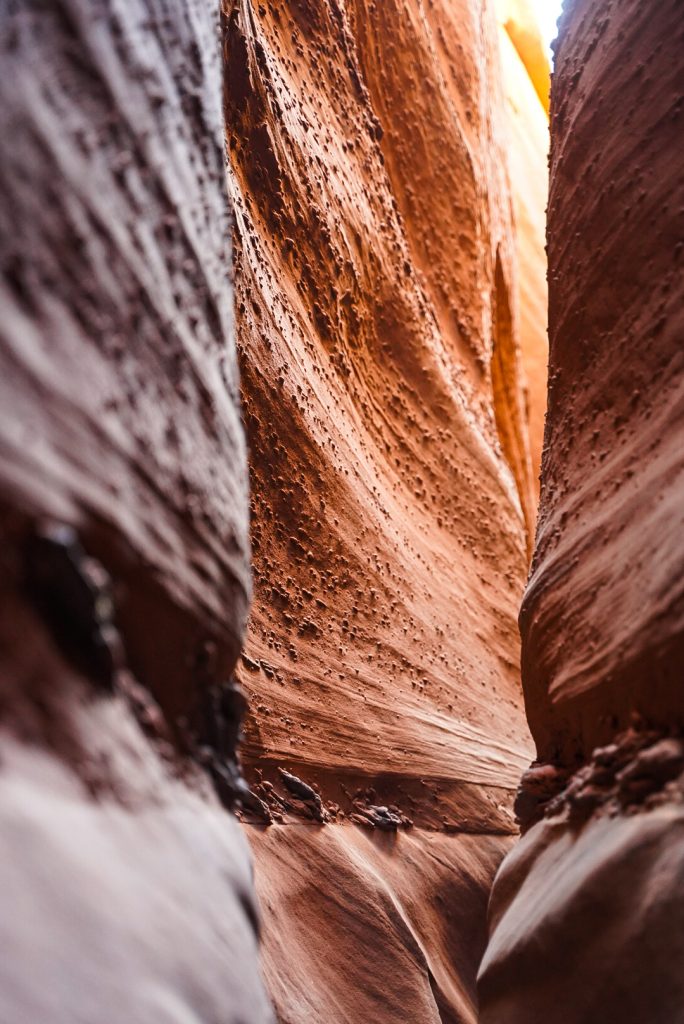
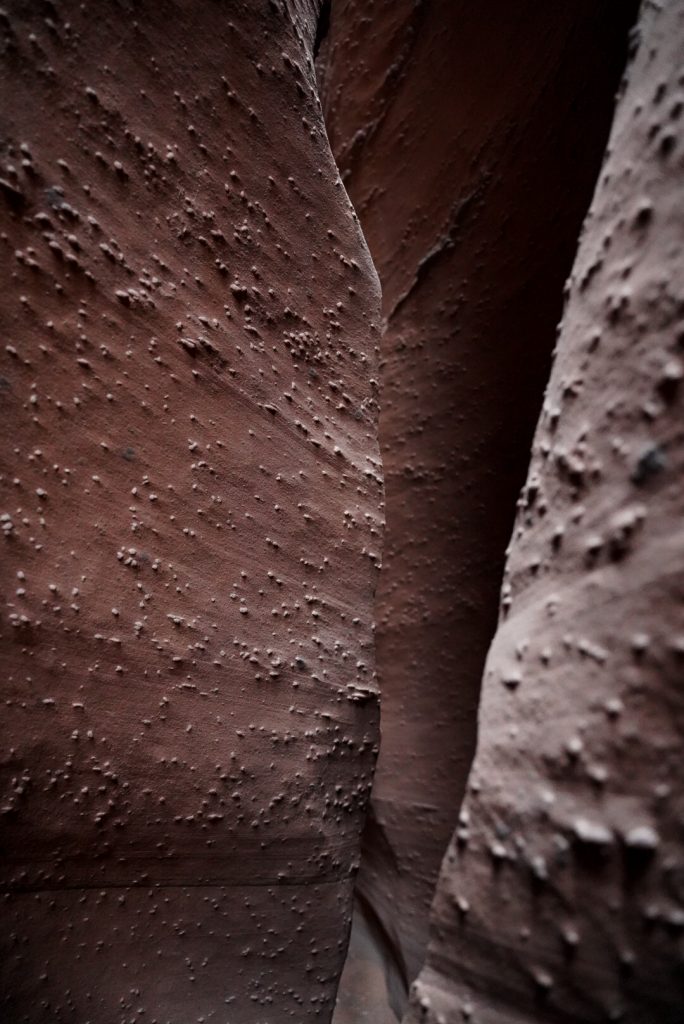
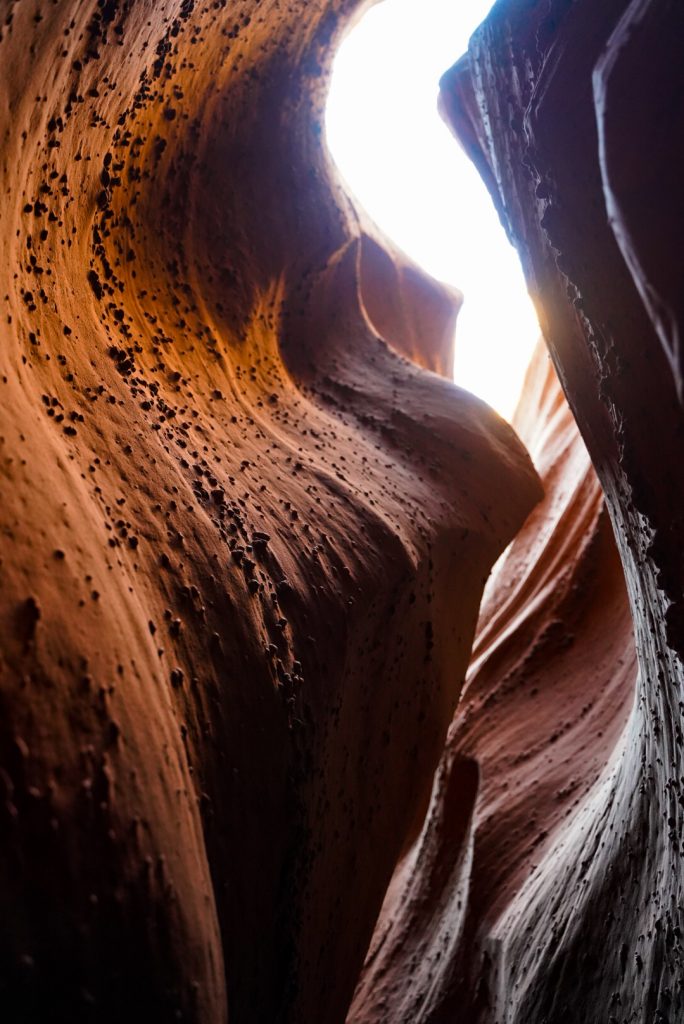
After the boulders it’s a series of shimmying, crawling, and skimming through the rest of the canyon. My absolute favorite parts of Spooky are the ultra textured walls and how sinewy (canyon talk for curvy) the walls are. Other slots like the narrows or Little wild Horse are narrow channels of straight walking- where you can see the light at the end of the tunnel most of the time. In Spooky- you can see maybe 5 feet ahead before the canyon dramatically twists and curves so there’s no end in sight.
*As a side note, this isn’t a good trail for the claustrophobic.
After an hour or so we were out of Spooky. We followed the trail along the wash easily back to where we passed the entrance to Peekaboo completing the loop. From there you hike back up the same trail you hiked in on.
Should you bring your dogs?
*The entrance to Peekaboo around 10:30 AM on that Saturday was INSANE. At least 20 people were waiting to make the climb up and it seemed to mostly be blocked with families bringing very small kids and dogs with them. PLEASE be considerate of other hikers and your furry friends. This trail is NOT good for dogs. The sand is very hot and will burn their paws unless you start at 6AM. Also consider the canyon is NARROWEST at your feet where dogs will be hiking through. Not only will you have to lower/ hoist your dog up these 10+ foot drops but you will have to help your dog over narrow sections of canyon where they WONT fit.
We were back at our car around 11 to find a completely full parking lot but had one of the best mornings we could ask for.