Tre Cime Trail Guide

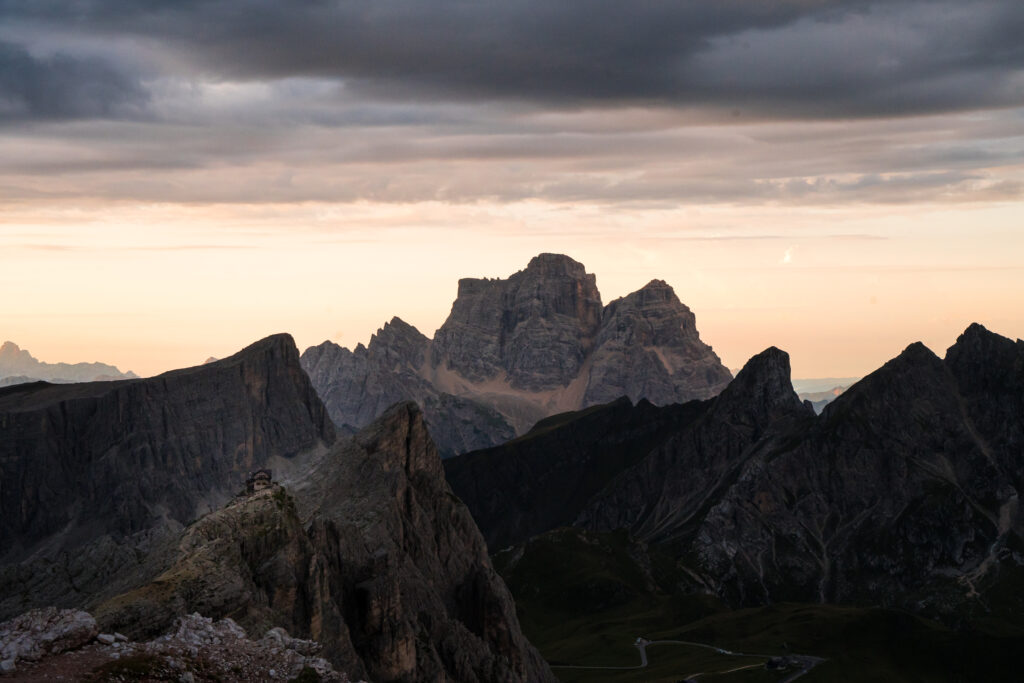
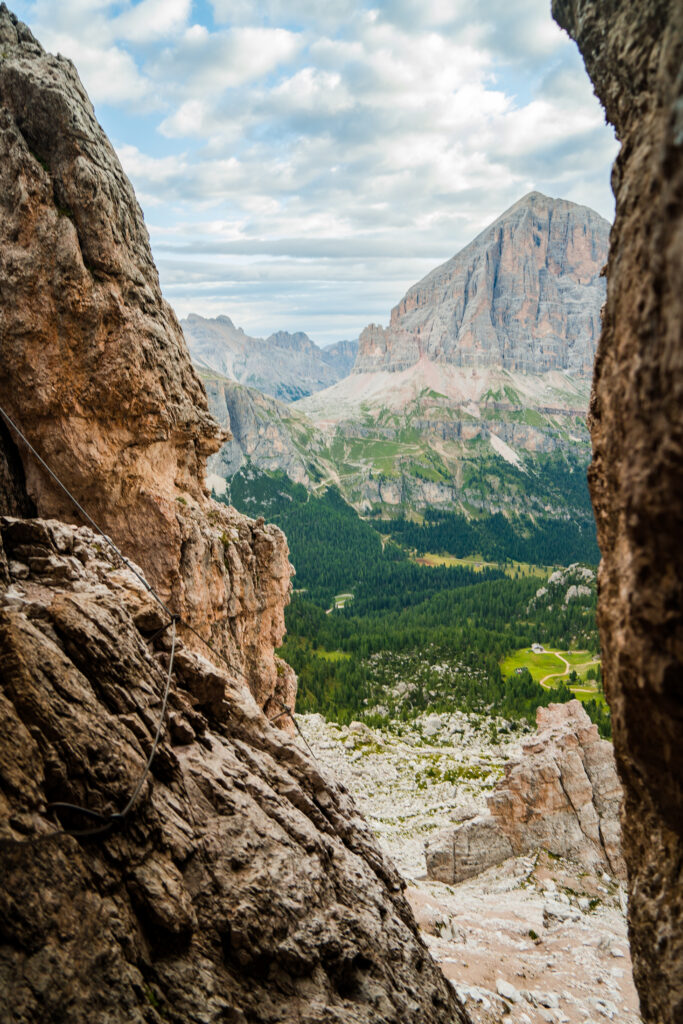
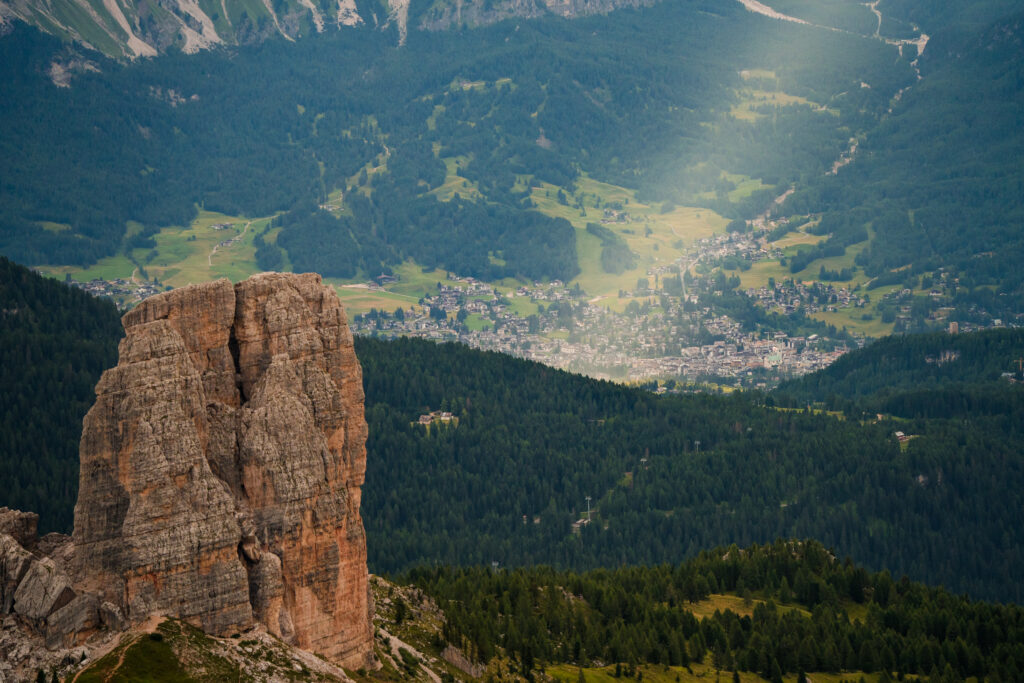
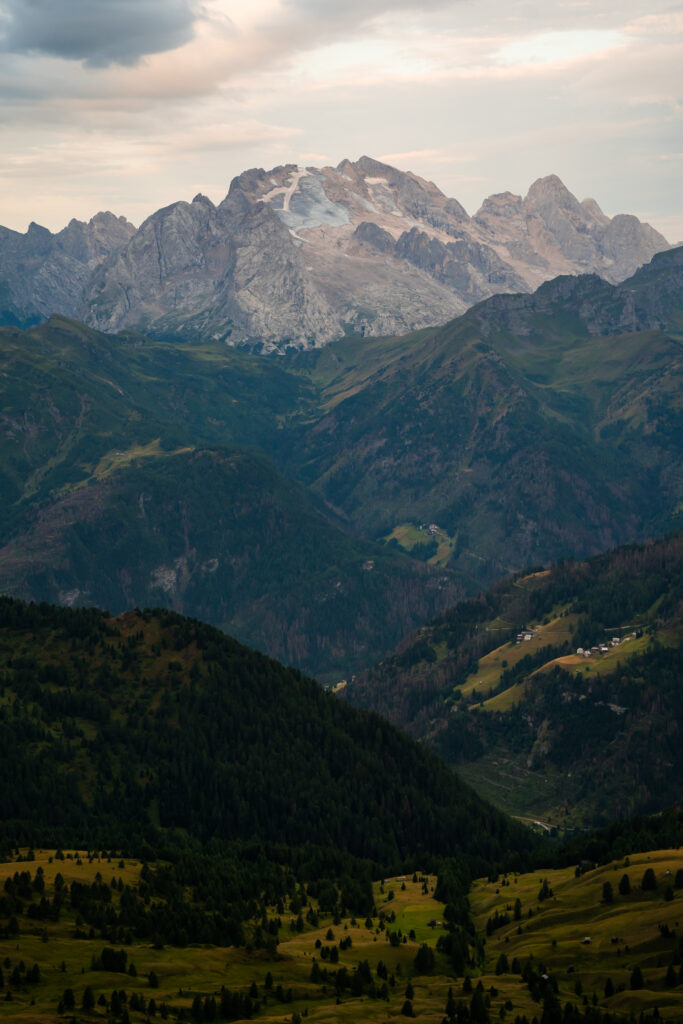
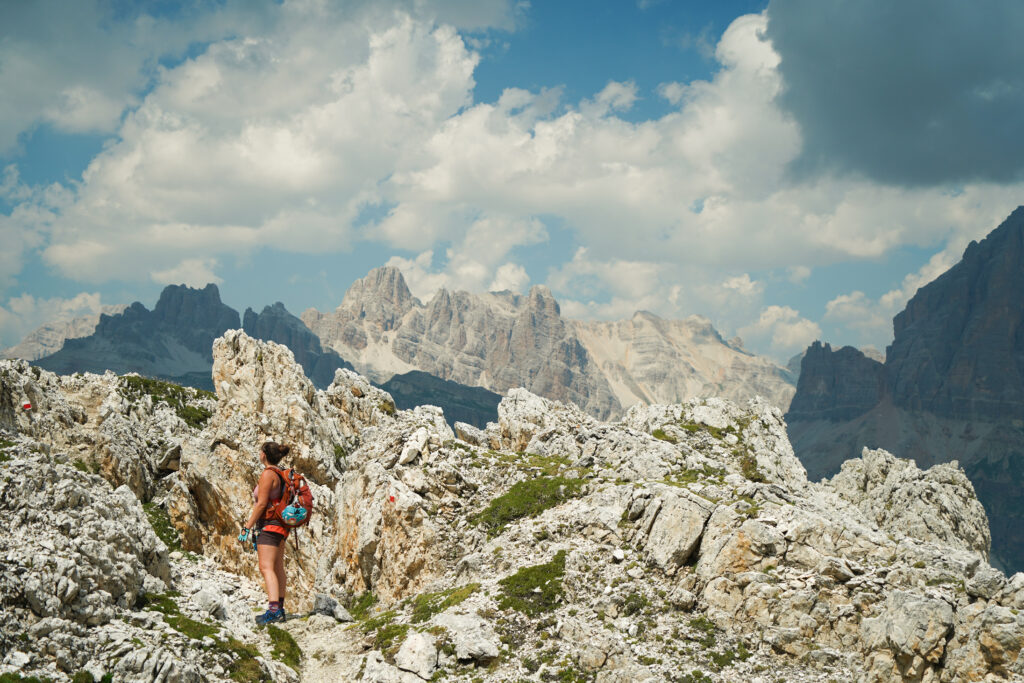
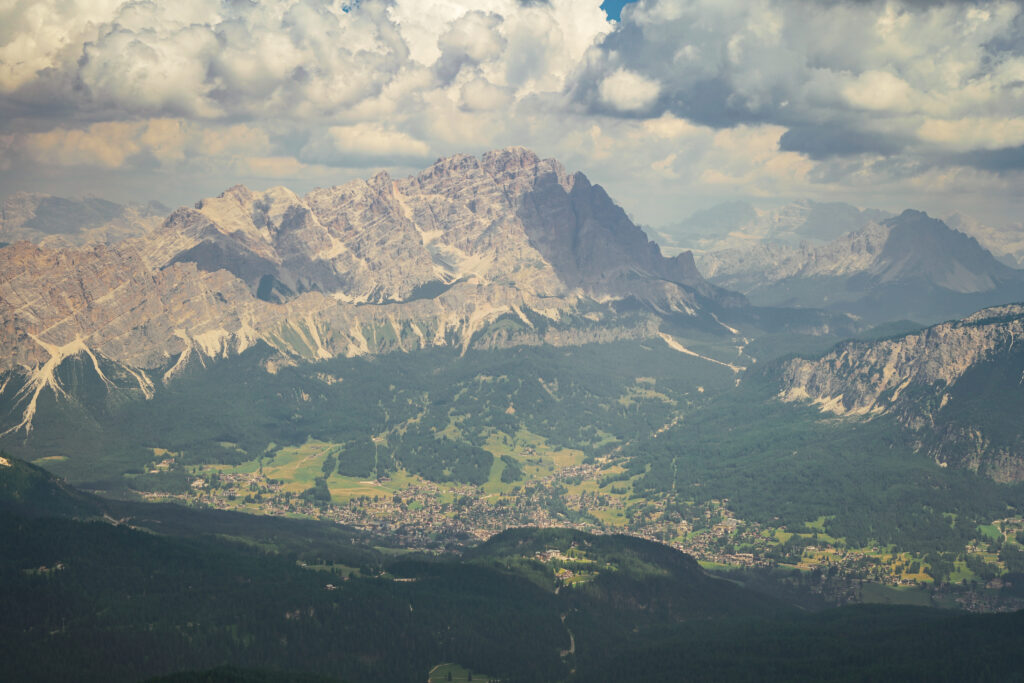
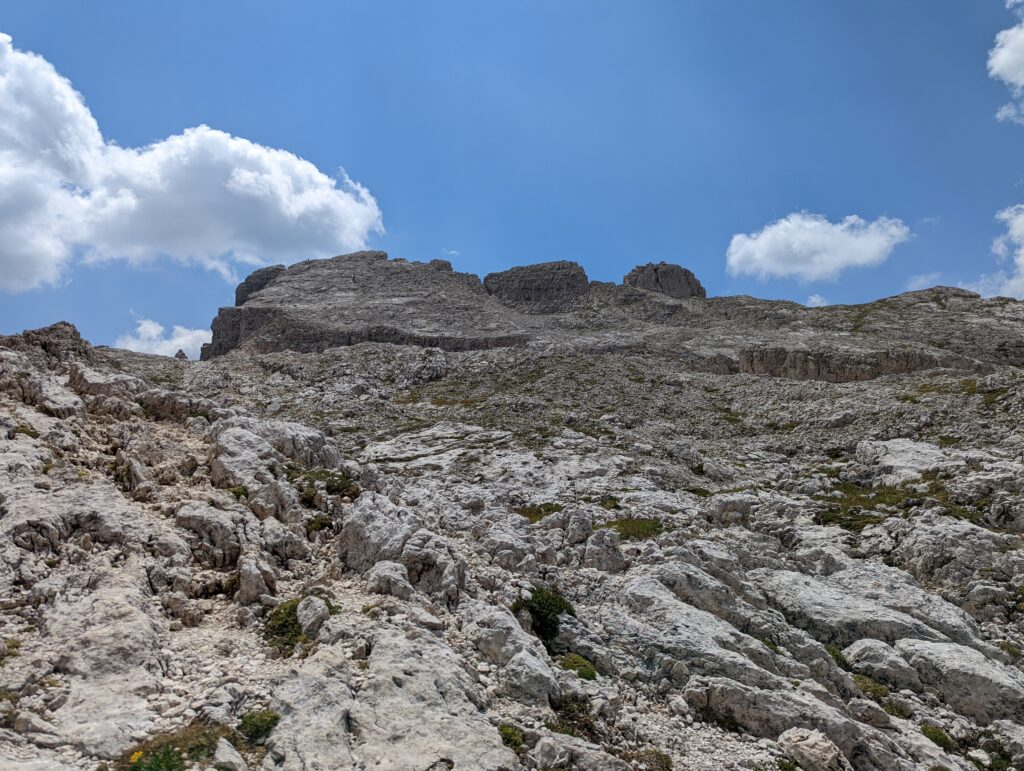
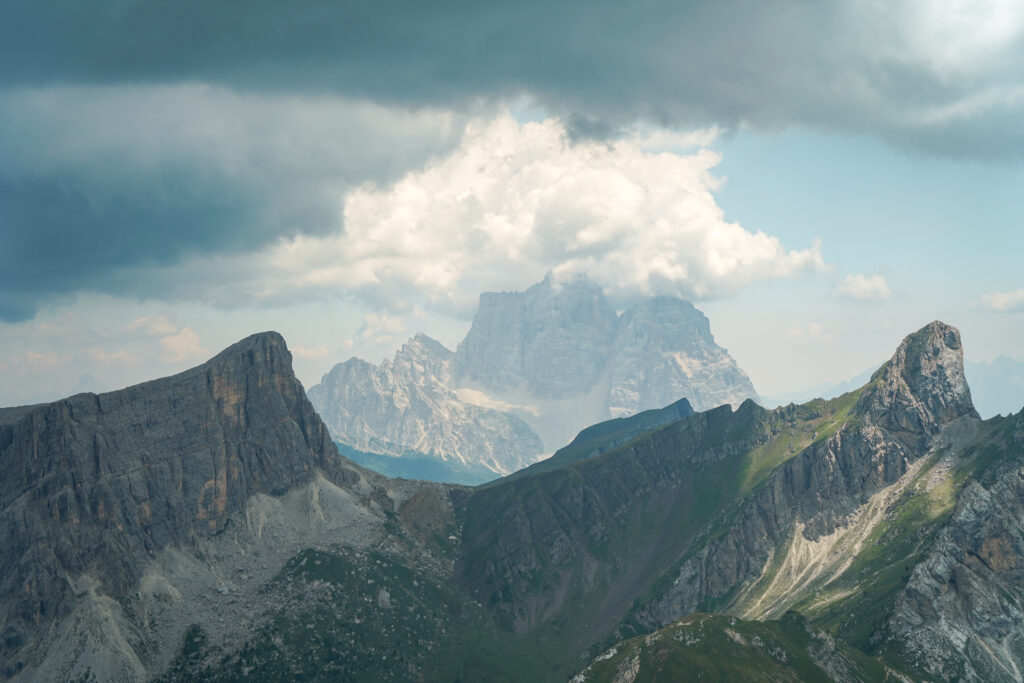
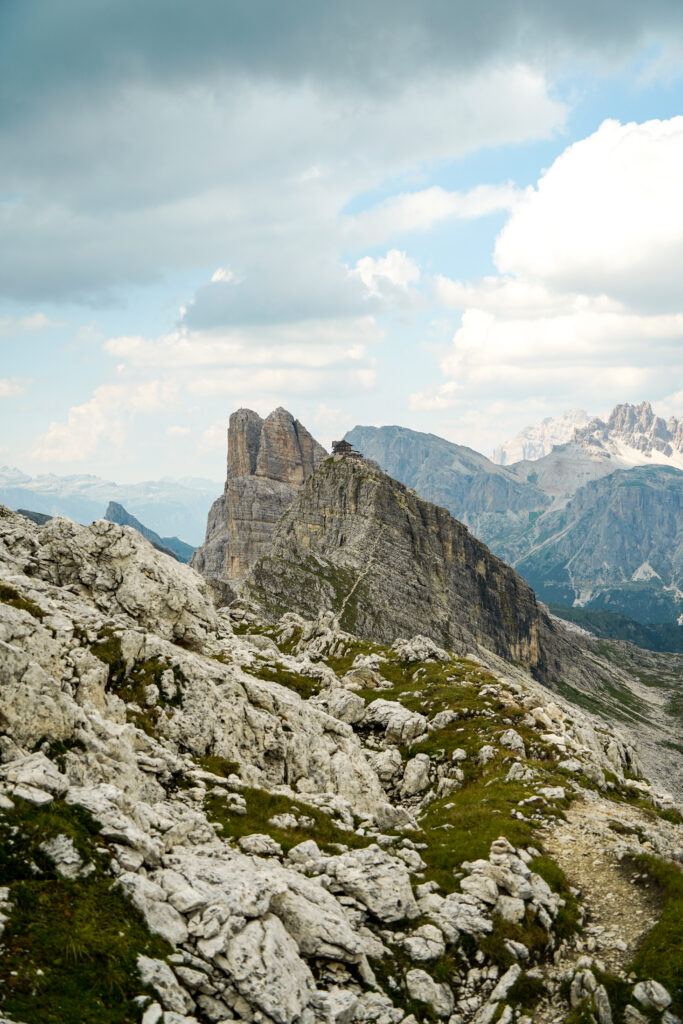
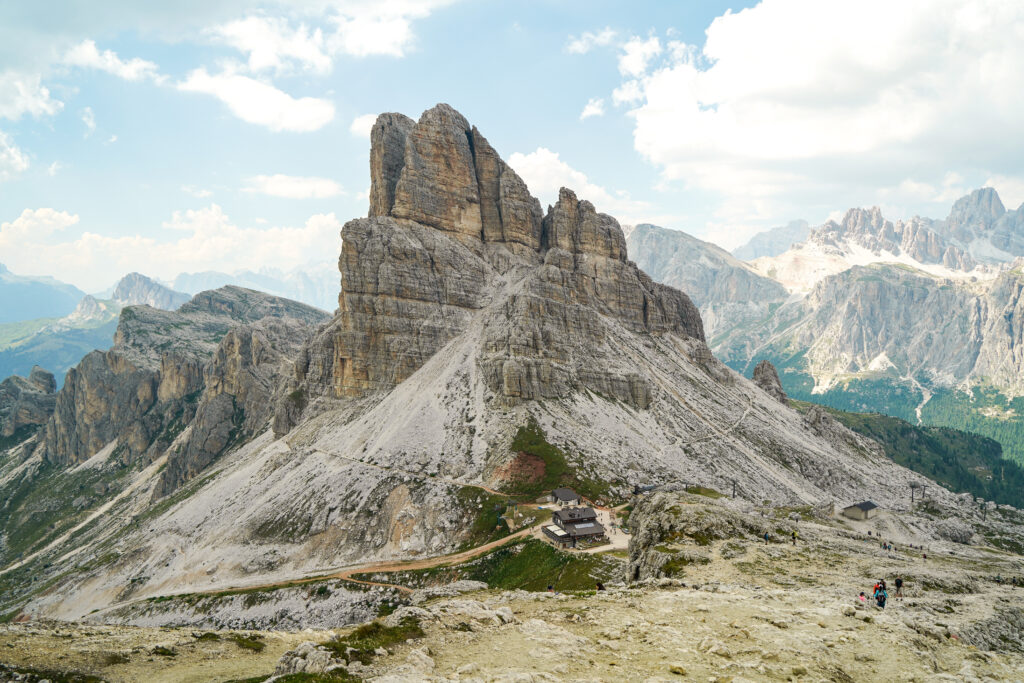
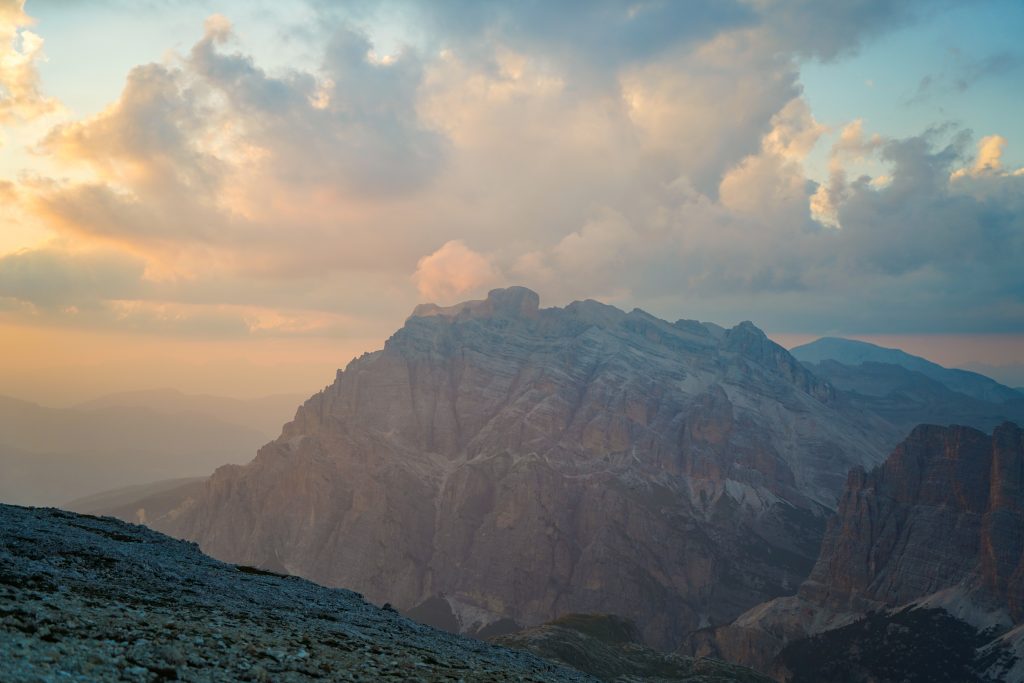
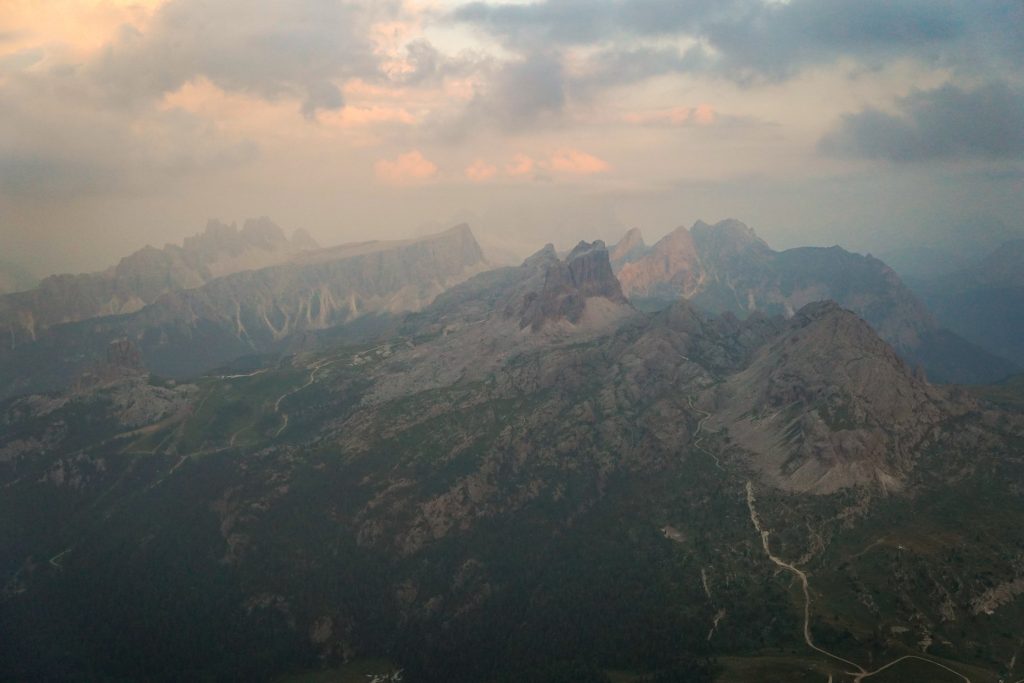
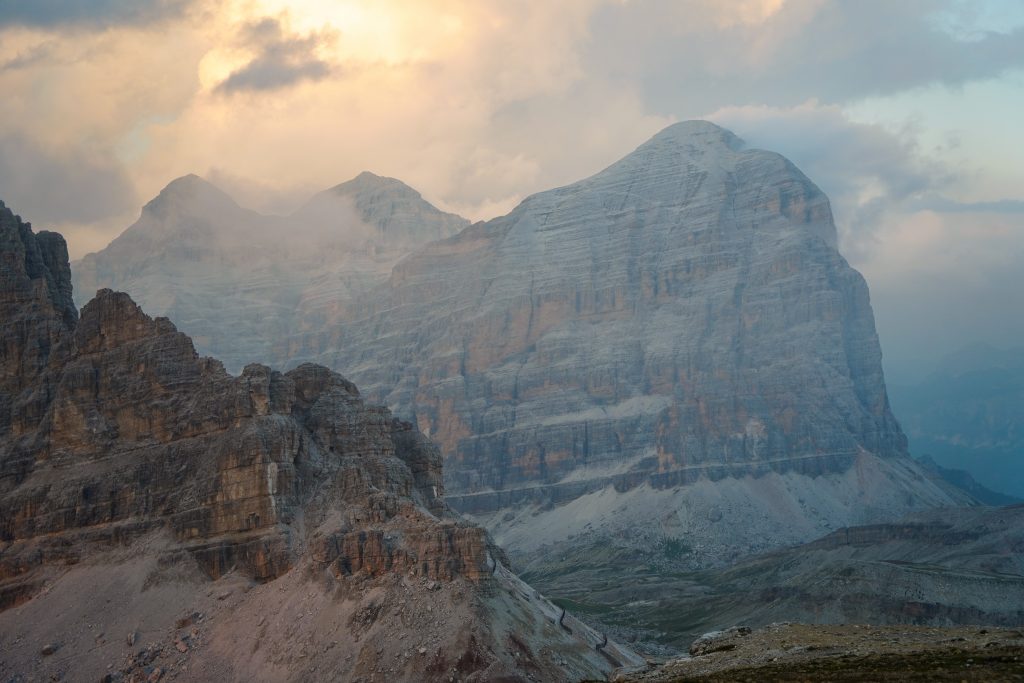
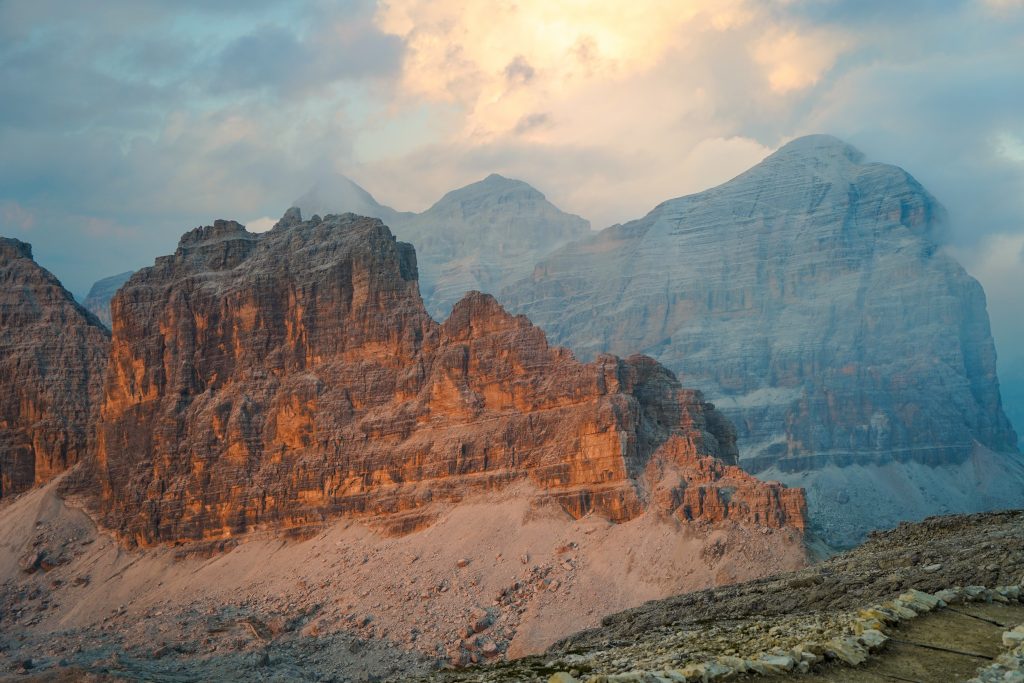
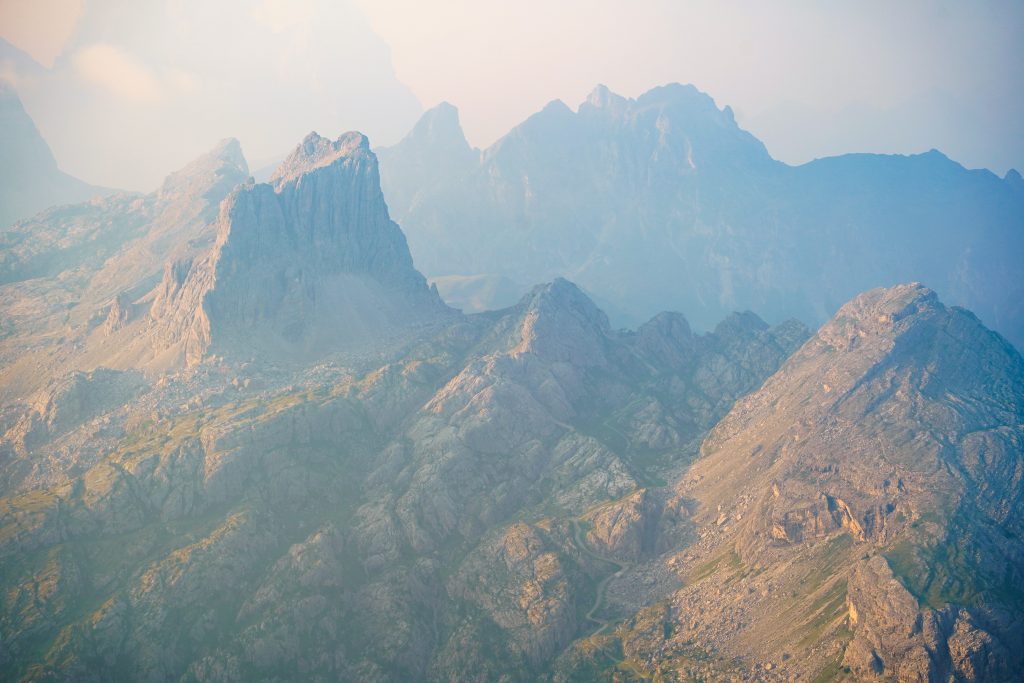
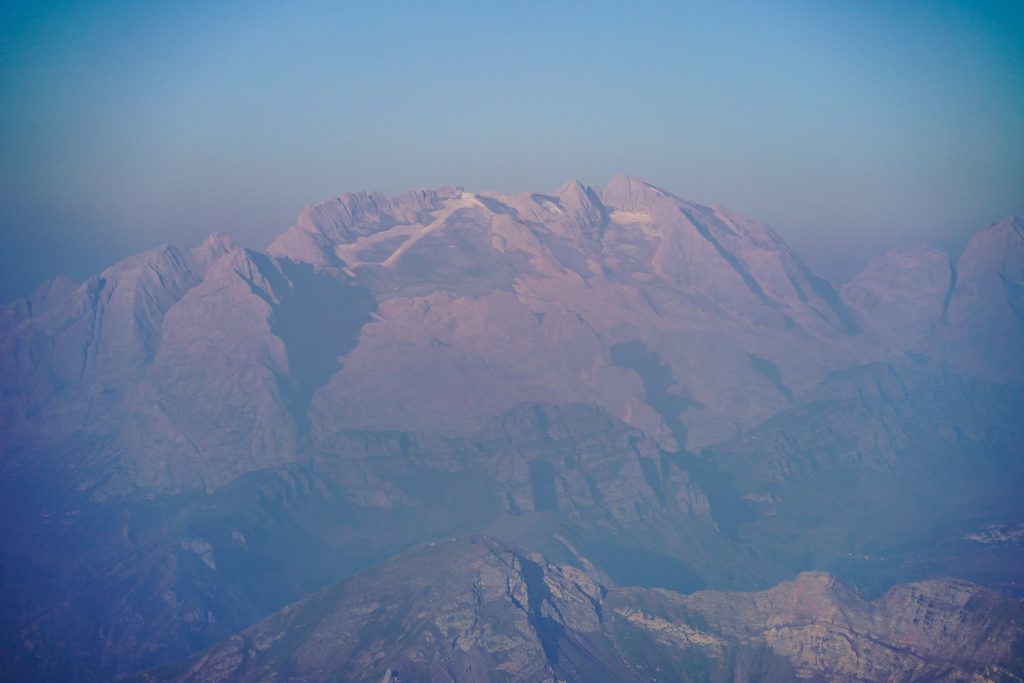
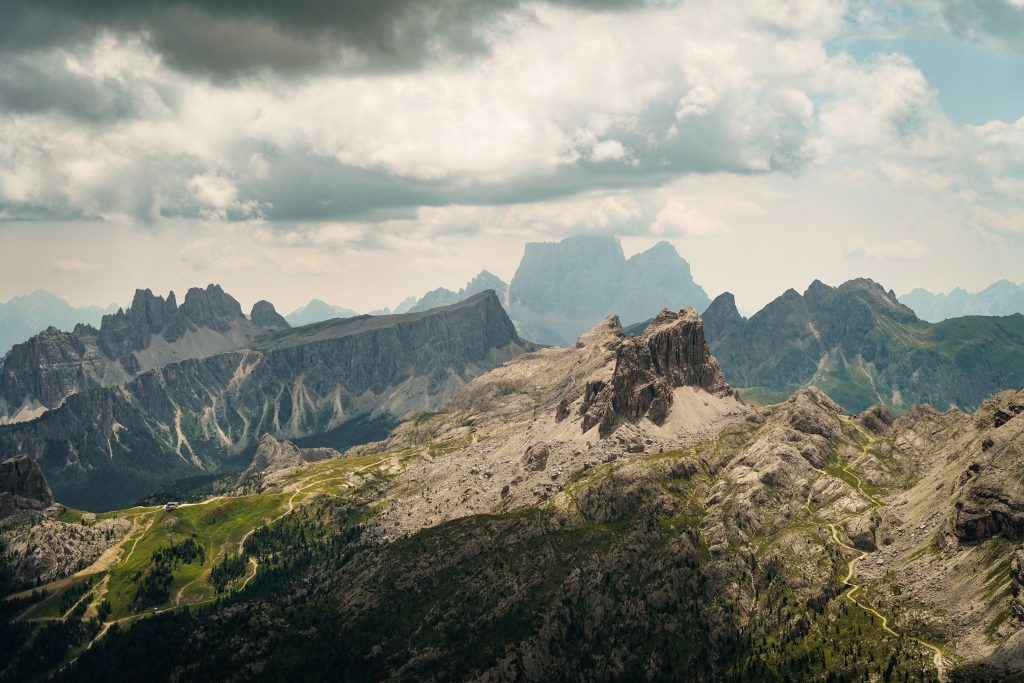
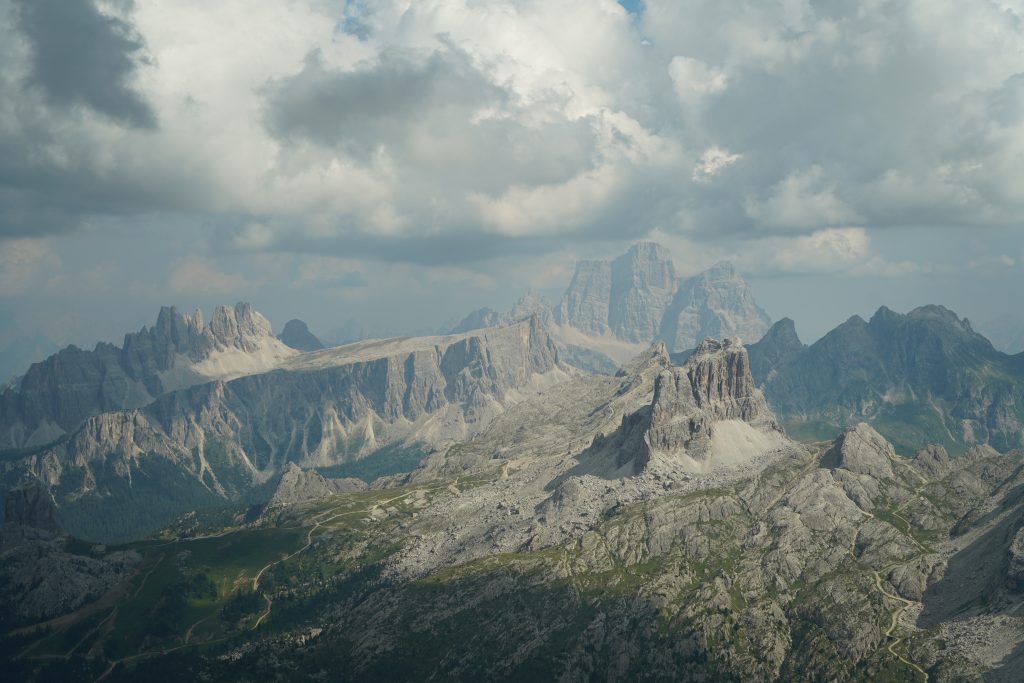
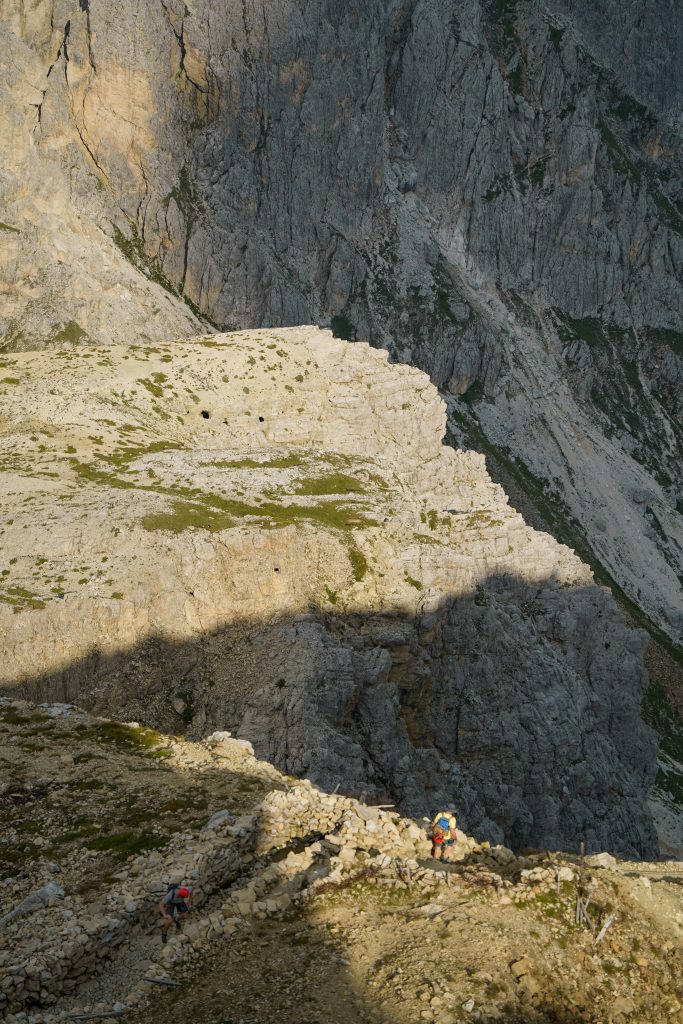
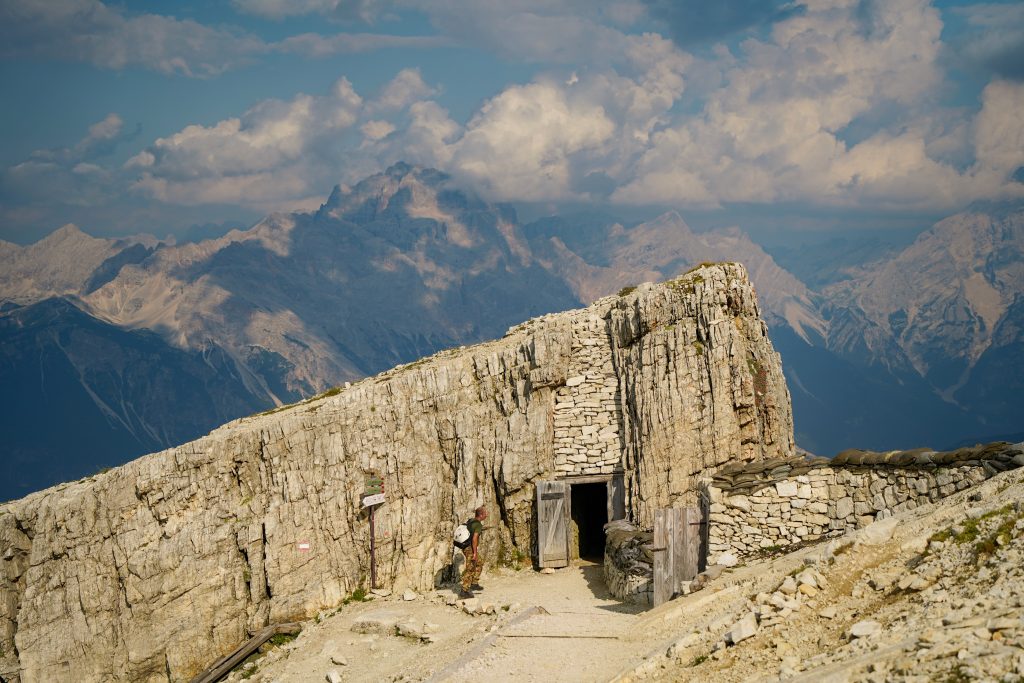
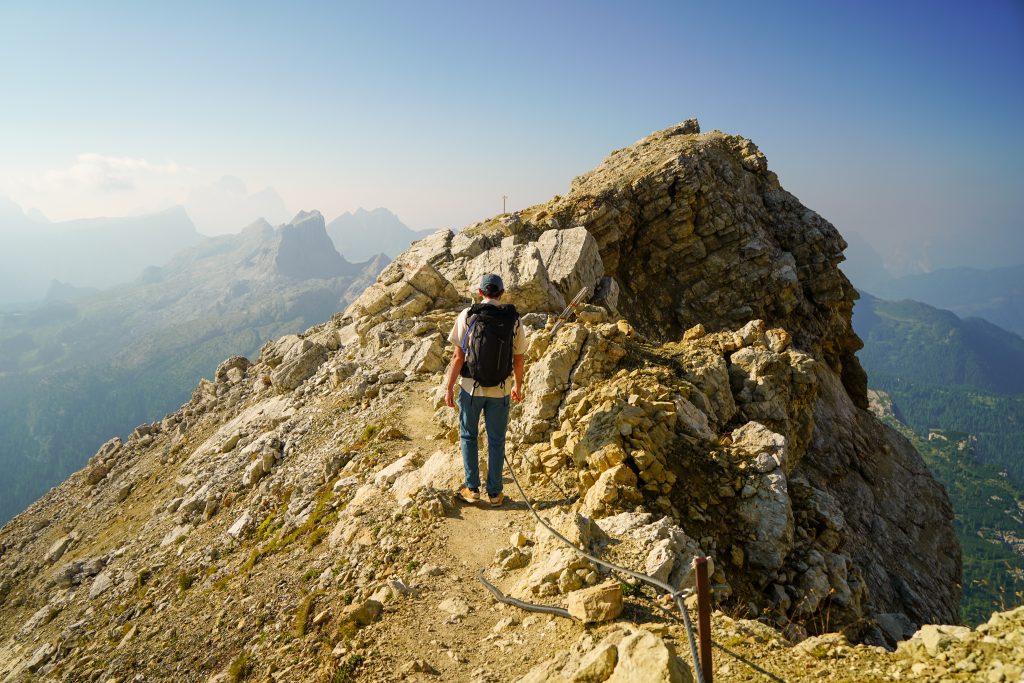
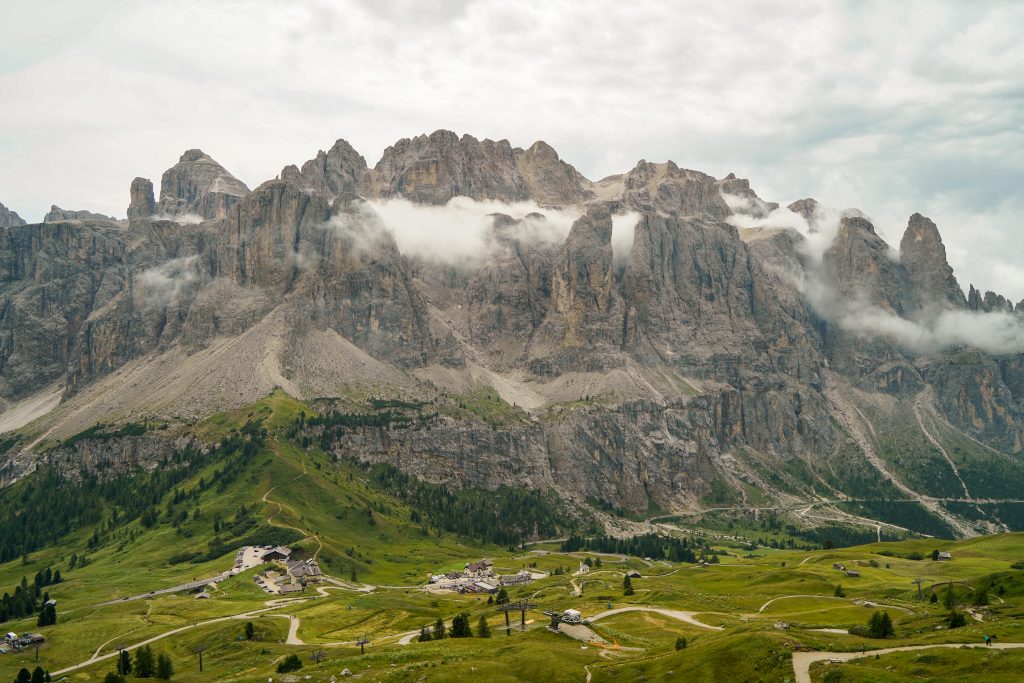
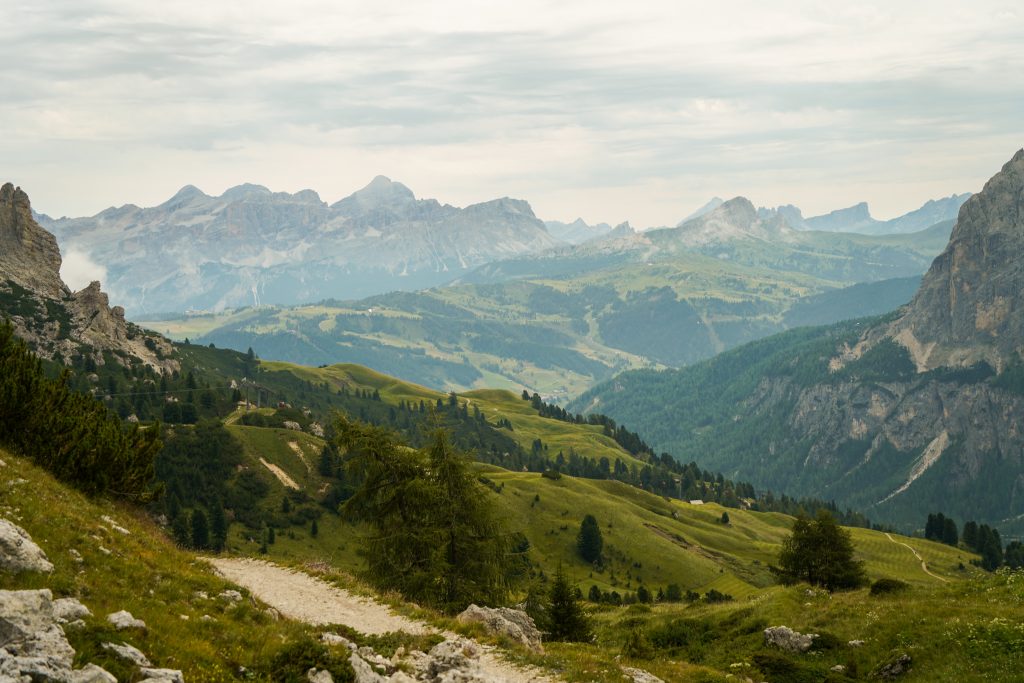
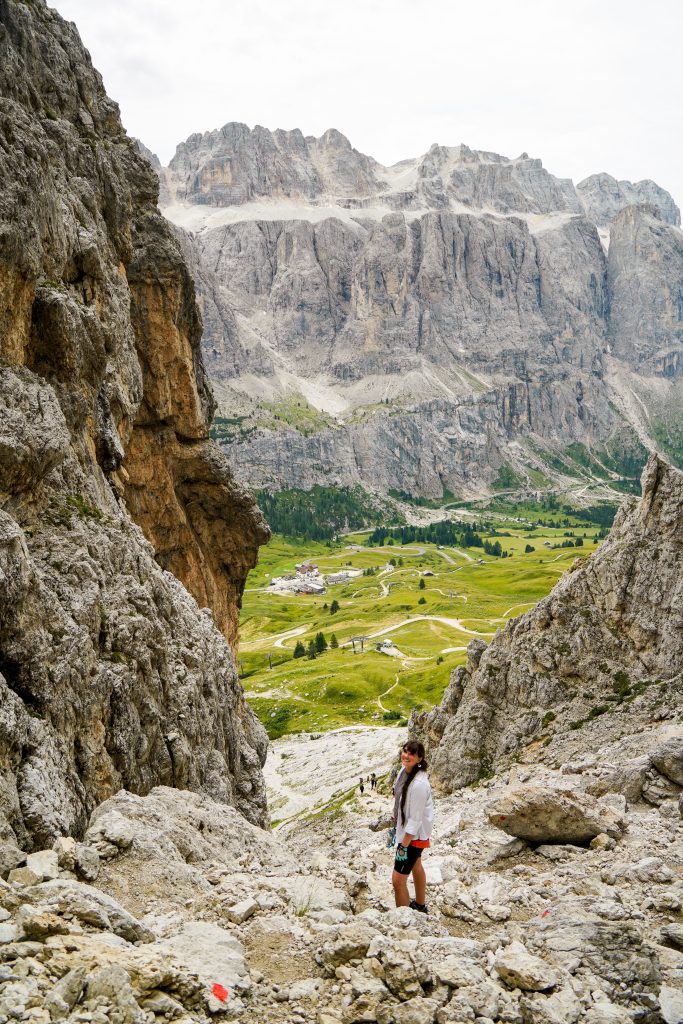
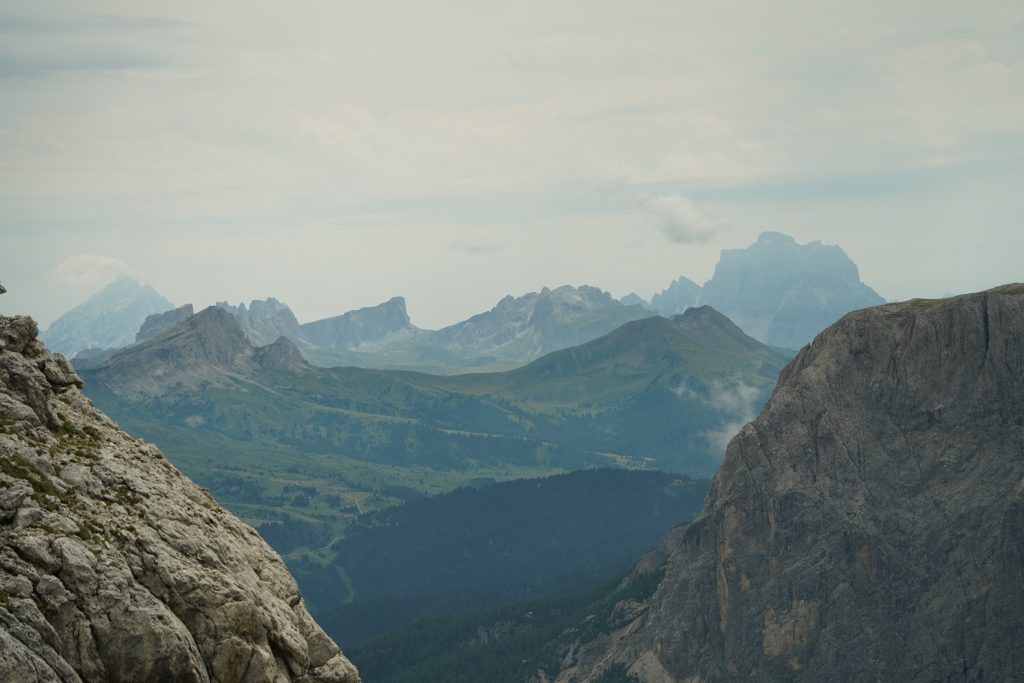
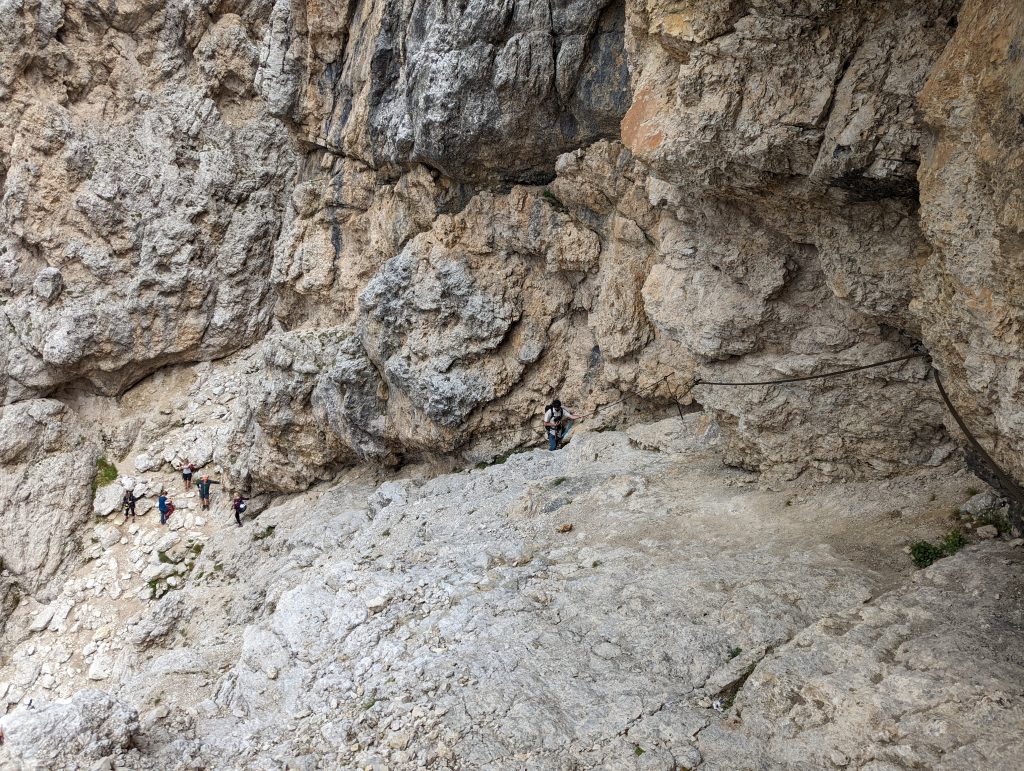
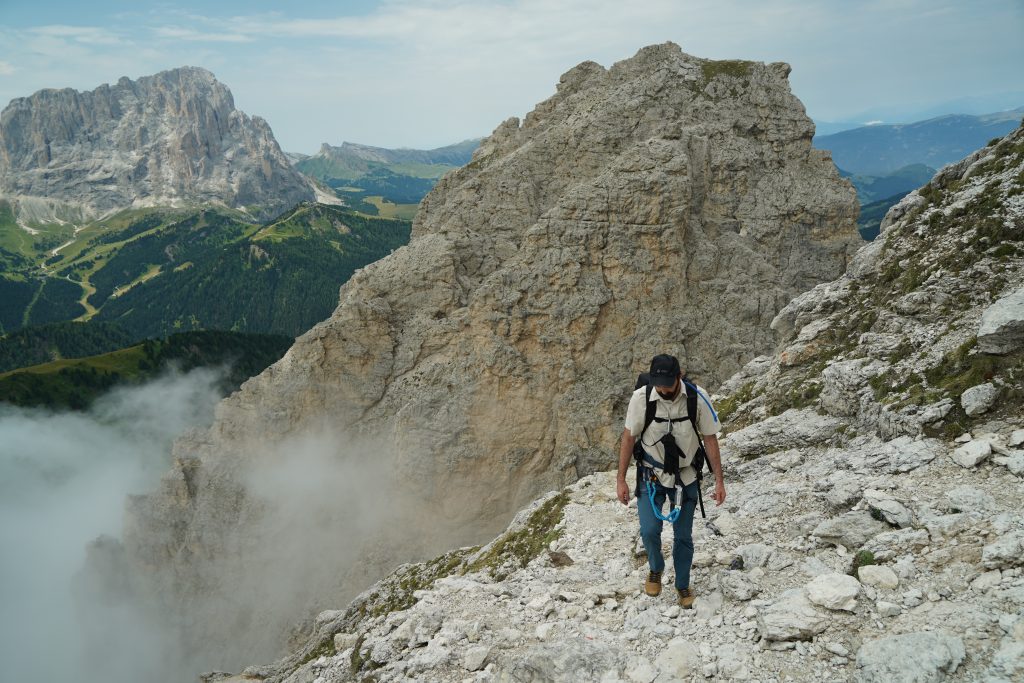
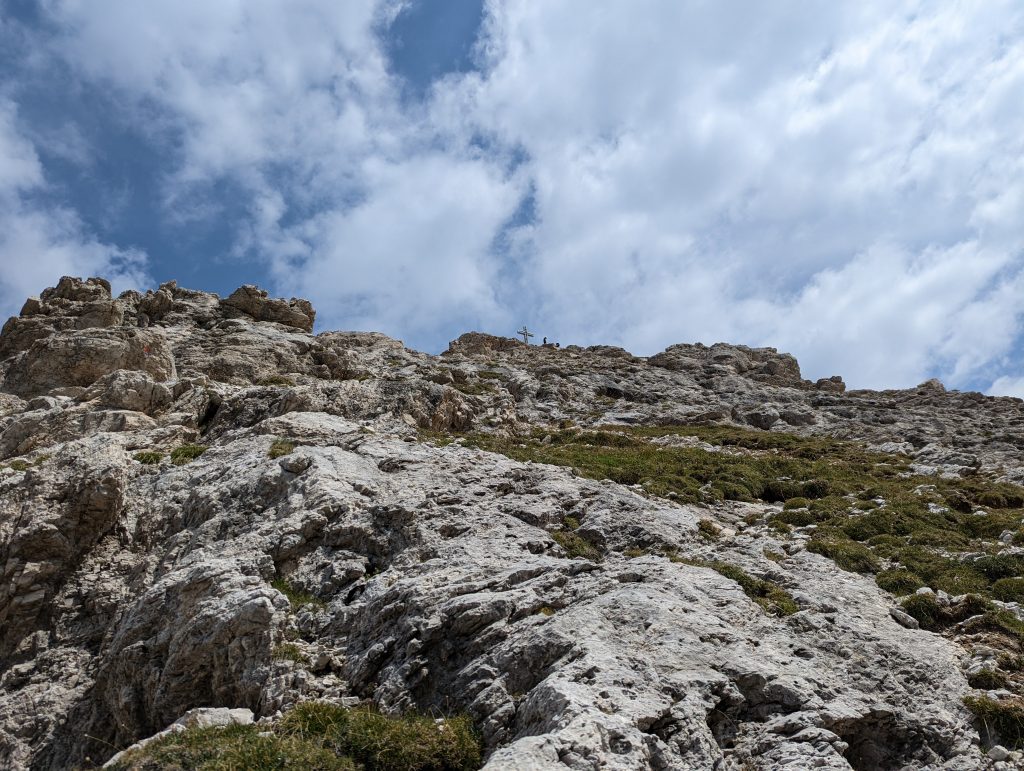
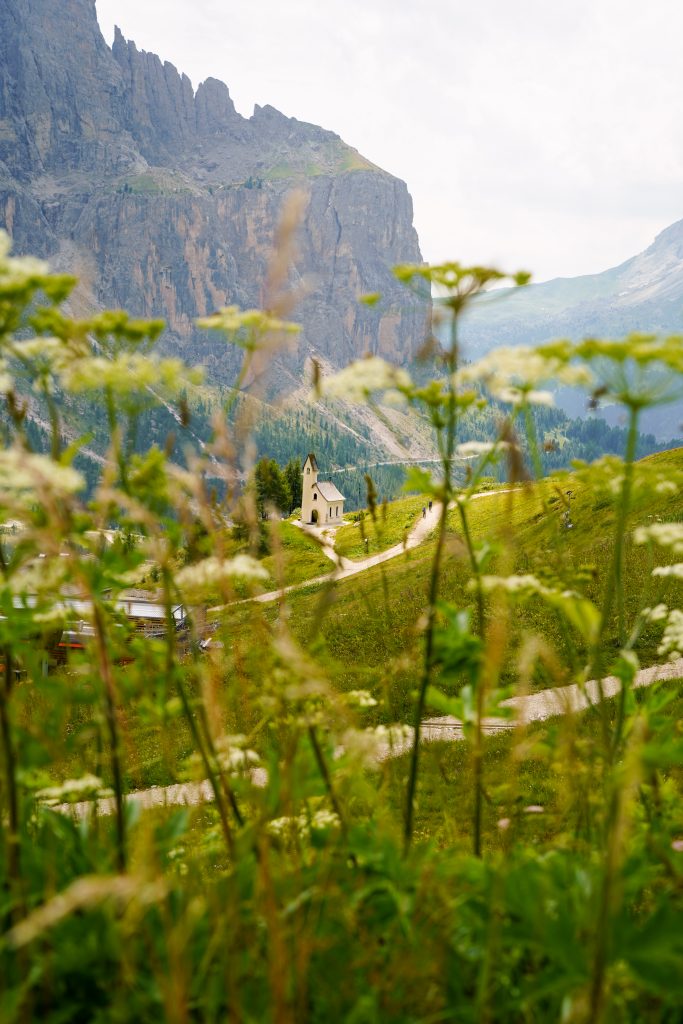
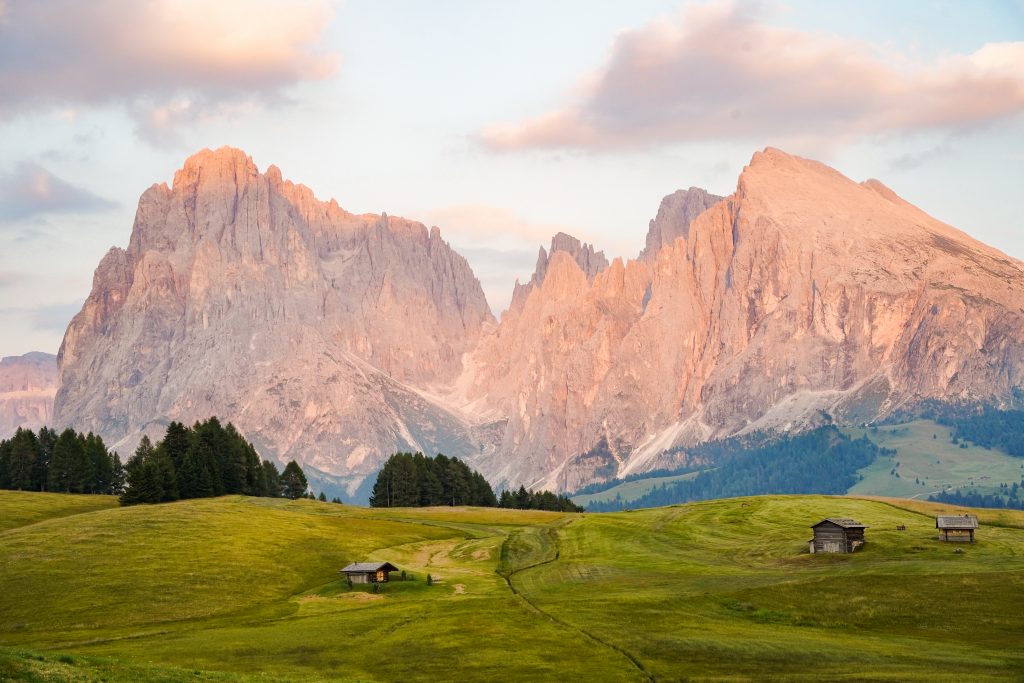
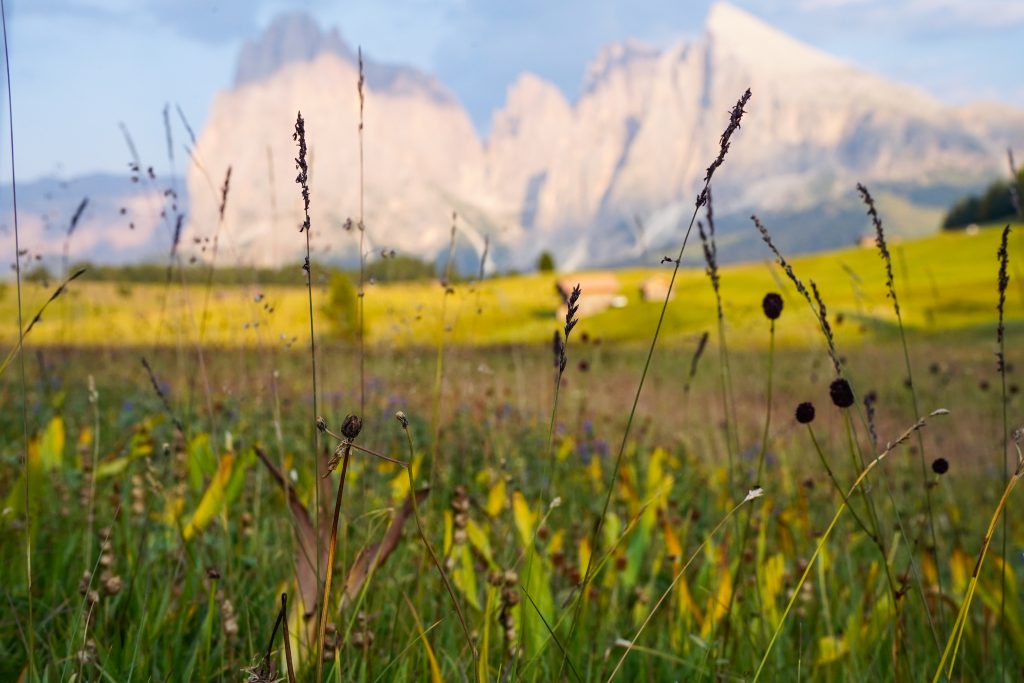
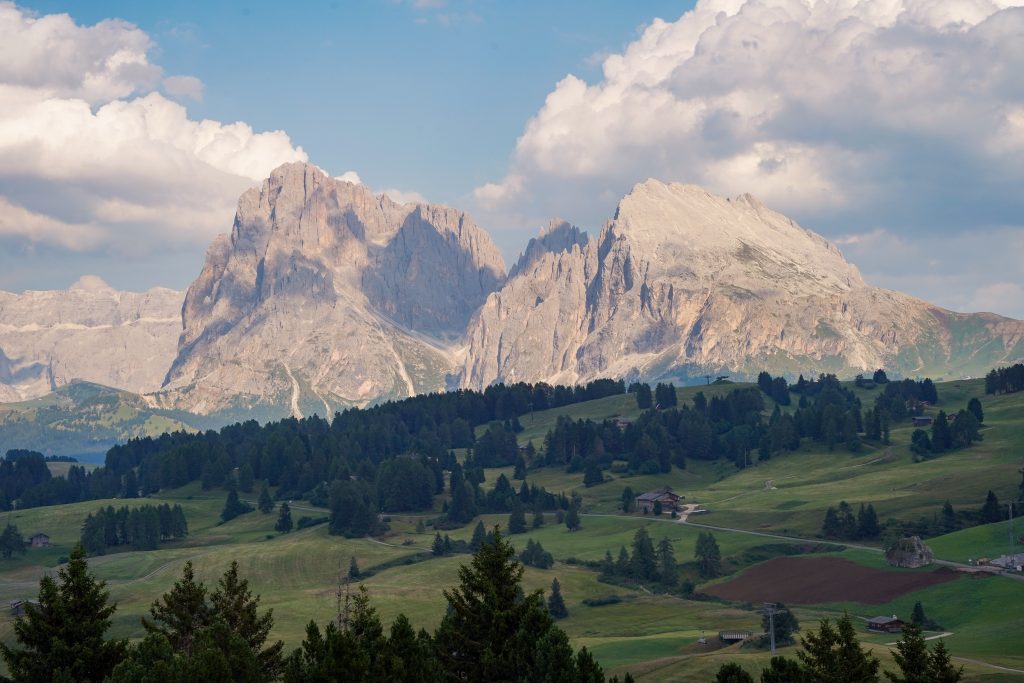
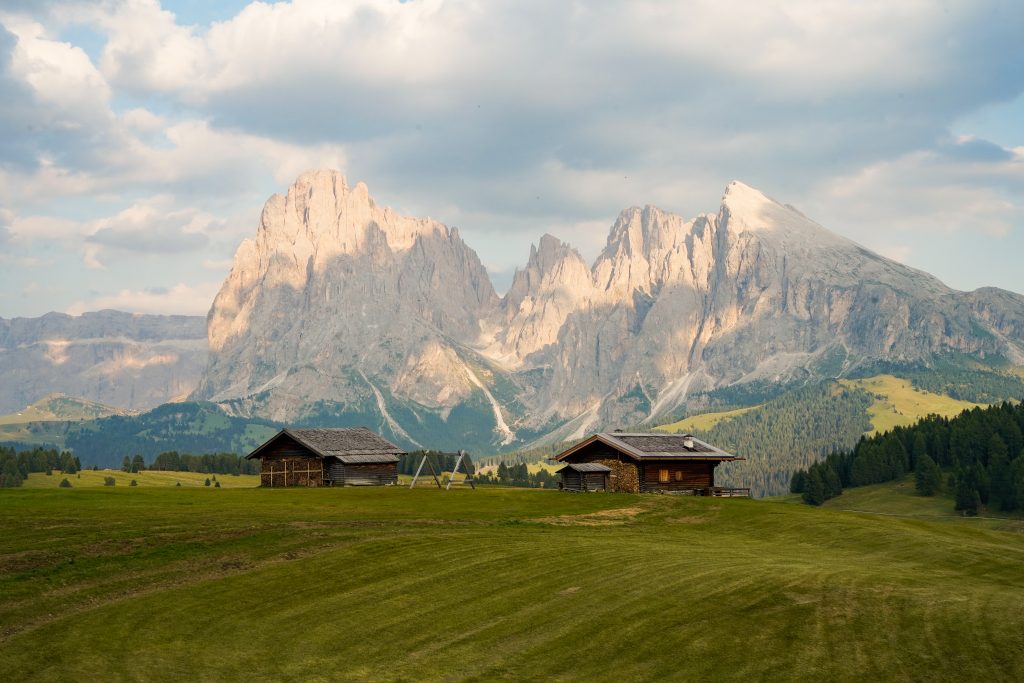
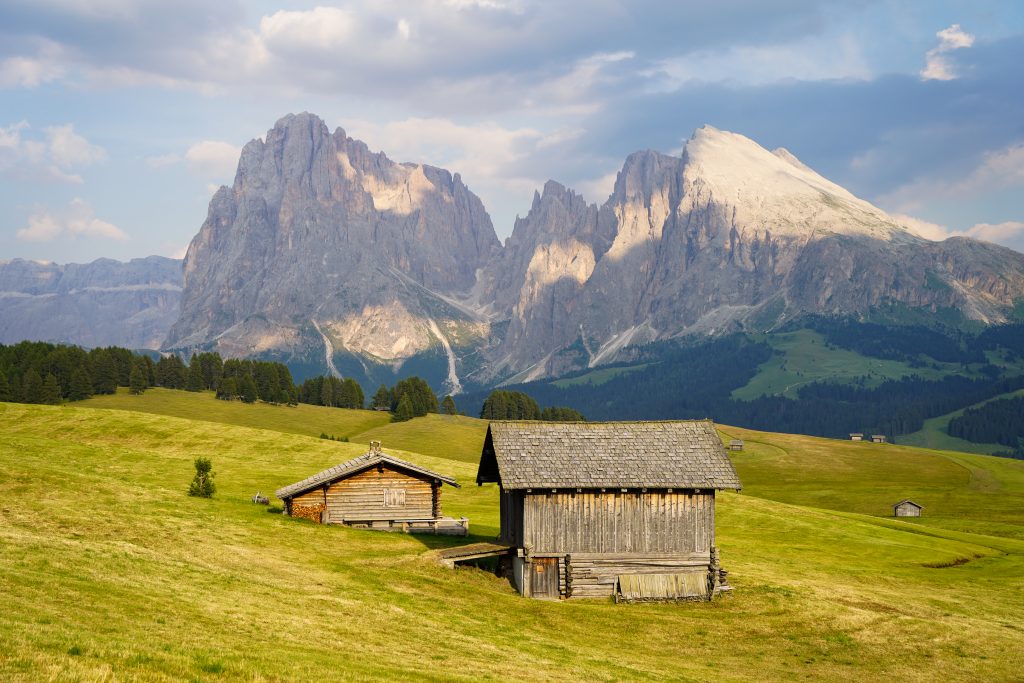
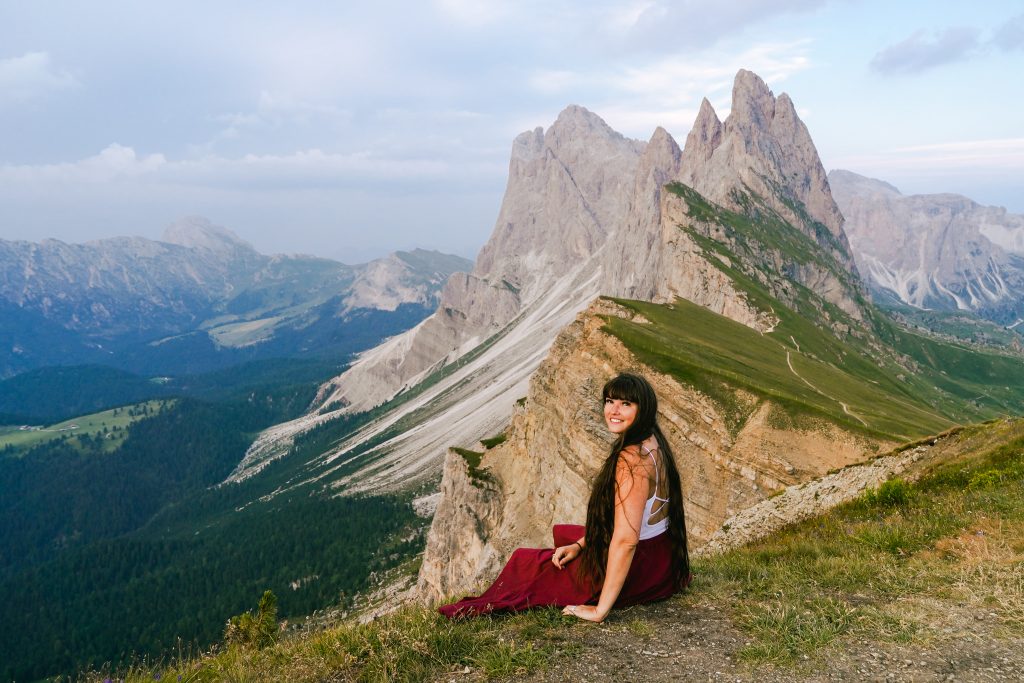
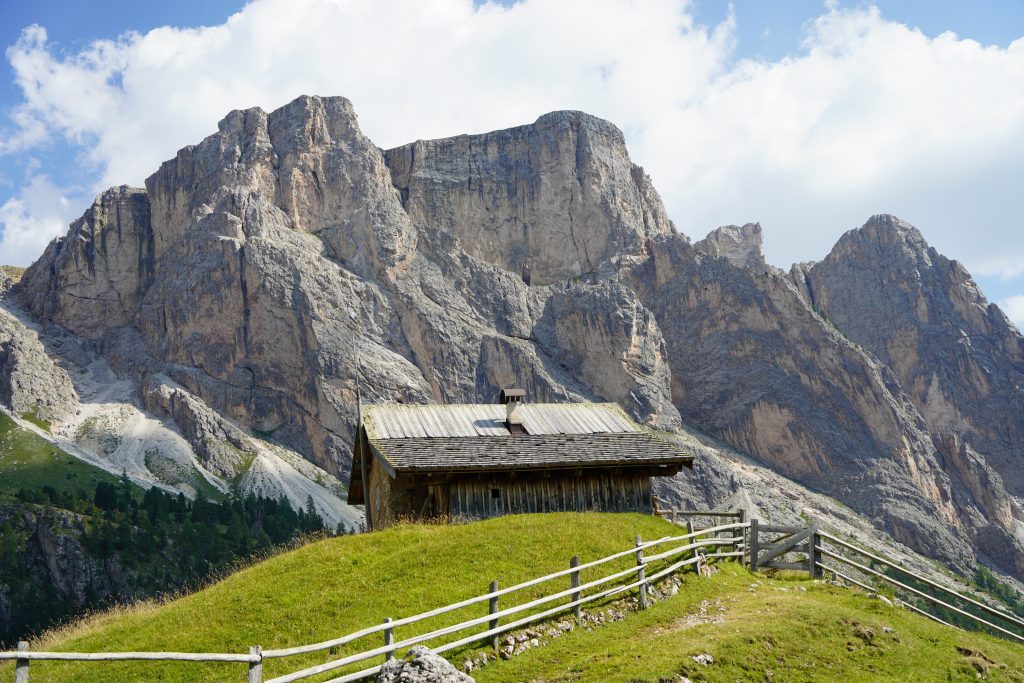
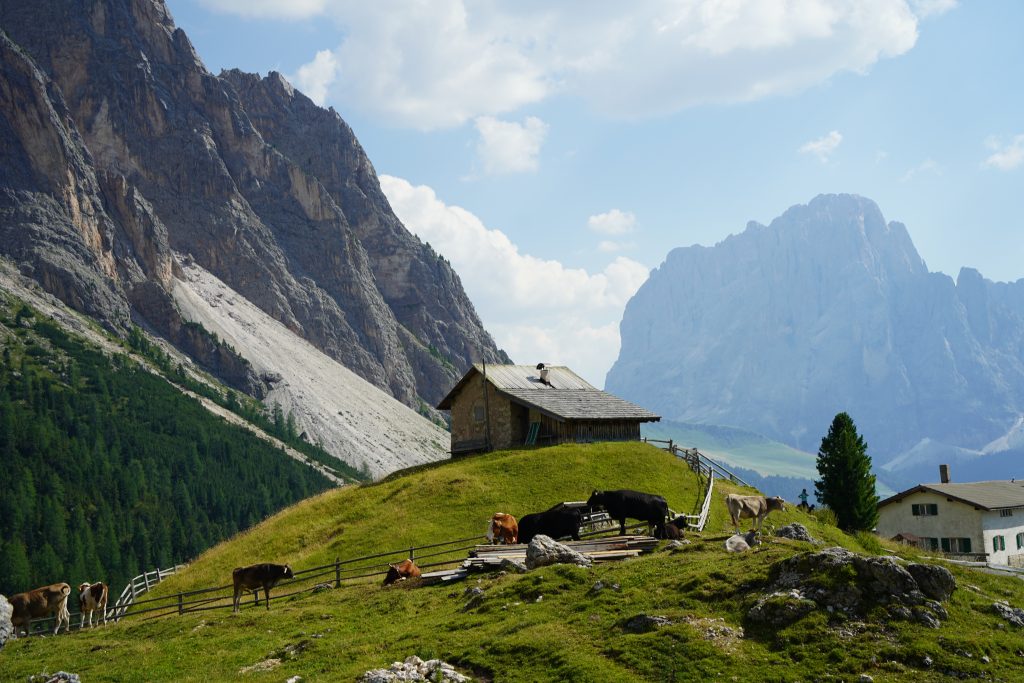
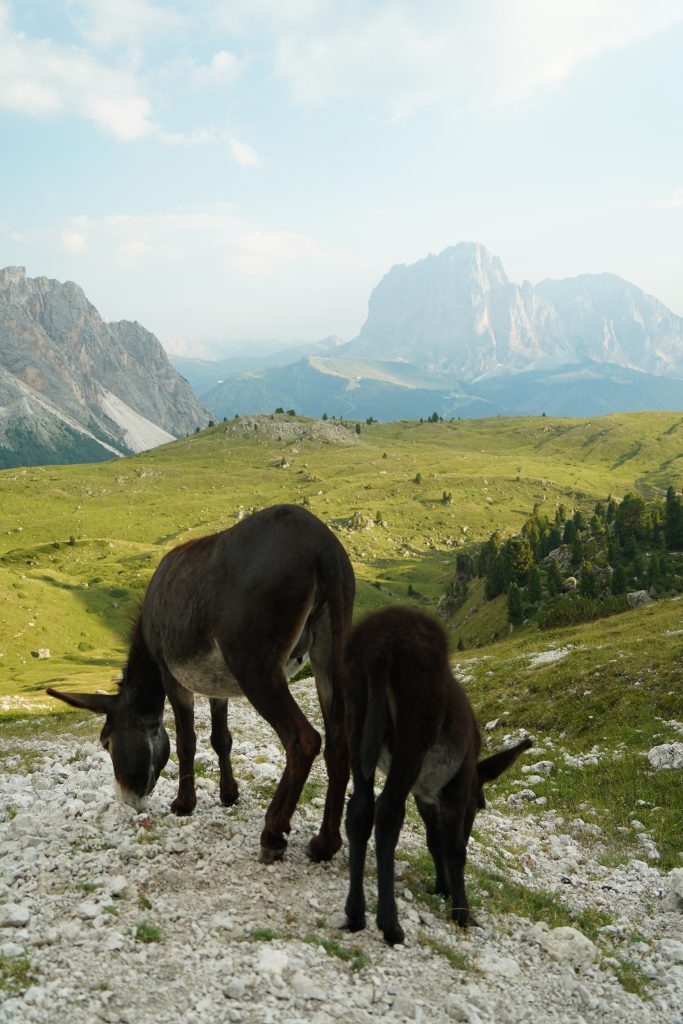
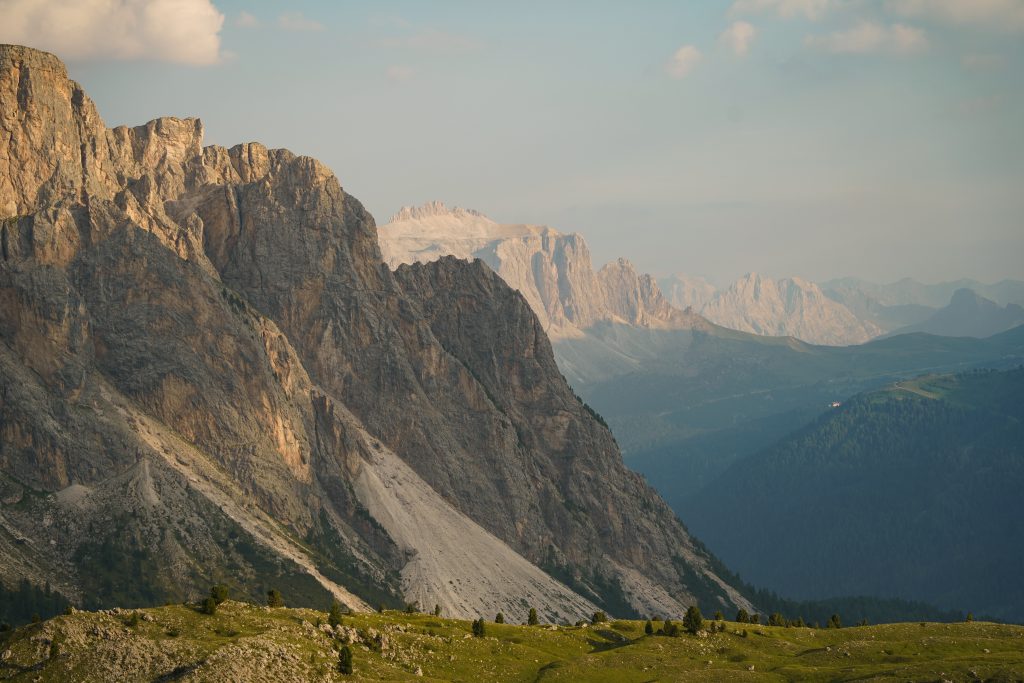
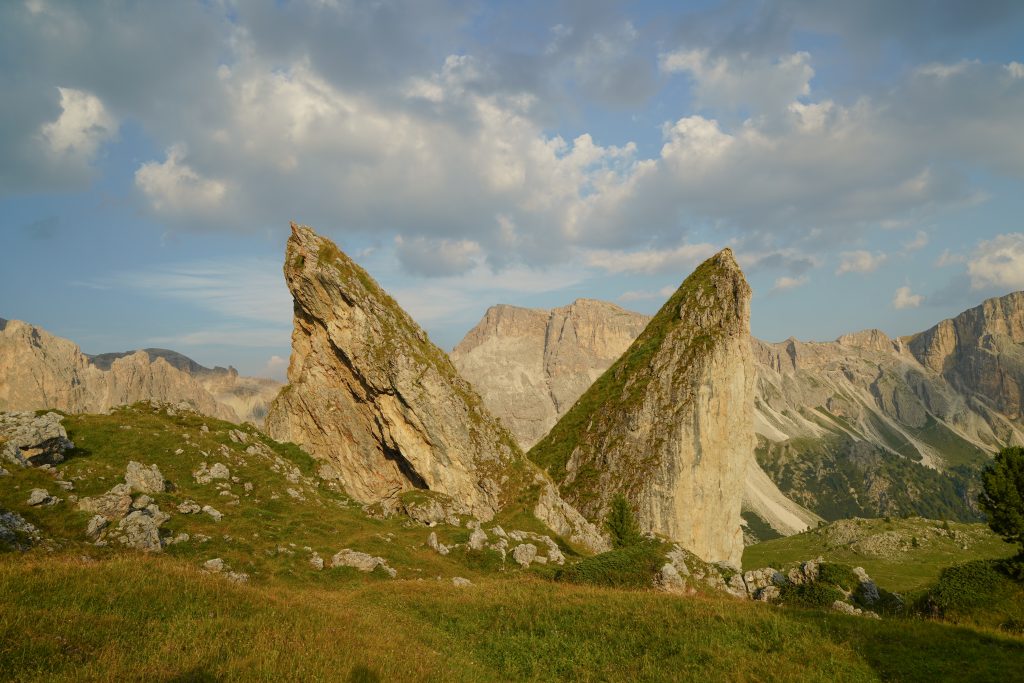
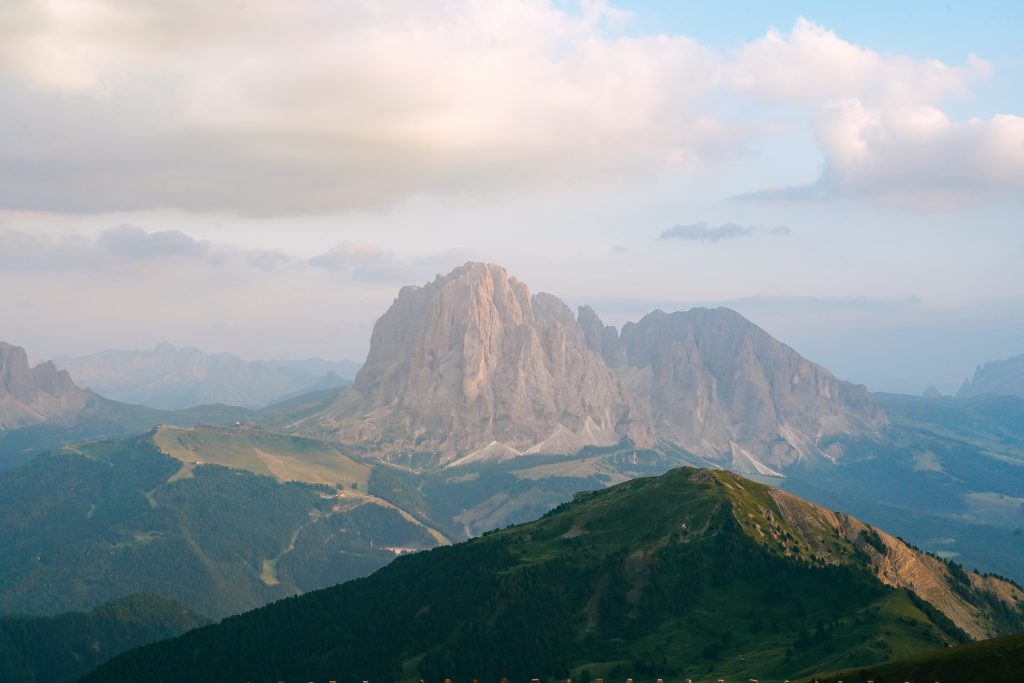
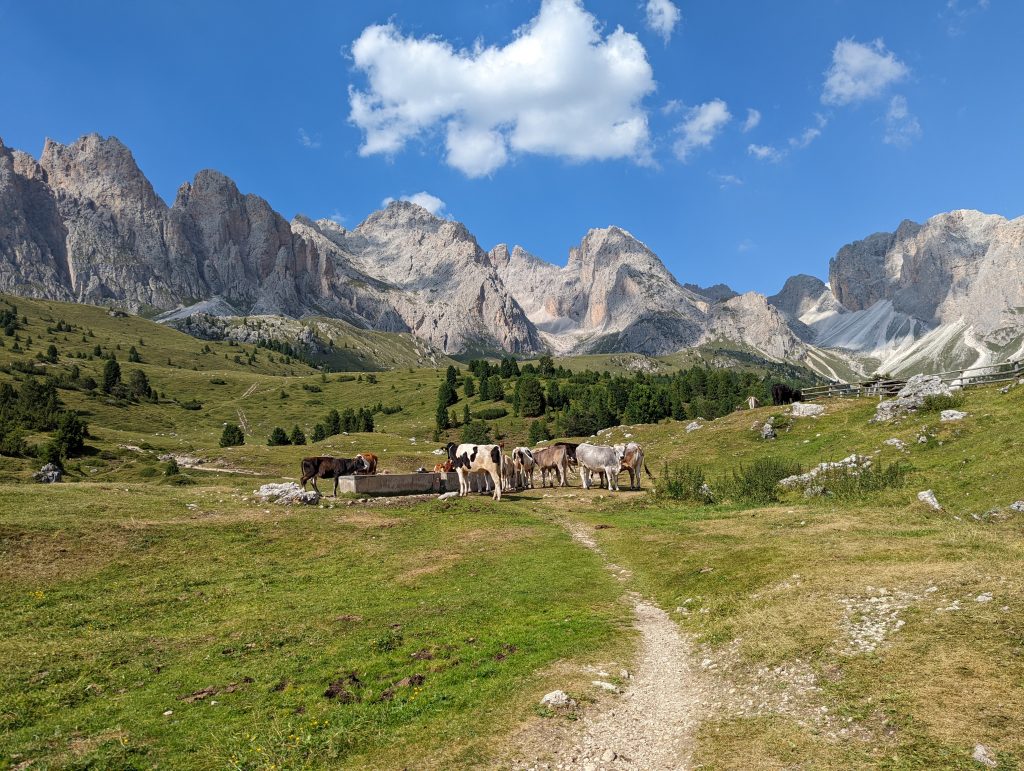
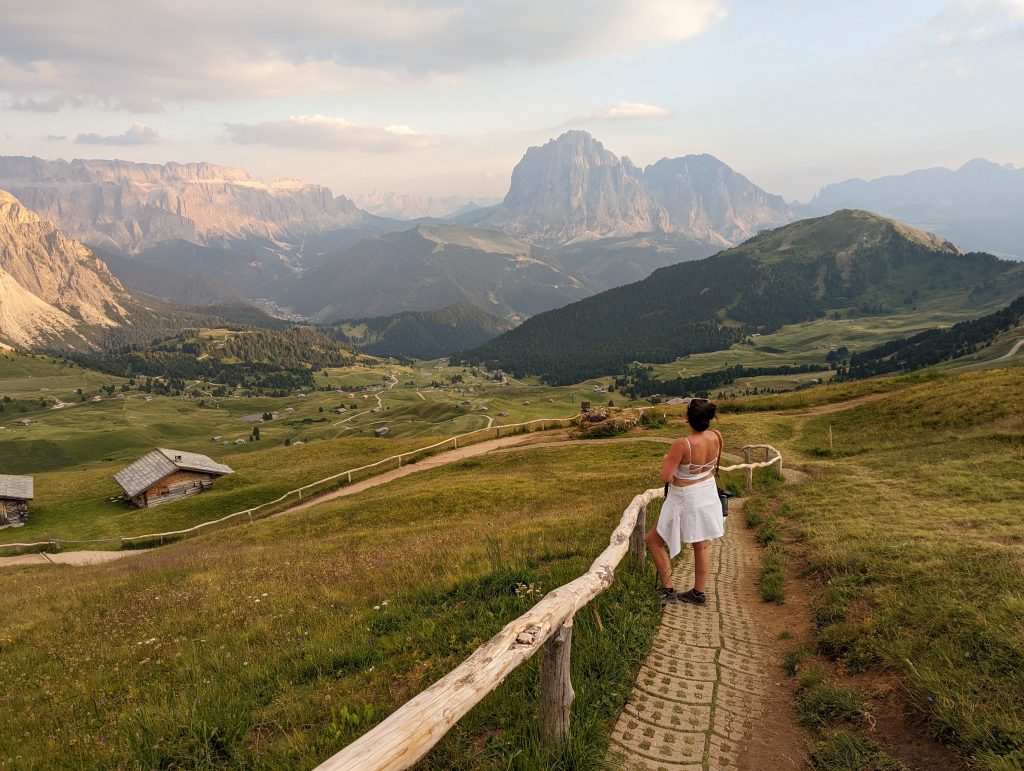
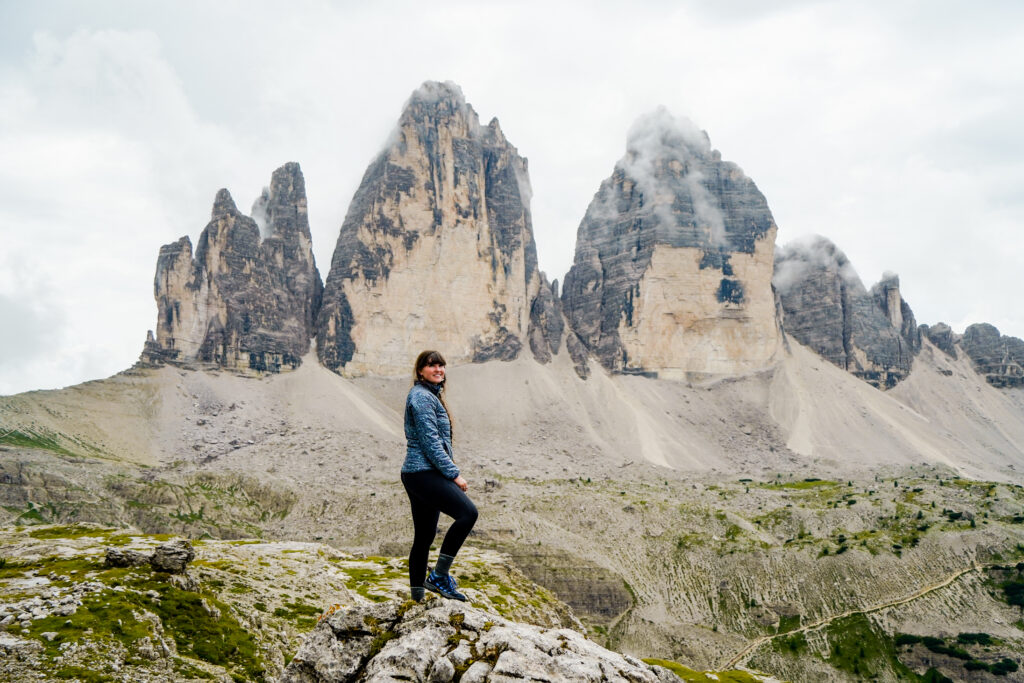
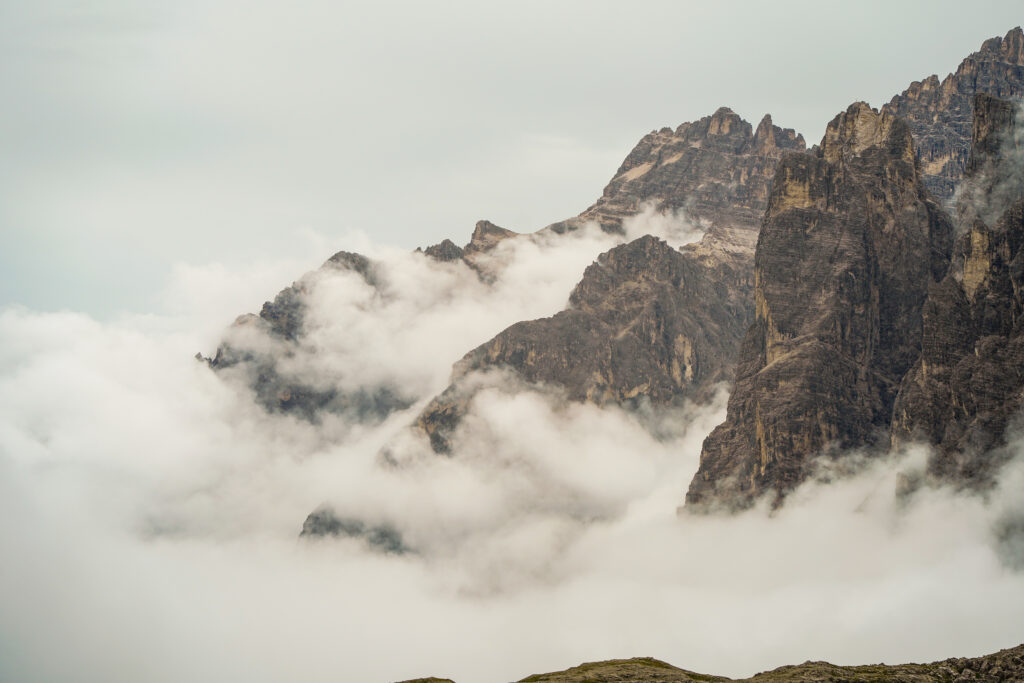
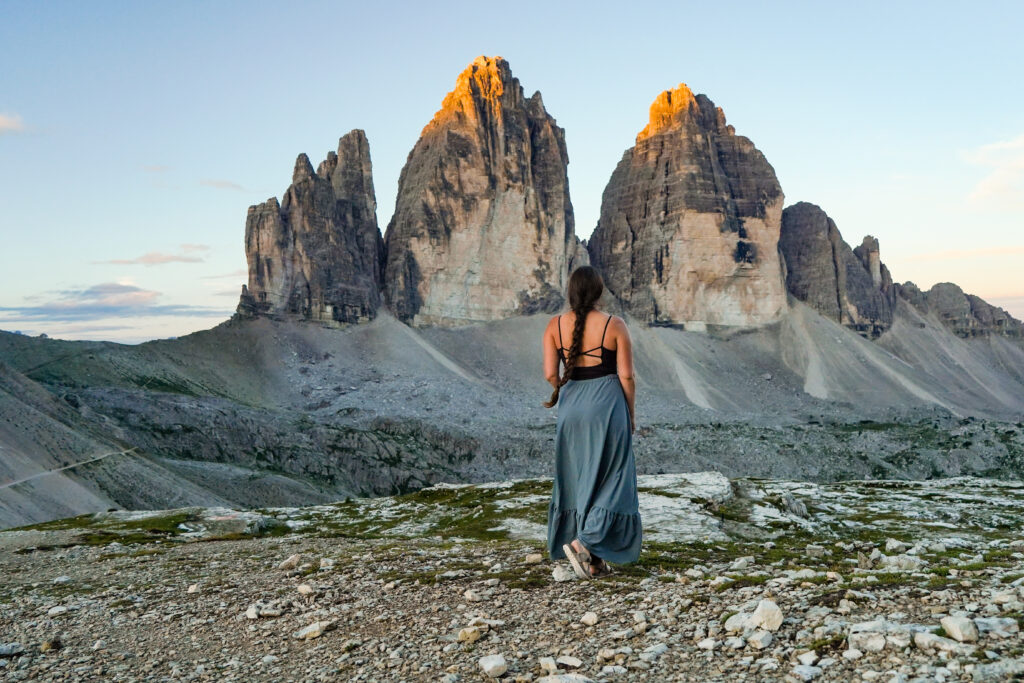
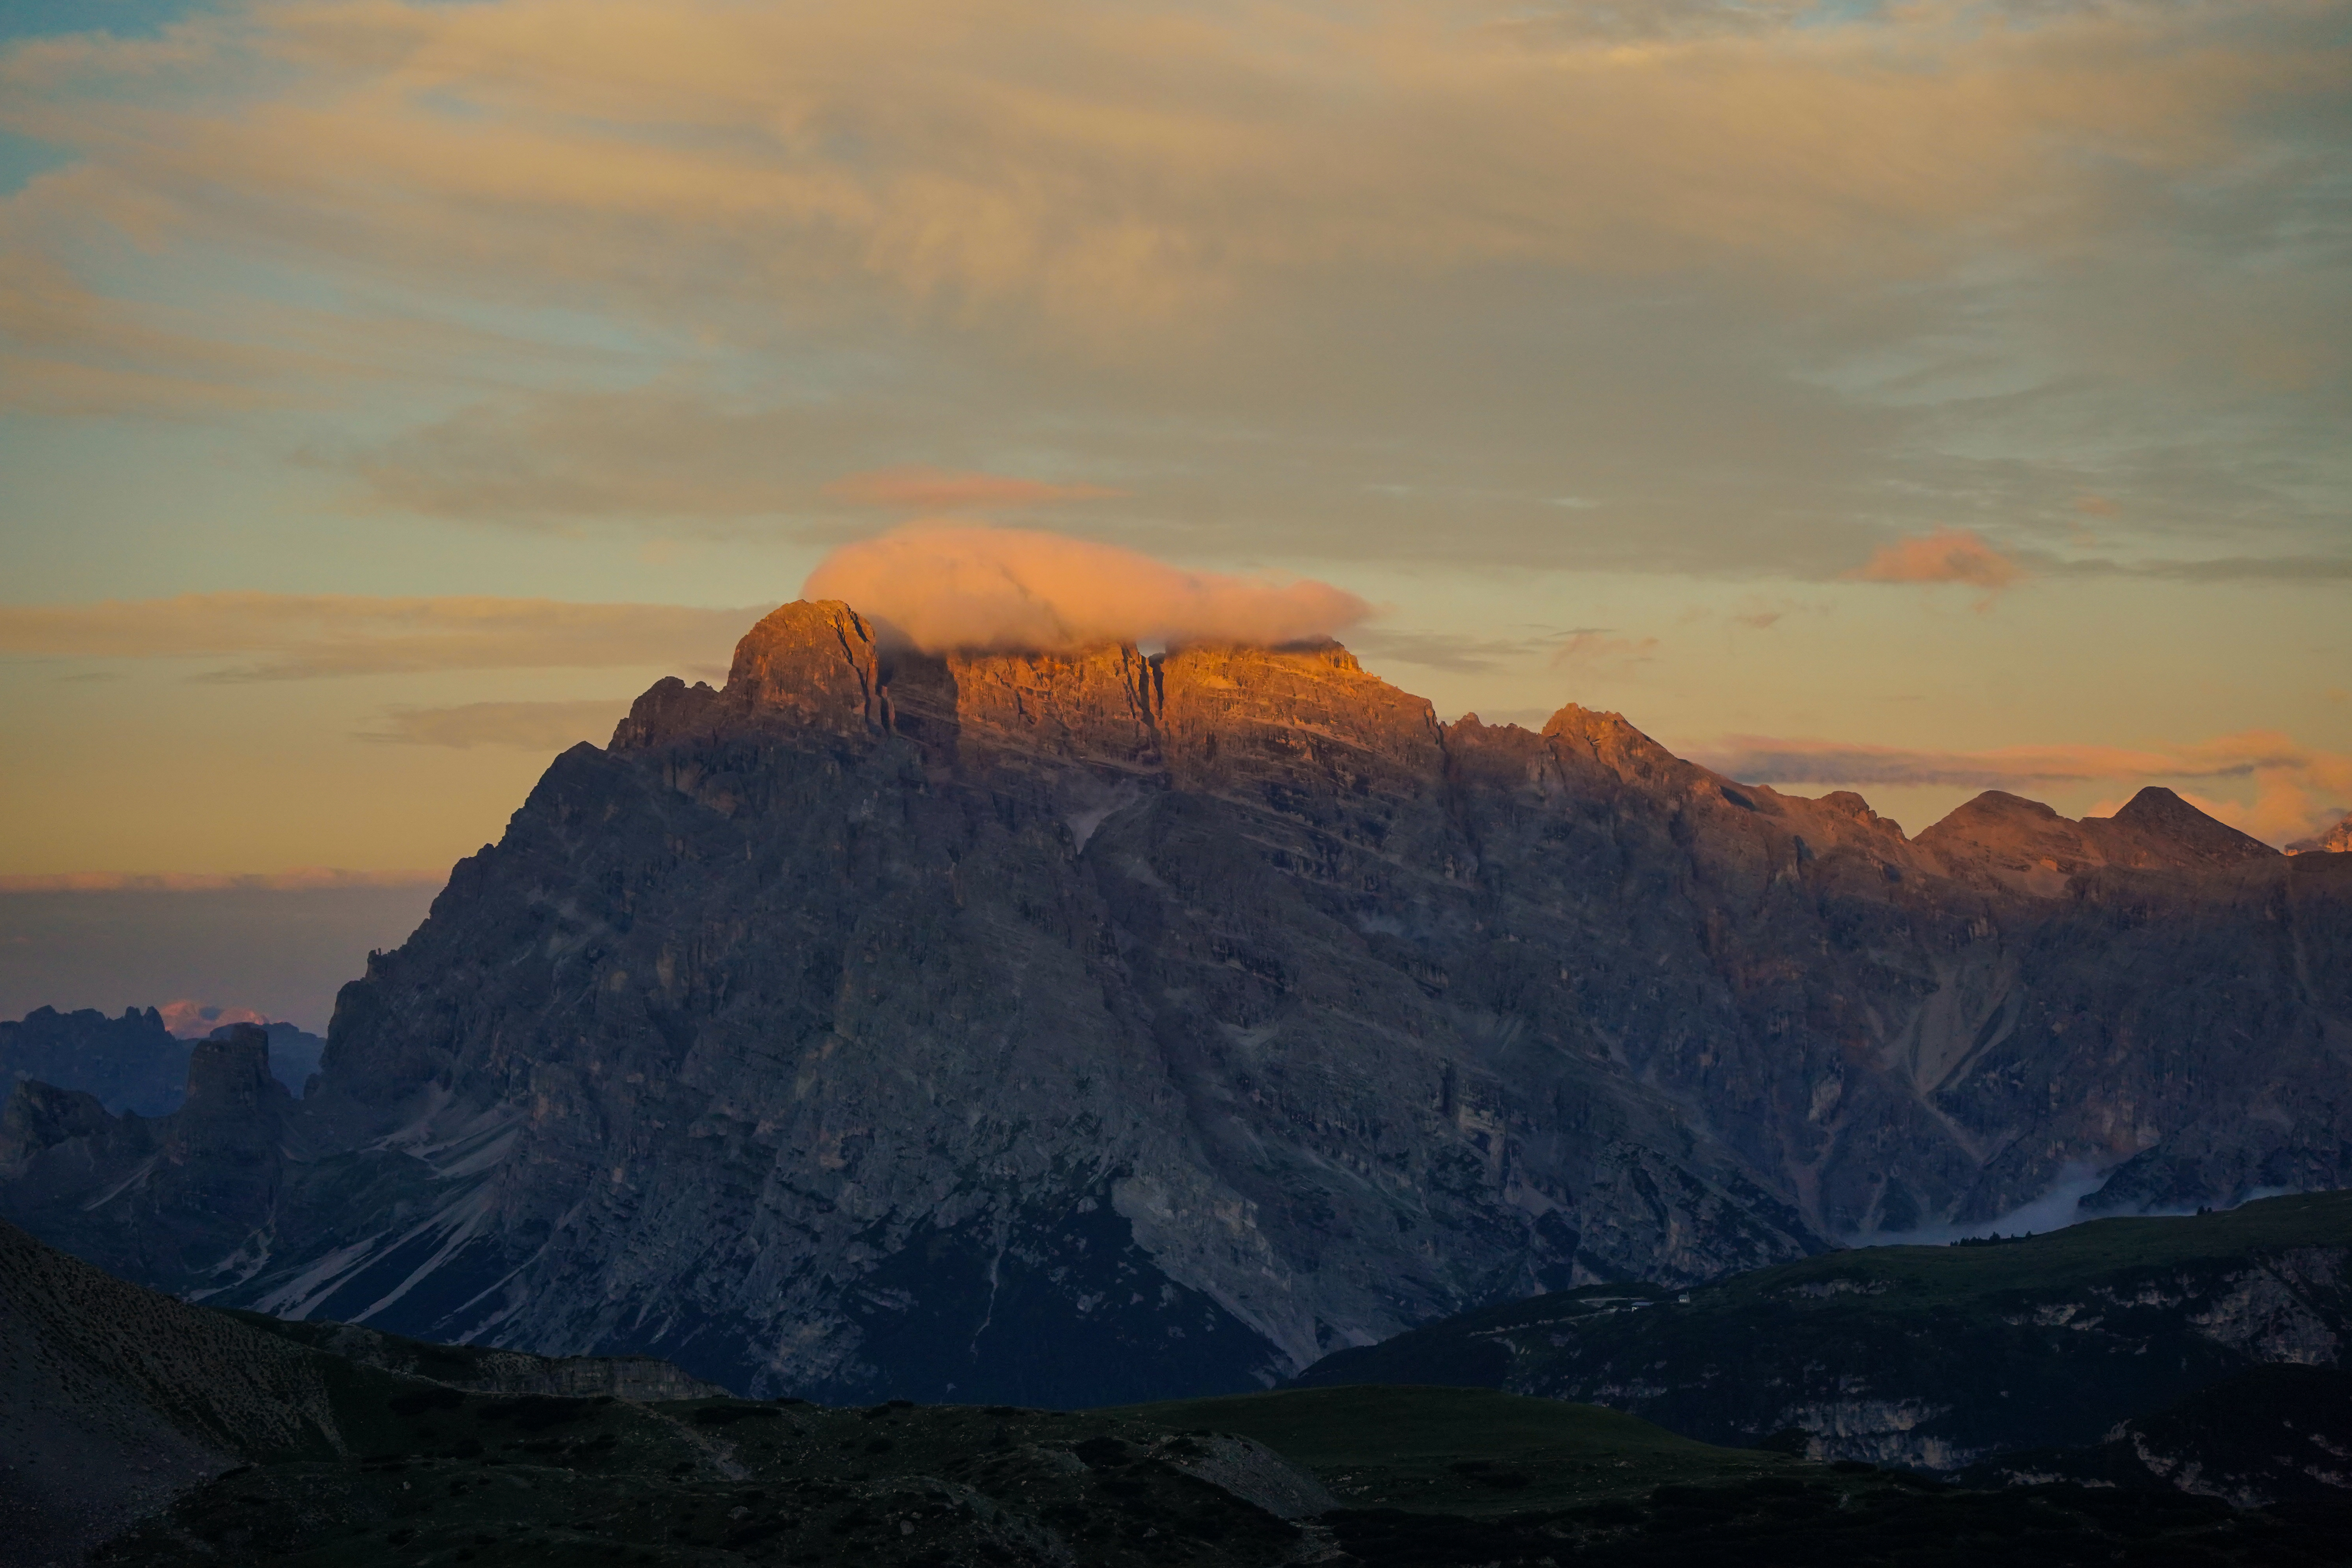
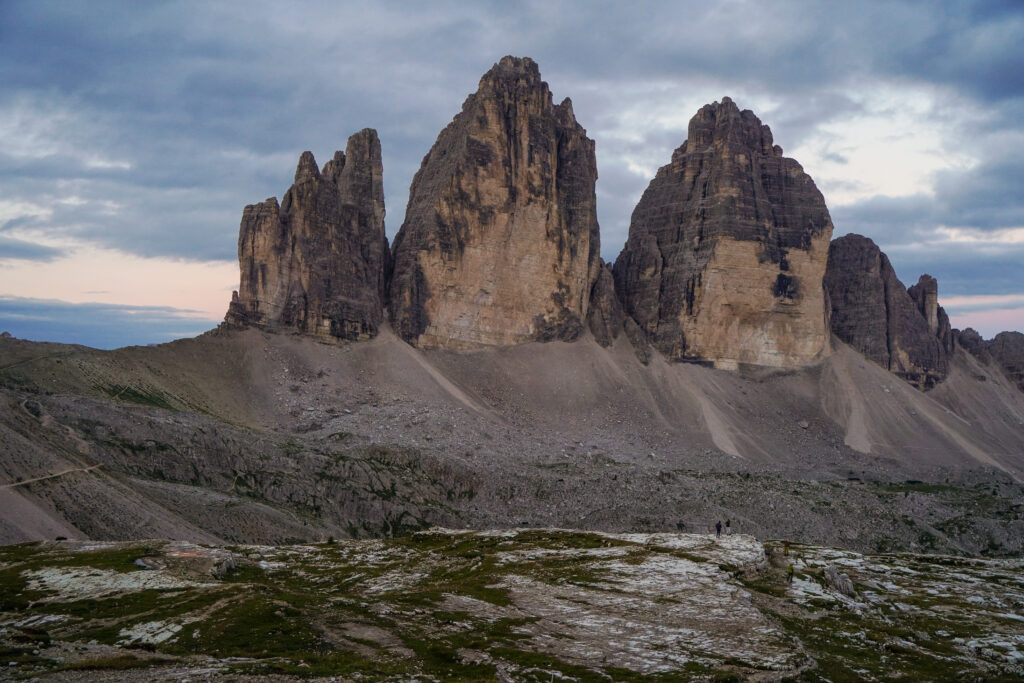
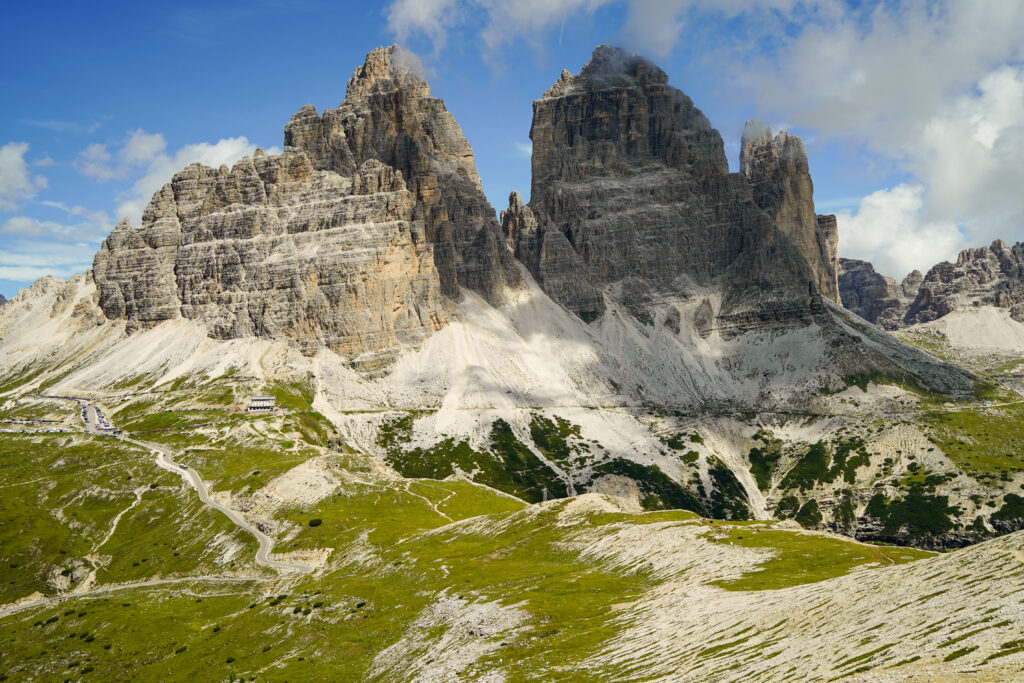
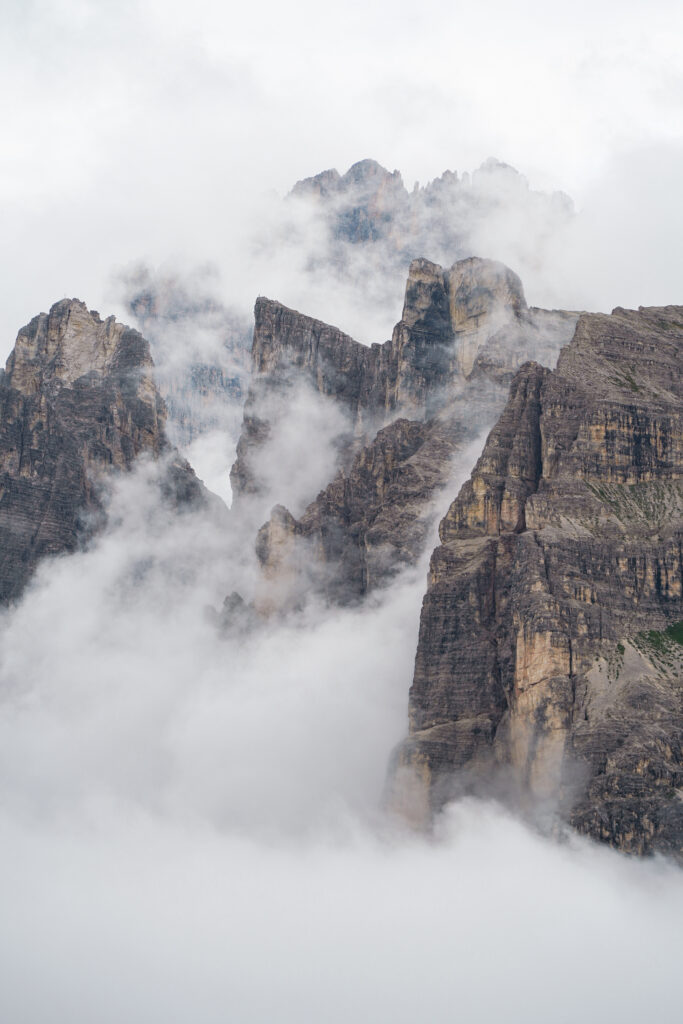
Tre Cime is probably the most iconic and well known area of the Dolomites. The trailhead services two of the most photogenic spots, there’s numerous amazing rifugios to eat/ stay the night at, and gorgeous views all around. One thing that doesn’t come across in photos is just how high up these mountain peaks are. At the base of the cliffs and on the main trail, you already feel like you are in the clouds- and sometimes- you literally are. 

Our experience at Tre Cime:

As we were visiting in late summer/ peak season we were worried the parking lot would fill up. So after a quick breakfast at our hotel, we started out as early as possible to the trailhead. Plot twist – the was still plenty of parking. As we got there a light rain started to fall and it was the chilliest it had been on our entire trip. I actually had to change out my shorts for leggings. (which is saying a lot for me as I needed those leggings to sleep in later..) We also threw on our rain jackets and not knowing what else to do, started the trek to the Locatelli hut and destination for this hike. 

Looking back at the start of the trail- Rifugio Auronzo in the clouds

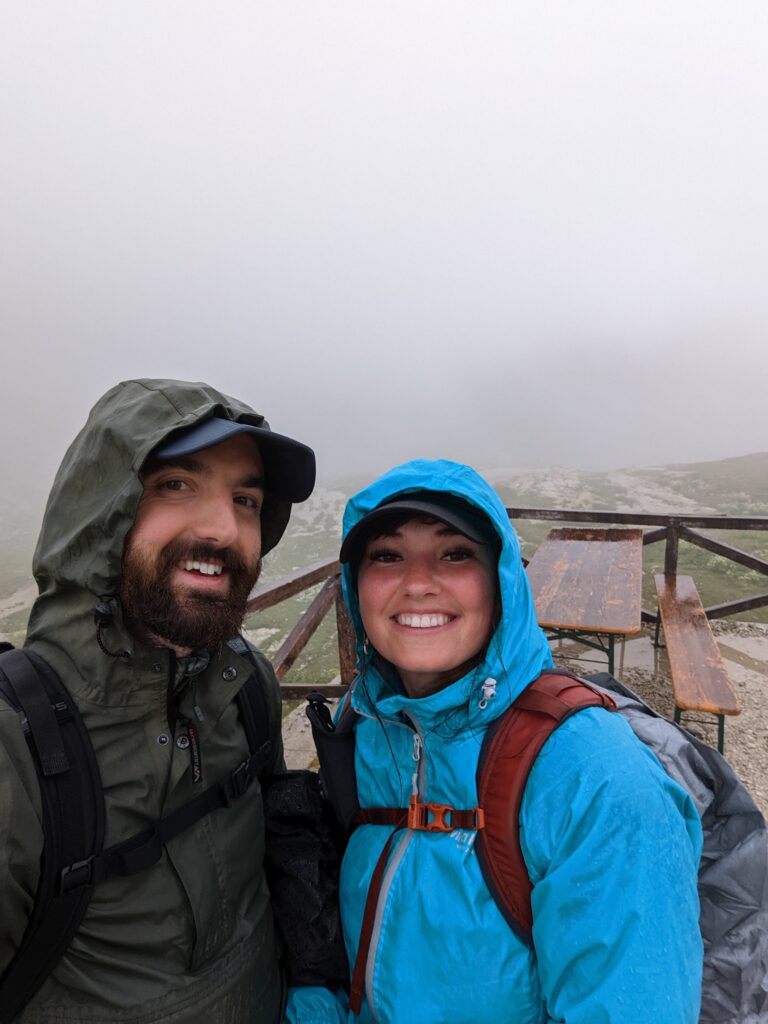
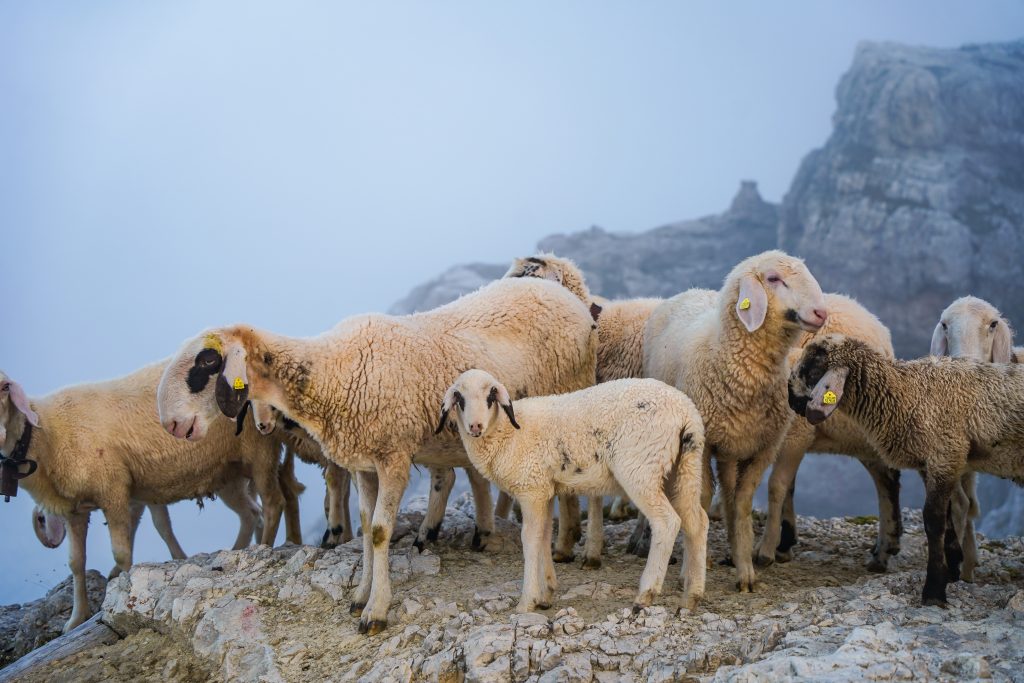
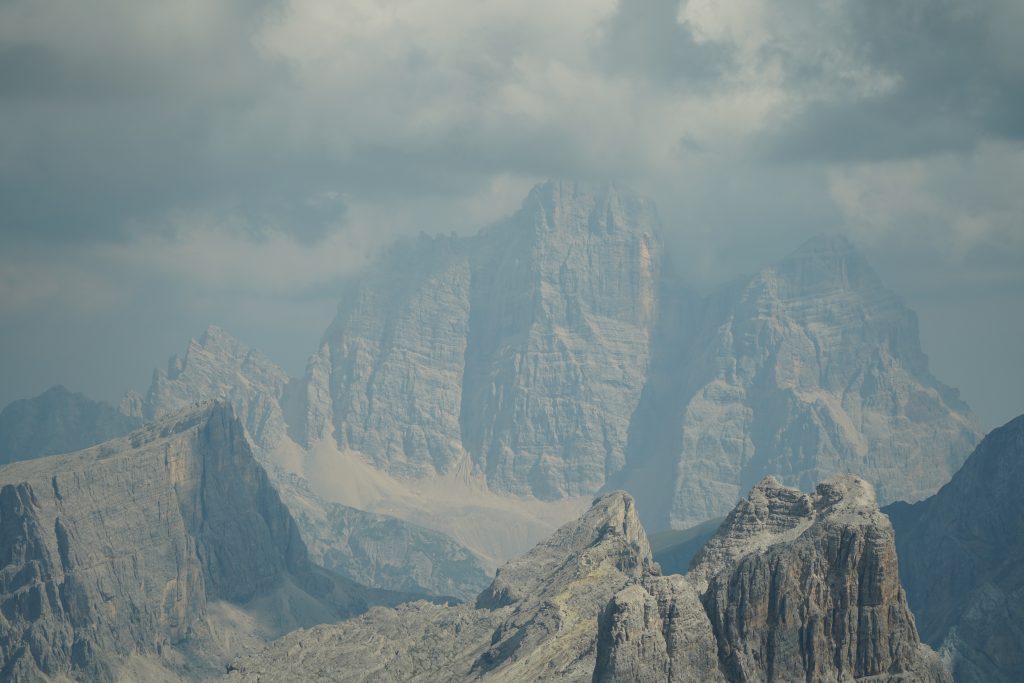
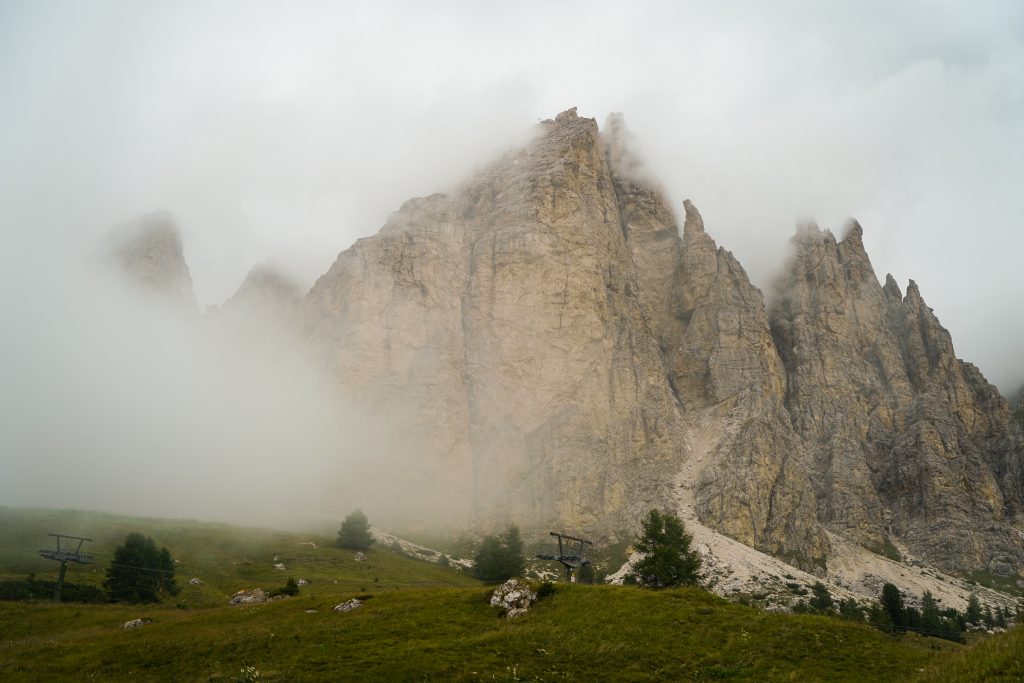
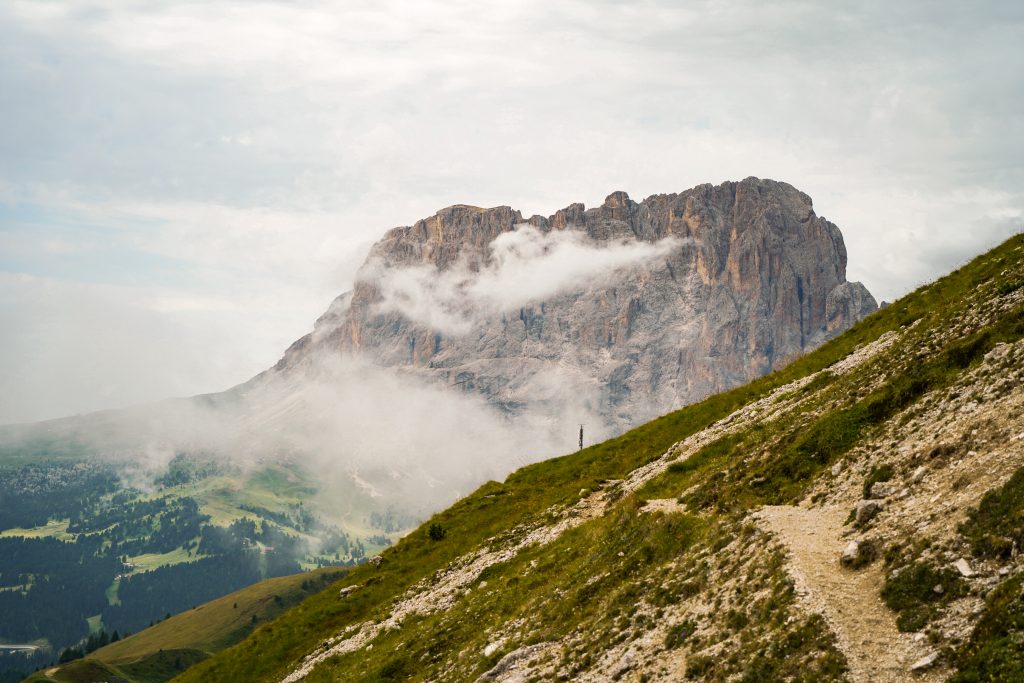
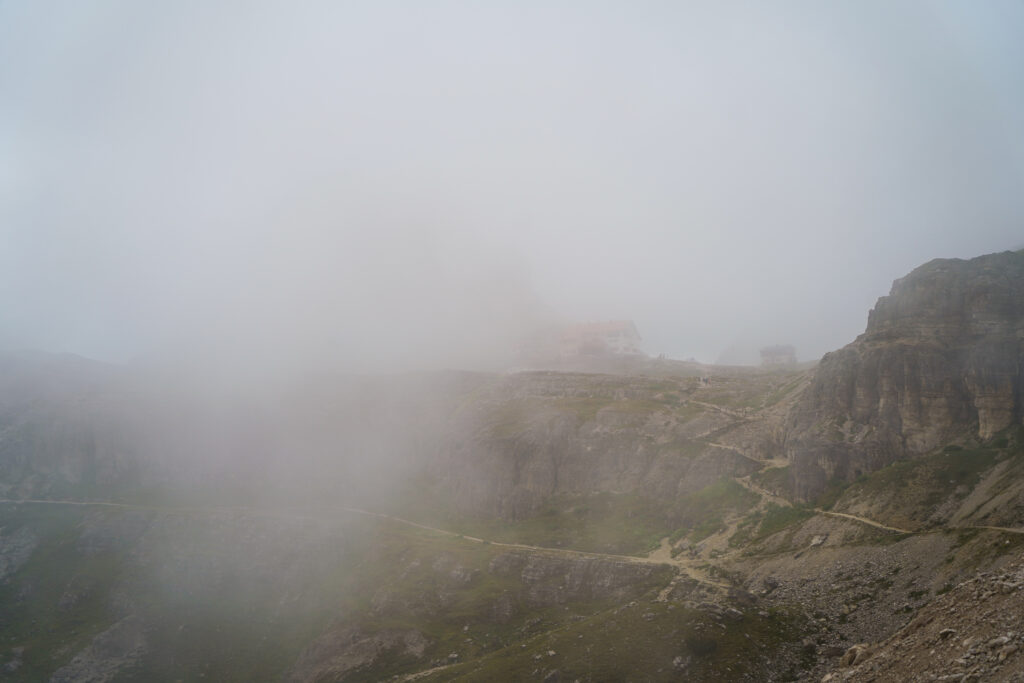
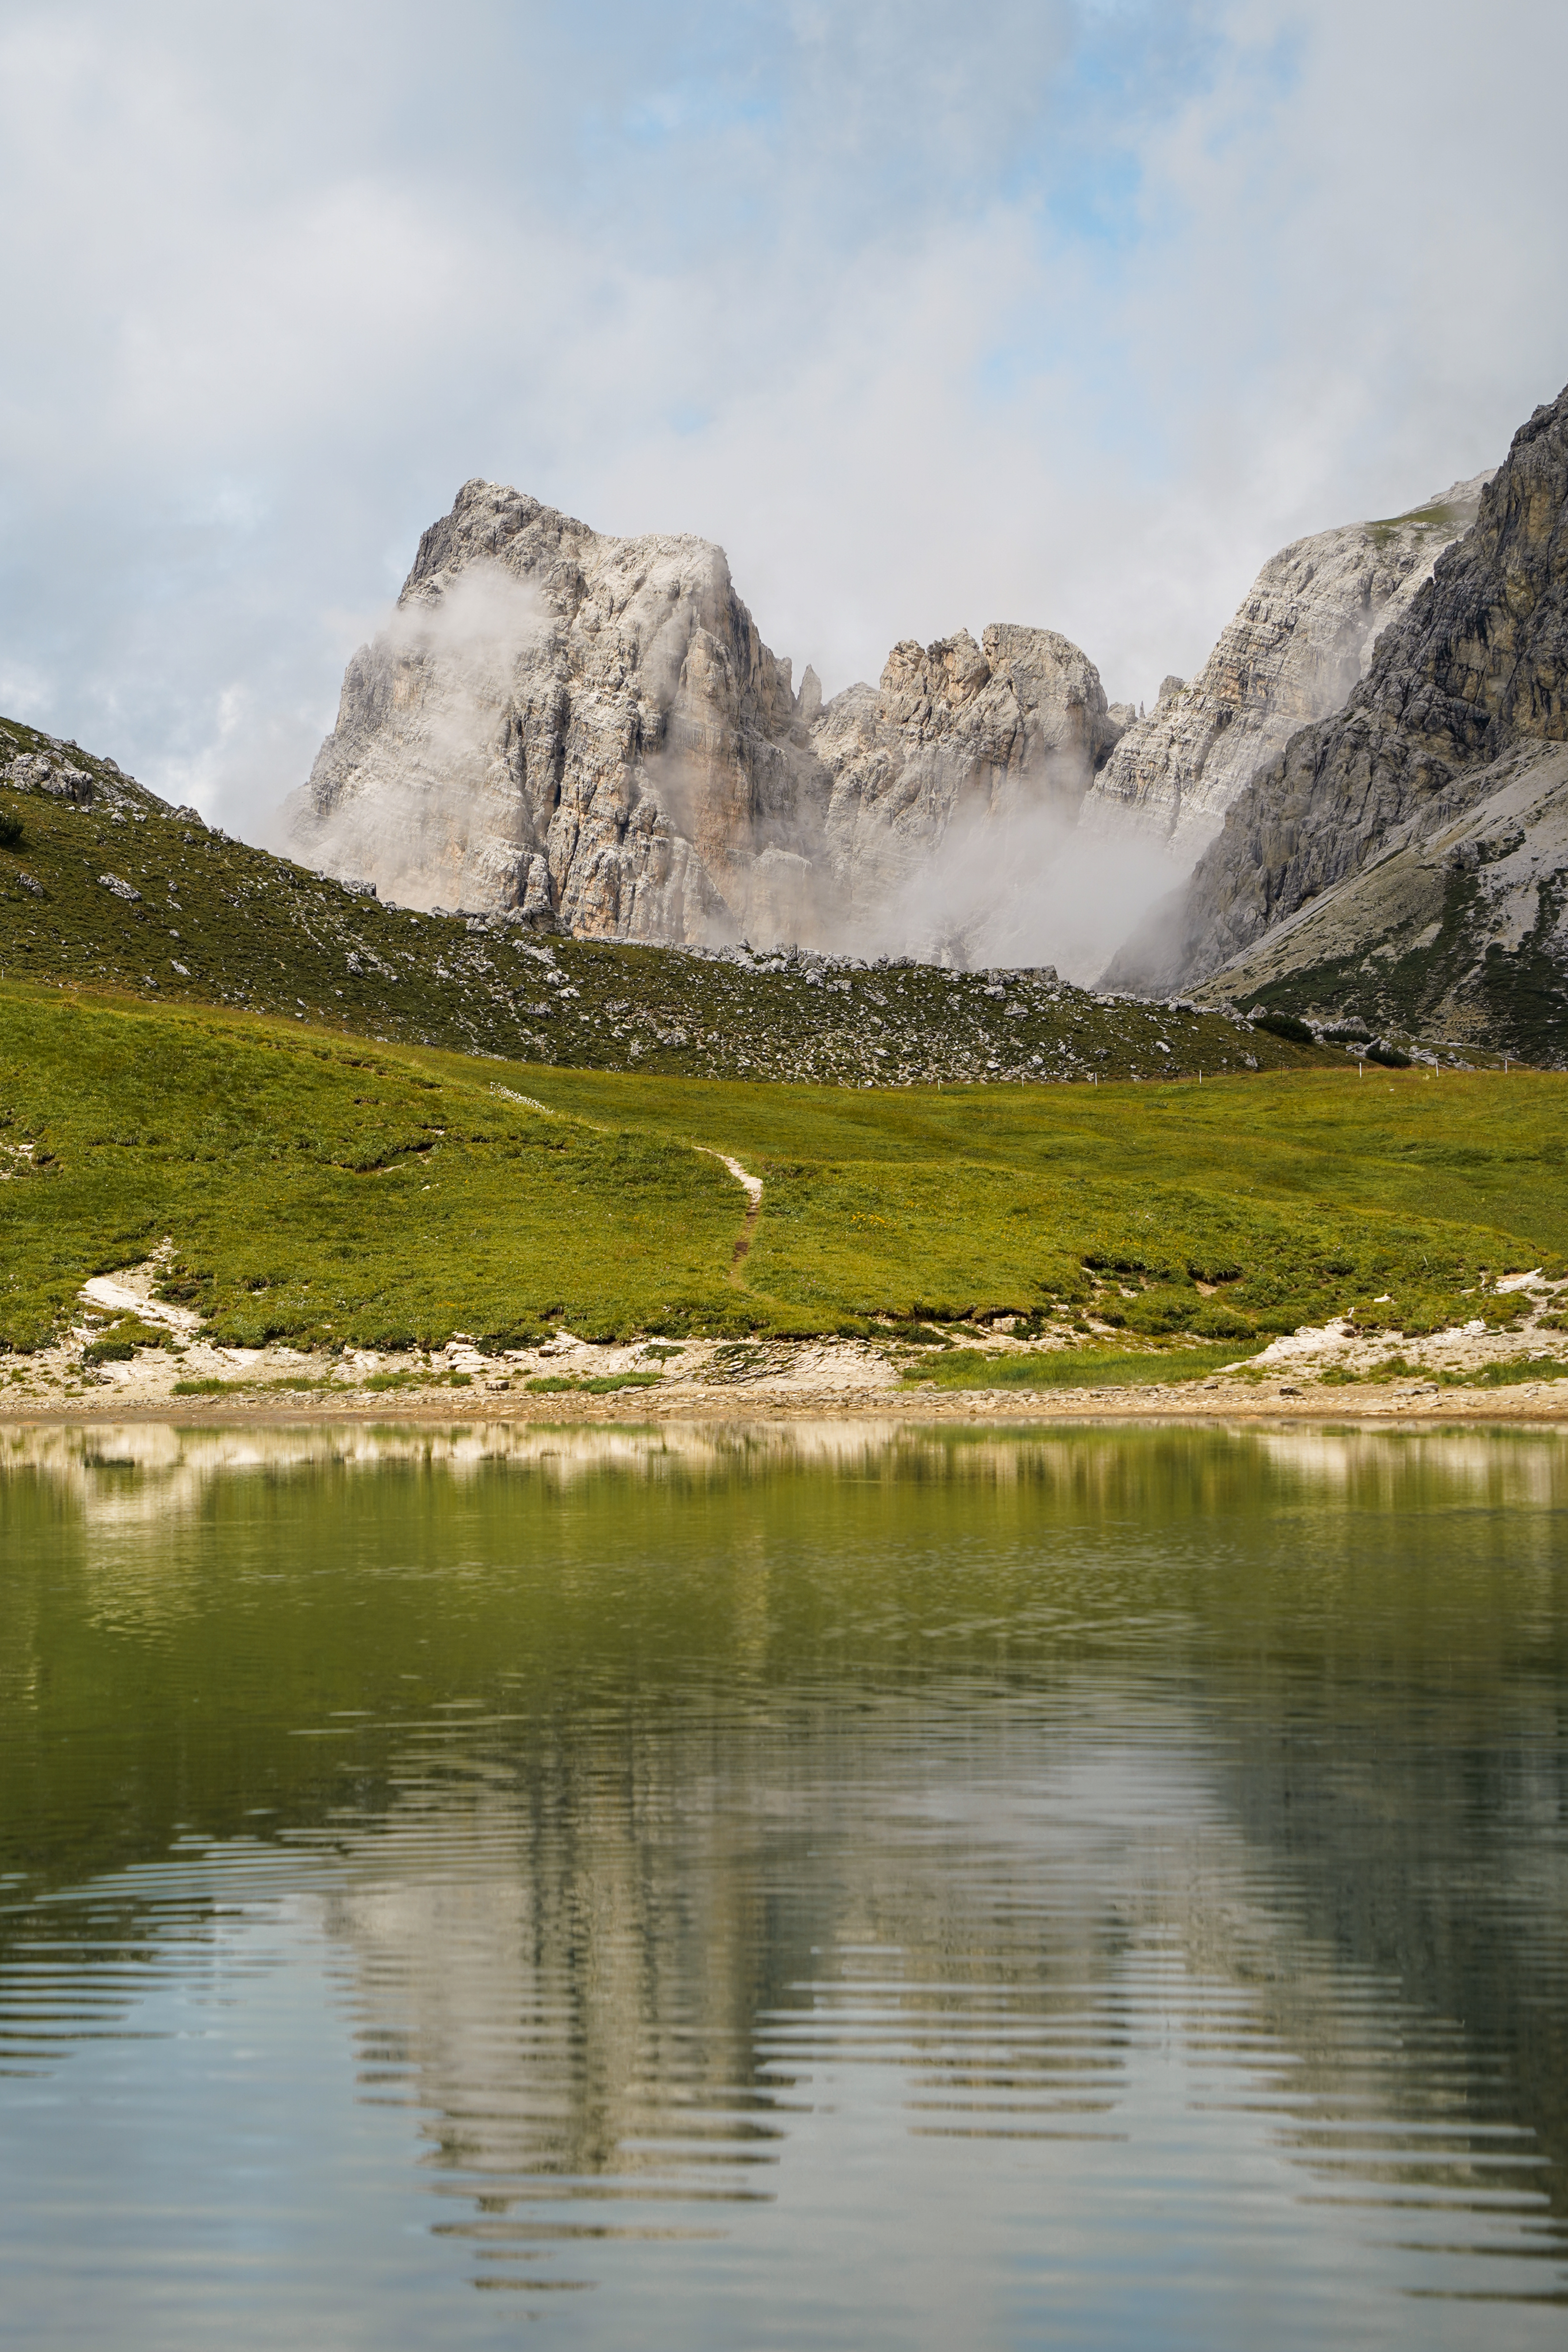
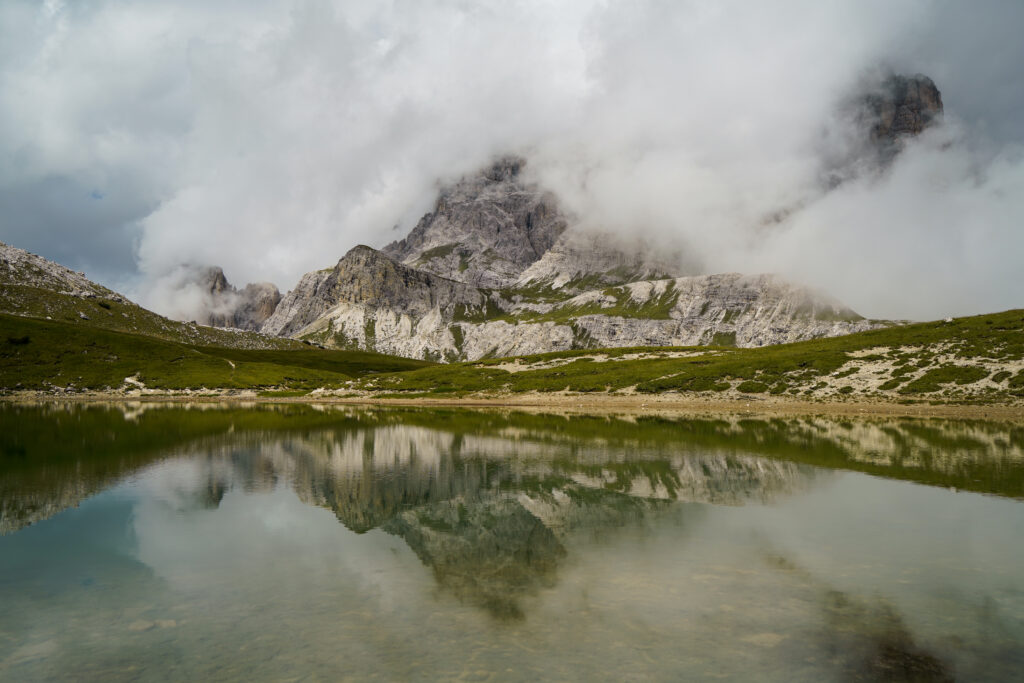
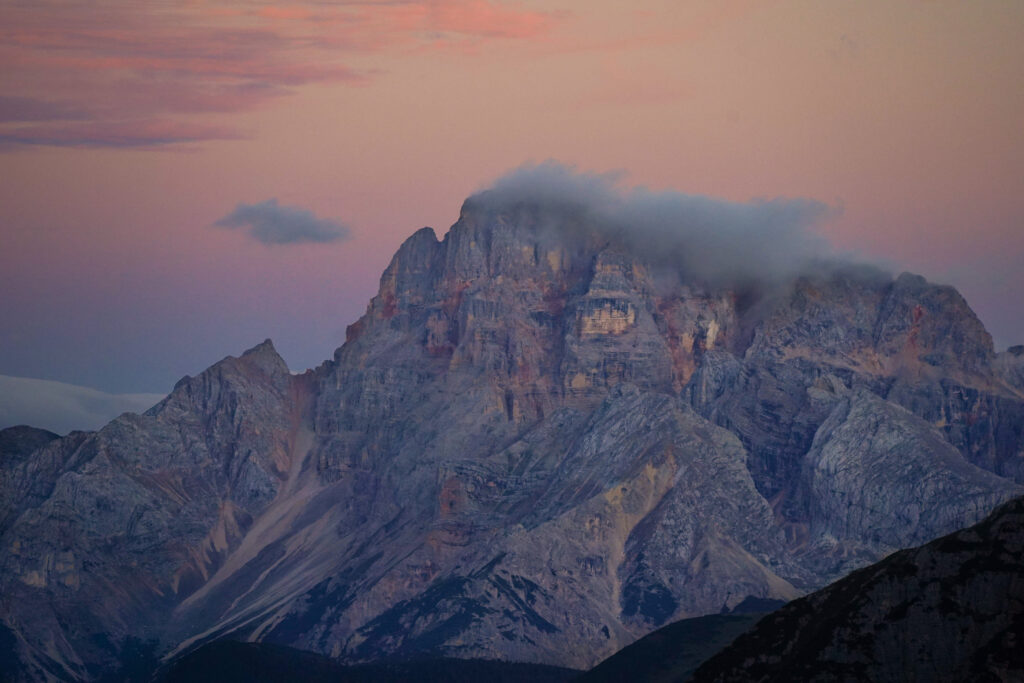
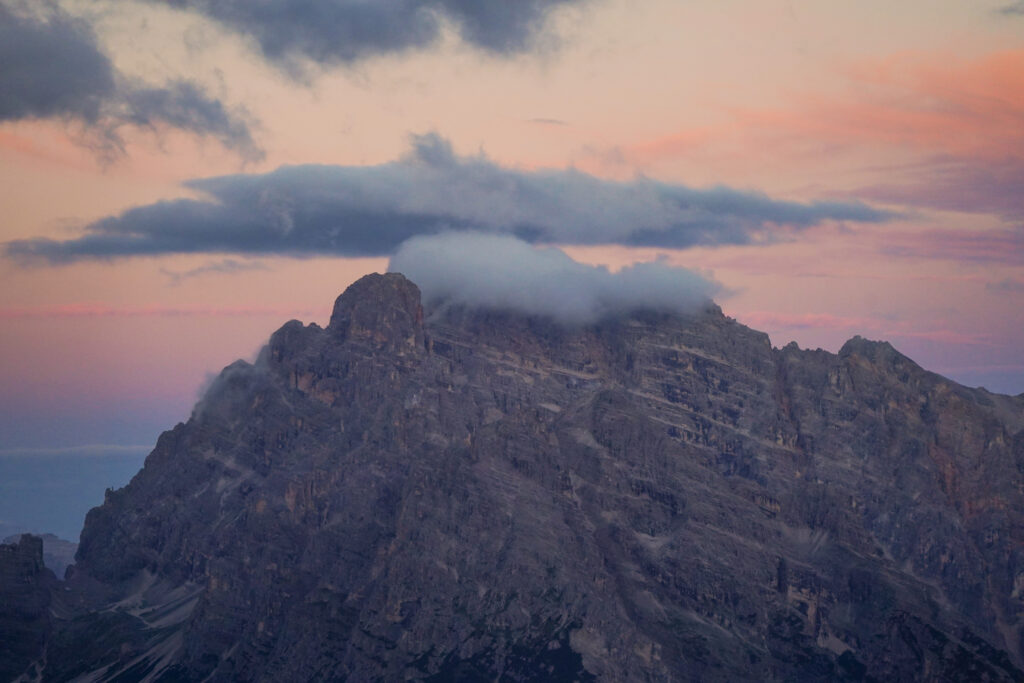
The entire way we had next to no views at all. Clouds everywhere. Rain, constant. What a trip. Even in these conditions though there were still many people hiking both directions of the trail. 

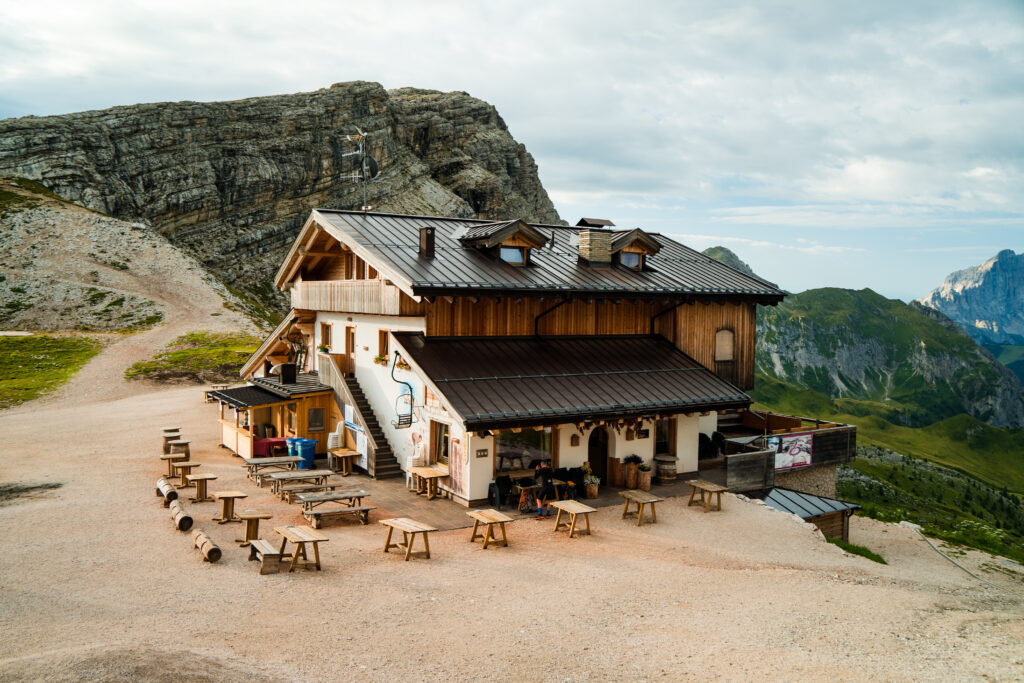
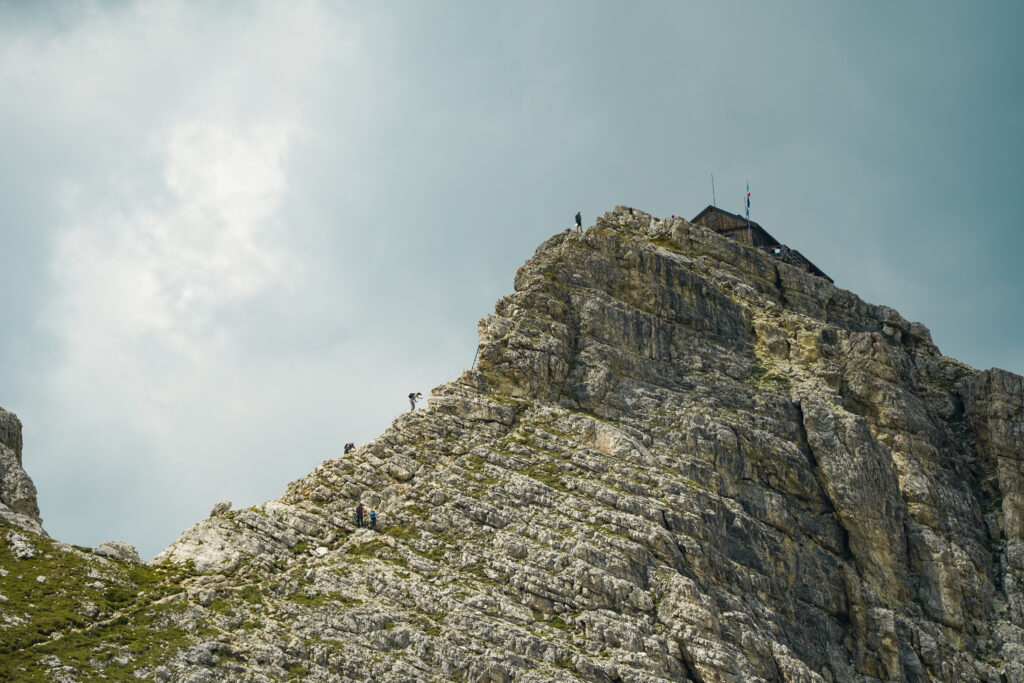
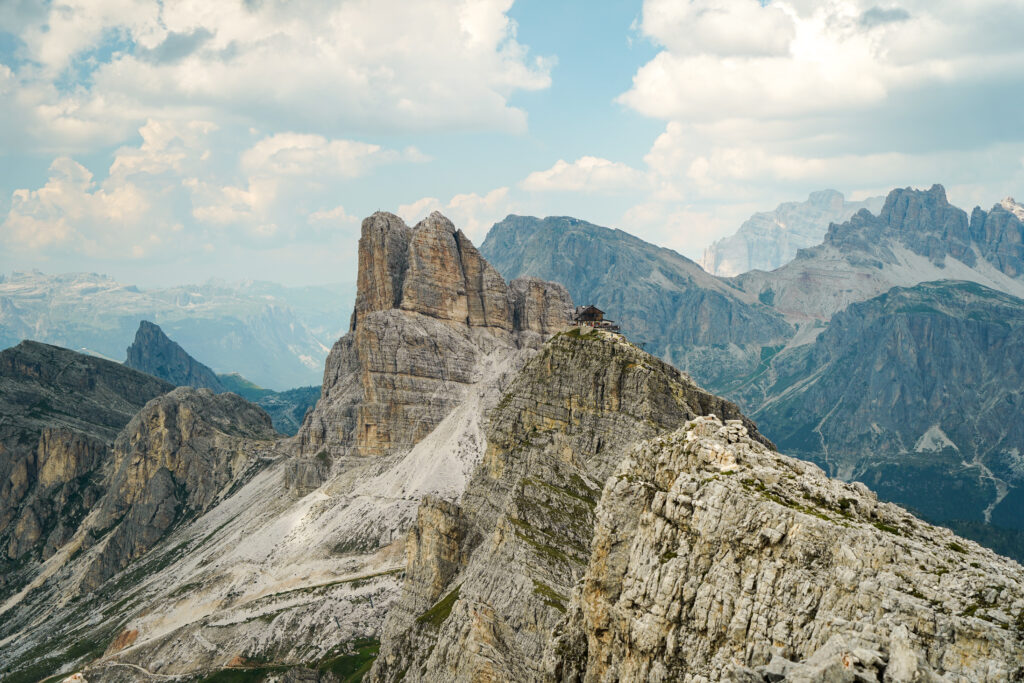
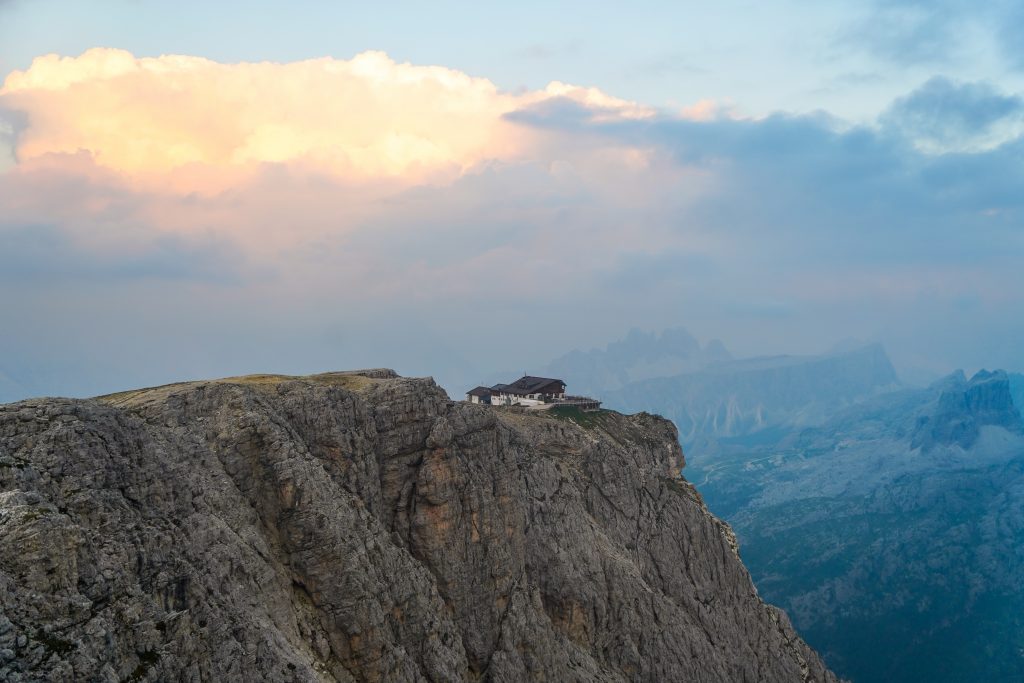
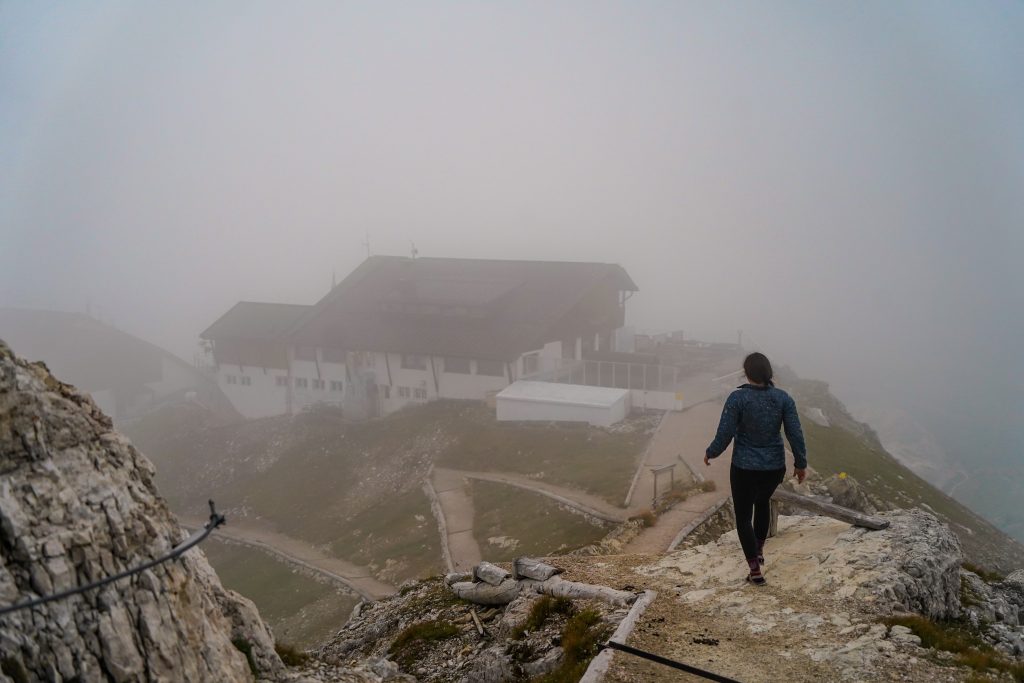
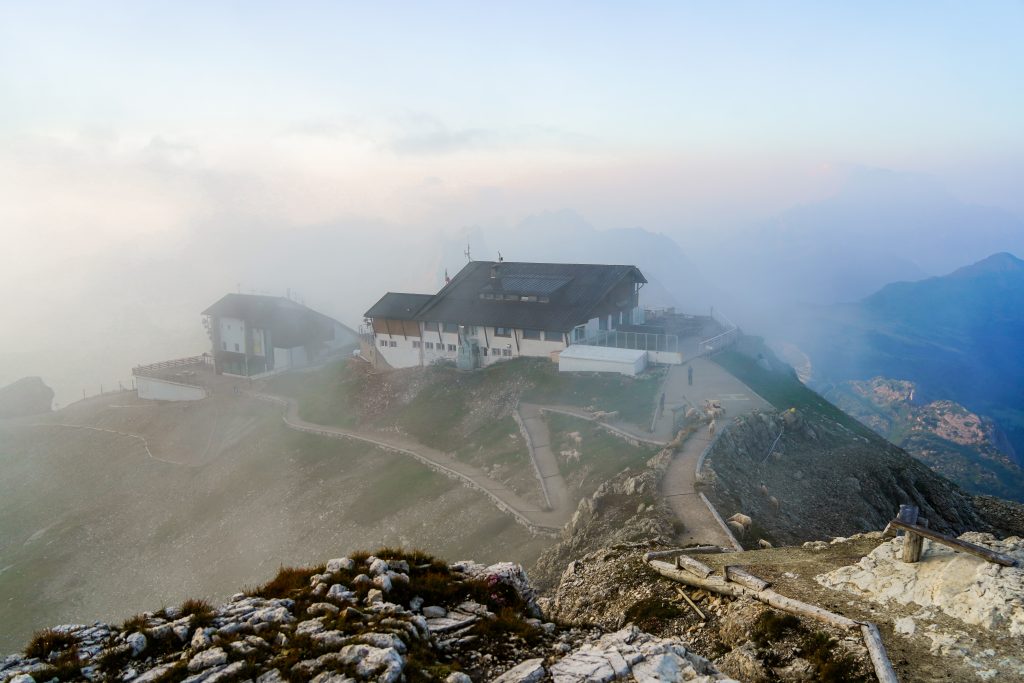
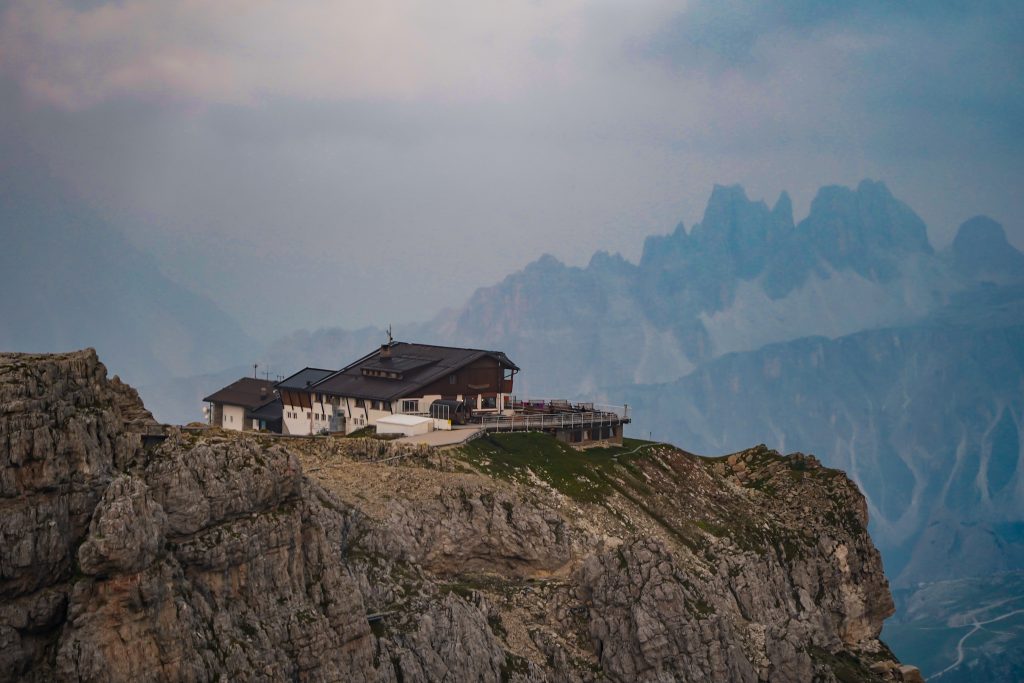
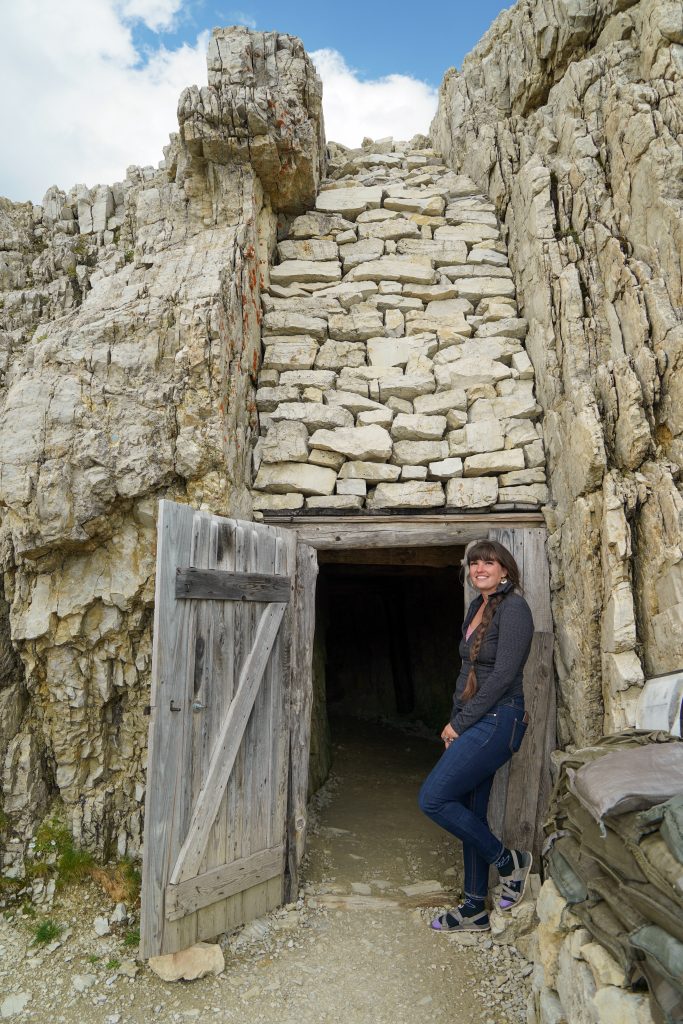
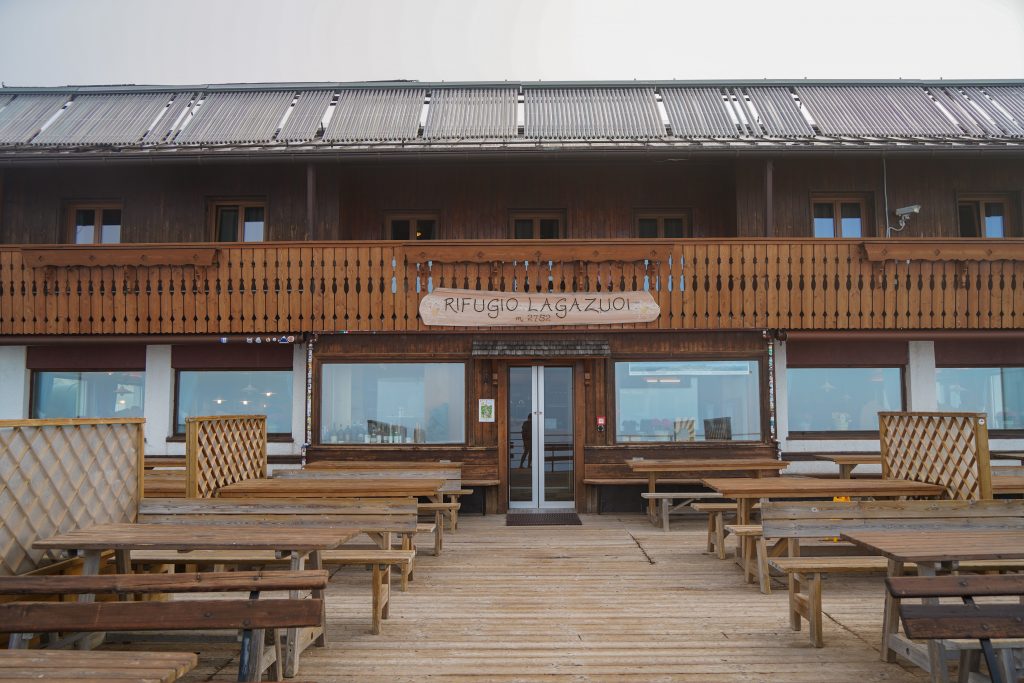
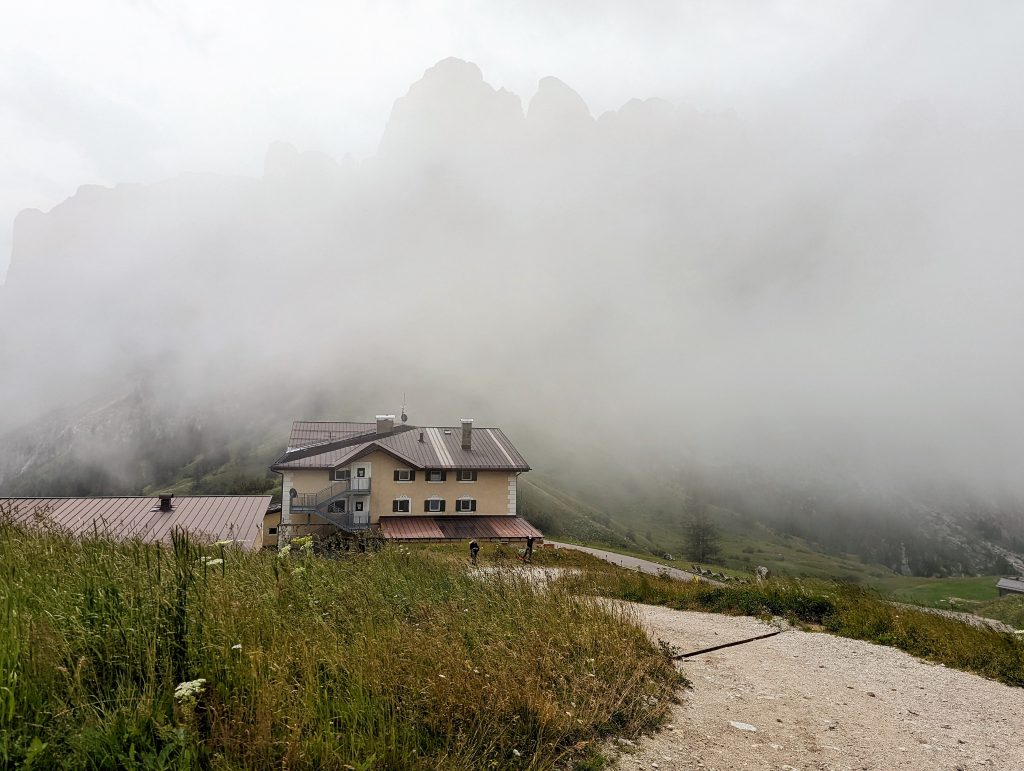
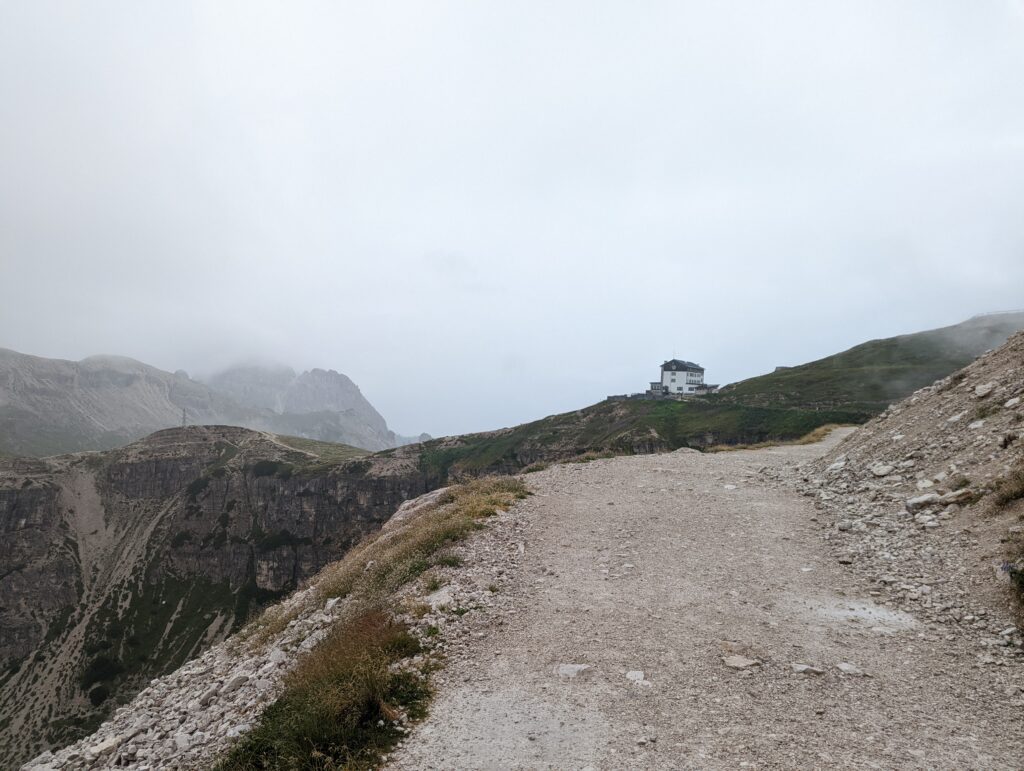
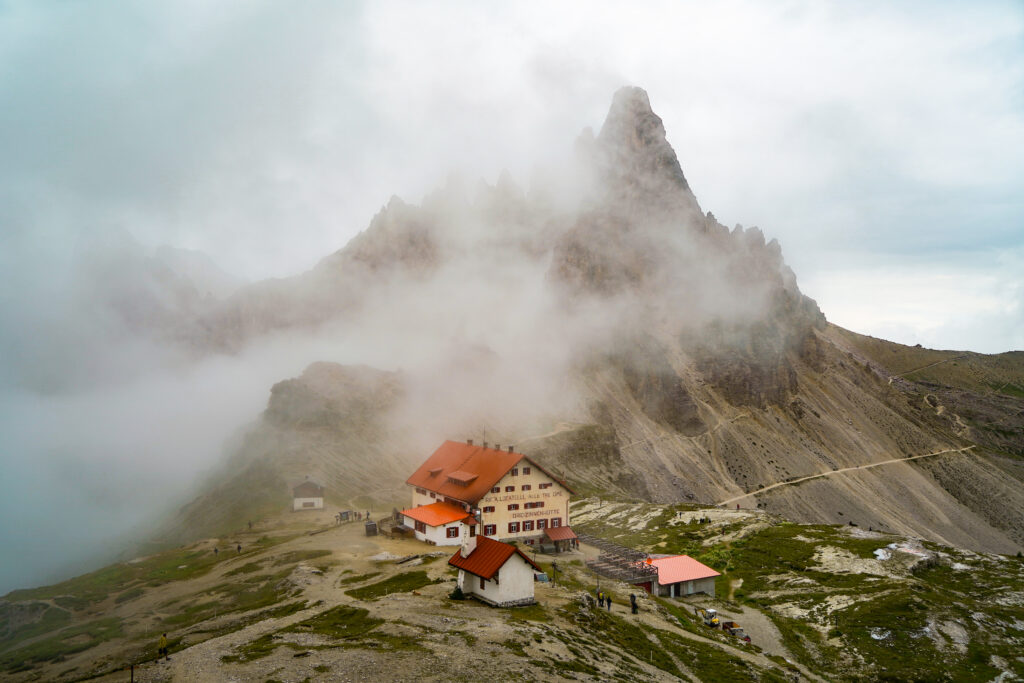
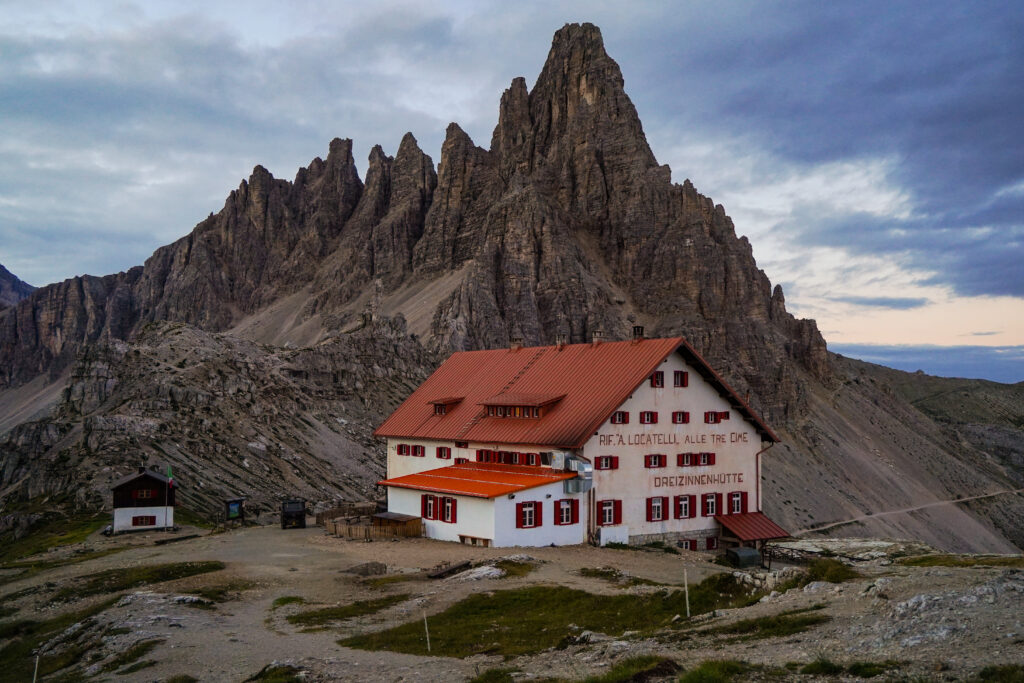
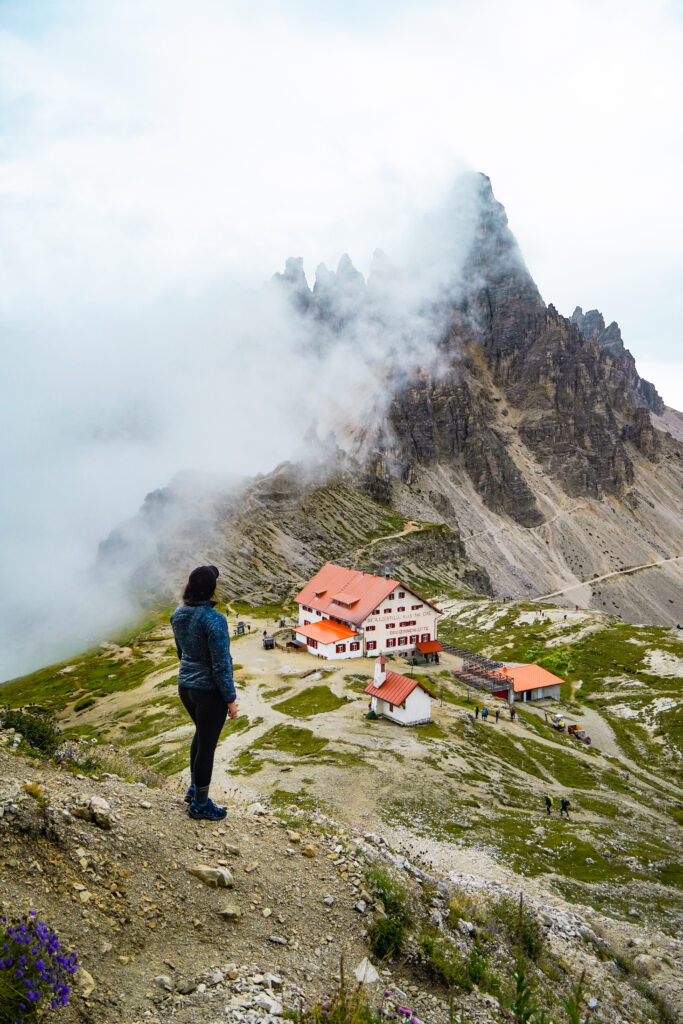
After 1.5 hours we reached the Locatelli Hut with absolutely no view of the 3 peaks and at only about … 10AM. Great only 5 hours to go until we could check in at 3. 

The Locatelli hut in the distance from the Forcella Lavaredo.

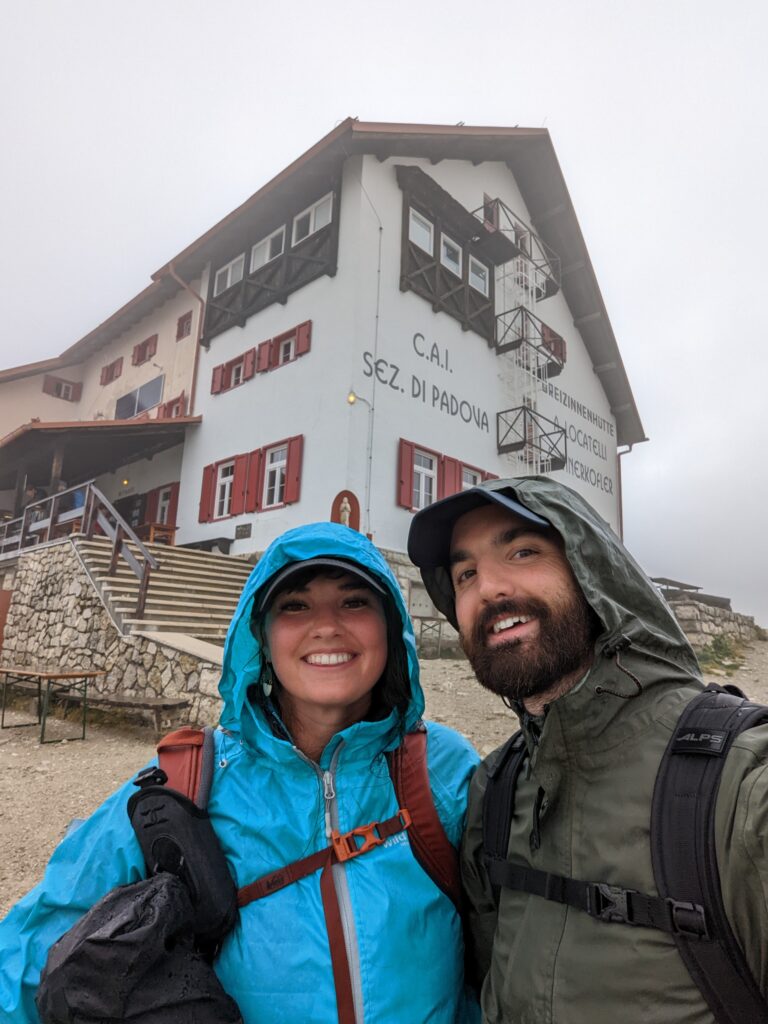
Inside the hut was a mad house. The dining area was completely full as was the hallway. Just as you walked in there were people everywhere stripping out of their wet clothes into something dry and it was hard to find anywhere to get out of the way. Eventually we started scouring for somewhere to sit and lucked out with a spot near the window. We ordered a cappacino to justify sitting there and since what’s better than a hot drink on a cold, wet day. 

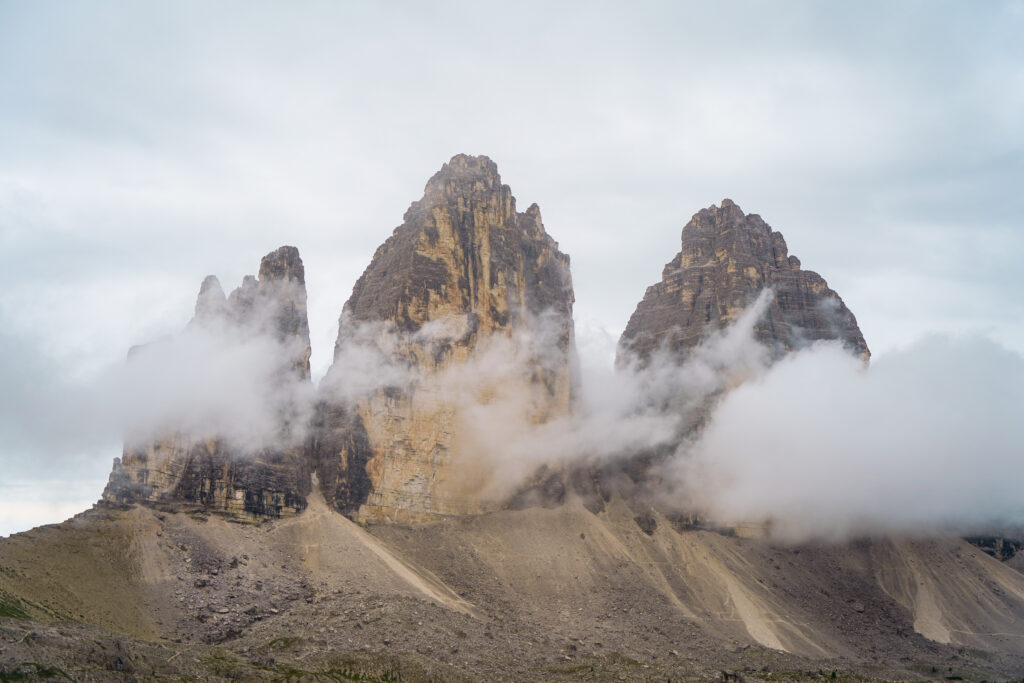
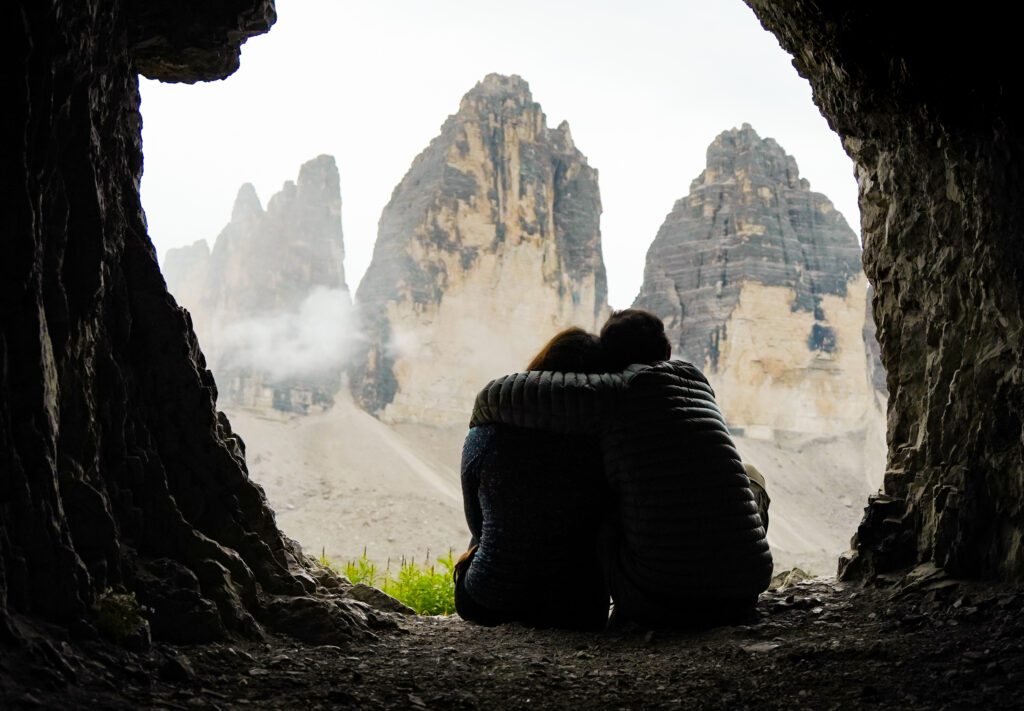
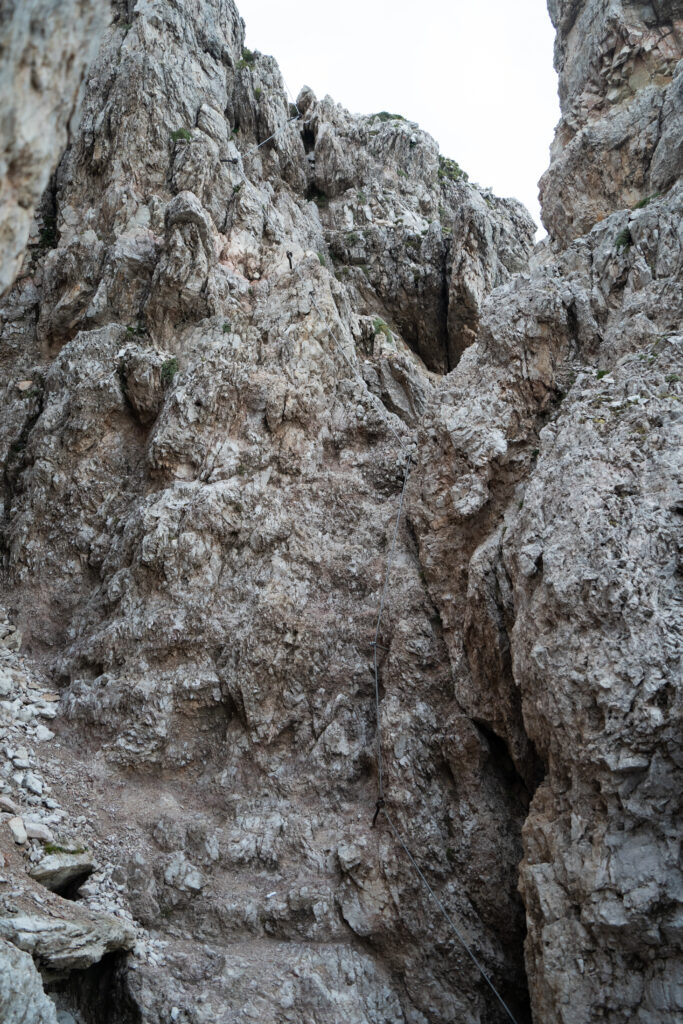
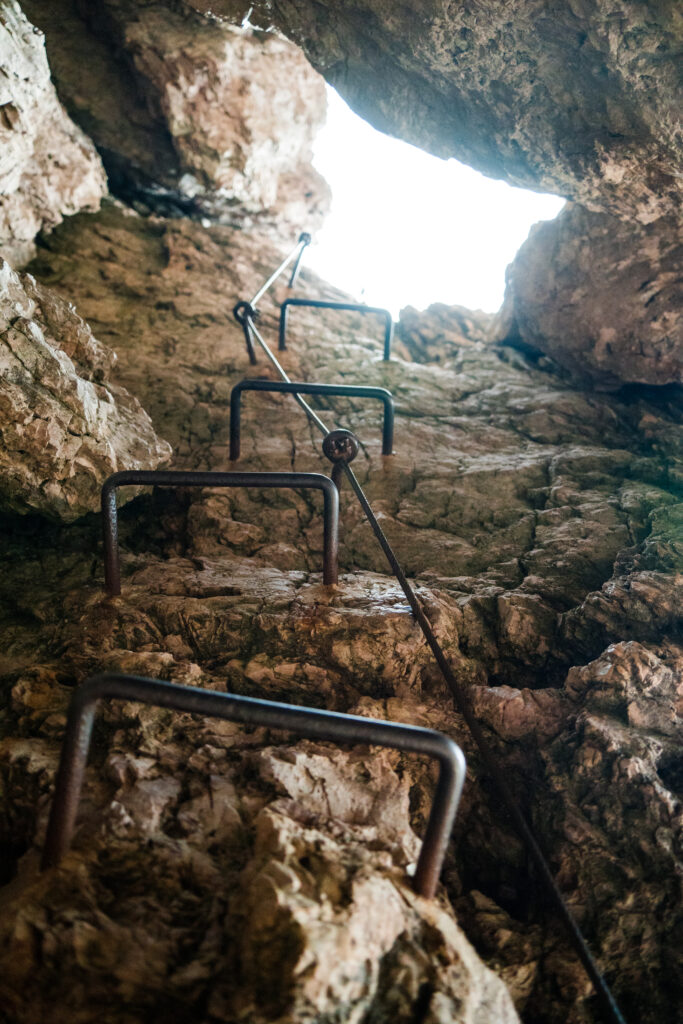
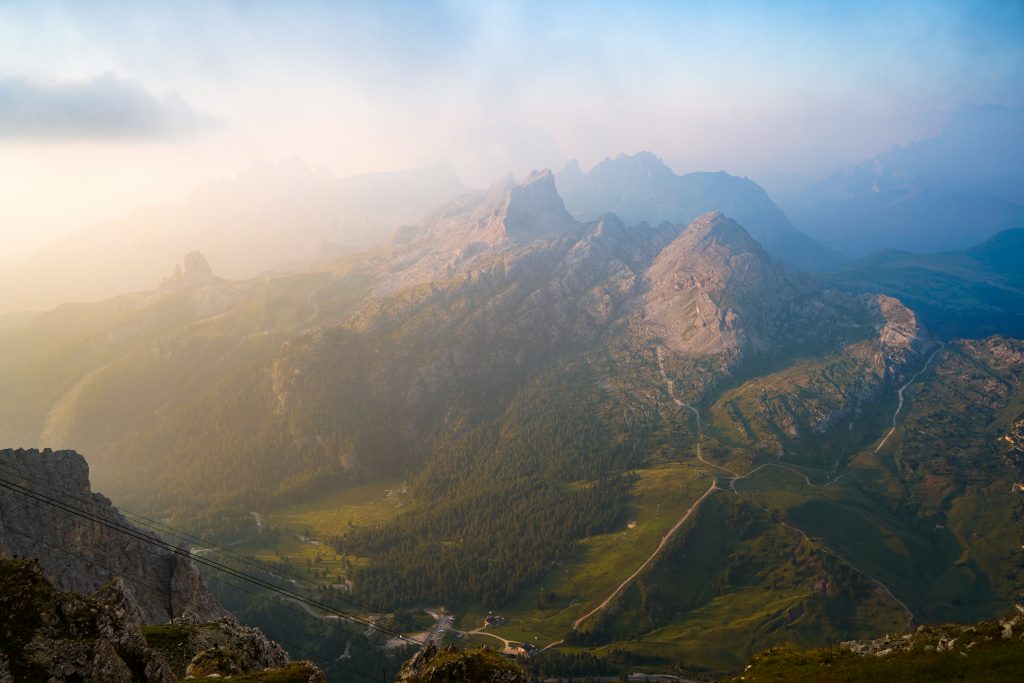
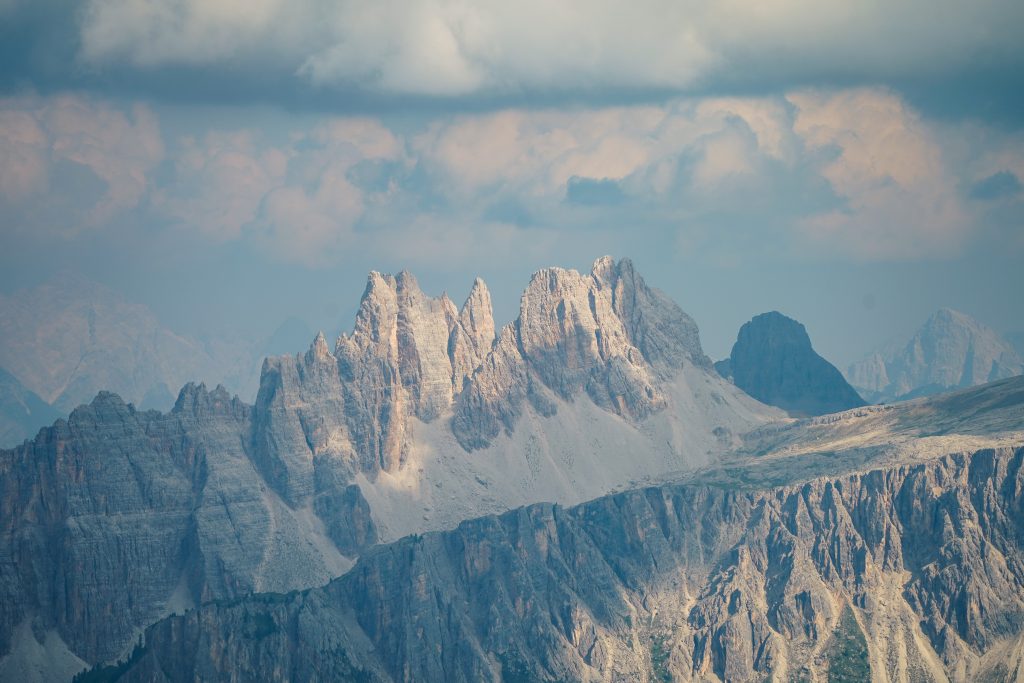
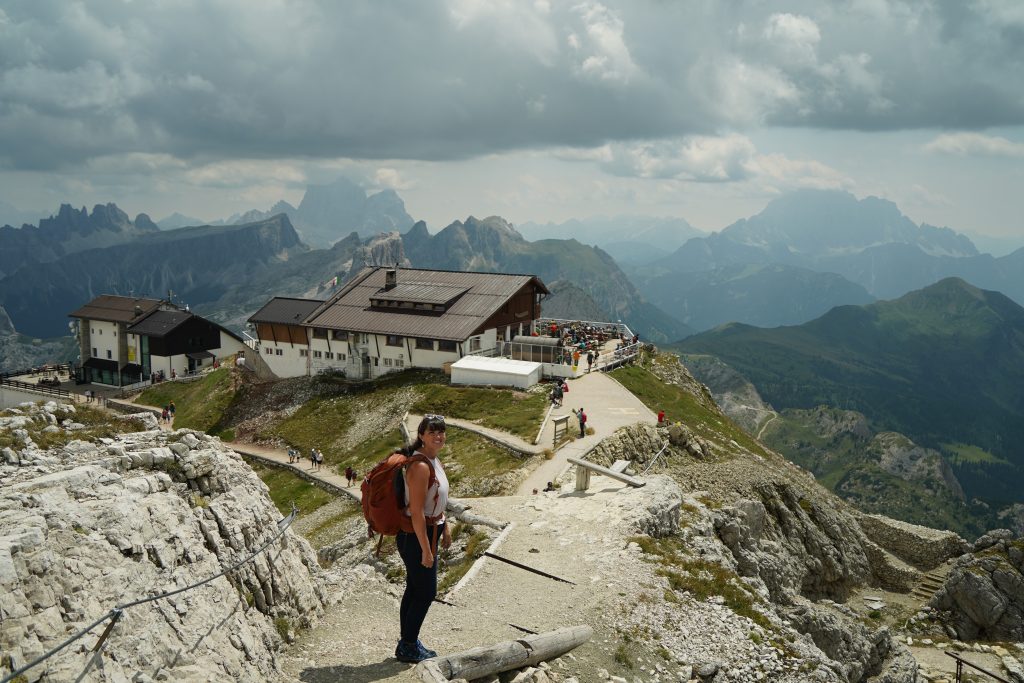
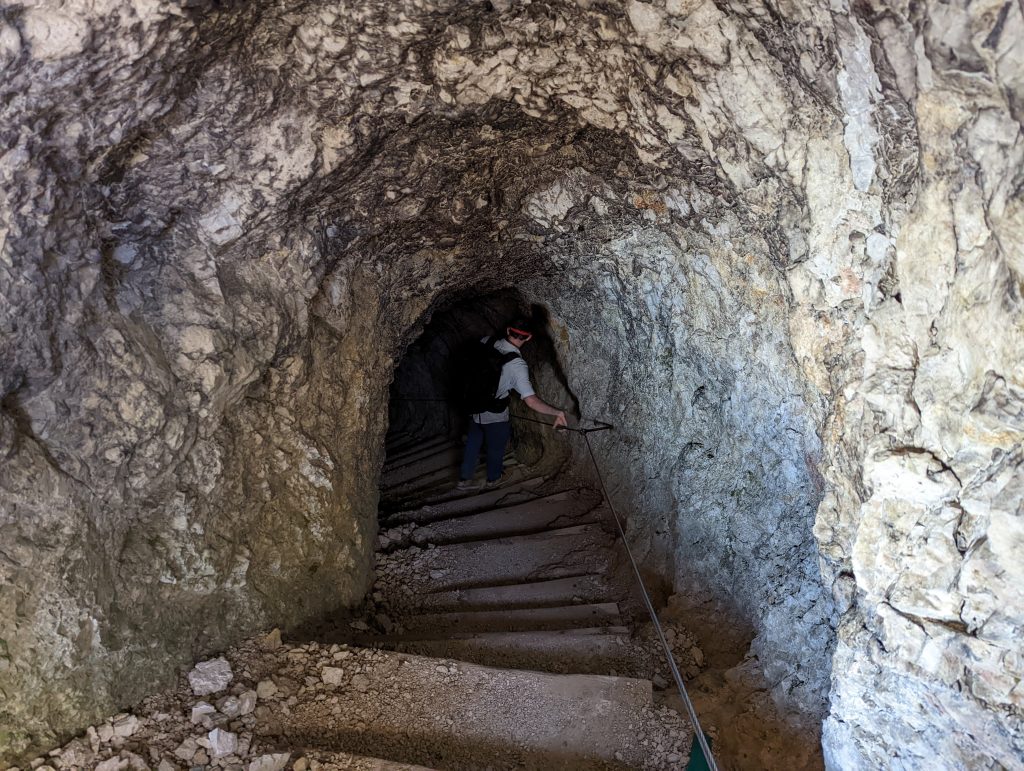
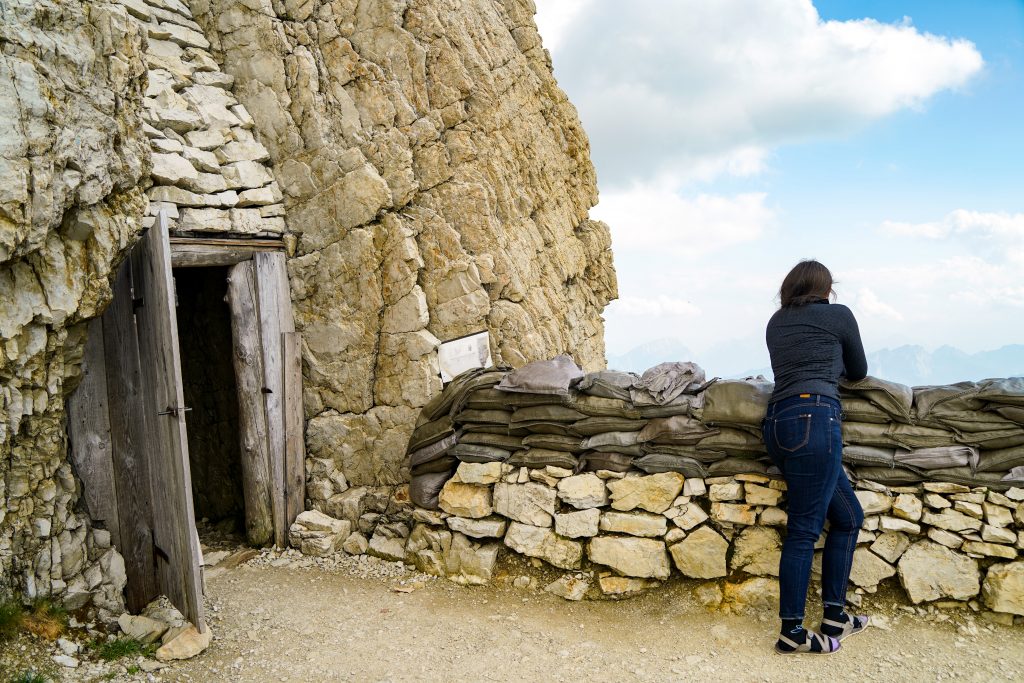
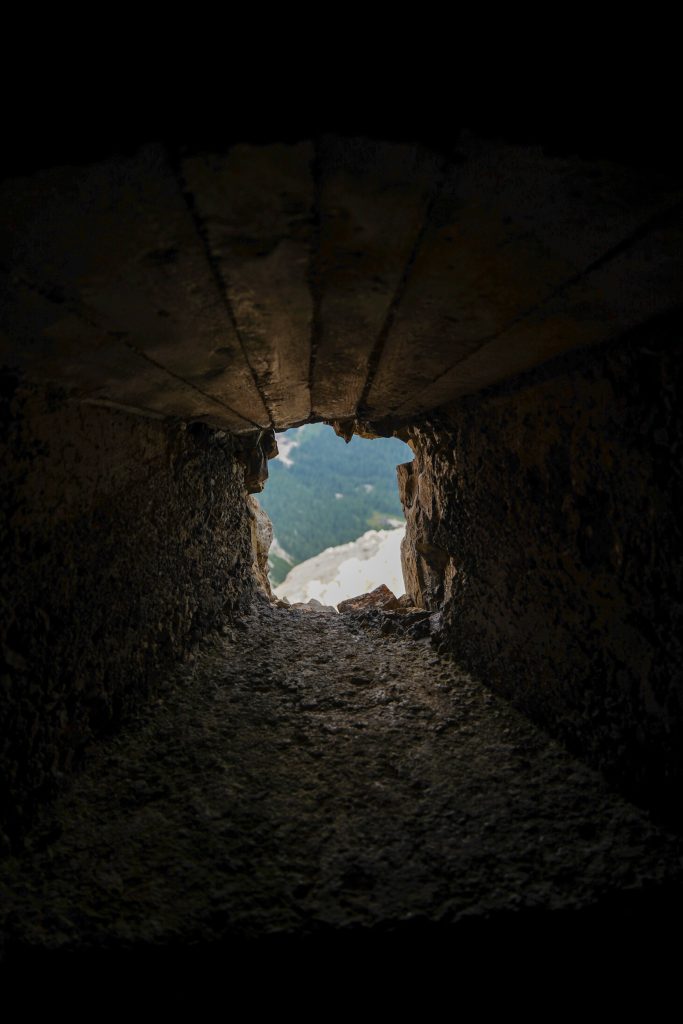
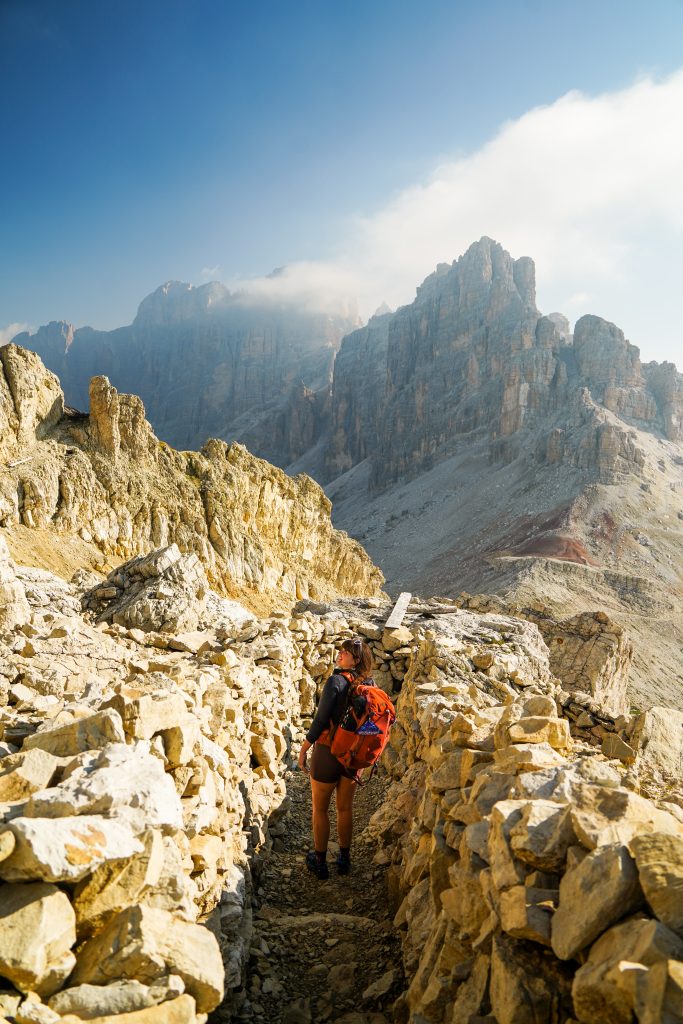
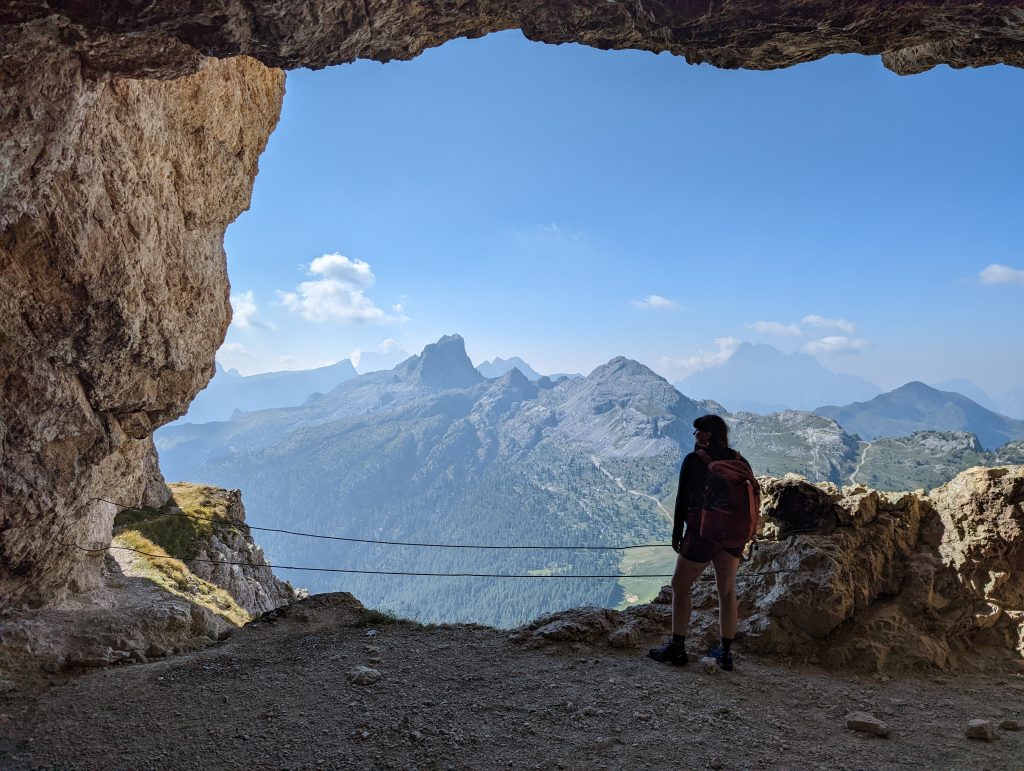
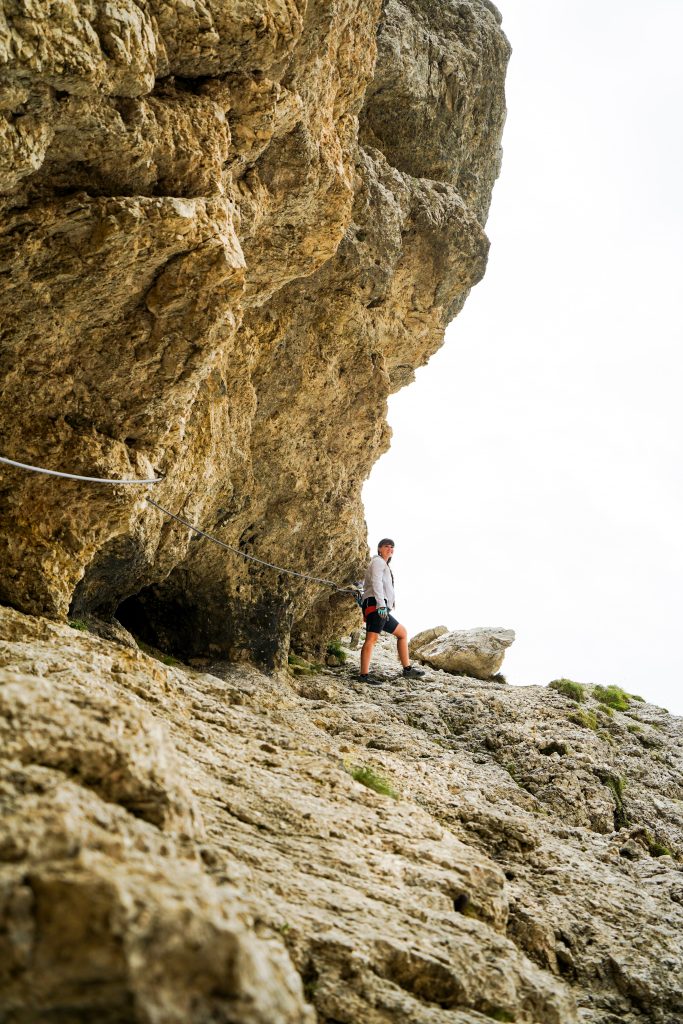
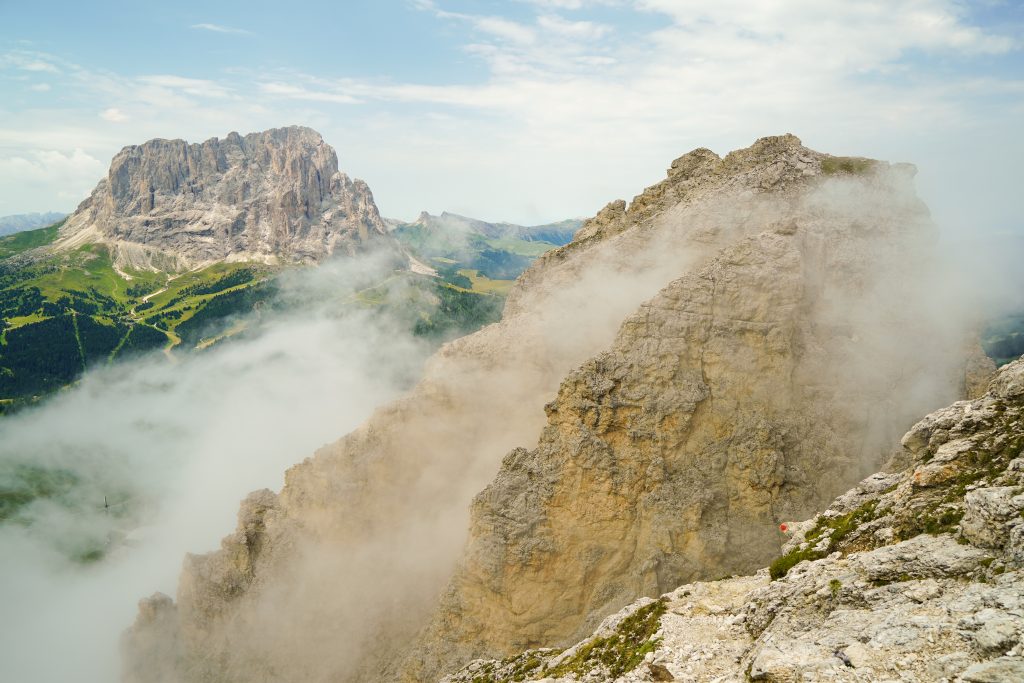
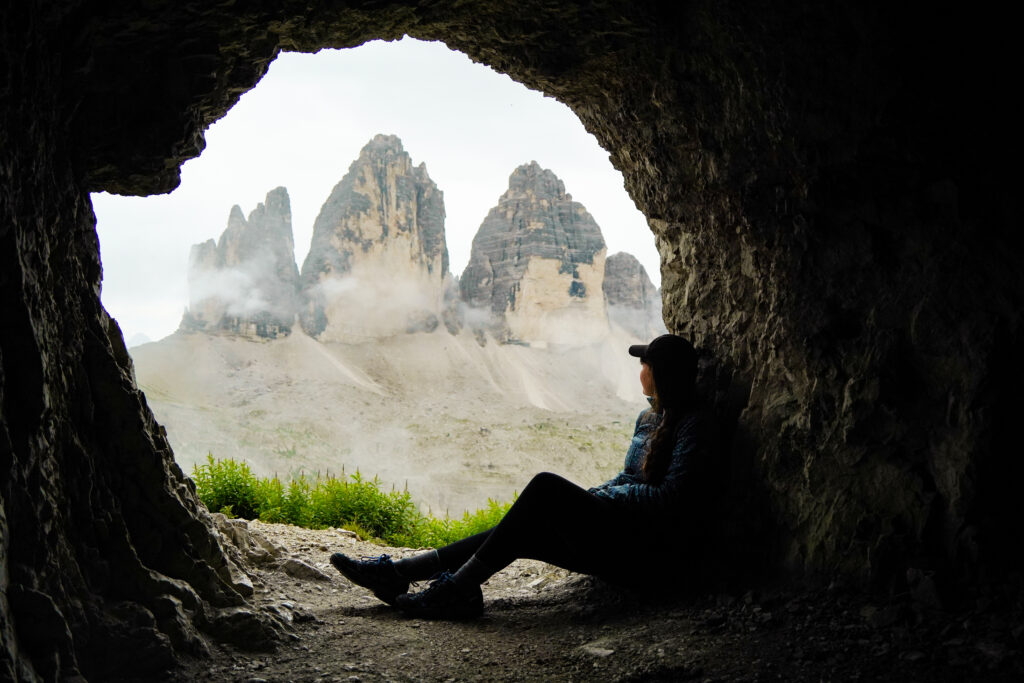
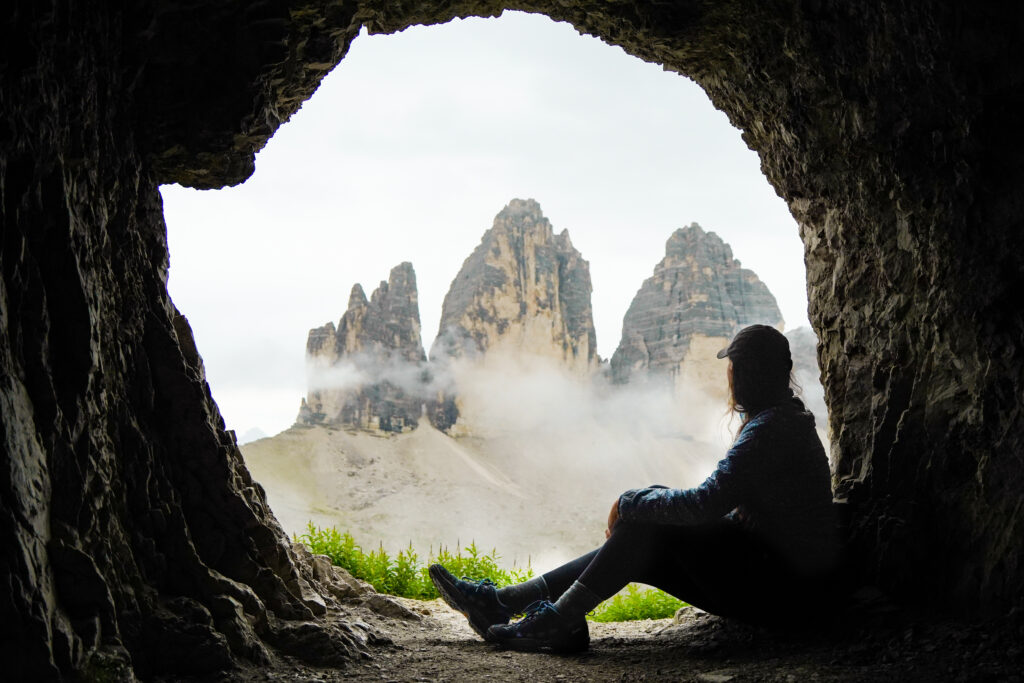
After about an hour, it finally started to clear so we head out to take advantage of whatever views we could (not knowing what the rest of the day would hold). We explored around the nearby caves but after a short time the clouds rolled right back in. So we head back inside to our same spot which was thankfully still free and ordered some lunch and … another cappuccino. 

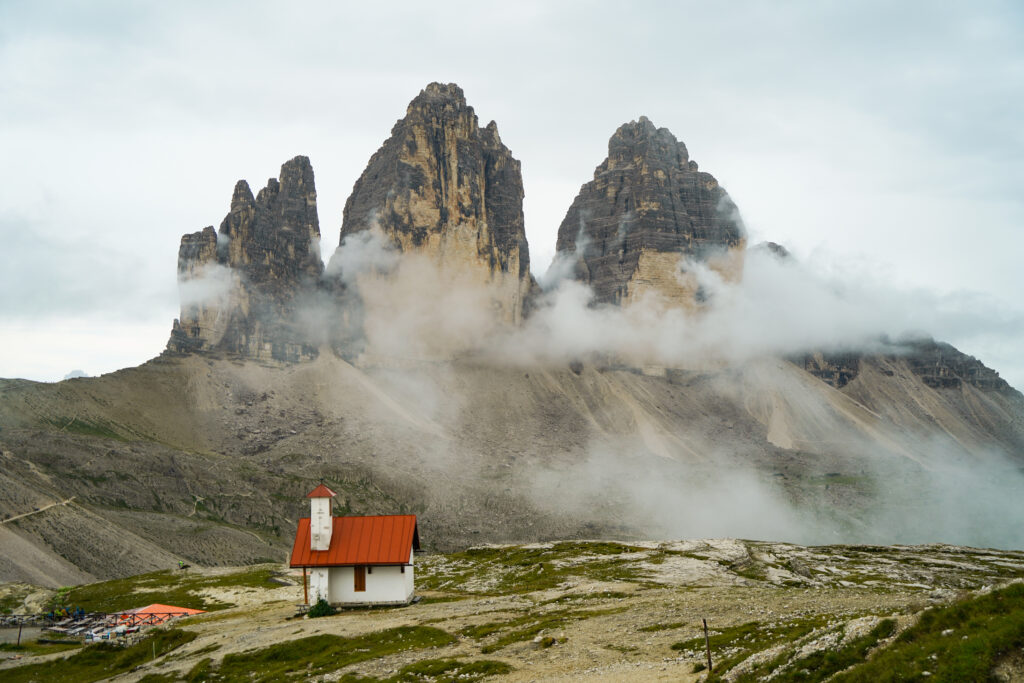
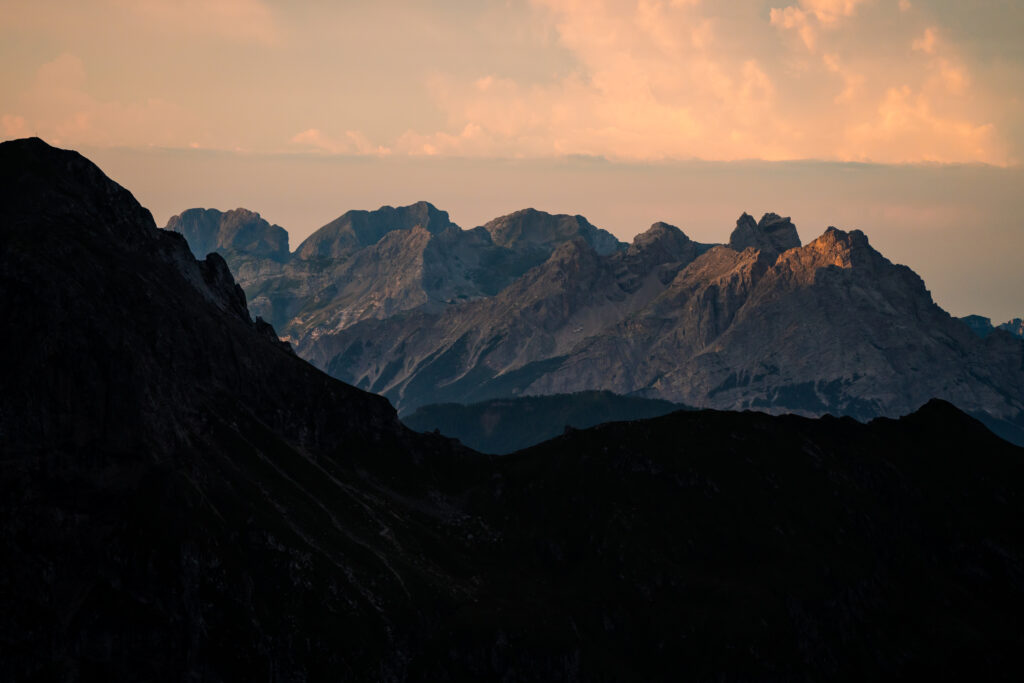
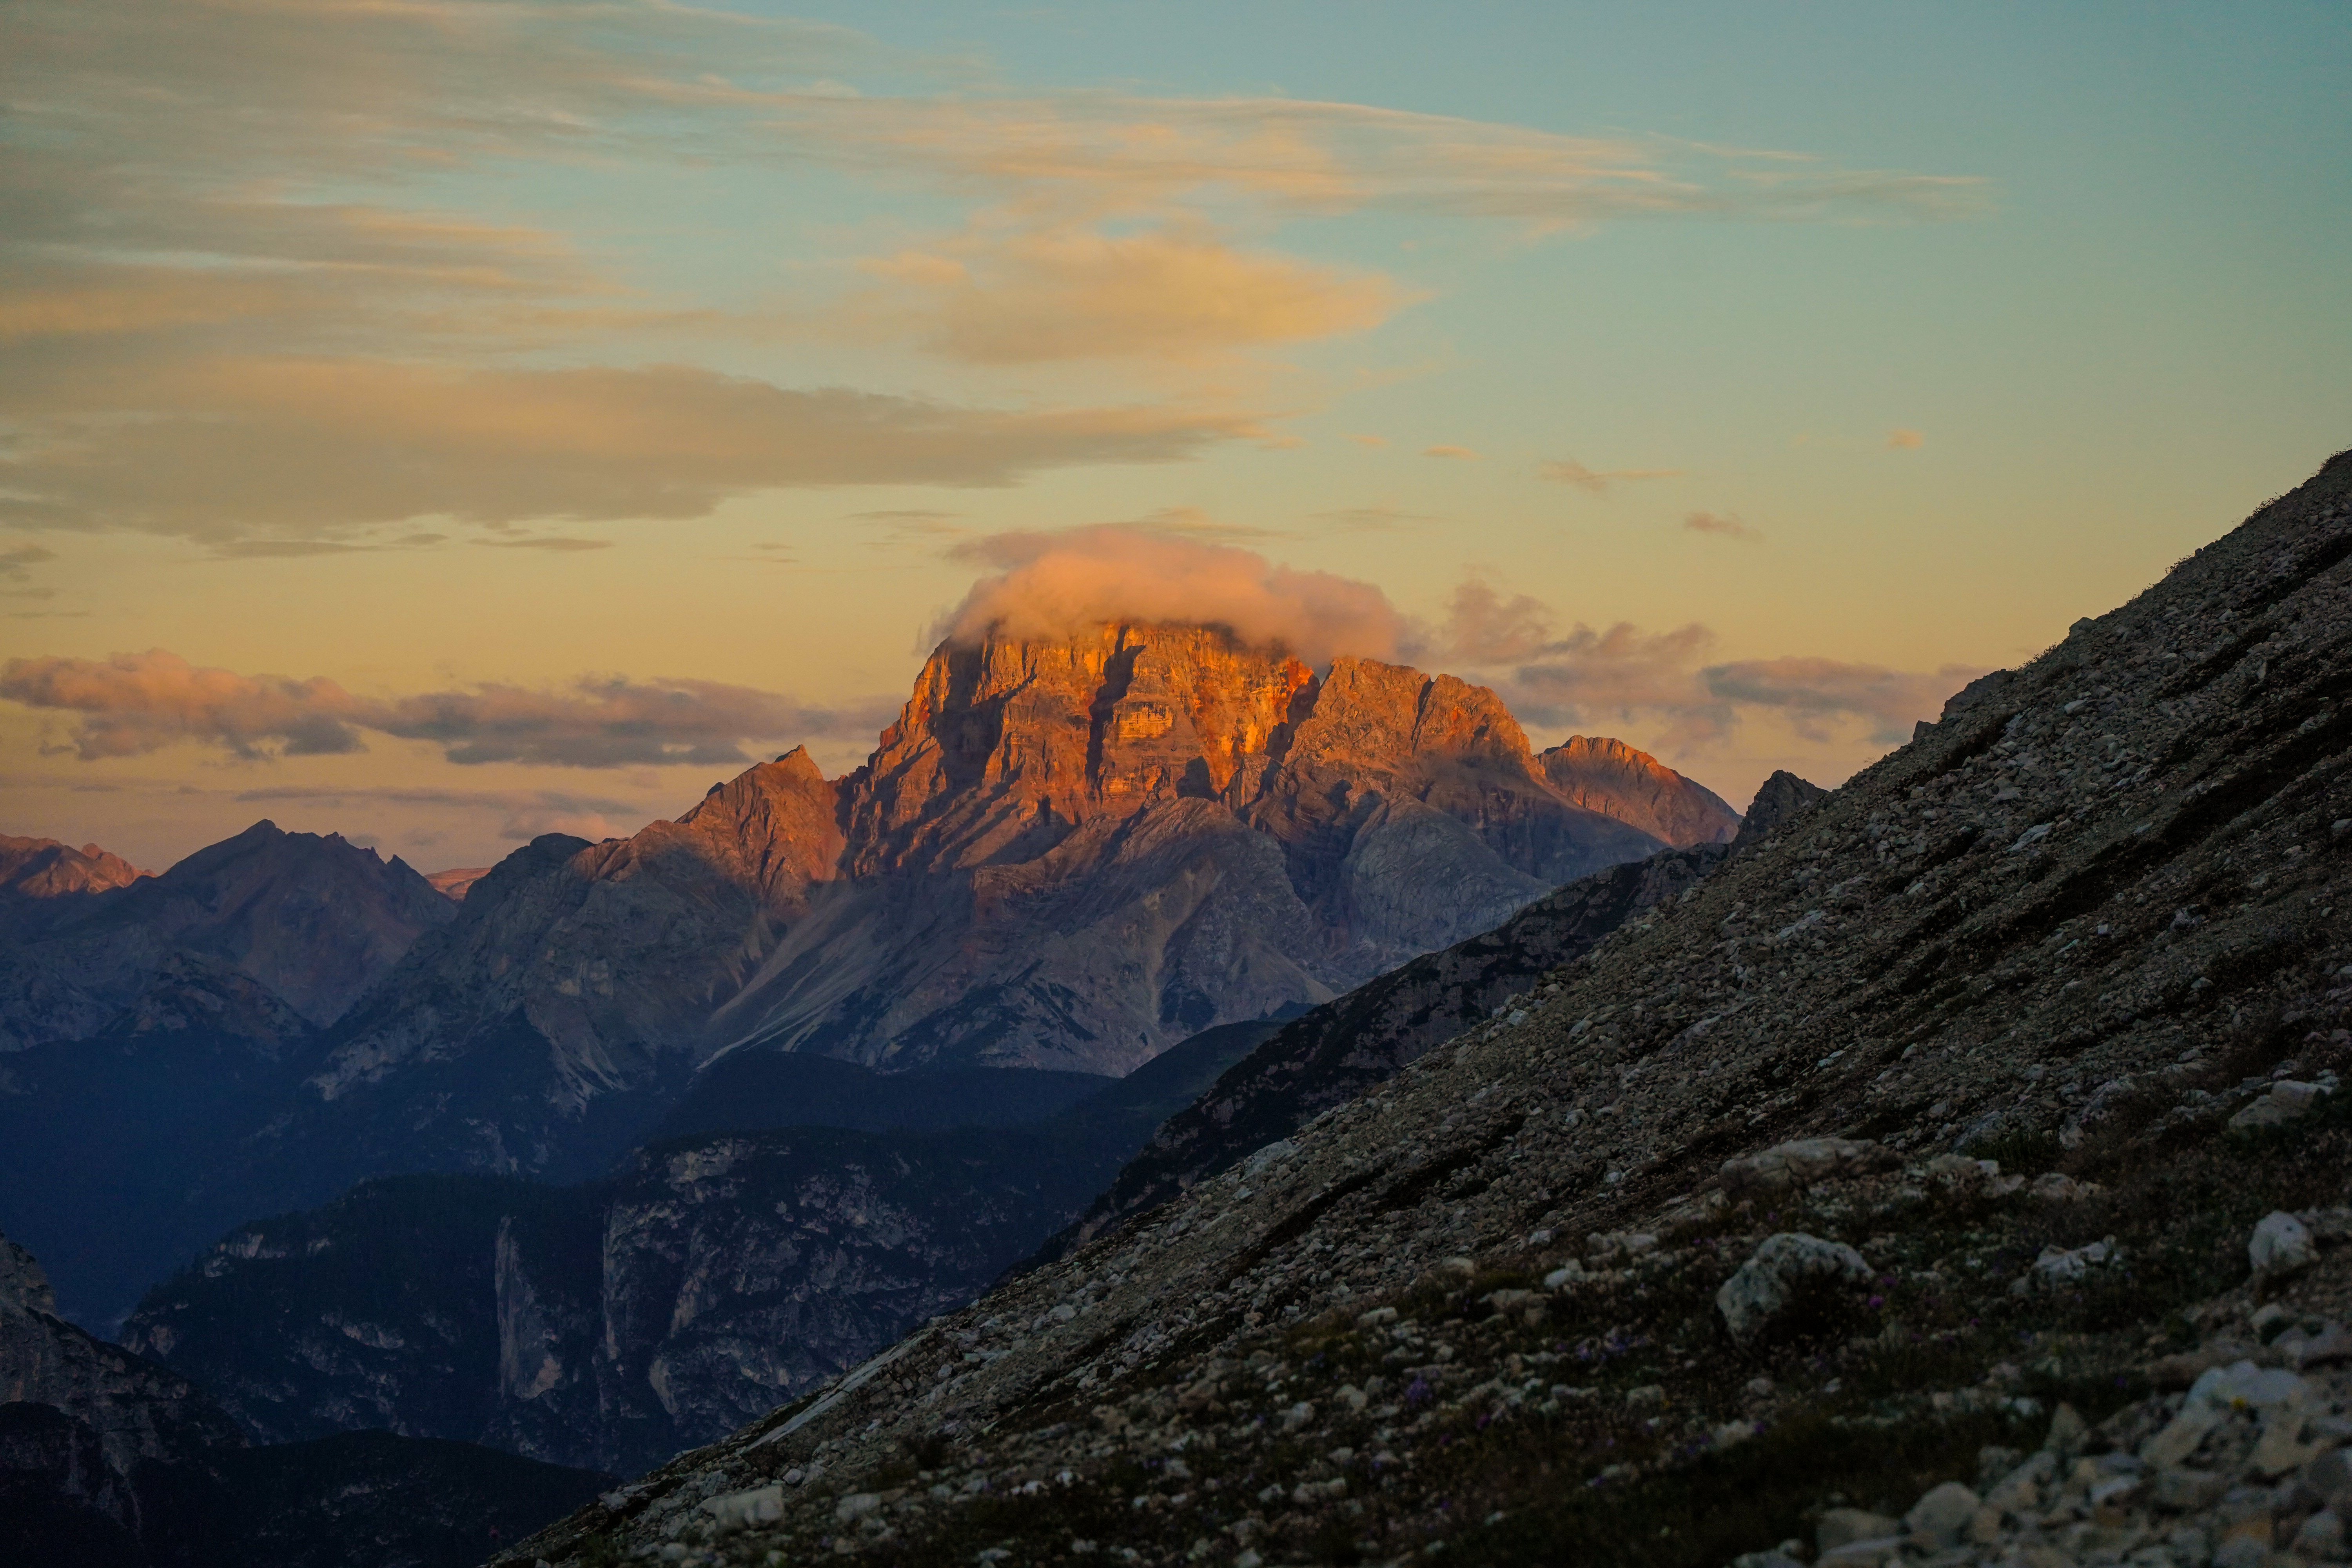
The menu was only in Italian and German but we saw most everyone around us eating a dish called Gholash and it looked good so why not. We got it to share.. Most everything was delightful except for the sauerkraut which neither of us were big fans of. We killed another 1,5 hours sitting there in the dining room, sometimes talking to other people. Eventually the sun truly came out! 

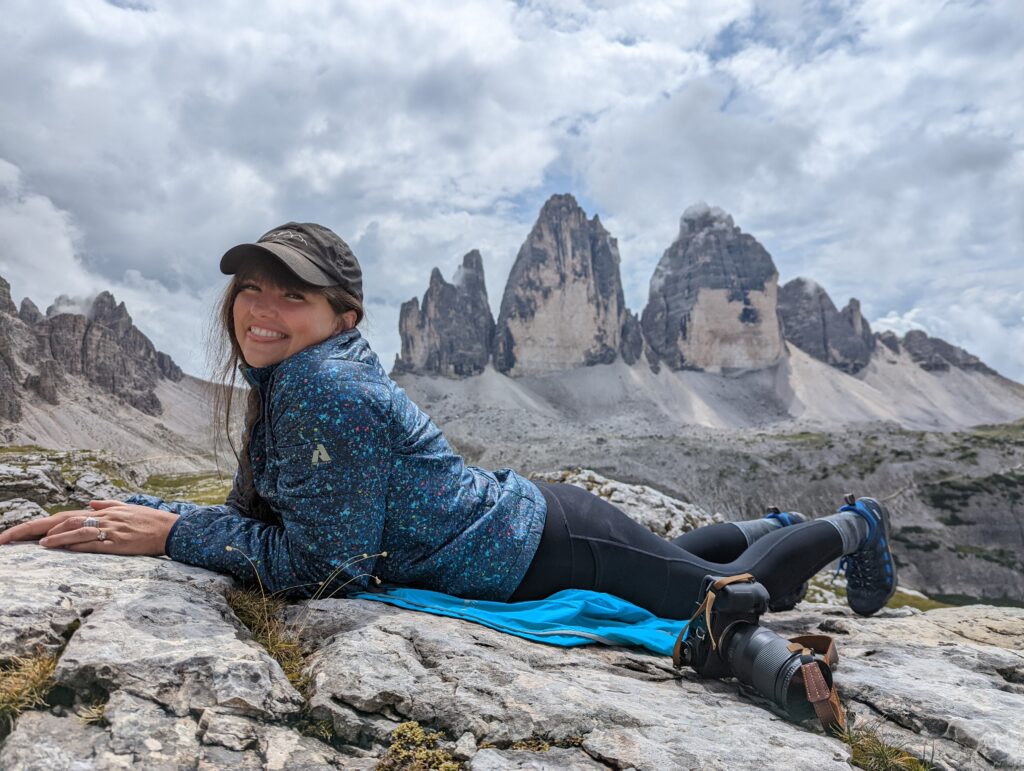
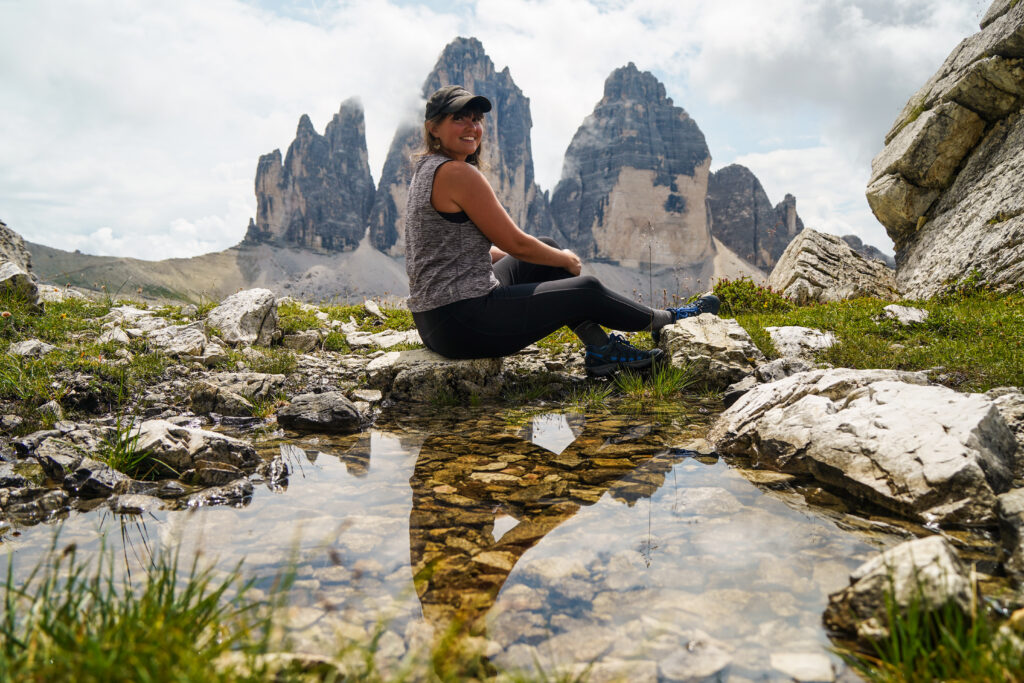
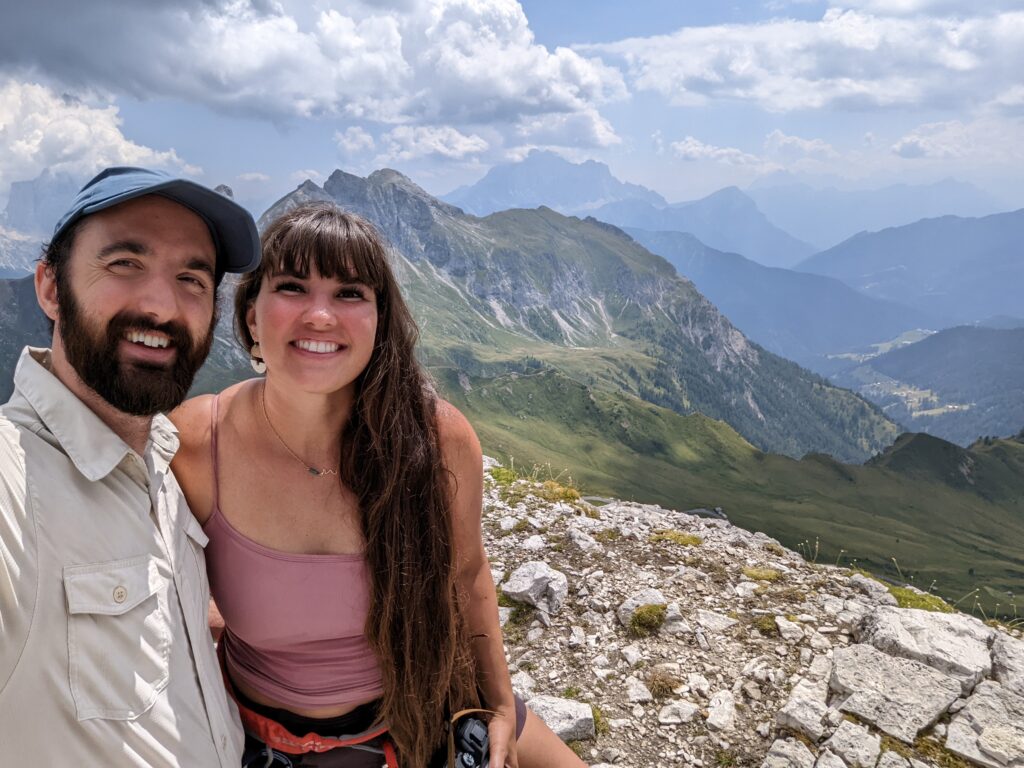
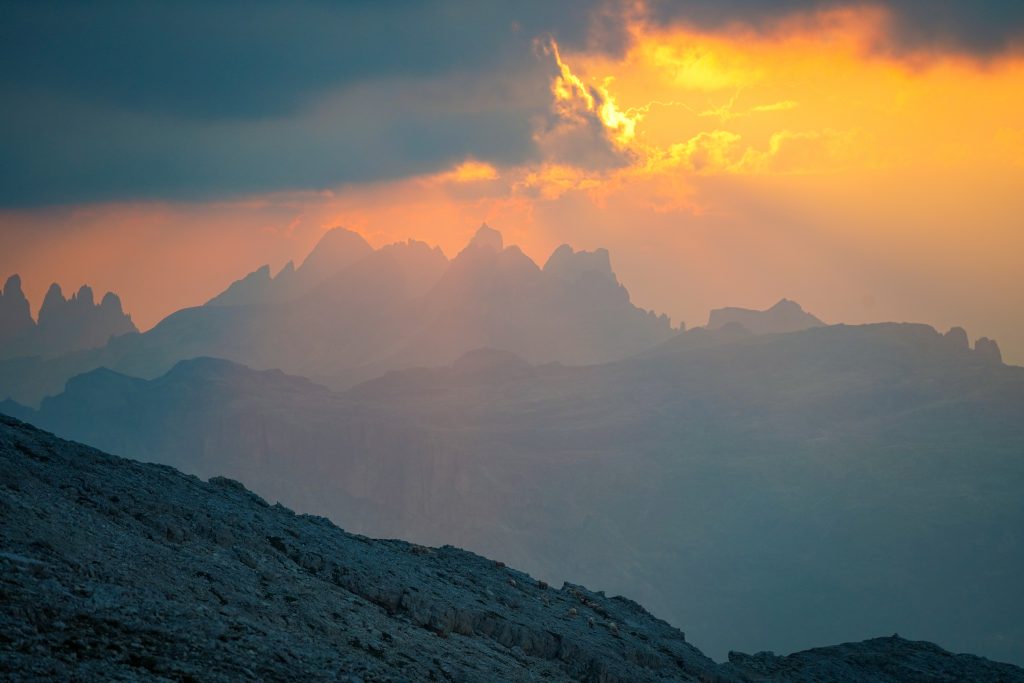
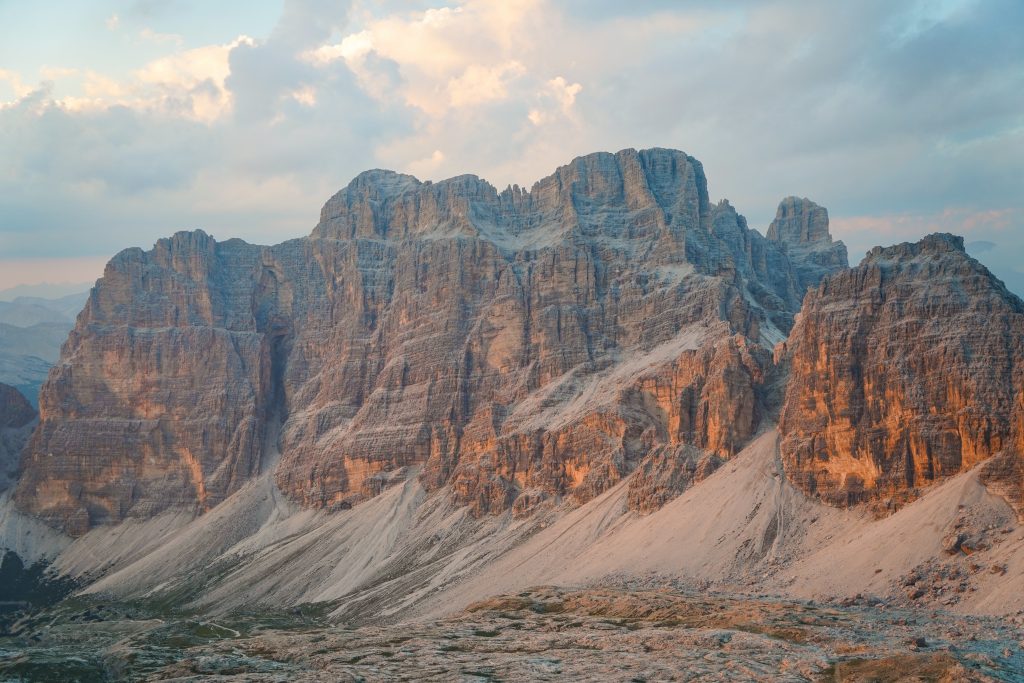
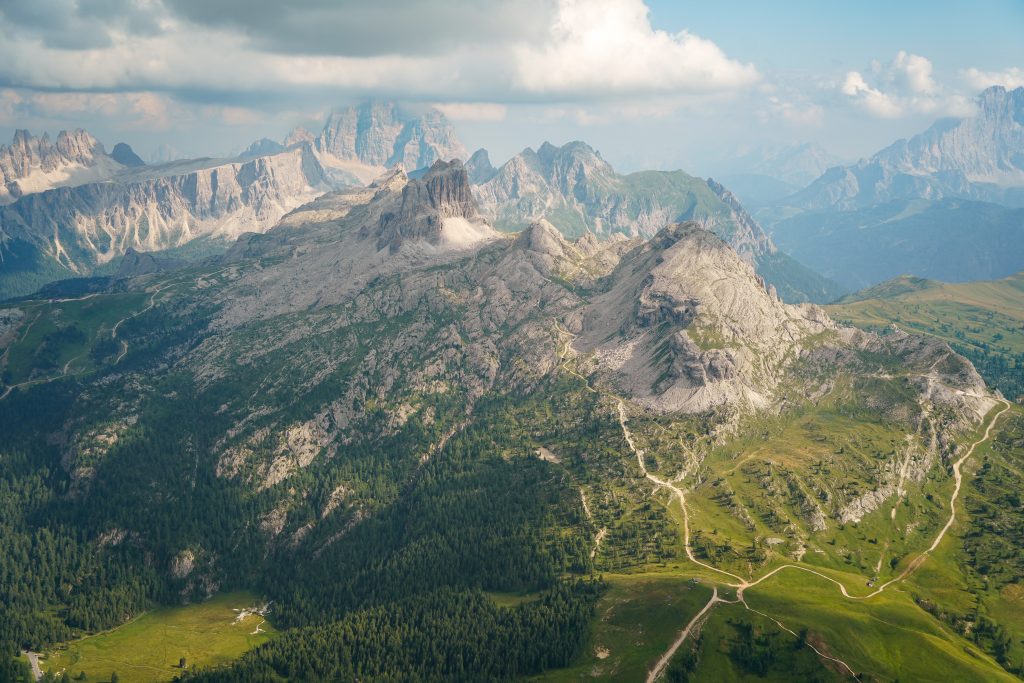
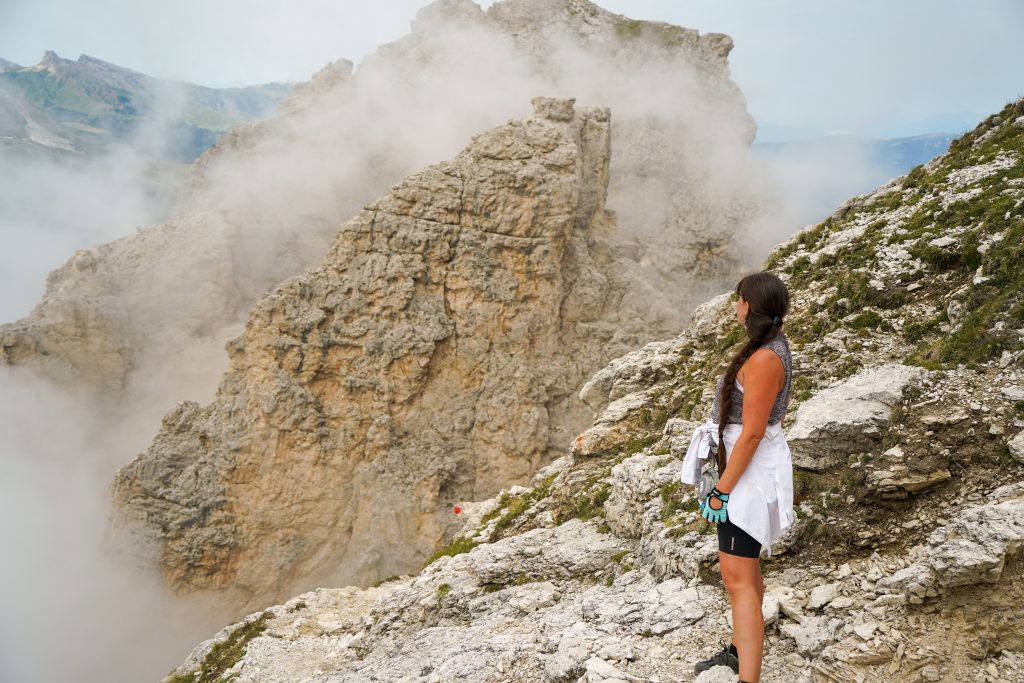
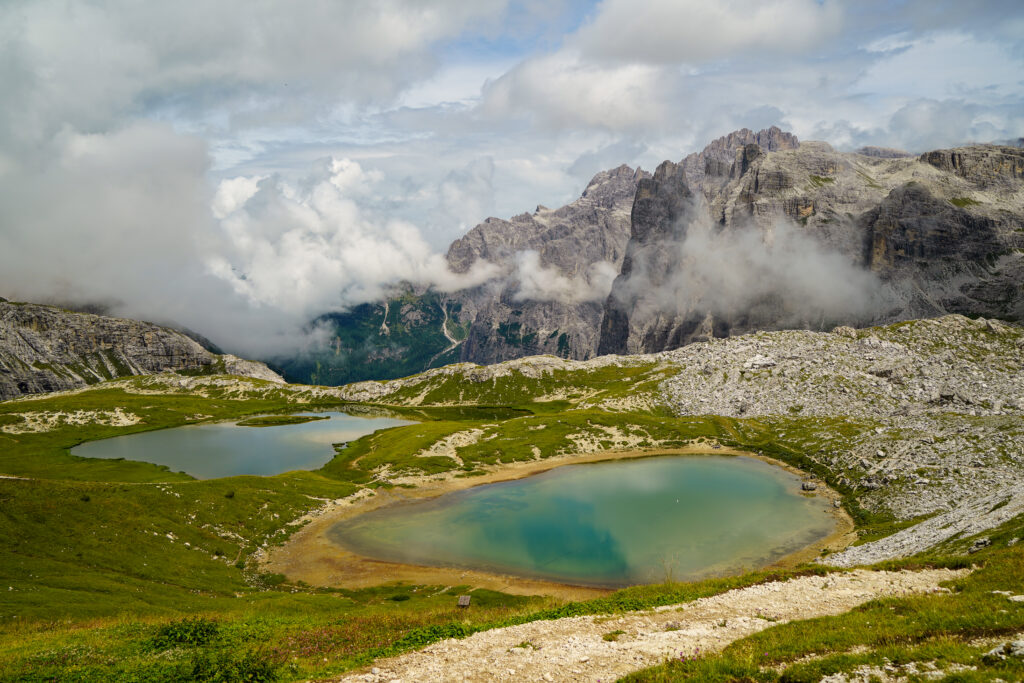
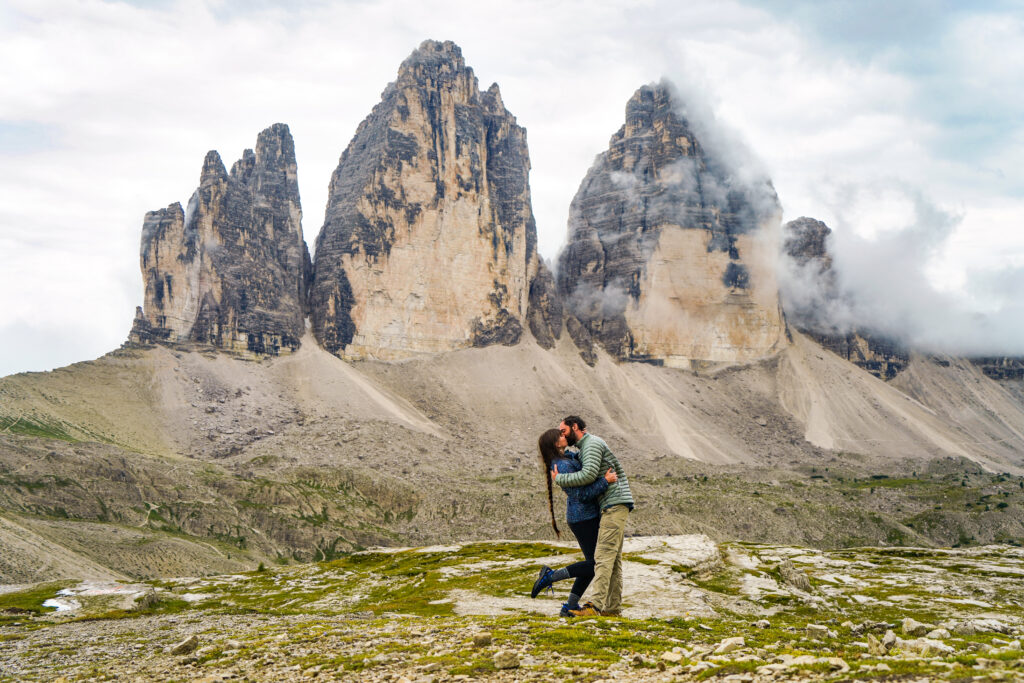
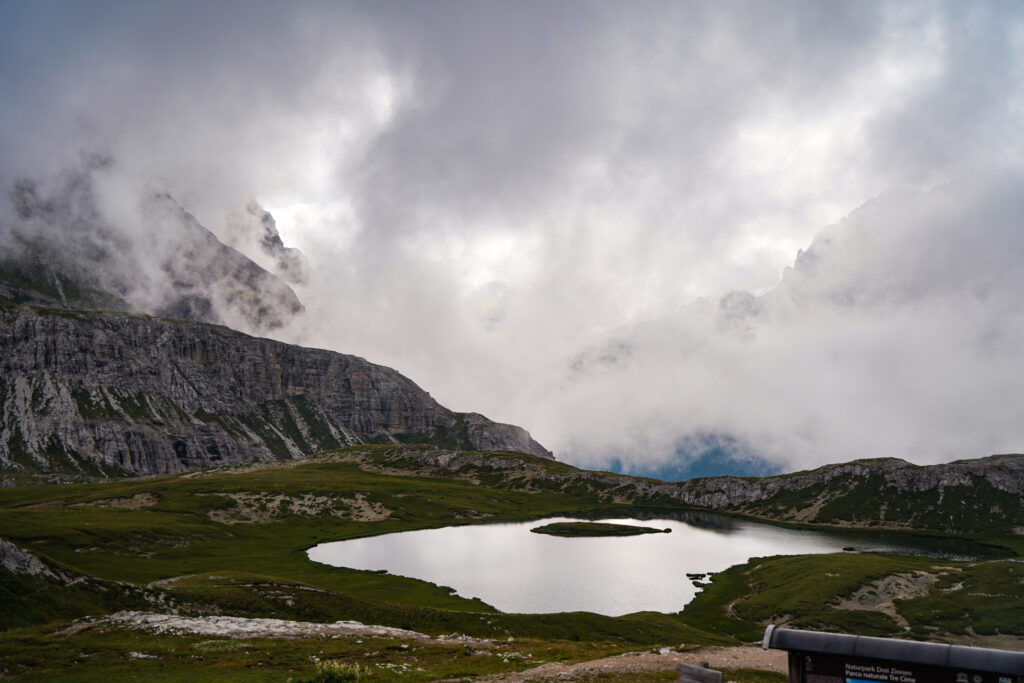
We had 2 hours still to go but I was so excited to finally get to frolic in the sun and see all the gorgeous views! We took some pictures, explored, and eventually wound up at the small lakes skipping rocks. 

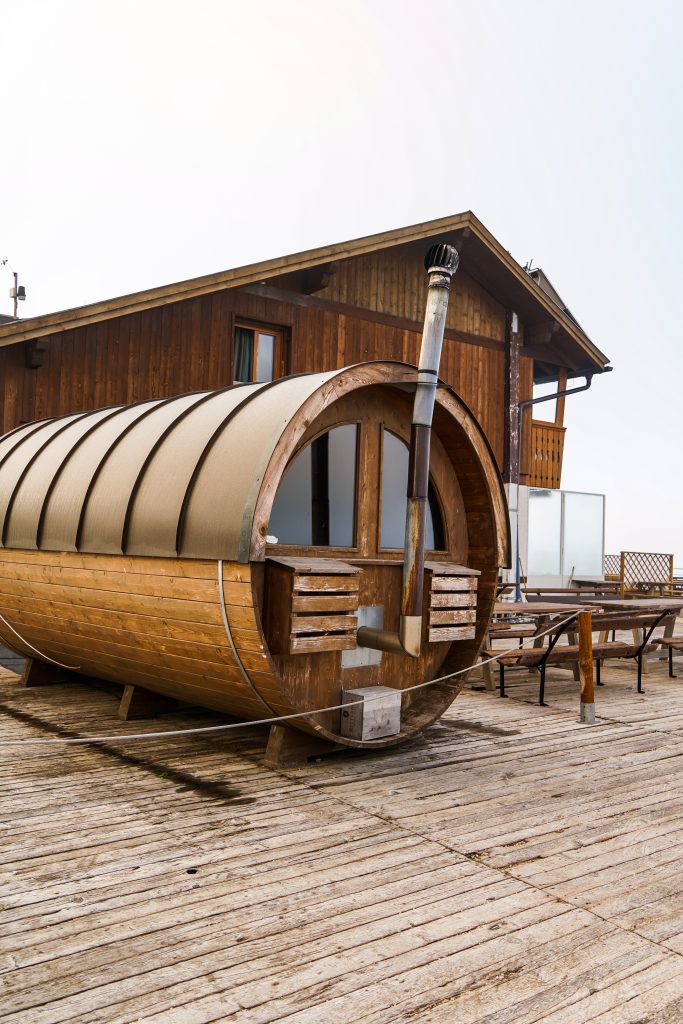
Right at 3 we rushed to check in which was the slowest and longest line we ever saw at checkin. (probably due to taking payment at checkin and in cash) From there we were relaxed in our room, got some snacks, and played cards until dinner at 7 which was probably my favorite mountain hut dinner of the bunch. (easily the most food)

The sunset was again all clouds but luckily sunrise was gorgeous! ~ Rifugio Locatelli with our destination for day 2 Mount Paterno towering in the background

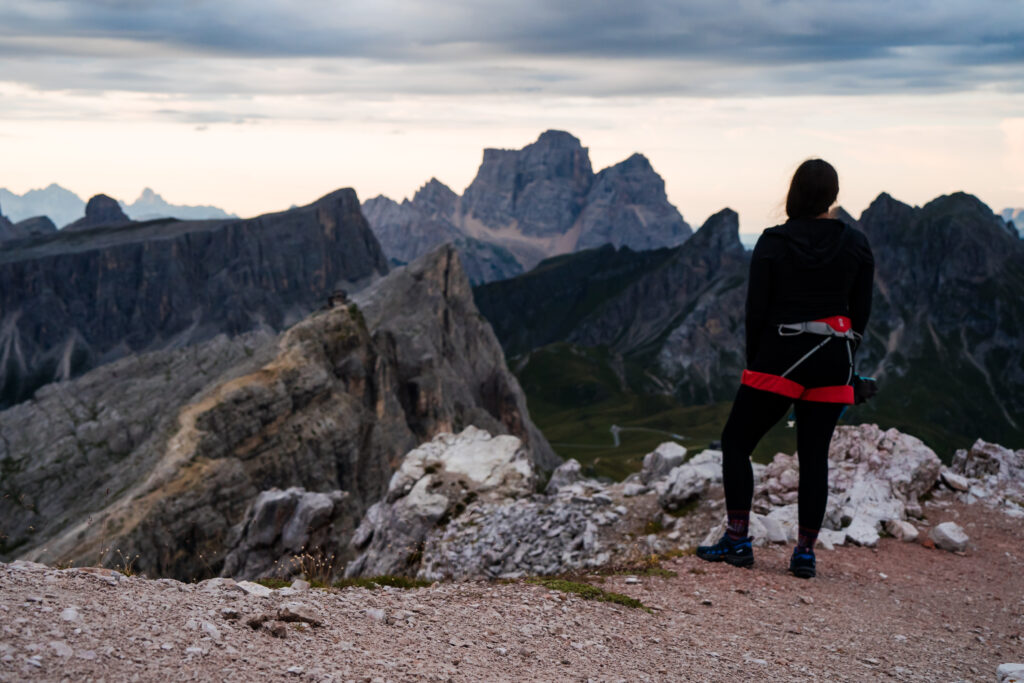
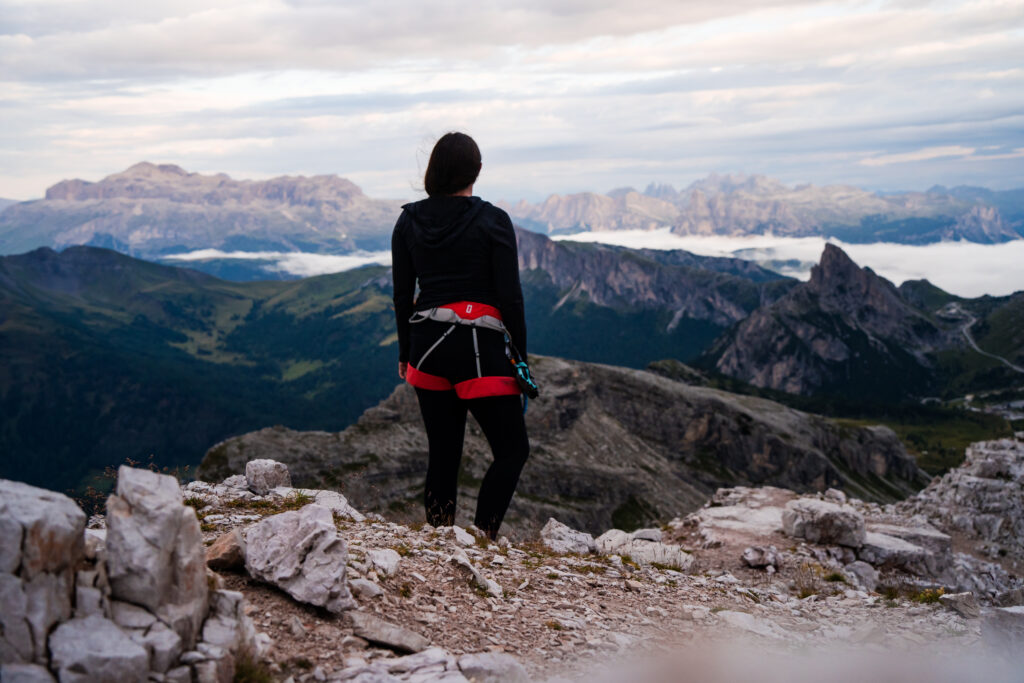
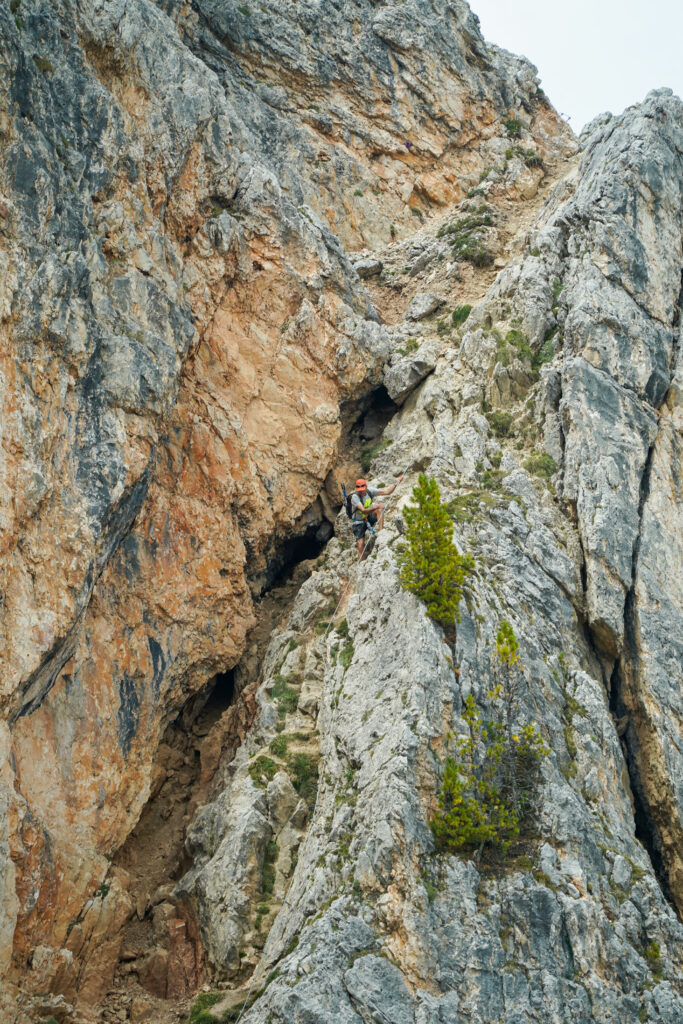
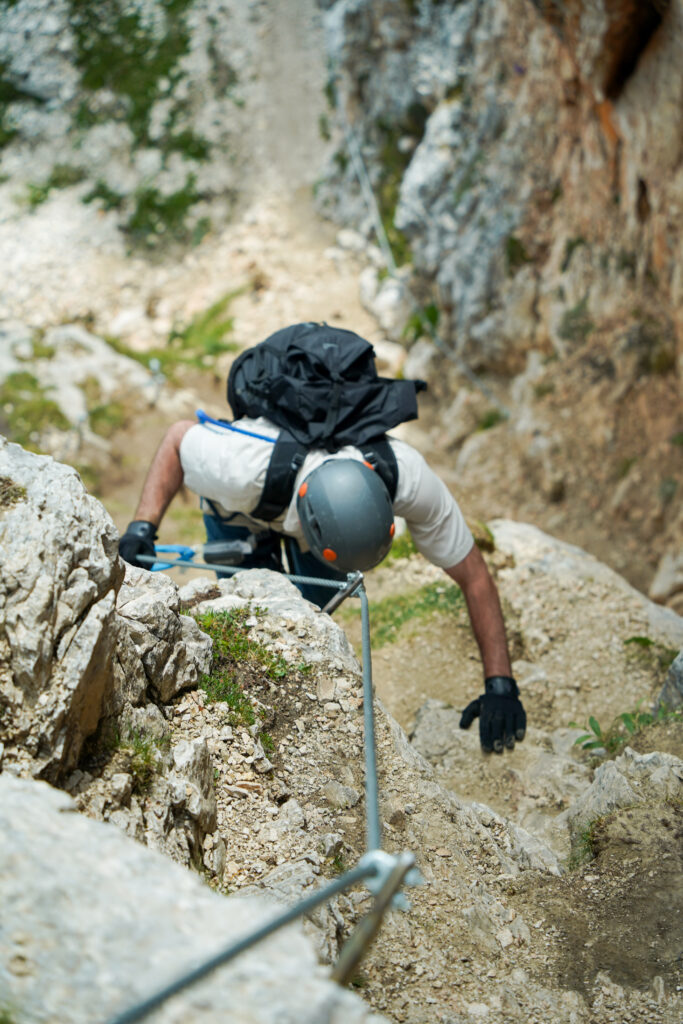
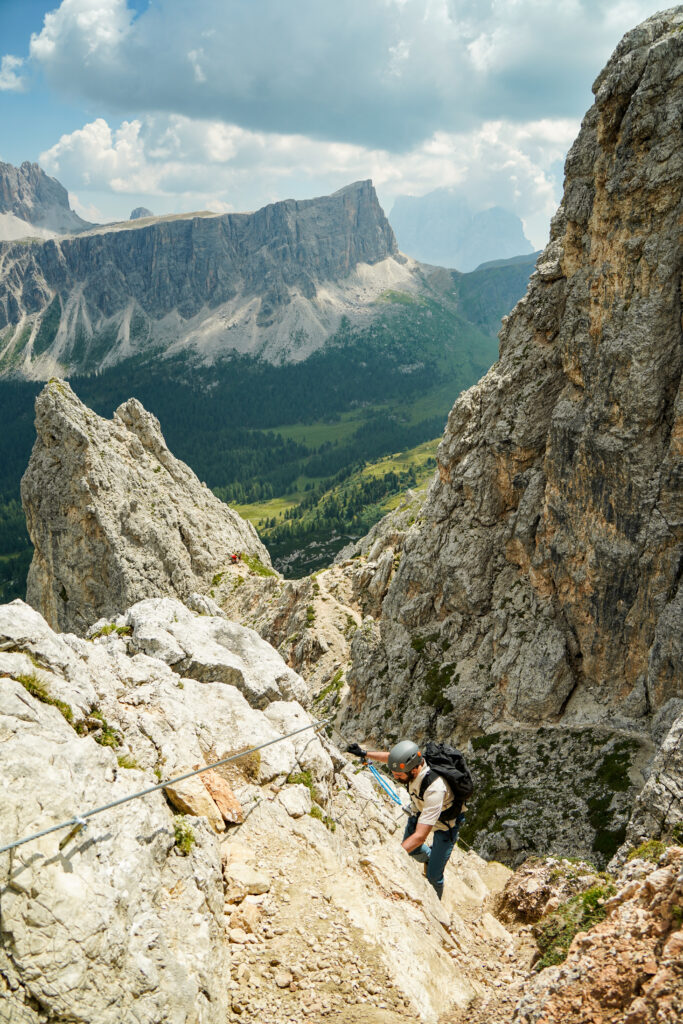
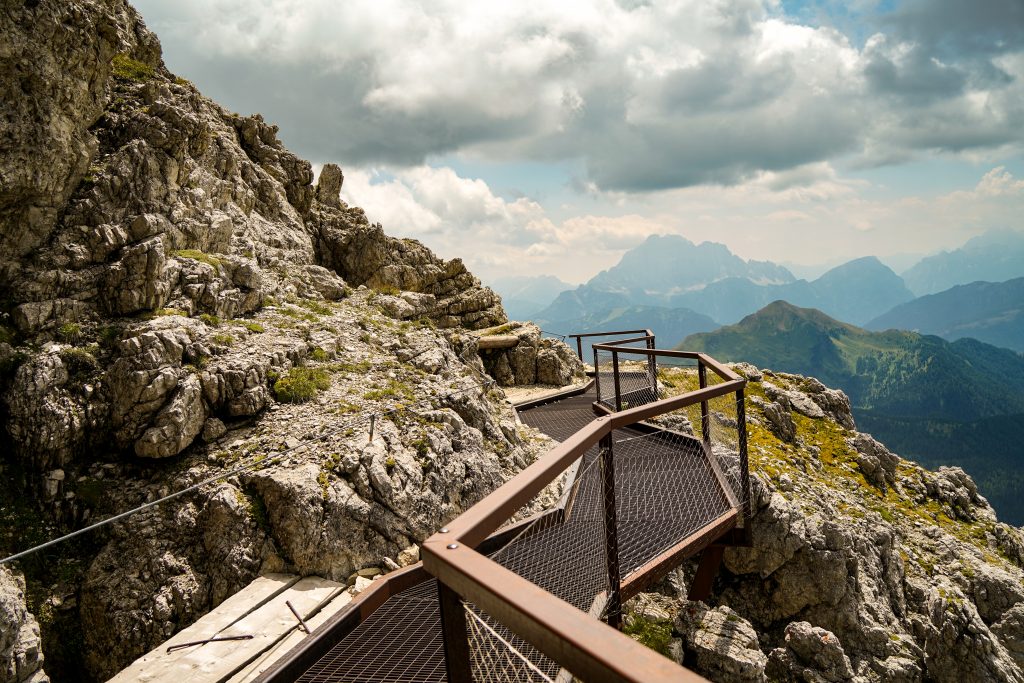
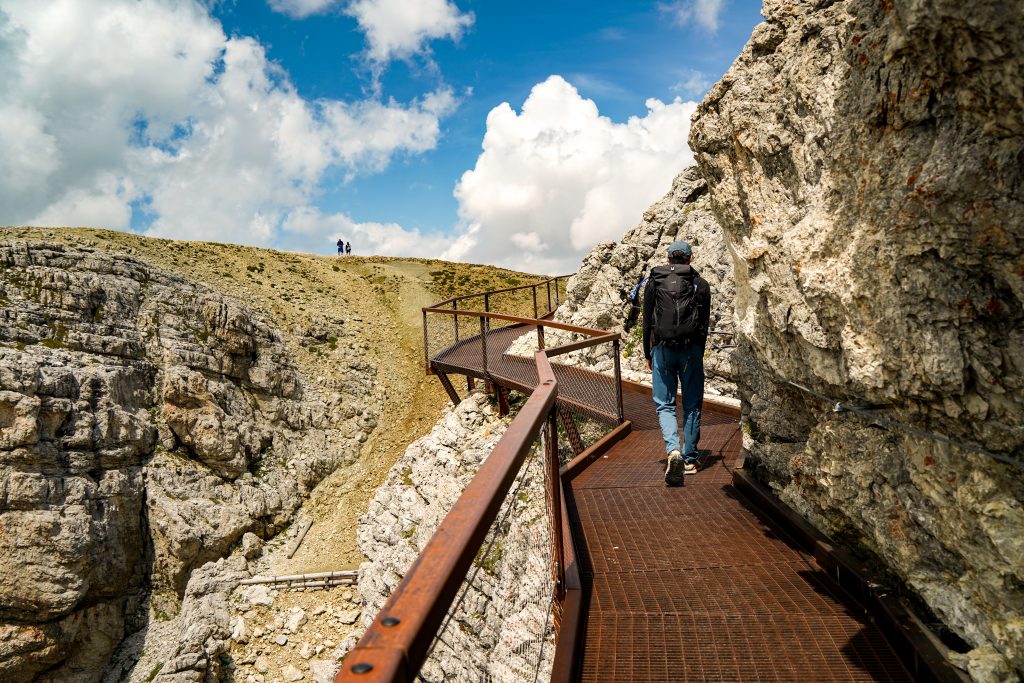
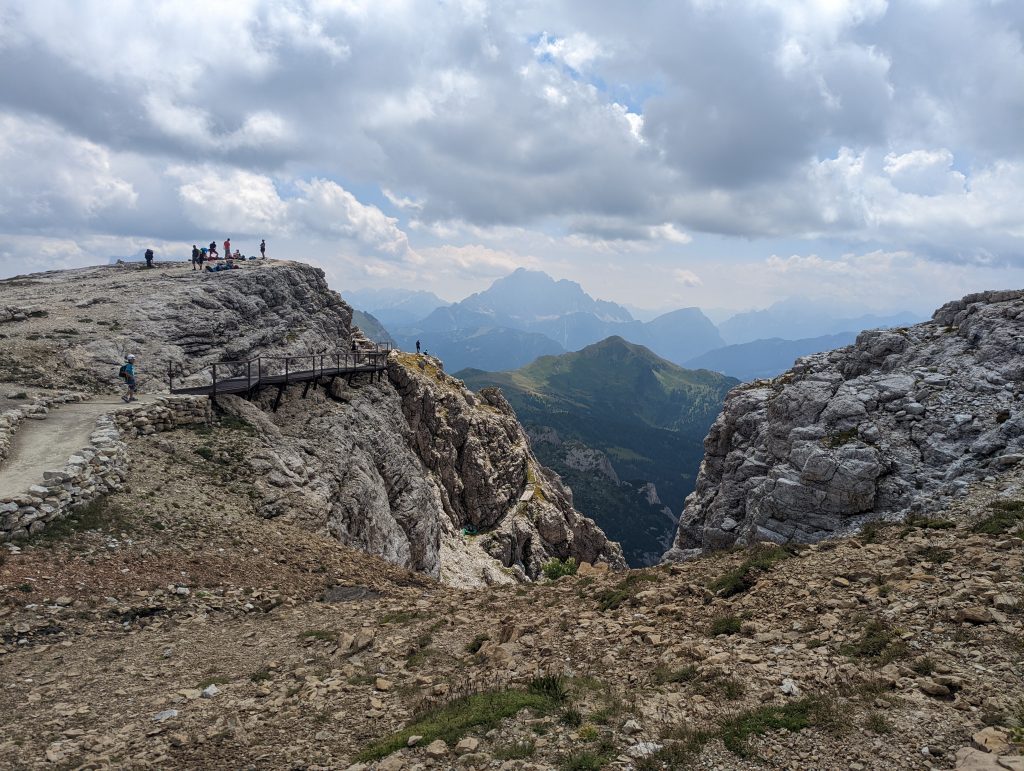
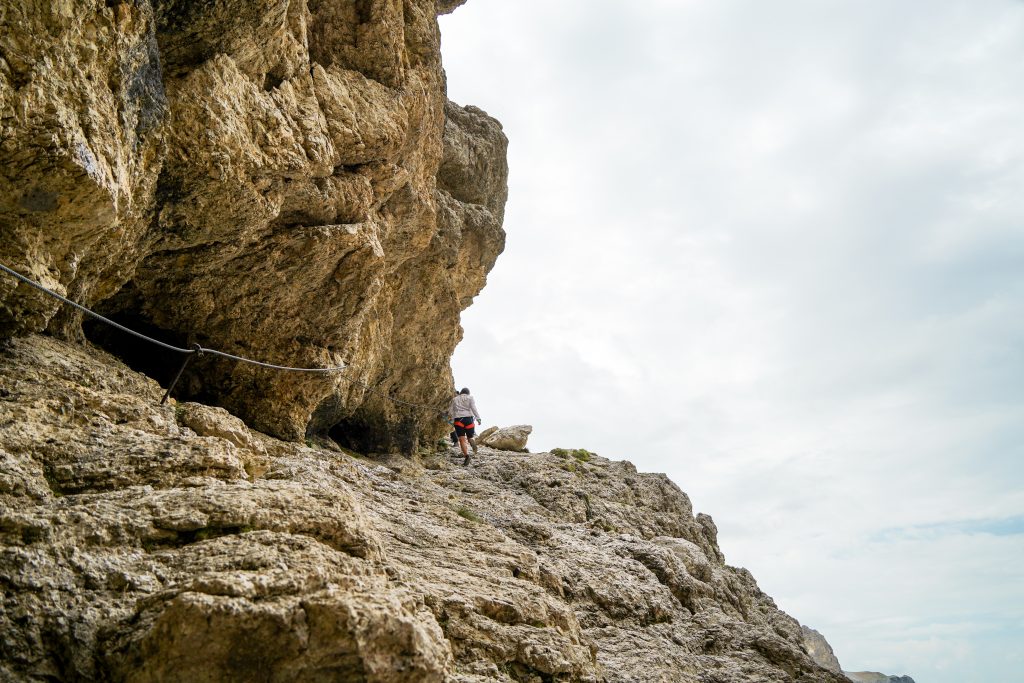
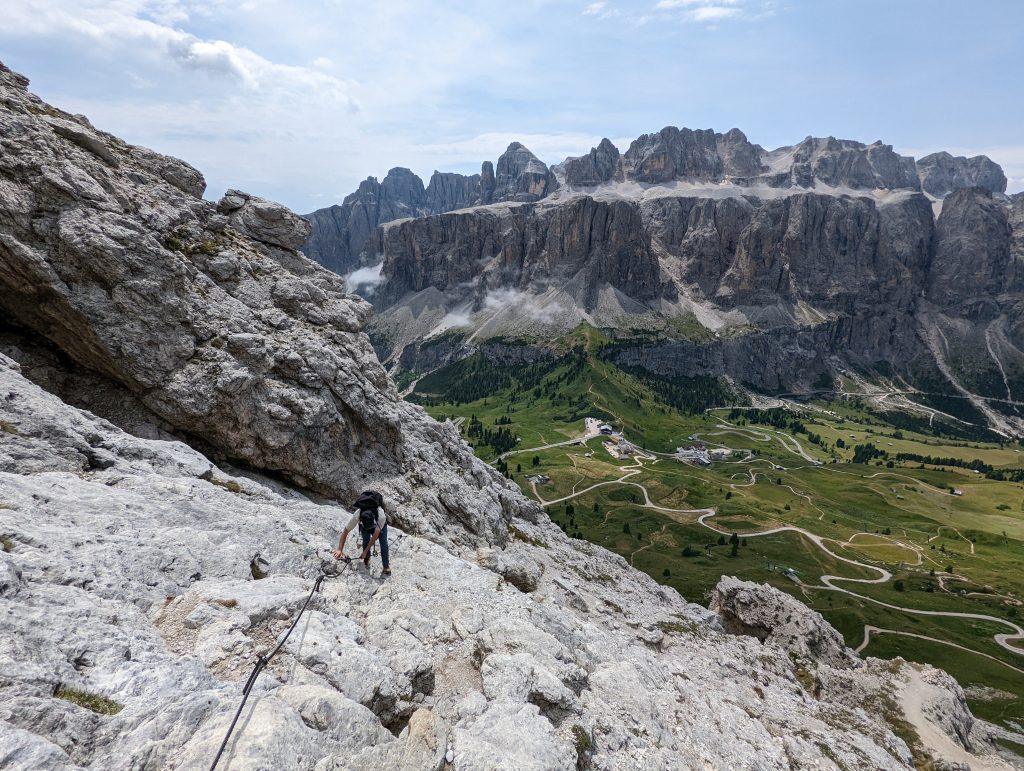
All in all, a wonderful day on the Tre Cime trail even if we did only hike half of it! We would have to skip the rest of the loop because the next day, we were taking the Mount Paterno Via Ferrata back! 

Tre Cime Trail Details: (To Rifugio Locatelli as an out and back) 

Distance: 5 miles RT
Elevation gain: 1500 feet on the way to the hut, and another 300 feet or so on the way back
Difficulty: moderate
Time: 3-4 hours

Facilities on the trail:

  • Toilets at Auronzo hut (trailhead): 1 euro and note these are squat toilets only.
  • Toilets at Lavaredo hut: 50 cents and note these are squat toilets only. 
  • Toilets at Locatelli: Standard toilet and free! If you can make it, I recommend over the Lavaredo hut whole heartedly. All of them provided toilet paper. It’s also not a bad idea of course to visit the establishment for a bite to eat or drink. 

Trailhead:

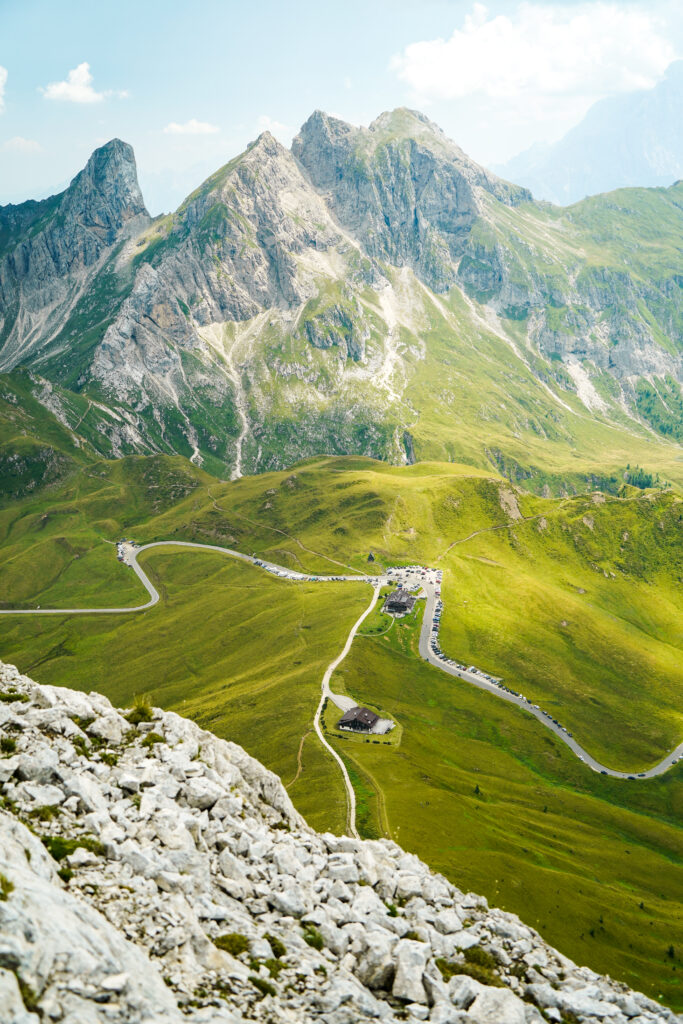
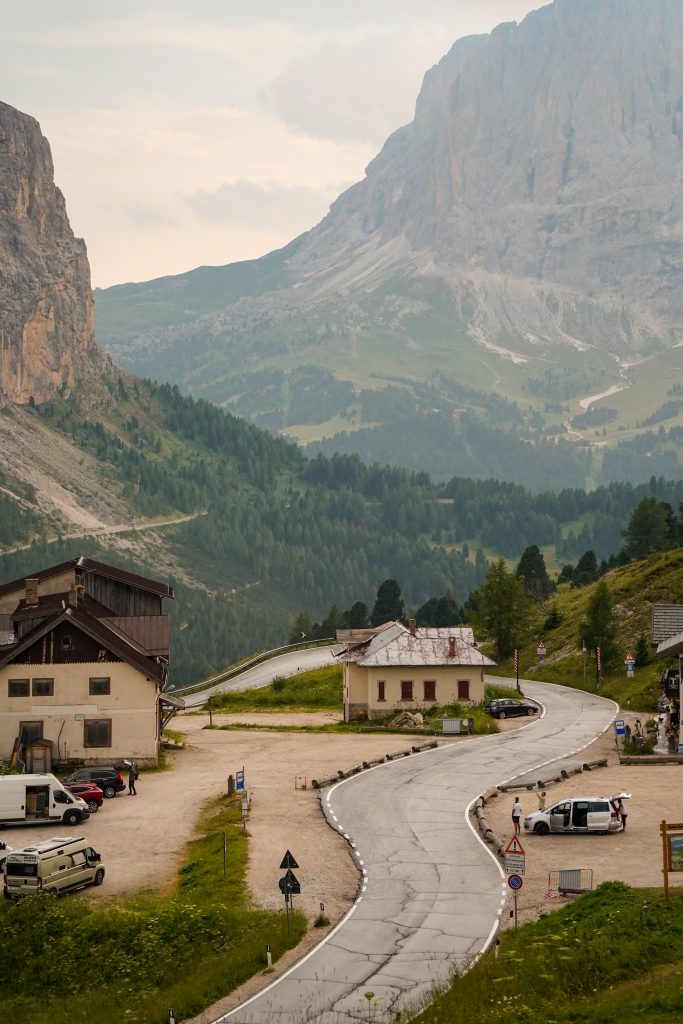
The trail starts from Rifugio Auronzo. Take the scenic road from the town Misurina. Note the final 7 km are an expensive toll road. It costs 30 euros per day that you are up there. So don’t make the same mistake we made thinking it’s just 30 euros to drive the road. If you are staying the night in one of the huts, it is 60 euros for both days and you WILL have to pay the second 30 euro charge when you exit. There are much cheaper and pretty good public transport options that I would HIGHLY recommend doing especially if you will be there for 2 days.

Option 1: Park in Misurina and take the bus. The bus from Misurina costs 8 euros round trip per person but you may be paying more money in parking fees.

Option 2: Park at Lago Antorno further up the scenic road at the last bus stop before the toll road starts. Parking here is free! The bus will still cost 8 euros round trip per person from this stop.

Option 3: Self-drive to the trail head and pay 30 euros per day.

I’m not a fan of buses but this bus system was easy to use, prompt on schedule, and a much better price. So I’d save the money and take the bus if I had a do- over.

Trail Description:

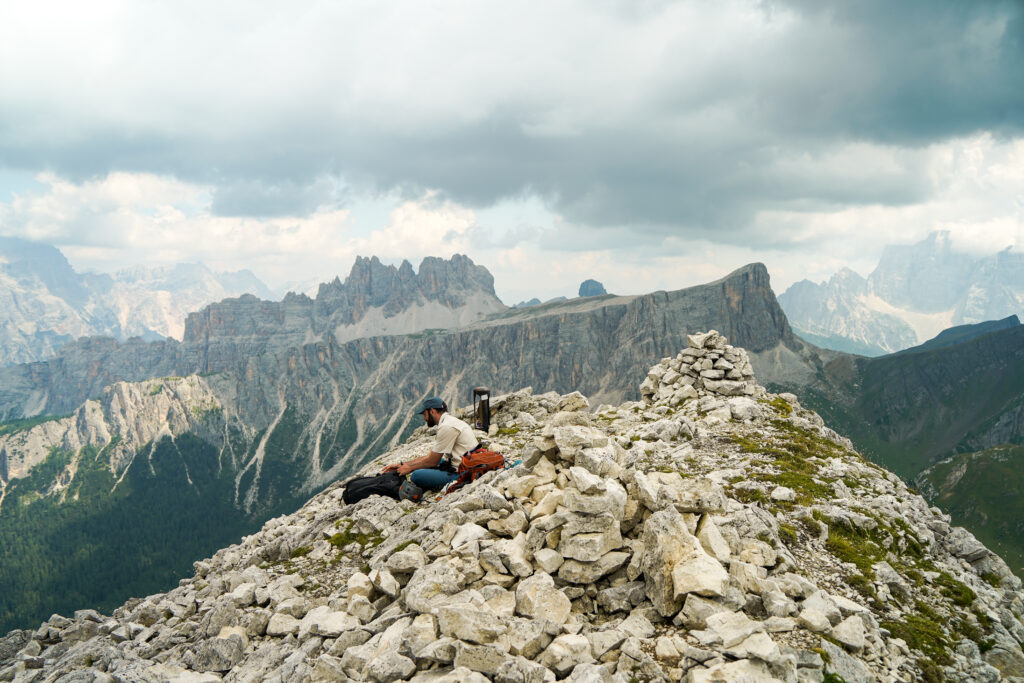
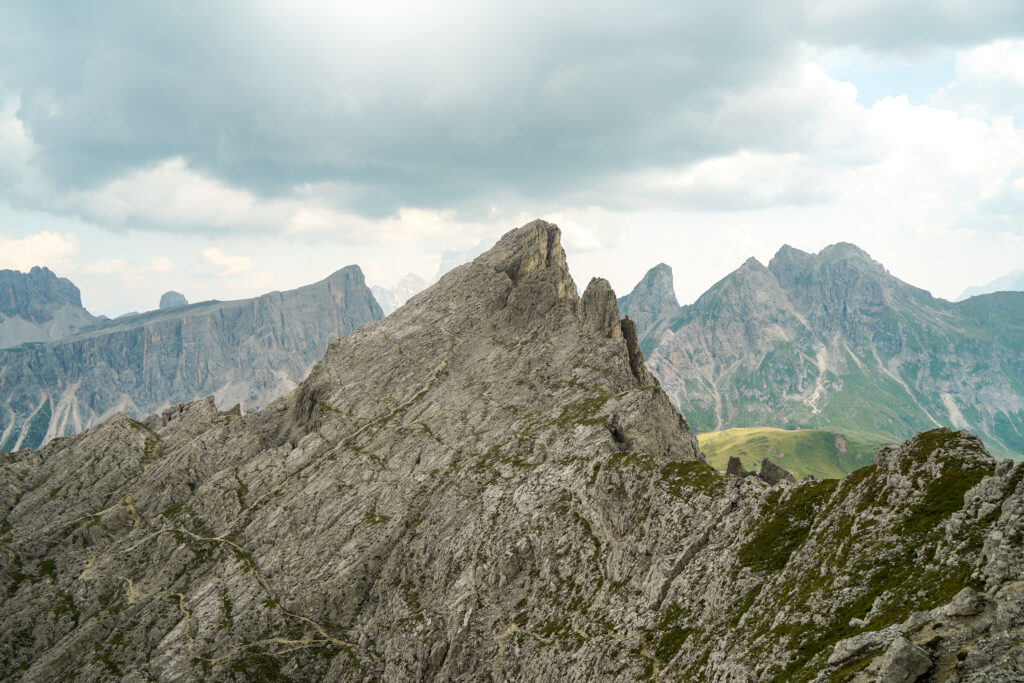
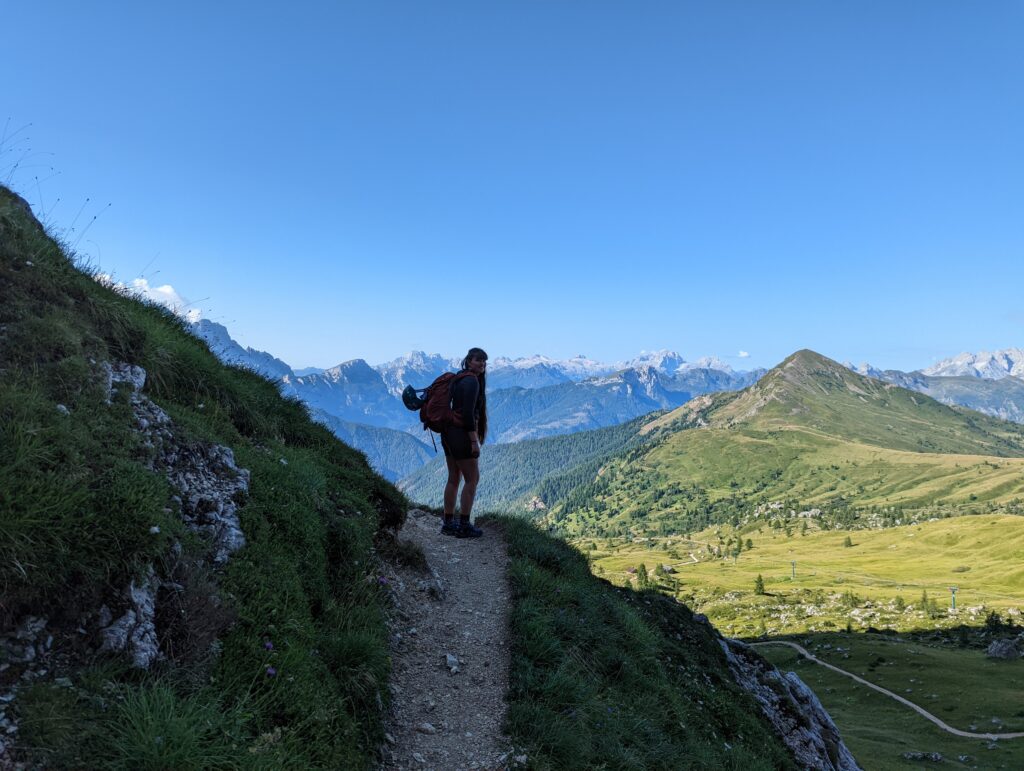
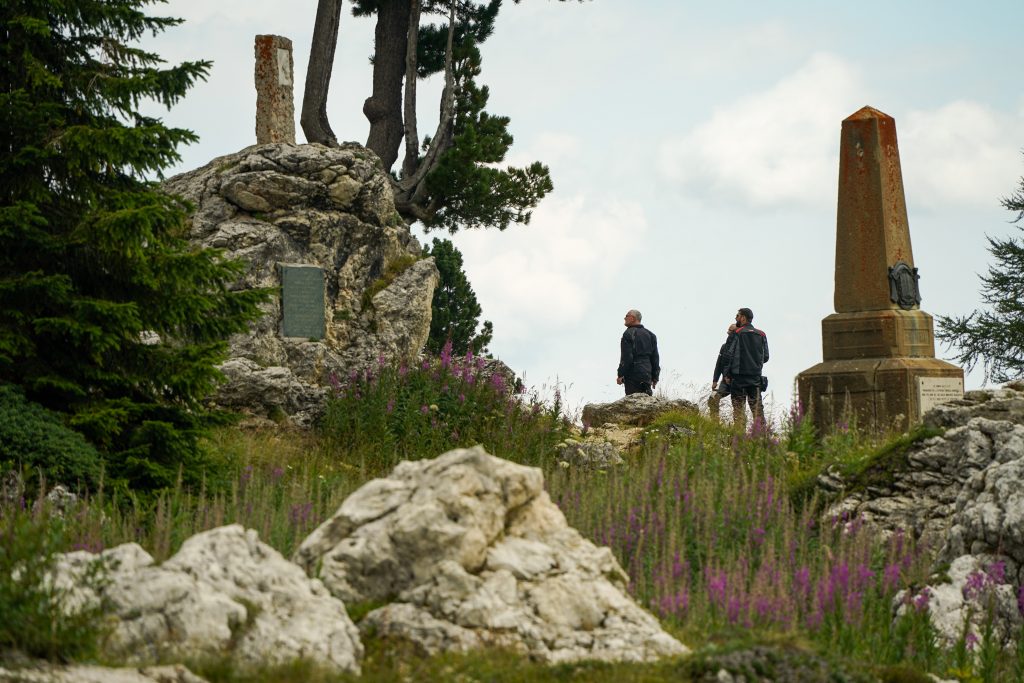
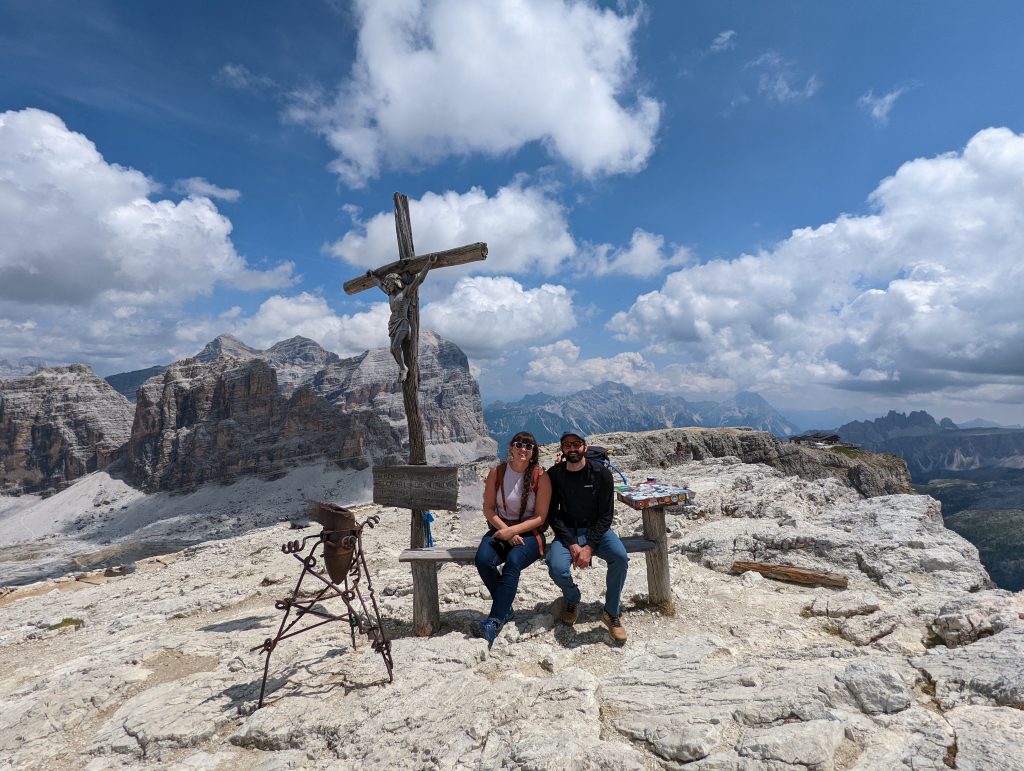
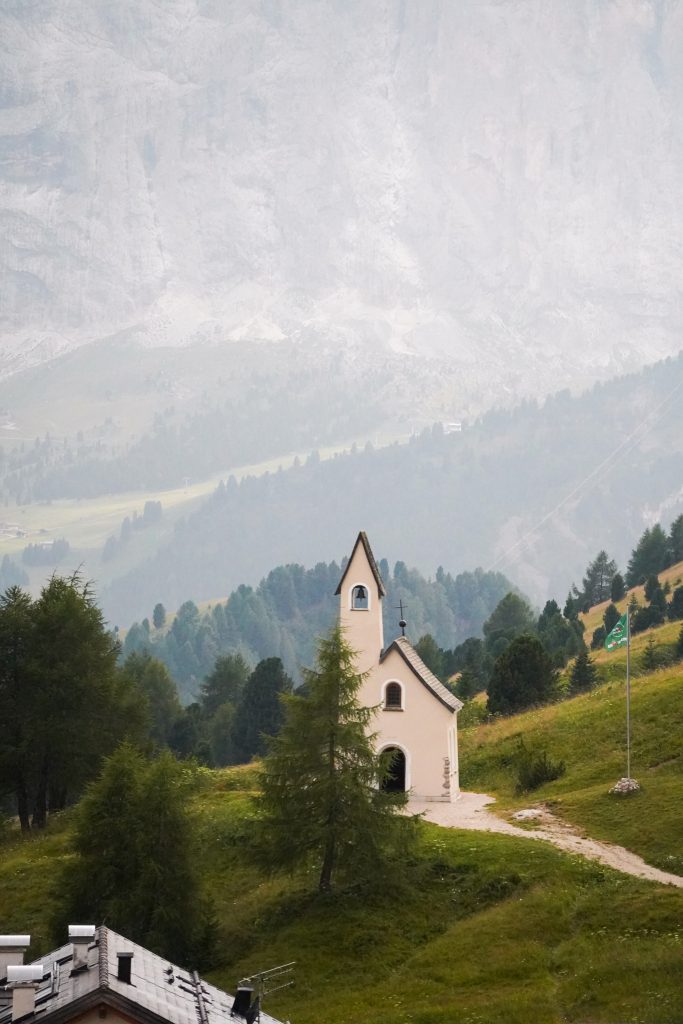
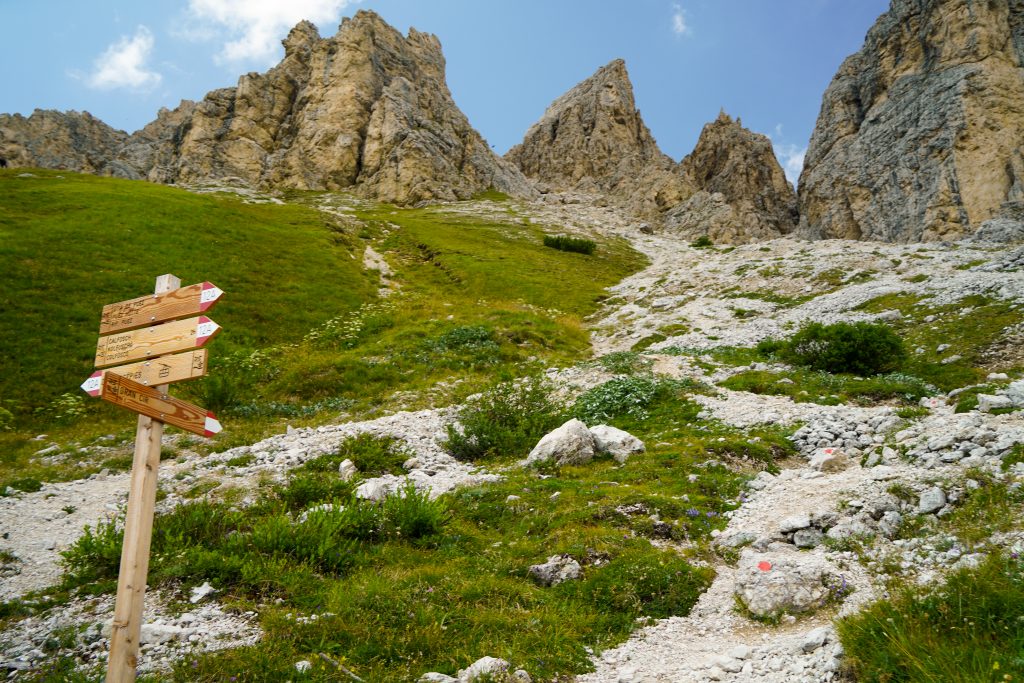
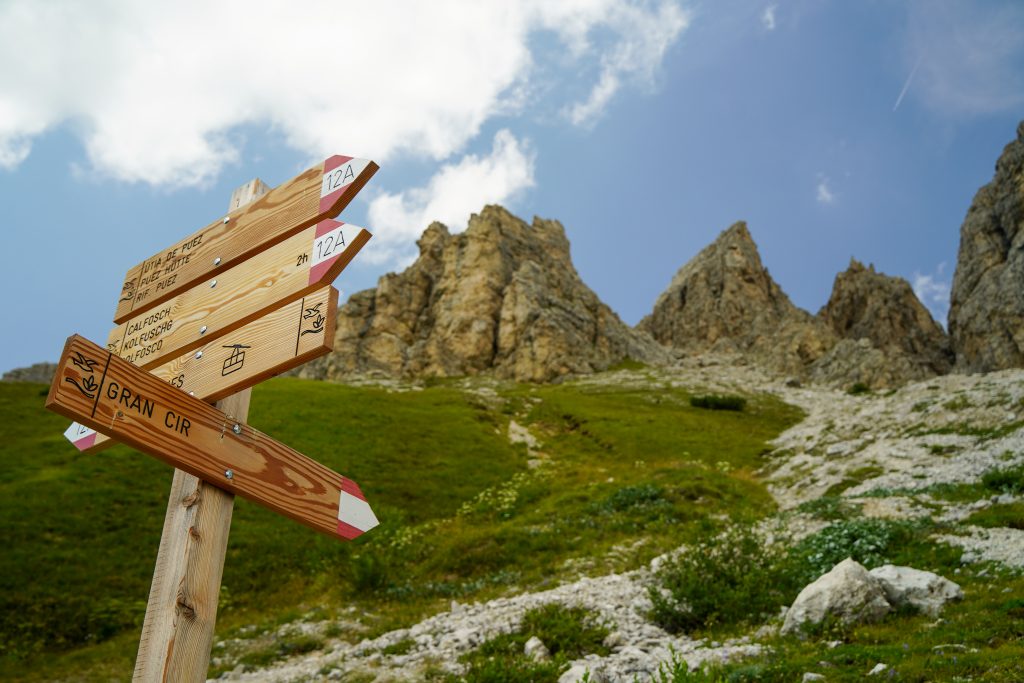
Follow signs for Lavaredo hut from Rifugio Auronzo. There are a few different trail splits but most of them are continuing in the same direction. There’s a split on the right near the beginning of the trail (before the Lavaredo hut) that heads down to a nice memorial visible from the trail. If you aren’t hiking in conditions like we had, your huts should be visible along the way as you turn corners, and the trail is overall very easy to navigate.

Tre Cime details if hiked as the loop:

Distance: 6.2 miles RT
Elevation gain: 1645 feet
Difficulty: moderate
Time: 3-5 hours

Trail Description:

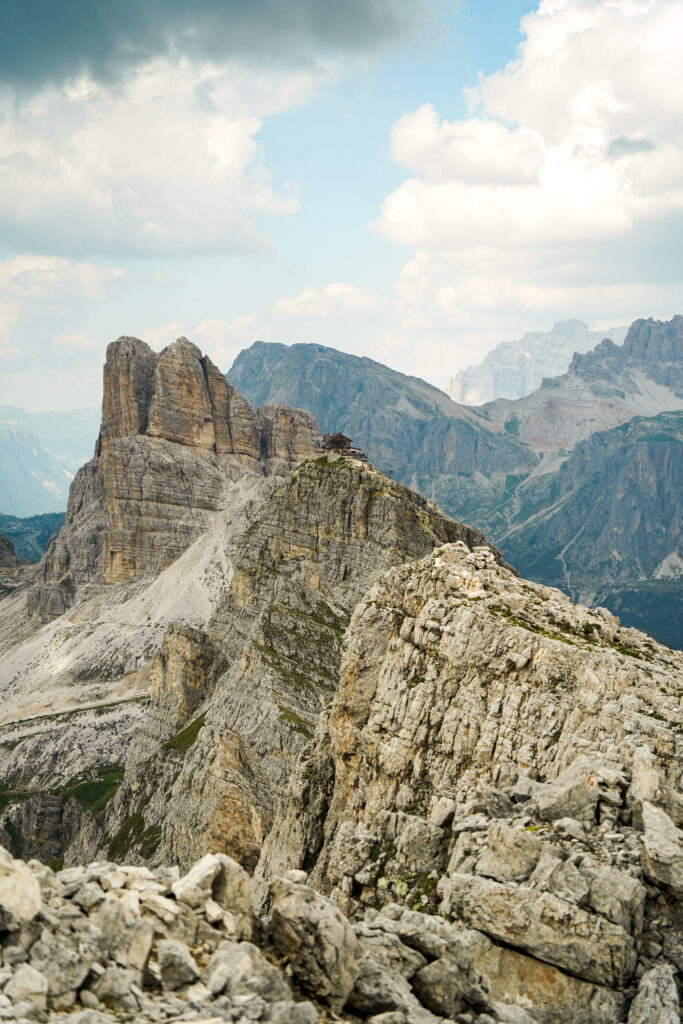
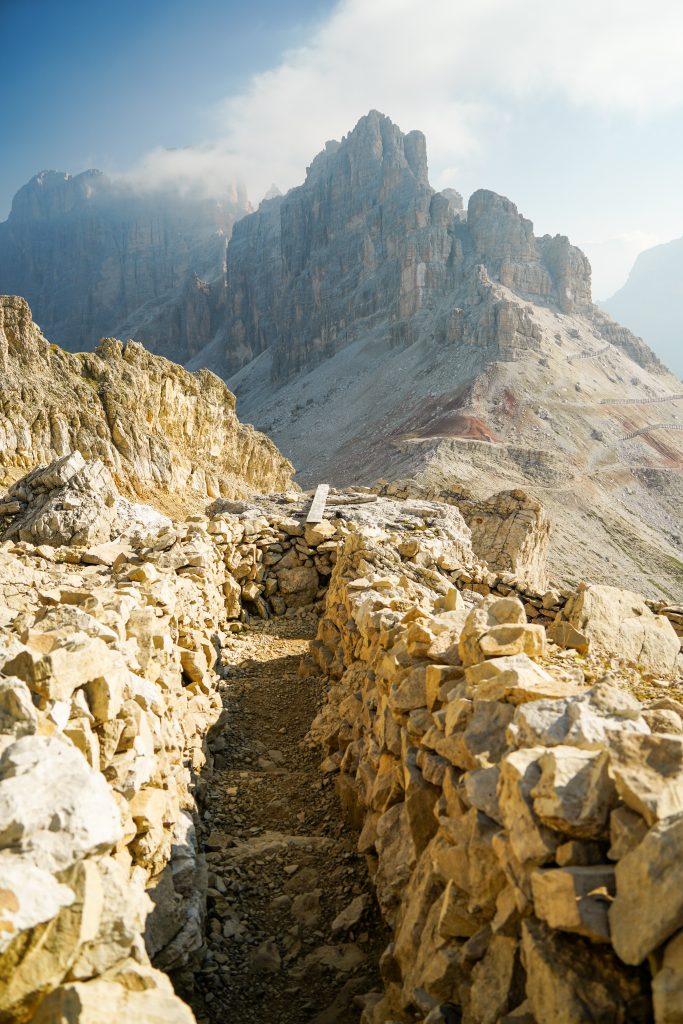
Take the same path to Rifugio Locatelli. On the way back from Rifugio Locatelli look for a trail branching off to the right. There are 2 paths, one that goes down into the valley and climbs back up that is the main part of the loop. However, save yourself some time and energy, and take the 2nd right that branches off a little over halfway back to the Forcella Lavaredo. This trail will cut across the opposite side of the valley from the Locatelli hut and will lead you just under the peaks themselves. Follow signs for Malga Langalm which is another hut/ restaurant. Here there are some more small lakes to enjoy before continuing on around the other side of the 3 peaks (opposite Forcella Lavaredo).

The trail ends back at the Rifugio Auronzo parking area but in a slightly different spot than you started. The trail can also be hiked in either direction, just try to make it to the Locatelli hut (even though there are short cuts to make the loop smaller) as the lakes on the other side really are worth the visit.

And that’s it! After hiking the trail in all these different weather patterns, I can honestly say I don’t regret any bit of it and I highly recommend booking a bed in the Locatelli Rifugio.

Via Ferrata Averau Guide – Sunrise Impressions

Via Ferrata Averau is a short steep climb to a fairly recognizable peak in the region. It’s visible from all of the Cinque Torri region as well as easily identifiable from Mount Lagazuoi. The cable section was among the most vertical of all of the via ferrata we did on our trip and with very little added help. This is one via ferrata that although short, I was extra appreciative of all my via ferrata gear and experience.

Trail/ Via Ferrata Description

Trailhead

The trail as described here starts from Rifugio Averau. Getting to rifugio Averau is a whole other matter. I recommend doing the Via Ferrata to Ra Gusela and Nuvolau since you’re already hiking with via ferrata gear. You can read more about that experience here. OR You can hike in from the Cinque Torri hut, or park at the Fedare refuge and take the Fedare cable car directly to the Averau hut. Check cable car times and prices here. I also recommend staying in the hut overnight as sunrise or sunset on the peak is magical. 

Trail Details

Distance: 1.5 miles RT from the Averau hut
Elevation change: 790 feet
1 cable section
Time: 1- 2 hours

The trail can really be broken down into three 15–20-minute sections. 

The approach

There are 2 trails that are both steep and braided. The footing is very loose and neither seemed to be much better than the other. If you’re not a fan of climbing loose shale… this isn’t the trail for you. If you take the first left branch, the trail will go between a tower on the main peak and just after that the cables will start. 

The cables

The cables take only 10-15 minutes if you’re a small group. While short, this was one of the most technical “climbs” I felt we did on our entire trip. The wall is a vertical climb (not a scramble) and there’s not a lot of “good” holds for your feet and hands. At one small section there is a fork in the cable. If you’re climbing during a busier time, the left fork is used more for descents as it is the only place the climb is assisted with ladder like holds. Take the right fork on your way up, and the left fork down. 

The final summit scramble

After the cables, turn left and you’ll see a braided trail climbing to the summit cross. There’s some cairns to help mark the easiest way. For the most part, there wasn’t too much scrambling although the footing is always loose. Watch your step! 

The view looking back toward the Nuvolau Hut, Ra Gusela Summit (with Giau Pass below on the right) and Mount Pelmo towering over it all in the background.
The view looking down first on the Cinque Torri hut and then down into Cortina D’Ampezzo with beautiful morning light rays.

My experience: 

Braden decided to sit this via ferrata out so I went as a sunrise mission while he slept in so he wouldn’t be waiting around for me. I found the trail “mostly” easy to follow though I did get confused by a side trail in a gully that I climbed up for about 5 minutes before thinking it probably wasn’t the way. If you can, having alltrails open is definitely helpful. It doesn’t have the chain section but it DOES have the rest of the trail outlined. 

Even with the slight deter, I made it to the start of the chains in about 25 min. The climb up was more vertical than I expected and it was a little intimidating going solo. 10 minutes later though I was done and moving on. From the top of the chains, it only took me another 10 minutes to the summit cross which I had all to myself. The sunrise was astounding and one of the best of our trip in terms of visibility and colors. I hung out for about 30 minutes at the top and then head down which only took me 35 minutes from top to the hut. 

*Climbing back down the vertical sections with no one to spot me WAS a little scary. There is one section that offers ladder rungs as a work around, so I took that route on the way down. If you were doing this during busier times, that would be the proper way down and you’d want to take the other cable up.

I didn’t see a single person on my entire climb and it was glorious! I definitely recommend going for sunrise. Then when you finish, you can return to your hut for a big hot breakfast! Scroll on for a few more sunrise photos.

The incredible Marmolada Mountain. This is Italy’s tallest peak (if you didn’t know from reading my previous posts) and I’m obsessed with it.

And that’s it! What do you think? Was this via ferrata worth the early morning- solo mission or what!

Via Ferrata Ra Gusela Guide

The summit of Ra Gusela is an iconic peak that captures many a photographer’s attention… but usually from below on the Giau Pass. Little do they know, it’s a fairly straight forward hike and via ferrata to the summit – with a bonus easy visit to the summit of Mount Nuvolau as well. From the top are panoramic views of the Cinque Torri (5 tower) region, several huts, Mount Averau, Mount Lagazuoi, and of course the even higher summits like the Marmolada. 

Trail/ Via Ferrata Details

Trailhead:

Giau Pass – This area has large free parking lots but it is very popular. Get there early to get a better spot. We had to park down the road and walk up to the pass getting there around 11AM. 

Trailhead to Ra Gusela

1.5 miles
1200 feet climb
1 cable section
Time: 1.5- 2 hours

Follow signs for Via Ferrata Nuvolau. The trail quickly branches off to the right from the main Gaiu Pass area. It weaves among boulders and beautiful meadows, generally making for easy walking for the first 0.5 mile. Stay left at the next 2 forks which happen in quick succession.

From there the trail will climb very steeply aiming for a saddle between the mountain and a tower. This saddle is the start of the short cable section. 

Photo on the left shows just about the entire length of cable en route to Ra Gusela. It’s pretty vertical but a lot like climbing steep stairs.

After the cables, again stay left to head for the summit of Ra Gusela. The trail is flat through a boulder field but then will climb steeply again for the final summit push. 

On the right, you will see the short cable section to Nuvolau. If you’re tired you can always skip Ra Gusela’s summit and head to the right. I recommend climbing up though as it’s definitely a cool view from the first summit. Other views include an incredible site down onto Cortina D’ampezzo.

Photo on the left is at the bottom of the final summit push to Ra Gusela… Pretty intimidating view but we did it! Smiling and happy to be on top selfie on the right!

What. a. view. This direction shows mount Nuvolau and the hut by the same name. Mount Averau is the pinnacle directly behind it. Then the mountain layer just behind Averau is Mount Lagazuoi where we just were that morning!

The sharp edges of Croda da Lago on the left and the ever-imposing Mount Pelmo on the right.

Ra Gusela Summit To Nuvolau Summit

0.4 miles
314 descent
245 feet climb
Time: 30 min- 1 hour

Watch out for deep cracks running through the mountain! I couldn’t see the bottom of this one….

After a rest at the first summit, head down from Ra Gusela and again take left forks to stay high. After a quick descent and some short climbing, the cable section to Nuvolau’s summit and hut will start. This cable section is again very short and even easier than the first section. You will be at the top in no time. 

Looking back at Ra Gusela’s peak. You can see the network of trails and splits making numerous ways to get between the peaks and the approach trail.

Nuvolau Summit to Rifugio Averau

0.5 miles
500 feet descent
Time: 30 min

From the summit of Nuvolau, continue on the obvious trail heading down. Eventually it will start to branch off- make sure to stay left to go to the Rifugio Averau and not have to climb back up a hill. Staying to the right will head down towards the Cinque Torri hut and dirt access road.

Averau Hut To Giau Pass 

Distance: 1.5 miles- 2 miles (there are more than one path leading to the same place, one is steeper than the other but shorter)
Elevation change: 150 feet short climbs overall, 550 feet descent overall
Time: 1.5-2 hours

After a short (or long – recommended) rest at the Averau hut, take the trail heading down the cable car side (again to the left) The trails are easy to see as they cut across the meadow. Following the steep cable car path is easier but a little longer. You can see where the trail cuts left off the road – that’s the route you’ll take for the 2 mile route. 

If you want to go the more adventurous way…. then take the first left cut higher on the meadow. This trail will go down a steep rocky gully with some of the loosest footing we had on our trip. Use caution if you go this way. Eventually both paths will meet again as the trail converges into one on a short climb back up. If you watch the cliffs above your head you might be able to spot the Nuvolau hut again where you just were! Then it’s a relatively flat/ slight descent as you make your way through a boulder section and back to the main Gaiu pass area! 

Our experience: 

My review of this trail is… a little mixed. On the one hand, there are great views, and the trail has some fun sections. On the other hand, I had been hoping for more Via Ferrata action than we had. For the 4-5 hours of hiking involved, there’s maybe 15 minutes of cables. The sections of cable there were I found the gear very helpful but potentially doable without gear if you are a strong climber. The trail is beautifully not crowded at all though so that’s always a win in my book. 

I also enjoyed looking over at Mount Lagazuoi where we had had woken up that morning and admiring Mount Averau which I planned to climb for sunrise the next day. Looking down on the Nuvolau hut is very cool and a perspective you won’t get without summiting one of the 2 neighboring peaks. 

Overall, I wouldn’t rate it as a “must” but I certainly don’t regret scheduling it into our lengthy vacation as I enjoyed the trail, loved our experience spending the night in the Averau hut, and am still drooling over the sunrise photos I got on Mount Averau. It’s not a “must” compared to other wow trails in the area but I absolutely can still recommend it.

Photography Impressions on Mount Lagazuoi

Now I’m not proud of this but there was just no way to fit all my photos from Mount Lagazuoi in one post. There’s just not. So without further ado, here is the absolute photo dump of day time, sunset, and sunrise views from atop Mount Lagazuoi.

Sunset

Looking up towards the summit as sunset took off

Looking over at the spiky ridges of the Seceda Ridgeline

Sunrise

My sunrise was mostly a bust due to intense fog and cloudiness but luckily this adorable family of sheep came and hung out with me while I waited for sun to finally pierce the clouds.

And cant forget the Marmolada. This mountain is astounding at any time of day… hence it’s many appearances.

Midday

One of my favorite views – Mount Averau in the middle foreground (I climbed to that summit 2 days later) with the towering Mount Pelmo in the background. Off to the left – the craggy peaks or La Croda da lago.

Mount Lagazuoi and WWI Tunnels

Mount Lagazuoi- The mountain you’ve never heard of but one of the coolest places in the Dolomites. It stands in a central part of the Dolomites dividing the more famous sections of Val Gardena from Cortina D’Ampezzo. It’s one of the most accessible mountain peaks to visit and offers astounding 360 degree views. From the summit, Grand Cir/ Gardena Pass, the Seceda peaks, Mount Avera/Nouvelau, Marmolada (Italy’s highest peak), and several others are easily visible. 

The area is also steeped in history with the hike up/ down from the summit riddled with WWI tunnels. The Lagazuoi tunnels, trenches stand as a testament to time on the grizzly battles that were fought in the area between Austria and Italy. So between the views, the history, and the accessiblity – Mount Lagazuoi is absolutely a MUST do in the Dolomites. 

How to visit Mount Lagazuoi

1. Easiest Way: Take the Lagazuoi cable car up and down. The hut is right by the cable car station and if you want to walk to the summit it is a pretty easy stroll to the very top. There’s also a lot of smaller tunnel off shoots from the top including some open air museums that you can visit without doing any hiking. This way you can see and experience the history and views without breaking a sweat.

2. Take the cable car up and famous Lagazuoi tunnel hike down. This saves you a lot of effort but still lets you experience the really long tunnels and bunker rooms that are located further from the top. This is the way we took and I can absolutely say I would not want to hike UP the tunnels. They are virtually a series of steep uneven stairs in the dark and that is not my picture of fun. (going down however was great!) Scroll on for details about the tunnel hike. 

2. Skip the cable car altogether. Take the Lagazuoi Via Ferrata up and the tunnel hike down. This path should really only be taken going up due to some very steep sections. It includes a very cool bridge and some nice via ferrata sections. Only take this path if you are equipped with the right gear. If I’d prepared mentally for the tough climb I would have loved to do it, but we were on a rest day.  

Lagazuoi Cable Car prices

Adults: $15 for one way, or $21 round trip. Children under 8 are free and discounted until the age of 16. For specific prices and the timetable of operation visit here: https://lagazuoi.it/EN/Information-Prices-and-useful-information-page20-Lagazuoi-cable-car-Summer-2022

Parking: Parking is free during the day for customers who take the cable car. ($5 if you don’t take the cable car) However nightly parking is $10 whether you have a reservations/ cable car tickets or not so keep this in mind if you plan to stay at the hut.

WWI history:

While I certainly can’t dive into the complex history that makes up WWI, I can give a little explanation of the Lagazuoi (and Dolomites as a whole) front. At the start of the war, Italy was actually torn between the 2 sides but eventually sided with Great Britain, France, and Russia predominantly due to land border disputes with Austria.

Austria had been occupying the mountain region of the Dolomites and had a much smaller army than the Italian troops so they retreated to the mountain tops. (hello high ground!) Italy spent most of the war then trying to dislodge Austria from these mountain tops. For most months of the year, the Dolomites are not hospitable and the fighting that took place for 29 months from 1915-1917 became known as the white war. 

Now the Lagazuoi front made up 5 mountain peaks including Lagazuoi itself- Austria held the summits. This mountain in particular was strategic for Italy because of the natural and large ledge below the summit known as the “Martini Ledge.” Italy had numerous encampments across the way in the 5 tower region (Cinque Torri and Mount Averau) so they could supply the ledge. Seeing as there was no way to attack Austria at the top, the only way to win was to lodge mines under the enemy army. 

Both armies made strong use of tunnels for supply chains and shelters but Italy built most of the tunnels leading up to the summit on this mountain.. In the end, Italy suffered a horrible defeat in another Dolomite front and retreated from all positions in 1917. The tunnels, bunkers, huts, and pathways created through a very unforgiving terrain is unbelievable to witness. 

The Rifugio: 

The location of this hut is incredible. It perches on the edge of a massive cliff face with valleys and other jagged peaks sprawled in the distance. It has easily one of the nicest decks for enjoying scenery and a great menu making it one of our favorite huts to visit. It’s also the largest and highest mountain hut in the Cortina area. Overall- another must visit and I highly recommend staying the night if you can. 

Prices:

Prices are right around $60 per person in either the dorms or private rooms and includes breakfast in the price. Dinner is $30 for the half board option or you can choose a la cart for dinner. Drinks started around $7 for beers and the hut does accept credit card for easy payment. 

For more information about this hut (and other huts in the area) check my post here: 

Hike details to the Lagazuoi Summit from the rifugio

Distance: 0.8 miles RT
Elevation change: 125 feet
Difficulty: Easy
Time: 30 min RT

This trail is an easy walk from the hut to the true summit and cross. It offers very cool views of the hut below and a few tunnels and embankments from the war along the way. It’s also where you’ll want to head for the best views at sunset. At the trail split, take the left for an easier path and to see a small tunnel/ cave, and take the right for a bit more of a climb but cool views of the hut.

Hike details for the Lagazuoi Tunnels:

Distance: 1.5 miles one way from the Rifugio
Elevation change: 2,320 feet of descent
Difficulty: Easy- Moderate going down (depending on your knees)
Time: 2 hours one way down

About our experience hiking the tunnels:

We started down the hike at about 9AM after having a great breakfast at the hut. The first part of the hike might actually be my favorite as the trail follows trenches and cliff bands. (side note, this trail like many in the Dolomites might not be great for people not found of drop offs) After about 20 minutes of mild descent, the trail enters the start of the long tunnel. 

Battlements, cliffs, and trenches along the way to the start of the long “galleria”

From there it is close to an hour of intermittent darkness. There is one spot not too long after the start where the tunnel forks. Either direction will take you down as they reconnect after a while. (If you really want to see it all, go down one of the forks and then back up the other, then back down which ever one is better) 

Along the way there are many small side tunnels, rooms, and windows ranging in size. Stop and check these out as you go as they can be really interesting. A lot of the side rooms have informational plaque that explain their purpose such as engine rooms (for the engine that dug the tunnel) anti mine tunnels, and bunk rooms! We tried to take in as much as we could but there is something about being in the dark that makes one…. hurry. 

It must also be said that the tunnels are winding steep staircases. The stairs are uneven and sometimes the ceiling is really short. For that matter I preferred to go down backwards like climbing down a ladder. There’s a steel cable that runs much of the way that I used for support and this way I avoided bumping my head and/ or blowing out my knees on all that descent. There were several minutes at a time where it was so dark, if we turned off our headlamps we couldn’t see our hands touching our noses.

The tunnels were really unique, and we couldn’t imagine the soldiers who built, lived, and fought in these tunnels. Finally, after a tunnel that seems to go on forever, you reach the famous Martini Ledge. Unfortunately, we didn’t bring via ferrata gear- if you do you can explore a lot more of the “open air museum” that is the Martini Ledge. (It was also known as a hanging city for it once housed 140 men plus provided kitchens and many necessities for the whole mountain) Without the proper gear, we continued down the main trail through a few more short tunnels and steeply dropping off trail sections. 

The final portion of trail is just a series of steep switchbacks through fields of shale (a lot of which is actually there from blasting and artillery fire on the mountain) The cable car station/ parking lot is easily visible and easy to navigate to on trails 401/402. Even without a map, it was easy for us to find our way. 

For more photos visit my Sunset and Sunrise Impressions from Mount Lagazuoi post.

Grand Cir Trail Guide

Grand Cir towers over one of the most famous passes in the Dolomites- Gardena Pass. From the top you can easily see the Seceda ridgeline towers, Alpe De Siusi plateau, Sella group, and even the towering Mount Pelmo (in the far East). It’s a fairly quick climb to the top albeit steep most of the way. Some sections of the route are protected with via ferrata cables and gear is recommended especially if you have a fear of heights. Be aware however that most of the route is class 3 scrambling and is NOT protected. 

This is more of a hike and scramble than a via ferrata route. 

Trail Details: 

Distance: 2.3 miles Roundtrip
Elevation Gain: 1500 feet (470m)
Difficulty: Easy via ferrata/ moderate hike
Time: 2-4 hours

Trail start:

Gardena Pass – Behind Hotel Cir

The trail starts right behind the hotel Cir and climbs steeply up narrow trails, or more gradually up the chair lift access roads. Either paths will eventually lead to the easily visible destination. (You can see the summit cross from the bottom if you squint!) Parking is available around various locations at the pass. We spent the night at Hotel Cir so made use of the free parking included in our stay. 

Hotel Cir from the trail

Trail Description:

The first 15 minutes or so if fairly easy hiking up a gentler slope. Once you get to the base of the gully there will be a sign marking the way to Grand Cir.

The trail is noted with red marks and makes a series or small switchbacks and stairs up the left side of the gully. At the top of this area (another 10 minutes or so) the trail crosses over and begins the first cable section up a ledge to the right. If you brought gear there is plenty or room to harness up before beginning the cables. 

The first cable section is pretty easy and seems to be protected in cases of wet weather where the rock would be very slick. It goes around the corner a little ways and then the steep hiking/ scrambling begins.

There’s a couple of “false” summits and great viewpoints as the trail climbs. There is one more short section of cable but most of the climb is unprotected and pretty exposed. 

The trail is fairly easy to follow with red marks continued all the way to the top. I only noticed 1 or 2 spots where the actual trail made a sharp turn that wasn’t as obvious and it would be easy to get off trail. Make sure to always be looking for those marks though and it will be easy to find your way. 

Below left: The 2nd short cable section. Below right: The first view of the summit cross from the trail.

At the top admire the 360 degree view and large cross that marks the summit on what feels like every peak in the Dolomites. Eat a snack. Enjoy the breeze, and prepare for a quicker and somewhat easier way down. 

Where to stay:

Hotel Cir was a great place to stay if this hike is a must on your list. It enables you to hike for sunset or sunrise easily or if you get there mid day, there’s plenty of parking! Otherwise consider some cheaper options in Val Gardena or Ortisei which are great bases for the other nearby points of interest. 

If you don’t want to stay on Gardena Pass, then Selva Di Val Gardena or Corvara are the 2 closest towns (about 15-20 minutes away) from the trailhead.

Other Points of interest nearby:

Seceda 

Alpe Di Siusi

How to visit the famous Alpe Di Siusi

Alpe Di Siusi is one of the most famous photography spots in the Dolomites and for good reason. From the golden halflinger ponies, fireweed flowers, lush meadows of grass, and many many cabins dotting the rolling hills – it’s all a compliment to the gorgeous backdrop Sassolungo ridge. It’s also the largest high alpine meadow in Europe so there is plenty to explore. 

How to visit Alpe Di Siusi

There are many ways to visit. When planning your trip also pay attention to signs/ information referring to the area as Seiser Alm. 

By Bus

Seiser Alm Express (Alpe di Siusi Express) bus runs from the village of Kastelruth (Castelrotto) to Compatch (Compaccio) and from there you can take another bus or hike (approx. 60 minutes). The actual bus timetables and all the connections can be found here.

By private car

You can only drive to the small town Compatsch (where we stayed) before 9 AM or after 5 PM and you cannot drive past the numbered parking areas within Compatsch unless you have a reservation for a hut further within the park. If you drive past Compatsch you risk a $112 fine which is not worth it when there’s cheap buses and many beautiful hiking trails to get further out into the meadows. (It’s also not worth risking the fine to drive up the scenic road between 9-5) The closest parking area to the trails is number P4 and all the lots cost the same – 18euros. (If you arrive after 6, the parking attendant leaves and there’s no way to pay this fee) 

By Cable Car

Recommended if you are staying in Ortisei and don’t have a private car to get around. Just keep in mind, the cable cars run limited times making sunset/sunrise photos more difficult to get. 

Ortisei – Alpe di Siusi Cable car information:

Cost:

Cost:
Adults Roundtrip/ one way: 23.90/15.90
Juniors 8-14 years old: 16.70/11.10
Kids under 8 are free
* To view specific timetables and book tickets visit the website here.

About our experience:

After much debate we decided to book a place to stay in Compatsch which gave us access to drive up to Alpe Di Siusi any time after our check-in hour. This way I could get a lay of the land for sunset and maybe even take nice sunrise photos. The apartment that we booked on Airbnb was awesome – we had amazing view from the private balcony and lots of space to relax. We drove up the road about 3:00 and checked in.

After checking the weather I thought sunset would be our best bet so we looked at the bus time table to drive closer to the “photo” spots. Cue naps running a little longer and missing the bus- we had to walk to the photo spots instead. It took about 1.5 hours to get to the area I had mapped out – it was mostly flat walking with a couple more hills at the end. The views were stunning the whole way so ended up not being too upset we missed the bus.

After snapping photos we started the walk back. The buses don’t run after about 6 so we started back just before the sunset actually happened – if we had any hope of eating dinner, we had to start back around 8. That being said I never really stopped taking photos as we walked back.

Our apartment, godsend that it was, had a restaurant/ pizzeria IN it that was open until 10. (otherwise there’s nowhere to eat after like 8/9 up there) The food was fabulous and the cheapest of our whole trip. The next morning the weather was looking very cloudy and I had no desire to walk very far knowing I wanted to hike later in the day so I just enjoyed the views from our balcony before check out.

So all in all staying in Compatsch didn’t impact our Alpe Di Siusi experience that much – We could have easily driven up after 5, taken sunset photos, and then driven back down into town. However the restaurant was great and I loved the views from the balcony! Based on your budget, a stay in Compastch is a great idea to save money on bus fares or cable cars and to experience sunset/ sunrise in one of the prettiest meadows.

Where to stay in Alpe Di Siusi 

Appartamento con vista sull’Alpe di Siusi $$- Where we stayed: highly recommend for the onsite restaurant with great hours, beautiful view from the porch, and overall great space. Just remember linens are not provided….

Adler Lodge Alpe $$$$$ – Expensive but it’s located right at the main view point and is a gorgeous hotel. If you’re on a luxury trip, it would be a dream. 

Icaro Hotel $$ – Similar location to Adler Lodge location and much more affordable- the catch is you have to stay 2 nights. Still worth checking out for the location, beautiful rooms, and incredible pool.

Any number of hotels in Siusi or Ortisei will also provide great places to launch your adventure from.

Photographing the Seceda Ridgeline

The Seceda ridgeline is one of those places in the Dolomites that you’ve seen before online and just have to see for yourself. This jagged wave of mountain is iconic and definitely not to be missed. While it’s not that difficult to visit, there are many options to consider for your trip!

Post Index:

The easiest ways to visit this mountain:

Option 1: Most affordable

Take the Seceda cable car from Ortisei (up and down). 

This cable car way involves a little uphill walking. It is not as easy as the next option but it is cheaper since it involves one ticket and the walk/ “hike” is  very short

Seceda Gondola info:

Click here for updated time schedules and to buy tickets:

2022 costs for reference:

  • Adult/junior roundtrip: $37/$19
  • Adult/junior oneway (up or down) $27/$14
  • Parking cost: $10/day (approx)

*Junior is age 8-16. Children under the age of 8 are free.

Photos from the Col Raisier lift and trail close by on the way to the Rifugio Hut

Option 2: The easiest AND most scenic way:

Take the Col Raiser Gondola then walk a short easy way to the Fermeda chair lift. This chair lift takes you directly to the photo spot. You can take the chair lift back down OR take the trail to Rifugio Firenze. The views are striking the entire hike and it is all downhill (though some segments are steep so if you have any trouble with steep downhill, please know your limits) After a visit to Rifugio Firenze for lunch (or the night!) take the Col Raiser gondola back down to S. Cristina.

Col Raisier Gondola info: 

Click here for updated time schedules and to buy tickets:

2022 costs for reference:

  • Adult/junior roundtrip: $25/$16
  • Adult/junior oneway (up or down) $17/12
  • *Junior is age 6-13. Children under the age of 6 are free.
  • Parking cost: $10/24 hours

Fermeda chairlift info:

Click here for updated time schedules and to buy tickets:

  • Adult/junior roundtrip: $19/12
  • Adult/junior oneway (up or down) $12/8
  • *Junior is age 8-16. Children under the age of 8 are free.

But wait- do you want to visit Seceda for sunset or sunrise?….. Or both?

All of the listed cable cars only run between 9-6 or so depending on the season so to visit during the golden hours, you’ll need to plan a bit more in advance.

Option 1: Sunset (what we did)

Take the Col Raisier gondola during their opening hours and stay overnight at Rifugio Firenze. You must checkin before dinner time. Once you check in at the hut, let them know you won’t need dinner and start your hike up to the photo spot for sunset. More details on the hike below.

OR if you are early enough, you could hike back to the Fermeda chairlift and take that up oneway and just hike back down in the dark…. but you’d be missing some beautiful scenery if you go that route. (Obviously, pack some food for dinner) 

Read more about staying at Rifugio Firenze (and other huts) in my post here.

Option 2: Sunrise

Take option 1 but instead of sunset photos, enjoy a delicious meal for dinner at the hut and instead hike up for sunrise! Make sure to start your hike 1.5 hours before sunrise to be there in time. After you take gorgeous morning photos, you can either take the Fermeda chairlift down by waiting until 9 or hike back down to the hut/ Col Raiser gondola. (which would be much cheaper saving money on cable cars and more scenic)

Option 3: Easiest but least luxurious

Take either of the Seceda cable car options up and down and tent camp at the summit. This way you can be up there for both sunset and sunrise. Please be aware that free camping is frowned upon in the dolomites so don’t set up anything until it starts to get dark and clean up your camp quick in the morning. Definitely leave no trace and be aware that it is usually VERY windy up there with little wind breaks for cover. 

 As you can see…. there’s many options that abound depending on your time, budget, and desire for dirt under your boots hiking. As always, comment on this post with any questions you might have and I’ll be glad to help. 

Details about the hike to Seceda from Rifugio Firenze:

Distance: 6 miles Roundtrip
Elevation gain: 1550 feet
Difficulty: Moderate
Time: 3 hours Roundtrip

Trail Description:

The trail starts behind the rifugio and climbs steeply for the first half mile on loose rocky trail. The view ahead is the same craggy peaks that you’ll see at the end but from another angle. The view behind you will be the rifugio nestled in it’s peaceful little valley. As the trail levels off you’ll start to encounter intersections. You can see where you are trying to go so aim up and to the left of the major peaks in front of you. (Generally if you aim to stay high, that’s the best bet)

These are views around Rifugio Firenze. In the right photo you can see the peaks and the faint trail in the middle heading…. up.

Views along the trail just past Rifugio Firenze. As we reached the junction we saw a cute little family of donkeys.

About half way there you will come across the very obvious  “wing” rocks. In general this part of the trail is so unique and feels like walking through a fairy tale of moss covered boulders and far off views. Just after that you’ll cross through a lovely donkey farm (make sure to always close any gates behind you!) and then the next steep climb will begin.

This time the steep climb is at least more solid as they’ve put mats down on the trail to help protect it from erosion and provide better footing. The view as you climb only becomes more and more spectacular – a beautiful grassy slope with small farm houses and sheds dotting the landscape.

Again you’ll see the Seceda cable car station which is you end goal so just continue picking paths that lead up to it. Most roads lead to Rome in this case, with a more steep one that climbs to the saddle (but doesn’t have much of a view) or a more gradual one that gains it’s way up the back of the cable car. Either will work.

Once you’re on top by the chair lift station, head toward the cross that marks the summit and you’ll see the best spot to take photos from (without a fence in the way) If you are there for sunset or sunrise no doubt you will see other photographers and maybe some campers around as well. Relax and enjoy the incredible view you climbed 1500 feet for (or more if you skipped all cables). Once you’ve taken all the photos you want, return the same way to the hut.

*Also be aware of the seasonal closures for the cable cars as they often close in the shoulder seasons.

* If you were to do this hike without the Col Raisier Gondola, it would add 1.5 – 2 hours of hiking each way. (almost 2000 more feet of gain from the bottom station of the gondola) 

View from the summit left. Views of the ridge from the saddle right.

Final photo dump of photos from the trail:

Ultimate Guide to Petra

Petra: One of the many highlights of Jordan. The iconic Treasury was featured in Indiana Jones and the last crusade and I don’t know anyone whose seen that movie and not dreamt of visiting this place since. Petra is so much more than the Treasury however; it’s miles and miles of wonderful archeological sites and definitely requires more than a day if you actually want to cover all the trails and see all the major points. Don’t worry though if you only have one day- just make it a full one and follow the tips below to get the absolute most out of visiting this once in a lifetime place.

Table of Contents:

Tips for visiting Petra:

  • Stay in town the night before so you can visit Petra (Wadi Musa) right at opening time! (Biggest tip of all)
  • Wear your comfiest walking/ hiking shoes. We hiked 8 miles on our visit and still barely scratched the surface
  • If the trail you are on is on the map you get with your ticket, don’t listen to the scammers who say it is “closed”
  • Beware scammers in general. There are lots of salesman camped out along narrow trails. Try not to engage with them unless you actually want to buy something. (or they won’t leave you alone)
  • Don’t pay more than $5 in a tip for the included horseback ride. Make sure to settle any prices or tips before getting on the horse.
  • Bring plenty of sunscreen, water, and snacks. You will be there ALL DAY. There are places to buy more if you need them, but the tents are very pricey.
  • Stay on the designated trails on the map- don’t pay the people who take you on dangerous and ILLEGAL trails to get a quicker view of the top of the Treasury.
  • Verify the days “Petra at Night” is offered when booking your trip. It is only a select few nights a week and if you’re interested in this, make sure you plan for it!
  • Hire a guide for at least the first walk to the Treasury and Street of Facades. It was very interesting learning about what life was like in ancient Petra as we were guided through.
Views from the high place on street of Facades we explored with our guide. You can see the main trail heading off in the lower right towards Monastery trail.

Practical Information:

  • Hours: Open daily from 6AM to 6PM in the summer; 6AM to 4PM in the winter.

Ticket price:

  • One day: 50 JD
  • Two days: 55 JD
  • Three days: 60 JD

*There’s no price difference for children. Plan ahead whether you’d like to visit for more than one day since the price is much cheaper then.

*You will need to submit your passport at the tickets office to purchase- make sure you bring it with you.

*If you don’t have a guide previously arranged, you can hire a licensed one at the visitor center when you buy tickets for around 50JD+ depending on how much of the site you would like guided.

Petra at Night Information:

Petra by Night runs every Monday, Wednesday and Thursday of each week. It starts at 20:30 from Petra Visitor Centre and delivers you back by licensed guide to the Visitor Centre around 22.30pm. You must have daylight tickets for the day of your nighttime visit.  The nighttime ticket however is NOT included and is an extra fee of 17 JD. (Children 10 and under are free for the night time show)

Photo taken from Jordan Tourism board website. I wish I could’ve seen this myself!!

How to get to Petra:

By Car: It is a 3 hours drive south of Amman on the desert highway or 4 hours on the more scenic Kings’ Highway to Wadi Musa. (Modern town just outside of Petra archeological site)

By Bus: JETT Bus leaves from Abdali station in Amman at 6.30 and arrives to Petra around 10.30. And it runs back on the same day at 17.00 (Summer season) 16.00 (Winter season)

Main points of interest on their respective trails :

  • The Siq (main trail) – This is the picturesque slot canyon that is almost 1 mile in length and ends at the iconic Treasury. While the canyon itself is special and beautiful in its own right, the carvings done by the Nabateans make it one of the most unique slot canyons in the world. Running the entire length of the canyon on both sides is a carved canal that was used for transporting water from the dam into town. There are also a number of decorative carvings, shrines, and statue remnants so keep an eye out.
  • The iconic Treasury (main trail)– The reason anyone even plans a trip to Petra, this building is just as cool to see in person as the pictures make it seem. There is still some debate on what the purpose of the building was for: whether it was a tomb/ temple, or a place to store goods and information (hence the name). It’s comprised of 2 floors with a 3 chambers on each level and stands at an incredible 128 feet high. While you can’t go in, make sure to wander around and get the many angles as well as peer down at the recently excavated graveyard underneath it.
  •  The street of Facades (main trail) – This street makes up the portion of trail/ canyon you walk through after the Treasury as it opens up onto the town. It has tombs on both sides that were likely used for royal courtiers in the middle of the 1st century AD.
Follow the canyon right past the Treasury and you’ll be at the street of Facades! This is where other trails will start to branch off.
  • The theater– What makes this theater so incredibly unique compared to other ancient theaters is that it was CARVED instead of built up. It was carved into the mountainside between 4BC-AD27 and had capacity to sit 4000 spectators.
  • The Royal Tombs (Al-khubha trail)– Comprised of 4 main tombs that are high up on the right side as you leave the street of Facades. In order (from right to left on the photo below) they are the Urn Tomb, the silk tomb, the Corinthian tomb, and the palace tomb.

These tombs were estimated to be constructed between 40-70 AD and a few of them were adapted around 446 AD to serve as Byzantine Churches.  All were used for burial and their names are derived from unique features of their appearance. These are fun to visit as you can go inside them and explore around. Our favorite was the Urn Tomb with it’s lower section of archways and the upper columned courtyard.

  • The Treasury overlook (Al-khubha trail)– Follow this legal and free trail to the viewpoint above the Treasury. There is a Bedouin tent perched right in the prime spot and evidently the tent charges 2-3JD for drinks in order to take photos there. We didn’t hike to this point but the concept doesn’t surprise us. If you plan to hike up here, I recommend having a small bit of cash on hand for the drinks.

  • The colonnaded street and Great Temple – The street was an original Nabataean creation that was refurbished (widened) during the Roman occupation. It would have been on of the principal shopping streets in ancient Petra. Excavations around the street indicate courtyard markets, fountains, and small temples used to line the street making it a primary part of the city center. The great temple which sits just beyond the colonnaded street, was colossal in size at an estimated 76,000 sq feet. Some of its columns and pavement were made of white limestone which would have made for a dramatic contrast to the red rock surrounding. The style and quality of the temple indicate it was built at the end of the first century BC and then used to a late point in the Byzantine period.

  • The Monastery – This is one of the largest monuments in Petra measuring 155 feet (47m) wide and 159 feet (49m) high.  It was built with niches to house sculptures and the interior is occupied by 2 side benches and an altar on the rear wall. It dates to the early 2nd century AD and would have been used for religious meetings.

  • The High Place of Sacrifice (Wadi Farasah Trail)– It is a steep half- hour climb from the theater to the high place of sacrifice which sits on the summit of the Attuf Ridge. The paths and stairs were part of the original processional way used by the Nabataean community. At the top, note the 2 obelisks standing 30 m apart in east/west alignment likely representing the 2 most important gods of the time. The high place of sacrifice is one of the best preserved of such sacred places and also provides a great view of the city center.  

  • The Garden Tomb (Wadi Farasah Trail) – Continuing past the high place of sacrifice and through the obelisks- follow the trail past more facades and tombs as it leads back down into the main parts of the town (see below on the map, it is the yellow trail)

*This is not a comprehensive list but it is the MAIN sites that you will see on the given trails. Unless you are incredibly fit, there’s no way to squeeze all of these into one day. It is recommended to visit for two days if you wish to visit them all.

Official trail map you get with your tickets

Trail Descriptions:

The main trail:

This trail travels from the main entrance to the start of the Ad-Deir (Monastery) trail. It is 2.5 miles each way and is relatively level- easy walking. (designated in red)

The Al-Khubha trail:

This trail branches off the main trail at the Royal Tombs and ascends up to a great overlook of the Treasury. It is a STEEP and exposed (so hot) climb rated as difficult. It will add 2.2 miles RT to your day if you go all the way to the overlook. (It is worth it to go on this trail at least to visit the Royal Tombs which is not a hard or long climb at all) (designated in green)

The Wadi Farasah trail:

Take this trail to escape the crowds and see the High place of Sacrifice, Garden Tomb, Tomb of the Royal Soldier, and more. It is 1.9 miles from the theater to the city center and will will skip parts of the main trail that you can see on your hike out. (designated in yellow)

The Ad-Deir (Monastery) trail:

This trail will add 1.6 miles RT to the main trail and is rated as difficult. It climbs over 800 steps but is absolutely worth the effort as the Monastery rivals the Treasury in terms of beauty and scale. (It’s also a lot less crowded) (designated in pink)

Follow the main trail with a short branch to visit the royal Tombs first. (2.5 miles + maybe 1 mile to see the Royal Tombs) Skip the Treasury overlook to preserve your strength and return to the main trail past the colonnaded street and city center. Take the Monastery trail up to the top and then back down. (1.6 miles) Then follow the Wadi Farasah Trail from the main palace up to the high place of sacrifice and then down which will take you to the theater back near the Treasury) (1.9 miles) Follow the main trail out from the theater (about 1.5 miles) back to the entrance.

This route hits the most major archeological points and will likely work with a guide for the first potion if you’ve hired one. It also ascends the Wadi Farasah trail more leisurely but then will be harder going down.

You could do this in reverse although I would hit the Monastery climb as early as possible since it is a longer/ harder ascent than the high place of sacrifice.

Braden taking a break after climbing all that way to the Monastery and not being able to go inside.

*Unfortunately, since I had broken my foot 2 days before we left on our trip and I was still in a boot, we had to scratch off the options of the Wadi Farasah Trail and the Treasury overlook. That being said, we still did around 8 miles that day.

A Brief history of Petra

Petra, known as the “ Red Rose City” because of the color of stone, was settled and developed by the Nabataeans. These people were an Arab tribe who first appeared in the 6th century BC. Their culture was initially similar to other Arab tribes in that they had little interest in agriculture but were nomadic and lived in tents. By the 2nd century BC they developed into an organized society in the area where they quickly grew in power and wealth.

Many armies from the Seleucids and Ptolemies warred for control over Jordan however the Nabataeans remained mostly untouched and independent throughout. They resisted military  conquest but were greatly influenced by the Hellenistic (Greek) culture of their neighbors. Many of these influences are easily visible in art and architecture throughout Petra.

When Rome took control of Jordan’s northern territories (Jerash) and Syria, they had many military engagements with the Nabataean people until finally from 70-106 AD the Romans claimed the kingdom and renamed it Arabia Petrea. At this time the city of Petra was redesigned according to traditional Roman designs (most easily seen with the palace and colonnaded street area.) Under Roman rule, the city flourished and grew with an estimated 20,000-30,000 people living in Petra during its peak.

As commerce shifted to trade routes in Syria or expanded to seaborn trade around the Arabian Peninsula, the city of Petra declined. Eventually the Nabataeans left their capital although no one really knows exactly why. The few silver coins or valuable possessions unearthed in Petra indicate it was an methodical move away from the city.

About our visit:

We had 2 nights in Petra town which is the absolute best way to visit Petra. Because we were there in the “low” season and COVID we actually met our guide about 1 hour after opening at 7AM to sleep in a little more. We were at the Petra Guest House hotel right outside the main gate so we walked right in from there.

For the first 1.5 hours or so we walked with our guide as he told us the history of the site, about the culture of the people (then and now) and pointed out very interesting structures so eroded by time we maybe would have missed them. Being from the land of many reservoirs and drought, I found the dam they built and water canals in the slot canyon one of the most interesting inventions.

The camel shaped rock

After we took our time taking pictures at the Treasury and exploring around there (since it would get busier later) our guide lead us to some pretty cool cave houses around the street of Facades that weren’t called out on the map and walked with us to the colonnaded street where he told us about the rest of the trails. We definitely enjoyed having a guide so I’d recommend hiring one to walk with you at least through to the Treasury.

Looking back at the Royal Tombs with the beginning of the Colonnaded street in the right side.

After saying goodbye we ran into a small dog whom I absolutely fell in love with. (She was sooo sweet) The pup escorted us the rest of the way to the Monastery trail where we parted ways. Then up up up we went. To be honest with my foot, I was super grateful it was stairs! So much easier to manage in a boot. We saw very few other people on the trail and when we reached the top we had it completely to ourselves for over an hour.

On the way up and down we were a bit bothered by the various sellers. (read the tips up at the top on best way to deal) Otherwise while it was a lot of climbing we didn’t find it too hard and the view was absolutely worth it!

Once we got back down we wandered our way back towards the Royal Tombs which we climbed up and explored while I tried to decide if I felt good enough to climb up to the Treasury overlook. In the end, my foot was hurting and the day had become really hot so we decided to call it a day and start the 1.5 mile hike back to the entrance.

We could have gotten a horseback ride (since it is “included” in the ticket) from the mouth of the slot canyon back to the main entrance (about 1 mile) but they were doing it in groups and I didn’t want to wait for them to complete the group OR to have to negotiate our “tip” amount as our guide warned us we’d need to do. So we just walked out the rest of the way happily ending our day at our airconditioned hotel.

*I wish we could have experienced Petra at Night but it wasn’t running due to COVID.

Where to stay for your visit to Petra:

Best places for location:

  • Budget: P Quattro Relax Hotel : 1.6km from Petra, beautiful rooftop pool, great price and rooms (cheapest hotel/ best value out of this whole list)
  • Mid: Petra Guest House Hotel : 0km walk (closest hotel), no pool but comfortable rooms and still a good price. Really cool cave bar.
  • Luxury: Mövenpick Resort Petra : 0km walk (right across the street), again no pool but highly rated and well known hotel brand.
View from our room on the top floor of the Petra Guest House Hotel.

Best hotels for a unique experience:

Swim in the Dead Sea

The Dead Sea is one of the most famous lakes in the world due to its high salination and low elevation. It’s actually the lowest land based elevation on Earth and that’s just the shoreline. The lake itself is almost 1000 feet deep at its deepest points making it the deepest saltiest lake in the world. The shores are 1400 feet below sea level and the salinity of the water is 9.6 times as salty as the ocean’s. The Dead Sea is split by both Israel and Jordan and can be enjoyed from both sides. It’s a popular place for tourists and locals alike to swim, float, relax, and cake on some mineral rich dead sea mud for your skin.

Tips for visiting the Dead Sea

There are several public beaches and resorts along the shore on both Jordan and Israel’s side and I would absolutely recommend choosing a location that has fresh water showers as a minimum necessity.

  • Keep in mind not all beaches have the “mud” although most of the resorts will gather it in a bucket for you.
  • Bring towels, sunscreen, and plenty of drinking water with you.
  • If you have bangs- try to pin them back before getting in the dead sea.
  • Water sandals are also very useful if your chosen location doesn’t have nice sand
A rest stop on the way down to the dead sea. It marks sea level which is fun as from this point you are still quite a bit above the top of the Dead Sea and still have a ways to go down to get to it.

Where we visited for our Dead Sea swim:

Holiday Inn Resort Dead Sea– We didn’t stay the night but the resort offers days passes that include towels and use of the poolside restrooms/ showers/ and of course- pools. We got an armband that allowed us to get the towels and prove we could be there. The resort also has little cabanas and beach chairs, showers, and waiters for drinks down by the lake itself.

About our experience:

We visited in summer so it was HOT and the sea was really warm too (not exactly refreshing.) We floated for a while and definitely did the coat yourself in mud thing (It does make your skin super soft!)

After a couple of rinses and swims, my hair had a lot of the salt water in it and I kept having issues of my bangs dripping into my eyes… which I then couldn’t wipe away because my hands also were covered in super potent salt water… so we didn’t last too long in the dead sea itself.

Luckily we had another hour after swimming in the dead sea to enjoy the resort pools and cool off before taking our full showers and getting ready to jump back on the road towards Petra for the night.

The drive along the Dead Sea is super beautiful and our driver pulled over in a couple spots to point out neat salt pillars or other natural and beautiful spots along the shore. It was really cool having some Biblical places or stories pointed out to us such as the city Jericho which is easily visible from Jordan. We definitely enjoyed this day in Jordan (split between Jerash and the Dead Sea) and even if we only spent a handful of hours at the Dead Sea itself- it’s a very memorable experience.