Backpack to Red Castle Lakes

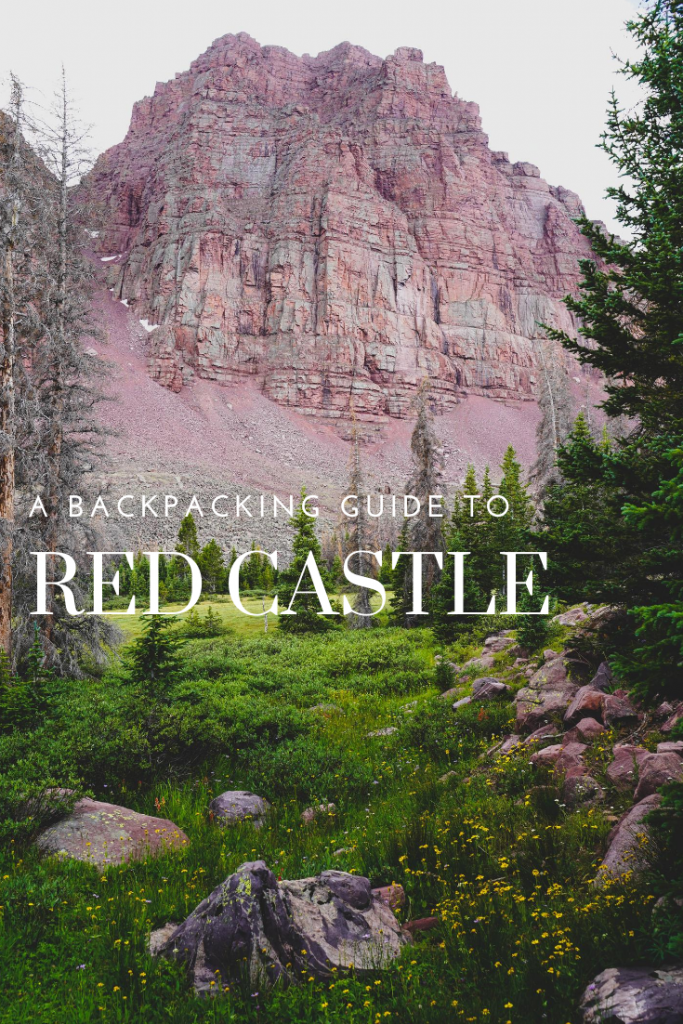
While almost everyone knows Kings Peak is “the” backpacking trip to do in the Uintas, Red Castle isn’t quite as largely known (though that continues to change with each passing year) I first heard about it and had a trip planned in 2016 but the trip was cancelled due to weather. Each year after I’ve tossed around the idea of going but something always came up! So this year was the year and all the hype from the last 4 years did NOT disapoint. 

Red Castle, which just happens to be one major drainage over from Henry Fork (trail to Kings Peak), is not just an incredible destination but a stunningly beautiful hike as well. Now that I’ve hiked both Kings Peak and Red Castle, I’d say the trail to Red Castle is more graded and overall more enjoyable. (could be my PTSD from Kings though, that was a bit of a rough trip) So with that here’s the deets:

Trail Information:

Total Distance: 26 miles RT to Red Castle Lake
Distance to camps: 20-24 miles RT depending on where you want to setup
Elevation: ~2,000 feet
Time:~5 hours to Lower Red Castle Lake (camp) each way
Fees: The parking lot is $5/day and recreation passes are NOT accepted. If you have more than 1 vehicle you can pay “additional vehicle” charges which is +$4/ car/ day so if you have 2 cars it would be $9/day instead of $10. This fee is CASH ONLY. Come prepared so you aren’t ticketed while out in the backcountry.

Trailhead:

While all trails connect and there are various ways to actually hike into Red Castle, China Meadows is the most popular route. The trail starts from the trailhead campground at the far end of all the campground loops. To get there, take exit 34 off I-80 and follow WY-410 E as it become Co Rd 283 and FR072 to FR125. Most of the roads are unpaved but still decent with only the last couple miles being a little more rough. As you pass China Meadows Campground and start the far loop, keep an eye out for a large parking lot.

Camping spot options:

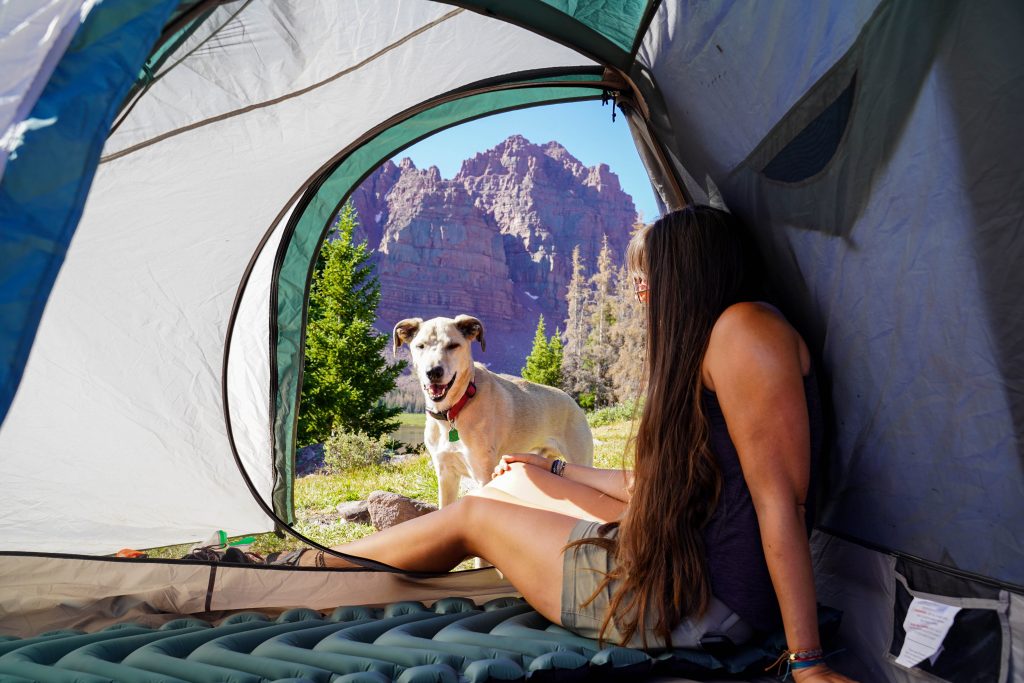
Red Castle is not a terribly difficult hike but it is a LONG hike. It can done as an overnight but would be much more enjoyable with 2 nights. We actually worked most of the day Friday, drove to the trail head, and started hiking in at 6:30 PM. Just getting halfway in made our 2nd day that much more enjoyable. Once near Red Castle, the camping options abound:

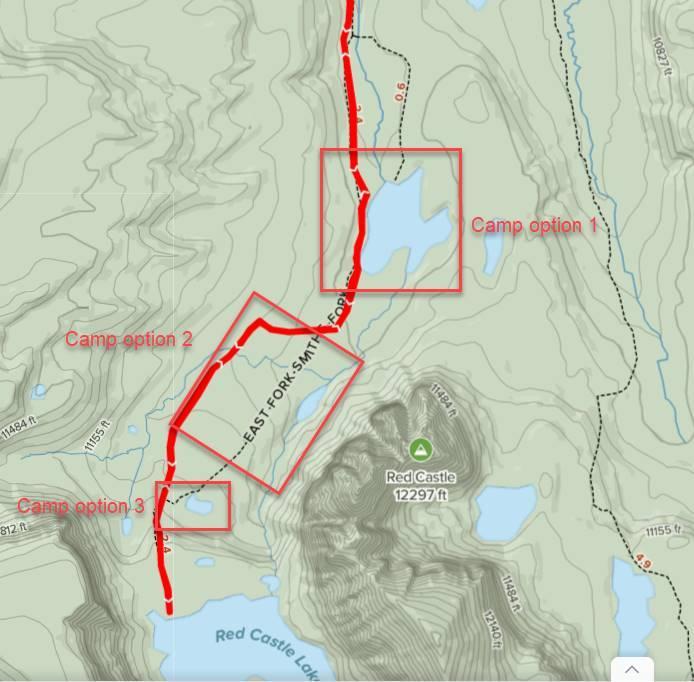
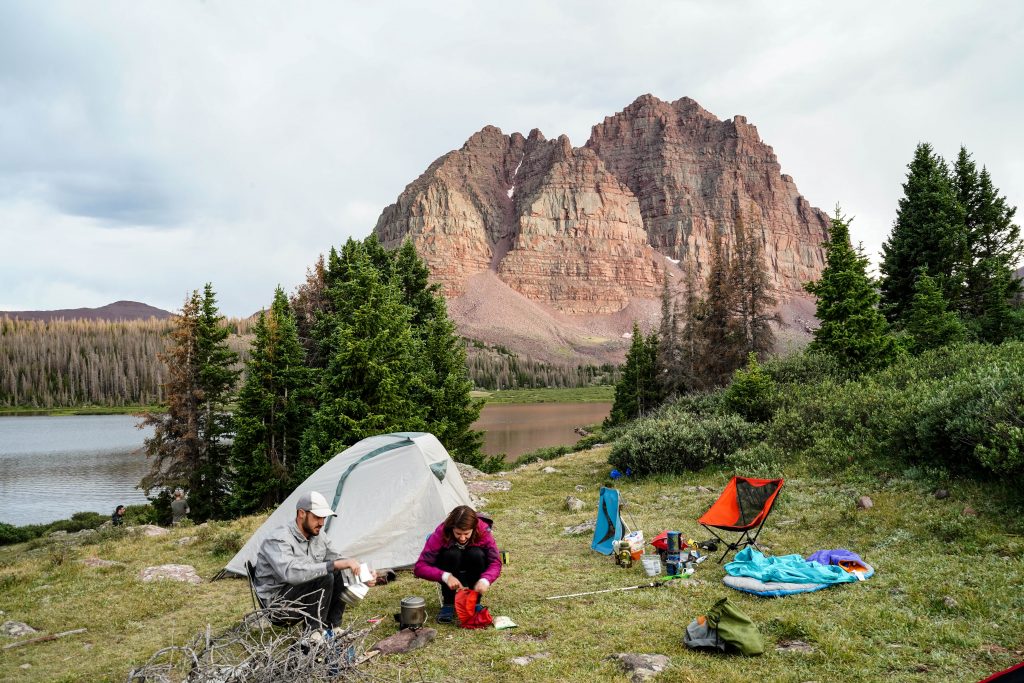
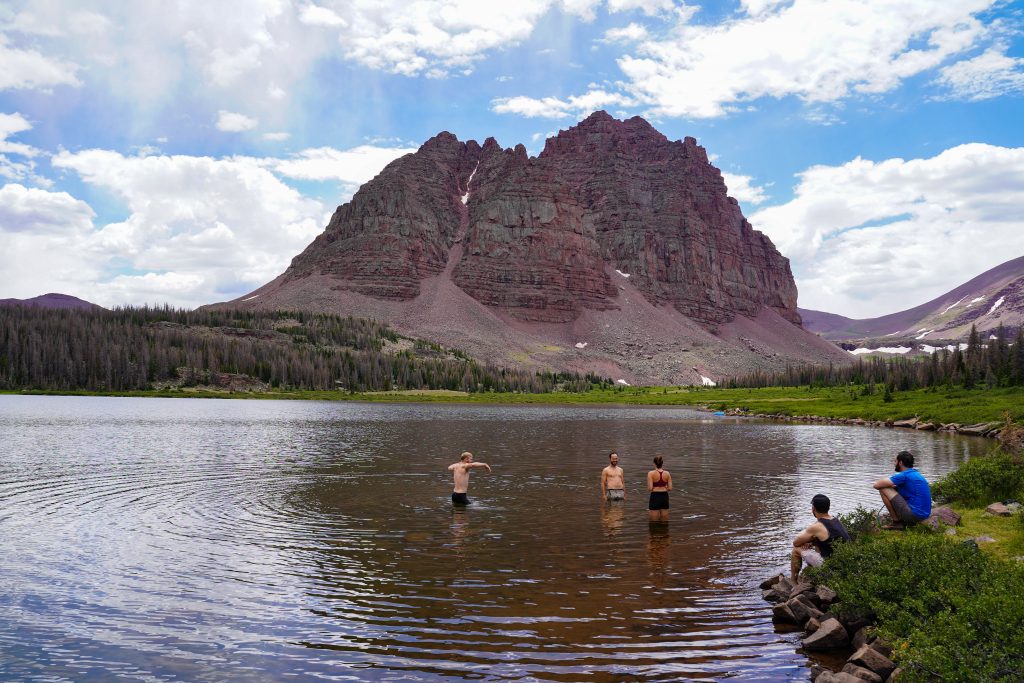
Option 1- Camp at Lower Red Castle Lake

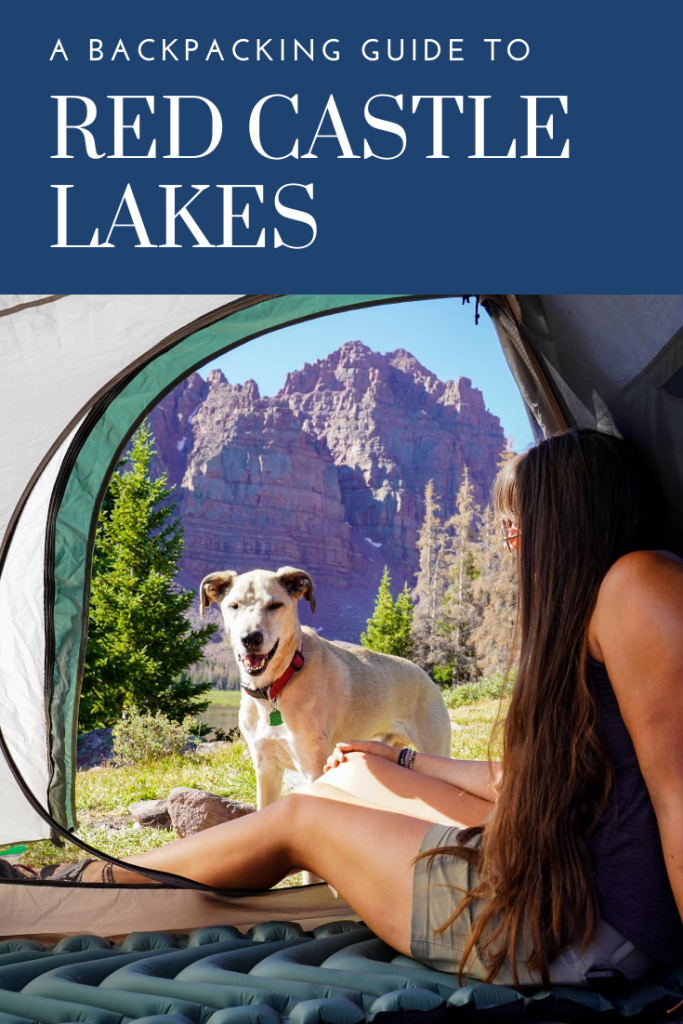
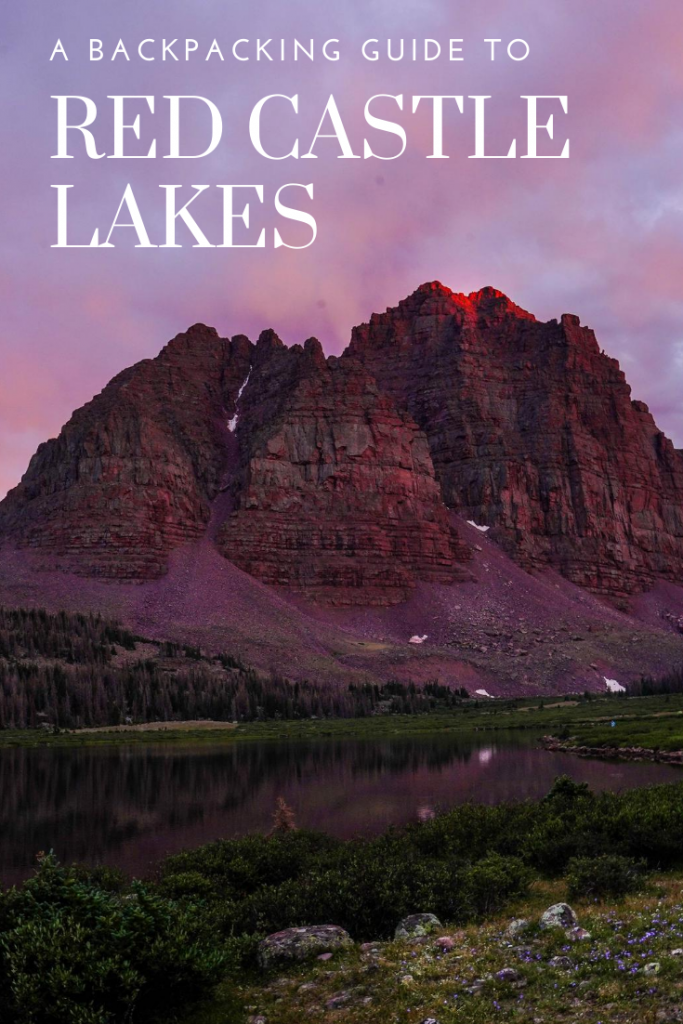
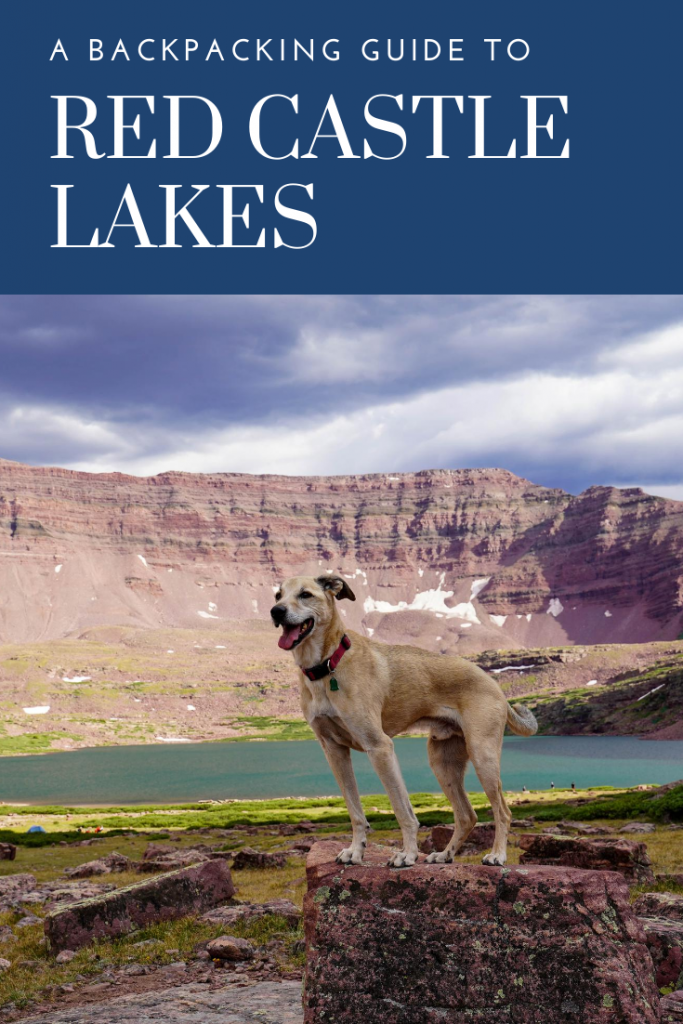
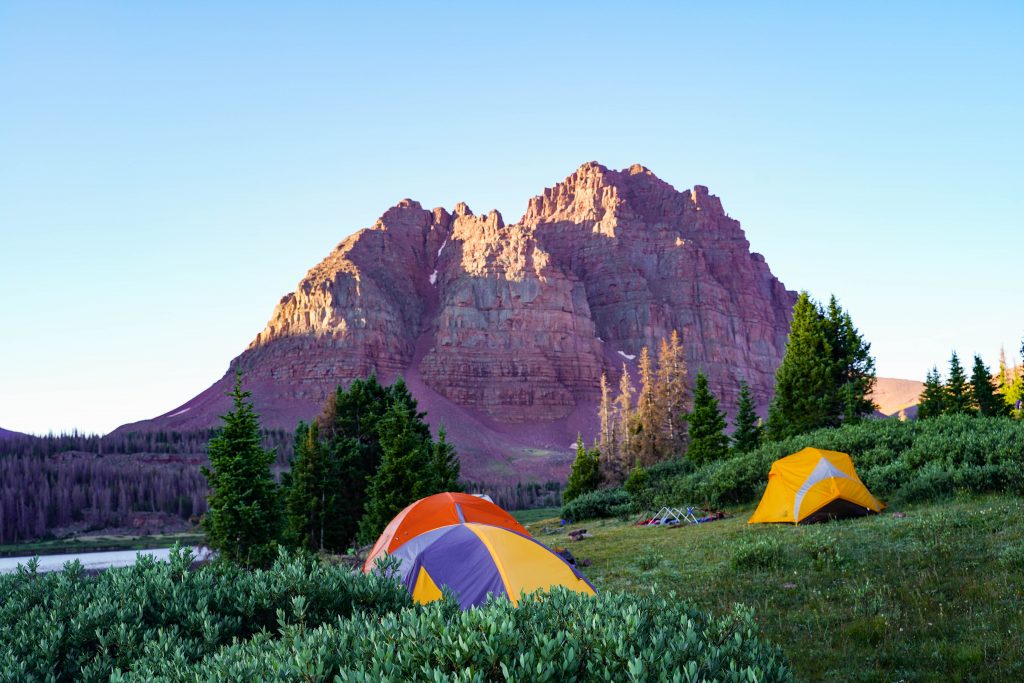
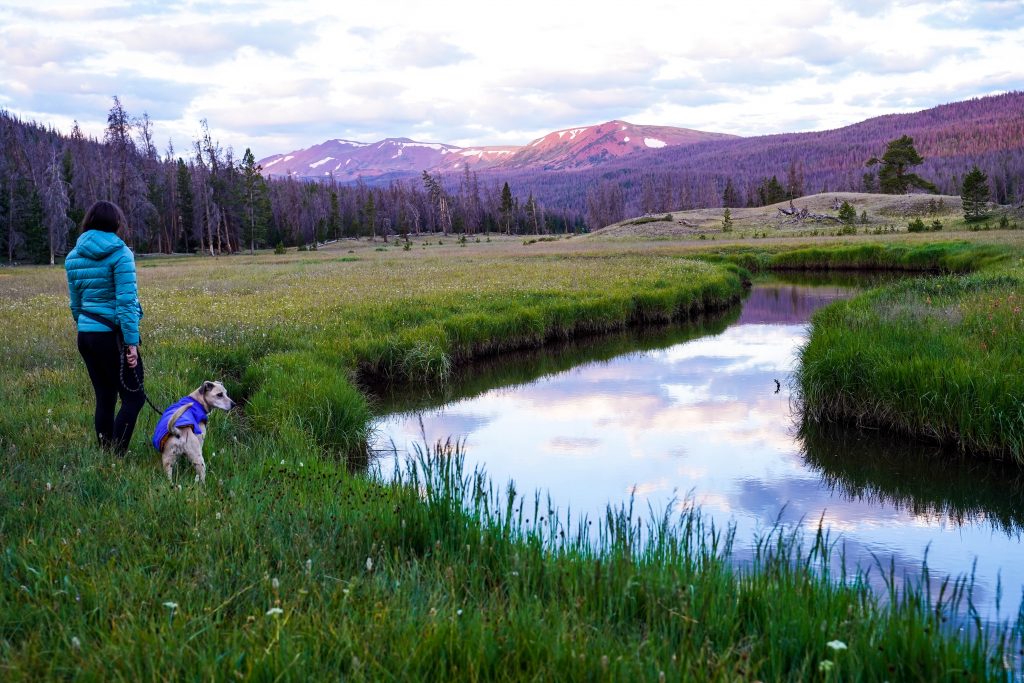
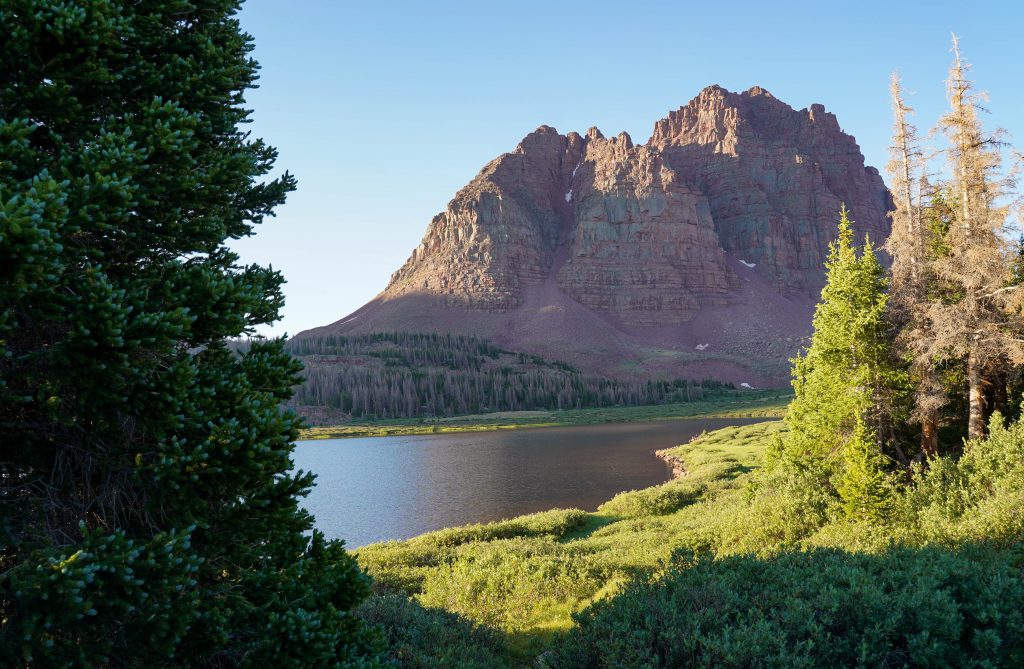
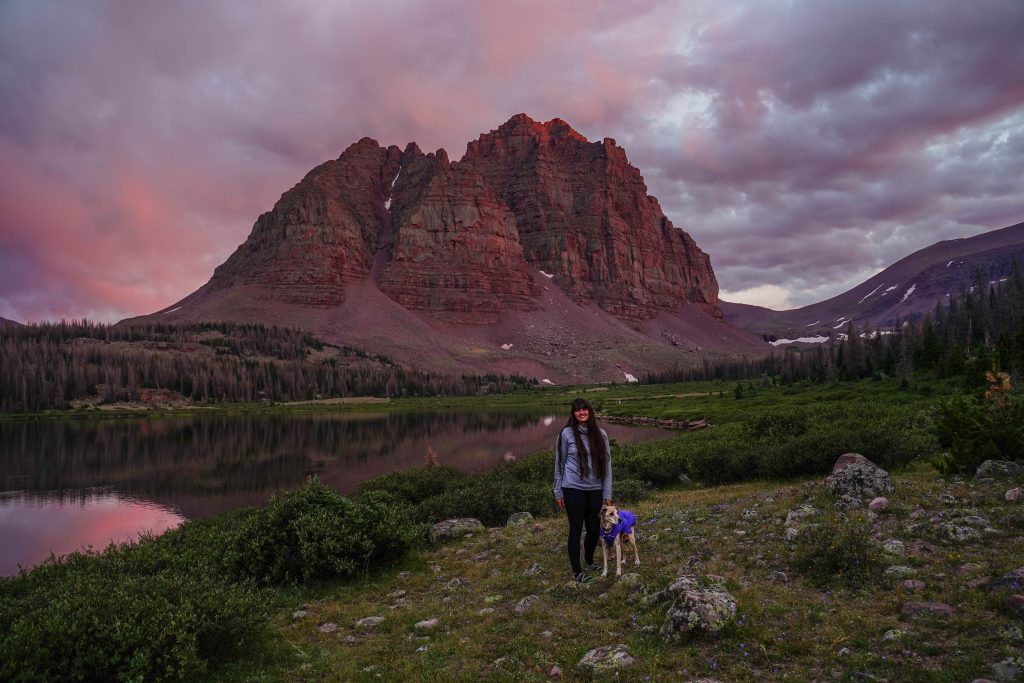
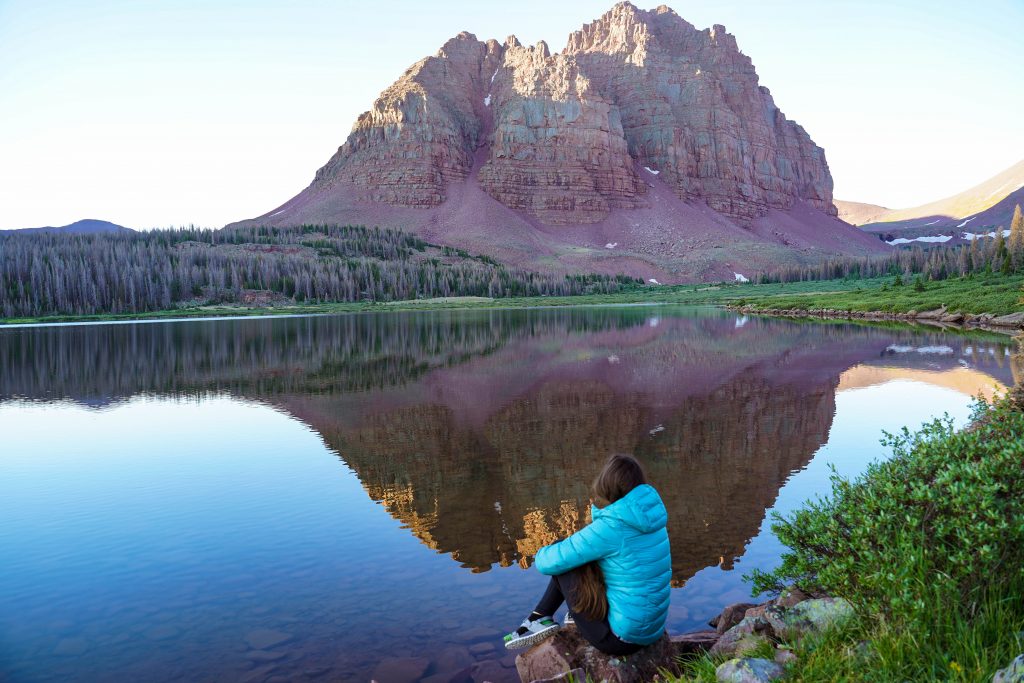
If you want that classic reflection of Red Castle on the lake and want the shortest hike with a pack possible, than camping around the lower lake is for you. (and for us) There are loads of places to setup all around the lake depending on the shore access and views you want. We got there Saturday afternoon and while it was busy we managed to still snag a great spot with some measure of privacy. (Just remember to camp 200 feet from water sources)

Option 2- Camp between lakes

As you head up from the lower lake there’s lots of beautiful forested areas to camp in near streams for water filtering and with Red Castle peaking out through the trees. If you have hammock sleepers, finding a spot in this stretch would be your best bet. This area will also provide more options for privacy and getting away from other campers however we did still see a lot of people camping along this stretch of trail. So while this may be the least crowded option, they area all pretty comparable.

Option 3- Camp at the pond just below Red Castle Lake

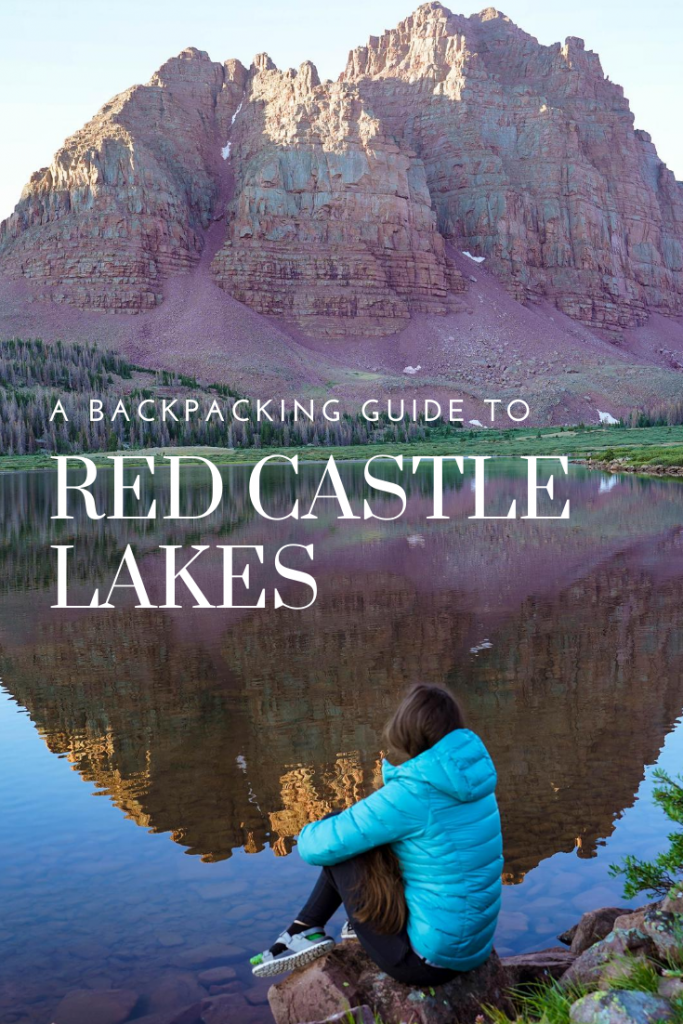
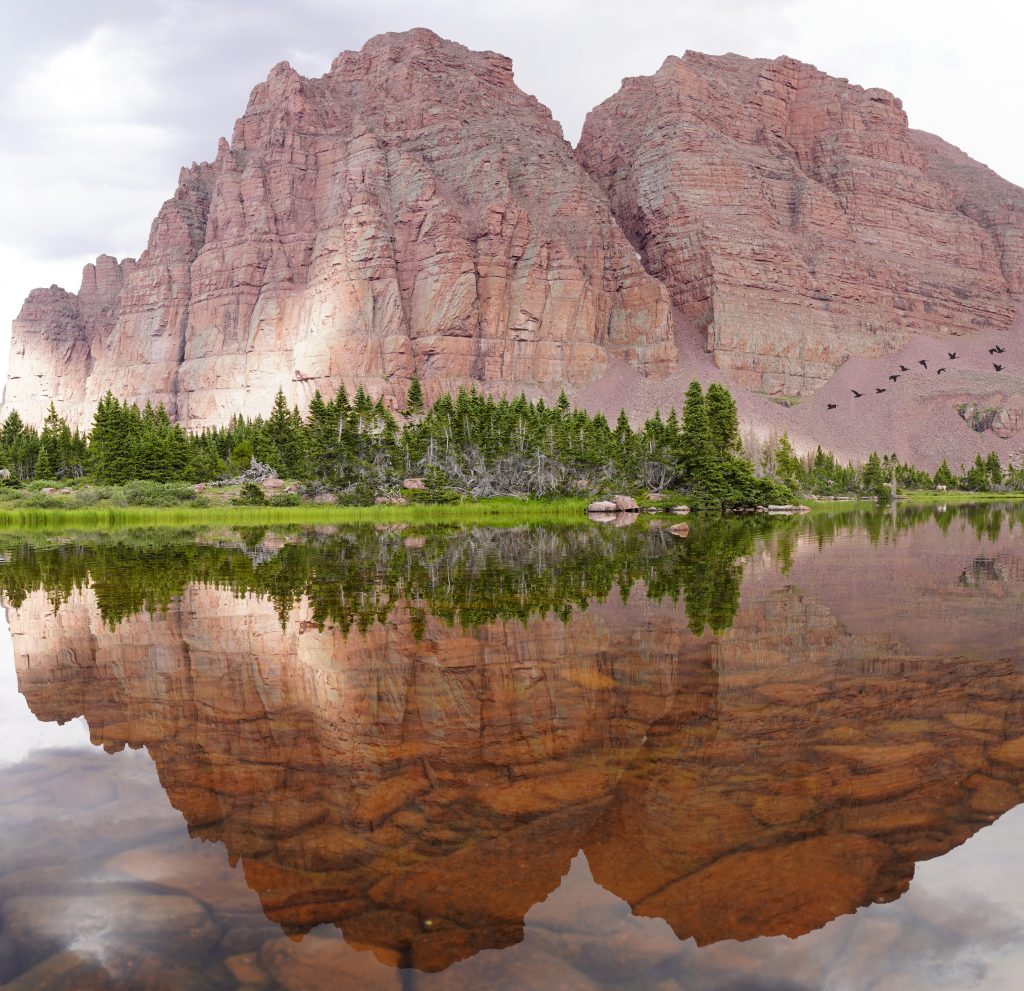
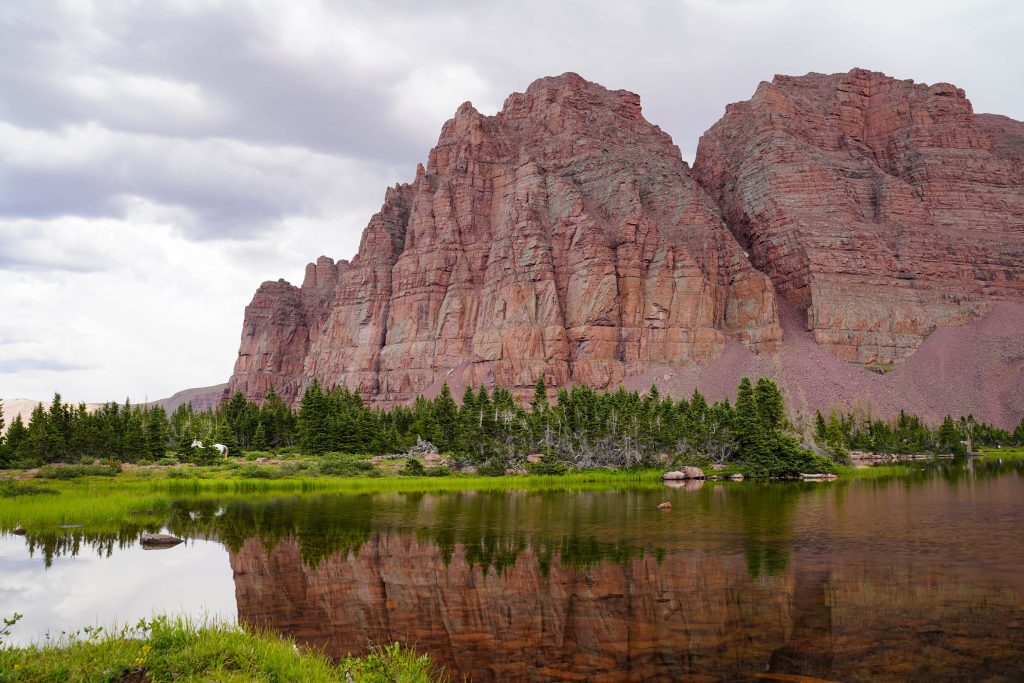
So, the main Red Castle Lake is huge and barren. It has no trees around it to break wind, hang water filters, or offer any privacy. (so I don’t recommend camping there). However there is a small lake un-named just below the basin for Red Castle Lake that offers plenty of shelter, water for filtering, and pretty gorgeous views to boot. This would mean you carry your pack 12.5 miles each way with about 1700 feet of gain so a longer harder hike, but definitely another worthy location to look for camp. 

All 3 options are great options with superb views and about equal levels of crowds. Just know if you don’t find a spot where you had your heart set on, you very well could find an even more brilliant spot just down the trail.
*It took us about 30 minutes of wandering along the side of Lower Red Castle lake to find our spot. We passed several already snagged spots that looked AWESOME but we were just as happy with where end ended up. Don’t lose hope

Packing list:

Gear:

  • Lightweight Tent
  • Sleeping bag
  • Sleeping pad + pillow
  • Jetboil or light stove
  • Long spoon and coffee cup
  • water filter
  • Solid backpack with rain cover
  • String for hanging packs when out hiking or at night
  • GOOD bugspray and sunscreen
  • luxury item: lightweight chair

Clothes

  • Puffy coat
  • Rain jacket
  • 1x shorts
  • 1 leggings/ light sweats
  • 1x fleece/ sweater
  • Socks and other underthings

*The weather can be super bipolar in the Uintas meaning you’ll want a full summer wardrobe during the day when it is hot, and warm winter gear for at night. In August we had a high of 70 (felt at least 75 in the sun) and low of 40 at night. Afternoon thunderstorms are common as well so rain gear is always a must.  

Food- For a 2 night trip here is what we packed per person:

  • 2x dehydrated meals (backpacker’s pantry) + 1 dehydrated dessert
  • 2x oatmeal cups (no dishes needed, just cook in the cup and pack out trash)
  • 3x flavored tuna packets + several handfuls of crackers for lunch
  • 3x larabars
  • several handfuls of goldfish for snacking
  • 2x hot chocolate packets for colder evenings
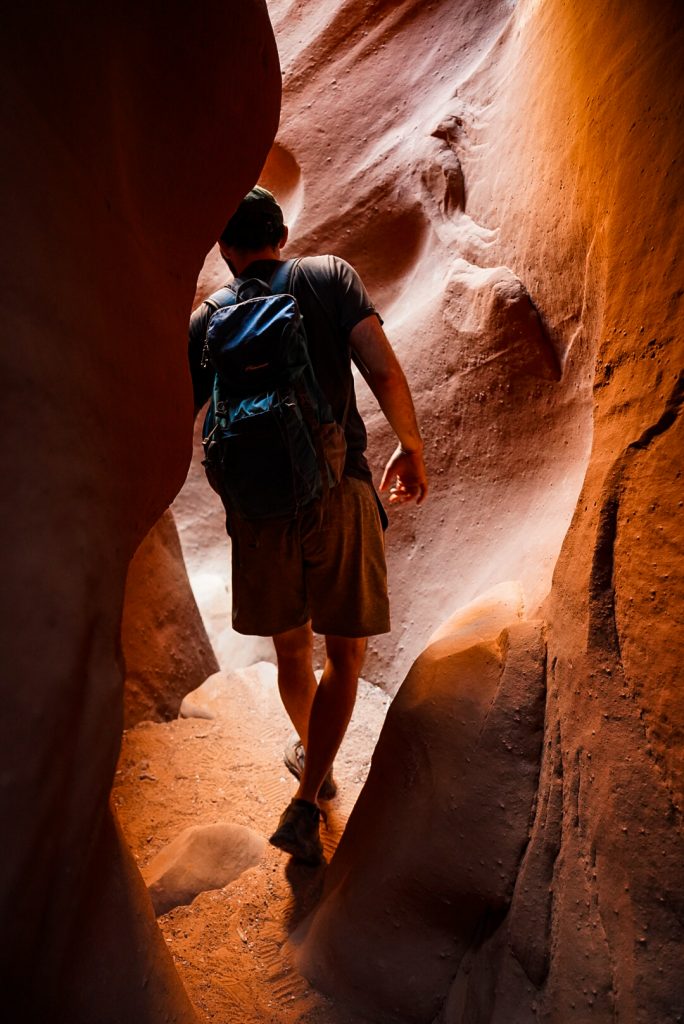
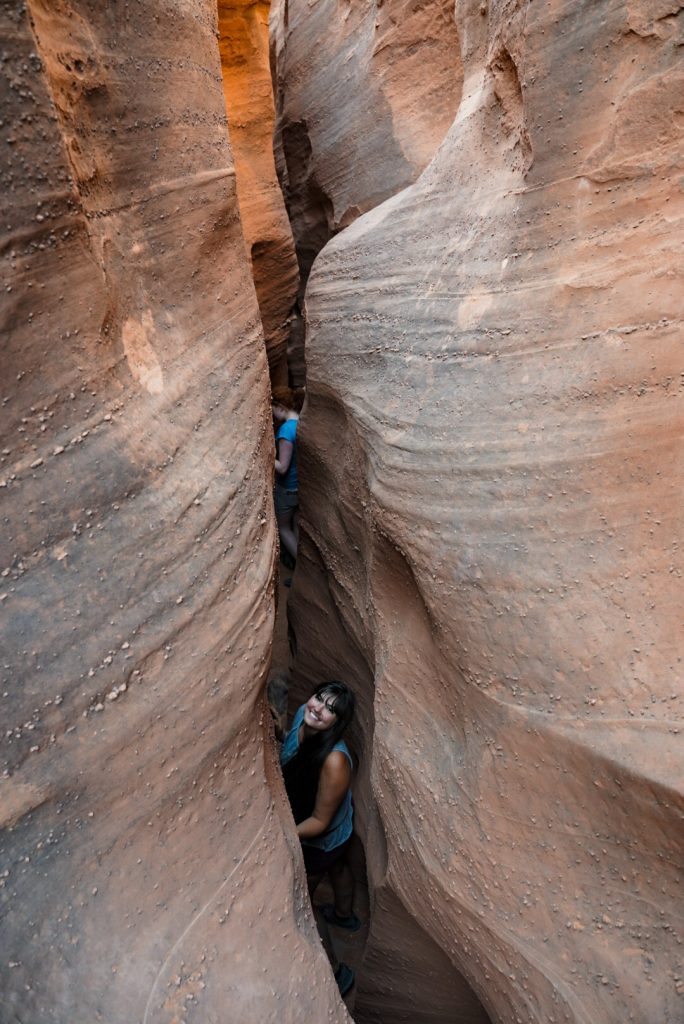
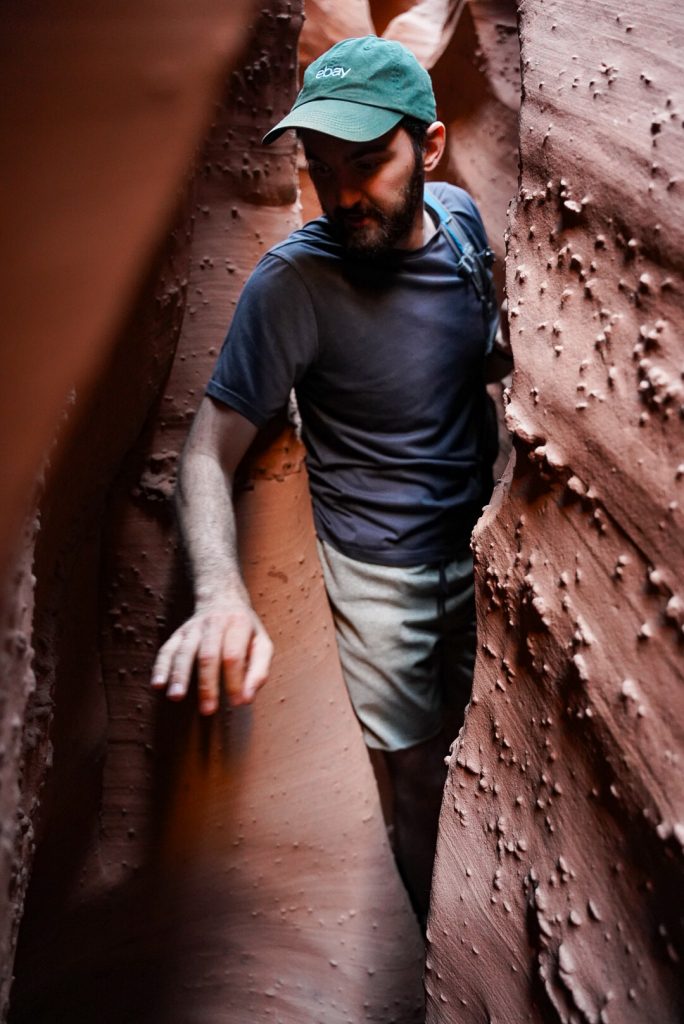
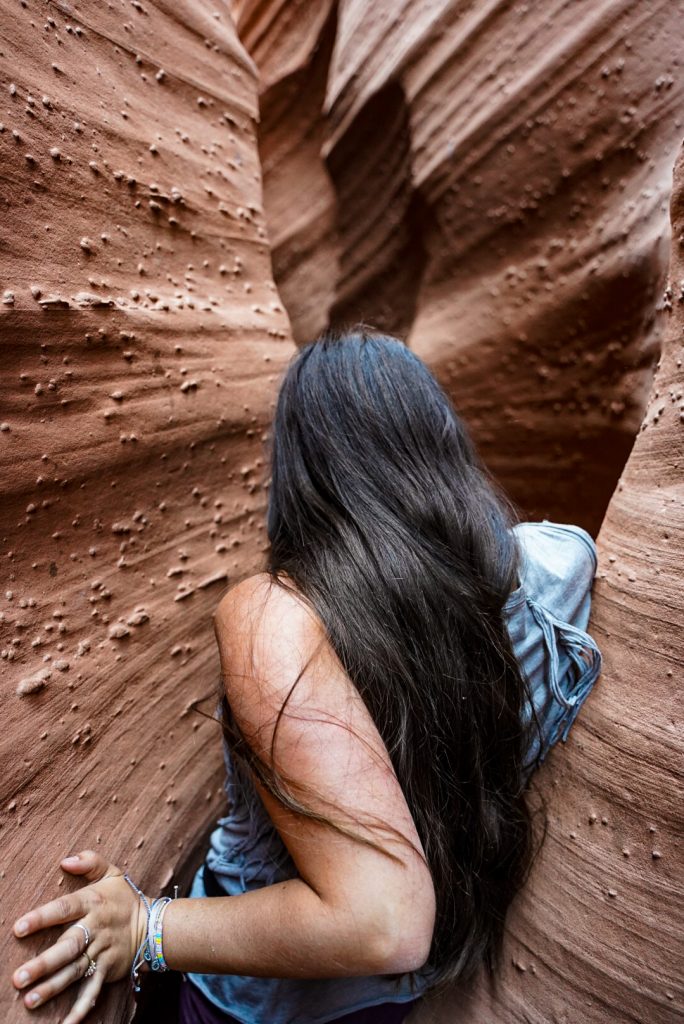
Trail Description: 

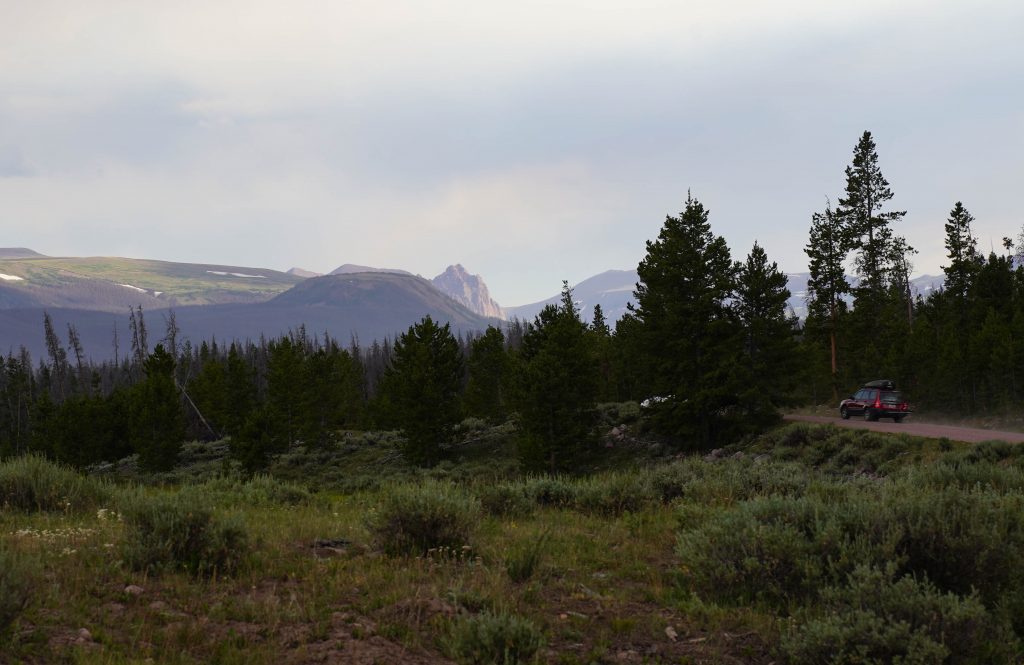
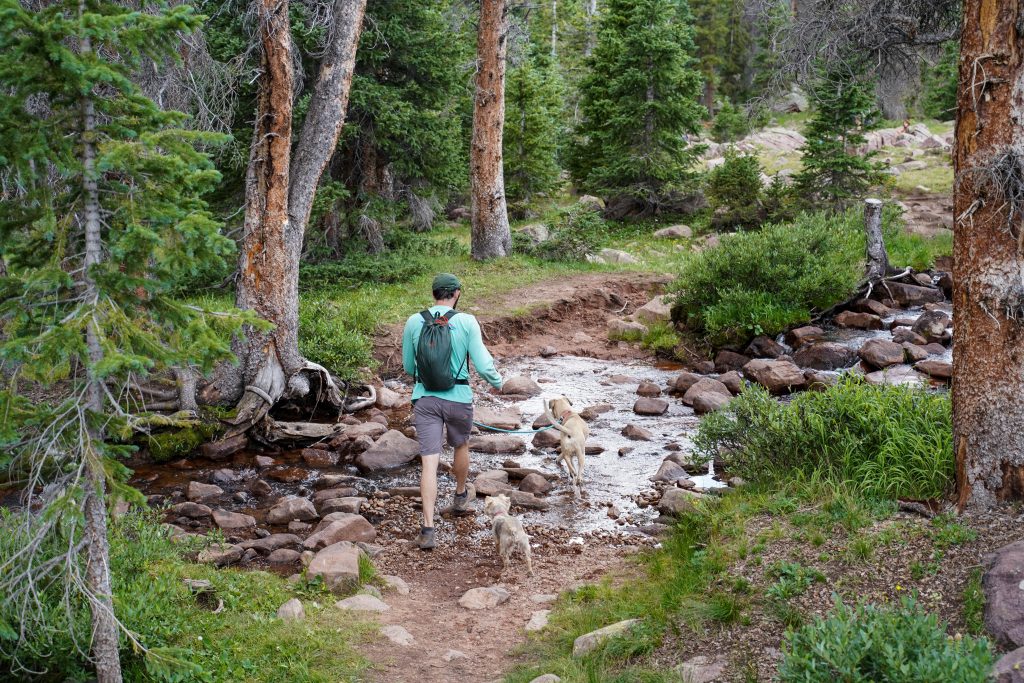
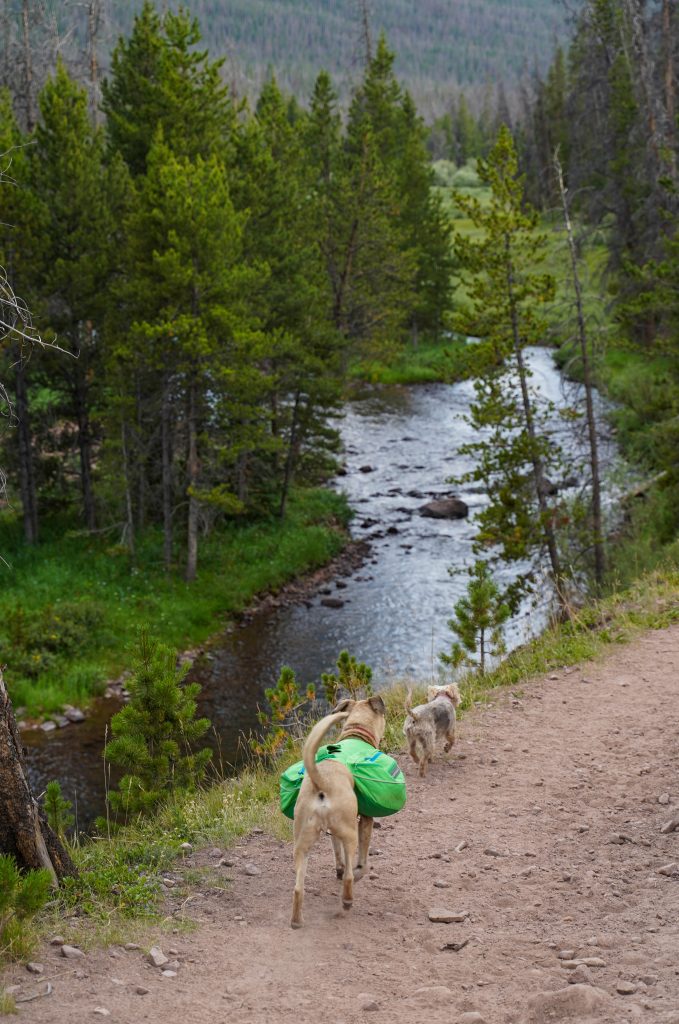
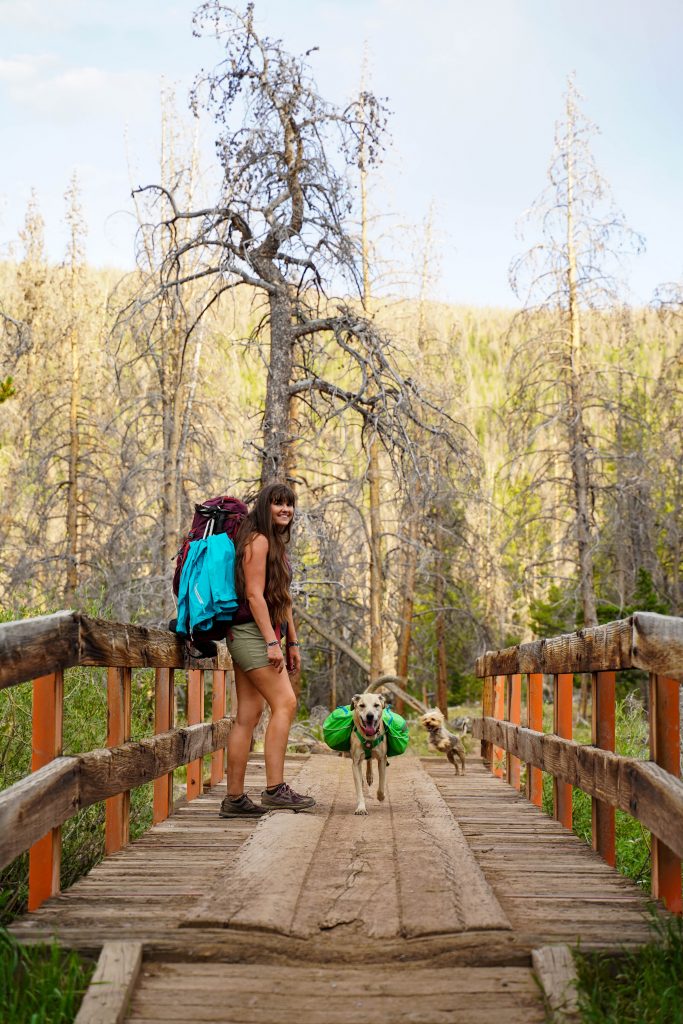
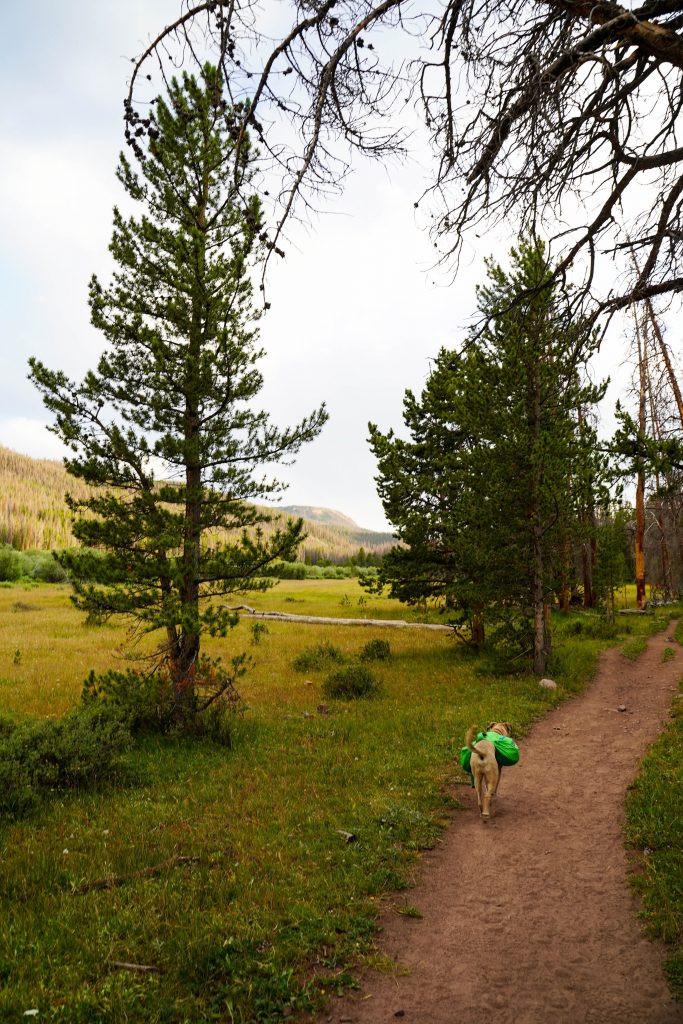
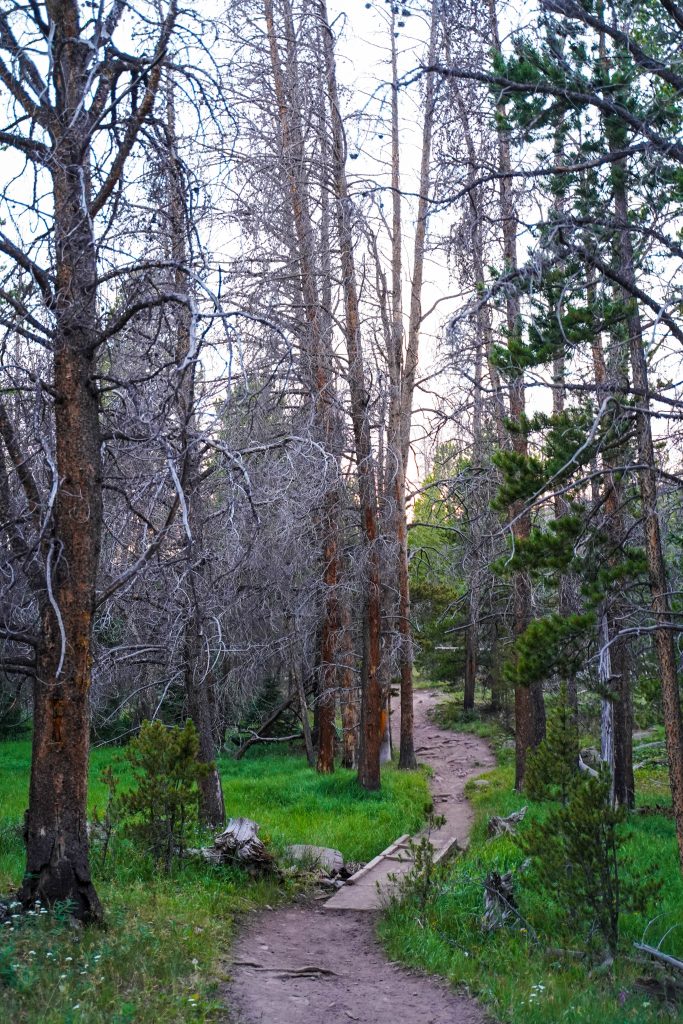
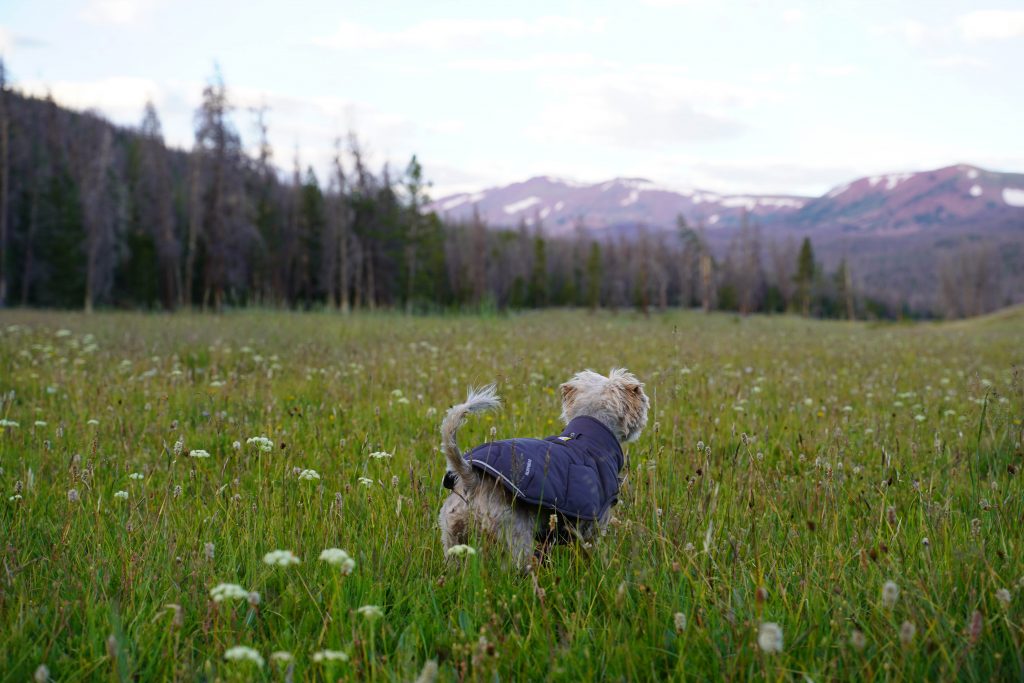
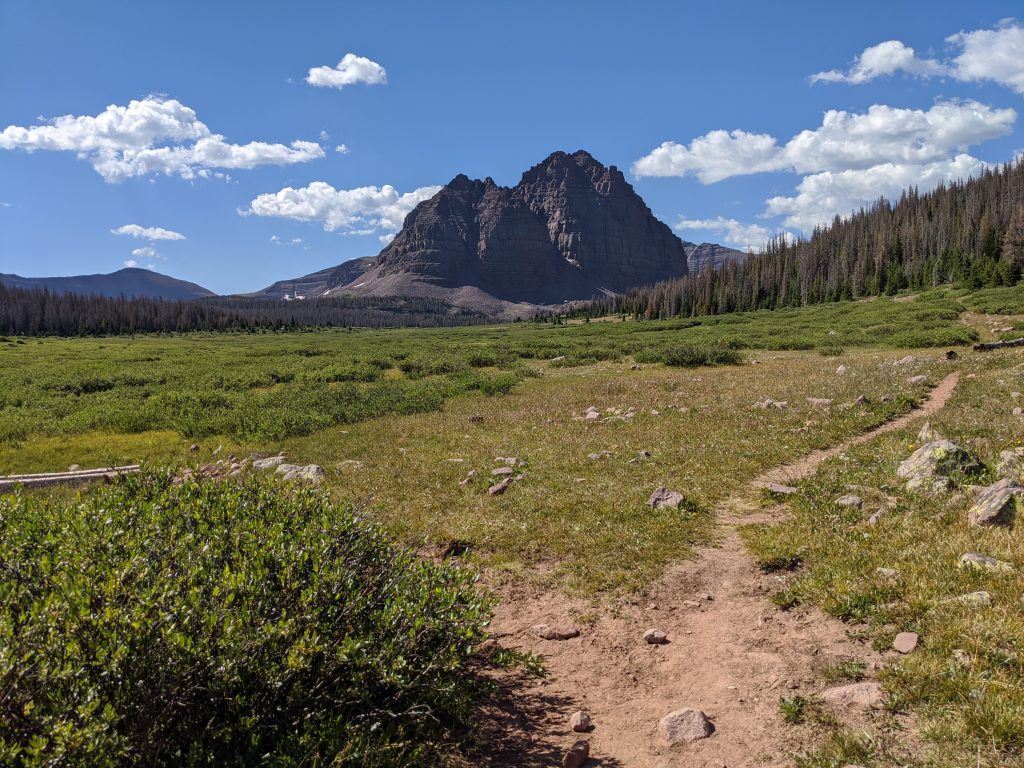
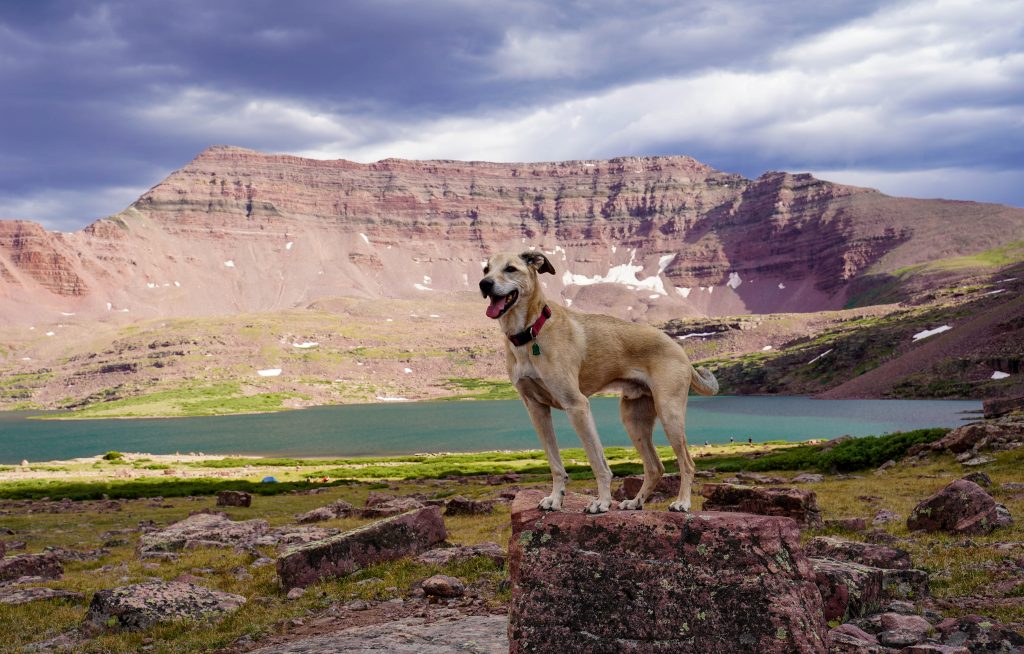
As previously noted we started in the evening on a Friday and just planned on hiking in as far as we could make it (which was several miles) The start of the trail is really easy, with the first almost 7 miles having little to no noticeable elevation gain. It wasn’t too rocky and was pretty easy going with our 2 dogs. Bonus- starting later we had the trail to ourselves.

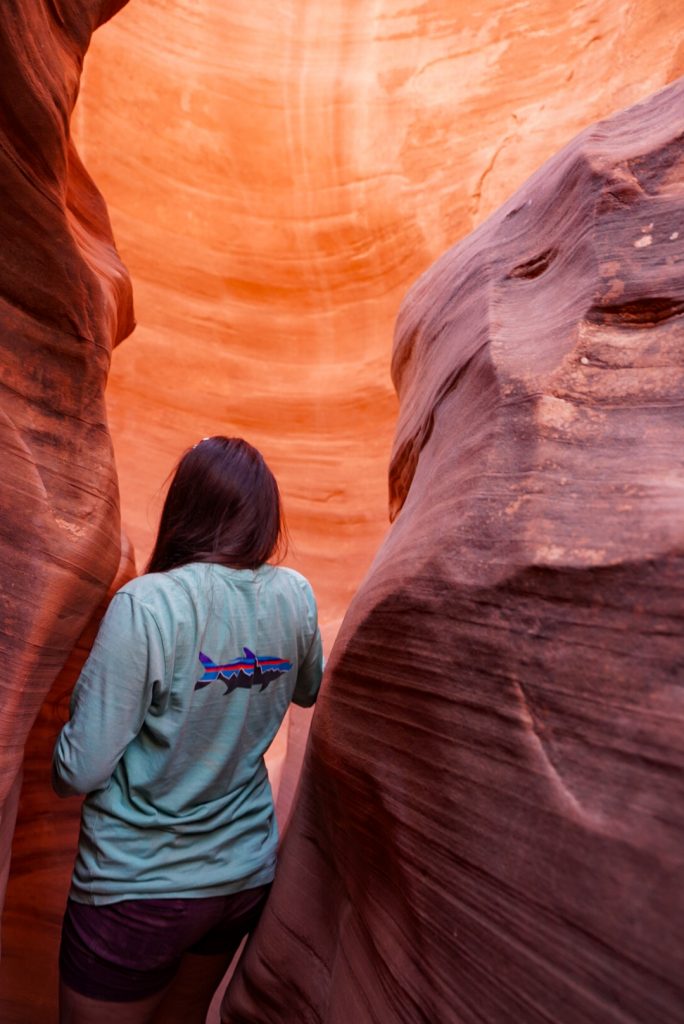
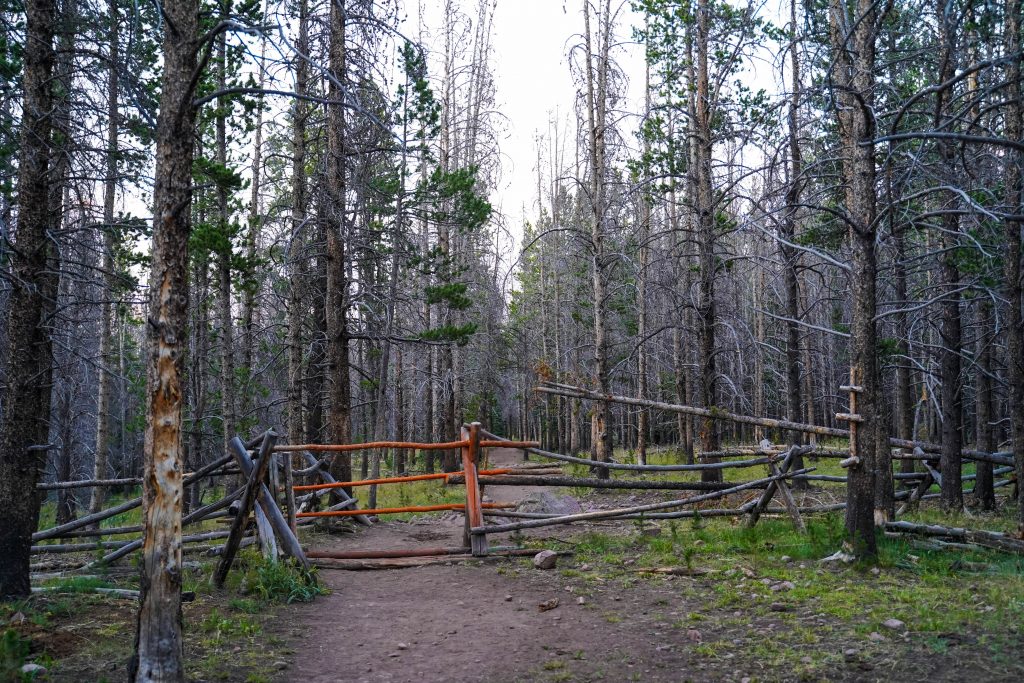
There’s a beautiful bridge 2 miles in and a random fence that you have to move logs out of the way about 3 miles in. After that you may notice some trail splits but they are all signed making the trail very easy to follow. You’ll just keep on the trail to Red Castle lakes.

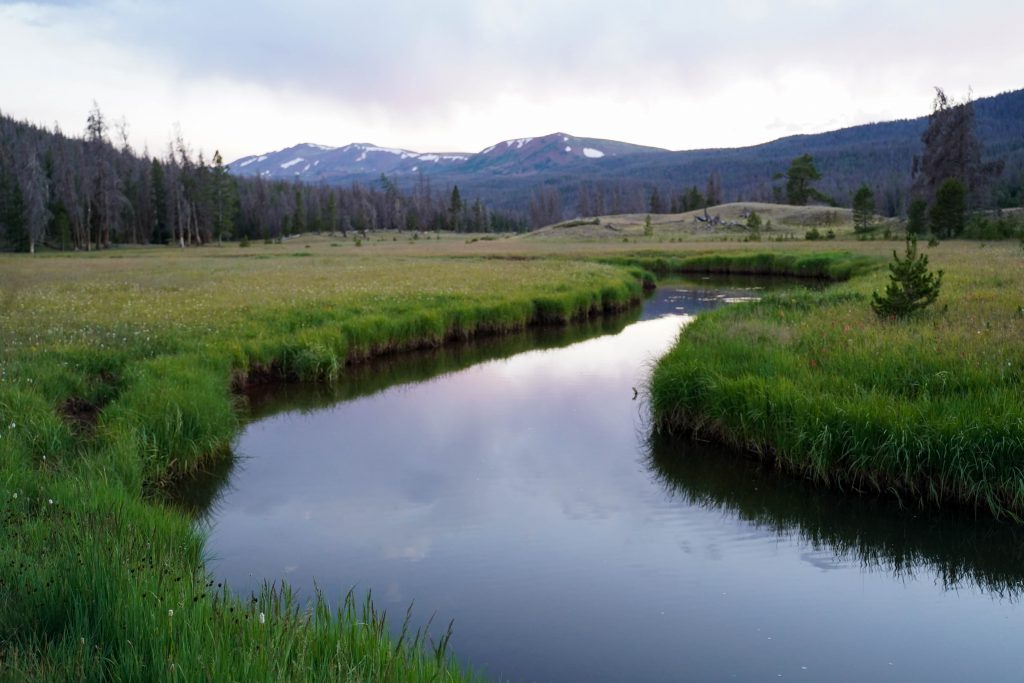
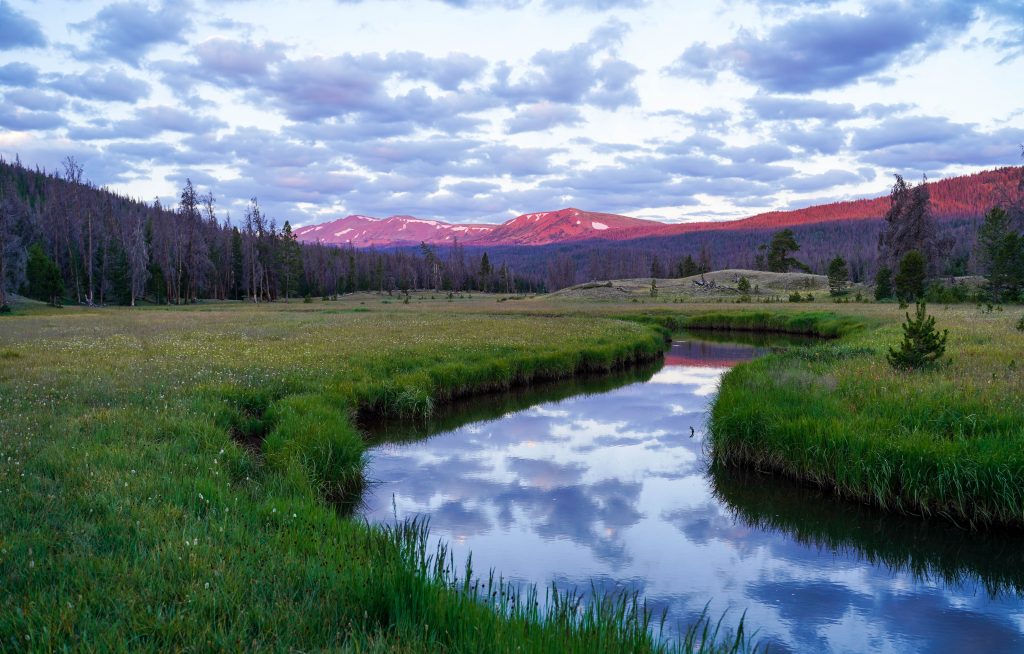
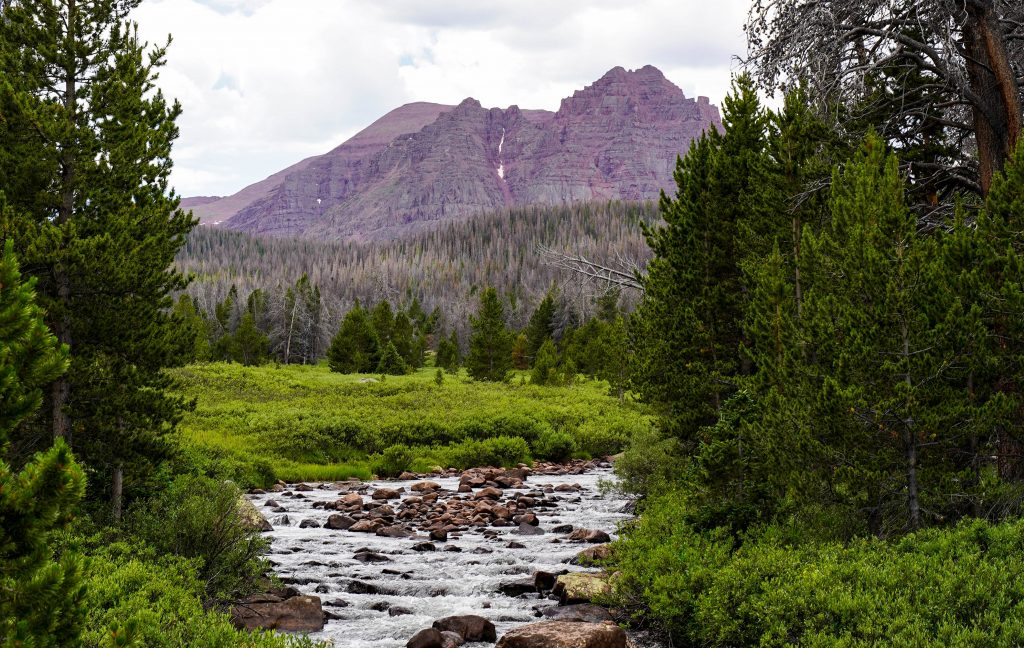
Around 8:30 we found a great little camp spot that even already had a fire ring so we called it a night and waited for our friends who started hiking even later than us. We were right near a stunning section of creek which made amazing sunset and sunrise photos and provided a very convenient spot to filter water from. 

Day 2

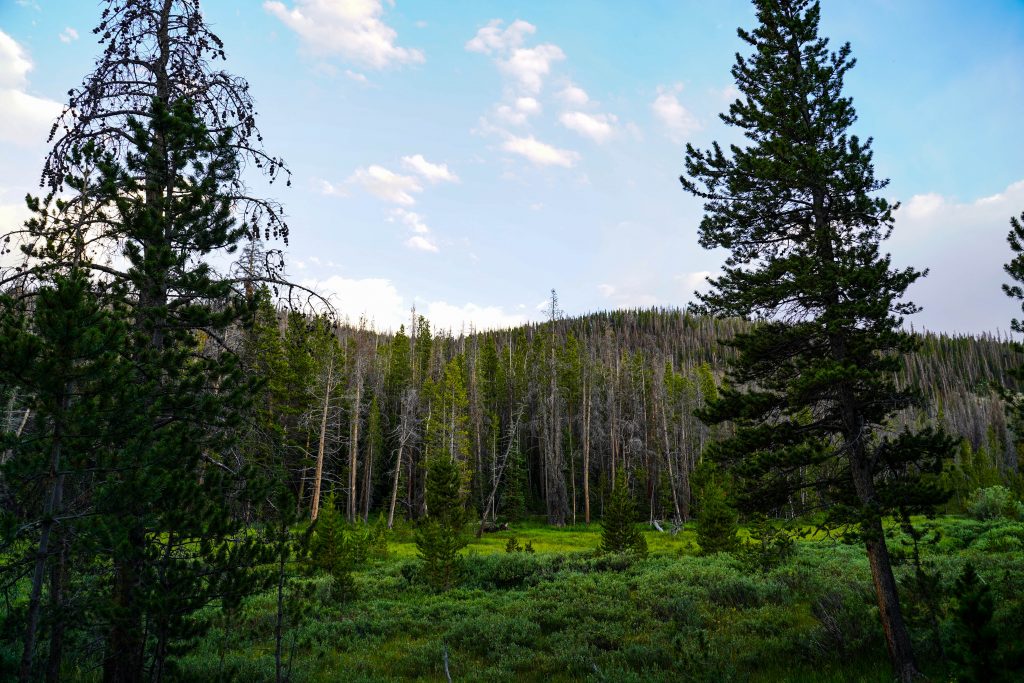
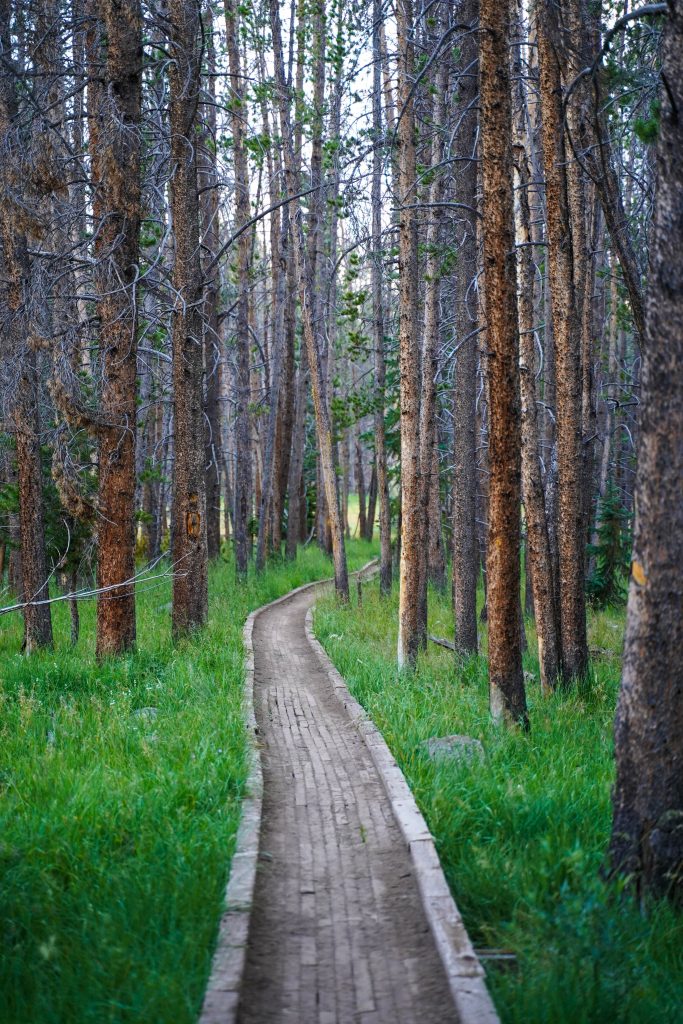
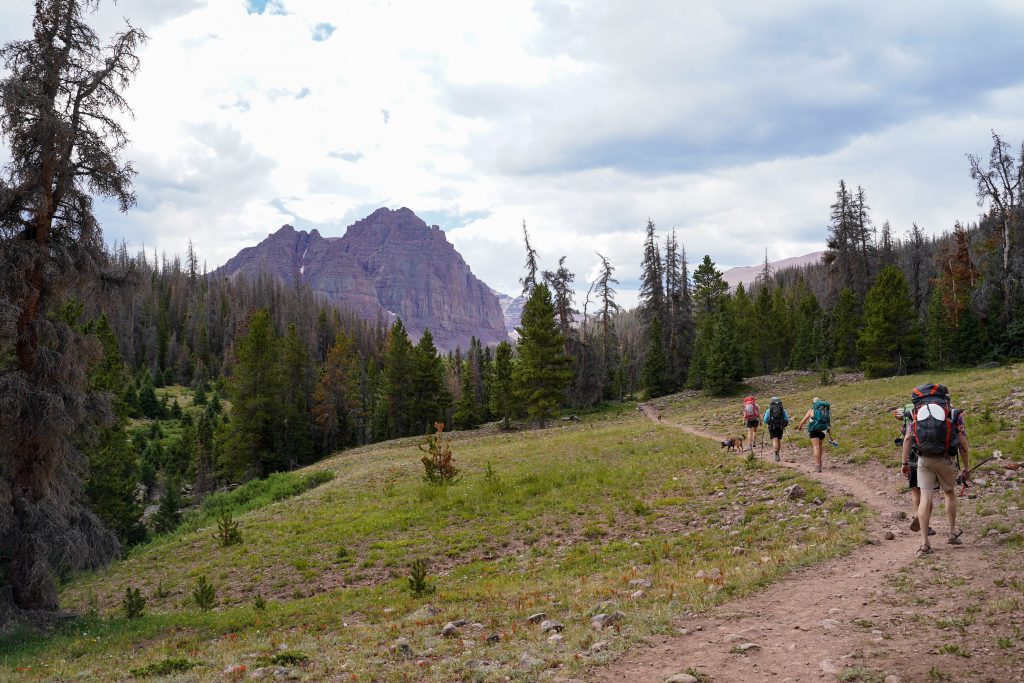
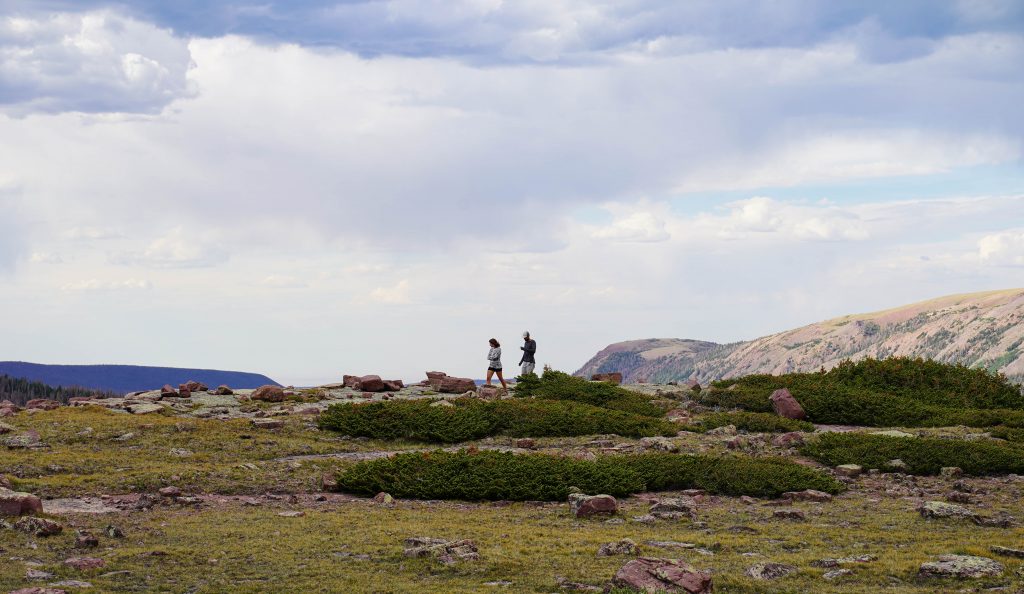
Starting in the morning we got a later start (around 9:30) and already noticed several groups hiking by as we cleaned up our camp. (so note Saturday a lot of people start hiking in) The trail again was pretty nice starting out moving between open meadows and trees (usually the climbs in elevation happen in the trees)

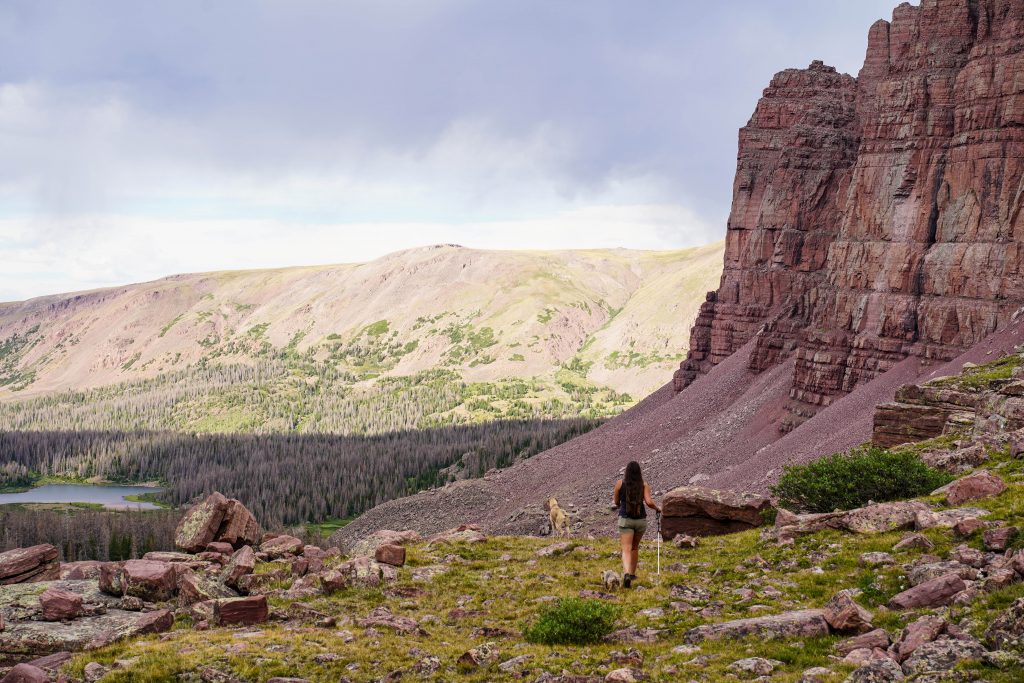
At about 8 miles in you get your first look of Red Castle as you cross your 2nd solid bridge of the hike. Then you’ll reach the switchbacks – which normally would strike fear in the hearts of people not wanting to go uphill- fear not, these are pretty mild. 

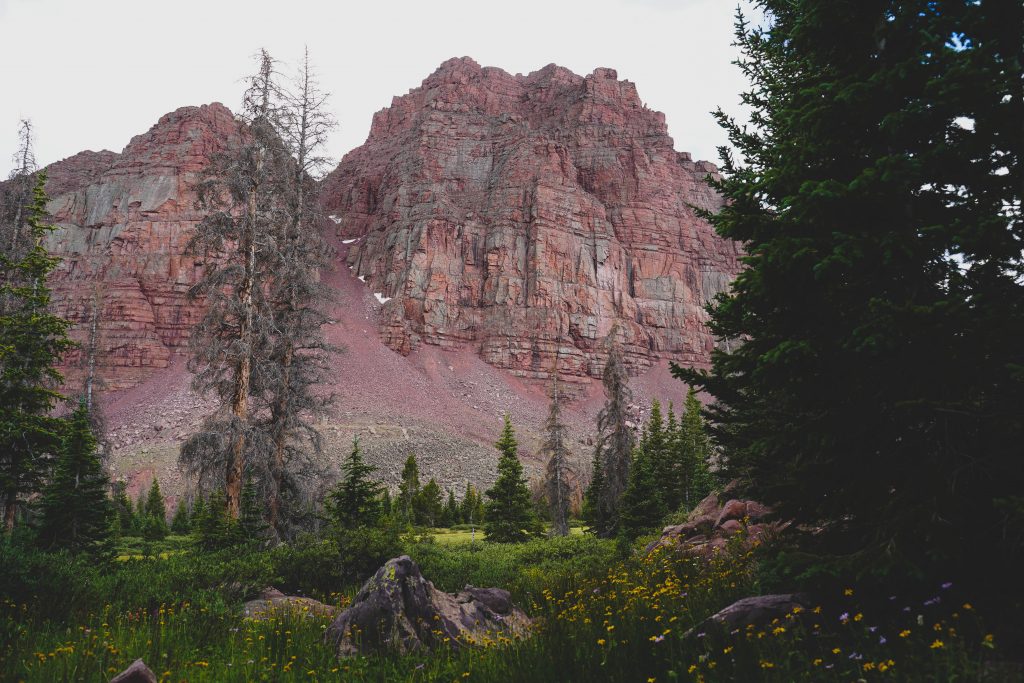
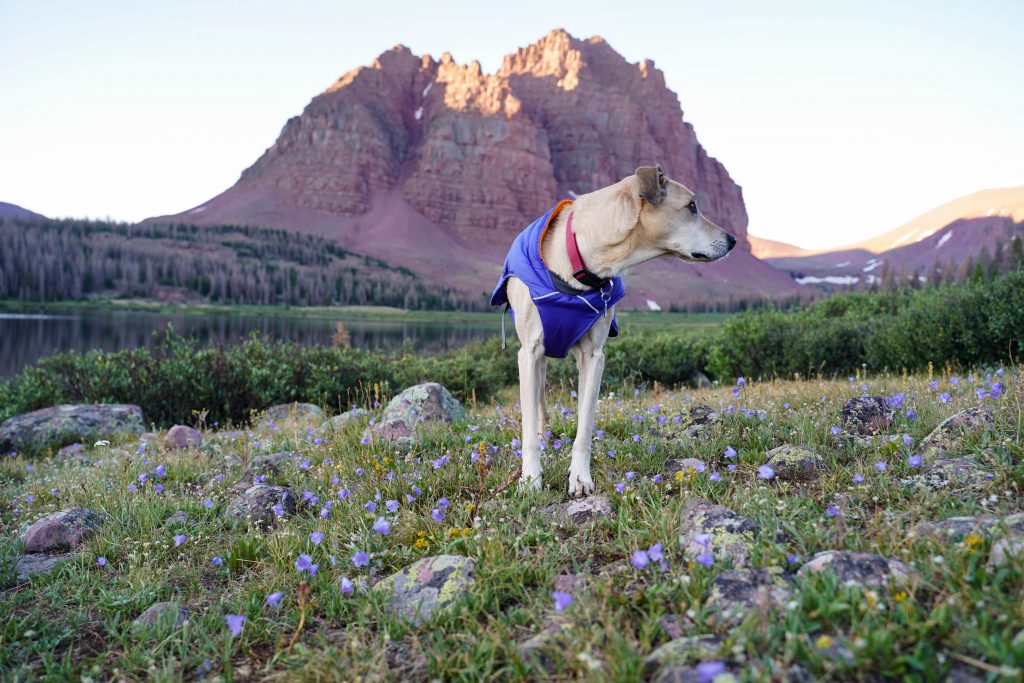
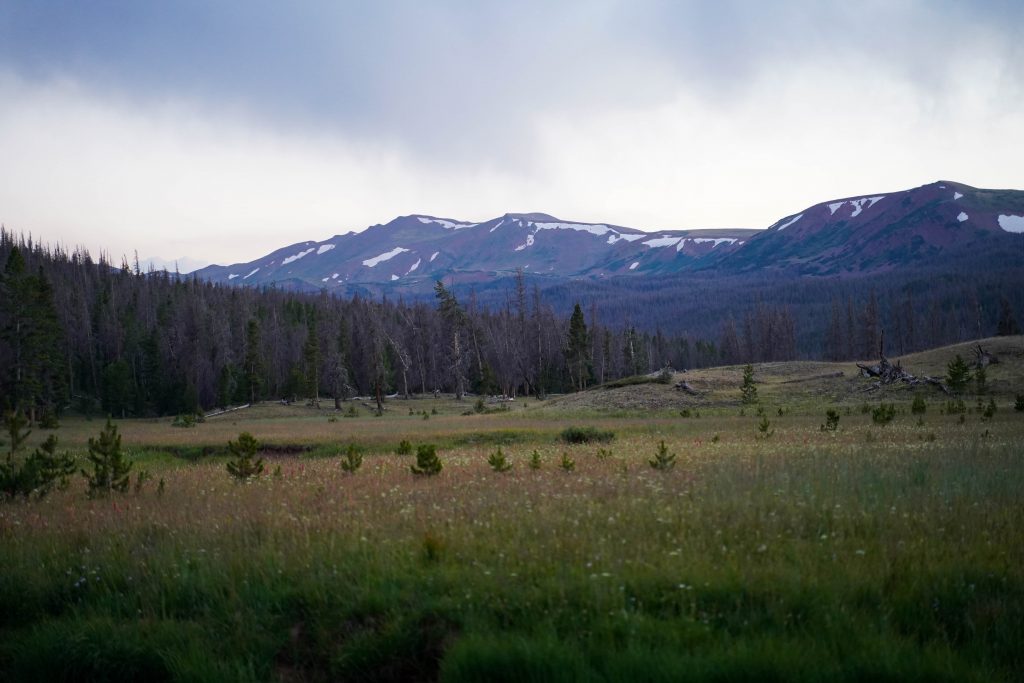
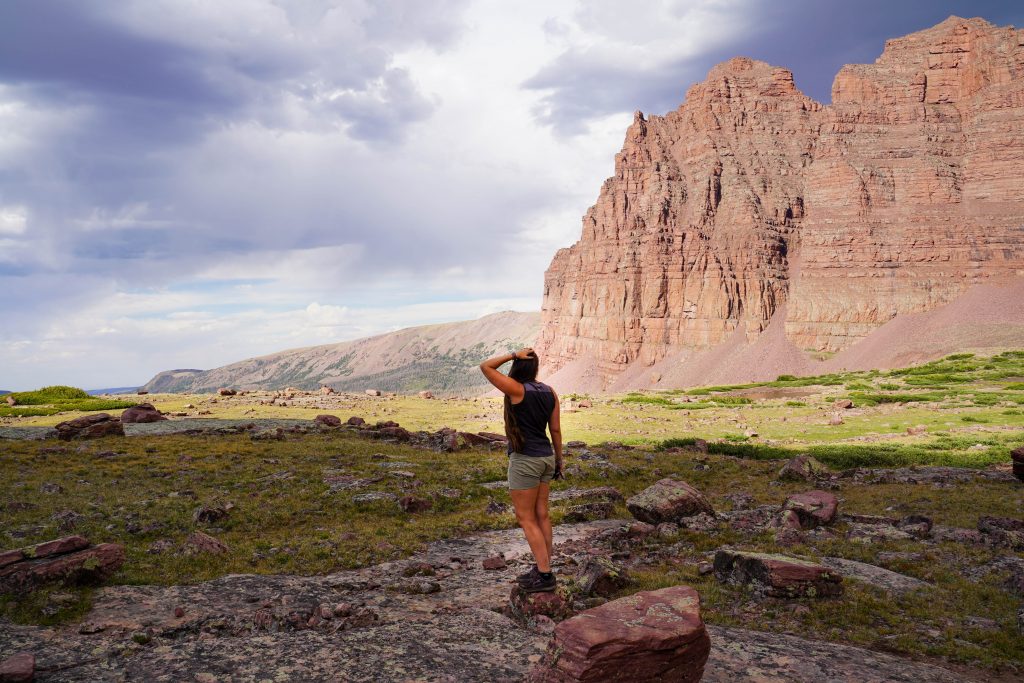
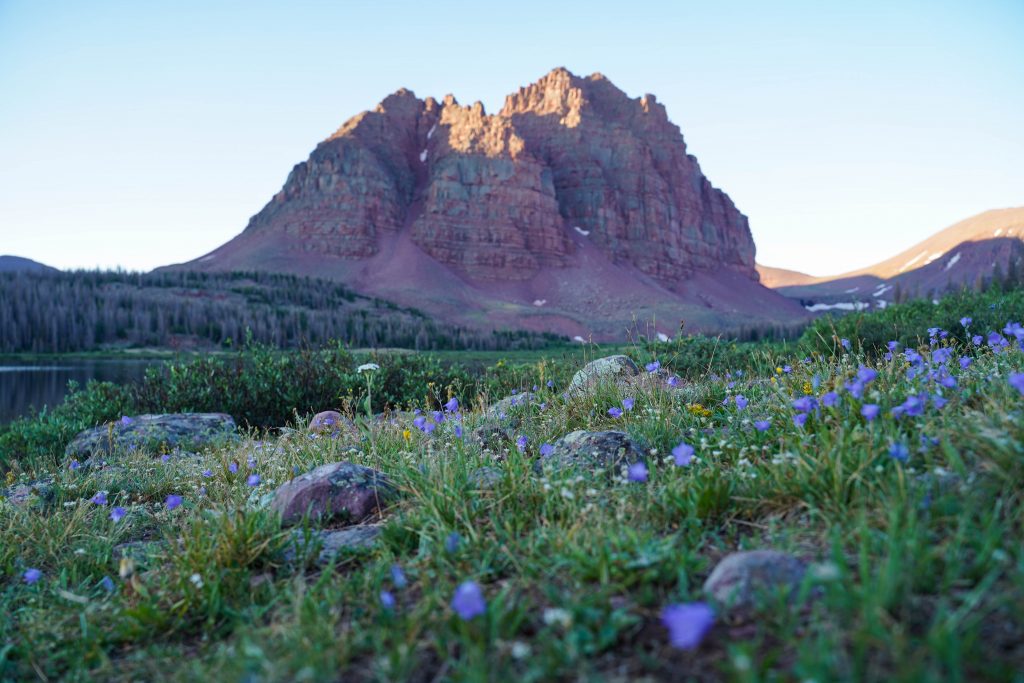
After finishing the switchbacks the trail opens back up with really nice views of Red Castle as you hike towards it. We were enjoying beautiful weather however it was HOT. The water along the way was very tempting to hop into.

Time to pick a camp spot

After the switchbacks you’ll reach a fork in the trail. This is where you decide where you are going to try to setup camp. If you want to camp by the lower lake, take the left fork which will go a couple yards and then at the unsigned fork you’ll go right. The trail crosses several streams but eventually leads you right to the lower lake where you can start scouting a good spot. This will be about 10 miles in. 

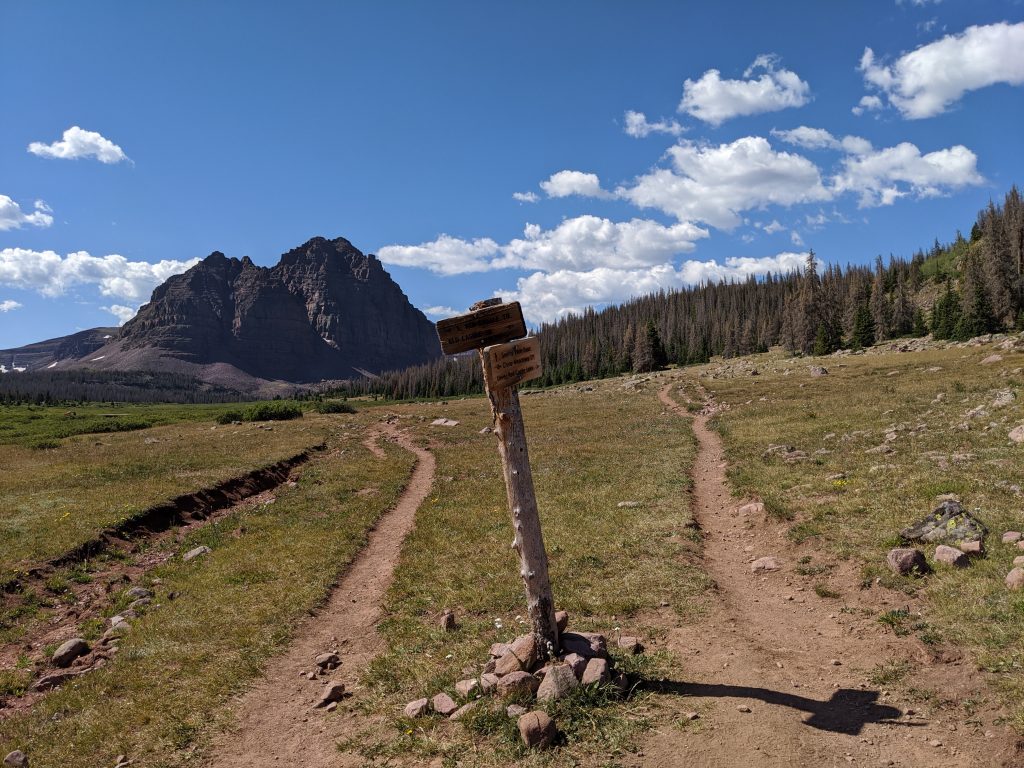
Otherwise take the right fork to climb up a hill that will take you around (and quite above) the lower lake. You can pick you way through some unmarked areas to this trail from the lower lake at later points- but it can be very muddy and overgrown. If you take the right fork, you will look down on the lower lake and hike on by where you’ll then come to some beautiful wooded meadows with creeks to filter water from. (camping option 2 about 11-12 miles in)

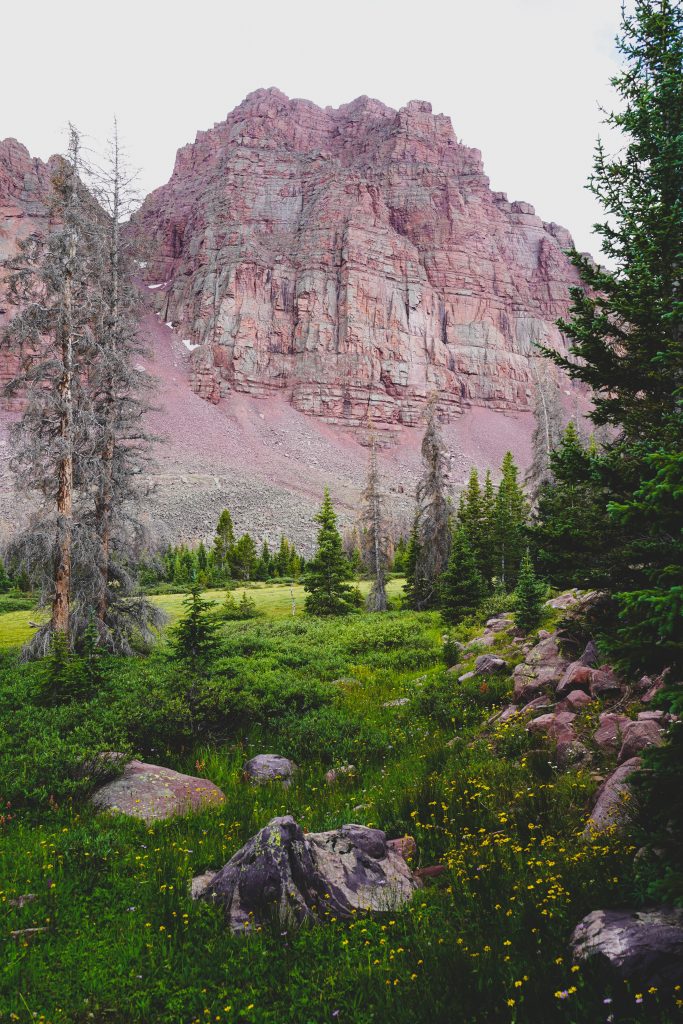
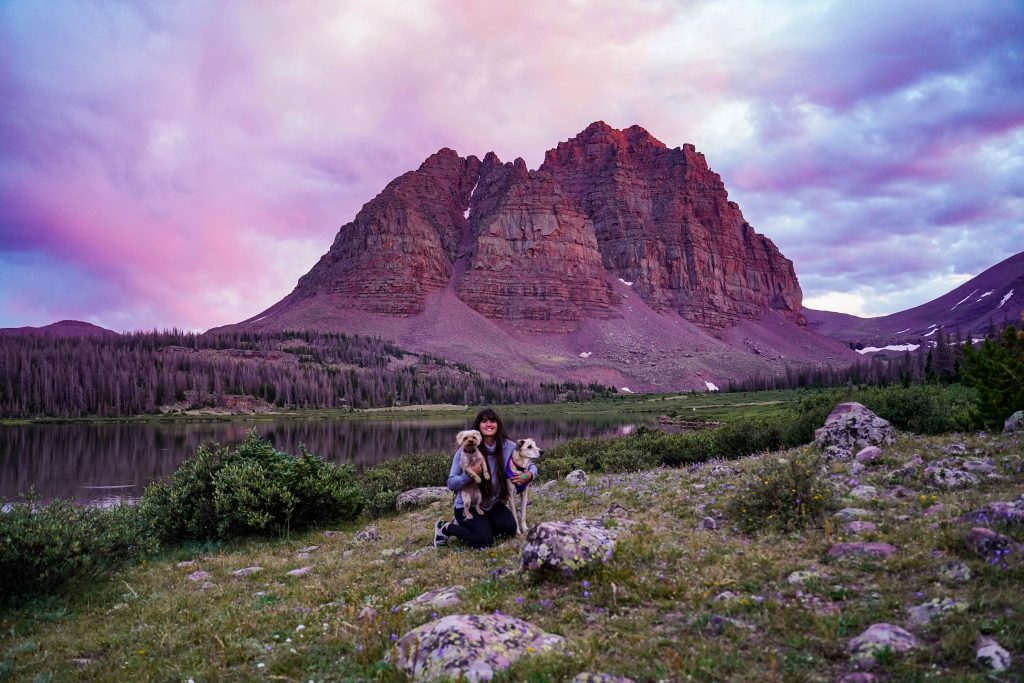
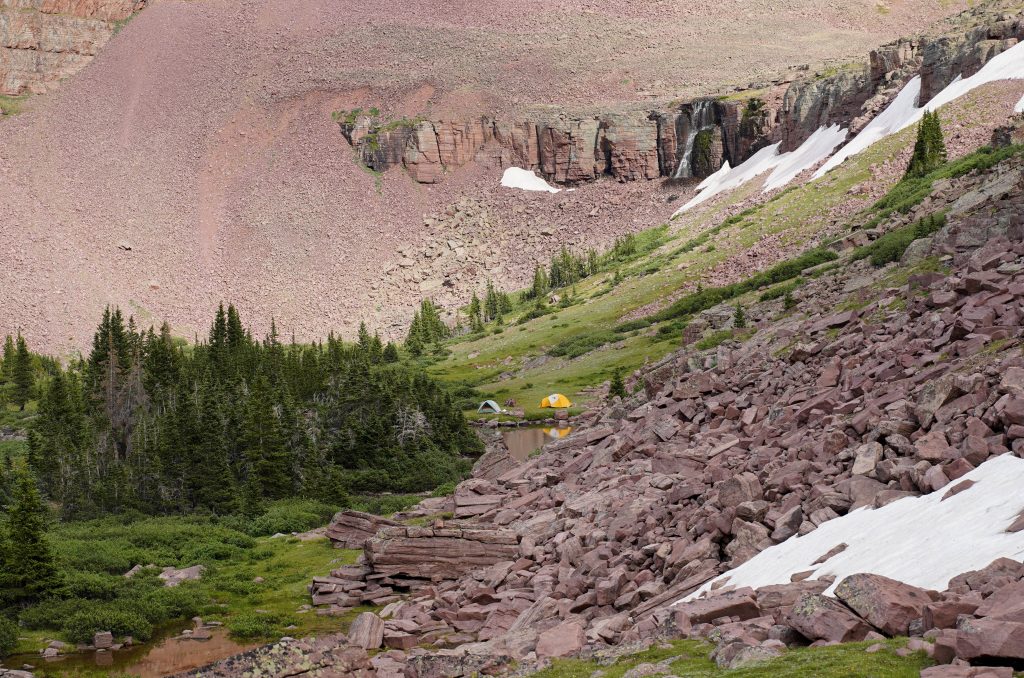
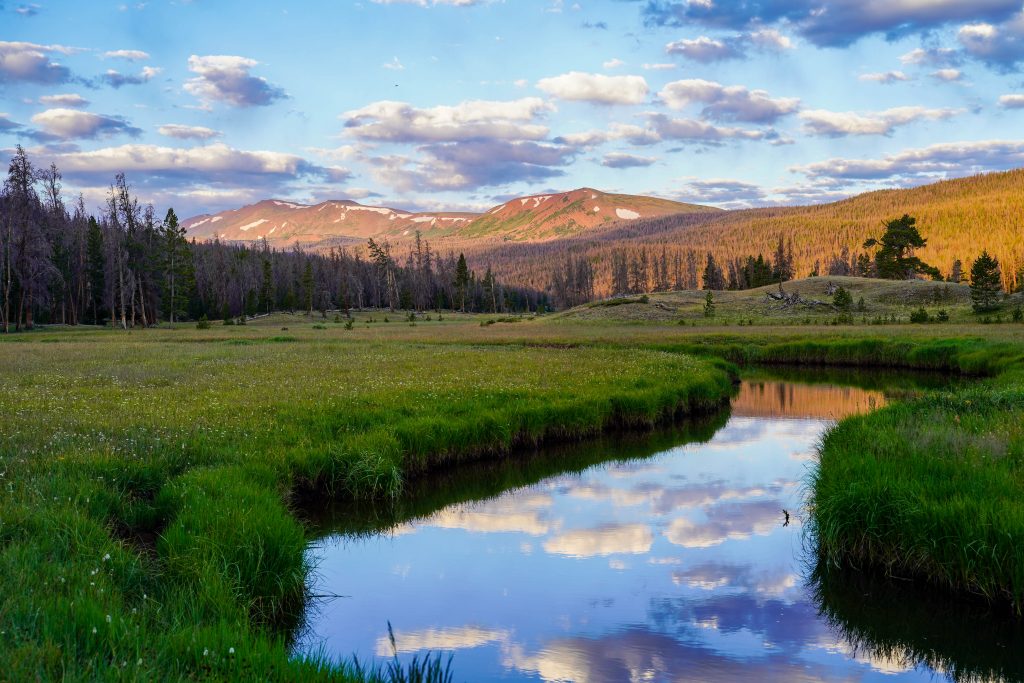
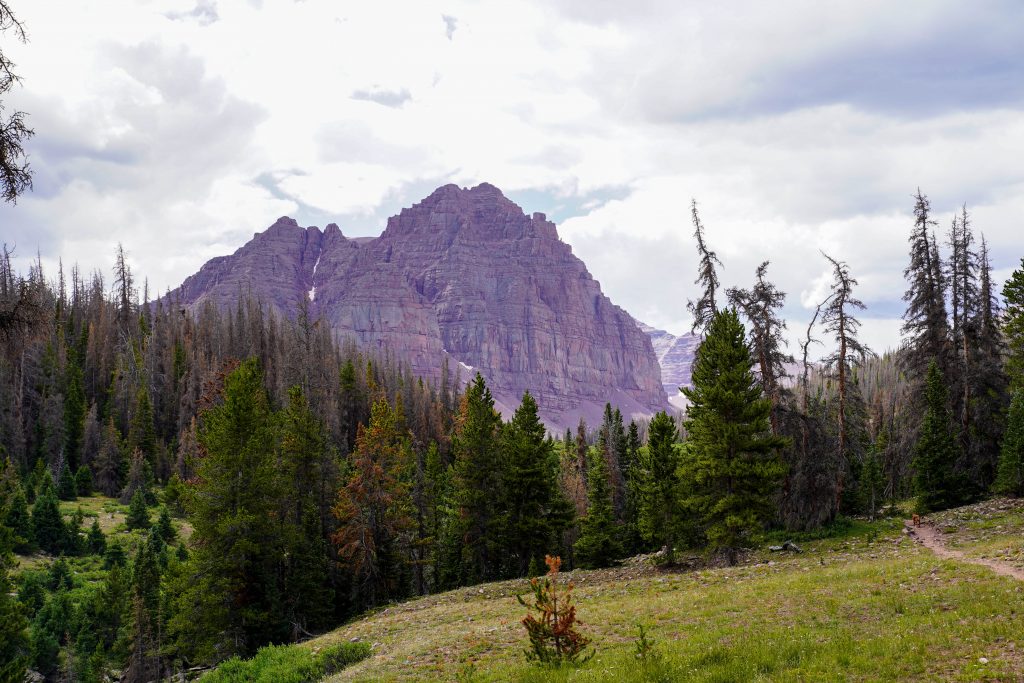
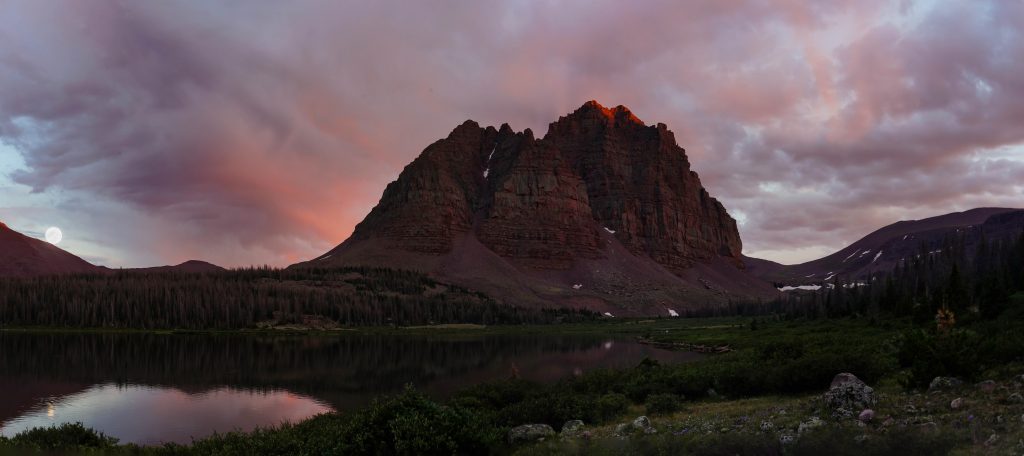
Continuing on past the lower lake you will start to notice quite a bit more elevation gain through the trees until you reach a beautiful unnamed lake with a waterfall and nice reflections of the side of Red Castle about 12.5 miles in. (camping option 3) This lake is the LAST viable camping option as from here on out you will be above tree line and subject to wind/ lack of privacy.

My experience

We dropped our stuff at the lower lake, had lunch and a dip in the lake, followed by a little nap and were ready to hike to main Red Castle lake. We started up about 4:30 PM and it took about an hour each way. (It was SO nice being free of our packs) We noticed as we hiked up that almost all the camping options felt about the same level of crowded… so really it just comes down to what kind of a view you want.

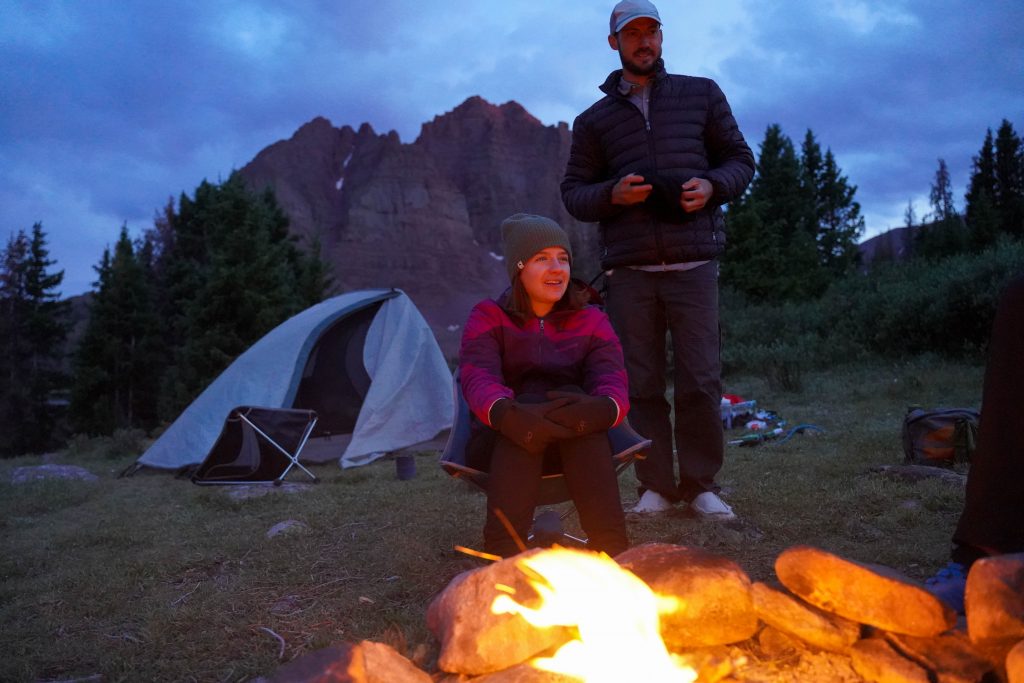
Again we had pretty incredible weather (if a little hot) After taking photos at the upper lakes, we headed back down for our dinner and sunset views from our own campsite (which were pretty unparalleled in my opinion) 
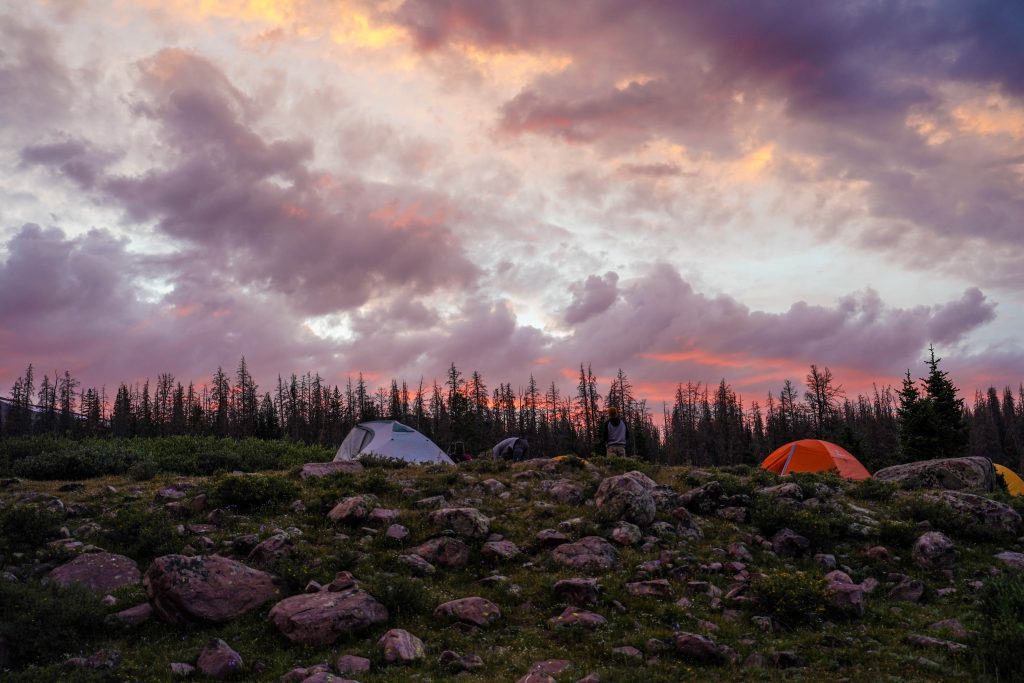
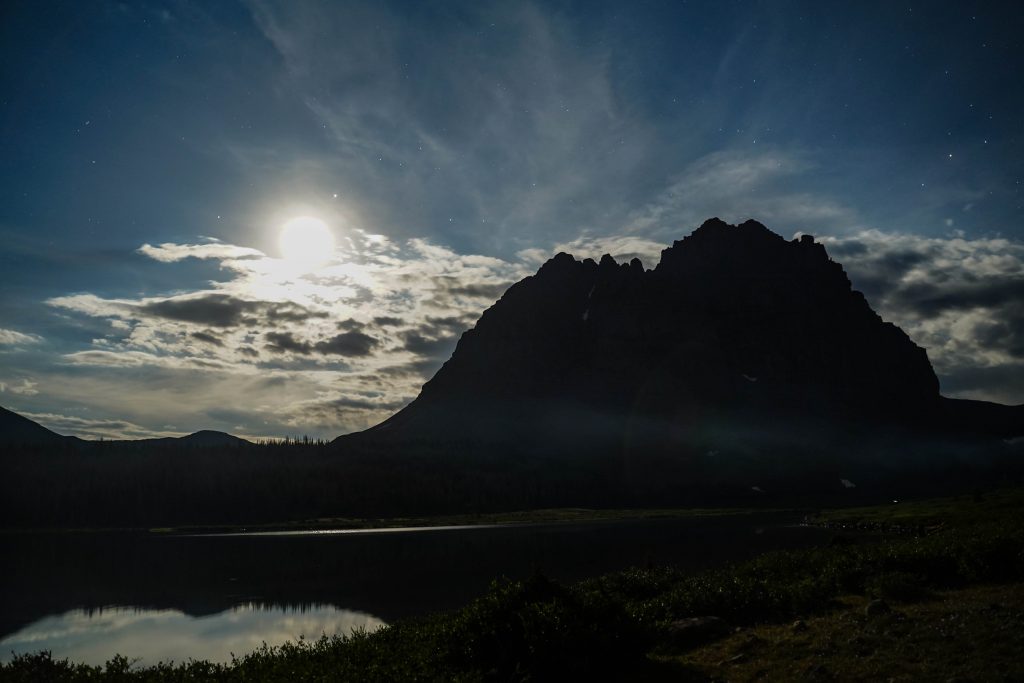
We collected fallen dead wood again (do NOT collect wood from live trees) for a small fire and had a nice evening before hitting the tents under a nice full moon. 

*Be aware of fire restrictions in the areas you are camping. Some don’t allow fires close to the water and some don’t allow fires at all. It may also be seasonal- be fire aware.

*The bugs were AWFUL- since we had such nice weather without wind, they were all over for several hours in the evening. Make sure you bring GOOD bugspray (100% deet) 

The hike out:

We had an easy going morning again, leaving camp around 10. It took us about 4.5 hours hiking back with about a 30 minute break. The hike back was nice as we noticed a lot of the groups left earlier so we had the trail to ourselves again. One of the great things about how long this trail is that people really get spread out along it. There may be a lot of people recreating in the area, but it never really felt all that crowded. Which is awesome for a weekend around here! 

Wrap up:

This backpacking trip is a total MUST DO. It is so incredibly scenic all along the trail with a breathtaking destination. Plan at least 2 nights so you can really enjoy the area and come prepared! Leave no trace as well so everyone can continue to enjoy the spot for years to come. 

Pin me for later:

Trail Guide – Peekaboo & Spooky Slot Canyon

These 2 slots are not only some of the most photogenic non-technical slots you can hike to, but they are also the first slot canyons I ever explored (and my first hikes in Escalante to boot!) While once upon a time they were relatively unknown and less accessible due to the dirt road from hell, now you’ll find a full parking lot by late morning on any weekend. They are a MUST do for anyone wanting to experience scenic slot canyons and visiting the Escalante area.

Trail details:

Distance: 6 miles RT
Elevation Gain: 700 feet throughout the hike (you only really notice it on your hike out to your car)
Time: 3-5 hours
Difficulty: Easy- Moderate
Pets?: Allowed but NOT recommended especially for big dogs
Fees: Free

Trailhead Directions:

From HWY 12, turn onto Hole in the Rock Road and drive for 26 miles where you’ll see a left turn onto BLM Rd 252. Drive another mile to where the road ends in a loop parking area with pit toilets and a trail sign.

While this road is definitely not pleasant (read washboard bumps and large gravel for over an hour) any car can make it as long as the road conditions are dry. Just drive slow and take your time if you have lower clearance and DO NOT attempt to drive down Hole in the Rock road if rain is in the forecast or if the road is wet/ snowy.

Tips for the best hiking experience

  1. Start as early as you can- preferably by 8 AM. Not only will this allow you to miss most if not all the crowds but it will help you beat the heat. It gets VERY hot out there.
  2. Pack lots of water… but in as small a bag as you can. These canyons are tight and you don’t want to lug a big pack through them.
  3. Don’t wear your nicest hiking clothes or bring your brand new hiking pack. The sandstone walls are TOUGH on gear and clothes.
  4. Hike up Peekaboo and down Spooky. Not only does this help with the flow of traffic (it is very difficult to pass people in these canyons) but the climbing sections are easiest this direction.
  5. Pre-load the trail map in all trails or download it if you have pro. The loop can be challenging between the 2 canyons so it helps to have the trail map to ensure you are on the right path.

Where to stay nearby:

Primitive camping/ boondocking is allowed anywhere off Hole in the Rock Road and is free. The most popular spot is about 0.5 miles from HWY 12 where there is a lot of flat space to bring trailers/ RVs/ other rigs out to park. There’s also a dumpster for trash at this lot but no restrooms. Otherwise you can camp anywhere there is a pullout big enough for you to get off the road without trampling plants. We camped at the overflow parking for the TH which is a huge area only 0.25 miles from the TH. (You can’t camp AT the TH) Remember pack out what you pack in including all trash, ESPECIALLY TP.

If camping isn’t your thing, there’s a Motel and excellent RV park in Escalante that has cabins at a great price called Canyons of Escalante RV park. I’ve stayed there many times and have always had a fantastic stay.

Our experience on the hike

Since we camped nearby we were on the trail by 8 AM and were the 3rd car/ group to start. (This was on a Saturday morning so timing was important) The beginning of the trail is about 1 mile of flat hiking following the rim below the parking area. The views are expansive of MANY canyons in the area and is beautiful but exposed with no shade. (this is one place I’d hate to hike in the late afternoon)

The steep slickrock climbs in and out. This only shows maybe 1/4 of the total elevation. It gets VERY hot on this section.

After about 1 mile we descended the steep slickrock down to the canyons base. Be careful in your route finding down the slick rock and watch for cairns to guide you.

Once down, we saw the trail to the Dry Fork Narrows on the left but decided to skip for now as our goal was to beat the crowds. Once we passed the dry fork narrows, we immediately saw the 10 ft. climb up into Peekaboo. We found it to be pretty easy with the small steps ground into the climb but it could be challenging for little kids who can’t reach each step.

Peekaboo Canyon

Once up the climb into Peekaboo is the most iconic section of this whole trail with the double arch. We only saw 1 trail runner in this section who passed us otherwise we took our time taking lots of photos in this section.

The Peekaboo slot is very short so after the iconic arches, the trail slots up into a skinny shallow canyon, widens, then slots again for another 10 minute stretch before ending at a tree where the canyon is gone and you’ll see a large wash. We initially missed the turn off to go on the loop here and headed up the wash 5 minutes before I checked the map and realized we’d missed our turn. Back at the tree, there’s come cairns that lead you up and over the hill and cut across sandy dunes. This is the other miserable section in the sun since the sand is soft and hot.

Spooky Canyon

After about 20 minutes we were down and at the top of Spooky ready to descend. Spooky is at least twice the length of Peekaboo and MUCH skinnier with little curvy down climbs where you’ll need to watch your step. For most of Spooky you’ll have to have your pack slung over one shoulder or off to the side.

A couple minutes in there’s another little arch great for taking pictures under and then about 5 minutes later the major obstacle in Spooky. The top makes it look like a series of boulders, but the boulders are all about 10 feet above the canyon floor. Aim left to a 4 foot hop down or chimney down climb. From the top of that boulder, turn around to face “up” canyon and you’ll see a small, dark tunnel cut into the boulders. This is a smaller step down and crawl through that will get you to the canyon bottom the safest.

Sometimes there’s a rope to help people down, but I wouldn’t count on it being there. If you aren’t comfortable with what I just described, bring some webbing or a rope just in case- or skip this hike.

After the boulders it’s a series of shimmying, crawling, and skimming through the rest of the canyon. My absolute favorite parts of Spooky are the ultra textured walls and how sinewy (canyon talk for curvy) the walls are. Other slots like the narrows or Little wild Horse are narrow channels of straight walking- where you can see the light at the end of the tunnel most of the time. In Spooky- you can see maybe 5 feet ahead before the canyon dramatically twists and curves so there’s no end in sight.

*As a side note, this isn’t a good trail for the claustrophobic.

After an hour or so we were out of Spooky. We followed the trail along the wash easily back to where we passed the entrance to Peekaboo completing the loop. From there you hike back up the same trail you hiked in on.

Should you bring your dogs?

*The entrance to Peekaboo around 10:30 AM on that Saturday was INSANE. At least 20 people were waiting to make the climb up and it seemed to mostly be blocked with families bringing very small kids and dogs with them. PLEASE be considerate of other hikers and your furry friends. This trail is NOT good for dogs. The sand is very hot and will burn their paws unless you start at 6AM. Also consider the canyon is NARROWEST at your feet where dogs will be hiking through. Not only will you have to lower/ hoist your dog up these 10+ foot drops but you will have to help your dog over narrow sections of canyon where they WONT fit.

We were back at our car around 11 to find a completely full parking lot but had one of the best mornings we could ask for.

Definitely start early.

Pin me:

100 Hike Challenge

About:

Why 100? Why hiking? Well let’s just say I have a favorite hobby, and that hobby is hiking. I love the feeling at piece with nature, the exercise from climbing up hills, the general sense of adventure in seeing new places AND having those places to yourself, and lastly the people in the hiking community! I really love it all (even if I still complain on the steeper trails)

How to accomplish the 100 hike challenge

  • If you haven’t tried the 52 hike challenge yet, give that a go! It aims at getting you to hike once a week for a year. (I was hitting the goal easily by October every year so I wanted to push myself even more and aim for 2/week) 
  • They don’t all have to be hard hikes! My only requirement for myself was that it was a mile long and got me out in nature (no urban hikes ) and I tried to make them as different as I could but with changing seasons, the same trail can look many different ways. 
  • DO try to use this challenge to get a little out of your comfort zone! Whether this takes you to hiking in a different state or to a different hobby, you might find some more outdoor enthusiasm when you find you like hiking to a climbing spot or a technical canyon. 
  • Do use this challenge to see some new places! It doesn’t have to be a different hike every time, but it won’t seem like quite a chore to hike twice a week if you are finding and experiencing new trails. 
  • Which brings me to- ALLTRAILS amazingly helpful app, highly recommend to exploring the trails near you, as well as using the trail map while hiking to ensure you don’t get lost.
  • Invest in some quality outdoor gear, especially shoes! It can be a bit of a process finding hiking shoes that fit just right (speaking from experience of seemingly always having he wrong footwear) so I highly recommend stores like REI which have 365 day gear guarantees! So you can actually WEAR those shoes hiking and return them if they aren’t the best fit. 
  • Highly recommend using a location tracker app like endomondo or strata as well, to track your progress on a trail and at the end know exactly how you did! I love being able to show the stats to my coworkers Monday morning to show just how crazy of a weekend climbing mountains I had. 
  • Last but not least, practice “Leave No Trace”, take nothing but photos, and leave nothing but footprints. 

If you need ideas for hikes out West, in Florida, or amazing international spots, check out my list (and photos of course!) of all 100 hikes I completed in 2018.

Color code is for anything that wasn’t a hike close by in my backyard: Some hikes have links to a blog post! Will link more as I blog about my favorite trails.

National Parks

Bryce Canyon
Canyonlands
Arches
Capitol Reef
Grand Tetons National Park
Grand Canyon

Countries 

The Unities States
The Philippines
China

States
Utah
Wyoming
Florida
Nevada
Arizona

State Parks/ Monuments/ Reservations
Goblin Valley
Escalante- The Grand Staircase
Florida Caverns State Park
Falling Water State park
Valley of Fire
Havasupai Indian Reservation
Antelope Island
Wasatch Mountain State Park

Hikes 1-25
1. Curly Springs Overlook via Dry Canyon 2.5 miles RT 800 feet elevation change
2. Battle Creek Falls 1.5 miles RT 600 feet
3. Jacks Mailbox 2.7 miles RT 1300 feet
4. Rock Canyon to the campground 4.7 miles RT 1370 feet
5. Adams Canyon waterfall 4 miles RT 1400 feet

6. Little Wildhorse- Bells Canyon loop 9.8 miles RT 1700 feet


7. Pleasant Grove “G” trail 2.2 miles RT 800 feet
8. Upper Falls from Nunn’s Park, 3.2 miles, 600 feet
9. The Provo “Y” trail 2 miles RT, 1000 feet
10. Trail of the Eagle, 4 miles RT 600 feet
11. Bonneville Shoreline between Grove Creek and BC, 1.5 miles RT 300 feet
12. Rocky Mouth Falls 1 mile RT, 200 feet
13. Traverse Mountain Ridge, 3 miles
14. Mt Tapyas in Coron, 1,5 miles RT, 700 feet

15. Badian Canyoneering in Cebu, 2.5 miles RT

16. Osmena Peak on Cebu, 1 mile RT, 400 feet
17. Grove Creek, 4.5 miles RT 1600 feet
18. Dry Canyon Orem to overlook, 2 miles RT- 550 feet
19. Hurricane Wash to Jacob Hamblin Arch – 7.7 miles 1 way, 500 feet

20. Jacob Hamblin Arch to Stephen’s Arch- 17.5 miles RT, 1000 feet
21. JHA back to Hurrican Wash TH- 7.7 miles 500 feet

22. Backpack in to Reflection Canyon, 9 miles 800 feet
23. Backpack out of Reflection Canyon, 9ish miles 800 feet

24. Horsetail Falls, 5 miles RT, 1600 feet
25. The Living Room of SLC, 3 miles RT, 900 feet
Hikes 1-25: 112.5 miles, roughly 22,700 feet of elevation change 

Hikes 26-50

26. Bells Canyon to lower waterfall, 5 miles RT 1630 feet
27. Twin Peaks from alternate trailhead, 3.5 miles RT, 1000 feet
28. Grandeur Peak, 8 miles RT, 3000 feet
29. Traverse Mountain Summit- 3 miles RT, 540 feet
30. Battle Creek Falls further up trail- 3 miles RT, 1000 feet
31. Sunglow Canyon- 3.5 RT, 1200 feet
32. Florida State Park compilation- 2 miles 


33. Horsetail Falls Work club lead- 5 miles, 1600 feet
34. Spring in Big Springs loop! 3 miles RT, 500 feet
35. Orem Big Baldy Summit (attempt), 5.5 miles 2400 feet
36. SLC foothills secret sunset spot hike, 3 miles RT 700 feet
37. Pine Hollow trail, 5.5 RT, 1600 feet
38. Heugh’s Canyon Waterfall, 3 RT, 1200 feet

39. Fire Wave, 1.5 RT
40. White Domes Loop/ Rainbow Vista trail, 3 miles
41. Tibble Fork Loop 5.6 RT 1600 feet
42. Lake Blanche 7.5 RT 2600 feet
43. Julie Andrews Meadow 4 RT, 1000 feet
44. Diamond Fork Hot Springs, 5 RT, 636 feet
45. Hilltop to Supai campground, 10 one way, 2500 feet
46. Campground to Navajo and general waterfall exploration, 2 RT

47. Havasu to Mooney, 2 RT
48. Supai Campground back up to hilltop 10 one way 2500 feet
49. False Kiva Trail 2.5 RT 170 feet and Mesa Arch, .6 RT
50. Corona Arch 3 miles RT 650 feet
Hikes 26-50: 109.1 miles, roughly 25,526 feet of elevation change 

Hikes 51-75

51. Delicate Arch 3.5 RT 590 feet

52. Negro Bill/ Grandstaff Caynon 5.3 RT 1700 feet

53. Grotto Falls Payson 1 RT
54. Wind Caves in Logan 4 RT , 1100 feet
55. Twin Peaks from main TH 3.75 RT 980 feet
56. Cassidy Arch CR 3.5 RT 1000 feet


57. Hickman Bridge CR 2 RT, 320 feet


58. Little Wild Horse Slot 3 RT

59. Willow Heights Lake 1.5 RT 650 feet
60. PC Hill 1.5 RT 518 feet
61. Wolverine Cirque Loop 8 RT 2,350 feet
62. Bald Mountain Uintas 4 miles RT, 1300 feet
63. Taggart Lake GTN 3.8 RT 400 feet


64. Delta Lake GTN 8.5 RT 2600 feet


65. String Lake/ Leigh Lake loop GTN 3.75 RT 182 feet


66. Maybird Gulch lake 8 RT 2000 Feet
67. Aspen Grove Waterfalls 3.5 RT 700 feet 
68. Bourbon Lake and Mirror lake loop combined 3.5 RT
69. Sunset Peak via Brighton 6.5 RT 2000 feet 
70. Tibble Fork lakeshore loop 1.5 RT
71. Buffalo Peak 3 RT 850 feet *
72. Mt. Superior loop 4 miles, 4,424 feet
73. Sugarloaf Peak 5 RT 1700 feet
74. Battle Creek Falls baby hike 2 RT
75. The Great Wall Jingshanling section 6 miles point to point – no idea on elevation change but it was  ALOT
Hikes 51-75: 100.1 miles, roughly 25,362 feet of elevation change 
Hikes 76-100

76. Huangshan Mountain (HM) West Sea North trail 4.5 point to point up 700 feet, down 1300


77. H.M. West Sea South trail – Fairy Bridge 7 miles RT 1000 feet 


78. H.M. Western Steps DOWN 8.3 miles point to point, Up 1300 feet, then down 3500 feet


79. Clayton Peak 4.5 mile loop 1700 feet
80. Dog Lake (Milcreek side) 6.5 RT 1200 feet
81. BC- GC loop 8.5 loop 2700 feet 
82. Gordon Creek Waterfall 2.5 RT
83. Carbon County trail exploring 1.5 RT
84. Big Springs Loop Fall! 3 mile loop 500 feet
85. Stewart Falls 3.5 RT, 650 feet
86. Queens Garden- Navajo Loop BCNP 3 mile loop , 625 feet 


87. Grand Canyon NR-SR 24 miles point to point 5800 feet down, 4400 feet up

88. Silver Lake AF canyon 6 miles RT 1400 feet

89. Ensign Peak 1 mile RT, 400 feet

90. Diamond Fork Hotsprings Fall edition,  5 miles RT 630 feet

91. Frary Peak on Antelope Island 7 RT, 2100 feet 


92. Nagah Canyon Capitol Reef – 2.3 mile loop 600 feet 


93. Herriman Fire Memorial Hill trail 3.5 RT, 900 feet

94. Upper Stair Canyon, 2.4 mile loop 500 feet
95. Shillelagh Canyon Right Fork 2 mile loop, 400 feet
96. Spanish Fork Cross/ Dominquez Hill 2.2 RT 360 feet *
97. Squaw Peak 8.6 RT, 3000 feet
98. Angel Cove Slot (both forks) 5 miles RT, at least 1600 feet

99. Shillelagh Canyon Left Fork 2.6 mile loop, 500 feet
100. Dutch Hollow Midway 4.5 mile loop 580 feet 


Hikes 76-100: 129 miles, roughly 36,445 feet of elevation change 


1 year= 450.7 TOTAL MILES around 110,000 feet of elevation change  (roughly)

Explore Historic Helper

My last Carbon County post: last but not least as the little town of Helper is up there on one of my favorite parts of the area. If you like small towns with artsy vibes, historic buildings, amazing locals, and delicious food, this town is for you! 

After my short off-roading/ hiking adventure around the Pinnacle Peak area in the morning, I regrouped with Katie and my favorite tour guide/ new friend Tina. We met up just off hwy 6 at the Big John statue which starts the historic town’s main street. After all the history and stories we’d been hearing about coal mining in the area that weekend, it was cool to see the spirit of the coal industry embodies in this statue
Big John is a must see as he really embodies the heart and soul of Carbon County which got its start with railroads and coal mining. Big John was crafted in CA and arrived at his permanent home of Helper in 1964 alongside the railroad/mining museum. He was named after the hit  1961 song “Big Bad John” as no other name really fits this 20 foot tall miner. 
Next up we headed down the street a little ways to the new Harley Davidson museum that is being built (and almost finished) It was beautifully done with a variety of bikes and other HD memorabilia. We just had a quick look around at the work in progress but I’ll definitely have to come back when it’s all finished up.
Helper Points of Interest 
The Western Mining and Railroad Museum
Next door: The mining equipment and museum yard 
Balance Rock: A little too strenuous of a hike to attempt on any given day but easily seen from the town’s main street when just looking to the north
Big John statue
Spring Canyon: An easy walk where you can see the remains of coal camps that helped form the foundation of Helper 
The front entrance to the Harley Davidson museum 
A Short History of Helper 
Helper was first settled in 1881 by Teancum Pratt and his wives and was followed closely by the railroad only 6 months later. Helper was then named after the team of “helper” coal-powered steam engines that assisted freight trains up the neighboring Price canyon (a 15 mile long climb with a 2.4% grade) to Soldier’s Summit. With the railroad came the need for coal and thus the need for man power and immigrants. In 1900 Helper’s population reached 385 people made up of at least 16 different nationalities and after coal worker strikes in neighboring mines like Castle Gate, the population grew to 850 between 1912-13. Helper essentially became a “hub” with multiple businesses surrounded by several coal mining operations. Even with the Great Depression, the town’s position as a railroad center provided stability and through WWII the town had additional stability provided by the increased demand for coal. Now, even though the need for coal from the mines has declined (the actual Carbon power plant was closed just in 2015 after 60 years of running), the town survives and has become a center for art with several galleries lining its main street. The main street also plays host to a summer art and music festival, monthly markets called “first Fridays” and soon its own film festival
A short ways down the street we passed a fun “alchemy” art studio that had chalk out front so you can grace the sidewalk with your own art. There were lots of beautiful art studios along the street that worth are window shopping and peeping in. 
I loved all the fun artsy elements of main street Helper. 
Continuing on you pass loads more old buildings that all have descriptions of what they were when first constructed as well as a sign leading to what will be a nice waterway beach spot for playing during the warmer months
And then you come to the museum yard with old mining and railroad equipment. 
While you can’t climb up ON the equipment, a lot of the pieces were interesting to learn about and make fun photo props. Right next door is the Western Railroad and Mining Museum which is certainly called for (when it’s open) We unfortunately hit a Monday which during winter hours, it’s closed on. 

There were lots of beautiful old buildings to enjoy
The historic street is framed by 2 made over Conoco gas stations that again are fun to walk around for photos and admire that Cars land vibe. 

 After the gas station we turned and headed back down main street. 
I love how nestled it is among those desert cliffs. 
 After window shopping more art galleries, adding some sidewalk art, and all that walking, we worked up an appetite and obviously had to get lunch in the Balance Rock Diner. (review in my where to eat post here
And after lunch, we hit up the coffee shop across the street Happiness Within for some caffeine before our drive back to Utah County thus concluding a wonderfully relaxing afternoon stroll along the historic Helper thoroughfare. 

So whether passing through or looking for a close by weekend getaway, I definitely recommend stopping in Carbon County for museums, playing in the wonderfully diverse outdoor landscapes, gawking at ancient American rock art, and eating! 
Katie and I with our Happiness Within Helper hats (and not shown here: Balance Rock Diner t-shirts) and definitely Helper fan girls now. I can’t wait to come back and explore more of this area. 

Where to eat and sleep in Carbon County

First and foremost: Let’s start with the food 
GROGGS Pinnacle Brewing Co.
 Our first night in town we headed to the local brewery/ pub (because after ATVing all day, that seemed the natural progression). GROGGS while sounding medieval, turned out to be quite delicious. They had decent prices, and fantastic food. I got my usual bacon cheese burger (which I would put on top 10 burgers ever) and Katie’s in-house smoked prime rib sandwich looked pretty fantastic as well. This place is open 7 days a week (though closes at 8 on Sunday) so if you’re looking for a place to eat, particularly on Sunday, I recommend.

Tangerine Eatery
 If you’re looking for grub on a Sunday, again options are limited but one of those options includes the Tangerine Eatery. FanTASTIC sandwiches at a decent price. I got the Chicken Bacon Avocado sandwich that has a unique pesto aioli on it and plenty of the good stuff. Add a soup for only $1. 
*Skip the frozen yogurt here and get some ice cream from downtown helper. I’m usually a big froyo fan but none of the flavors were creamy or really stuck out to me. 
Udderly Ice Cream
Set on adorable Helper main street in the old Emporium building this ice cream shop serves up delicious Leatherby creamery options in a vintage ice cream setting. *ALSO OPEN SUNDAY! 
Family Fave: Balance Rock Eatery & Pub
Historic pub located on main street in Helper, the menu has it all. Breakfast served all day, sandwiches, burgers, salads, you name it. The portions are giant and prices reasonable, making this a stop I’d hit every time I pass through Helper. I loved the historic building, the incredibly- friendly service, and don’t get me started on the food. 
I got a bacon and cheese sandwich (wow… I stick with a status quo don’t I?) that was basically an entire chicken breast, amazing bacon, and a ton of cheese. It was SOOO good. Also try their in house made “rock chips” which have a light BBQ seasoning on them and there perfect crisp to pair. 
My #1 favorite eating spot in Carbon County. 
Happiness Within Coffee shop
If you aren’t hungry when passing through or don’t have time for a meal, then check out Happiness within for your caffeine fix. I loved the ambiance of the interior with exposed brick and art to gawk at. They had a nice range of offerings and I especially loved their October specials. Again small town friendliness adds to the appeal. 

Unfortunately that’s all we got to try that weekend but other honorable mentions based on local recommendations include:
1. Greek Streak for your Mediterranean craving
2. Los 2 Amigos
3. Sherald’s Drive in

Where to Sleep 
We stayed in the luxurious Holiday Inn Express that’s a mere 4 years old, has super comfortable beds, and a crazy good breakfast so as far as hotels go… that’s my top recommendation. BUT if you’re feeling adventurous, here’s a few of my favorites to check out. 
Nine Mile Ranch Bunk and Breakfast
$80-$95/ night for hotel room
$60-$95 for cabins *pet friendly 
Campfire songs, cowboy poetry and Dutch oven cooking are all part what make the Nine Mile Ranch bunk ‘n breakfast unique. Situated in the mouth of historic Nine Mile Canyon, “the ranch is a perfect place to get away from the busy world,” explained owner Myrna Mead. The location has camping, rooms, and even a Teepee with an all you can eat breakfast and dutch oven dinners. They offer tours, horse back riding and on foot. 
Next time I come down, I’m probably going to check this place out. 

Historic Knight’s Landing Apartment on Helper Main Street $99/night
Sleeps 4, book through AirBnb
Upscale apartment located in a historic 1918 building on Helper’s main street. Within walking distance to the local, market, two restaurants, art galleries, museum, the river walkway and everything else Helper’s historic main street has to offer.
Historic Helper House $96/night
Sleeps 4, book through AirBnb
Helper House is a cozy, single level home located on Helper’s Historic Main Street. Located close to the River Walkway, this charming house is in an ideal location for all of your explorations in Central Utah. Across the street is our famous “Big John”, Utah’s tallest coal miner, and less than 10 miles away is the USU Eastern Prehistoric Museum. You also will have a front row seat for the annual Helper Arts Festival and Utah’s Christmas Town’s Main Street Light Parade.

Artist’s River House $115/night
Sleeps 4, book through AirBnb
100 year old family home, restored with modern aesthetic yet maintaining original charm. King bed in bedroom with fold-down couch in living room and floor space for air mattress.
One block from historic downtown Helper with easy access to two diners, western mining and railroad museum, artist studios and antique shops.

2 Bedroom House $59/night
Sleeps 6, book through AirBnb
Entire upstairs of a house with Stylish decor – stainless appliances, warm blue interior paint, laminate flooring, & full tile shower with glass surround. An affordable place for a whole family.

Airbnb Guest Suite $35/night
Sleeps up to 5 guests, book through AirBnb
A 375sq ft space with a private secure entrance and private bathroom. There are no shared spaces. There’s a king size bed, sleeper sofa, and space for additional travellers! Perfect for budget minded travelers looking for a clean, safe and cozy space. Enjoy WiFi and Netflix.

Trail Guide- Gordon Greek Waterfall

Everyone knows I can’t go on a vacation without checking out at least one hike and in this case, the Gordon Creek waterfall was calling my name. 

Trail Stats:
Distance: 2.5 miles RT if you go all the way to the top of the falls
Elevation gain: 250 feet (there’s one decent up and one down each direction)
Kid friendly, dog friendly, ATV friendly. 

Driving Directions: 
Don’t over complicate this. Go ahead and plug Gordon Creek TH into google maps, it has the right location. It will take you from from HWY 191 onto Consumer’s Road and this is where it might get tricky. Google tried to convince us we needed to go through a coal weigh station but the truth is (while you can go that way when the gate is open) you want the left turn just before the plant. After a 50-100 feet you’ll cross a cattle guard and continue on this road until it merges with Trestle Road. From here google maps works like charm. The trailhead will be about 3.5 miles from where you turned off Consumer’s road and the gravel road is well graded with no pot holes (so family vehicle safe!) When you reach the trail head sign, park anywhere and follow the ATV road for the hike!

The ATV road/ trail is just to my right, follow it all the way to the falls!

 One short downhill section and you’ll be in my favorite area. Around the bend you’ll cross a small stream and head up a hill.

 Not too long after that you’ll be able to see the falls. We first headed to the top of the falls and then came back to that plateau to enjoy the view in front.

 Looking out across the top of the waterfall

 Trying not to slip

 Lots of places to sit, dip your feet if it’s a hot day, and a cool area to explore around the top of the falls… just take care not to slip.

 We wandered over to the plateau for a better look at the canyon that Gordon Creek flows through

 Not to mention the falls themselves

We had some time to kill so we spent about an hour sitting here with this view, enjoying some drinks and talking about life. We saw one other small family that shortly visited the falls before continuing back up the trail.. so all in all we had the area to ourselves! 

 As there was no one to take our photo… this was the best we could get with a giant pile of rocks and a phone on selfie timer haha

The trail will maybe take you 30 minutes each way. So the main time decision is how much time you’ll spend at the falls. Keep in mind that there’s no services anywhere along the road or at the trail head… so if you have 1 too many coffees at breakfast, or drinks during your life chat, plan accordingly.
AND PLEASE PACK OUT YOUR TRASH. 

After vising the falls, it’s an easy little drive on the trestle road just past the parking area to see the trestle bridge that crosses over Gordon Creek. (you could see it for a half a minute hiking back from the waterfall from afar)
The Gordon Creek Trestle bridge was built in 1912 and serviced the Mohrland Branch of the Utah line for almost 100 years. It saw it’s last train crossing 6 years ago, and unfortunately, part of the rail deck was burned and damaged so the bridge (in its current state) is not longer safe for use.

Map of the trail. The yellow dot is the trail head. The shorter detour pointing down is the road to the trestle bridge if you’d like to visit. (It’s definitely a cool checkout if you’re interested in trains, history, bridges, or all of the above!) 
**Bonus: If you have an ATV or bucket loads of time to explore, there is a cabin that is another couple miles (2-3) past the waterfall, and a SECOND LARGER waterfall another 3-4 miles past the main one. (So if you want to do all of that, you should plan on at least 8 miles RT, possibly 10 but seemed worth checking out.) Supposedly the ATV road goes almost up to the 2nd falls so if you have one of those, it would be a great place to explore! Enjoy! 

Fall Carbon County ATV ride

Fall Carbon County ATV Tour

Let me start off this post by saying that not only did this tour far exceed my expectations, but the entire area did. If you hear Carbon County, most people immediately ask “what is there to even do there,” “where is that?” Then you mention “Price” which is on all the road signs when you head from SLC to Moab and you get a few nods. 
WELL, time to change that.

I cannot believe I have lived so close (less than 1.5 hours!!) from such a beautiful place! Our tour was organized as part of the 
FIRST ANNUAL CARBON COUNTY FALL JAMBOREE

ABOUT THE EXPERIENCE:
The tour includes both breakfast before the ride, and lunch halfway through, organized leaders who will make sure you stay on the right path/ don’t get too separated from the group, and are ok in case of emergency. Not too mention you are guided with some of the best HISTORY experts on the area. We learned so much about the history of coal mining in the area! And did I mention the cost of this was $25 for first person on a vehicle, and only $10 for passengers?! 
**You do need your own or rent and haul in an ATV/ 4-wheeler/ QUAD/ whatever you want to call it

The tour was a full 8 hours and went up above 10,000 feet at Bruins Point passing old coal mine construction (more on that below) and incredible fall colors. Then it descended down Dry Canyon  to 9-mile canyon (basically the red rock desert we all know and love) before climbing up Cottonwood Canyon to alpine plateaus with WILD HORSES and back down to the starting point. Basically THIS. PLACE. HAS. IT. ALL.

Map of the route we took.

We met at 8 for what has to be the best breakfast I’ve ever heard of : Breakfast Pizza! with coffee and orange juice. We picked up our swag bags which included genius buffs (but bring your own just in case!) as well as a map of the roads we’d be taking, an awesome Carbon County Patch, water bottle, and more info on the area. We had a brief safety debriefing/ information meeting with the leaders of the group and then loaded up.

THERE WERE 37 MACHINES/ &70 PEOPLE
It was awesome! I’ve never experience what it is like to ride in a biker gang, but I’m pretty sure it was similar to this. Everyone lined up, flags flying, ready to ride on a beautiful fall morning. 

Oar Buckets on the 3.5 mile long cable way 

We rode a ways up admiring the fall colors that were changing, some old ruins of homes (from the early 1900s) as well as gawking at still standing, original and unaltered, oar buckets on a cable line. The towers supporting the cables were all still standing, and by all appearances untouched by time.

Half way up the mountain, we stopped to keep the group together, admire a tower up close, and get a little history lesson. The cable line that ran between the towers was constructed in the 1920s and ran 3.5 miles each way, making the line a total of 7 miles altogether. At the time, this was the longest continuous cable in the US. 

MORE ABOUT THE SUNNYSIDE COAL MINE 
1. Coal mining in the area got its start in the area in 1883 with the introduction of the Denver and Rio Grande Western Railroad company that needed coal for the trains.
2. Sunnyside started out as Whitmore Coal (in Whitmore canyon) in 1896.
3. The coal mined in the area was of good “coking” quality which means it was excellent for making steel. (by baking the coal in giant ovens, it forced out impurities leaving mostly Carbon behind) Giant coke ovens (650 of them) were created in the area to easily coke the coal before shipping it to areas in the Western US.
4. By 1909, the sunnyside mine was mining 3000 tons of coal/day and by 1914, furnishing nearly 300,000 tons of coke coal per day.
5. Unfortunately the the railroad and copper smelters that were the primary customers of the coke were switching to use of coal directly which made the Sunnyside mine less useful in the 1920s-30s. Luckily though, in 1942, Geneva Steel in Utah valley, and a steel manufacturer in California found plenty of use.
6. With the exception of the war years however, demand for coke was dropping off so the mine struggled. The ovens themselves operated until 1958 when they closed as well.  

 Pretty fall colors as far as the eye could see

We stopped once more to see the tower where the cable originates before really stopping at the summit, Bruins Point. Here we took a slightly longer break for bathrooms (in the woods, no toilet here) and views of the fall colors surrounding.

 
Katie and I on the summit!

Then back on our respective rides to drive a longer ways down into the desert?! All the sudden it went from fall woods, to red rock canyons.

 TIPS TO HAVE THE BEST ATV ADVENTURE:
1. Wear layers! In the morning shade it was very chilly and at the top of the mountain all day it was windy and cold! Make sure you have a warm jacket/coat, and maybe a blanket to cover your legs!
2. On that same note, bring a good thermos to keep your hot drinks warm in the morning
3. IT WILL BE DUSTY. Don’t wear your Sunday best, make sure to wear sun glasses/ goggles, and have a buff or scarf to cover your nose and mouth when it gets real dusty.
4. Also on that note, bring some nice wet wipes or baby wipes to periodically clean the dust from your face and hands. It makes a huge difference.
5. Bring a map of the area! We were in a tour led group, but there were diverting roads and paths that without a leader or a map could get tricky!
6. MAKE SURE YOU HAVE ENOUGH GAS FOR YOUR JOURNEY
7. Bring a speaker for music, cool drinks for when it gets hots, and have a blast!

 Stopping for another short re-group break. Amazing turn out for a first annual event!

 Driving through what felt like the Grand Canyon!

Before I knew it, we were admiring our first look at the Indian rock art in the area (which hardly anyone gets to see as we had not yet made it to 9 mile canyon)

See the rock art?

A short time later we were at our lunch stop in the Daddy Canyon Complex where a pit toilet was available, short hiking trails, and picnic tables were located.

We had our packed lunches (good sandwich, apple, bag of chips, and small dessert) along with our chilled beverages from the cooler, and then went exploring during our 1 hour break. We walked back in along the canyon admiring so many more petroglyphs!

Taking my best guess at what some of the art means! 

Taking a lunch break to go for a walk in the desert

ABOUT 9-MILE CANYON & THE ROCK ART 
1. Wondering how 9-mile got it’s name? There’s a few stories out there, but the most likely comes down to when John Wesley Powell (ring a bell?) was exploring the Green River in 1869 ad used a nine mile transect for mapping the canyon.
2. 9-Mile Canyon was inhabited by native peoples for over 8,000 years with the most prolific artists of the area hailing from the Fremont people who lived in the area from 1100-1200 AD.
3. The canyon is often referred to as “The Longest Art Gallery in the World
as the entire canyon has amazing wall art in abundance.
3. Main points of interest include: An original homestead cabin at the cottonwood Glen Picnic Area, a Granary (ancient building walls) as well as a pit house, and tons of rock art. The most popular sites there are located around Balanced Rock and the Great Hunt Panel.

We had one more stop along 9-mile canyon to see the giant art of “The Great Hunt Panel.” A stop definitely worth checking out! In fact look around the corner to see a buffalo!

At this stop we were about half way through our tour and one of my new friends from the group, Boyd, offered me the chance to drive his side by side Polaris! Um YES! I was thrilled, so this backseat bystander transformed into a Motocross racer on a Side by Side. 

We turned up Cottonwood Canyon which while still being mostly red rock, seemed a different sort of dessert and transformed into more open high alpine plateaus. It was up here that we were treated with the icing on the cake so to speak:
WILD HORSES

 I’d always heard Utah was home to some wild horses, but had yet to see them with my own eyes. We started off spotting only 2 or 3 here and there before coming across the rest of the herd of around 20 horses, that all started running by.

At this point, my day couldn’t get much better but I guess I’d been impressing my ATV companion (with either my driving skills or chatting abilities.. I’m still not sure) and I was allowed to continue on driving. Needless to say, I’ve got a great new friend(s) from this experience!

Cottonwood Canyon eventually connected us back up to Bruins Point and we headed back down Spring Canyon past the old Oar buckets and finished where we’d started at Sunnyside park. 
A whole lot dustier than we started, but grins on our faces that couldn’t be wiped off. 

This was just the start of my discovery in Carbon County. More posts to come on hikes, historic towns, more ATV trails, and NBD: Stock Car Races. Stay tuned. 
**Sorry for the China post interruption, wanted to get this info out while there was still time left in the Fall season to enjoy!

I lucked out with amazing friends with ATV’s but if you have neither the ATV or connections, here’s a few spots you can rent one from. (Keep in mind you need to be able to transport the ATV from Spanish Fork to East Carbon, about 50 miles as there is currently no rental spot in Carbon County.)

1. TRAX® PowerSports of Provo: 801-613-8729

  • ATV (can fit 2 people) will run you $156-$195 per day depending on length of rental 
  • Side by side (2 people) is $196-$245 per day 
  • Side by side (4 people) is $220-$295 per day depending on model and length of rental
2. Summit Motorsports in Spanish Fork:801-405-7433 
  • Call for prices 
3. Toyitup Rentals in Spanish Fork: (801) 489-8697 
  • Call for prices 

52 Hike Challenge

52 Hike Challenge
What is it?
52 HIKE CHALLENGE IS A GLOBAL MOVEMENT EMPOWERING YOU TO TAKE A PERSONAL JOURNEY TO DISCOVER THE PHYSICAL, MENTAL, AND SPIRITUAL BENEFITS GAINED THROUGH HIKING ONCE A WEEK FOR AN ENTIRE YEAR.
THOUSANDS OF PEOPLE ALL AROUND THE WORLD ARE TAKING THE CHALLENGE TO HELP CHANGE THEIR LIVES IN A POSITIVE WAY, ONE STEP AT A TIME.


My Hikes
Hikes are in Utah unless otherwise stated
  1. Bonnevile shoreline trail from Orem to the Dry Canyon TH – 3 miles 

  2. Lake Blanche trail (didn’t make it all the way due to weather) – 4 miles 

  3. BattleCreek Falls  – 3 miles 
  4. Pine Hollow trail to Pine Hollow peak 5 miles  

  5. Desolation Trail to SLC Overlook 4.5 miles 

  6. The Living Room – 2 miles 

  7. Alpine Loop Road – 4 miles 

  8. Bells Canyon to the waterfall – 5 miles 

  9. Grove Creek Canyon – 3 miles 
  10. Ghost Falls – 3 miles 
  11. Eagle Crest Trail – 5 miles 
  12. The Wild Rose Trail – 3 miles 

  13. Canyon Overlook in ZNP – 1 mile 
  14. Hidden Canyon (ZNP) – 3.5 miles 
  15. Donut Falls – 2 miles 
  16. Horsetail Falls – 5 miles 
  17. Dry Canyon – 3 miles 
  18.  Diamond Fork Hotsprings -5 miles 
  19. Queen’s Garden/ Navajo Loop in Bryce Canyon- 3 miles 
  20. Capitol Reef- The Grand Wash – 3 miles 
  21. Capitol Reef- Cassidy Arch – 3 miles 
  22. Capitol Reef- Hickman Bridge – 2 miles 
  23. Heugh’s Canyon – 3 miles 
  24. to the “G” – 2 miles 

  25. Twin Peaks- The Avenues – 3 miles 

  26. Thira-Oia (Santorini, Greece)- 10 miles 

  27. Thira-Port-Thira (Santorini, Greece)- 1.5 miles 

  28. Bluff Point State Park loop (Connecticut)  – 3.5 

  29. Buffalo Peak – 4 miles 

  30. the “Y” – 2 miles 

  31. Timpanogas Trail to see the lower waterfalls -3 miles 

  32. Ferguson Canyon – 4 miles 

  33. Timpanogas Caves – 2 miles 

  34. Willis Creek Slot Canyon – 2.5 miles 

  35. Escalante Petrified Forest loop – 2 miles 

  36. Combined Rocky Mouth Falls and Grotto waterfall for 2 miles 

  37. Cecret Lake-Sunset Peak-Catherine’s Pass – 8 miles 

  38. The Cliffs at Etretat France – 4 miles 

  39. Sugarloaf Peak – 4.5 miles 

  40. Wolverine Cirque – 8 miles 

  41. Haifoss (Iceland)- 2 miles 

  42. Svartifoss (Iceland) – 2 miles 

  43. Glacier Hike (Iceland)- 1 mile 

  44. Glymur (Iceland)- 6 miles 

  45. Battle Creek- Grove Creek loop – 10 miles
  46. Stewart Falls – 3 miles 

  47. Frary Peak – 7 miles 

  48. Pine Hollow Trail – 4 miles 

  49. Willow Heights Lake – 1.5 miles 

  50. Big Springs – 3.5 miles 

  51. Upper Falls – 1 mile 

Total Mileage for 52 hikes: 187 miles