Philippines Day 8- Manila

Ah Manila… the city (in the Philippines) that never sleeps, has terrible traffic, and an odd assortment of things to do. We wanted to have a full day (just in case) back in Manila before our flight home and as I didn’t have anything terribly specific in mind, we let Tippe’s local friend plan our day. 

View of Makati from our rooftop pool at our hotel/apartment 

Rooftop pool we actually never made use of
As fate would have it, we were in town on a better traffic day: A SUNDAY and Sundays also host incredible farmer’s markets! 
So we headed to the border of our “neighborhood” Makati and Fort Bonafacio (BFC) for some good old eating and shopping. 
We explored the little shops, I picked up some bracelets from a craftsmen (helllooo b-day presents) and this home-made jam stuff that was so good I practically scooped it right out of the jar without anything to spread it on, before we settled on actually eating some things. 
We tried a Viennese iced coffee drink, the most famous Filipino food Lumpia, and my favorite was the grilled corn. Simple… but so good. 
One of the green building spaces around the Farmer’s market 
After exploring the market, we headed to BFC to our friend’s apartment to learn about how she enjoys teaching English at a local school and admire her awesome view of the neighborhood from her balcony. Then we packed up and headed to another “neighborhood” within Manila to visit a museum.  
A history museum you ask? NOPE haha instead a fun art museum with lots of 3D images and activities. Basically, a photo op paradise. 
We just happened to coincide our visit with probably EVERY SCHOOL’s field trip (on a Sunday?) so the sheer numbers of screaming little kids running around was a little over whelming. But we stuck it out and spent a few hours roaming around, posing for millions of photos. 
Art in Island Practical Information:
Hours: 9:30AM- 9:30 PM
Cost: $10/ adult
No food, drinks, or SHOES allowed in the museum 
No shoes allowed! All of the images extended to the floor! 
Some of my favorites….

There were over 200 master pieces in this museum that were all done by 18 Korean artists when the museum was founded. ALMOST everything is 3D! 

ok.. that should give you an idea. but seriously despite the hordes of kids, there were so many things to enjoy and take photos with! They also did a show in the “big room” the one with the boat and waterfalls that was essentially a cool retelling of Genesis from the Bible. It was interesting to see religious stories presented that way. (probably the coolest way Genesis will ever be depicted.. the lights were unreal) 
Then we headed to the Peace Monument located nearby at Quezon Memorial Circle with more farmer’s markets, and even more… PEOPLE. It just happened to be a huge religious festival at this park with tons of people and a gospel choir. Once again I was struck by what it must be like to live in such a deeply religious community. We walked around the monument, took a look at the museum underneath it (but didn’t want to pay so skipped out on actually visiting it) instead took a turn around the Orchid and Bonsai tree show that was taking place in another part of the park. There were some pretty cool Bonsai trees in there. Then to dinner we went where you guessed it.. we had more BBQ pork, before parting ways with our friend back in BFC. 
For some info on Fort Bonifacio (BFC), it’s the most expat area of Manila, and by far the most western feeling. We explored their shopping area without much of an aim while waiting for another of Tippe’s friends to meet us for a late supper? and drinks. 
We ended up at the ONLY OTHER PINK’s in the world outside of LA, California. 

They had sort of a cool Speak Easy in the back where we ate our hotdogs (which were incredible) and caught up. Being surrounded by city planners as I was, (Tippe is a city planner for Park City) we got a tour of BFC from an expert who helped plan a lot of the area with a walking tour and everything. It was cool to learn about the growth in the area, BFC was a beautiful neighborhood that I would probably choose to stay in if I ever visit Manila again
And that concludes the epic Philippines adventure! A bit of information handy for visiting Manila:
1. The area almost ALL reviews recommended for staying in was the business district of Makati. 
It has lots of hotel options, is one of the safest neighborhoods, and lots of eating options while being centrally located and not TOO far from the airport. 
2. The historic district is located in Intramuros which is where I’d be most interested in visiting next time I come.. didn’t get to it on this trio
3. If you plan a day in Manila, try to make it a SUNDAY as there will be loads less traffic ( I mean less than half and traffic is still pretty rough even then)
4. Also on Sundays, the farmers’ markets are wonderful
5. I would personally recommend BFC for staying in as it was cleaner and felt a lot safer to me. But then again.. it is much further from Intramuros historic area, but not too much further from the airport. 
6. If you are interested in visiting Art in Island/ the monument it was located in Quezon City just north of Manila.
7. Other day trips you SHOULD consider if you aren’t a city person (like me) is the waterfall restaurant at Villa Escudero which is about a 2 hour drive from the Manila airport. 
8. Last but not least, download GRAB for easier taxi services around Manila. At the time we used Uber (no longer in the Philippines) and it was by far more convenient than a taxi)
The next day our flight wasn’t until almost 2 so we slept in, then took a taxi to the airport where we went to a Spa and got 1 hour full body massages… for $13. Then hit up the lounge to eat and relax before our flight. I tried my darndest to get a few more souvenirs but there really wasn’t as many options as I was hoping. Ah well. I definitely had enough to carry in my backpack as it was. We had a layover in Tokyo and LA with our travel time right around 24 hours. It was pretty good to be home after that. 
Day 8 Manila costs:
Uber to Sunday market: $0.65 pp
Homemade Jam $1.88
Other foods at the market (Corn, Lumpia, Iced Coffee) $3
Souvenirs at market: $18
Uber all day split by 4 people $4 pp
Lunch/dinner at restaurant $2
Coffee bean $3.50
Half of hot dog at Pinks $2.35
Pinks fries and Gingerale $8.50
Uber back to hotel $1 pp

Day 8 Total Costs: $30 without souvenirs, $48 with

Day 9 leaving costs:
Taxi to airport with skyway toll $3 pp
1 hour massage at Airport Spa: $13
Lounge access: FREE

Total TRIP COST: $1,085 

Philippines Day 7: Return to Manila
First off, sorry this post is insanely late… It’s been a busy summer that will maybe get blog posts one day… one day. Anyways so Day 7, sleep schedule remained royally cursed so I was up before dawn and back out in a rocking chair crossing my fingers for another crazy sun rise. And while it wasn’t as mind blowing as the previous day, the calm water, canoes, and clouds just on the horizon were the peace this crazy day needed to start out with.

Sitting in a rocking chair watching the sky slowly illuminate. Perfect. 

The reflections of the clouds were my favorite part
followed by seeing the dome from the church slowly lighting up
Once Tippe joined me, we headed down the stairs to wade in the water where we found lots of star fish! 

Looking back at our cool hotel from the water. The rooms on the front upstairs I bet are the best. Away form the road and with view of the sunrise out their window. 
We spent the majority of the morning eating breakfast and being lazy around the resort. More sun bathing, more reading, and a few more photos… 
But eventually it was time to head out to catch the early afternoon bus back into Cebu. We were hoping once again to miss traffic and have only a 3-3.5 hour bus ride back to the South Cebu bus station.
Sitting in front of our hotel waiting for a bus to flag down. This is where it gets interesting. The first bus that goes by is one with Aircon and movies and the like… well it’s totally packed (every seat full) but we wanted to get back so got on anyways. So we sat ourselves down in the back in the aisle and waiting for people to get off… We’d be waiting for 1.5 hours like that and with one false alarm when the bus stopped at a rest area only like 45 minutes into our ride. haha we got all excited then realized everyone was leaving their stuff on the seats to save them. Dang it. But finally we hit a popular stop, snagged some seats, and got to enjoy Dr. Strange the rest of the way back (about 2 hours) and I made it again without my bladder busting ! Hurray! 
So there we were at the South bus station next to the mall with a few hours to kill before our evening 7:30 flight. We got some lunch in the food court, did some very light shopping, got $2 manicures for want of nothing else, and then finally took a taxi back to the airport around 4.  It took almost an hour in standard Cebu traffic to get to the airport but there we picked up a few more souvenirs and some light dinner before getting aboard a plane ( again like a solid hour before take off lol)

Then in Manila it took our Uber ages to come pick us up (almost an hour) till we got checked in and then headed out to meet some of Tippe’s friends at roof top restaurant. We hung out there until pretty late and then as we walked back into prime taxi area stopped in to try some fried chicken at the Jollibee which is the main fast food restaurant everywhere in the SEA. For the price, it was pretty good. 
Then at long last, we were hitting the hay back at our apartment/ room in Makati. 
Day 7 Costs:
Breakfast meal at hotel: $3.25
Water bottle for bus: $0.35
AirCon Bus back to Cebu: $3.15
Mall Manicure: $2.00
Tea Zone Bobba: $1.10
Waffle sandwich snack $0.50
Starbucks at airport: $3.80
Seattle’s best panini at airport $3.45
Uber from airport to hotel $1.25 pp
Taxi from hotel to rooftop bar $1.00 pp
Jollibee $2.30
Uber back to hotel $0.75 pp
FLIGHT back to Manila: $41.50
Lodging:
Day 7 Total:$77.40 including hotel and airfare 
Philippines Day 6: Swimming with Whale Sharks

Whale Sharks- Did you need another reason to visit the Philippines? 
While there are numerous boating spots around the islands to spot or possibly swim with whale sharks, the most accessible and reliable is definitely Oslob on the island of Cebu. Here the whale shark tours operate 363 days of the year, are incredibly affordable, and you can “count” on seeing them. The reason why? Unlike other whale shark sighting spots, the tours in Oslob feed the whale sharks.

Ethically is this ok? Good question and it’s one I read up about a lot in preparation of my visit. As with all animal tourism activities, it’s always a good idea to read up on and decide if the activity you want to participate in is ecologically ethical. Feeding the whale sharks does create potential dependency, over socializes the whales with humans, and diverts them from what used to be set migratory habits. What I took comfort in was knowing that the tours here had VERY strict rules on not touching or swimming too close to the sharks, reportedly has marine scientists studying and keeping an eye on the sharks in the area, and that the sharks are wild and FREE to roam where they may. No cages, holding tanks, nets, notta! More on that later…..

My hand sneaking into the photo to show just how CLOSE I was to the sharks 
(Don’t worry my hand snuck into the photo only because I was frantically trying to swim further away from it, not trying to touch it) 

So would I recommend this tour? YES! If you have it on your bucketlist to see or swim with whale sharks I would as long as the rules and regulations don’t change. SO more on our experience…
We were one of the first groups but there were already LOADS of people waiting to be canoed out to the swimming area. 

We had heard that the best time was as soon as it opens to see the sharks and with less crowds. The tours are all a flat rate of 1,000 pisos (no matter who you book it through) but you will see extra costs based on transportation. We were about 8.5 km at our resort from the whale shark watching area and we paid 1175 pisos/ person. We potentially could have paid a trike driver less to get us there but as we wanted to get there EARLY, we didn’t want to stress about it so we just booked it through our resort. Which turned out to be great! Not only were we picked up promptly at 5:30 (without sighting any other drivers on the road… so flagging a cheaper trike would’ve been a challenge) but our driver also had pre-purchased our tickets for us so when we got there and saw the horrendous line already at opening, we got to skip right through to the information debriefing and selecting our snorkels with only a 20 minute wait before we were out on the water.

The safety and RULES debriefing area 

I definitely found the extra 125 pisos worth it for this luxury and our driver/ tour guide (?) was very helpful in telling us where to go where we probably would’ve been a little lost other wise.

Goofy snorkel photo… Recommend bringing your own 😛 
After selecting your snorkel (if you pay for the swimming option) you wait for your number to be called and then you go to assigned canoe. About 10 people fit in pretty small canoes and you have to sit 2 people to seat, but not to worry! It’s a very short ride out to where the water is deeper. We were maybe the 10th boat out and we hooked to the line. At this point your 30 minutes start, you can take off your life jacket, and hop right in!

See the whale shark swimming toward us with his mouth open?

All of the boats assemble in a semi circle while the canoes with the feeders are on the inside. They slowly move in front of all the boats dropping fish so that the sharks tail along and everyone gets to see them! They do feed them PRETTY CLOSE to you so there were multiple times the sharks large body or tail would get REALLY close to us and we had to get out of the way but it was also insanely cool to see them get that close. The semi circle setup also created pretty cool scenarios in that the sharks would swim in and out of the area to eat UNDER you… Twice we would be watching the shark they were feeding in front of us and would look down to see one swim RIGHT under our feet. (Thus try your best NOT to kick a lot when treading water and always be aware of what’s under you)

All in all the experience was AMAZING, and my only regret was not having a go pro as I battled with my phone in one of those water proof sleeves almost the entire time. (so I got next to no great photos with only 1 decent video) Too soon they were calling us back into the boat and we were headed back to shore. There they have showers to rinse the salt water (and potentially fish guts from the sharks eating) off before we caught our ride back to the resort.
For a longer video of swimming with the whale sharks, go here:

I was pretty devastated to not get that many cool photos but regardless of the documentation, it was still one of the most incredible swimming experiences I’ve had. 

We had almost all day left to relax and explore Oslob! So for lunch we walked into town and tried the “fancy” restaurant our driver from the previous day had recommended. The food was good but let’s be honest, the pork was literally the same as the street food at twice the cost. The watermelon shake I had on the other hand was amazing. Then we spent some more time sitting in the sun pool side and hanging out around our waterfront resort.

 Riding side saddle behind the driver on the motorcycle while Tippe road with another couple in the side car of the trike. 
   The MOST incredible sun rise I have ever seen in my life that we watched from the trike as we drove to the Whale shark experience. I seriously didn’t filter or edit these photos in any way. 
  I can only imagine how it would feel to experience this sunrise from that canoe
 Palm tress and power lines as we drive away from the water front
 The road is definitely much emptier at 5:30. 
 Back at the resort lounging in a hammock chair
 Lunch at the “fancy” restaurant. I will say the watermelon smoothie was crazy good. 
Most of my afternoon spent sitting in a hammock chair with my book gazing out at the water
Once it started to cool down in the evening, we walked to the city center of Oslob to see the historic church and fort. We happened upon the public square first, complete with political statue, pineapple fountain, public offices, and giant church not far off. We headed toward the church to check it out.
Pineapple fountain with the church dome behind it 
Oslob’s city center 

Our Lady of the Immaculate Conception Church

Oslob first became an independent parish in 1838 which them lead to the present- day construction of an incredible church as patroness. It was built out of cut coral stone and was started in 1830 – finished 18 years later. The buttresses were added between 1848 and 1850 and may favorite part, the adjacent bell tower was built in 1858. The church was burned down during the Second World War liberating Philippine Commonwealth troops and Cebuano guerillas against the Japanese in Oslob in 1945 but was eventually restored.

Walking around the church grounds 
 All the perspectives…. 

While we were walking around the church it was during evening mass and there was a lot of singing and music coming out of the church which was wonderful to hear though we were a bit sad to not go in. We mostly checked out the beautiful architecture and some of the fun signage they had around including one that indicated the street the church is located on is the oldest one in Oslob: Calle Aragones which was built in 1878. This street also leads you into Oslob’s heritage park where you will find the next two points of interest:

The Spanish Cuartel ruins
Located right in front of the church stands an unfinished building made of coral blocks resembling a Spanish-era barracks. This was intended to be the “cuartel”, barracks for Spanish soldiers. It was started about 1860, but remained unfinished at the end of Spanish occupation in 1898. Now it’s a cool place to play hide and seek or take nice photos.

 I love being able to explore ruins 

The Baluarte
Last but not least as it’s probably the most interesting historical piece in Oslob, is the baluarte ruins. Baluarte essentially means bulwark or bastion and has a main function as a small fort or point of defense. At one point, there were 74 baluartes built along the coastline of Cebu and were built to defend the small towns against pirates from neighboring islands.

 The backside of the Baluarte 
 Close up on an obvious piece of coral in the baluarte walls

Now there are only 22 ruins remaining, 13 of which are in Oslob specifically. Most even still are located on private property but there are a couple you can see, with this one preserved in the Heritage park, being fairly easy to visit. This Baluarte was built in 1788 and has a success story in 1815 that caused the town to relocated to its current location. While again it’s mostly in ruins, I still recommend going to check it out, along with these other historical sites. All are located next to a beautiful park right on the coast.

The front side

After our history lesson, we headed back to the street vendors for more bbq pork which we topped off with some drinks from the 7/11 and deserts from our favorite bakery. Then we headed back to our rocking chairs at the hotel to hang out and watch night time fisher men go out on their boats thus concluding a very relaxing day with a very pleasant evening.

 The beautiful park in the city center area 
 Love that dome! 
BBQ pork with coke again but this time added a thing of rice to try with it. 

Day 6 Costs:
Swim with Whale sharks tour: $22
Morning smoothie at hotel: $2
Lunch BBQ and watermelon smoothie: $3.35
Dinner streetfood: $1.25
Drinks from 7/11: $1.45
Bakery items: $0.50

Lodging:
Sascha’s Resort Oslob: $9.50 pp

Day 6 Total Costs: $40

Philippines Day 5: Kawasan Falls Tour

Day 5, another Island, another Epic Day. This was the only day tour we pre-booked before our trip: Canyoneering Kawasan Falls and hiking Osmena Peak. There was a fair amount of mis communication leading up to it as far as pick up time since initially they had said pick up at 6:30 but then the night before when I e-mailed to confirm, they said 8-8:30… well ok so the next morning around 8 we started watching for the van and it got there just before 8:30 but I noticed later he tried to change it back to 6:30… oops we were already passed out though. So 8:30 it was. We had a comfortable private van for the almost 90 minute journey to the Canyoneering outfitter. There we finished paying for our tour, selected our lunch options, and were fitted for helmets, life jackets, and water shoes (if you wanted… I just used mine that I know I like) 


The outfitters before we hopped on the motorbikes


After getting all fitted up, we had a VERY thrilling ride on motorbikes to the start of the canyoneering trail (about 10 minutes) with 2 of us behind one driver on a bike… I honestly think this may have been my first motorcyle experience and being on the back of 2 people was pretty terrifying haha I was never sure if I was supposed to lean or not to lean or what on turns. Thankfully we made it there alive and the scariest part of the day was over. *whew! 
At the start of the trail, you register at a guest book with your guide, throw your stuff in a dry bag, and head out for a nice walk. It takes anywhere from 20-30 minutes to actually walk to the canyon but the path is paved for the most part and the views over the island are really great. (lots of palm trees) There are some really steep jungle path stairs down to the water but then you’re ready to start your swim! 

What part of the long hot walk looks like. You start out on a nice path with great views of palm trees and in general, the island, before descending some scary jungle stairs to the water. 

 About the Tour
I researched a few companies for canyoneering Kawasan Falls before settling on Highland Adventures. They were very responsive and helpful in planning and were one of the few companies that I saw combined a tour between Canyoneering Kawasan Falls AND hiking to Osmena Peak. Since these were 2 very high on my lists things that seemed like they would be more difficult to book once there, we decided to spend a bit more for the security of knowing we’d get to do it. Plus since our hotel was far from the falls, we didn’t think we’d have too many other day of deals.
The tour is all day with 2 different iteneraries with pick ups around 6-8 AM and getting back a little after 5. It includes the gear you need, a private tour guide, entrance fees, all transportation, and lunch at the falls.
There are 2 canyoneering routes Badian and Algerian. Since there were many more tours offered and information about Badian, that was the one we choose. There is also this page to compare them if you are interested in the jump heights.

What the area looks like at the beginning. SO COOL
Once at the water, we did our last minute sorting, our guide took over my water camera, and we headed out. The first couple of jumps are maybe 4 feet and really easy. The caves surrounding the water are so cool and the water color felt great after the walk to get there. (Our guide took videos of almost every “jump” even the little 3 foot ones which are honestly just embarassing to watch. haha)

Getting ready for my all too exciting first “jump” 
Rockin and rollin!
There were a couple of fun “slides” and one slide to 4 foot fall that you lay on your back and went “head first” over just to switch things up. 

After about an hour we got to the meat stick spot where if you are hungry, you can buy pork/ chicken?/ etc kebabs for 40 pisos. This is also the site of the first “big” jump about 20 feet. It looked like you could walk a little further to a smaller jumping spot but where is the fun in that?

 Am I good?

20 foot jump – the warm up
The cool cave area under the jump!


Once you jump, you can see the caves under the cliffs you were just standing on and they are full of stalactites and fun formations. Then it’s another hour or so of adventure with the jumps getting bigger and bigger. 

 Every bend was scenic and cool! I loved every bit of it! 
 Our guide took a lot of photos for us…. 
 Floating on down the river. We were walking quite a bit, but swimming a lot as well! 
 Waterfalls constantly

 Sorry, not sorry. There’s a LOT of photos from our guide. haha 


We passed a beautiful DAM waterfall and did a few smaller jumps before reaching an optional 30 foot jump off a suspended bamboo walkway. This is the EASIEST 30 foot jump. No pushing off necessary, so your form for hitting the water is a lot better (for me at least) making this my favorite jump of the day. 

We survived a 30 foot jump! 
A bit more hiking along 


A little more walking and wading through water, and you get to the last jump of the day: and it just so happens to be right into a waterfall. Again it’s about 30 feet but if you could do the last one, you can do this one right? RIGHT! This one requires a little bit of a shove off meaning my form wasn’t great, my land not pleasant, but hey it was still exhilerating and awesome and I regret none of it!

Getting ready for the jump! 

After the last jump you’re in the first picnic area and it’s lunch time! We got 2 choices of meat with rice and coke to drink. We soaked up a bit more sun and hung around the area though we could tell our guide was kind of ready to go.

 Hanging around in the post jump swimming area
 Lots of dogs hanging around the lunch area asking for handouts 

 Very important food shot with a view

 We started to head now to the parking area where we passed the ACTUAL Kawasan Falls and things clicked into place a bit more. The waterfall we jumped was still an upper fall and we had further to go before getting to the main recreation area. It was a lot more crowded and a bit shady so we didn’t stay and swim more but it was a beautiful area and if we’d done the earlier itinerary in the day, this would’ve been a fun place to be in the afternoon sun. It was another 5-10 minutes from Kawasan Fall to the parking lot where our van was waiting.

 Perfectly tropical places to hang out
 Havasupai, is that you?
 Pretty waterfalls DO exist in other places! 

 Looking back at the falls from our walk 
More beautiful views on our walk to the parking lot. 

Next up we took our van up to:

Osmeña Peak

The ride took almost an hour from Kawasan Falls and seemed to go on forever. Just as we thought we couldn’t get any higher in the mountain ranges, we’d dip down for a bit, and continue on up. The scenery on the drive was stunning. The mountain road up was bumpy at times, and VERY windy.. If you are prone to motion sickness, you’ll definitely want to pop some Dramamine. Finally we were parked and had a short climb ahead of us. While you don’t need to hire a guide to hike to the peak, you DO have to stop in at the entrance to pay a 30 piso fee if doing it on your own (our fee AND guide were included in our tour).

Trail stats
Distance: ALMOST 1 miles RT
Elevation gain: 400 feet
Time:15-20 minutes up, 15 minutes down
A photo spot our guide showed us! I totally would’ve missed it otherwise, and it was so cool! 

There are a couple photo spots to stop at on the way but once you are at the top, that’s when the real view starts.

 Made it! 

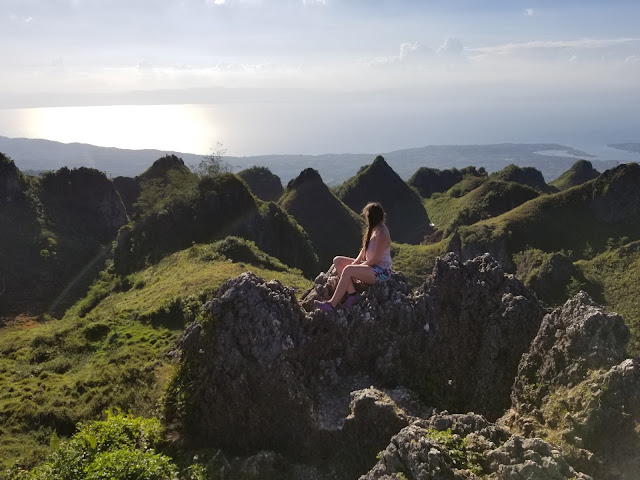
Osmeña Peak is the tallest peak on Cebu standing at 3,323 feet above sea level. You have incredible views of the small and large peaks surrounding like little hills on the mountain, as well as the island coast line. 

 On top of the world

Bustin a move 

 Word to the wise, the peak is often CLOUDY in the morning so better schedule your trip to the peak in the afternoon for best results.

 Summit selfie

There were a few other people at the peak (some wearing fashion sandals… cue eye roll) but for the most part we were able to hang around and enjoy the peak without feeling too crowded. There was even a cat lazying around at the top!

Not sure why the cat is chilling up there.. but maybe it likes a view as well
Following our local guide back down the trail

After we hiked back down, we had another hour van ride down to the mountain side and back to Oslob. Our driver wasn’t the most talkative but he really lit up when we pointed out a buff looking chicken and then preceded to regal us with facts and stories about Cock fighting on the island. Oh boy.

 Festive little mountain towns! 
Some picture perfect lettuce heads in the lettuce capital of the Philippines. 

We also found out the city of Mantalongon (that we drove through on the mountain) is the capital of lettuce production in the Philippines. There were giant heads of lettuce everywhere! That was an fun thing to learn about. Our drive dropped us off in Oslob town (a bit from our resort) and recommended a restaurant and food stands to try for dinner. With that our tour was over and our dinner adventure began.

 BBQ pork that wasn’t as good as Coron but still good (and don’t worry, totally cooked despite the color) 
All the various street vendors and eating areas 
delicious smoothie in a bottle

We again tested the small town ATM, but were once again denied funds. I’m serious people, get yo money out at the airport. So with that in mind, we economically chose the food stands. Tippe tried some squid (which hadn’t been cleaned out at all so fair warning.. prepare for some blackened fingers if you try this) and I just got more BBQ’d pork. I mean 3 sticks and a soda only cost $0.85! Then I got a fun fruit smoothie in a water bottle and some bakery snacks for dessert. Our hotel was an easy 5ish minute walk from the street vendors and we happily settled in for another early night in preparation for another early morning.

Day 5 Costs: 
Skipped Breakfast
Kawasan Fall Canyoneering Tour $75 
Street Food Dinner: $0.85
Street fruit smoothies: $1.00
Bakery breads for snack and next morning: $0.50
Water: $0.40

Lodging:
Sascha’s Resort Oslob: $9.50 pp 

Total Day 5 Costs: $87.25

Philippines Day 4: Exploring Cebu

OK so day 4. Our flight was scheduled to depart at 7:30 so the shuttle picked us up at 5:30 from our hotel for the 30 minute ride back to the airport. Cost was the same at 150 pisos pp and we got there right after 6 after picking up a few other people on the way. The line was pretty long to get in (the airport was still opening and we had to go through FIRST security) Again we had to show proof that we already had tickets to get through this security point. Once in, we went to one of the 3 booths, they weigh your carry on (and this time we could only have 1!!) and then you go through 2nd security… which ironic enough there was a guard sitting there telling you the machine was broken and to just go on through haha but he was checking our boarding passes at least. Then once again like an hour before our flight they started boarding and we were off a few minutes early.

Once we landed in Cebu, we praised the money gods for working ATMs (as both of us had basically no cash) and we spent a bit of time sorting out how to get to Oslob. The cheapest option is the BUS, but everyone was horrifying us with tales of 5-6 hour bus rides with no potty brakes and in some cases, no AC… that wasn’t appealing. But the people in the airport were chalking up a private car to be over 3000 pisos (like 60+ dollars) and we’d still be in traffic.. with just a bit more flexibility on stops.

Ultimately we left the AP scammers behind, took a grab cab (which saved us nothing.. ended up being a metered cab instead of like UBER) and headed to our first historic site in Cebu.

Fort San Pedro


It took us 45 minutes from the airport to get there but the cab dropped us off out front, I bought my ticket, Tippe attempted to buy a ticket but they didn’t have enough change for our recently ATM drawn bills so we both got in for 30 pisos.  


The fort is beautiful and reminiscent of St. Augustine but even smaller! It was hard to imagine this defending all of Cebu back in the day but I guess it did the trick since it is still standing. A bit of history:
It was built by the Spanish under the command of Miguel López de Legazpi, first governor of the Captaincy General of the Philippines. The original fort was made of wood and built after the arrival of Legazpi and his expedition. In the early 17th century a stone fort was built to repel Muslim raiders. Today’s structure dates from 1738 and is the oldest triangular bastion fort in the country. It was the center of the first Spanish settlement in the Philippines. During the Philippine Revolution at the end of the 19th century, it was attacked and taken by Filipino revolutionaries, who used it as a stronghold.
Following the revolution, the US stepped in and with the victory at the Battle of Manila Bay in 1898, the Spanish era in the Philippine Islands came to an end. The fort then became a part of the American Warwick barracks during the American regime. From 1937 to 1941 the barracks were converted into a school where many Cebuanos received their formal education. 


During World War II from 1942 to 1945, Japanese residents of the city took refuge within the walls and when the battle to liberate the city of Cebu from the Imperial Japanese forces was fought, the fort served as an emergency hospital for the wounded.
From 1946 to 1950, Fort San Pedro was an army camp. After 1950sm the fort faced being demolished to replaced by a City Hall, however the people fought back and in 1957, the city council commissioned “The Lamplighter”, a religious sect, to manage a zoo subsidized by the city within the fort courtyard.


By 1968, the façade, quarters and walls of the original structures of Fort San Pedro were so obliterated that only the two towers were recognizable. Plans for the restoration of the fort was started and the zoo was relocated making the fort what it is today. 

About the Fort

The fort is triangular in shape, with two sides facing the sea and the third side fronting the land. The two sides facing the sea were defended with artillery and the front with a strong palisade made of wood. The three bastions are named La Concepción (SW); Ignacio de Loyola (SE), and San Miguel (NE). It has a total inside area of 2,025 square metres (21,800 sq ft). The walls are 6.1 metres high by 2.4 metres thick (20 feet high by 8 feet thick), and the towers are 9.1 metres (30 ft) high from the ground level. The circumference is 380 metres (1,248 ft). The sides are of unequal lengths and the one fronting the city is where one may find entry into the fort. Fourteen cannons were mounted in their emplacements most of which are still there today.

After the fort we put our next destination into Google Maps and since it was only a 10 minute walk, headed there on foot. While it was an easy walk, it wasn’t the best showcase for a city. There wasn’t always a side walk, traffic didn’t seem to pay much attention to street lights, and the street warers were VERY persistent and pushy. We did pass a 7/11 which was great to go in, get some cold water and a snack, as we carried on our way to our next stop:

Magellan’s Cross

The cross is housed in a chapel next to the Basilica Minore del Santo Niño on Magallanes Street just in front of the city center of Cebu City. While the “visible cross” is not the original, it is said to encase the original. The original cross was planted there on March 15, 1521 by Portuguese and Spanish explorers, as ordered by Ferdinand Magellan upon arriving in Cebu. There are 2 beliefs as to why the original cross is not visible. First that the encasement was designed to protect the original cross from people who chipped away parts of the cross for souvenir purposes in the belief that the cross possesses miraculous powers. Second, that the original cross was destroyed or disappeared after Magellan’s death and the cross today is a replica that was planted there by the Spaniards after they successfully Christianized the Philippines.

Either way, the cross is cool to see for what it represents to a deeply religious country. The painted ceiling on the inside of the chapel was the main highlight for me, and since you’ll definitely want to see the Basilica Minore del Santo Niño, you may as well stop in to see the cross.

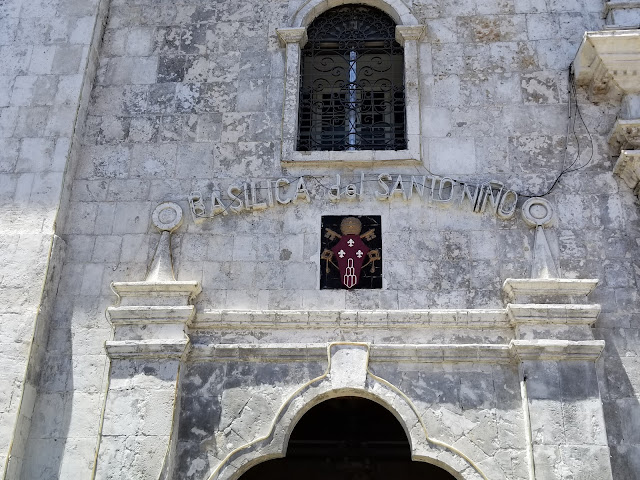
Santo Niño Basilica 

After the cross which is in the main square, you follow a small alley to get to the Basilica. There is a security checkpoint there to get through where they search bags… both Tippe and I looked at each other with a big laugh thinking about emptying out all our luggage in our backpacks. Luckily there was a small cafeteria right there that we decided to camp out in with one of us watching the bags while the other explored the Basilica grounds.

 The party worship grounds outside the old basilica 

It was a breeze going through the bag check after that lol. The square beyond that is pretty magnificent. It included a museum and the actual Basilica on one side, and on the other, a “pilgrimage center.”  The center was built to hold the mass crowds who congregate for Holy Mass on Fridays and other Religious festivals. Essentially it reminded me of St. Mark’s Square in Rome, if the Philippines had its own version.

 The small skirt wrap they gave me to cover my legs… which basically went to just past my shorts and right above my knee. 😛 Too tall. 

The Santo Niño Basilica, (Minor Basilica of the Holy Child of Cebú) is a minor basilica in Cebu City in the Philippines that was founded in the 1565. The oldest Roman Catholic church in the country, it is built on the spot where the image of the Santo Niño de Cebú was found during the expedition of Miguel López de Legazpi (you follow me, same guy that built the fort..) The icon, a statue of the Child Jesus Christ, is the same one that was presented by Ferdinand Magellan to the chief consort of Rajah Humabon upon the royal couple’s christening on April 14, 1521. It was found by a soldier forty years later, preserved in a wooden box, thus marking the spot and day when the first church would be built. The first church to be built on the site where the image of the Holy Child was found was burned down on November 1, 1566. It was said to be built by Fr. Diego de Herrera using wood and nipa (a type of palm tree. A new church was started in 1605 and finished in 1626 but was again burned down in March 1628. The 3rd model was begun 1628, this time using stone and bricks (a great innovation at that time), but the construction was stopped because it was found to be defective.

The present building was started on February 29,1735 and completed in 1739. It’s actually a lovely symbol of community coming together as the church in the area did not have means to complete it on its own. So, the parishioners of Opon and San Nicolas contributed materials, while the people of Talisay contributed labor.

Between 1739 and 1889, the church underwent multiple renovations including adding the windows, but the church retained much of its original features.
In 1965, His Eminence Ildebrando Cardinal Antoniutti, Papal Legate to the Philippines, conferred the church the honorific title Basilica Minore upon the authority of Pope Paul VI. As a Minor Basilica, it is given precedence over other churches and other privileges. Pope Paul VI at the time, said it is “the symbol of the birth and growth of Christianity in the Philippines.”

The Heritage of Cebu Monument 

After visiting the Basilica we had one last stop to see in Cebu city: The Heritage of Cebu Monument.
We’d somewhat debated going to see this since we were closer to the South Terminal Bus stop at the Basilica, but after deliberation, it would only add 15 minutes of walking and we decided it was worth it… That is still being debated in my mind. On one hand, the monumnet looked and was cool. But the walk there was HOT, long, and again not the prettiest part of town. At one point we had a homeless person trail us several blocks asking for money for food. Everytime we’d speed up and out walk him, but he would catch up as we had to wait for traffic at intersections. Luckily once we got to the monument, we spent long enough looking at it and wandering around (out of view) that I suppose he lost interest. Either way it was a hot nerve wracking walk.

Another church we passed on our way to the monument 

The monument itself is massive and interesting, but the information plaques are all largely sun faded (so you couldn’t read about what you are seeing) but here’s what I learned: The Heritage of Cebu Monument is a tableau of sculptures made of concrete, bronze, brass and steel showing scenes about events and structures related to the history of Cebu. The construction of the monument began in July 1997 and it was finished in December 2000.  The structures depicted in the Heritage Monument are the Basilica del Santo Niño, the Cebu Metropolitan Cathedral, the Saint John the Baptist Church, the Magellan’s Cross, and a Spanish Galleon. The scenes depicted in the Heritage Monument are the baptism of Rajah Humabon, a procession of the Santo Niño, a Roman Catholic mass, and the Battle of Mactan between Lapu-Lapu and Ferdinand Magellan. The persons depicted in the monument include the late president Sergio Osmena Sr. and Blessed Pedro Calungsod.

I also learned that apparently the area the are the monument is located in was home to the residences of the most prominent families in Cebu during the Spanish period. It wasn’t that glamorous when we walked through there but there are apparently a few private museums close by that depict what the houses and life looked like back in the day.

After the monument, we braved the walk to the bus station. Luckily it looked like we’d be walking by a college and through much more populated areas. The bus station also borders a mall which was nice as we headed into the AC of the golden arches (McDonalds) to try SEA’s nuggets, picked up some proper sun screen for me, and then went in search of our next ride.

Faithful as ever to trying McDonalds in every country I go to

The bus station was pretty chaotic with lots of buses going the direction you need to go ( I mean… there’s only 1 highway to get to Oslob) we told a friendly looking driver which direction we were headed and he said he could drop us off at our hotel. Great. Then for me I hopped into the restroom (which I should’ve used at the mall) as they wanted 10 pisos for the honor of using a very short stall with no paper. Then we boarded our very CHEAP, but no AC bus. It wasn’t very full so we stationed ourselves at the back, each in our own row next to an open window. I was still terribly fearful of this ride turning out to be 6 hours, but the bus driver told us 3. It turned out to be 3.5, so still better than expected and my bladder and I somehow made it just find. Likely from being dehydrated and hot the whole time haha. Several people would get on the bus selling wares while we were still in Cebu. We bought cold water from one person for 15 pisos, but other than that, the Mcdonalds held us over.
As our stop was coming up, we both watched our approach on Google Maps wondering if the bus driver would truly remember after 3.5 hours where to drop us off… He didn’t haha. And I didn’t know how to ask to stop so as we passed the sign for our hotel, I hopped up and yelled STOP. It worked! haha but was definitely NOT how the locals do it. (I still don’t know the secret.) It was a huge relief to get off the hot bus and an even bigger relief to have a nice clean bathroom at our hotel. YAY! I made it! (this bus ride was probably the biggest stress of the entire trip for me) haha

 The little restaurant at our hotel resort 
 Our hotel was RIGHT on the water with amazing views down the coast on either side 
Not to mention a pool complete with water slide! 

We made right around 5 but were pretty pooped from the walking with our packs, HOT day, and all the traveling. So we took it easy and lounged around the fantastic resort we had, even trying some of their food. (I got fried chicken which was pretty decent, if not quite filling.) Our resort was right on the water but on the wrong side of Cebu for stellar sunsets… either way the lighting was nice and we enjoyed the views while it gradually got darker.

Day 4 Costs:
Shuttle back to Airport: $2.90
Flight from Coron to Cebu: $43.75 pp
Taxi from Cebu airport to Fort San Pedro: $6.30
Fort San Pedro Admission: $0.60
Snacks/water from 7/11: $1.50
McDonald’s lunch: $3.90
Water on bus ride: $0.30
Bus ride to Oslob: $2.60
Dinner at hotel: $2.90

Lodging:
Sascha’s Resort Oslob: $9.50 pp

Day 4 Total Costs: $30.5 without the flight, $74.25 with flight

The Ultimate Coron Tour

Philippines Day 2: The Ultimate Coron Tour
Waiting for the sun to come up so we could escape our room 

This day was definitely EPIC but it was off to a slow start… Since we fell asleep so early we were wide awake around 1:30 AM with nothing to do until 8ish when the tour company would come get us. We killed time reading and chilling in our room until 6 when the sun started coming up so we threw on a cover ups and ran outside to greet the morning sun on the water. By 7, coffee shops and restaurants started opening for breakfast so we walked into town to grab some waffles! Then back for a bit more waiting for our tour.

It was a somewhat colorful sunrise…. 
The main highway into Coron town where all the cafes are

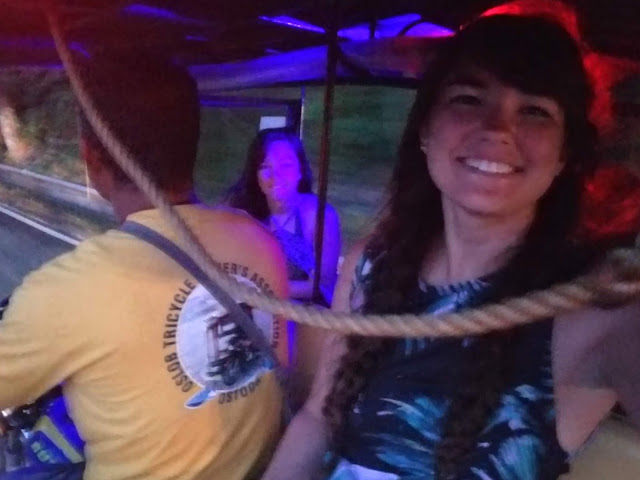
They were pretty prompt right at 8:30 and had a trike right outside the hotel door that we took on a 5 minute ride to the tour operator shack. There we paid for our tour, were rounded up with a few other guests, and transported to our boat…. which we were sitting on by 9 and waiting.. and waiting. It seemed to take FOREVER for them to gather all the guests on the boat (we were one of the first to arrive) and then get the supplies. They also didn’t tell us snorkels weren’t included in our tour so after 30 minutes of sitting there I asked if I could just go run and get my goggles that I brought from my hotel room that I could literally see from the boat! haha Thankfully I did too since half the areas were snorkel stops and it would’ve been a huge bummer to miss them! Tippe paid 100 pesos or something to rent a snorkel for the day.

Our first ride on the back of a trike
About the Tour
The Ultimate Coron Tour is very similar even though offered by multiple companies. It includes 7 sites, 5 stops, entry to all of the sites, a kayak at one of the stop, a full lunch at one stop with coke to drink, a snack after the last stop, and water all day aboard. For this tour, all of the stops were about 20-40 minutes away so there is plenty of time to enjoy the scenery on the boat. Group numbers range from 15-20 but we easily had 20 people on both our tours. You have one tour guide and several boat men that operate the boat to accompany you. For a great price, this was a great tour! But know you have private options that started around 2700 pisos for 2-4 people for a full day. This cost however does NOT cover lunch OR your entry fees to all of the sites (which are around 100-200 pisos) unlike the group tours which cover everything! 

Finally just after 10 we were off to our first destination:

First glimpse of the Twin Lagoon 

Twin Lagoons

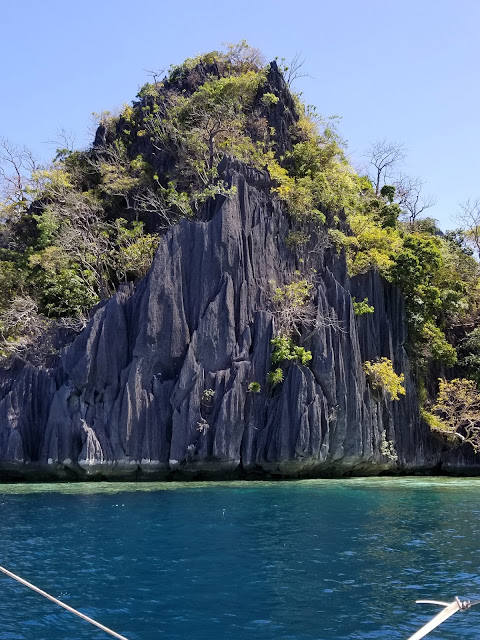
This stop had been on my bucket list before any of the other Philippines destinations to be honest, as it was the first thing I came across. The water is a beautiful green and the surrounding cliffs have the most interesting erosion pattern. There’s a spot where the cliffs are seperated under water where you can swim into the adjoining lagoon which was really cool. (though it wasn’t as cool as the video I’d seen suggested it would be) We had 40 minutes to swim around the lagoons before we had to head back to the boat and onto our next destination:

Boat selfie
Lots of boats parked outside the lagoon. We had to walk/ swim but you can see the first lagoon tucked in there around the corner. The water was seriously perfect. 
Standing on the bow of the boat
In the first Lagoon making our way to the 2nd one. 
The first Lagoon still 
Looking over to the connection to the “twin” You can go over… 
Or you can go under to get to the twin lagoon 
You didn’t have to swim very far and head space wasn’t too bad. 
You just had to watch out for some of the over hang
Finally in the 2nd lagoon. I loved the cliff formations! 
Back to the first lagoon so we could hear the whistle warning us our boat was leaving soon 
 The water was seriously THAT color
Hanging out in the lagoon 
Back to the boat
Ready for our next stop
Skeleton Wreck

A great diving and snorkeling spot that was teeming with fish and the wreck clearly visible. (though without fins extremely hard to dive down to see) This spot is the remains of an old Japanese war ship (there are MANY around Coron Island) The only downside was that by the time we got there, it was SO busy with other boats… many of which would anchor right next to the ship and would float over it… kind of a hazard when you have a bunch of un- aware tourists with their faces down in the water… We almost got run over twice before I gave up and went to just look at the fish away from the wreck.

There were LOTS of fish in this area 
The bow of the shipwreck 
Sppoookkkyyy
Fish were everywhere and so were the people haha
One more of the wreck 

Skeleton Beach

Our lunch stop and as you may have guessed… a beach smack next to the ship wreck. The tour lunch was great! They grilled yellow fish (tuna), pork, and chicken with tons of rice then we had bananas for desert.

Clams, pork, and fish on this day! 
The over water shack we ate our lunch on

CYC Island/ Coral Gardens/ Beach

Here we had the option of snorkeling more or just swimming over to the beach area which is what we ultimately decided to do. The beach was almost sand bar in appearance since it jutted out past the island but it felt like it was the middle of no where unlike the other beaches which are on the giant island of Coron. We didn’t do much here in the 30 minutes or so that we had, except lay in the sun.
I was pretty impressed with the enterprising guy that was kayaking around selling beer and snacks to the lazy beach goers, like how genius is that?! They seemed to be about 100 pesos? so if this is something you’d want to partake in, make sure you bring some extra pesos with you in your dry bag.

After the rapid fire of stops before here, we were excited to relax on a beach haha
GLT/ Girls Love Travel sign (how Tippe  and I met!)

Kayangan Lake

My other most anticipated stop of the day, Kayangan lake is said to be the cleanest AND clearest lake in South East Asia… I haven’t seen all the lakes but I can say it was both clean and clear. haha
The water is fresh water in the swimming area so the tour boats required us to bring out life jackets… little did they know I can easily float in fresh water just as easily as in salt water.. I’m that buoyant hahaha. But it did come in handy for towing my stuff around.
The entrance to the lake had restrooms you could use.. if you dared and really needed to, as well as other little shops. We only had 45 minutes though so we trekked up the hill to get our photos of the incredible view point, and then have a relaxing swim in the lake itself. After a full day of salt water, and just a little A LOT of sunburn, that cool fresh water felt AMAZING.
There were also really cool boulders/ rock formations to check out under the water, and a few other people found caves. I would definitely put this lake on your must do list with a visit to Coron.

More cool island formations around Coron

Heading up the stairs to the viewpoint and then on down to the lake.
There were around 300-350 steps totals 
The amazing view of Coron bay as you make your way to the lake
Highlight of the day for sure 
Right by the viewpoint there are some caves to explore! 
The lake

Heading back to our boat at the (almost) end of a terrific day! 
A boat that matched the color of the water so perfectly 
Looking back towards where the lake was on the other side of that saddle

Siete Pecados

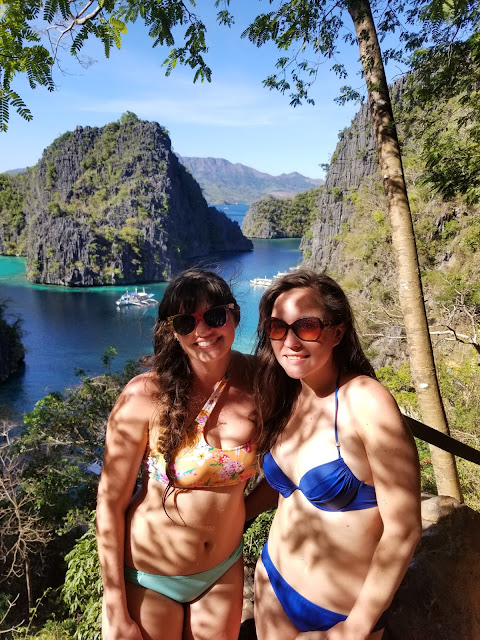
Our final stop before turning the boat home and we almost had to miss it due to the winds picking up. The Siete Pecados weren’t even on my list of things I had to see when we set out to Coron but boy am I glad we got to check this area out! The coral gardens were incredible! Definitely the most abundant, vibrant, and beautiful we saw on our entire trip. The water was super shallow and clear so at times I was worried I was closer to them than I probably was… either way it had me keeping my body flat as we floated over the tops of them. If you love snorkeling, I would make this another must when in Coron.

So. Much. Coral

Our boat dropped us back off shortly after 5 where we had another <4 minute trike ride back to our hotel. We rinsed off (let’s be honest why would we wash our hair with another beach day the next day?) and we headed to find some dinner. We had noticed a restaurant with a heart shaped entrance when looking for breakfast and as we wandered back that way the smells coming from their grill was too good to pass up. I got a pork kebab with rice and this incredible sauce that they just called “sweet sauce” plus a hot chocolate like coffee drink called Milo? Apparently it’s a big thing in SEA.
Then we were back in our room ready to snooze again around 7:30! haha Solid day in the sun.

Day 2 Costs:
Waffles and drink breakfast: 230 php/ $4.40
Ultimate Coron tour (includes lunch and entrance to all sites): 1200 php/ $23
Dinner: 120 php/$2.30
Aloe for my crazy burned skin: 350 php/ $6.75

Lodging:
Luis Bay Traveler’s Lodge– $12.50 pp

Tour Company we used:
Wonderful Island Travel and Tours (one of the many pamphlets picked up from the airport)

Day 2 Total Costs: $49 pp

Philippines – Coron

So the Philippines… a place most people asked me why I wanted to go there?
Well uh let’s see: stunning beaches, warm water, incredible landscapes, whale sharks, caves, and SO cheap. So with that… let’s go over why YOU SHOULD be planning a trip to the Philippines.


View from the rooftop bar at our hotel 

The only negative: having to fly 26 hours each way (but hey it’s the same for really anywhere in South East Asia… so don’t let this scare you off!) We had about 2 hour lay overs in San Fran and in Tokyo before landing in Manila at 9:30 PM. Our only plan was to GO TO BED, and our hotel was only a mere 4.5 km or 15 minutes away. Outside the terminal they have a queue of taxis with the posted prices to make it easy for you. We hopped in a yellow metered cab and he took us right to our hotel for 140 pesos…. or $2.70.

Same view in the morning

Next morning was up and back to the airport, only this time to the Domestic terminal (which isn’t attached to the others) and was only 2 km/ 8 minutes so half the cost of previous night at 80 pesos.

The airport is SMALL and it’s important to know you need some sort of voucher, or SOMETHING that shows your flight itinerary (depending on the airline) to even get INTO the airport as they have a STAGE 1 security to get in to the airline check in desks. I’d also recommend saving them to your phone or printing them out since wifi and service is not the most reliable over there.

Smaller Islands we flew over on our way to Coron

Anyways we were checked in, grabbed breakfast, and only had to wait like 40 minutes before they boarded… 20 minutes earlier than they said they would board. So another tip: ALWAYS get to the airport 30 minutes earlier than you THINK you should get there. ALL of our domestic flights in the Philippines boarded an entire HOUR before our departure time and one even departed 20 minutes early… They aren’t messing around over there.

Busuanga Island (where Coron town is) 

So now that we’ve gotten through all the boring travel stuff, HELLLOOOO CORON, Palawan!
Immediately getting off the plane it was much hotter than Manila and the airport was SOOO small. As you leave the departure gate you feel like a celebrity as people hand you discount tour pamphlets and all the different shuttle drivers ask you where you are going. There’s no taxis, and from what I saw, few to none anything else, so a shuttle is the only way you will get from Coron airport to Coron town proper. It was a beautiful 30 minute drive and the air conditioned shuttle cost 150 pesos pp.

Outside the little domestic airport 

We got to our hotel right around noon, too early to check in so we dropped our bags, traded my socks for sandals, and headed out to explore. We had expected to take it somewhat easy on our first day but we had energy, and with a lack of beaches close to the town, we settled for our more demanding bucket list item:

Climb Mt. Tapyas
The Mt. Tayas view deck is very Hollywood. haha 

Trail Stats:
1.5 miles RT if you start down in the town. 
700+ steps and around 700 feet of elevation gain 
It’s free to climb and there are shaded benches along the route for weary travelers to take a break.

As we were doing it in the middle of the day, we had the place just about to ourselves, but boy was it HOT.

The views at the top were definitely worth it though. Incredible views of Coron bay and the surrounding islands as well as inland from Coron town.

There’s more trails around and behind the viewing deck that lead to more stunning photo spots and seating areas.

 The view looking over at Coron Island with the town next to the bay

Family pose in the pagoda with the back side of Mt. Tpayas view
Another photo of the backside Mt. Tapyas view
Heading back to the stairs

After some time hanging out we headed down to find some water and lunch. We ended up at an ok place in town where I tried chicken adobo (a popular dish in the Philippines as I’d come to find out) and cucumber lemonade.

Then it was time to finish our check in, which promptly lead to being comfortable, and thus falling asleep at a tradgically early time… of 5 PM. but hey jet lag! haha we had our tours figured out for the next day and it would be a long one so we missed out on sunset night 1 but sleep was oh so sweet.

Days 1.5 Costs:
Food on the plane and access to a lounge for additional snacks in Tokyo- free
Taxi from airport to hotel: $1.35 pp
Taxi back to airport: $0.75 pp
Seattle’s Best coffee and muffin: $3.50
Flight from Manila to Busuanga airport (Coron): $85 pp
Shuttle from Busuanga airport to Coron town proper (hotel): $2.89 pp
Lunch/dinner in Coron town: $4.00

Lodging:
Night 1- Nichols Airport Hotel $23 pp. Plain jane but they gave us a water bottle, had a nice view from a rooftop bar, and very conveniently located. AC and clean were the name of the game here.

Night 2- Luis Bay Traveler’s Lodge $12.50 pp Great location! Reviews were mixed on this place, and they did have cheaper non ac rooms but I’m glad we “splurged” since our room was great! We had a powerful AC unit AND a fan, TV, and really sturdy twin beds. The room was quiet from street noise although one night there was a weird dripping noise that about drove me nuts but for the price?! It was a nice location too, 2 minutes from the market and tour shops.

The view out of room’s window… we were literally over the water 

Total Costs for 2 nights and day 1: $133 and that includes 2 nights AND our most expensive domestic flight…