This has to be one of the most underrated parts of the south island- looking through guide books, blog posts, itineraries- nobody even hinted that this location was a thing. But us Middle Earth fans? We know it’s a thing- so I give you a guide to Mount Sunday or in LOTR lore Edoras.
Driving to Mount Sunday
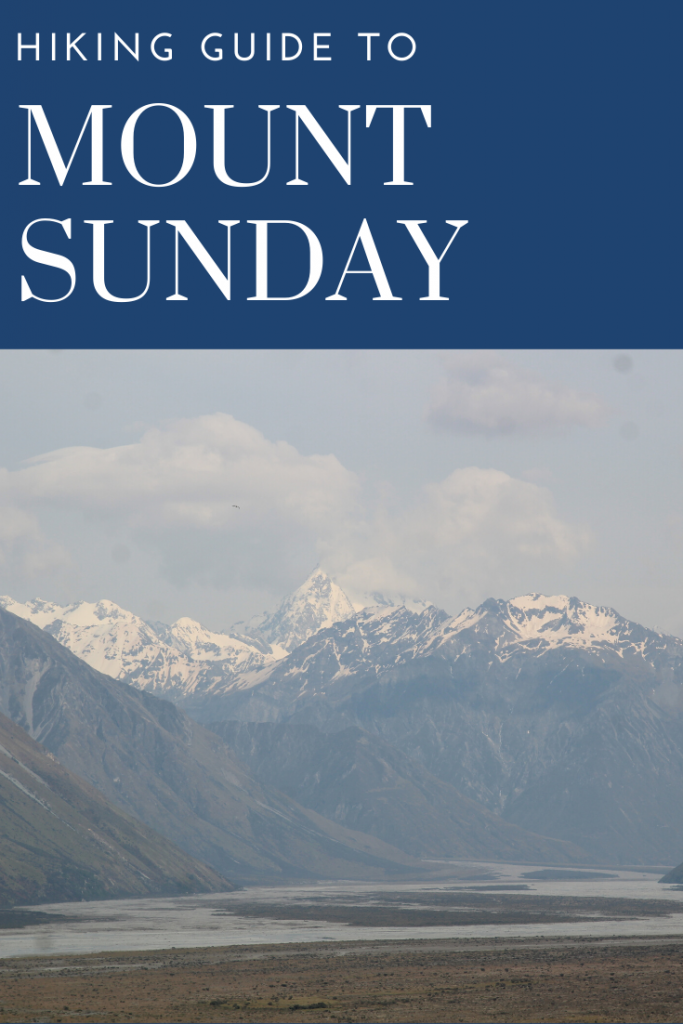
The road out to Mount Sunday is only around 2.5 hours from Christchurch but it is a bit of a drive- and a decently long haul on a gravel road, but don’t let that deter you. It was well graded- just slow so any ol’ car can make it in fine weather. Take hwy 1 out of Christchurch, taking a right to stay on highway 76 towards Ashburton Gorge and Mount Somers. Once in Mount Somers, you’ll continue onto Asburton Gorge Road. From there you’ll drive straight onto Hakatere Potts Road (the gravel one) for the final 48.1km. (about an hour)
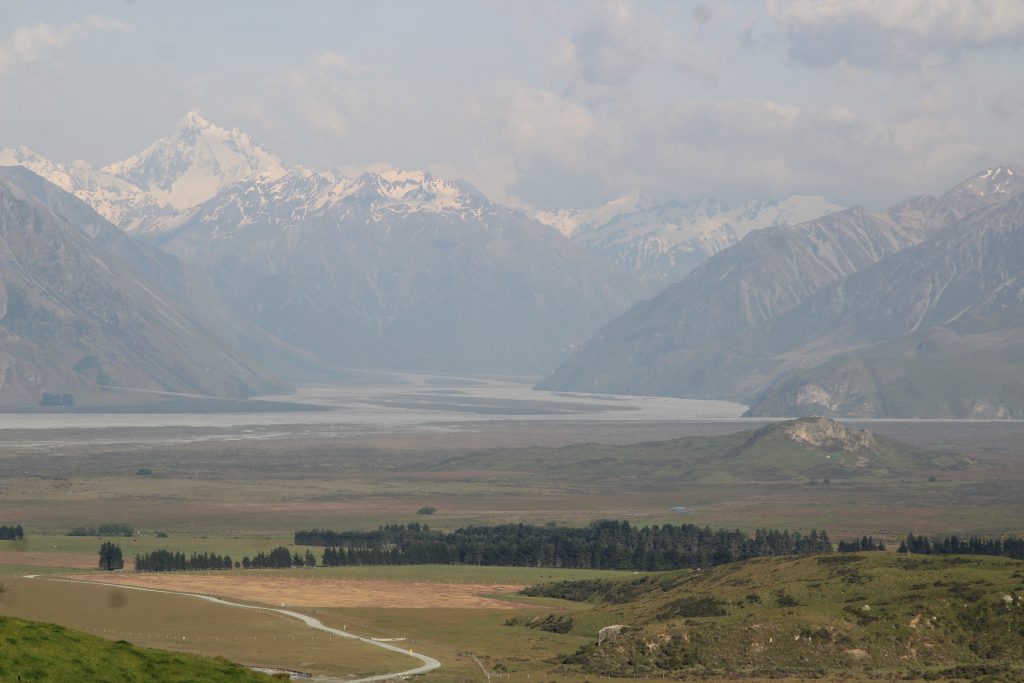
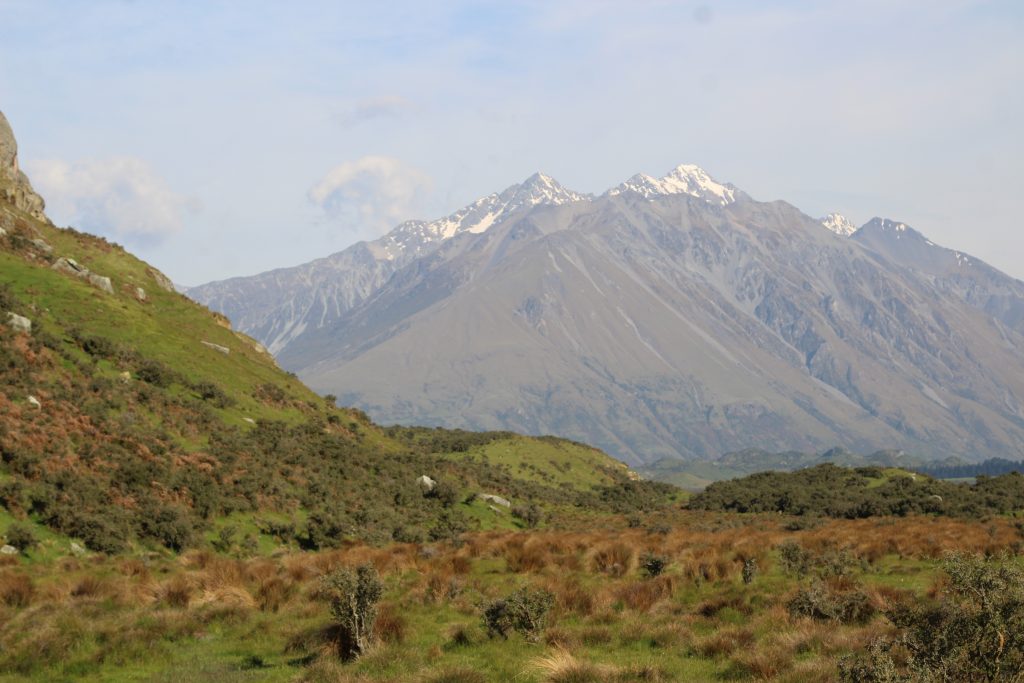
The best part of the drive is undoubtedly at the top of a hill just before you drive down into the valley- you have expansive views over the plan with a clear view of Mount Sunday randomly jutting out of it in the middle. When you see it, you’re about 20-25 minutes way from the parking lot which will be on your left.
Address: 1705427/5″S State Highway 5, Mangakakahi, Rotorua 3015, New Zealand
Where to stay near Mount Sunday
Apart from a view campgrounds along the drive in from Mount Sommers, your only option closest to Mount Sunday is at Mount Potts lodge which will run you $220/ night and books up fast. I’d recommend finding a place in Mount Somers if you are already road tripping around the south Island so you can get to Mount Sunday earlier in the day. (before the tours)
If you are camping, expect to pay around $20-$35 for the night.
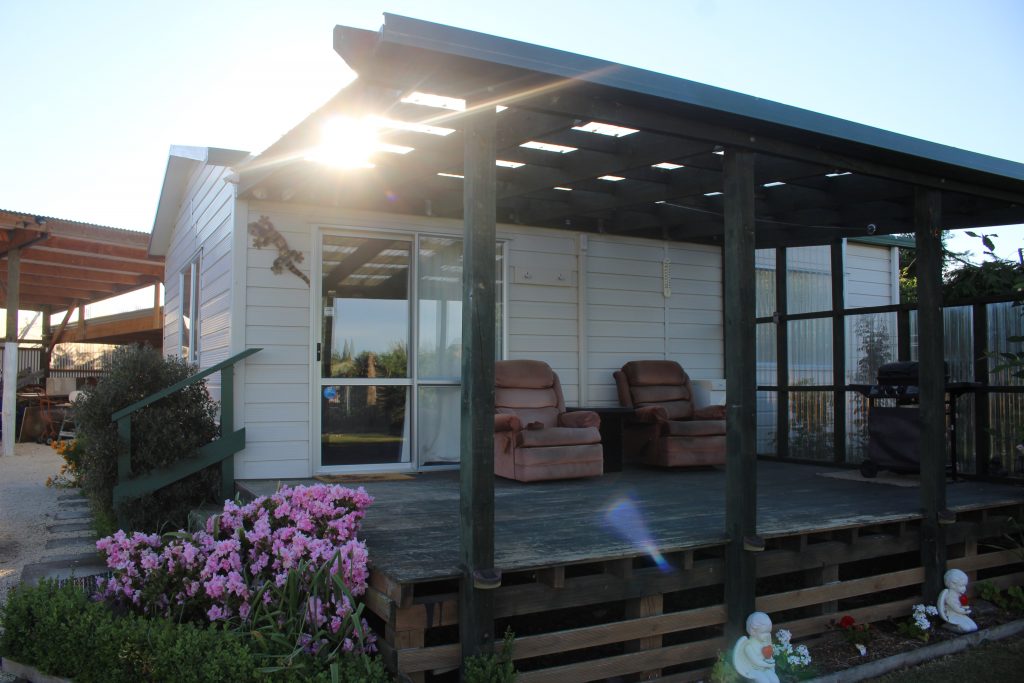
Where we stayed in Mount Somers for only $72- an entire cottage with included laundry
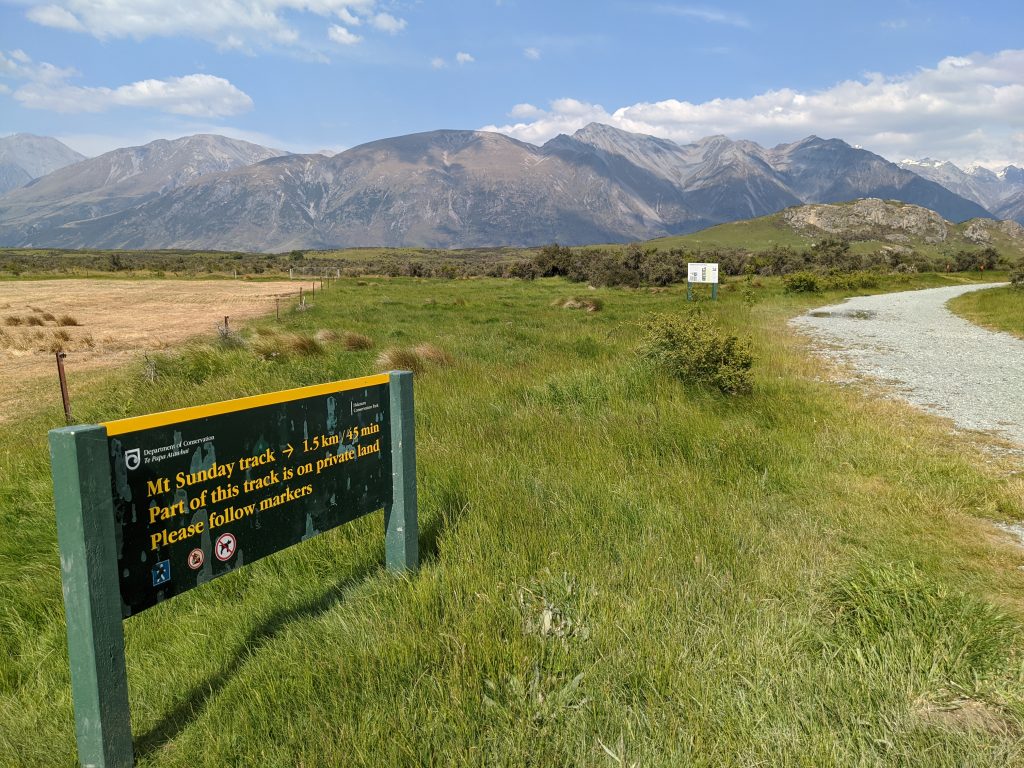
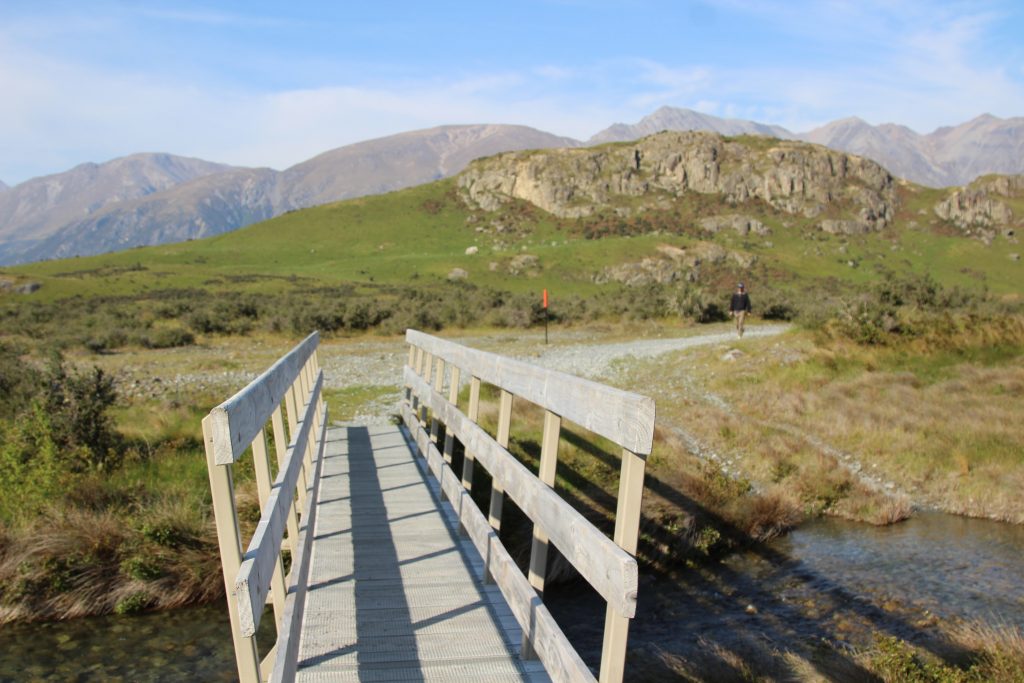
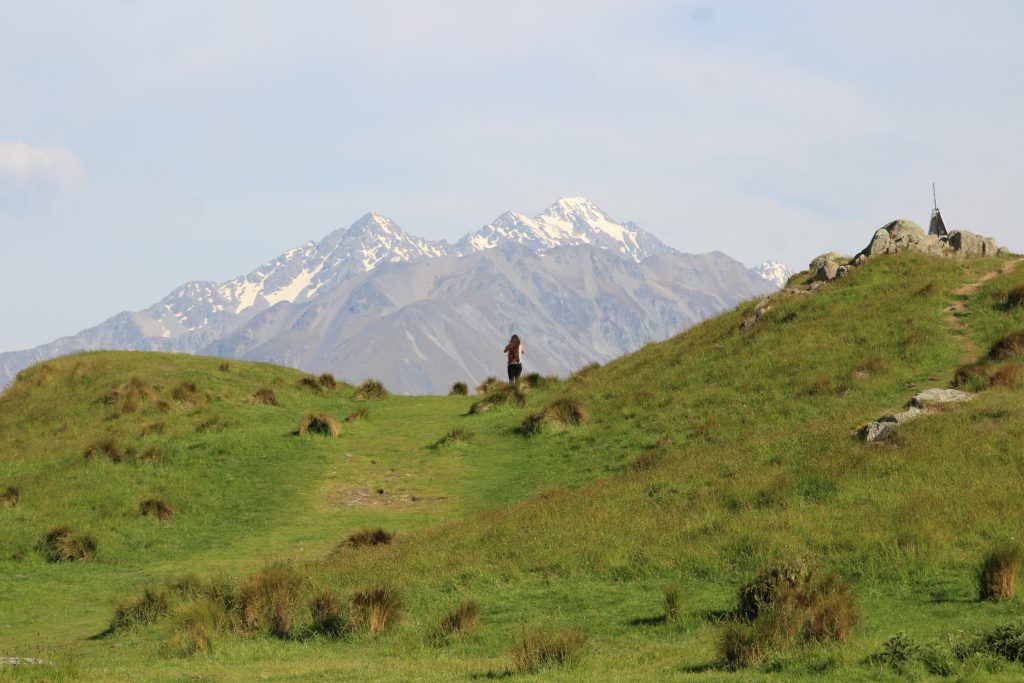
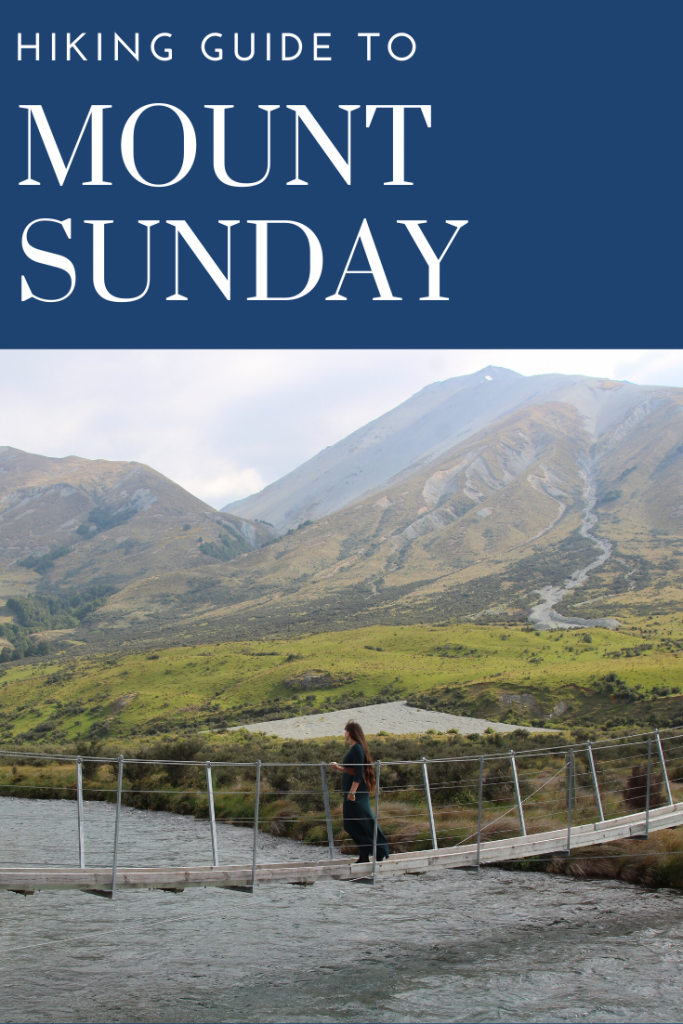
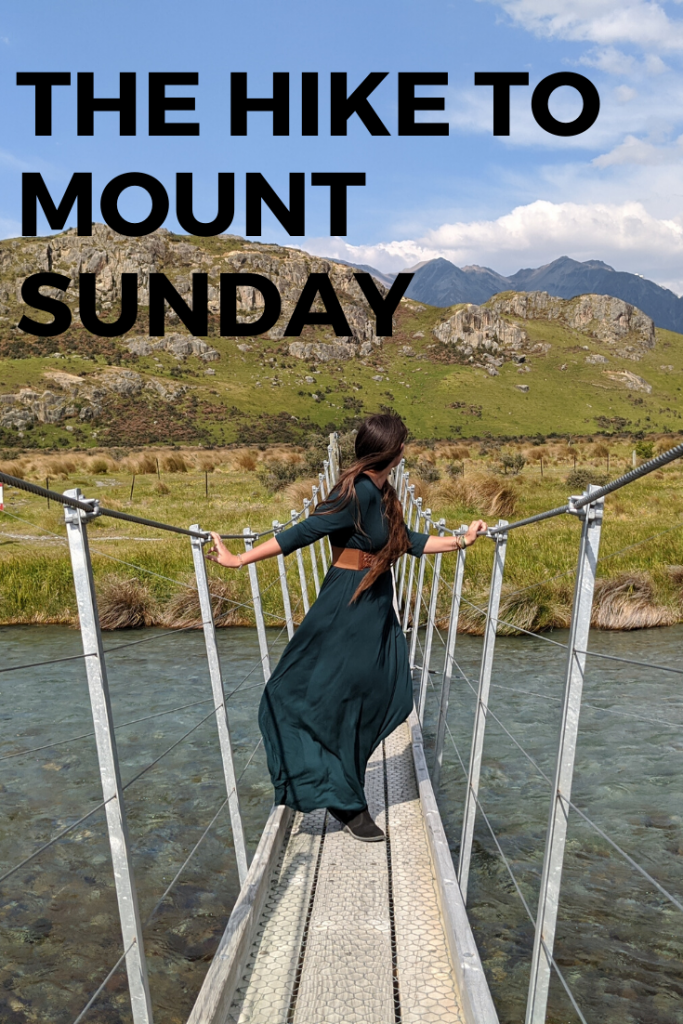
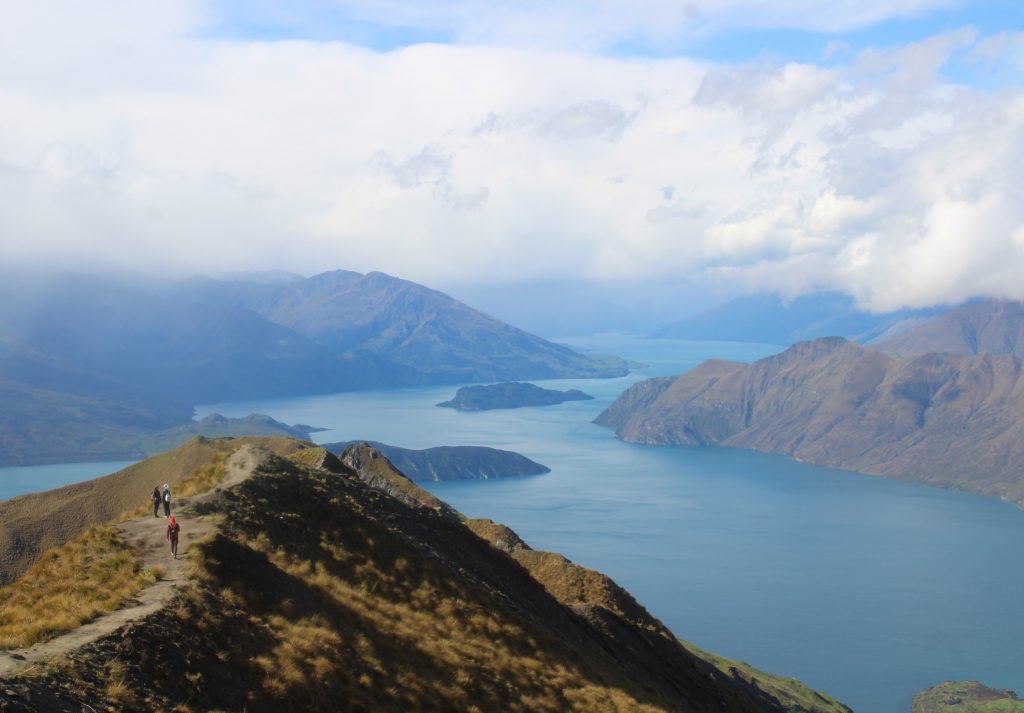
The hike to the top of Mount Sunday
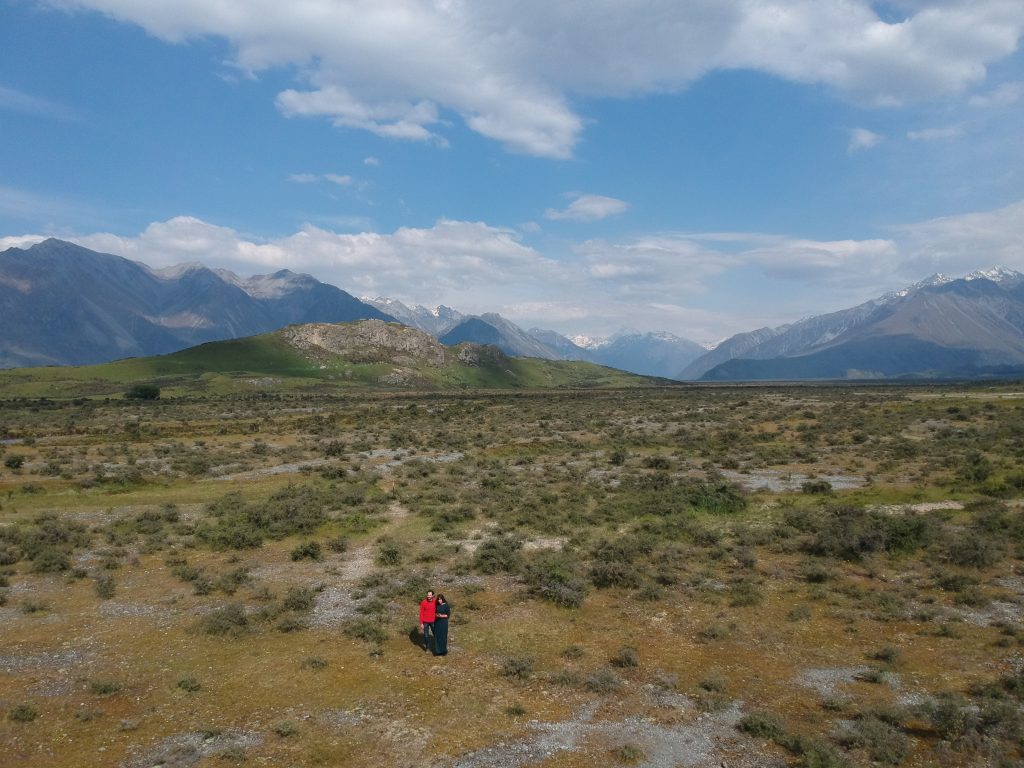
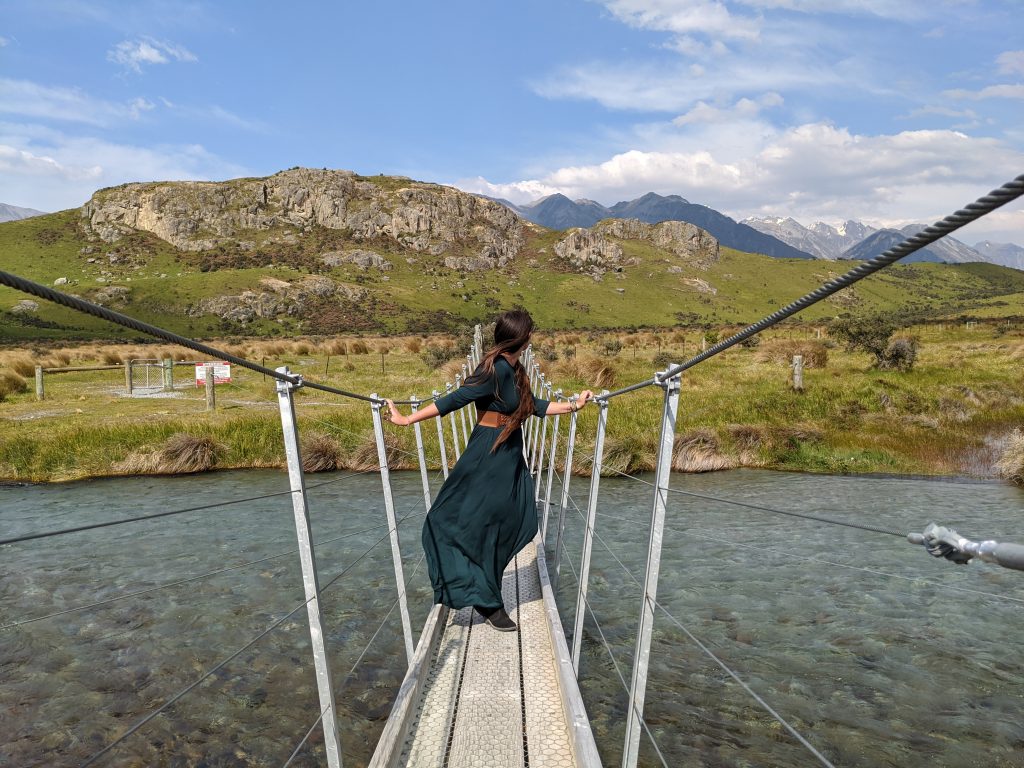
Now for the fun stuff- the short but sweet 1 hour RT hike from the parking lot will lead you across multiple little bridges of clear glacial water and up the steep hill that made up the Edoras set. There’s not set left behind, but you can 100% picture Edoras as you walk up the hill and view the flat top and surrounding mountains.
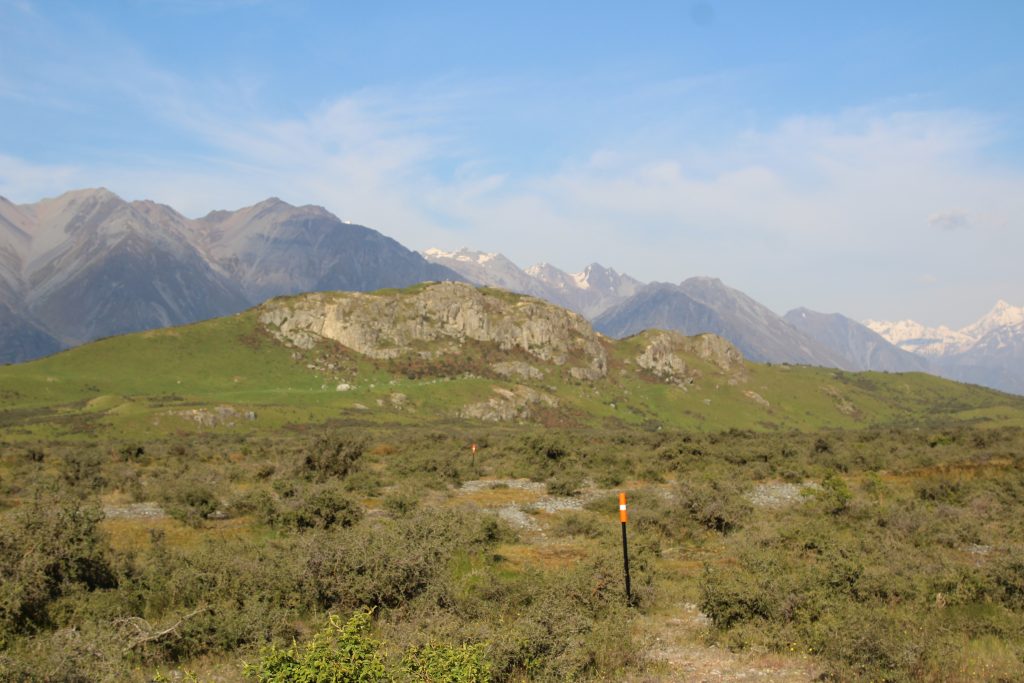
The trail starts from the opposite end of the parking lot with a few signs about the wildlife and a reminder to stay on the trail as parts of the land belong to a private ranch. While the first bit is an easy to follow track, you’ll have to watch for the orange flags that indicate where you’ll veer off towards the mount and from there you’ll see some marks in the footing but will mostly need to rely on the flags to get you across the small bridges. Eventually you’ll get to the beautiful swing bridge which has a max 1 person load and makes for dramatic photos and then it’s just a steep climb up the hill to the top.
You’ll follow the orange markers through the grass tussock
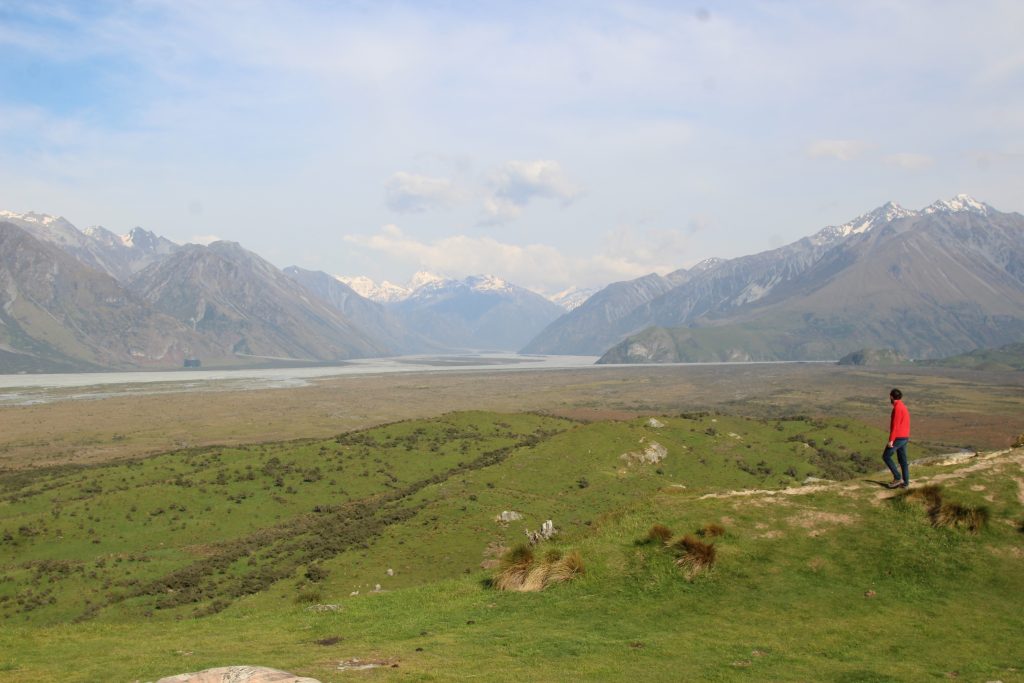
Views from on top of Mount Sunday
While we had a very blustery and chilly day, we lucked out in having the place completely to ourselves! (about 9AM) We spent a lot of time taking photos and videos and otherwise enjoying the beautiful landscape before heading back down to continue our road trip south.
Notable spots to see nearby
Lake Tekapo
Rakaia Gorge Walkway
Bonus where to eat near Mount Sunday:
Panthers Rock Bar & Café – one of our favorite meals we had on the south islands was at Panthers. We both got daily specials which were delicious plus topped it off with the national dessert of New Zealand-Pavlova. It was affordable, homey, and delicious.
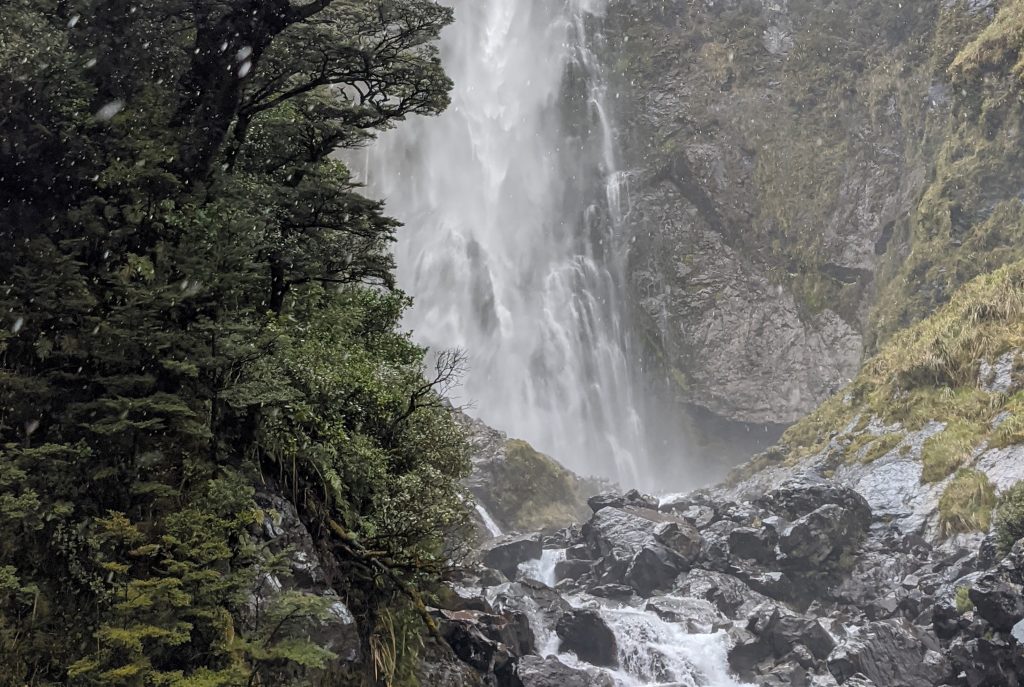
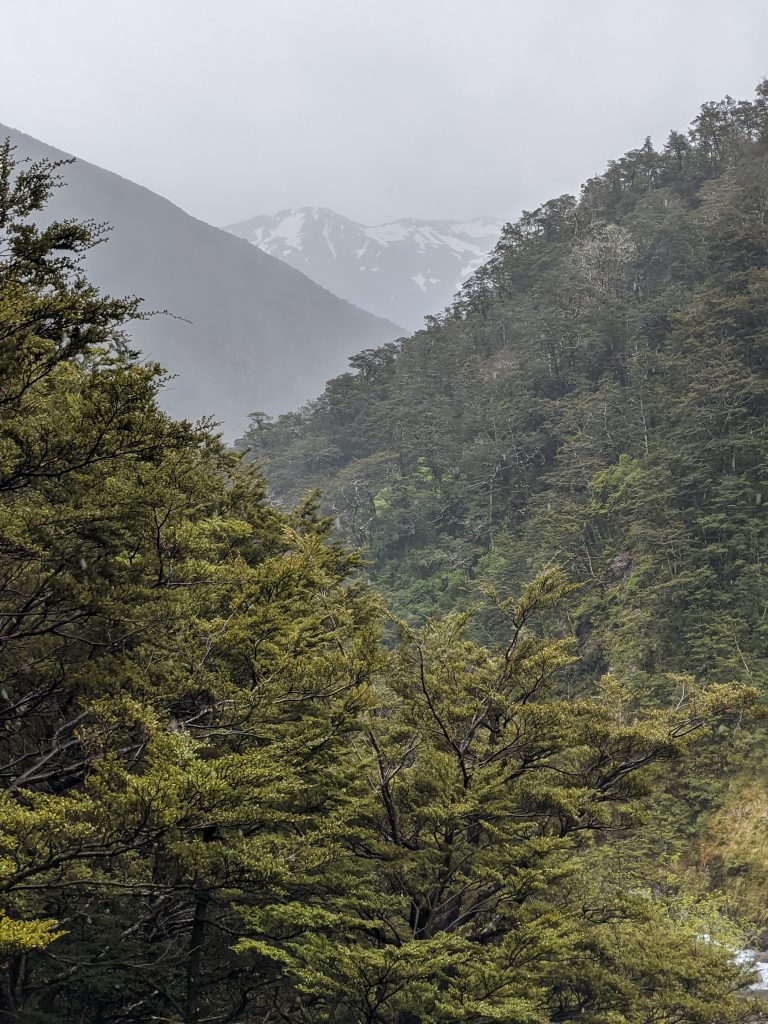
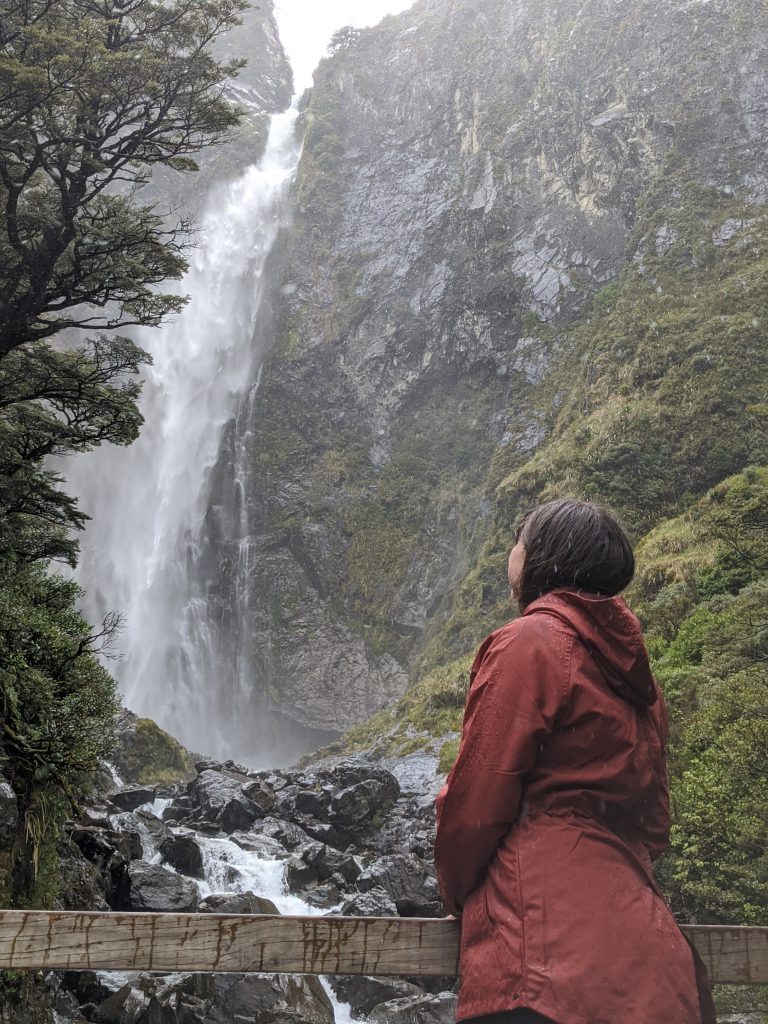
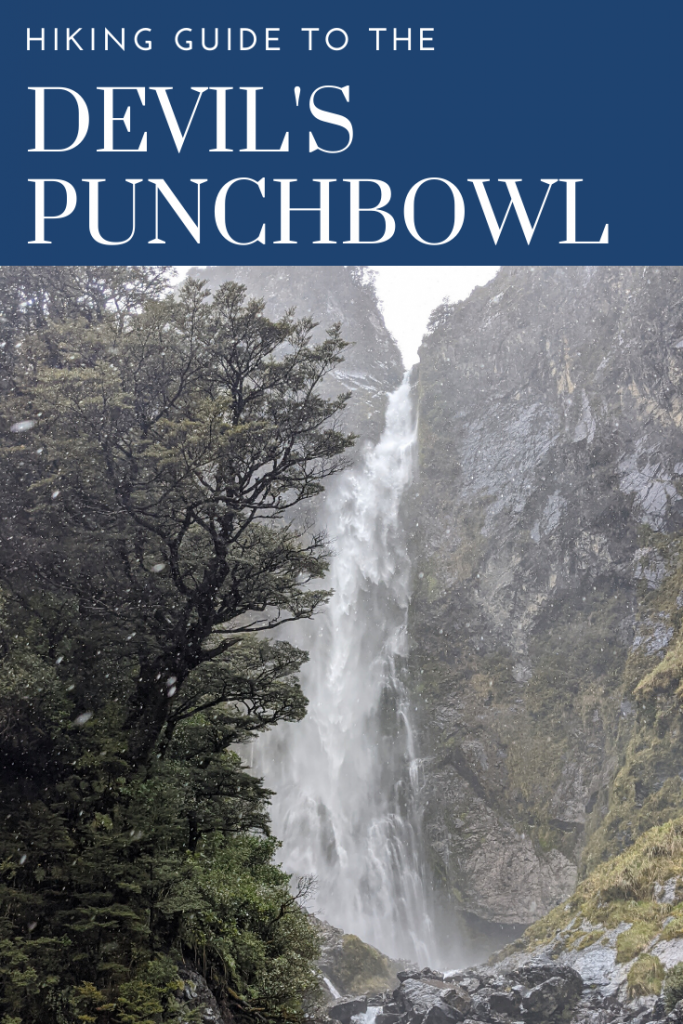
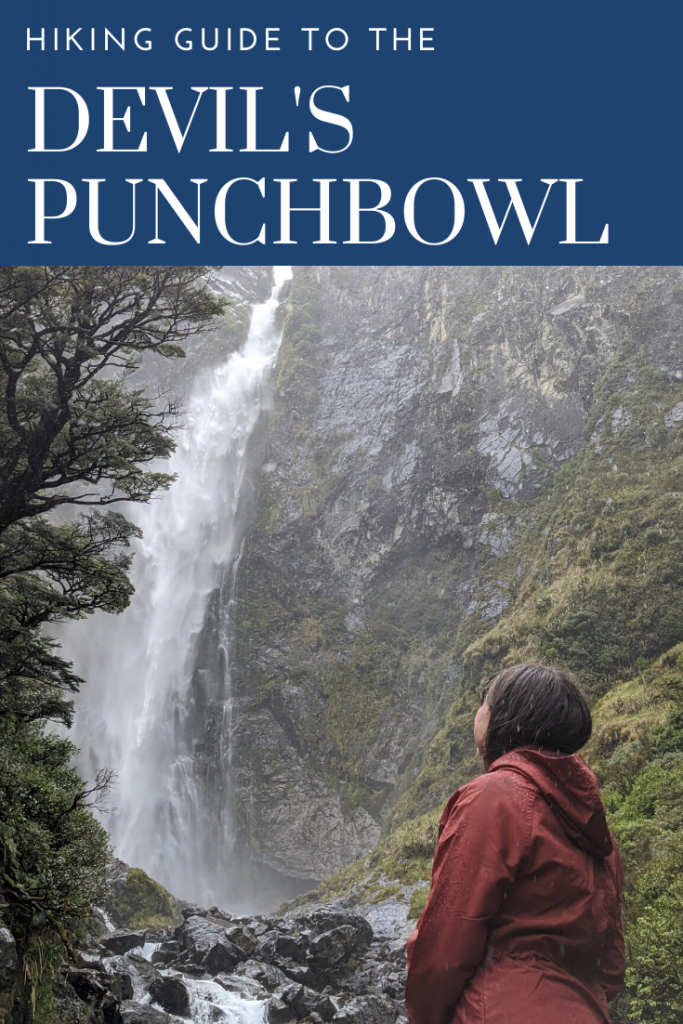
If you’re a fan of waterfalls, mountain passes, and Lord of the Rings, than the Devil’s Punchbowl hike is for you. It’s a shorter hike that leads to the base of a 430 foot (131 m) roaring waterfall and is situated right off the main road through Arthur’s Pass to the west coast. The hike itself will only take you 1-1.5 hours RT and will take you across 2 beautiful bridges and through lush vegetation. It’s a safe hike rain or shine with the steepness of the trail being negated by slip protected stairs.
The drive from Christchurch is a beautiful one. At only 2 hours, it packs in some beautiful farm lands, mountains, braided rivers, and interesting rocky hills (ie. Castle Hill). From Christchurch, take highway 73/76 (13.9km) until it turns right and becomes old West Coast Road. You’ll follow that all the way (133.5km). You’ll know you are getting close when you cross the long 1-way bridge across the Waimankariri River and the turn off will be on your right just on the other side of town. (Look for Punchbowl Road)
Don’t use google maps as it will take you just past the turn off for the actual parking lot (speaking from experience) At the trailhead there are some portapotties but otherwise no facilities. You’ll start out walking up river to a visible bridge. You’ll cross 2 long bridges in short succession and follow the trail from there as it heads up wooden boardwalks and multiple stairs. There aren’t any trail splits or conflicting signs making this a very easy trail to follow.
About our hike:
As we drove from Christchurch, we noticed clouds overhead and high winds in the area which deterred us from our longer hike of the day- the Bealey Spur track. However we were not deterred from hiking to the Devils Punchbowl since for one, it is considered inspiration for some of the waterfalls used to create Rivendell in the Lord of the Rings and for two, it’s just an incredible looking waterfall.
Once at the Trail head, we practically ran against strong winds to the crossing of the first bridge which has no wind protection. Aka it kind of sucked. Once we were across those bridges however the trees broke the wind for us making for an easy, albeit wet, hike. It only took us 30 minutes up and though thoroughly drenched at this point, we still took a few minutes to stand at its base and take it all in before a quick 30 minute jaunt back to the car.
I can only imagine how resplendent this waterfall is in the sun, but for now I’ll take our memories of running across bridges to find shelter from the wind, learning my rain jacket was not indeed water proof, and gazing up at the tallest waterfall of our trip.
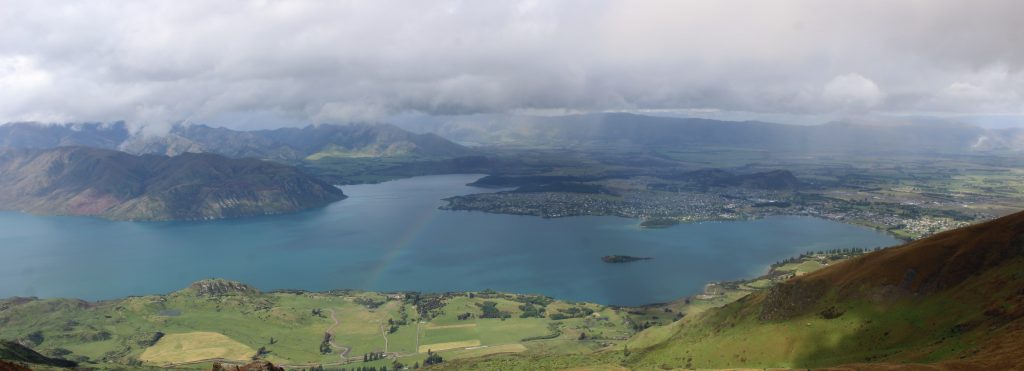
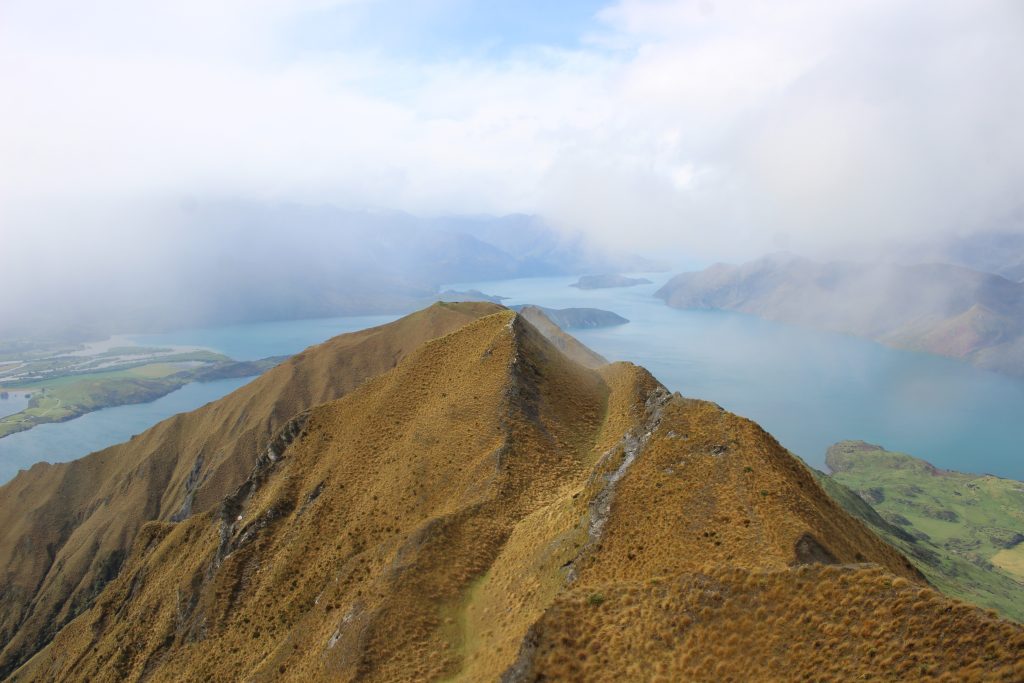
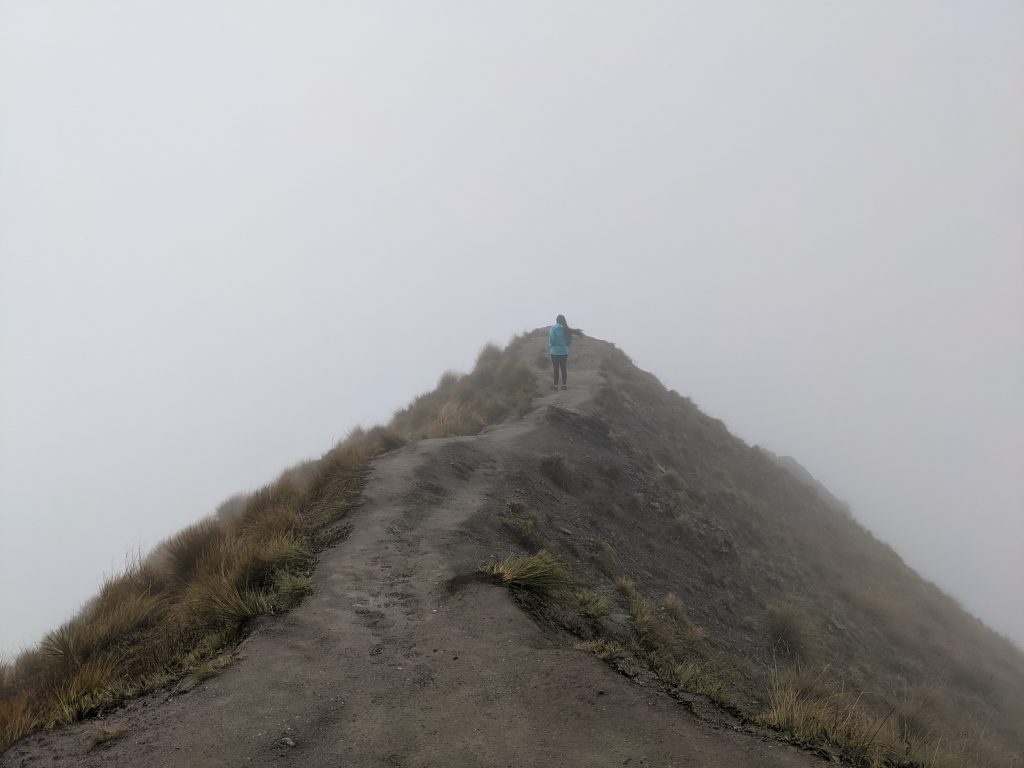
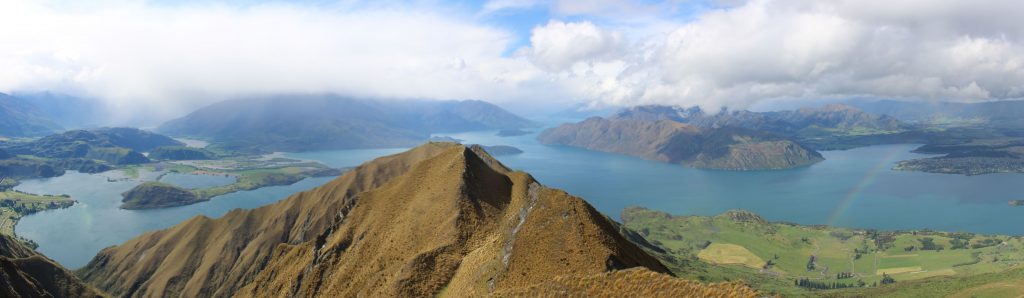
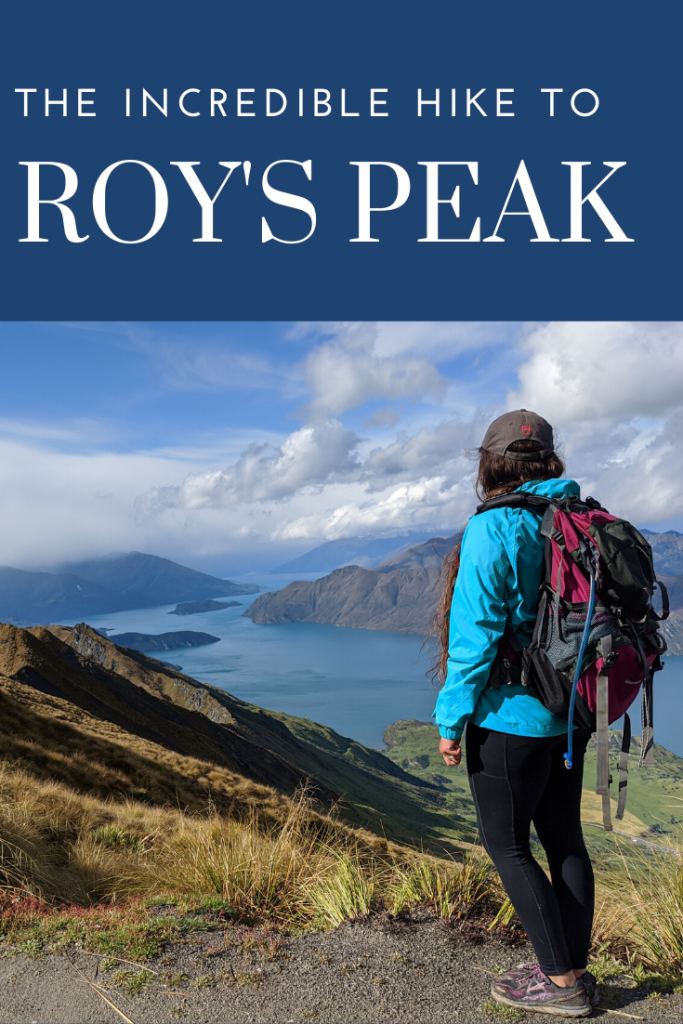
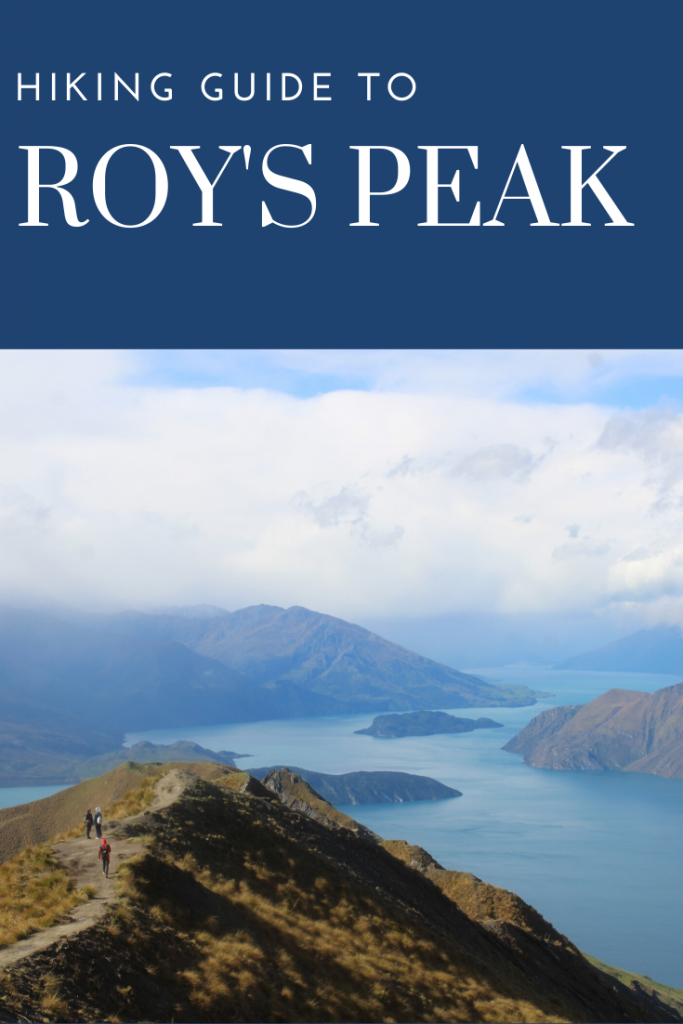
An iconic hike in Wanaka, and cover photo mecca, Roys Peak is a challenging hike up 4000+ feet to expansive views of Lake Wanaka and the Wanaka townships. While it isn’t a fjord, the views are fjord like with the lake stretching on 27 miles into the distance. The mountains surrounding it reach upwards of 6500 feet (2000 m) and form the iconic u-shape of the lake’s valley. This hike is wonderfully graded but is definitely challenging and hikers should be in good shape if attempting.
Hike Details:
Distance: 10 miles/16 km round trip Elevation gain: 4265 feet/1300 m Time: 6-8 hours
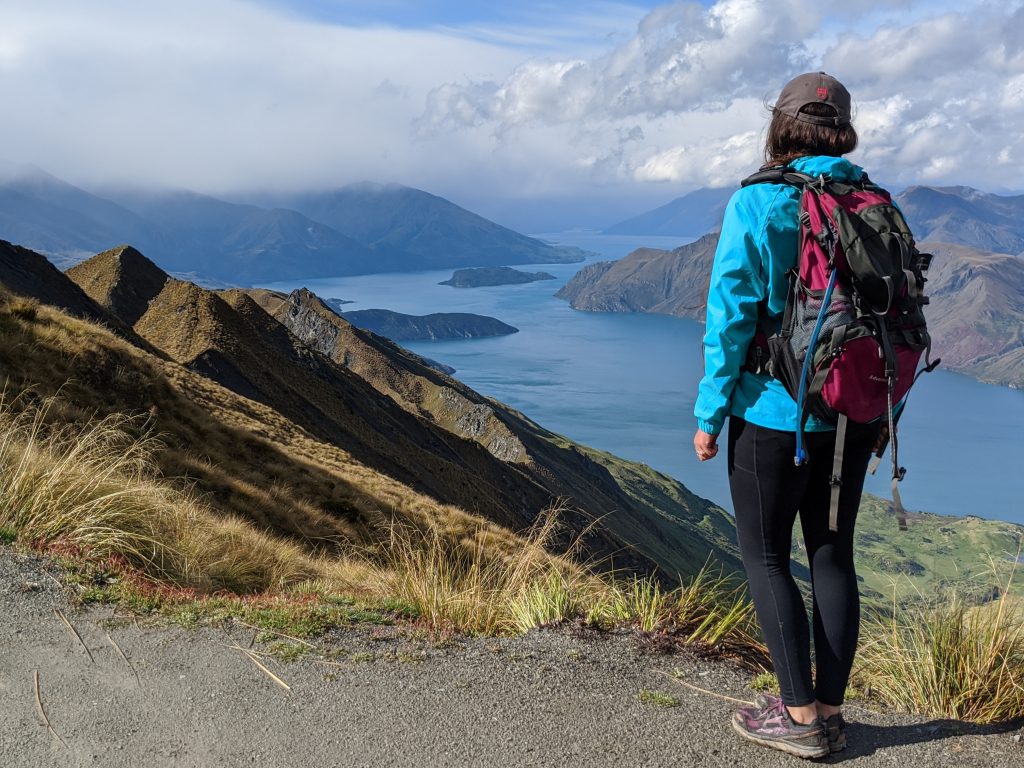
A moody day on Lake Wanaka
When to hike Roys Peak:
** The trail is CLOSED October 1-Nov 10 for lambing season. You will not be able to hike this area at all during those dates. **
Nov- Dec is spring and the trail will be more green and less busy, but there is greater potential for foul weather. Jan-Feb are the best months weather wise but also VERY popular. The car park very frequently fills by 9AM in the morning. Fall, Mar- Apr will be less crowded but again- you risk a rainy day. If you are visiting in the winter May-September, the NZ DOC recommends you have alpine equipment (ice axe/ crampons) to attempt this hike.
Trail Description:
The trailhead is a large parking area on the leftside of the road 6.6 km/ outside of Wanaka center and will only take around 7 minutes to get there. There are porta potties just past the start of the track and again about 6.5km up at the lookout but no toilet paper is supplied- pack your own.
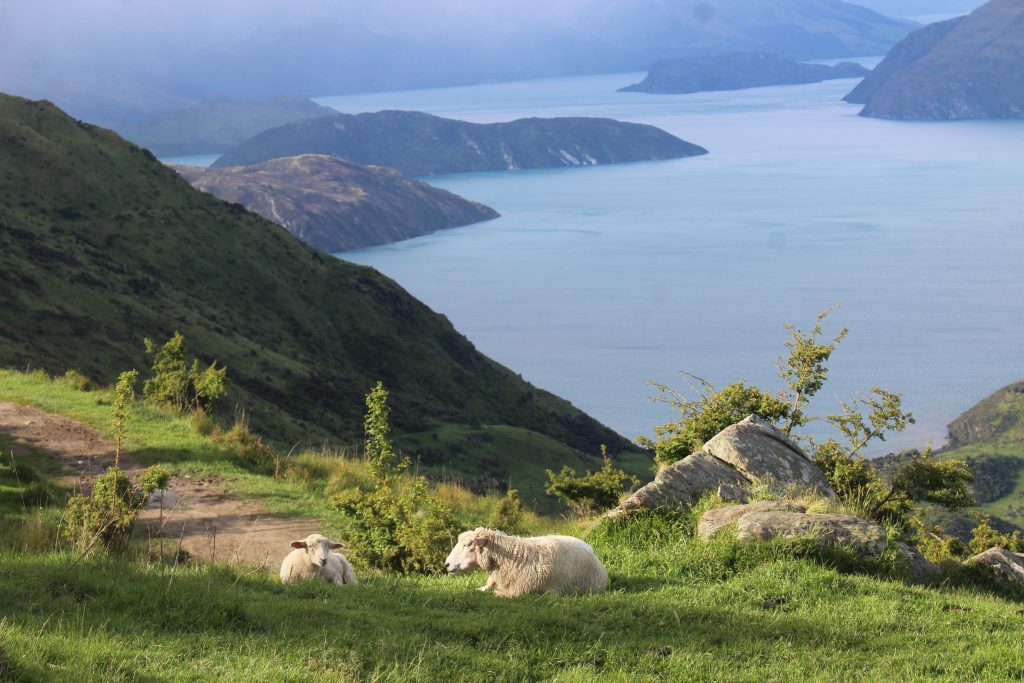
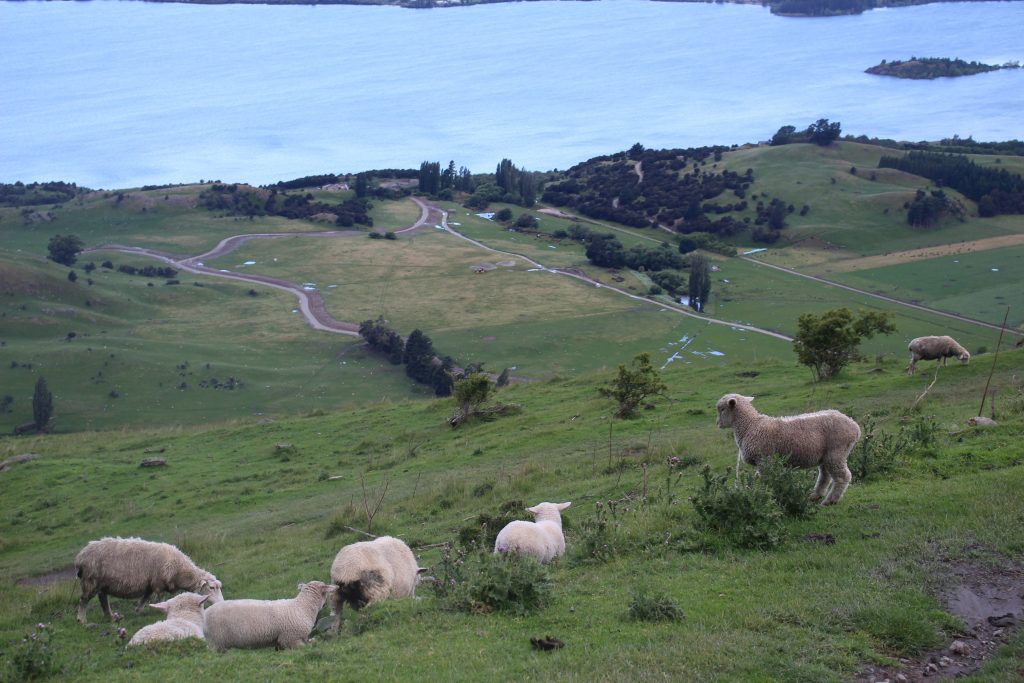
Sheep hanging out on the trail
The track as mentioned is well graded and at a constant incline switch backing up the hill. There are a few places people have cut across the switchbacks creating shortcuts but these are often VERY steep and slippery- taking just as long and are more fatiguing than just staying on the trail. To protect the environment- please stay on the track and quit adding to the slope erosion. The view doesn’t change much (depending on the weather) as you have largely the same view the whole time. The sheep however are so cute and entertaining so it still makes for an interesting hike. We loved all the little lambs running around first week of December.
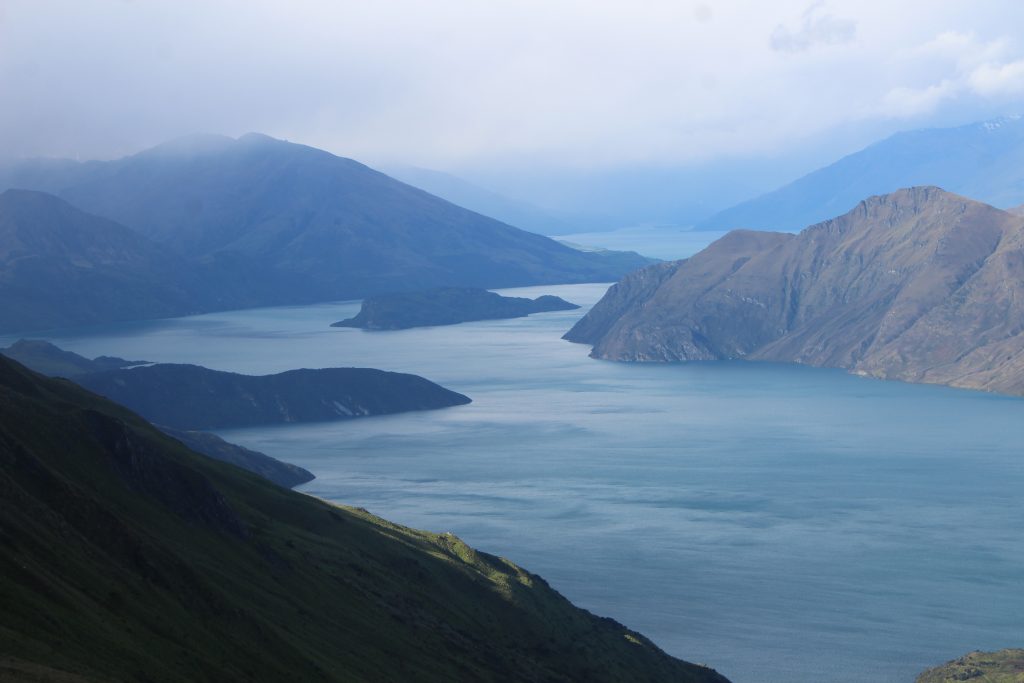
A panoramic view of the bay from about 1.5 miles into the trail
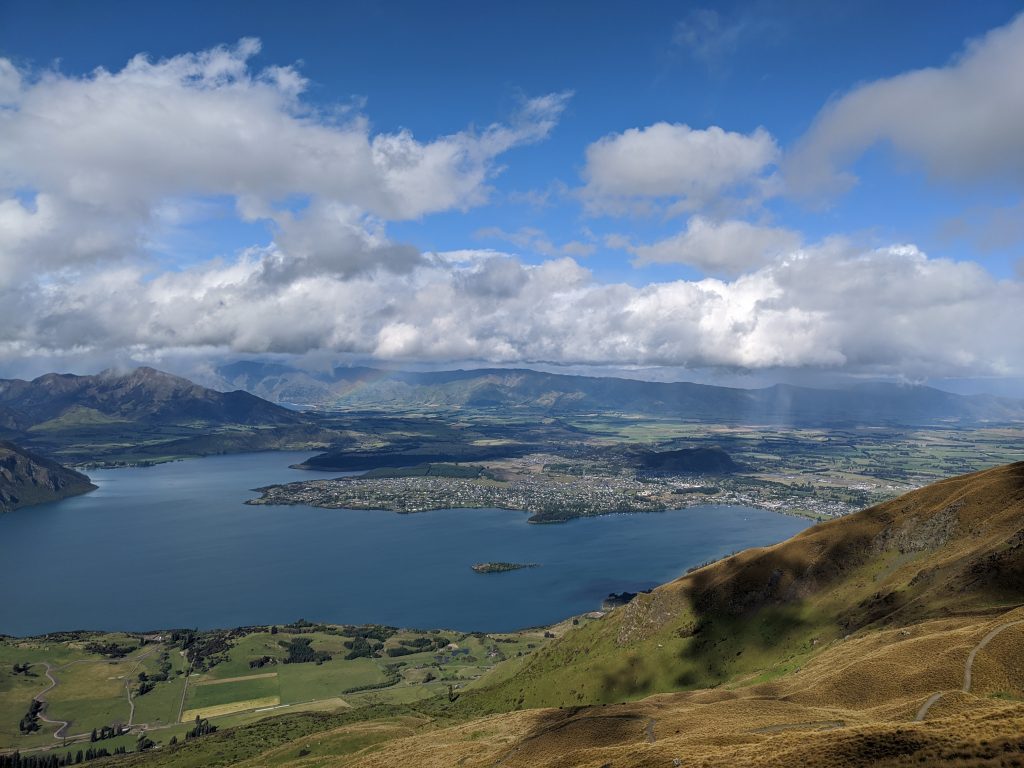
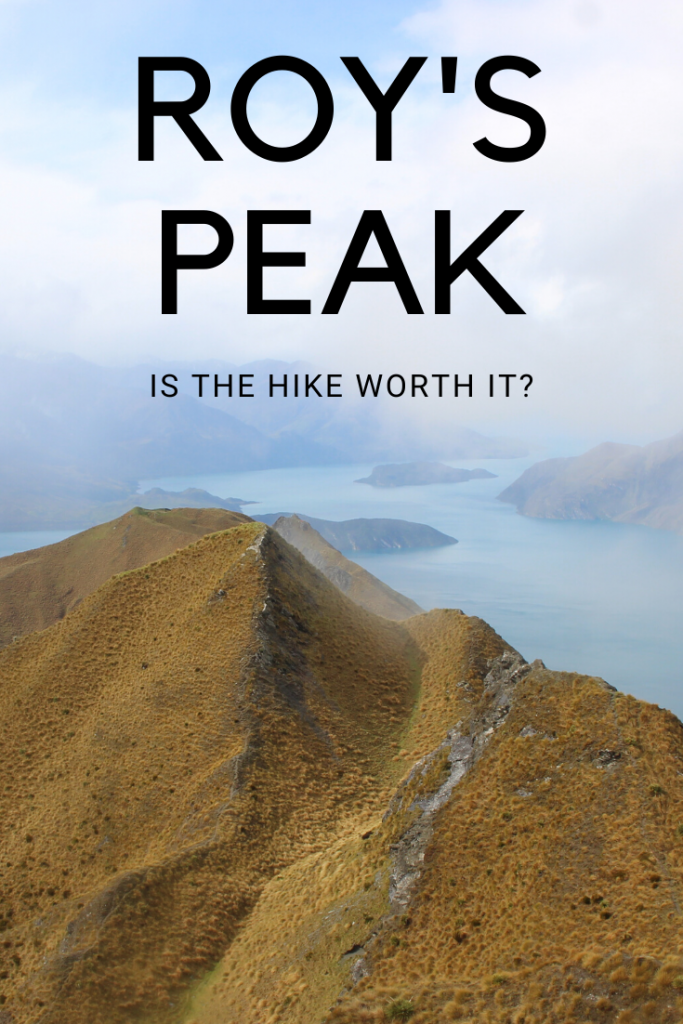
The Roy’s Peak lookout
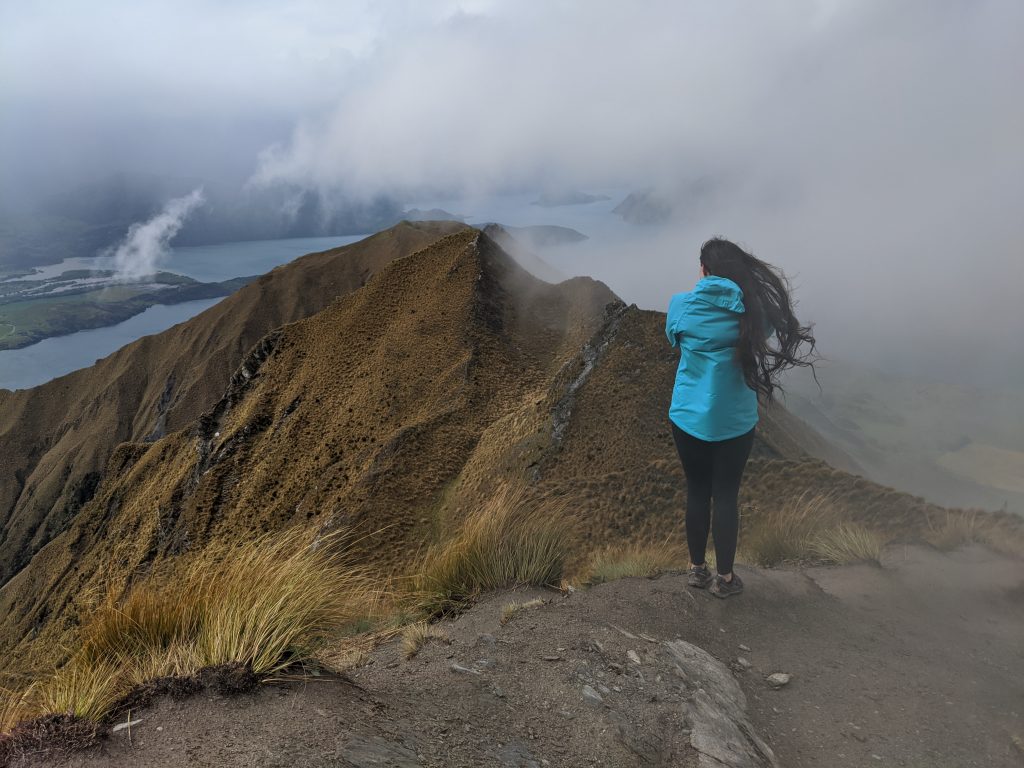
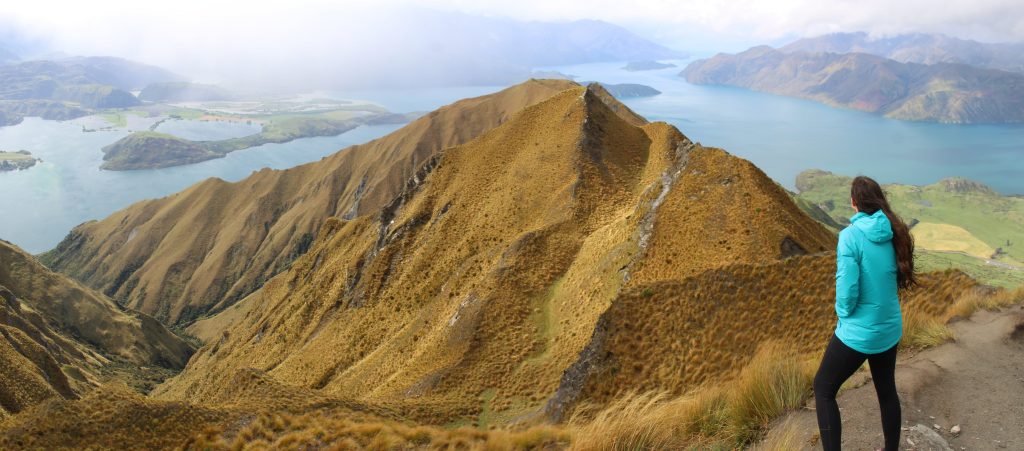
The lookout is about 6.5 km/ 4 miles and is a great goal if you don’t think you can make it to the very top. It’s still about 3700-4000 feet of gain meaning it is still hard, but it will shave off 1-1.5 hours of your hiking time to stop here. This is also where the iconic “gram” photos happen.
The iconic view from the lookout
Our hike experience:
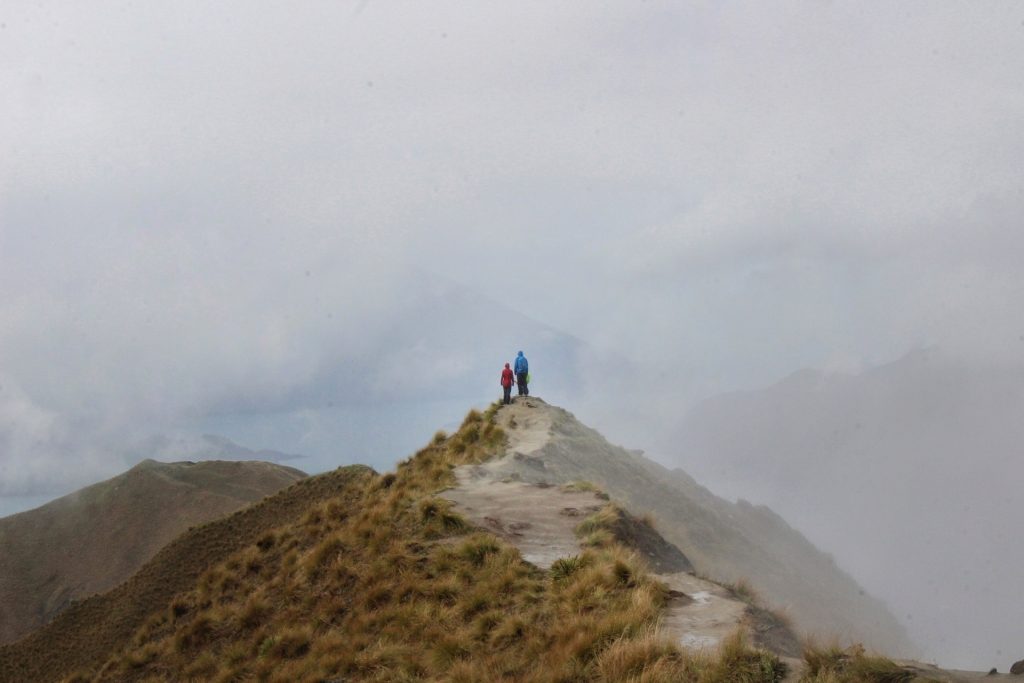
We were visiting the first week of December during a horrible rainy week. We’d gotten rained out of our plans of camping in Mt Cook National Park for 2 nights and ended up in Wanaka for 3 nights/ 3 days instead. It rained… every. Single. Day. Luckily we heard about a pretty great weather reporting site for NZ called YR.No And on our 1st full day we noticed the rain was supposed to lighten around 2 PM. So 2 PM is when we started up the mountain with moments of dry weather but still raining. The views were mostly clear at least so we had a view as we climbed up.
A mix of sun and rain on us as we hiked up
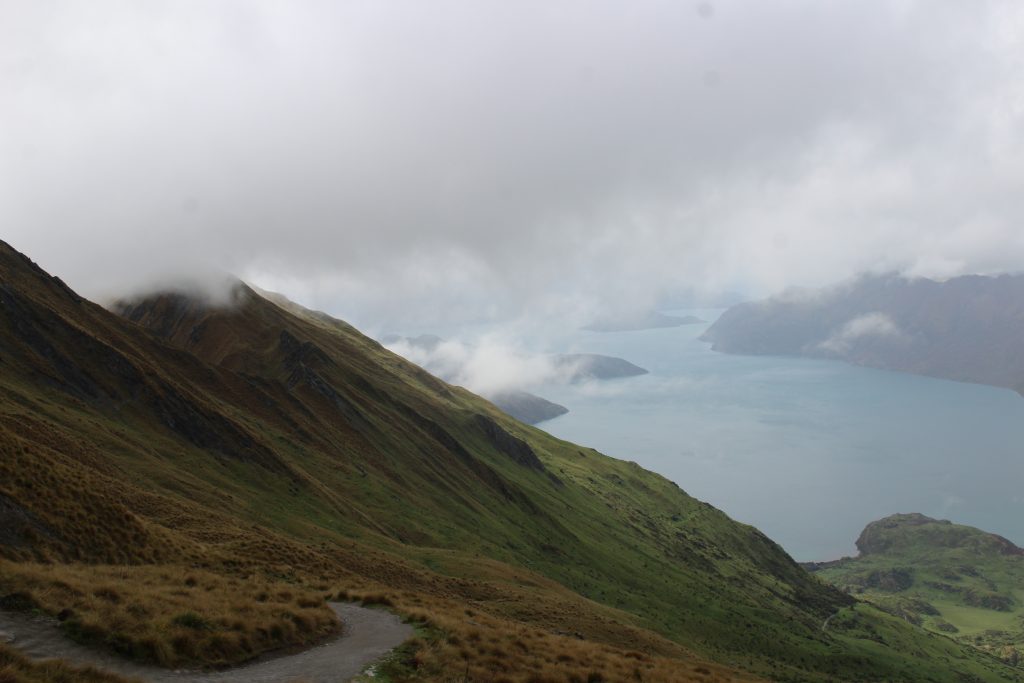
Intense clouds rolled in as we got near the top
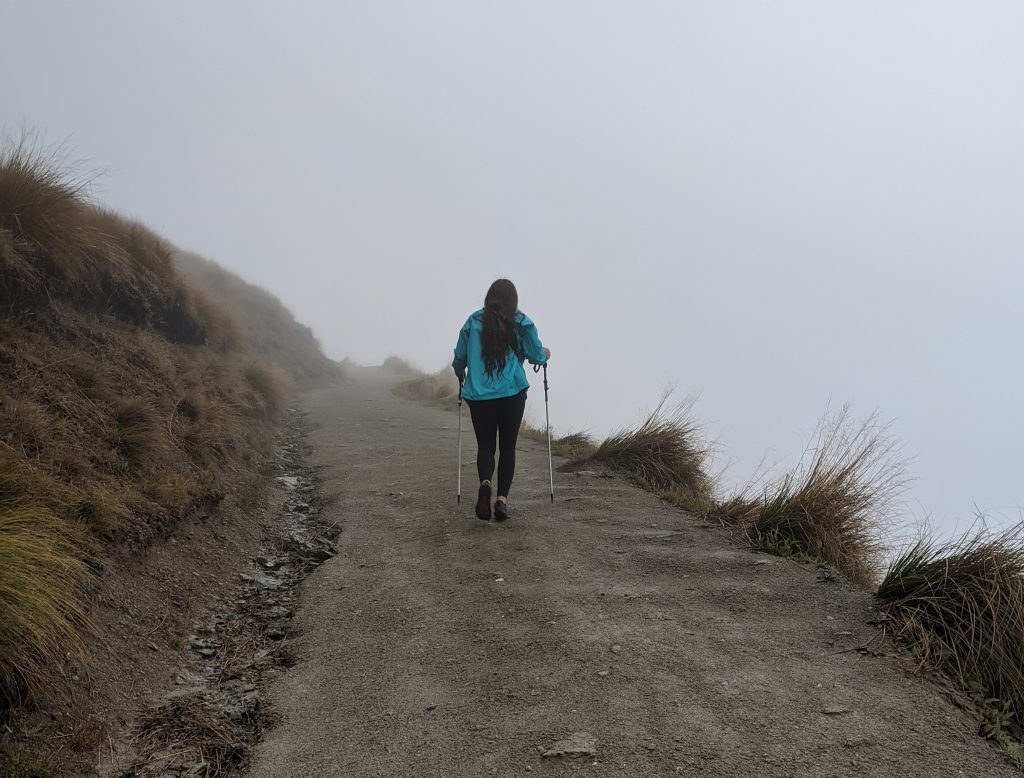
We reached the lookout after 2.5 hours of climbing and the entire lake, trail, and most of the iconic ridges were completely hidden in clouds. We hiked down the ridge a little ways to make sure we’d notice if it cleared enough to grab some photos. We sat out there for a miserable 30 minutes, with arctic wind gusts, hail, rain, and a constant cold wind as a companion. I didn’t want to give up on the clouds clearing from the view though! There was only 1 other couple at the time and they left after about 15 minutes. Just as Braden was giving up himself (and threatening to leave me up there) the wind picked up indicating the clouds would likely shift more.
The view at the “lookout” when we got thereWe had 1 or 2 false alarms when we thought the clouds might fully departFinally after 30 minutes, the clouds started lifting for real
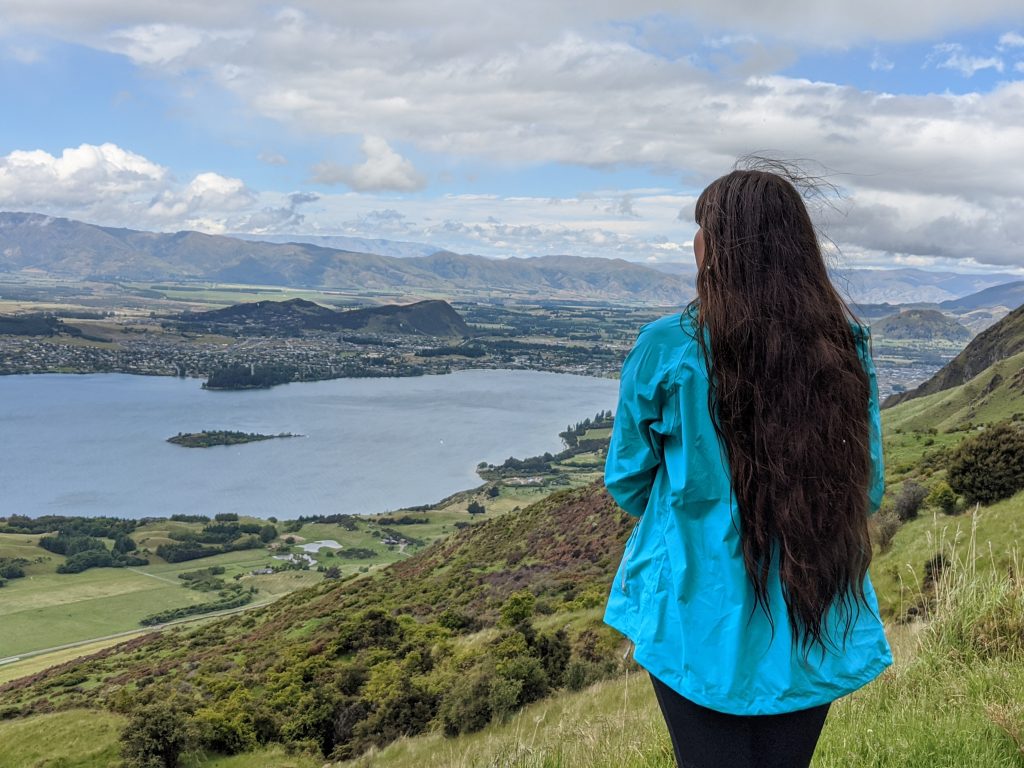
Shift they did- WOW we got the view AND the peak to ourselves for 10+ minutes before another couple who started after us made it to the lookout with much better timing. Considering it was still very windy and cold, we hiked back down the trail to a more sheltered area for even more photos in the glorious sun. Then it was on down the trail to the end. With the constant downhill- my knees thanked me for packing my hiking poles.
Photos from the lookout
While we were pretty disappointed to miss out on all the hikes we’d planned in Mount Cook National Park, being able to hike to Roys Peak and get the iconic view plus a wild hiking experience semi made up for it. They actually closed the track along with many others the next day due to the rain making the trails so muddy. (Wanaka itself flooded as well) Just another example of why you should be flexible with your travel plans and look on the bright side. While we missed Mount Cook, we were still able to do this truly incredible hike.
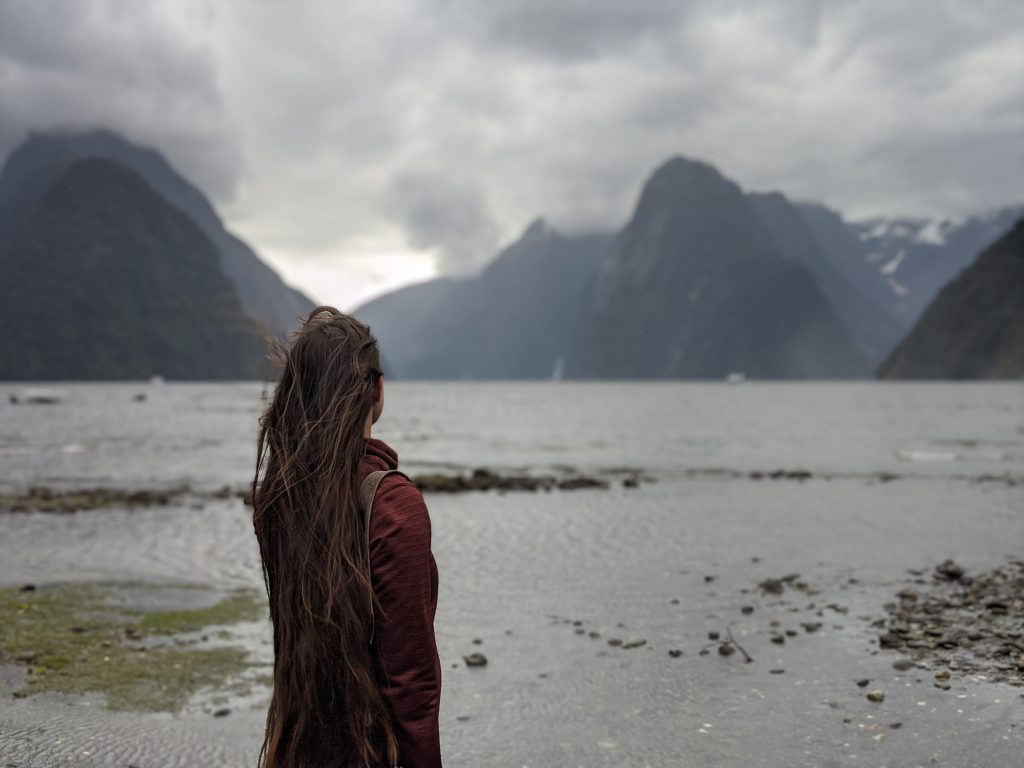
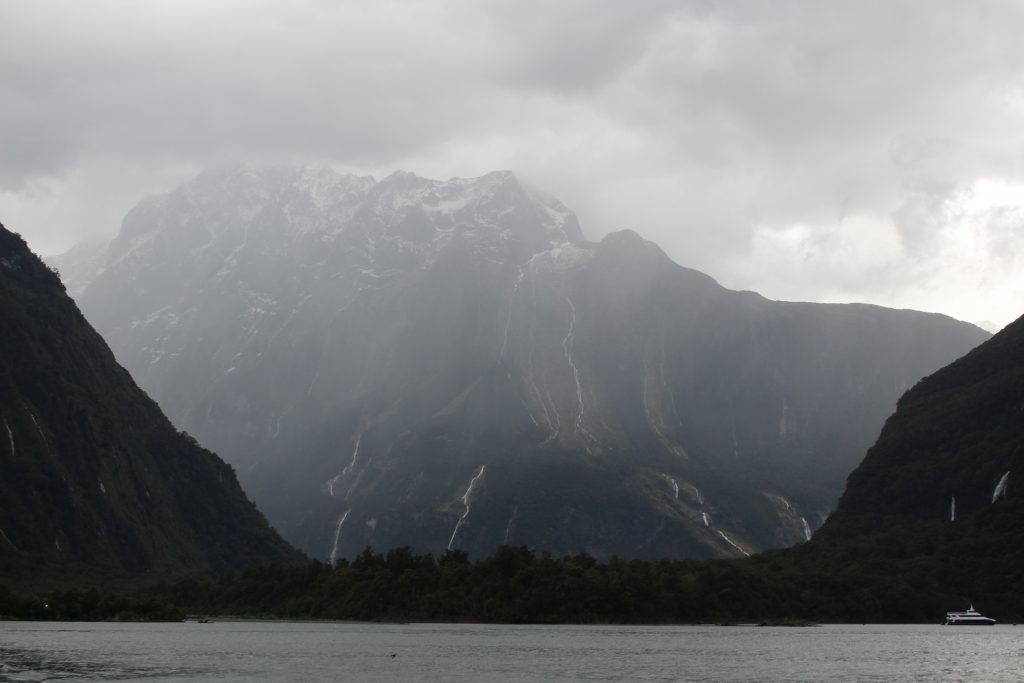
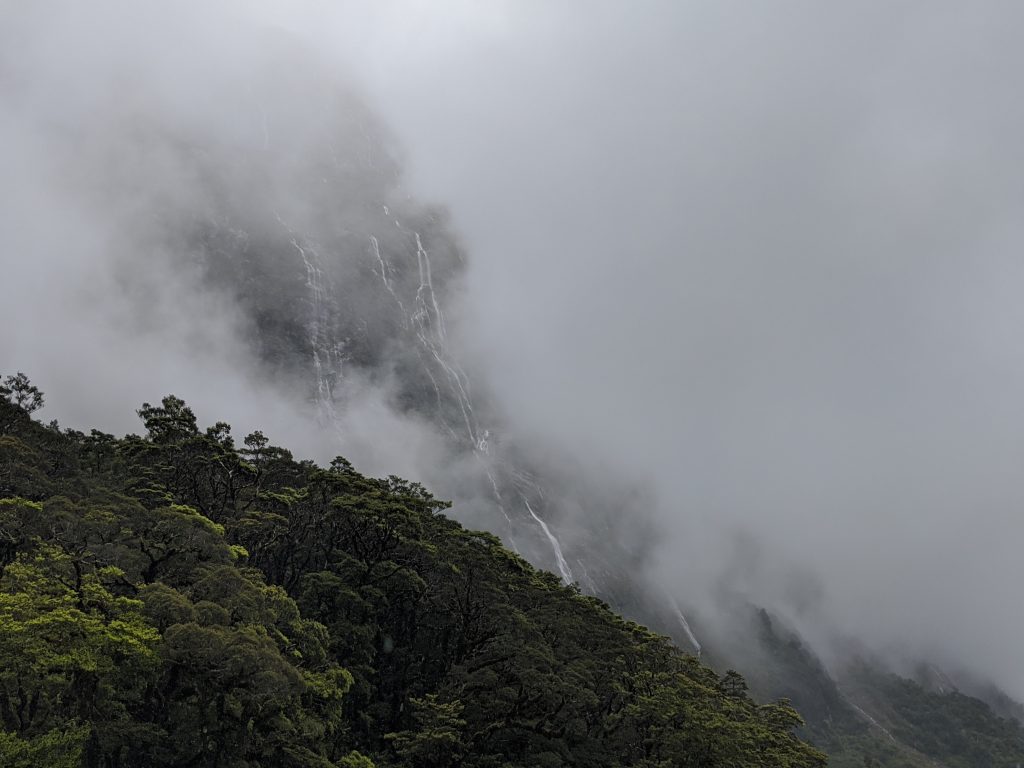
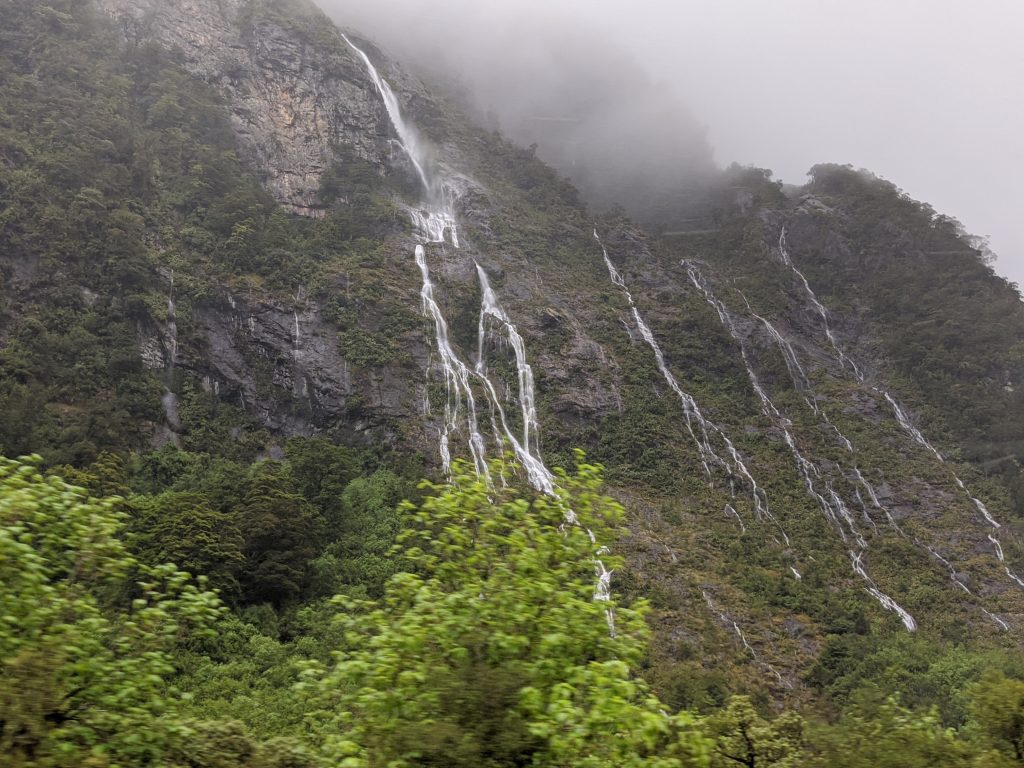
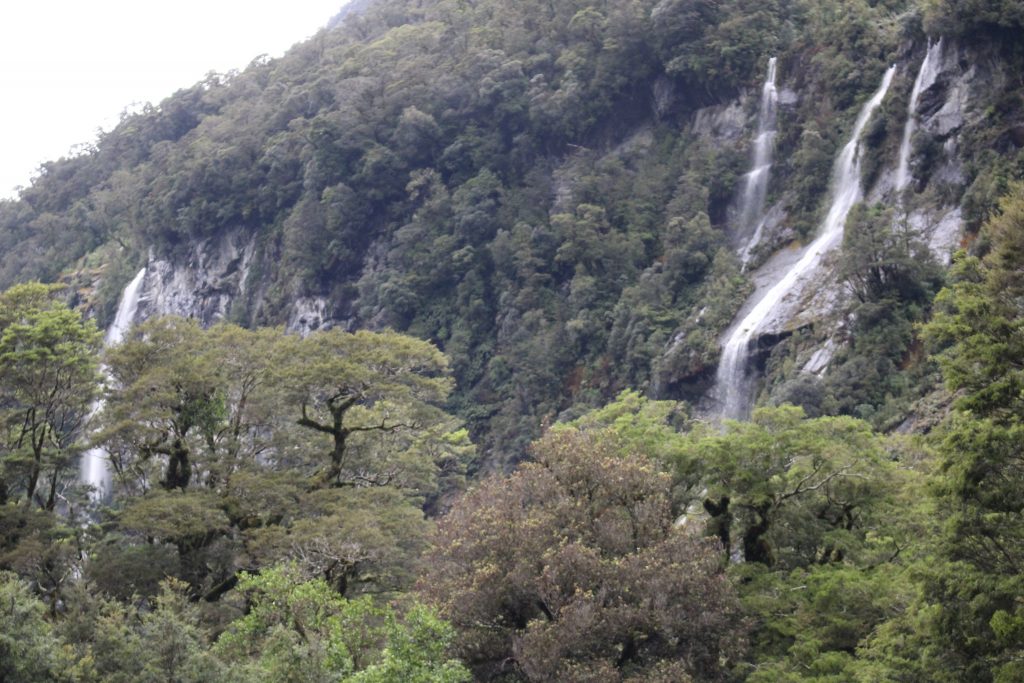
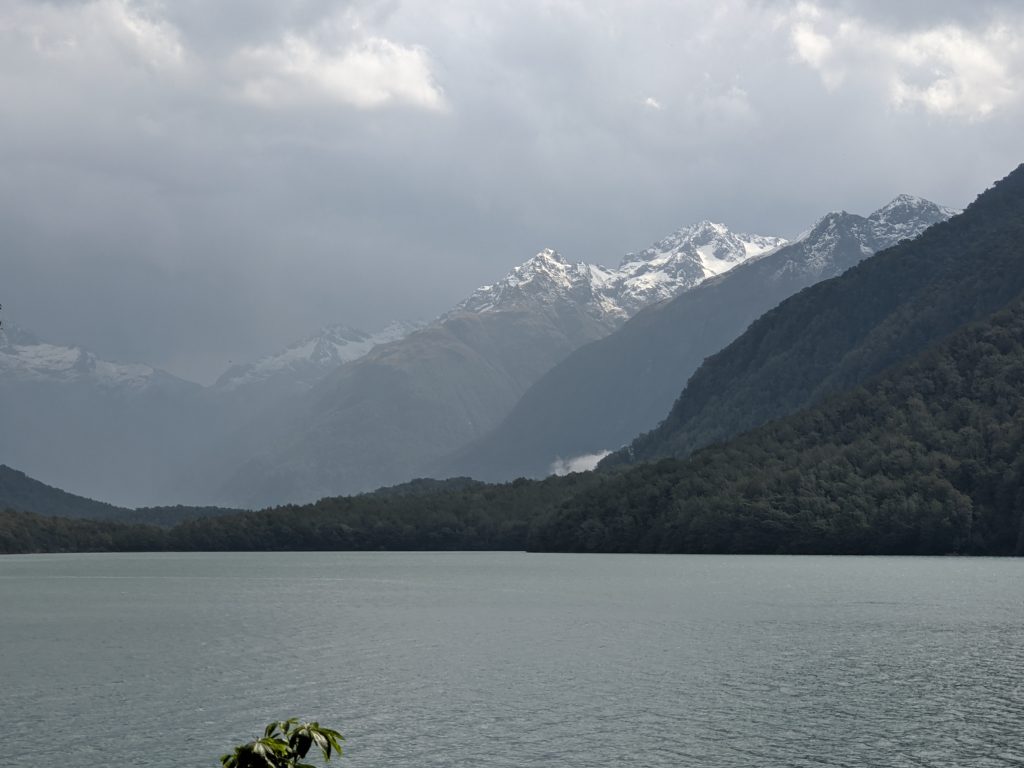
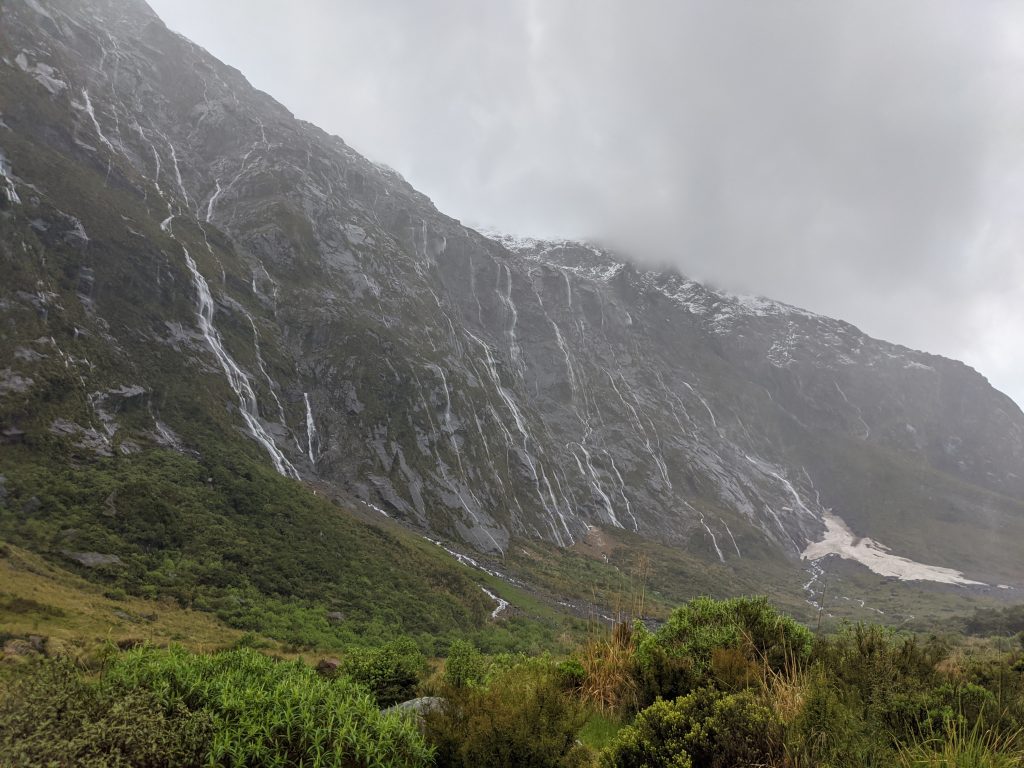
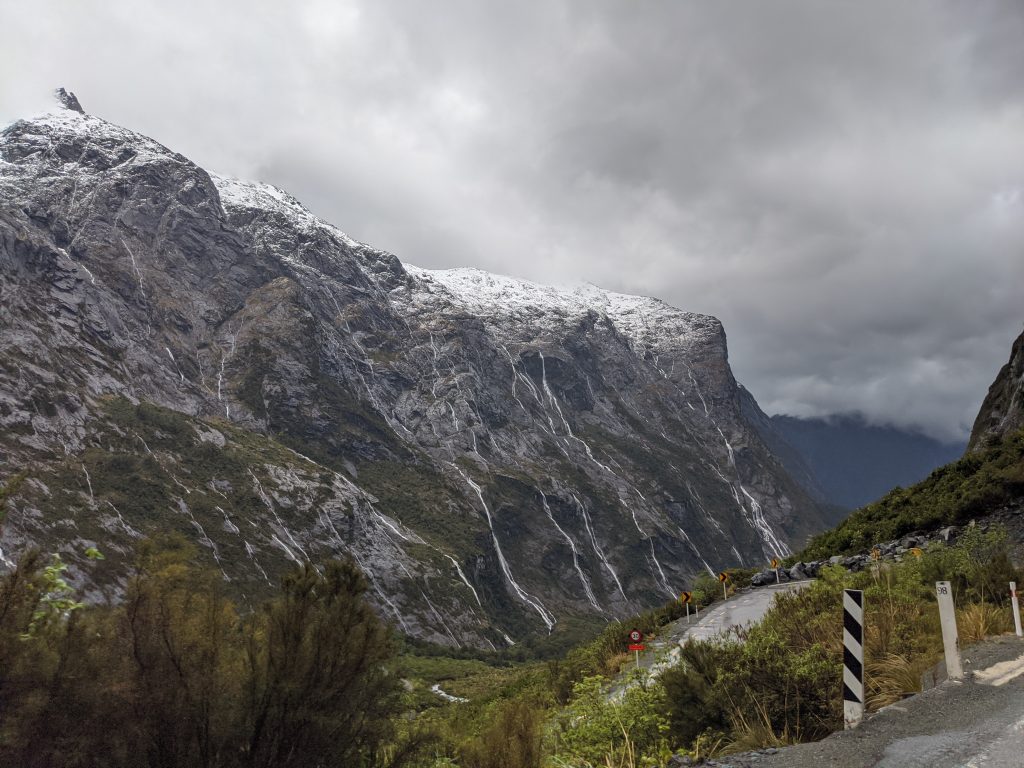
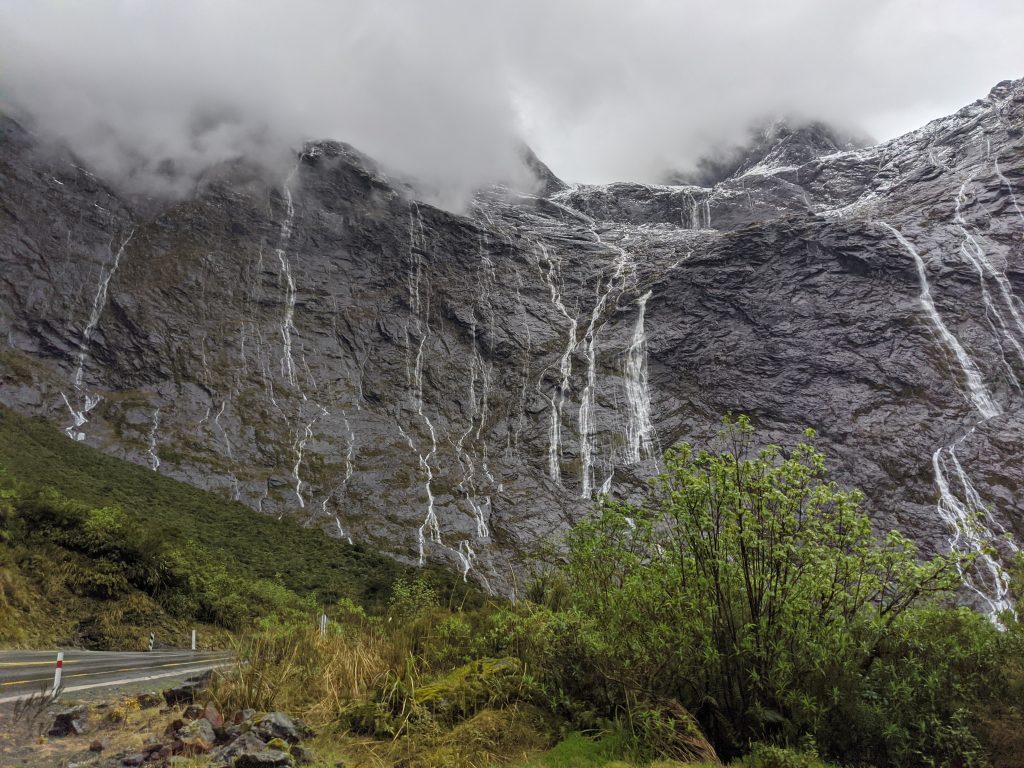
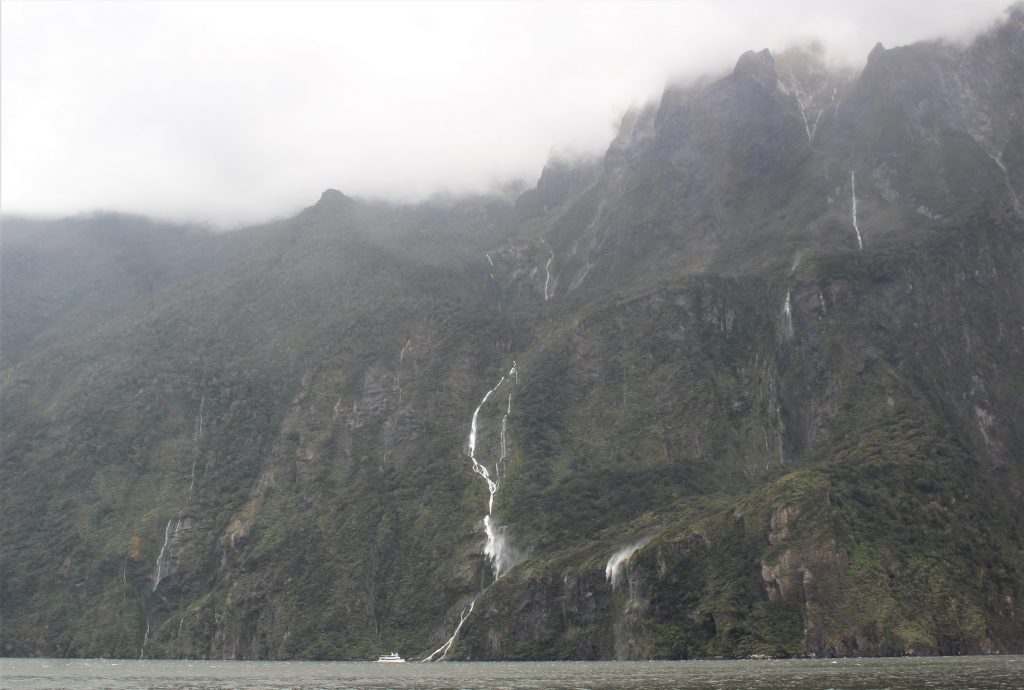
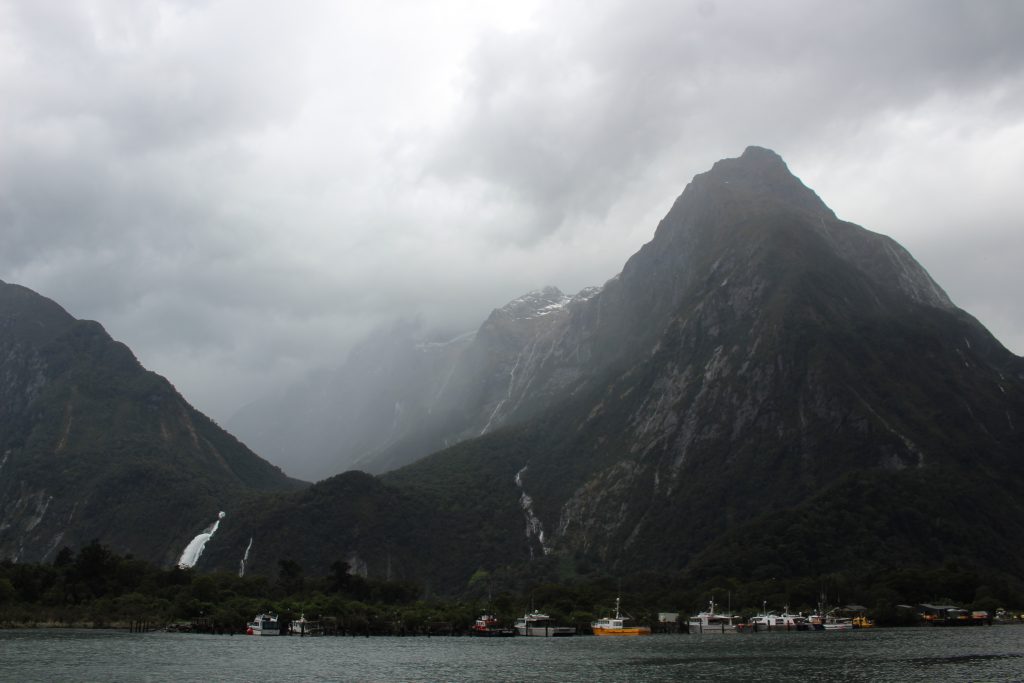
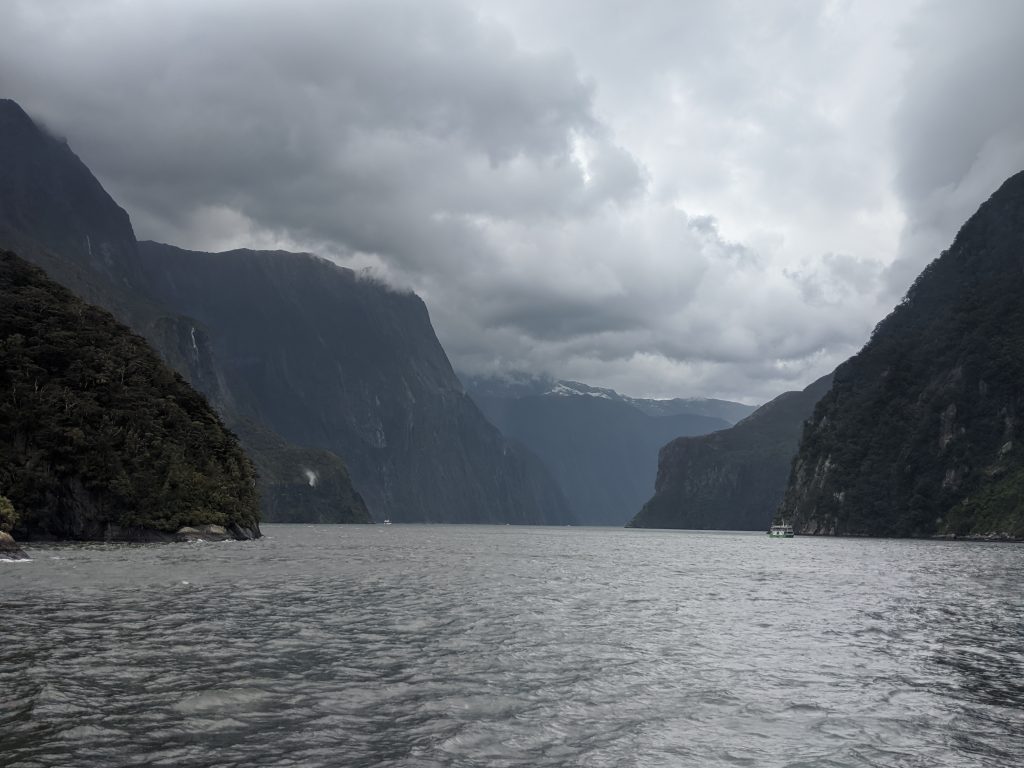
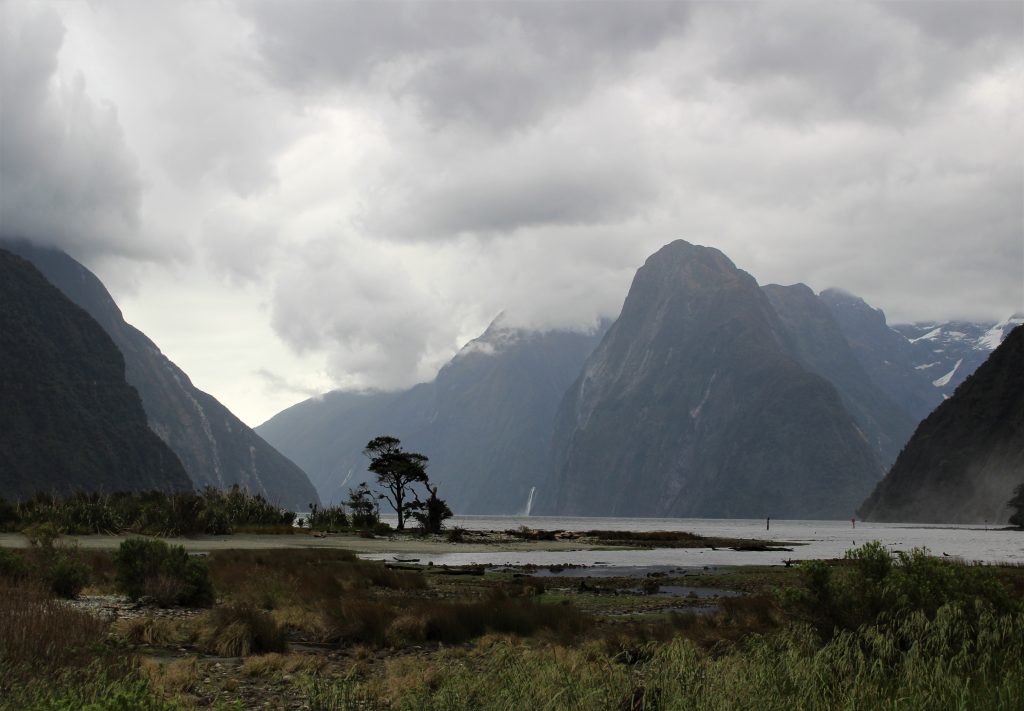
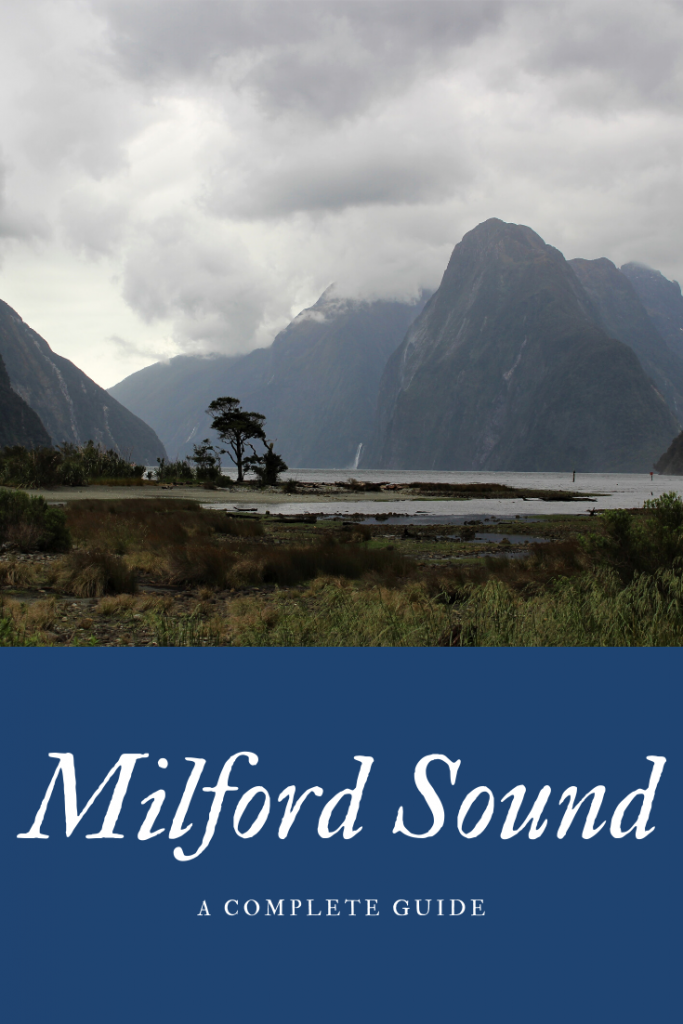
If you’re visiting the South Island of New Zealand, the number 1 thing that should be the top of your list to do is a trip to Milford Sound. I can honestly say that rain or shine, this is one of the places that really lives up to the hype! There’s just nothing as spectacular as the drive down to the sound through deep glacial valleys, passing hundreds of waterfalls (especially if it’s raining), plunging into a dark tunnel that cuts right through the mountain side, and ending your drive on rocky beach with one of the top 5 views I’ve ever seen. Make sure to plan an entire day for this adventure as there are many incredible stops along the drive, and you won’t want to miss a cruise out to the sea.
Tips for visiting Milford Sound:
Don’t fret about the weather, in fact if it’s raining and cloudy you might get less mountain peaks, but the waterfalls more than make up for it.
Rent a car, drive yourself, book your own boat. There’s so many great stops along the way that tour buses can’t stop at, and the boats you get put on are packed full of people. Do yourself a favor and DIY this day and book your cruise with Mitre Peak cruises if you want a more intimate cruise experience.
If you have the funds book an overnight cruise on the sound, and/or a helicopter flight
Pack some lunch/ snacks for the drive. The only eating option once you’re down there is a mediocre over priced café.
Park in the FREE lot (the first parking lot as you get to the sound) and take the free shuttle to the cruise terminal/ visitor center to save a lot of money on parking.
Plan on wearing long pants and long sleeves or bring heavy duty bug spray. The black sand flies at Milford Sound are no joke- they will leave itchy welts on your skin for weeks and they love the rocky shores of Milford.
The closest place to stay (unless you have a campervan) is Te Anau.
The afternoon/ sunset is the best time to photograph the sound and surrounding peaks. Afternoon/ evening cruises will also be cheaper and less crowded than afternoon cruises.
It’s at least a 1.5-2 hour drive without stopping from Te Anau to the end. Plan your cruise time accordingly.
100% pack a rain jacket.
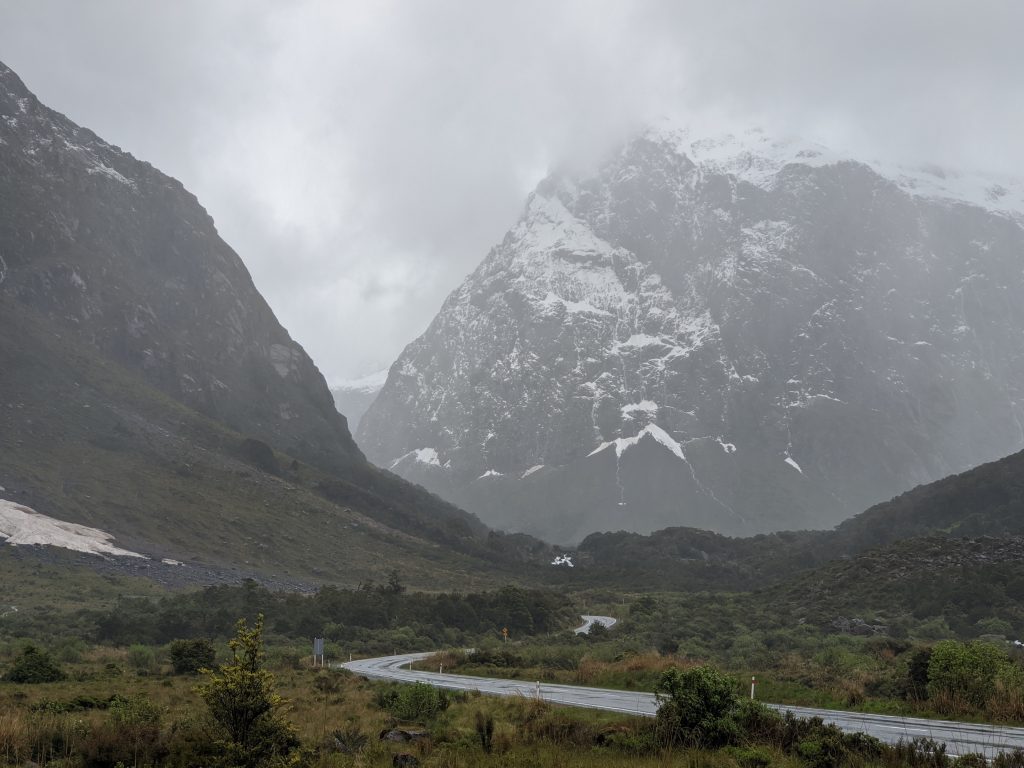
A view along the rainy drive into Milford Sound
The Mitre Peak Cruise boats- much smaller and more intimate than other liners
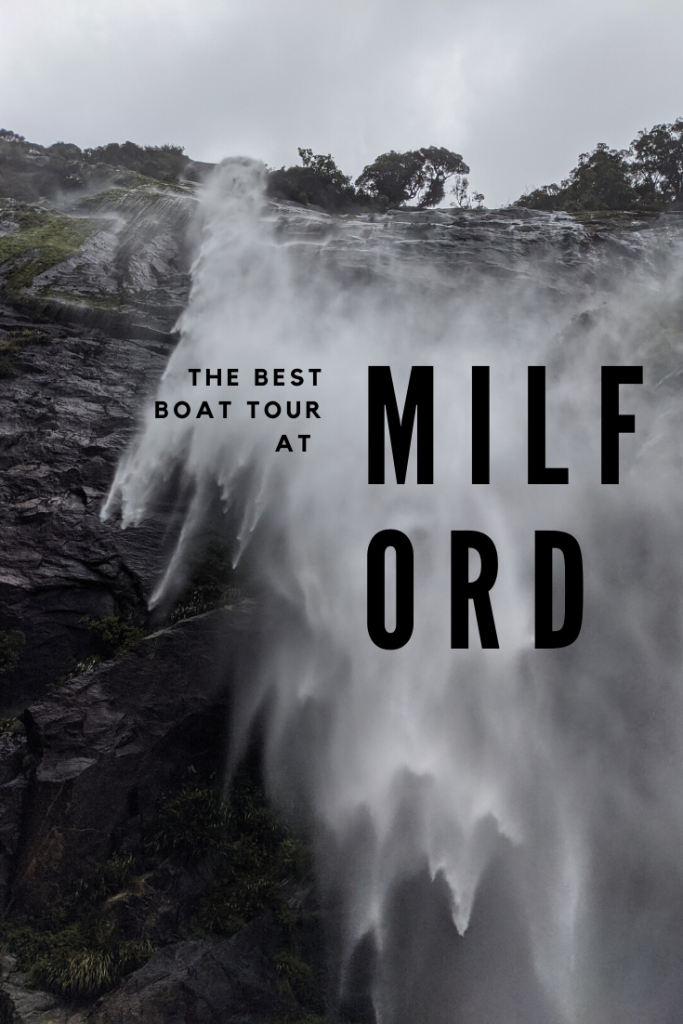
Which boat tour company to choose?
I can’t recommend Mitre Peak cruises enough. The boat might be the smallest of the Milford Sound cruise boats, but it’s actually the only one designed specifically for the conditions in the sound. It’s the fastest and most maneuverable boat, meaning if foul weather cropped up- it’s going to be the best boat to be on for getting back safely. While other boats can fit 400 people on multiple decks, the Mitre Peak boats max out with around 80 and they specifically try to keep booking at around 40 people to make their tours more comfortable.
The first deck with plus interior. The 2nd deck is outside but half covered
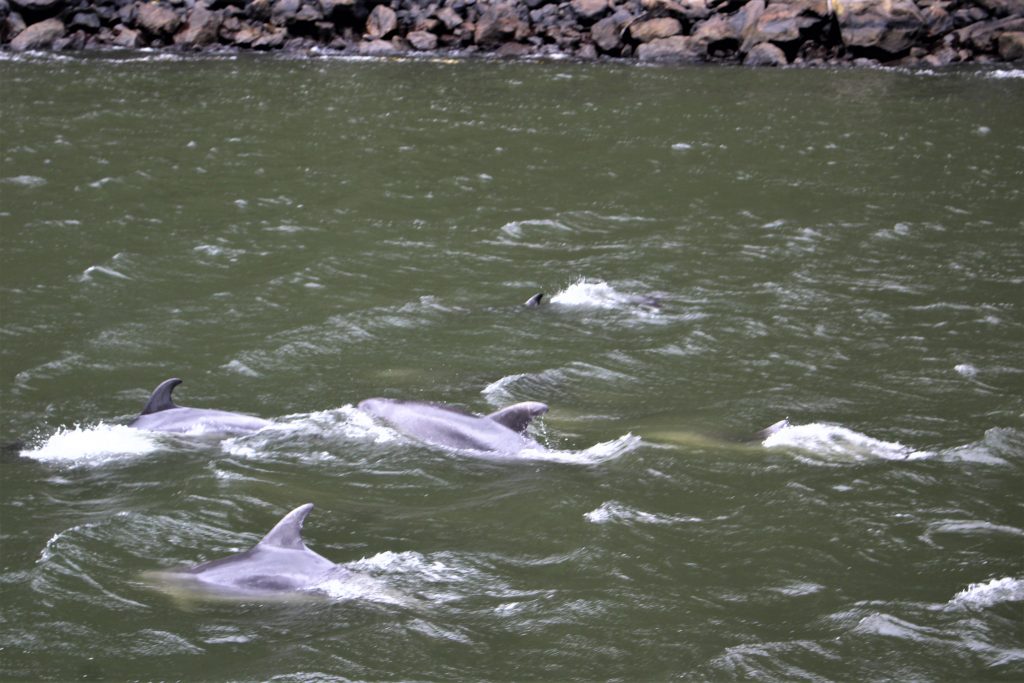
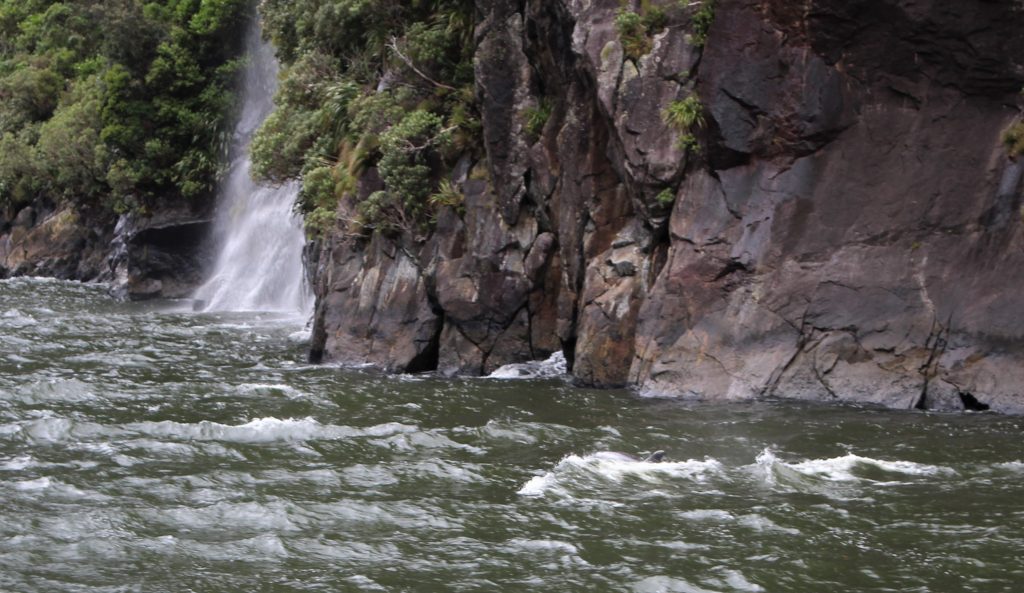
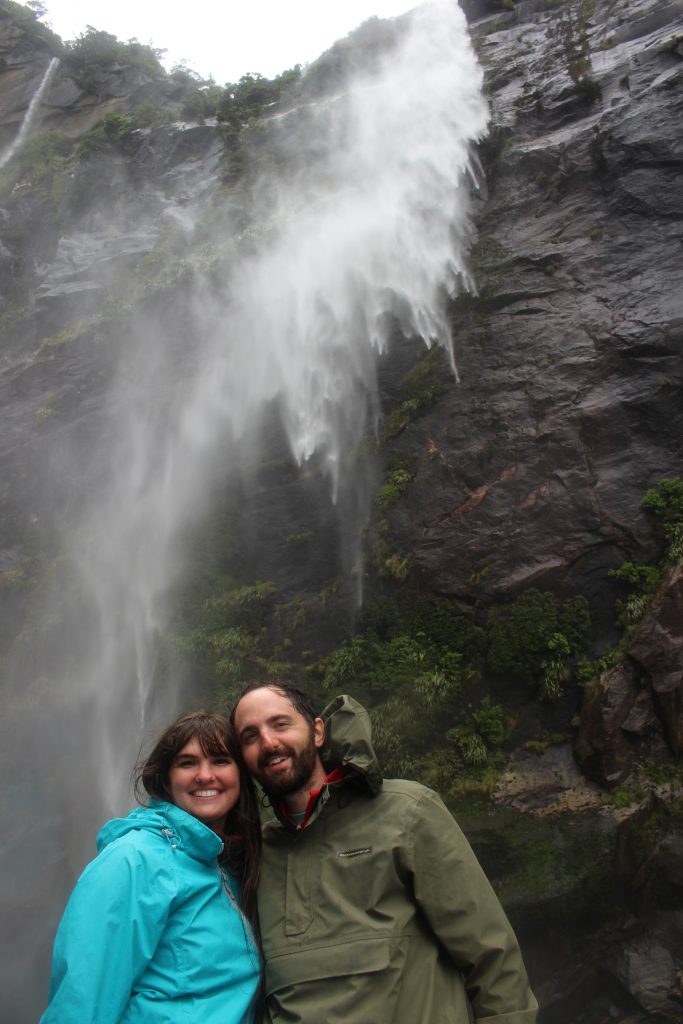
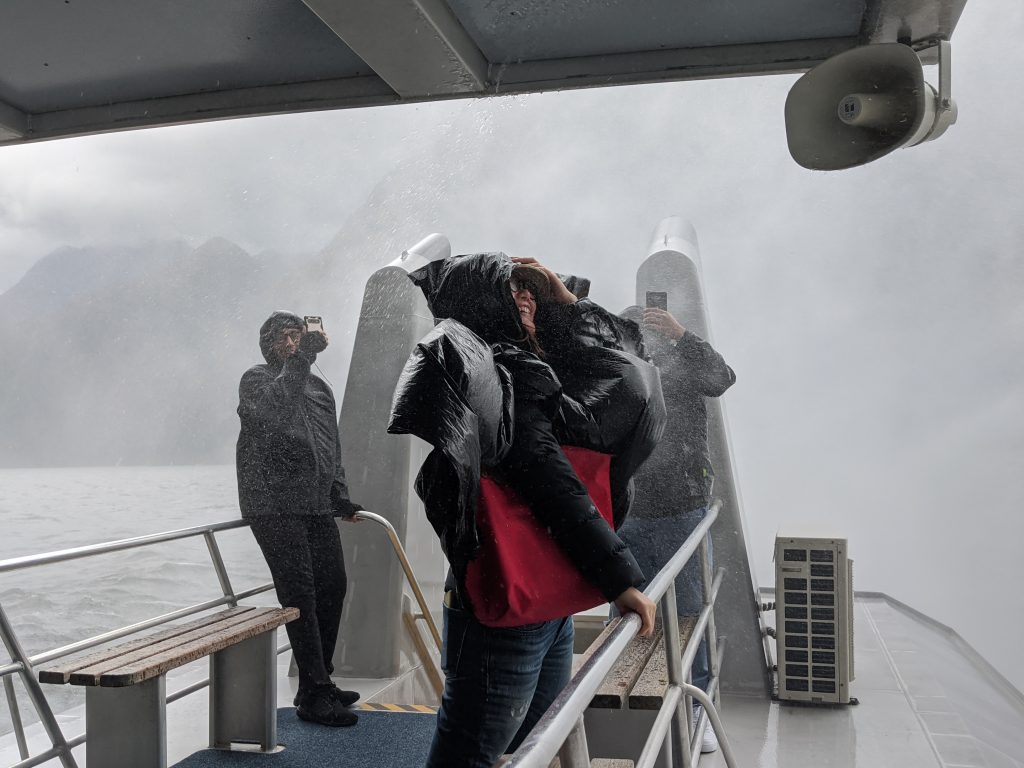
They provide complimentary tea and coffee during the whole cruise, have amazing staff that took group and individual photos for EVERYONE that wanted one in specific spots, and really comfortable lounging seats. No matter where you sit on the boat you’re guaranteed great views, but the 2nd deck was our favorite spot. Like all tours, they take you all the way out to the sea and right up close under 2 waterfalls. (Stirling falls will SOAK YOU TO THE BONE. Only stay out on the bow or back if you desire to be completely wet) We also saw seals AND dolphins on our tour with the crew lingering near the dolphins so we could enjoy watching them for longer. Best of all, their pricing is competitively on par with all the other cruises- so there’s literally no reason to not book your cruise with this company.
Some of the wildlife we saw on our cruise.
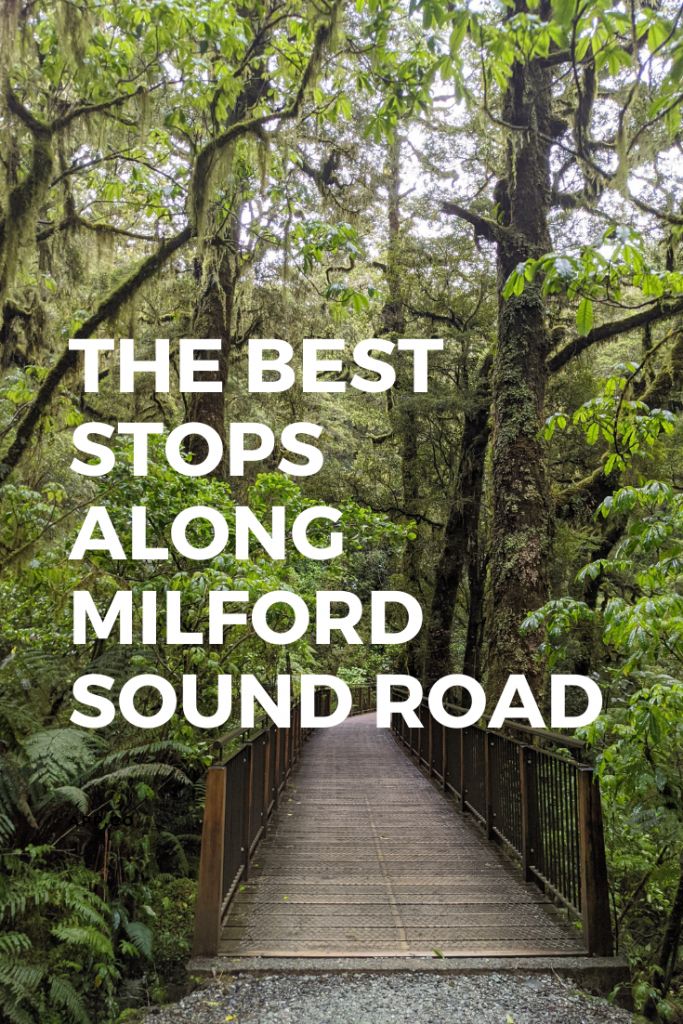
Best stops along the Milford Sound Road
While we weren’t able to do either of the must-do hikes along the road due to heavy clouds and rain, we did pull over at multiple small lakes/ turnouts/ valleys to take photos and the Chasm was a fabulous walk even in the rain. So with that here’s my suggested must do stops, but keep in mind, you’ll want to stop in just about every pull out to enjoy this incredible drive.
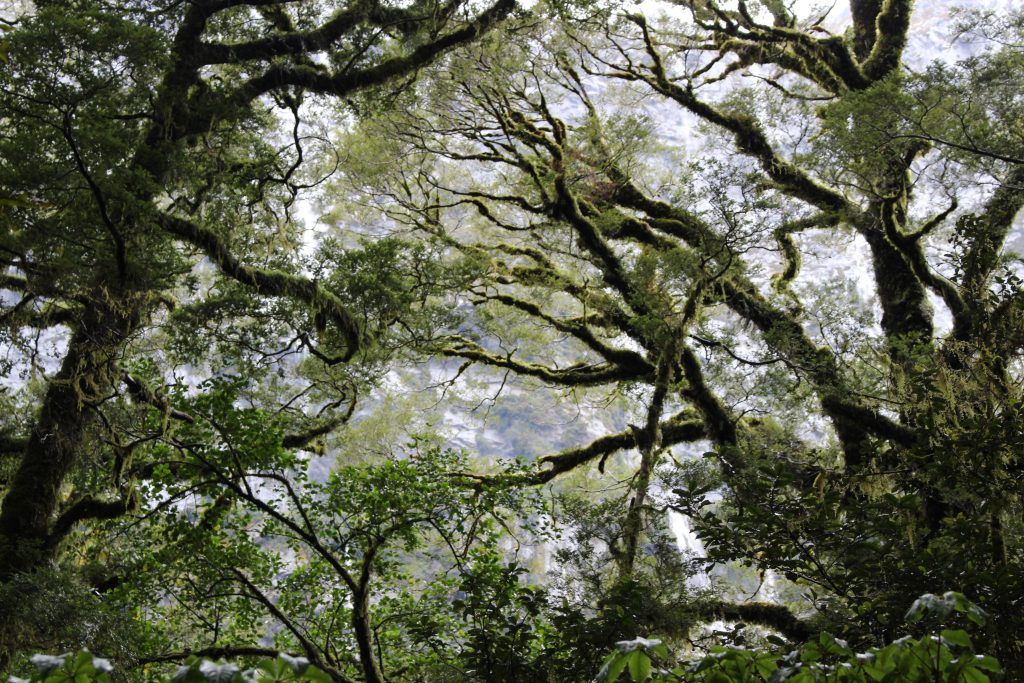
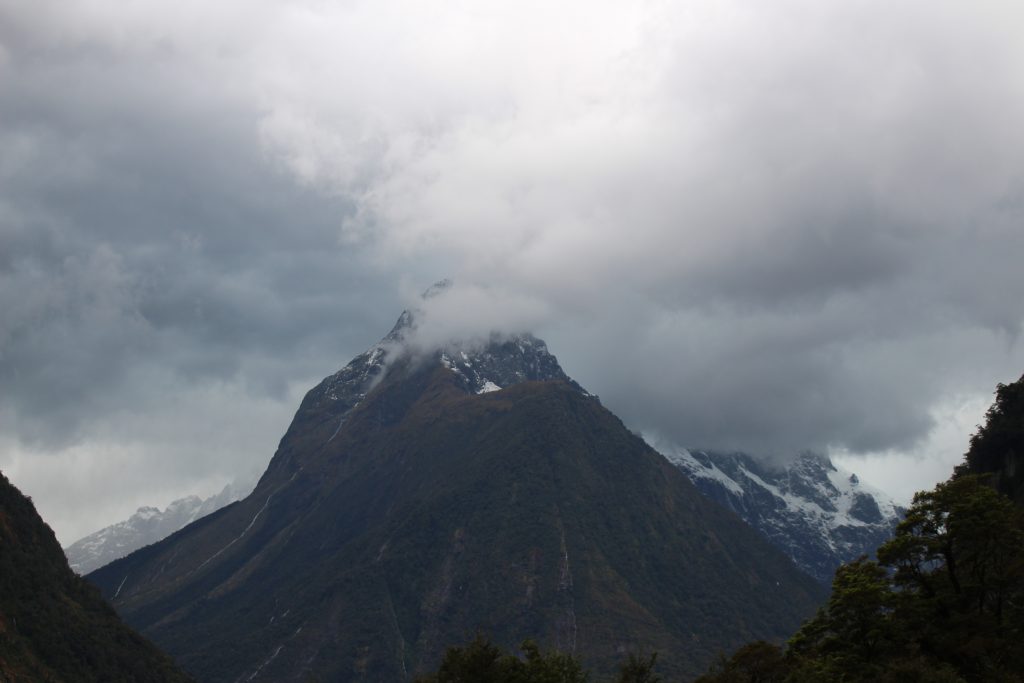
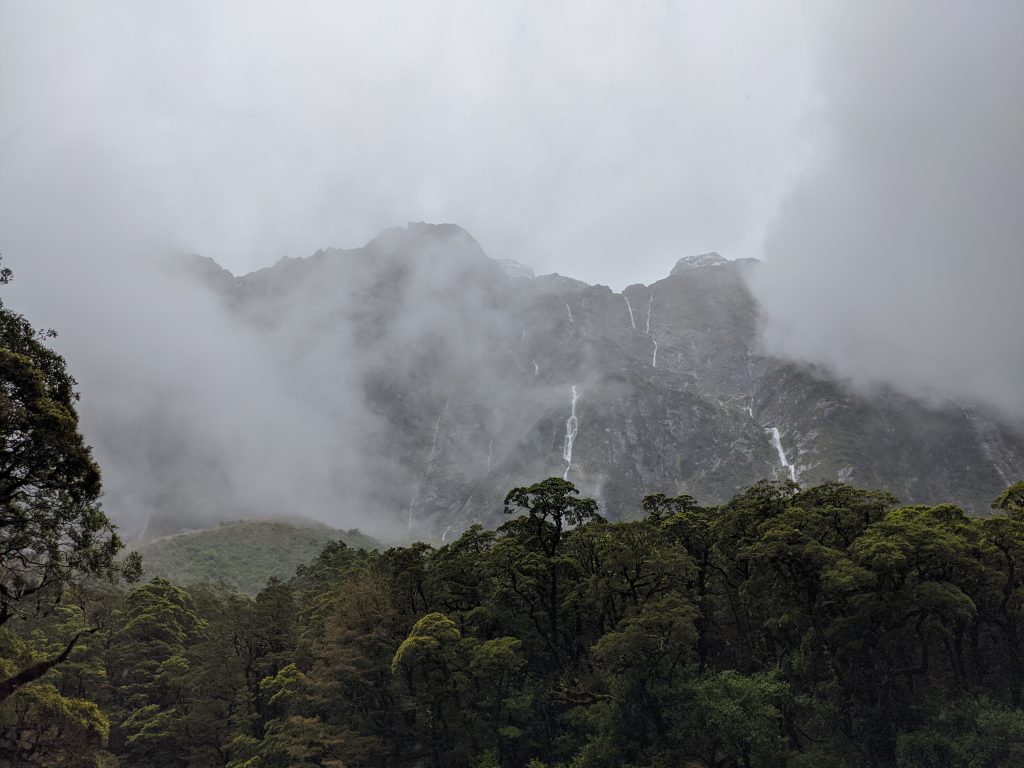
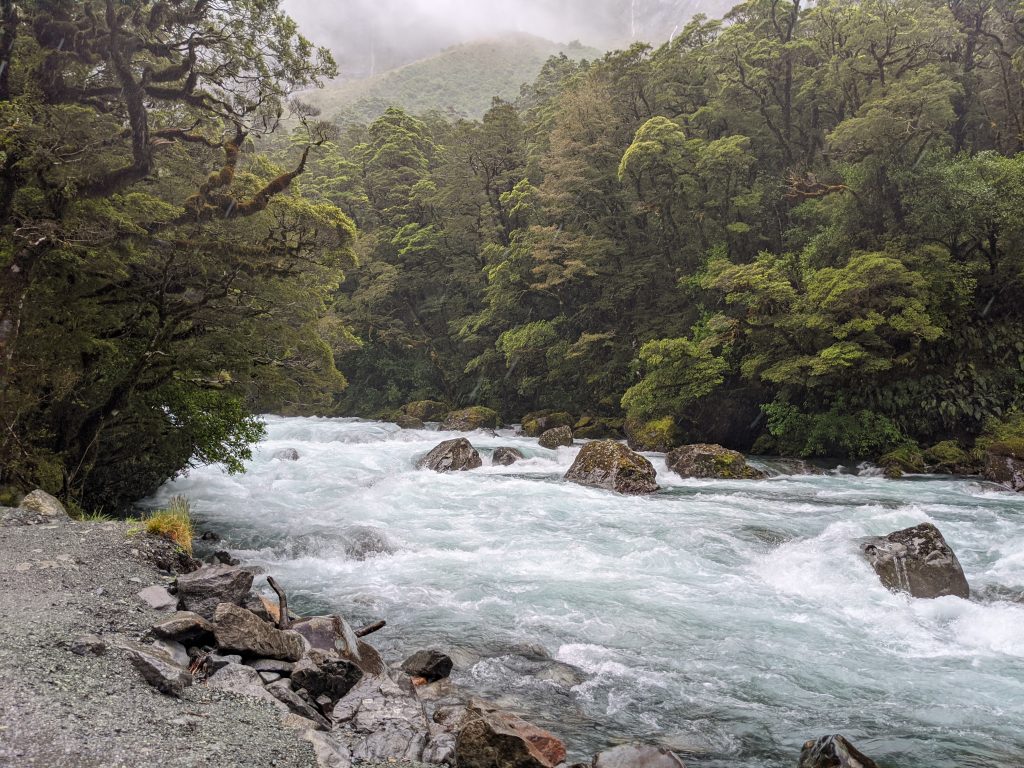
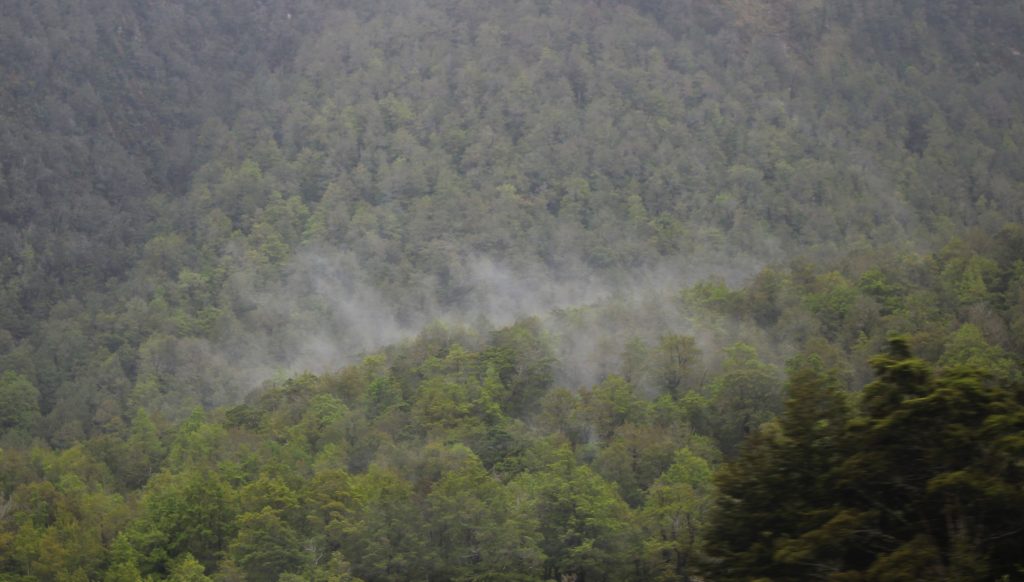
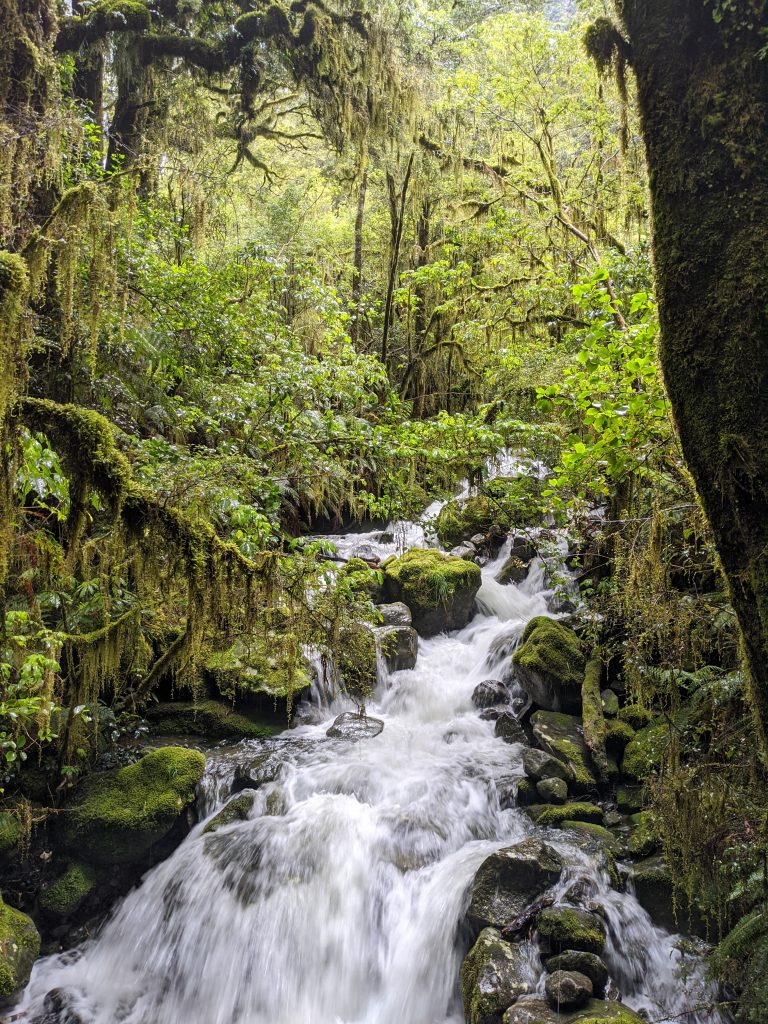
The Fjordlands area is considered rain forest making for a unique blend of glacial mountain valleys and dense forestation.
Eglinton Valley
53km along the Milford Sound Road from Te Anau
An easy and quick stop with lots of parking just along the roadside. The entire route is photogenic, but there’s something about this valley with towering snow capped mountains surrounding and a tranquil river ever changing as it makes its way through.
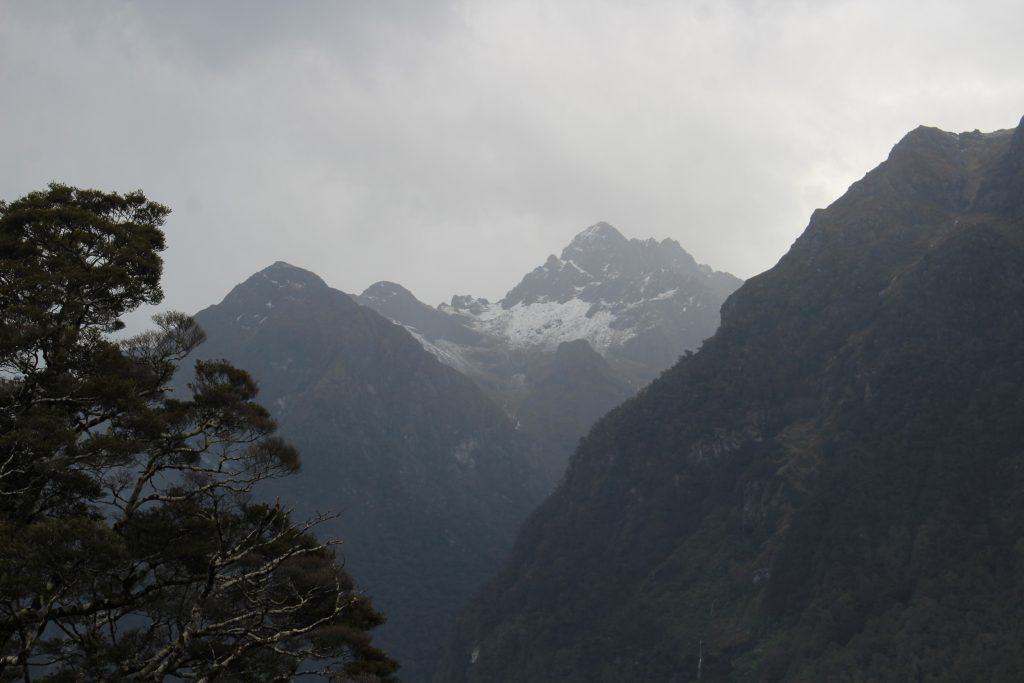
The Divide – Hike to the Key Summit
This is a great stop to hit the facilities and break up the drive. If you’ve got a clear day, the hike to Key Summit is a must do hike and offers an elevated perspective on the surrounding glacial valleys- and isn’t too challenging of a hike. From the summit, you’ll have great views of the Routeburn track (which bonus, you’ll walk a short portion of) and Hollyford Valley, even glimpsing Lake Marian across the way in a high hanging valley. This is a popular, graded hike though, so don’t plan on having it to yourself.
Hike Info
Trailhead: The hike begins at the Divide stop along Milford Sound Road, starting on the Routeburn Track as it heads to the Lake Mackenzie Huts. Distance: 5 miles/ 8 km roundtrip Elevation gain: 1389 feet Time: 3 hours
Not Marian lake, but one of the many “short” lake stops you can make along the drive
Marian Lake Hike
Just past the Divide on Hollyford road is the Lake Marian carpark. Rain or shine this hike ends in a beautifully reflective lake and odds are you’ll have it to yourself. You’ll also get to experience crossing a very photogenic swing bridge and enjoy views across to Key Summit and the surrounding valleys. Be warned, while the first part of this hike is rather easy, the trail steeply gains up toward the end to reach the hanging valley and will require good balance and potentially use of your hands.
Distance: 4.4 miles Elevation gain: 1434 feet Time: 3 hours
One of my favorite stops- the Chasm is SO incredibly scenic
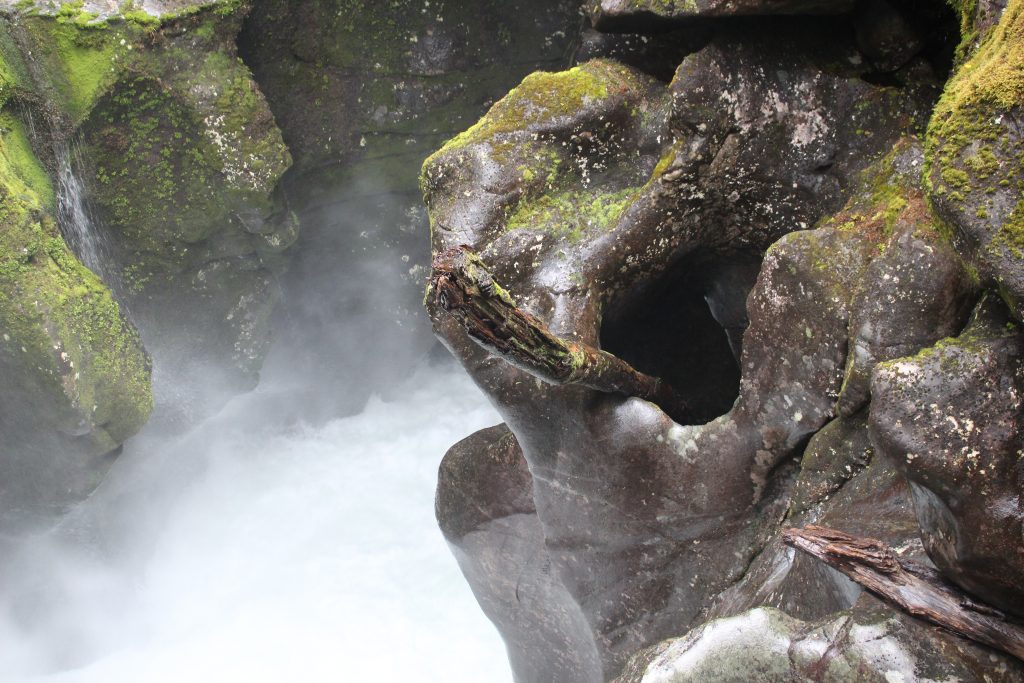
The Chasm
If you aren’t much of a hiker but still up for a nature walk, the chasm is a fantastic 15-20 minute loop walk through vivid green rain forest culminating at a rushing river that drops steeply down into “the chasm.” Rain or shine, this walk doesn’t depend on expansive views and offers a unique look at the tree canopy and rivers that make up the rainforest of Fjordland National Park.
*There are no facilities at this stop.
Some of the amazing views along the road. The tunnel is where it is really at- there’s currently no stopping allowed due to rockfall danger so have your co-pilot ready on camera standby.
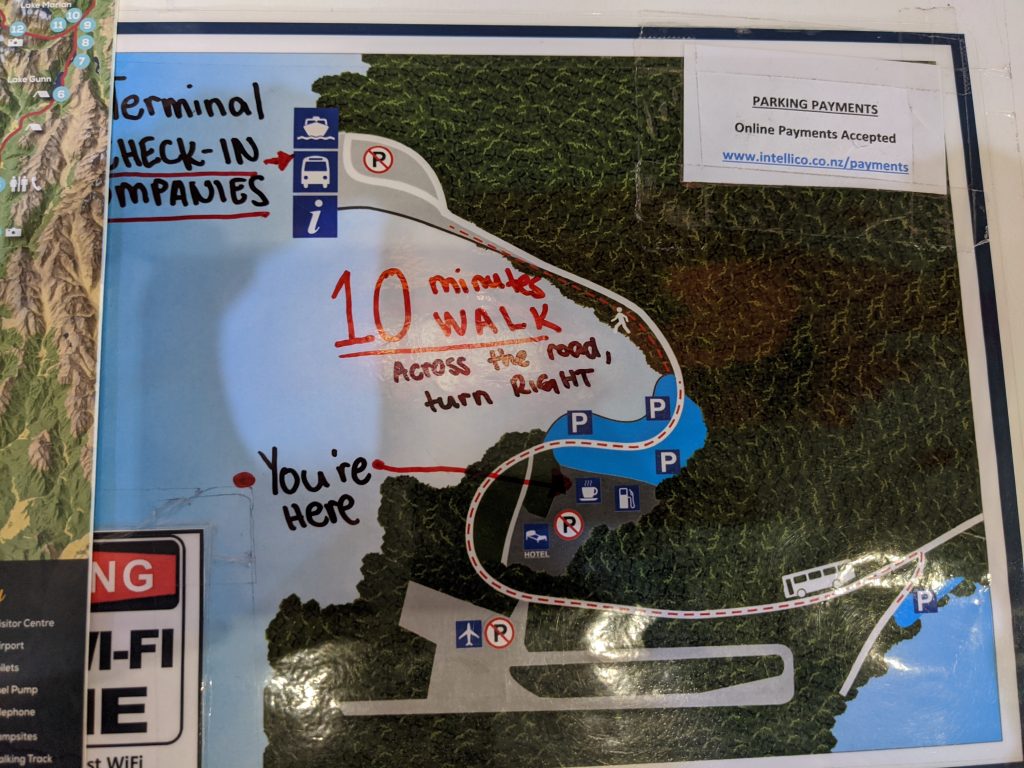
Where to park at the end of the road
Once you pass the Milfrod Sound Lodge and Piopio café, the next left turn is into the free lot. (It’s right along side the river and hard to miss) Then you’ll pass the turn in for the Airport and see another parking lot across from the visitor center/ another small café. The parking lot there has packing machines that cost us $27 (41 NZD) for 4 hours- and there is a minimum of 3 hours that you have to pay for (if you are doing a cruise). The free parking is only a 10 minute walk and has a free shuttle as well. (Save your money)
A map of the facilities and parking at the end of Milford Sound road
You can’t drive down to the cruise terminal but it’s a pretty 10 minute walk or so (part of it covered if it is raining) with several little photogenic beaches along the way. The shuttle also goes to the terminal so no matter which parking lot you park in, you can catch the shuttle if you need to down to the terminal. Once in the terminal, find the specific cruise desk you want to do and either exchange your online voucher for tickets, or purchase once there. From there they will load you onto the boats and sail away you go.
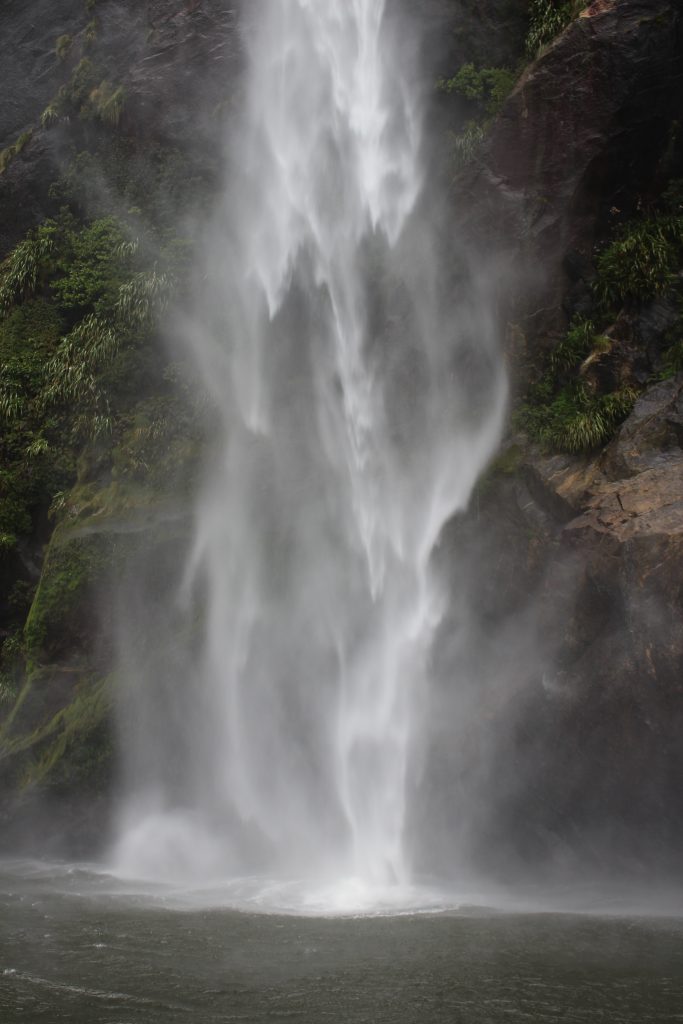
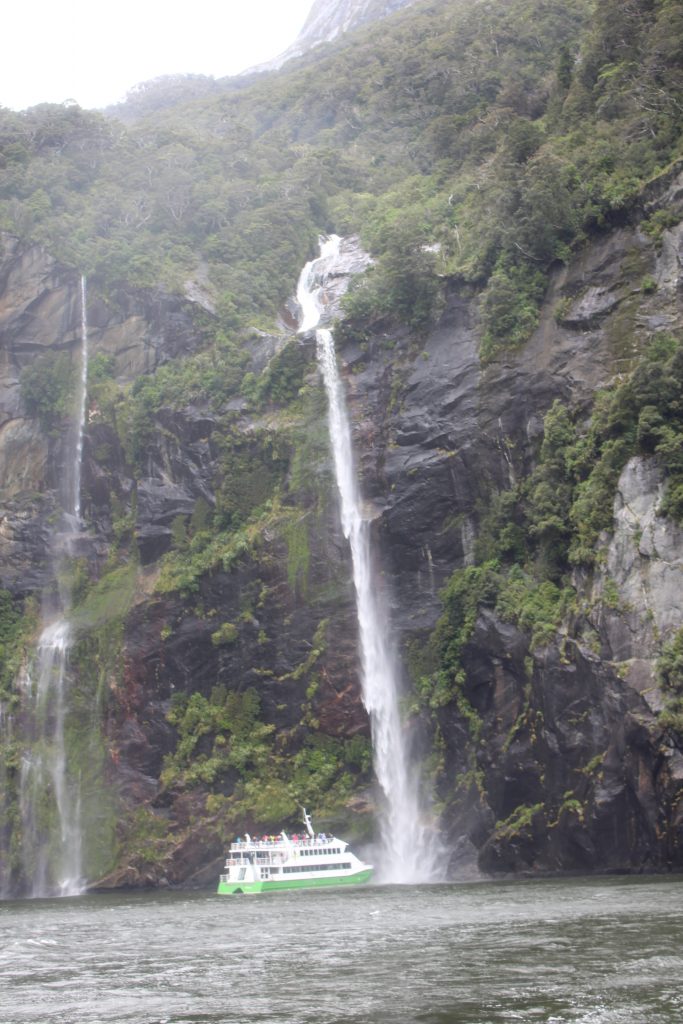
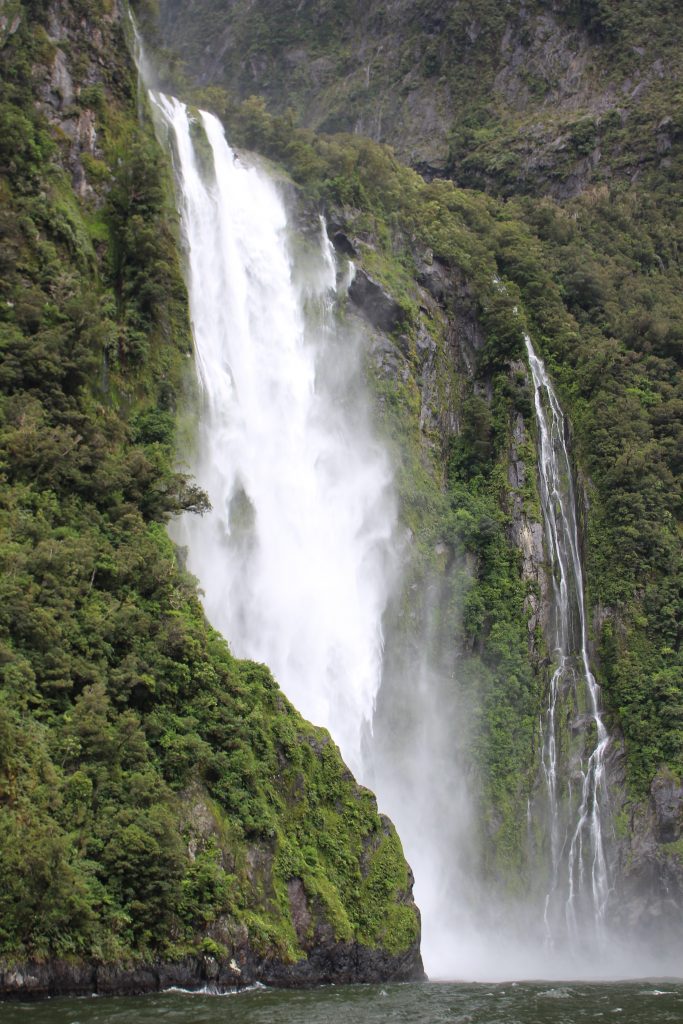
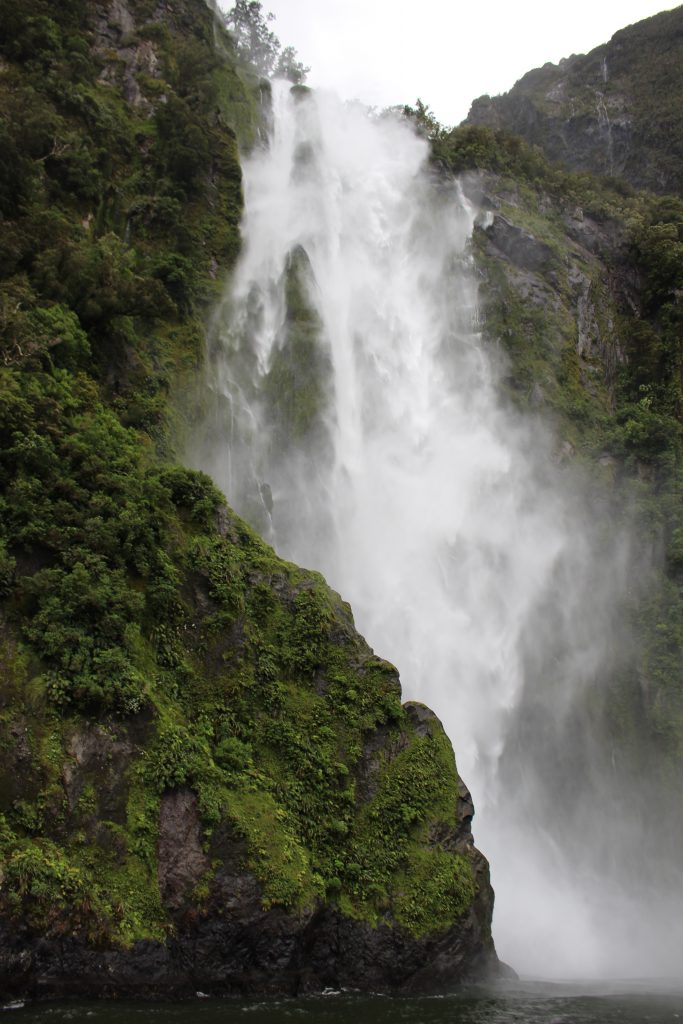
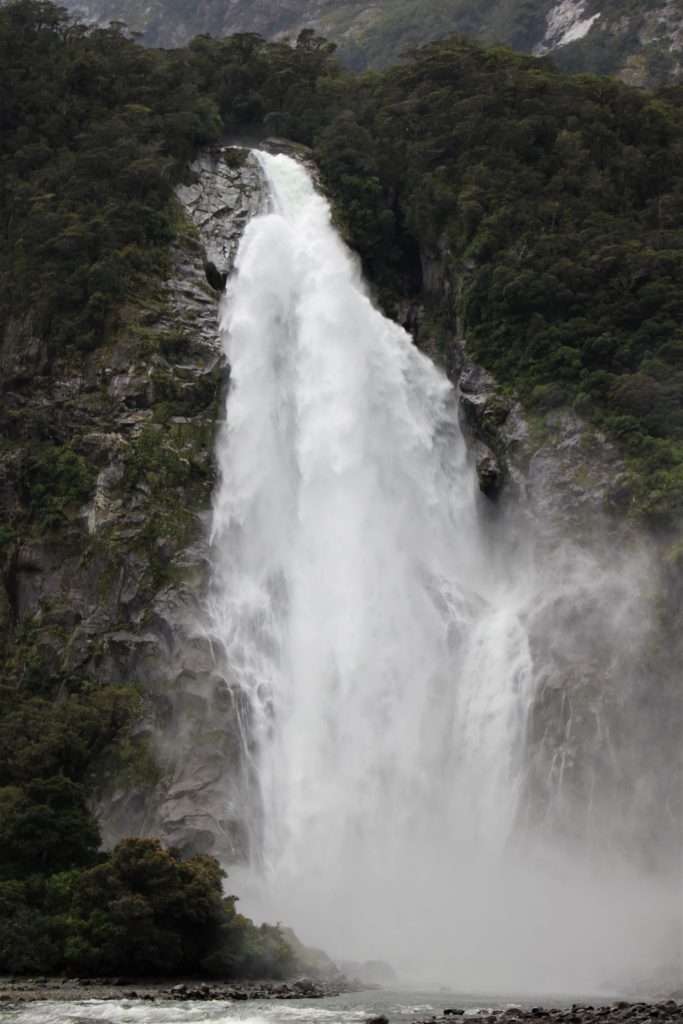
Waterfalls along the Sound you’ll see on the cruise Don’t stand out in the open under Stirling Falls unless you want to get thoroughly soakedAnother tourist boat getting thoroughly soaked under Stirling FallsOnly Milford Sound can make a massive boat look so smallViews at the beginning of our cruise- where the sound meets the freshwater riverA view from the sea looking back into the sound.
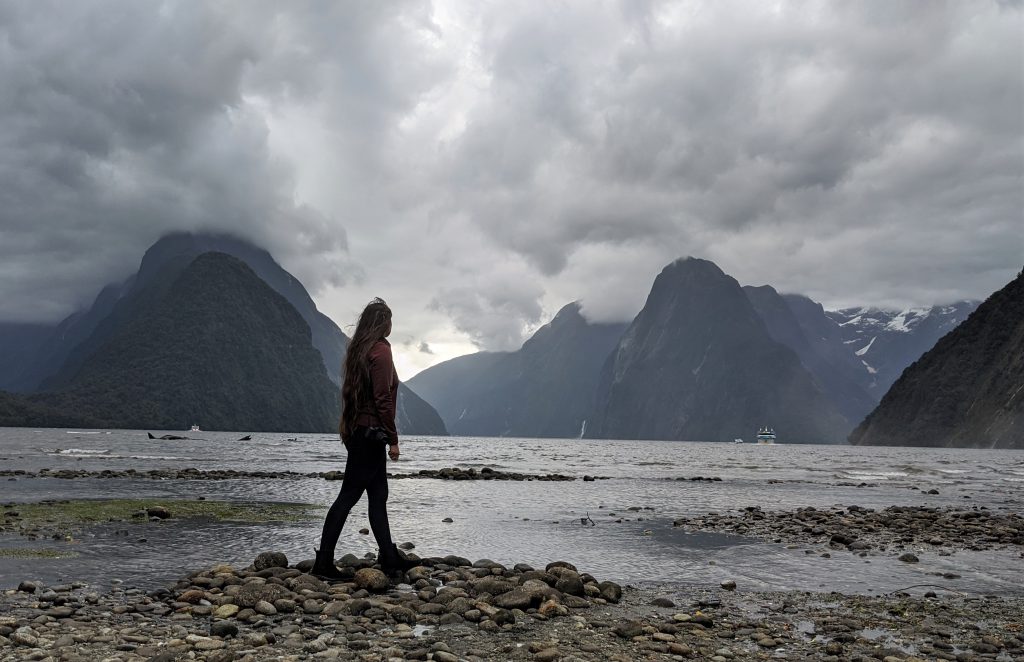
Bonus: While the scenic boat cruise is a must do, you should also consider the short and easy walk from the info center down to Sandfly point. (10-15 min each way) It has some of the best unobstructed views of the sound while keeping your feet firmly on solid ground. Just be sure to bring your bug spray if you’re in shorts or short sleeves.
The awesome view of at Sandfly Point. Stirling Falls in viewSandfly point from the trail.