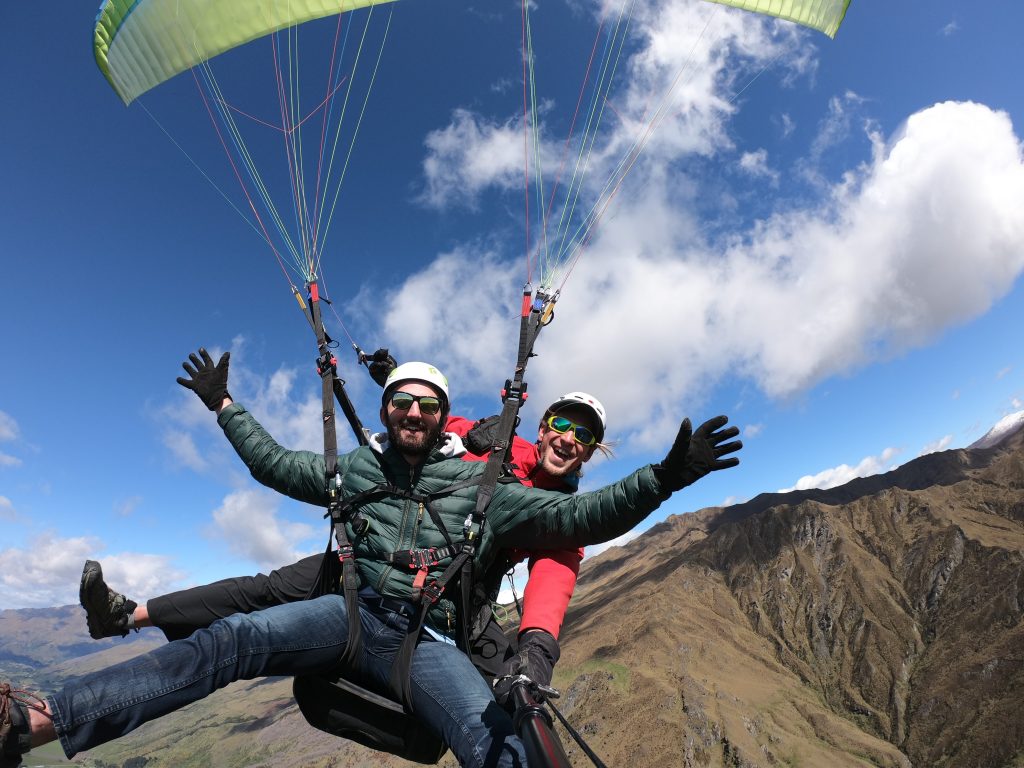
Paragliding in Queenstown

Paragliding.

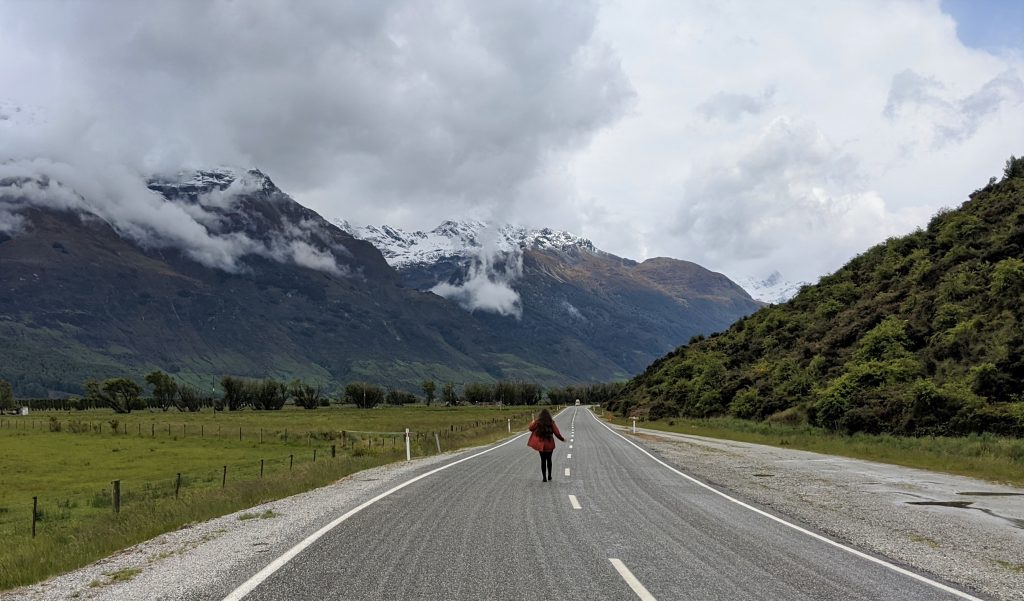
An activity that I’ve wanted to do for years but wanted to experience for the first time somewhere truly epic. When we booked our trip to New Zealand, I knew this would be the place. The unique lakes and incredible mountains would make the perfect backdrop for my first open air flight. Best of all Queenstown is a mecca of paragliding with multiple take off hills and competitive pricing. (It’s cheaper to paraglide in Queenstown than it is in Utah) We almost didn’t get to fly due to prolonged bad weather for all 3 days we were visiting, but luckily the morning of our departure, the clouds lifted and the wind died down making for perfect conditions for flying.

Which paragliding tour to choose?

There are two mountains for take off in Queenstown- Bob’s Hill and Coronet Peak. I knew I didn’t want to do Bob’s hill as it isn’t very high and we’d get a similar view just from taking the lift up and luging. So with Coronet Peak our take off of choice- we had 2 companies to choose between. Coronet Peak Tandems and Skytrek. They were pretty evenly priced and reviews were mainly positive for both. Ultimately we chose Coronet Peak Tandems since they were a hair cheaper and we knew the price of our photos and videos wouldn’t cost too much compared to an unknown price with Skytrek.

Coronet Peak Tandems was AWESOME. They communicated wonderfully in the few days before our flight- texting us about weather conditions and rescheduling to a time that worked best for us. The pick up and drop off in downtown Queenstown was seamless and the flight was exactly as expected.

About flying with Coronet Peak Paragliding

There are 2 take offs on Coronet Peak- the main takeoff and higher take off. Make sure to choose the higher take off for the longest flight possible as well as to experience some acrobatic flight tricks. The higher take off is the highest paragliding take off in Queenstown and sits at 5,400 feet. This company has the most tandem flight records from Coronet Peak (vs. Skytrek) and has an incredible team of pilots with year of flight experience. They offer tandem hanggliding and combo flight deals for both hang gliding and paragliding.

Tour costs:

Higher take-off flight: $151 USD/ $236 NZD per person
All videos/ photos taken during tour: $40USD/ $60 NZD per person->
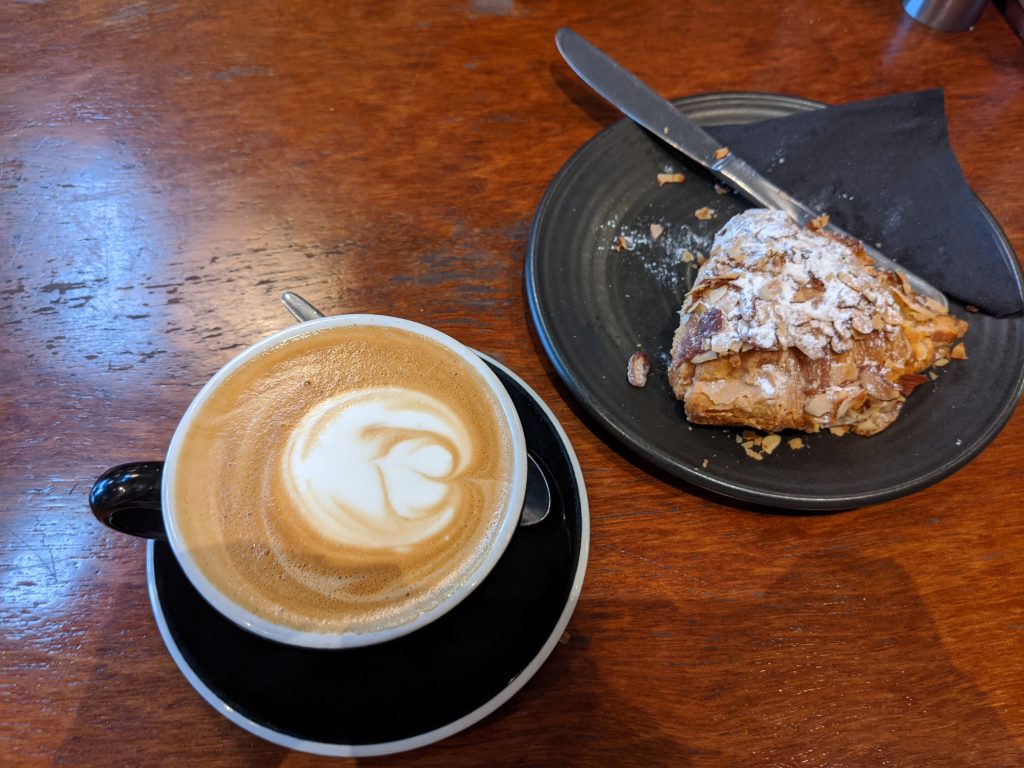
Latte in the landing zone: $3 USD/ $4.70 NZD

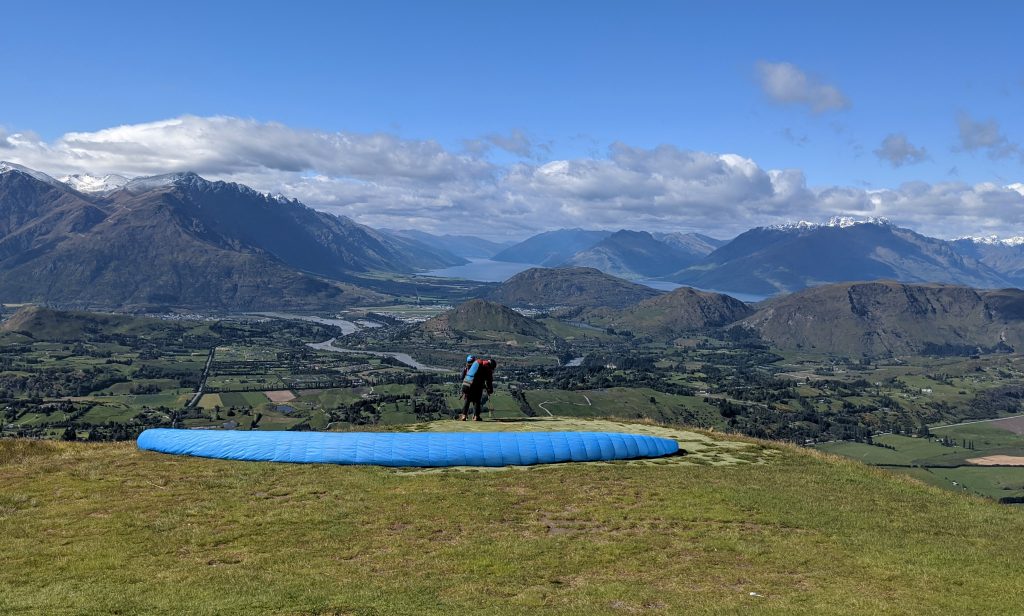
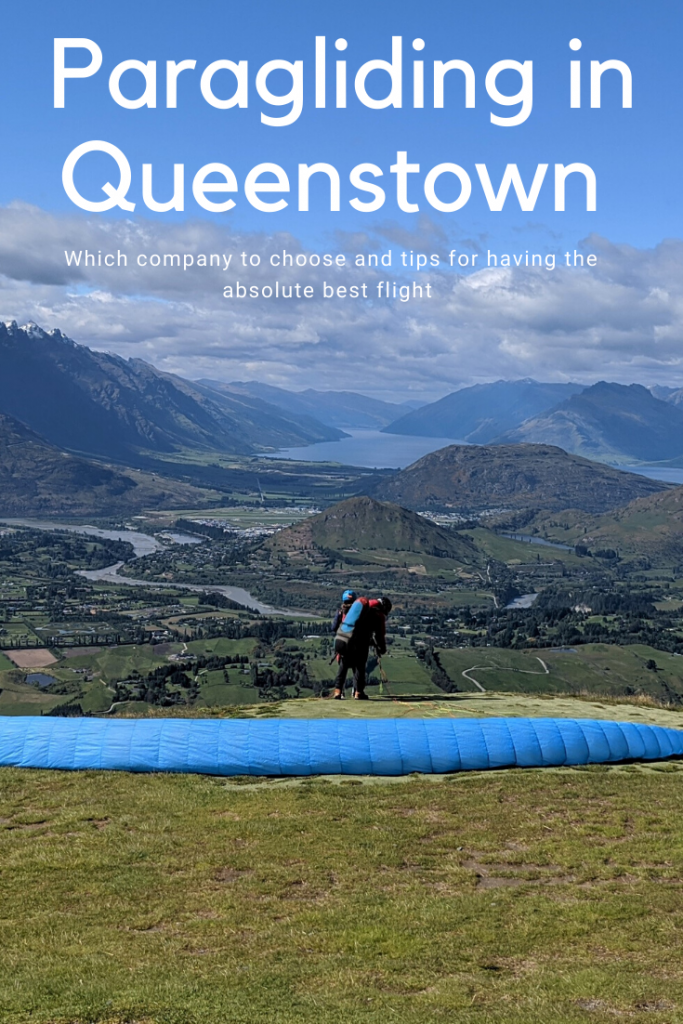
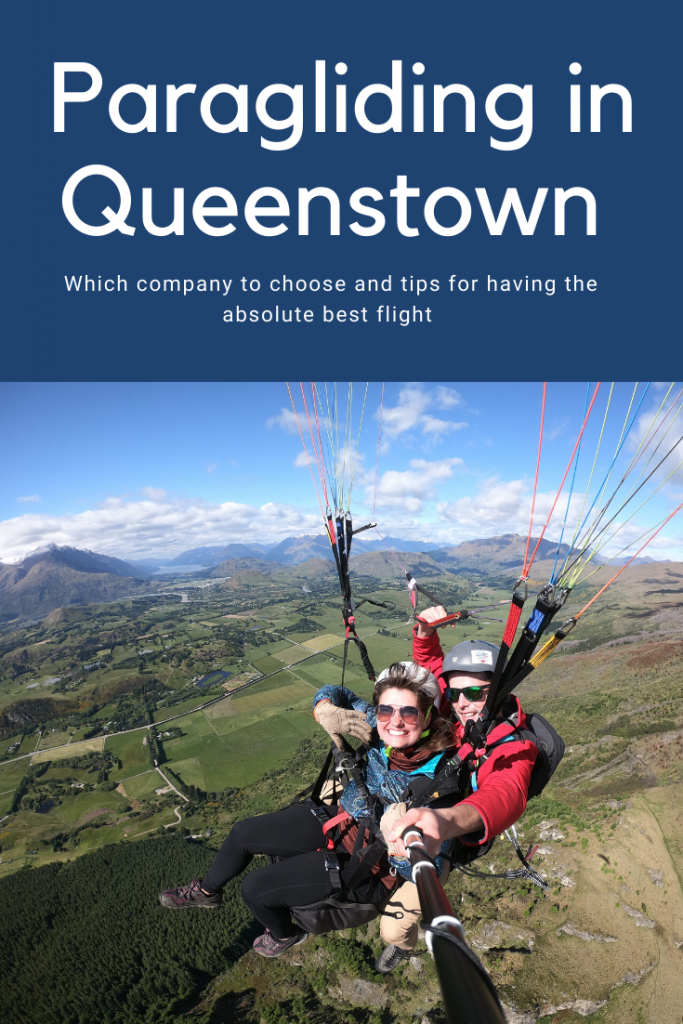
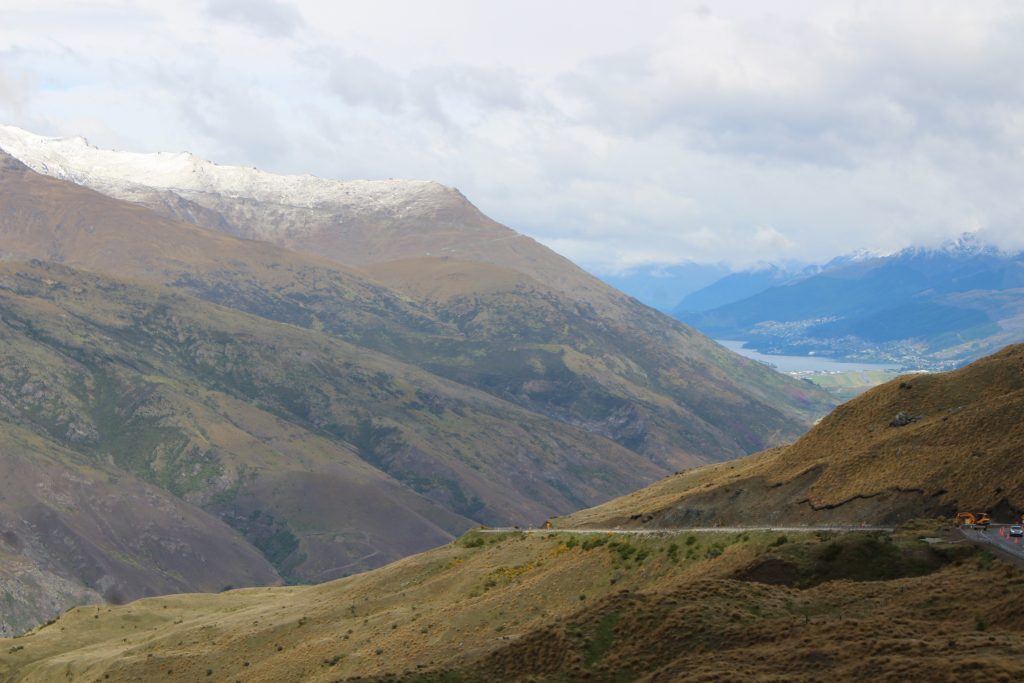
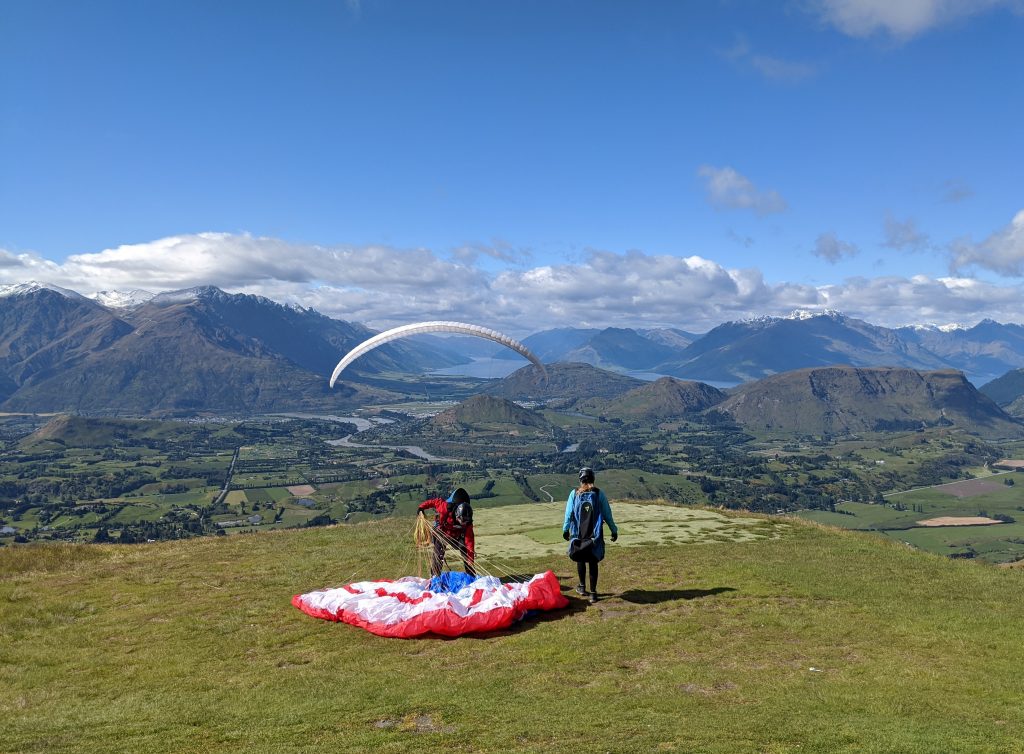
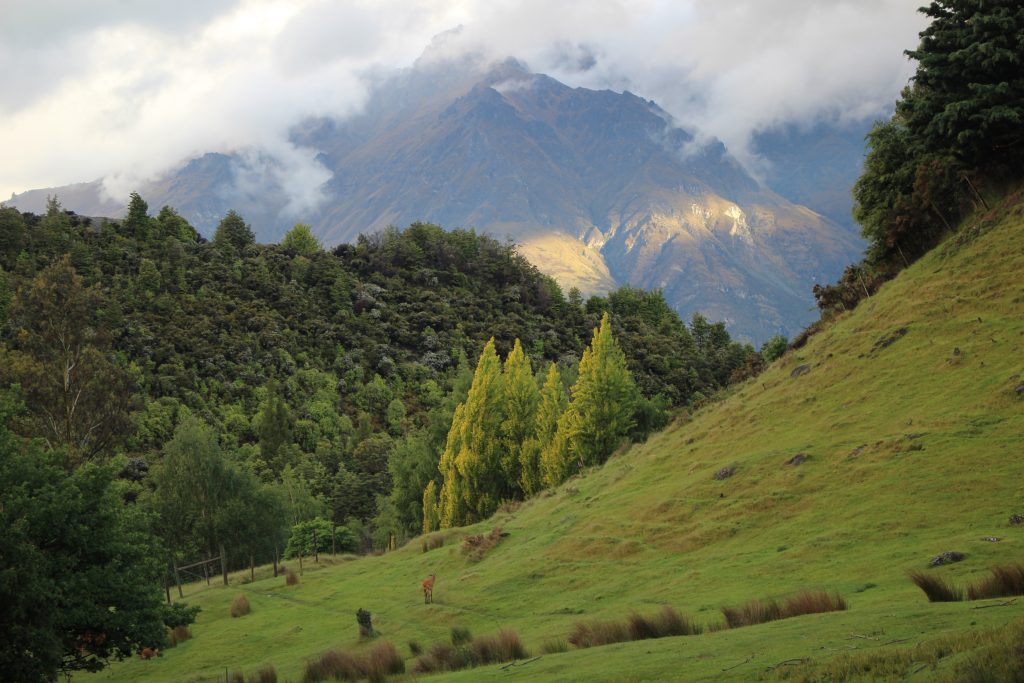
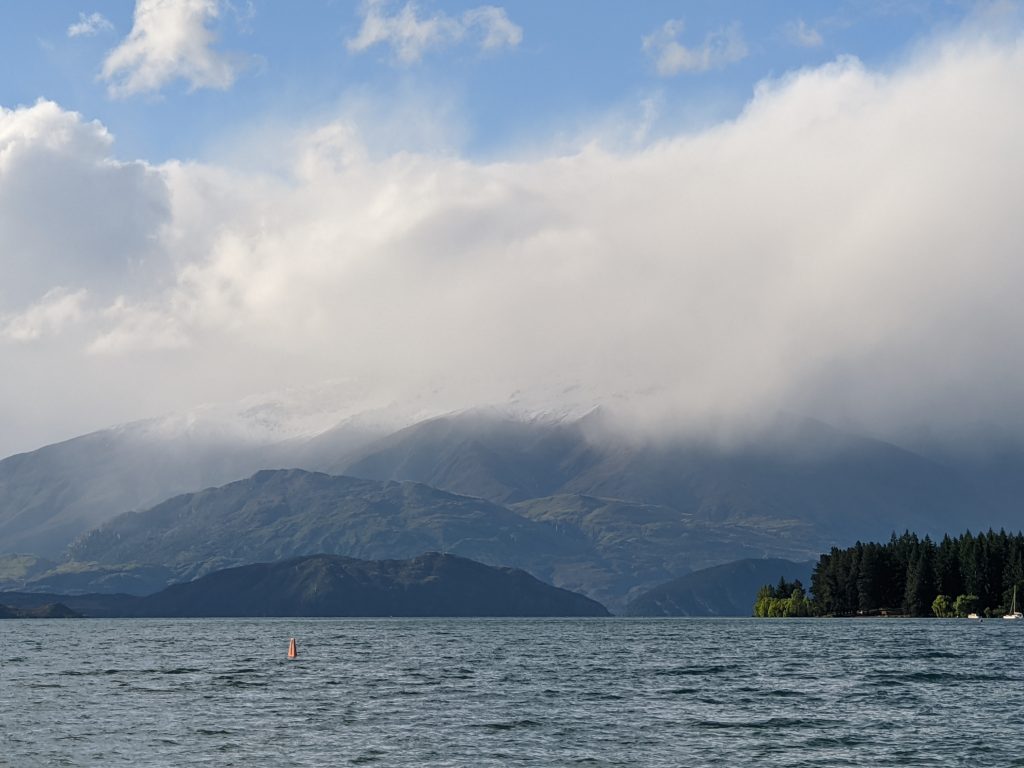
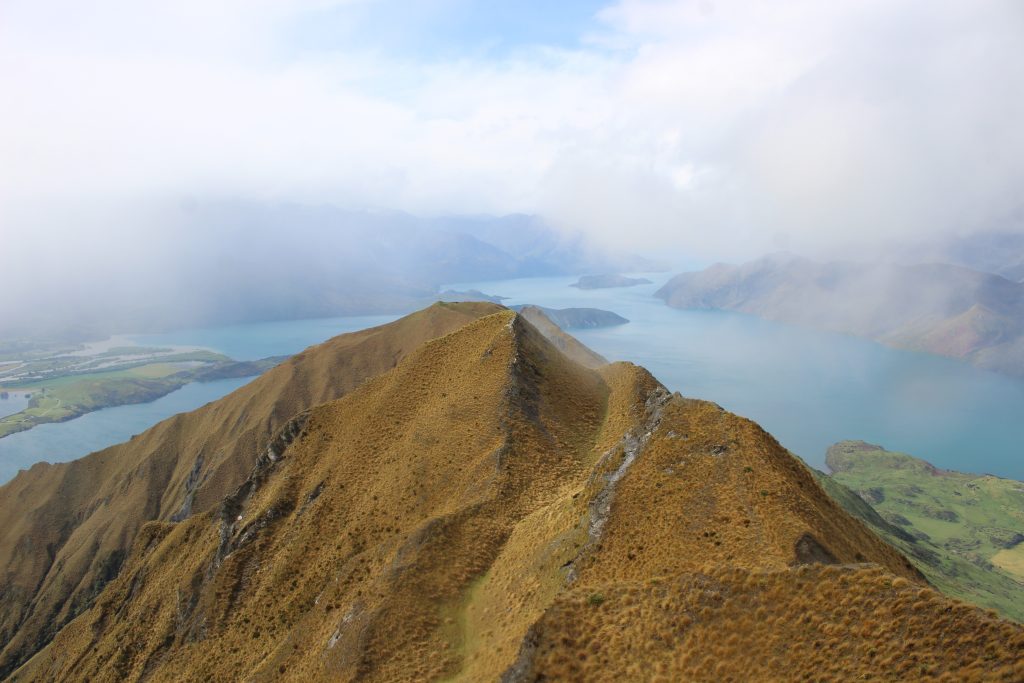
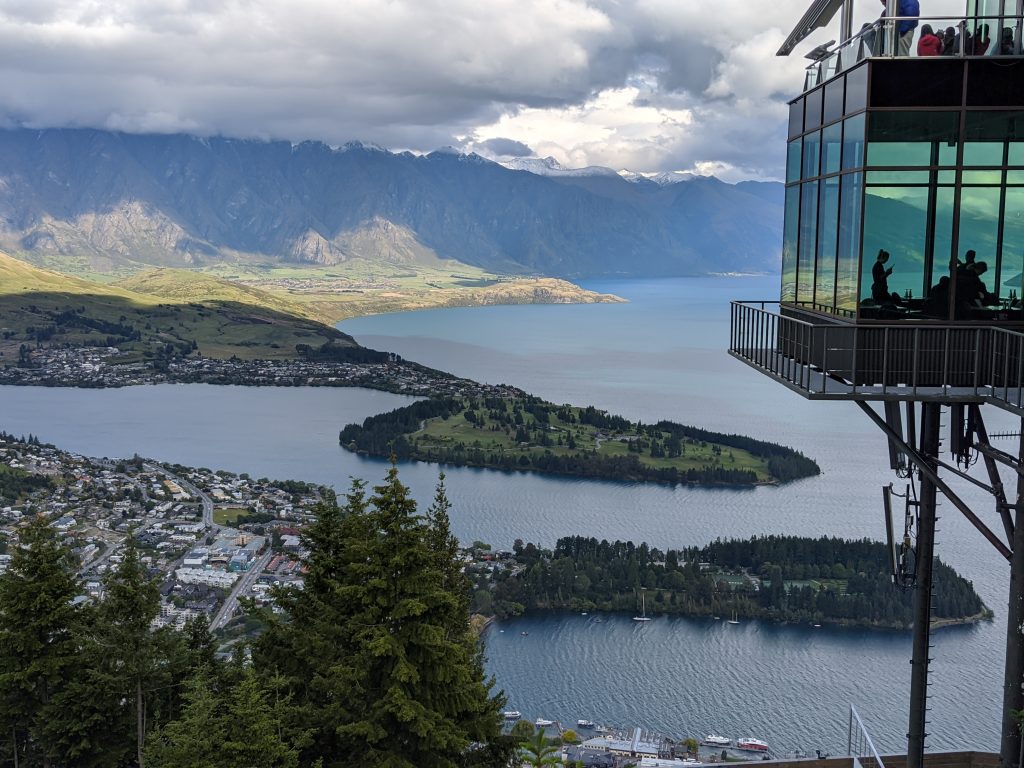
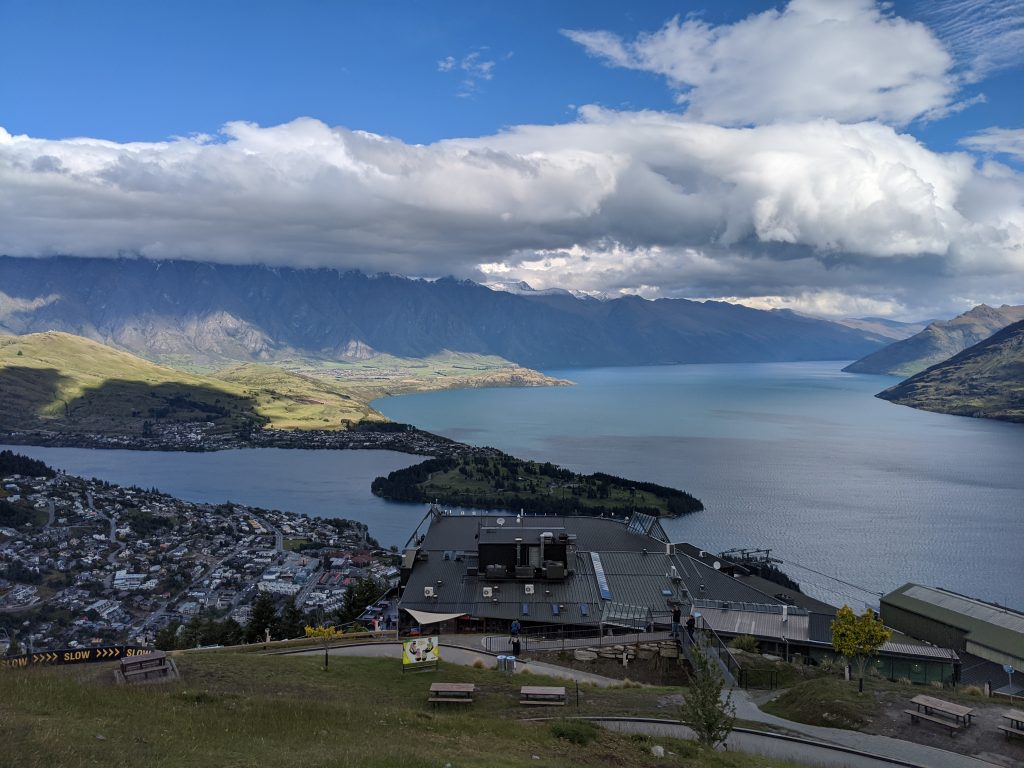
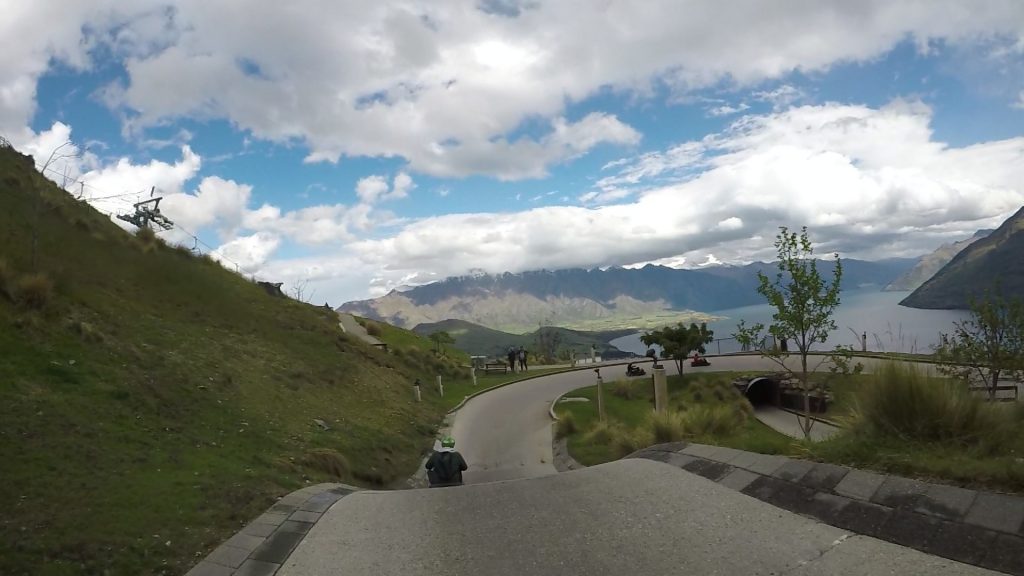
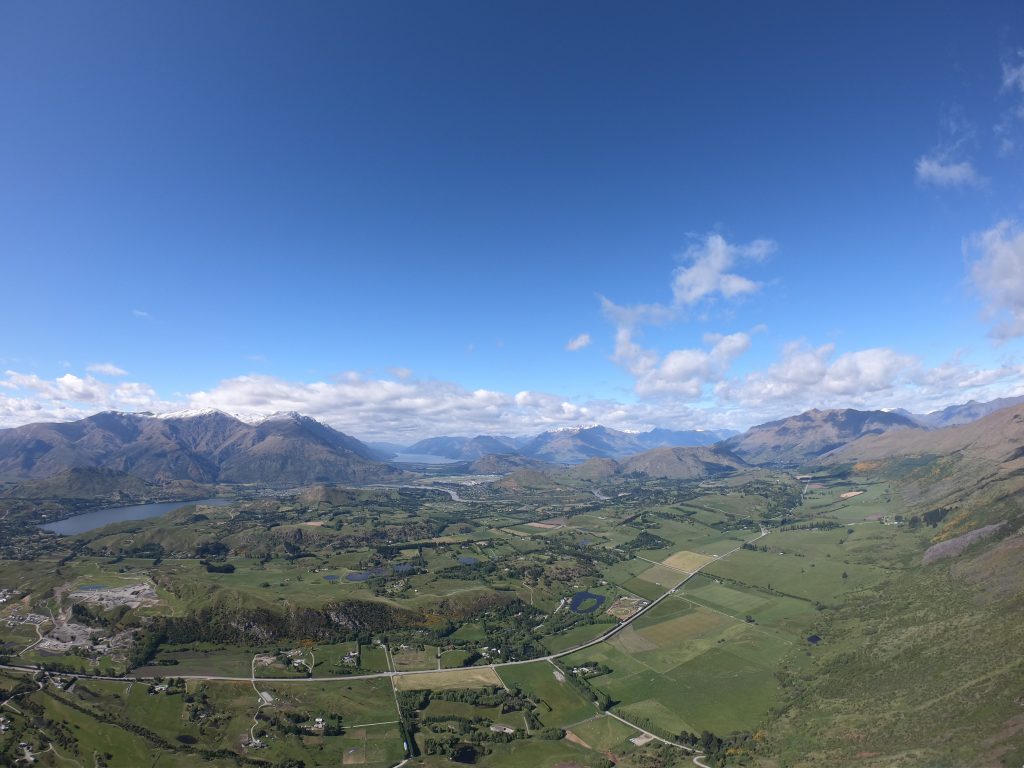
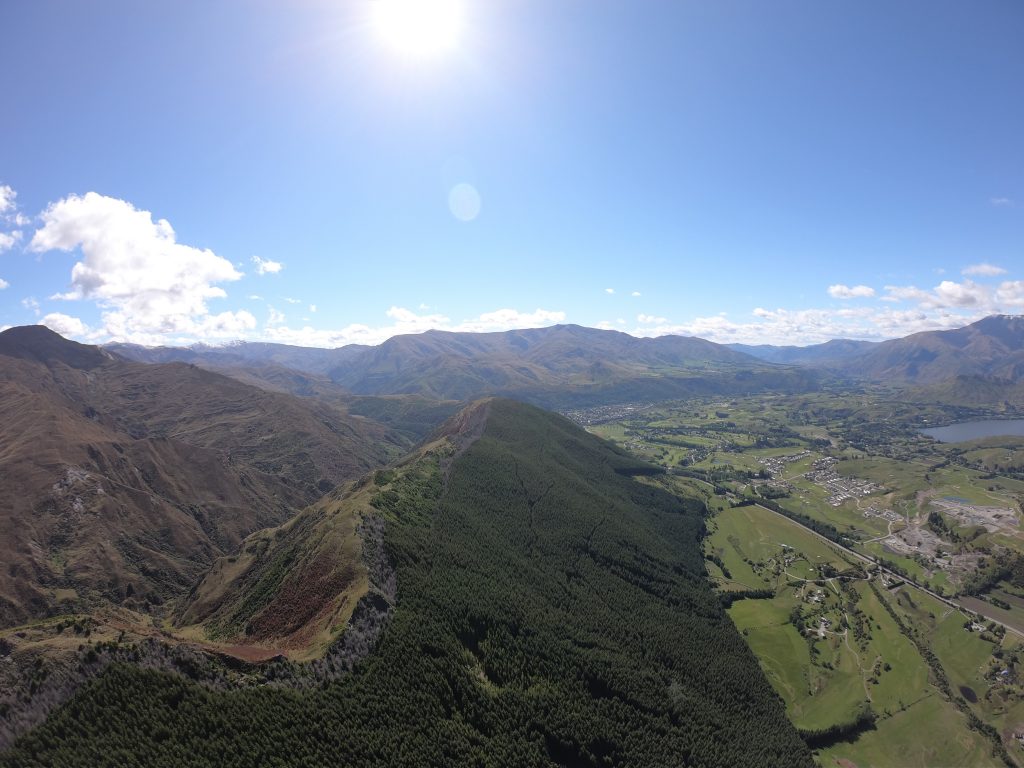
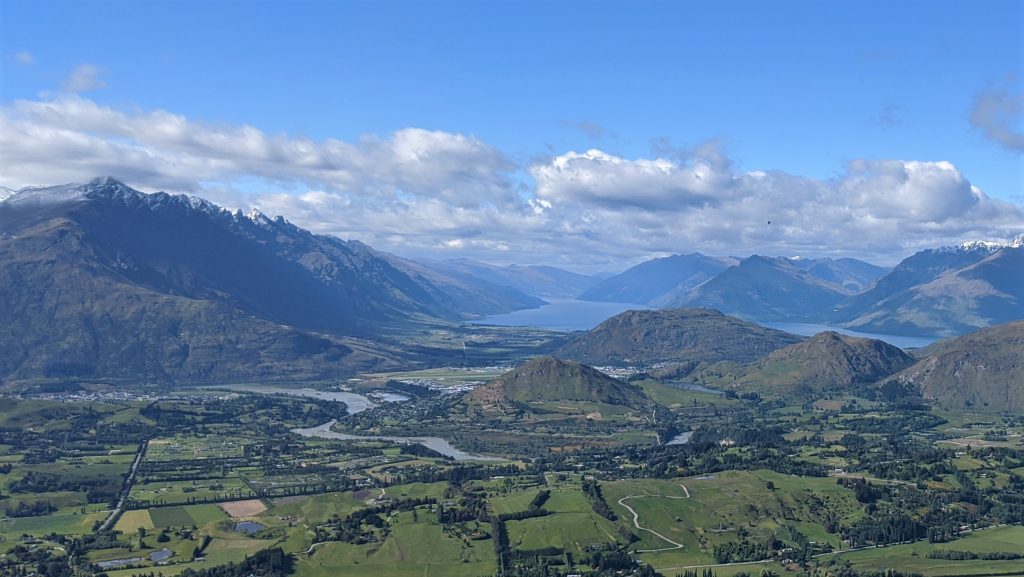
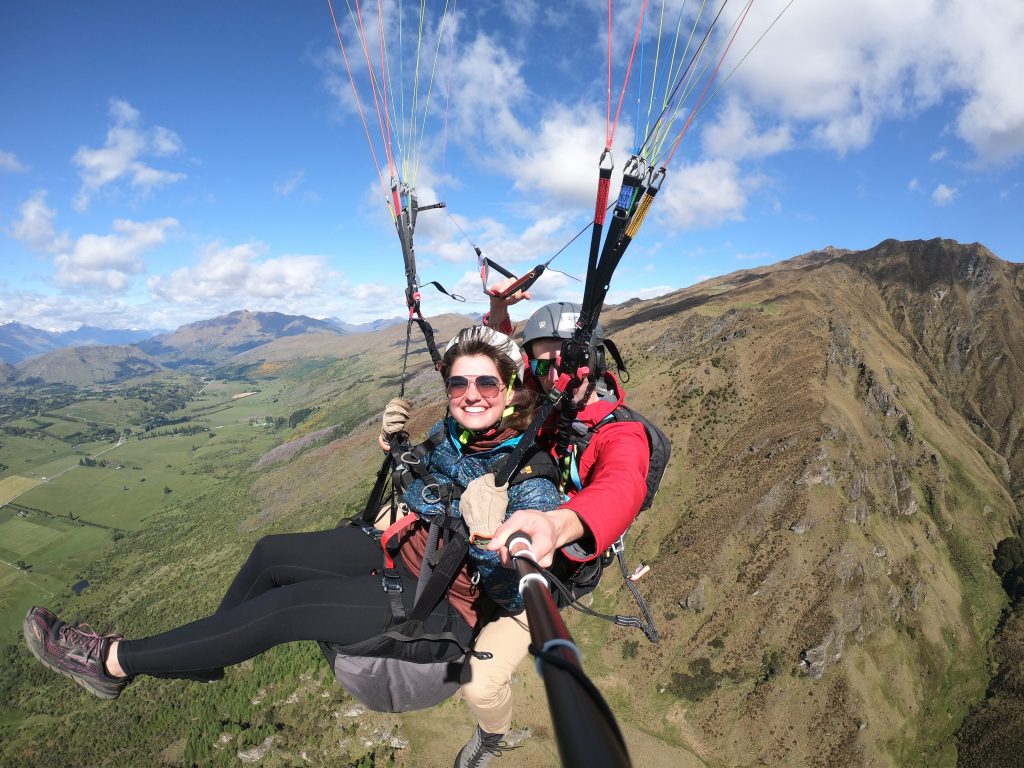
From the take off you have AMAZING views of Queenstown city, Lake Wakatipu, and the Remarkables mountain range- making this one of the big reasons for choosing Coronet Peak for take-off. The flights last around 20 minutes with the pilots doing their absolute best to keep you in the air as long as possible. All of the pilots we met on our tour (about 10 of them) were crazy passionate about flying and so excited to be in the air. You could tell they love flying- adding to the feeling that you will get the best absolute flight experience.

Tips for the best flight experience:

  1. Even if it is a warm day, pack a warm jacket or coat. It gets cold up there. Dress warm in general with pants and definitely closed toed shoes.
  2. Our pilots provided us with gloves and sunnies, but if you have a special preference for the look of your sunglasses in photos- pack a pair that fit well.
  3. You can’t have any lose articles AT ALL so if you don’t have a gopro mount for your clothing then you will just have to rely on the footage they take. If you don’t have zipping pockets to secure your phone, wallet, etc.. then your pilot will store your things in their bag for the flight.
  4. Morning is an excellent time to book for great lighting and to better weather.
  5. Schedule your tour for the your first day in Queenstown. Then if the wind/ weather isn’t right and they have to reschedule you, you have plenty of options.

Our experience with Coronet Peak Paragliding

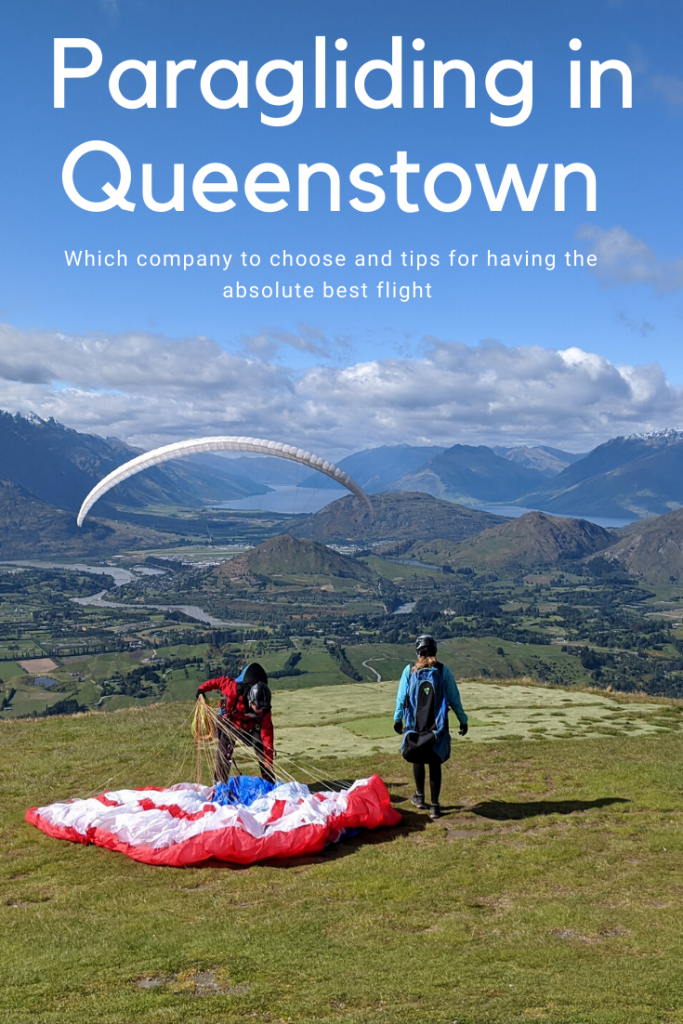
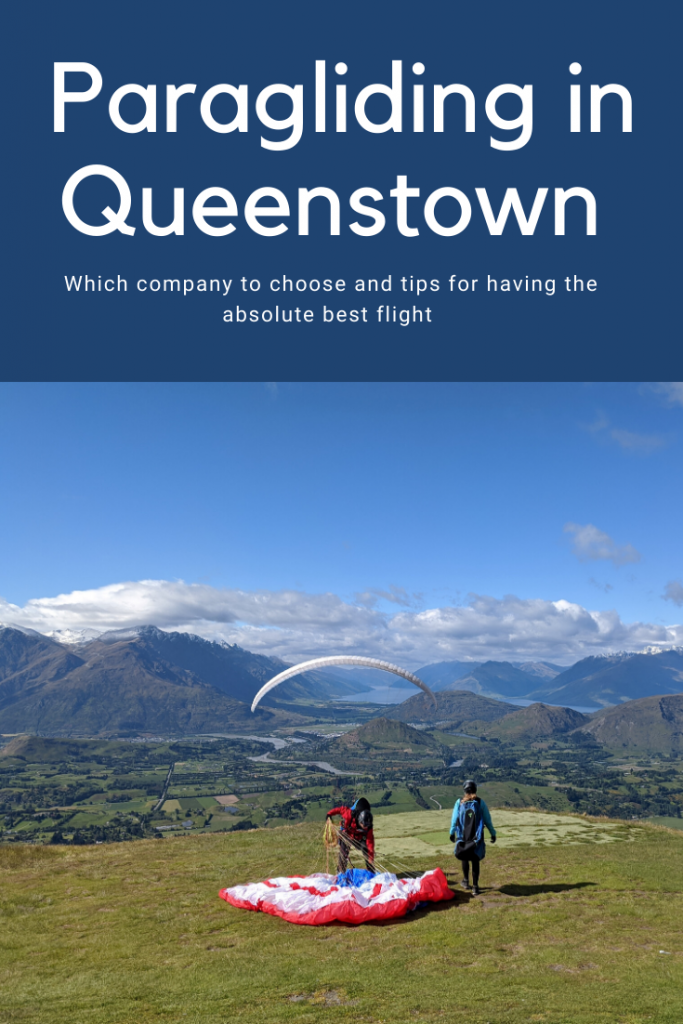
We signed up for the 2nd tour of the day at 9:30 AM so we could sleep in. We met them just outside the art museum by their van where they picked up the 8 of us that were going at that timeslot. We drove about 10 minutes in that van to another location where we picked up the pilots and climbed into a larger bus/ van. We were all paired with our pilots based on body weight and height and take off location. It was then another short drive of 10 minutes or so to the very top where the higher take off tour was dropped off first.

Selfie with my pilot before our flight

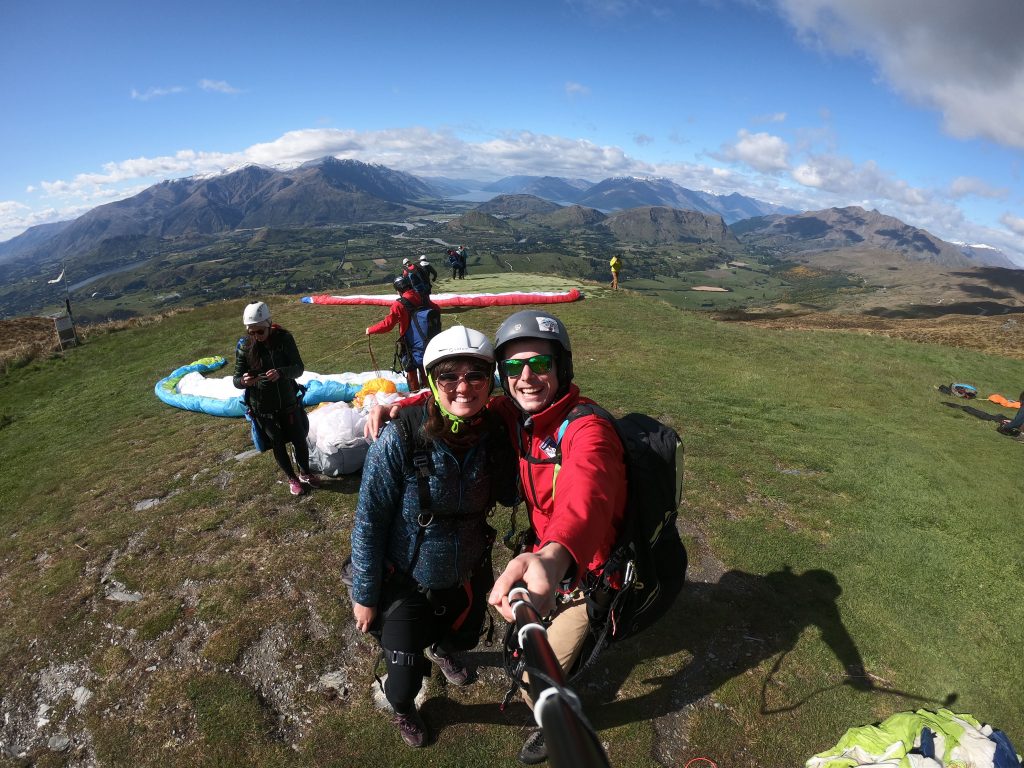
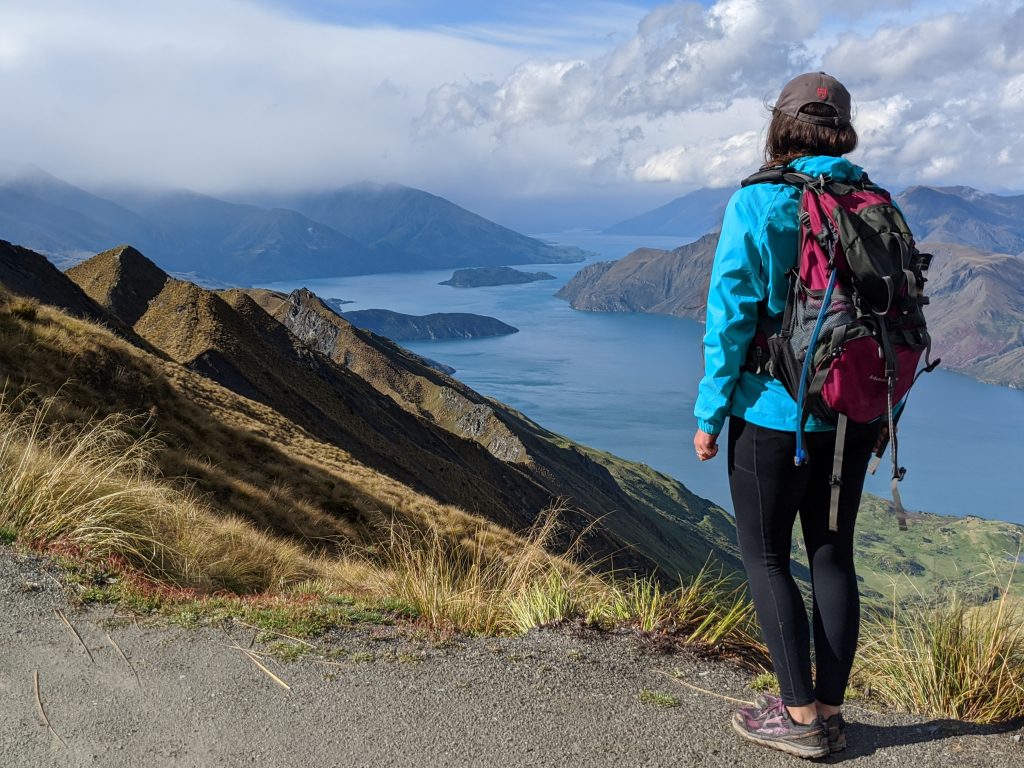
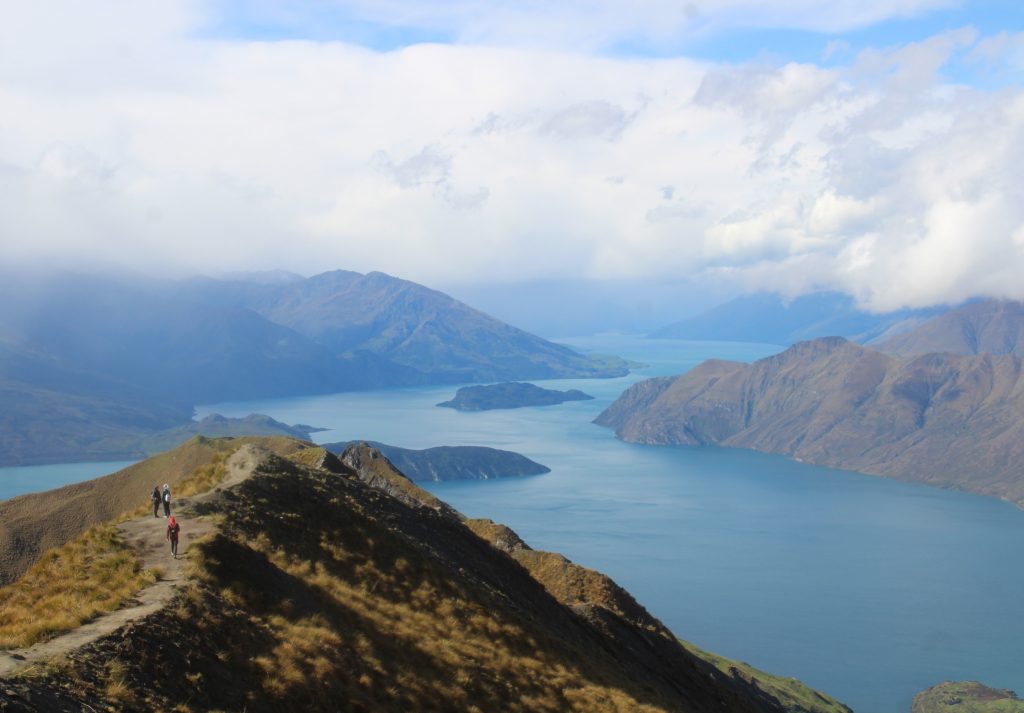
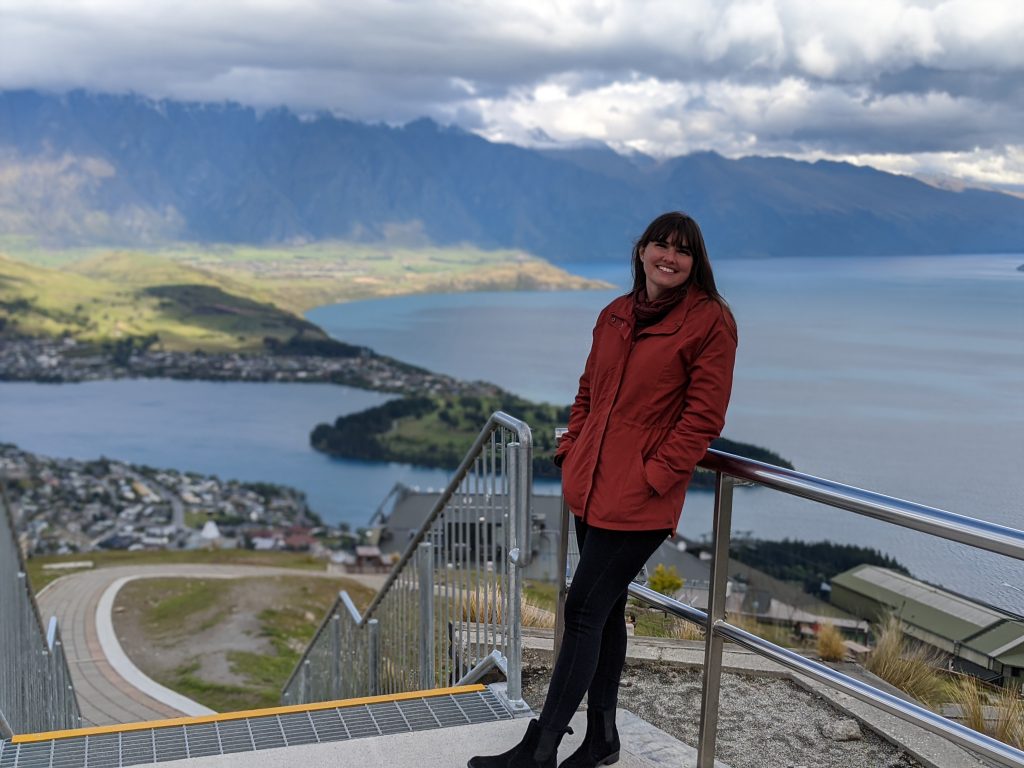
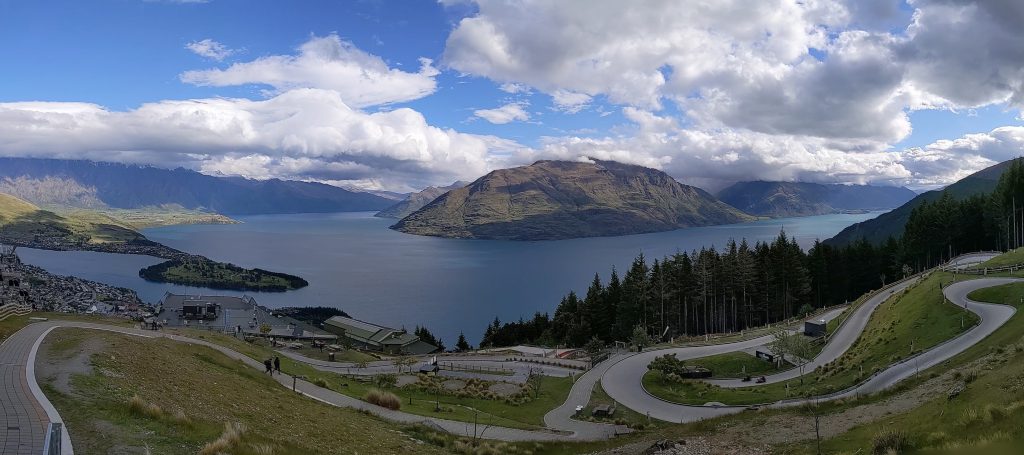
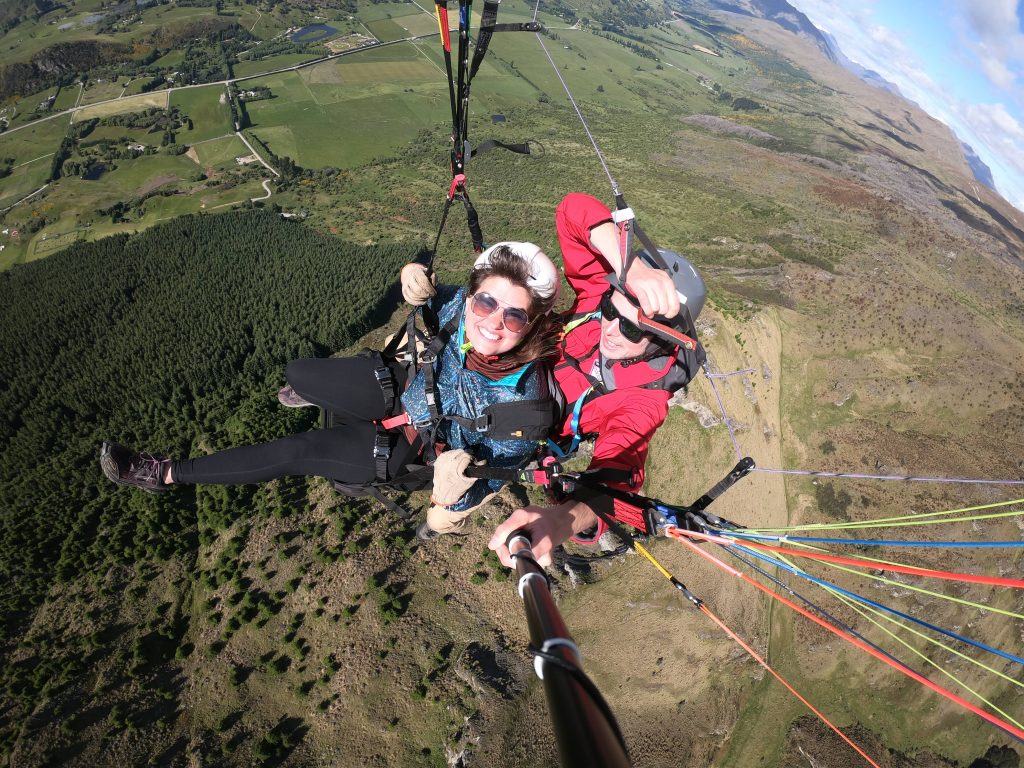
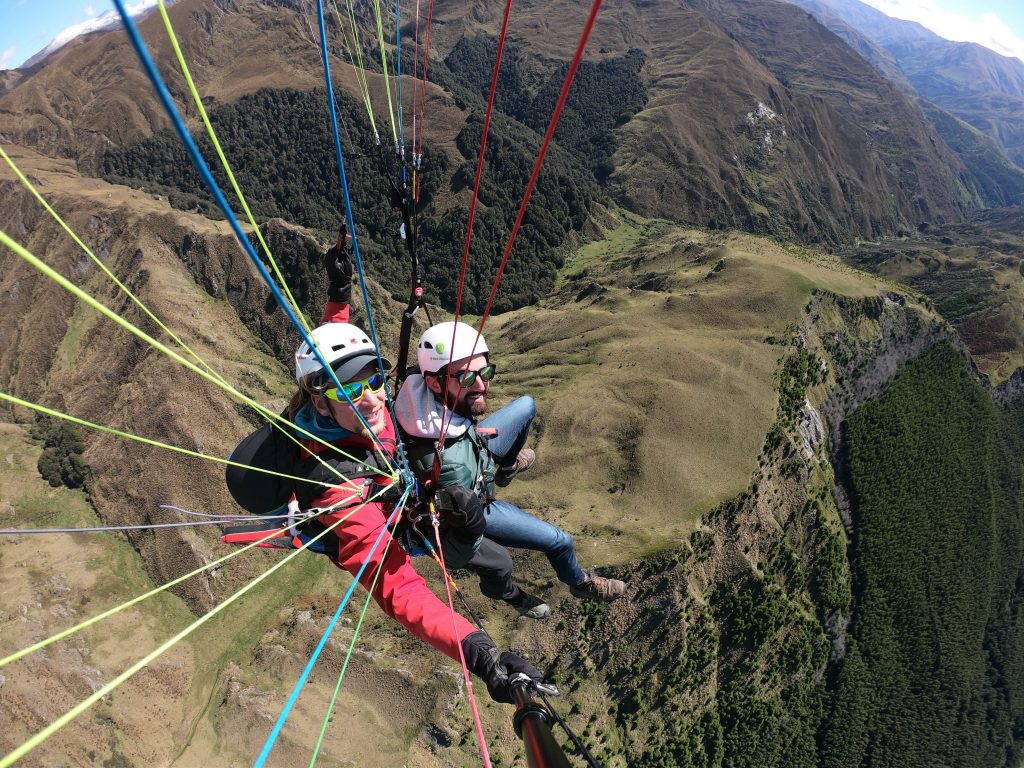
The view from up top was just honestly incredible, I’m not sure if you can drive up there on your own since it is part of a ski resort/ dirt roads, but if you can, I highly recommend it. We figured out our order for take off and got a quick debriefing of how the flight would go. My pilot, Jack, explained that you will set your sights straight ahead and try to run toward it as the pilot pulls up the glider and gets ready for take-off. There’s no running off a sudden edge, in fact the take- off hill was actually pretty mild of an angle.
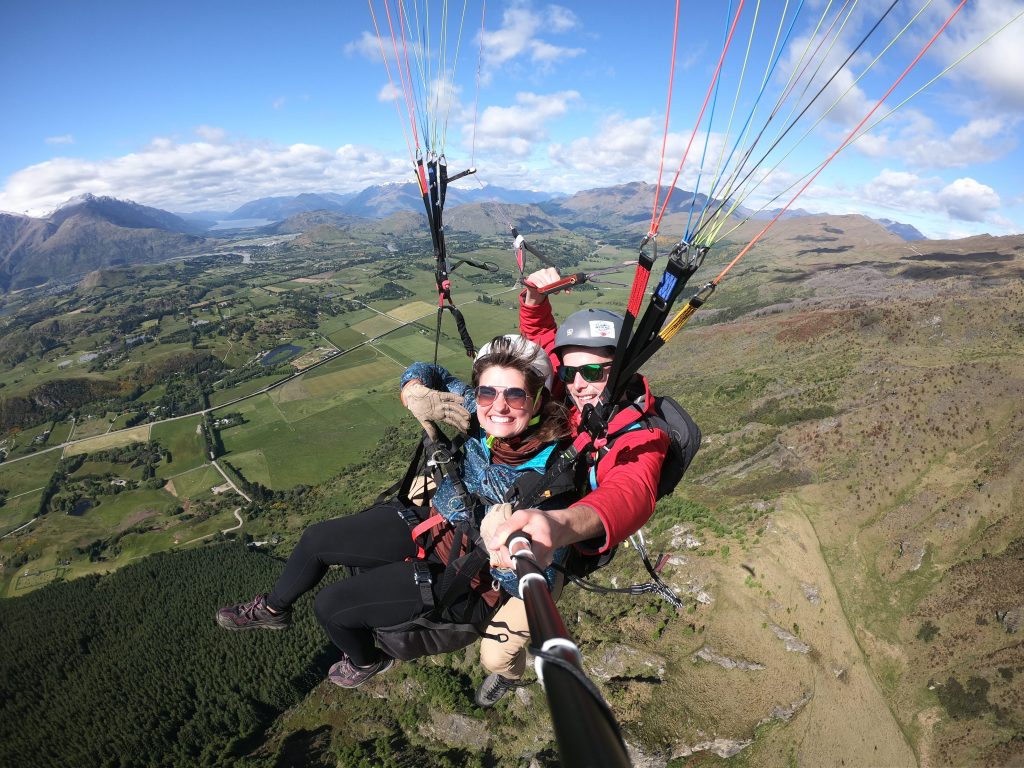
The flight

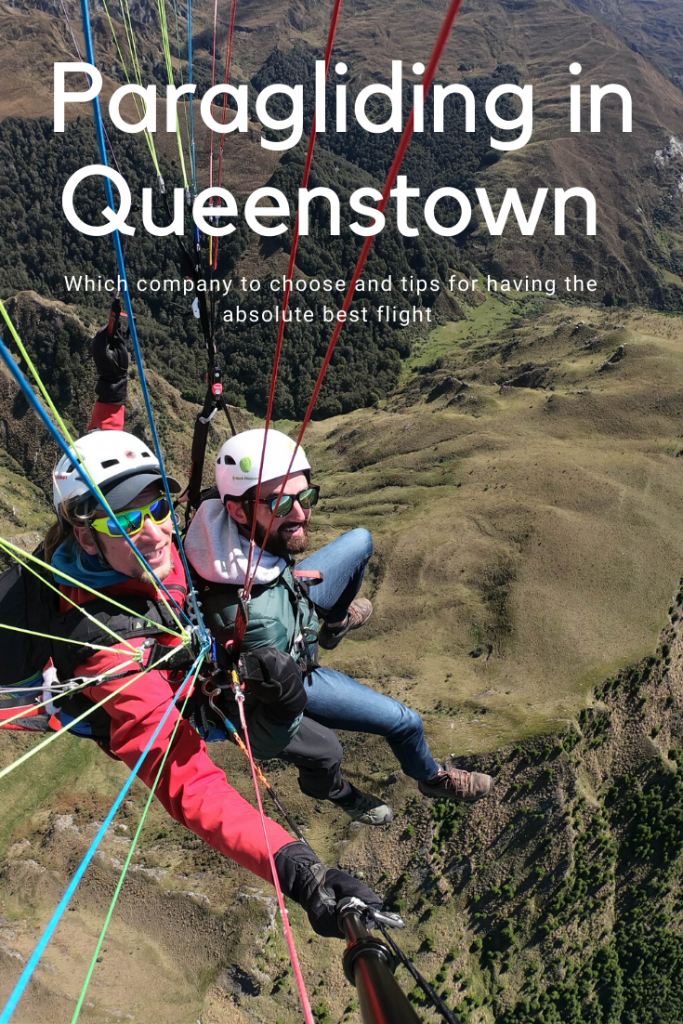
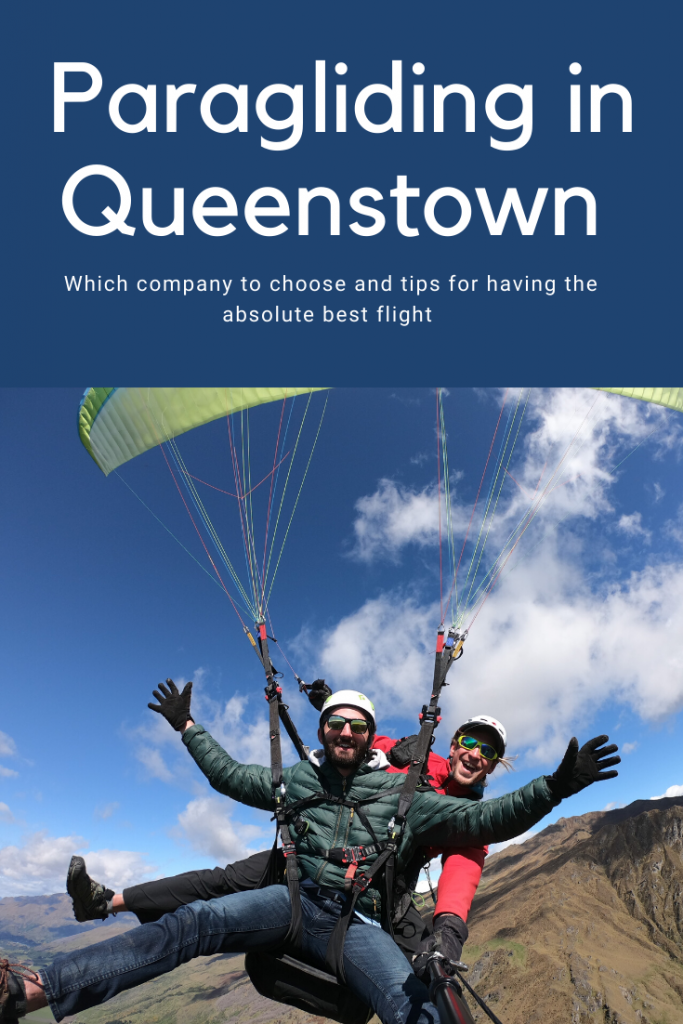
I didn’t time it but I’m sure I was up there for 15- 20 minutes. Jack explained a few things about thermals and how the warm air coming off the mountain offers lift (which you can definitely feel). The more thermal activity, the better as it will continue pushing you higher. He let me steer a couple times and we did some photos/ videos before moving towards the landing zone. The last descent we did some “tricks” which pretty much involved going into a sort of tight spiral with a couple of swings that bordered on going upside down. Basically I had no way to keep track of which direction was which, but it was very fast and VERY fun.
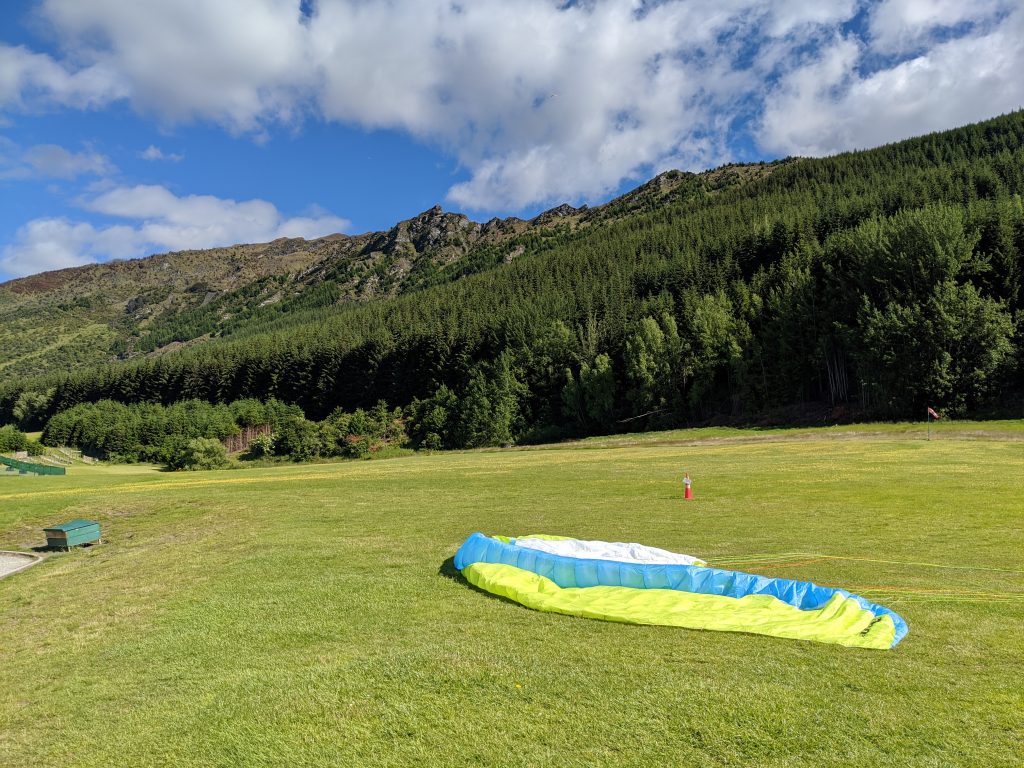
Photos from my incredible flight. The bottom picture shows Coronet Peak itself.
The landing

Upon landing you get very close to the ground and then sort of hop (what feels like jumping down off a 1 foot curb). I’d say it was easy but since my legs were all jelly from the flight still I kind of collapsed in a heap. Definitely don’t do that! My poor pilot struggled to get me back on my feet as the seat is really awkward and we still had to unclip everything! Haha

*It was a little embarrassing

Braden and his pilot with the landing zone smiling up from far below

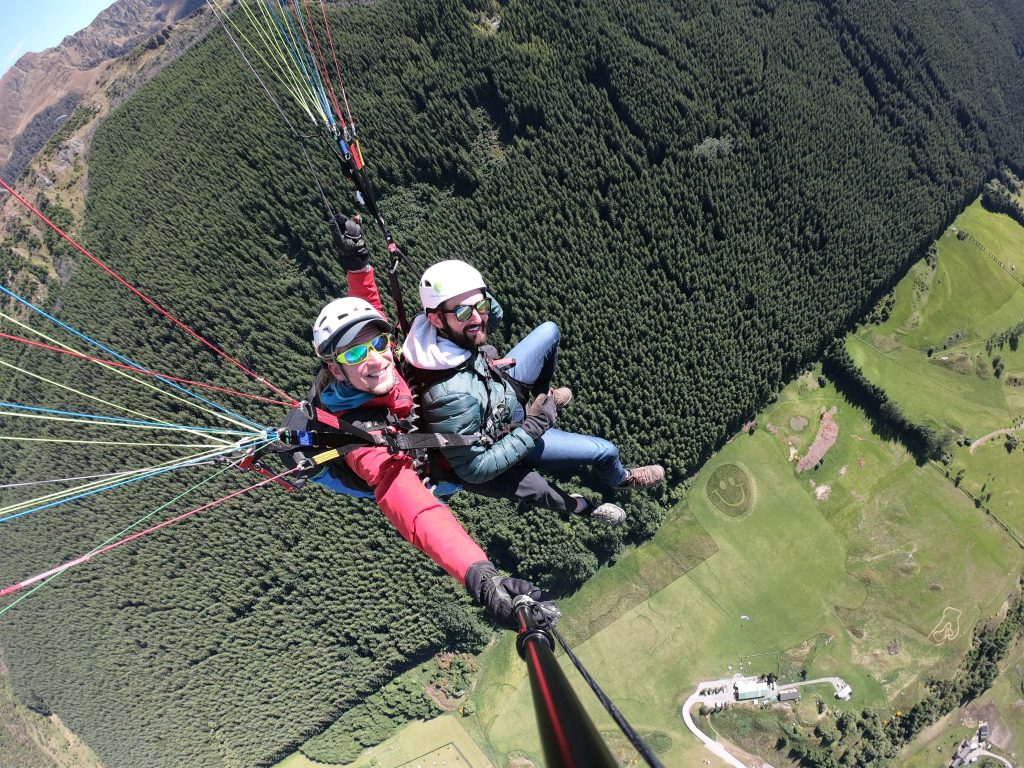
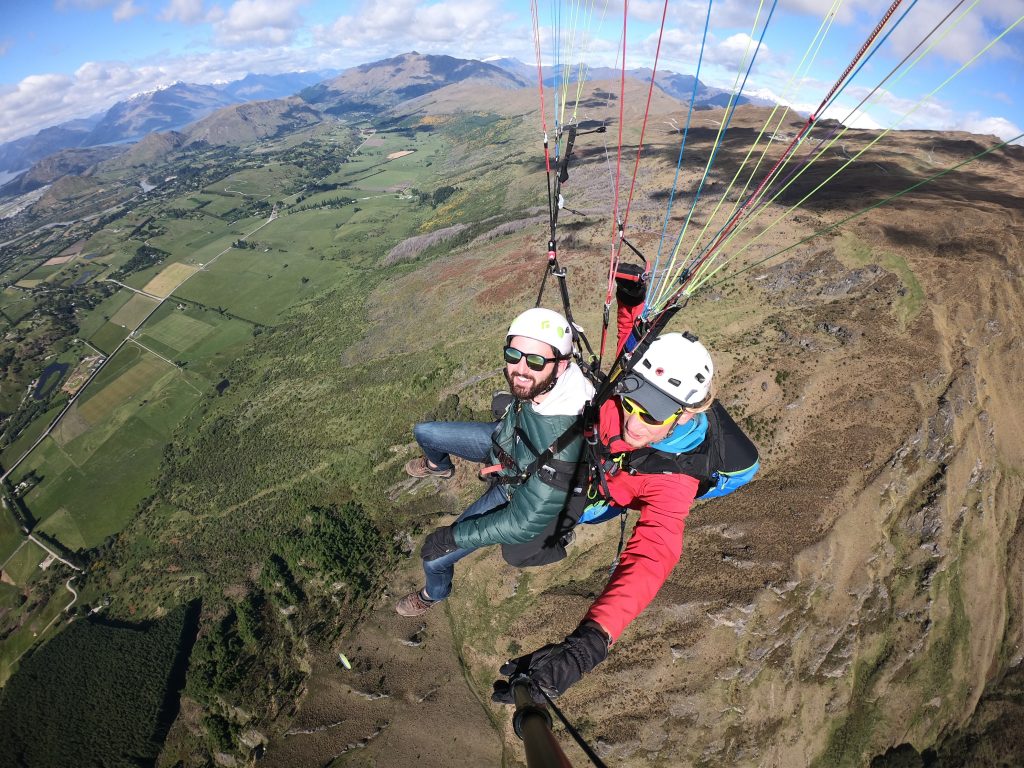
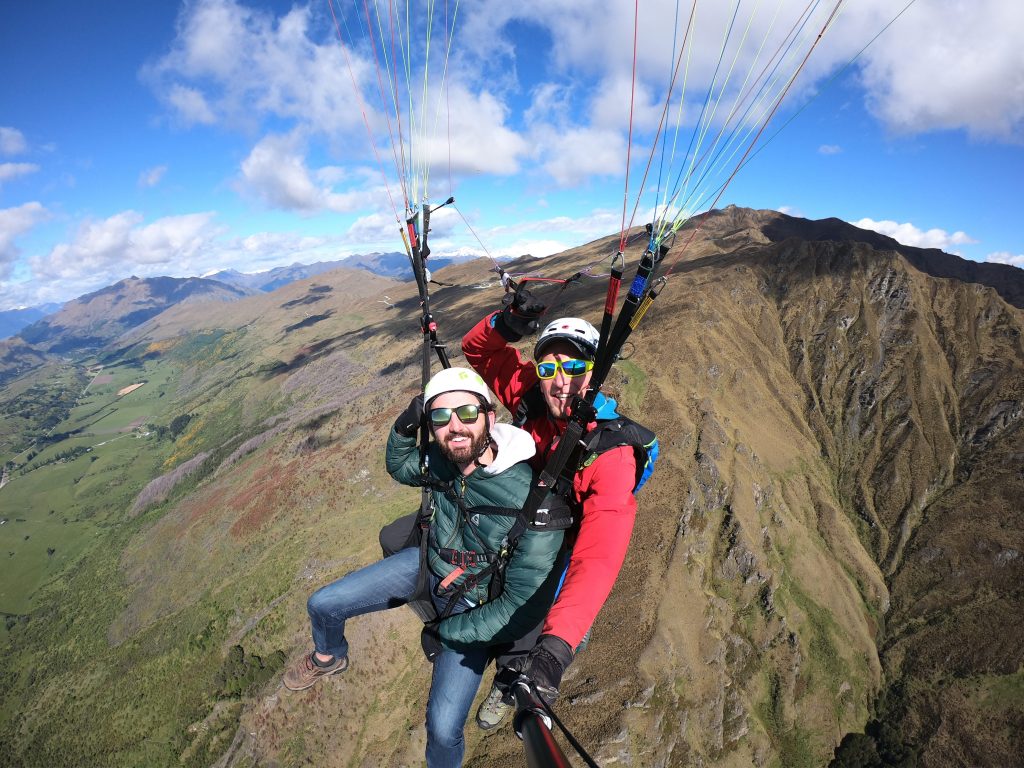
Braden had the BEST flight of everyone in our group. His pilot, Rene, caught some awesome thermal energy and ended up at the same height as the peak where they could see all the way to Wanaka! With all the lift they got, their flight probably lasted 5 more minutes than mine and looked like an absolute best.

If you want to go with a pilot with the absolute most thrill and stoke- definitely ask for Rene. That being said, Jack was also great but a bit more reserved.

Some of the photos Braden got from his flight. We were so high up!
On the ground

Back on the ground of the landing zone there’s a small coffee shop where you can look over the gopro footage from your flight. We had about 15 minutes on the ground before the lower take-off flights met back up with us. Then it was a short journey back into town, again transferring vans to go into the center.

All in all, this is a must do in Queenstown. (I guess you could go sky diving but that’s a lot shorter than paragliding) It’s just the right amount of thrill without being terrifying with a super easy take off and landing.

Back on the ground after an incredible experience

Let me know in the comments below if you’d be interested in paragliding in Queenstown or if you have any questions about our experience!

Other articles on nearby spots:
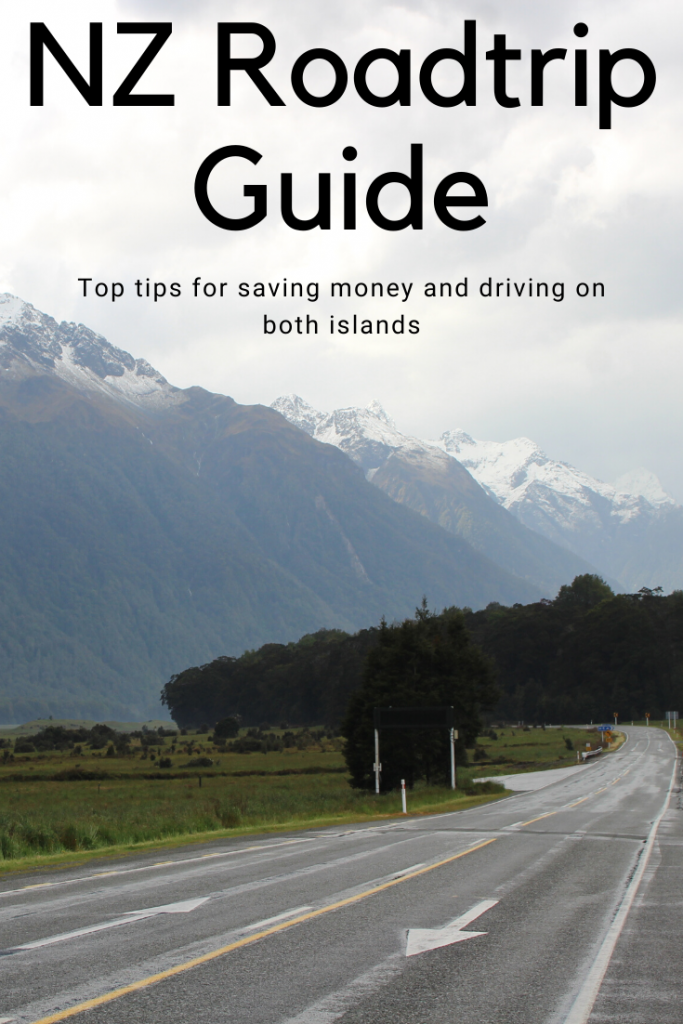
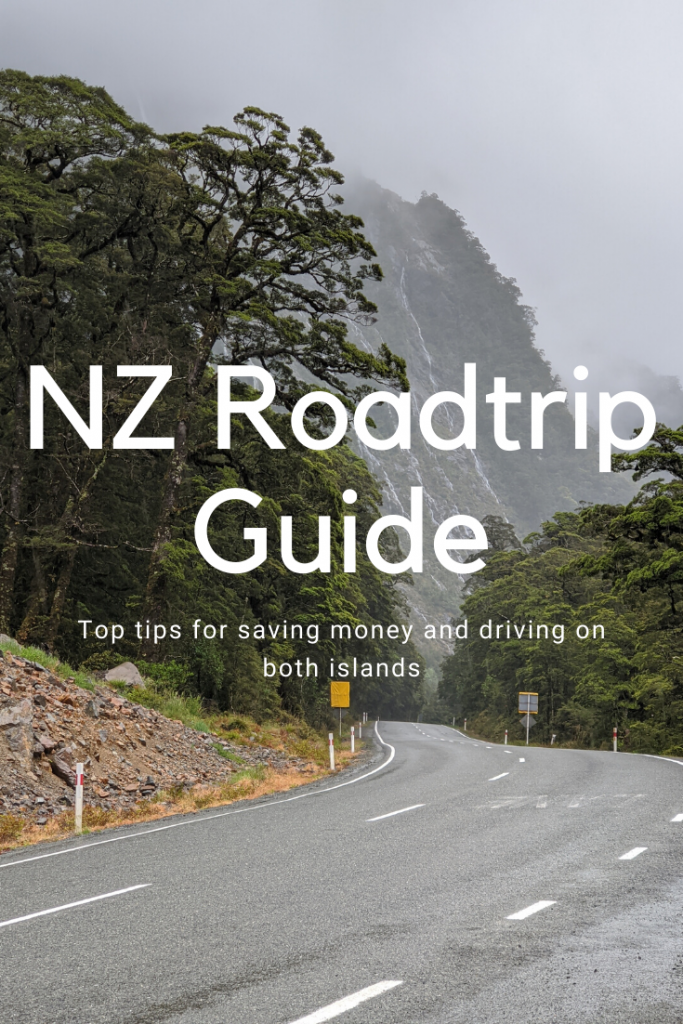
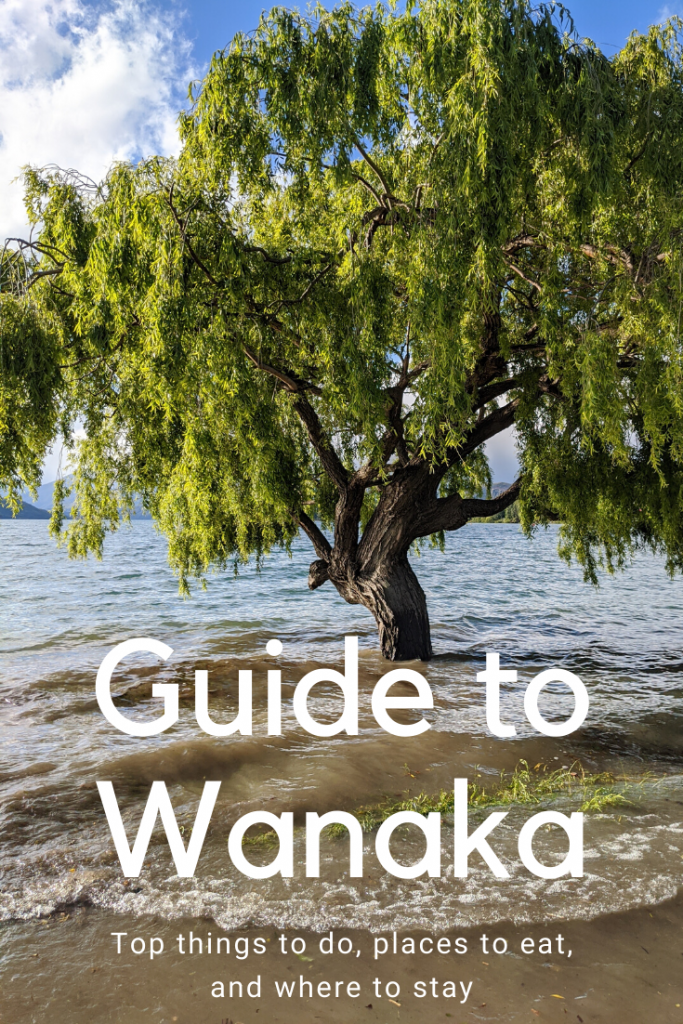
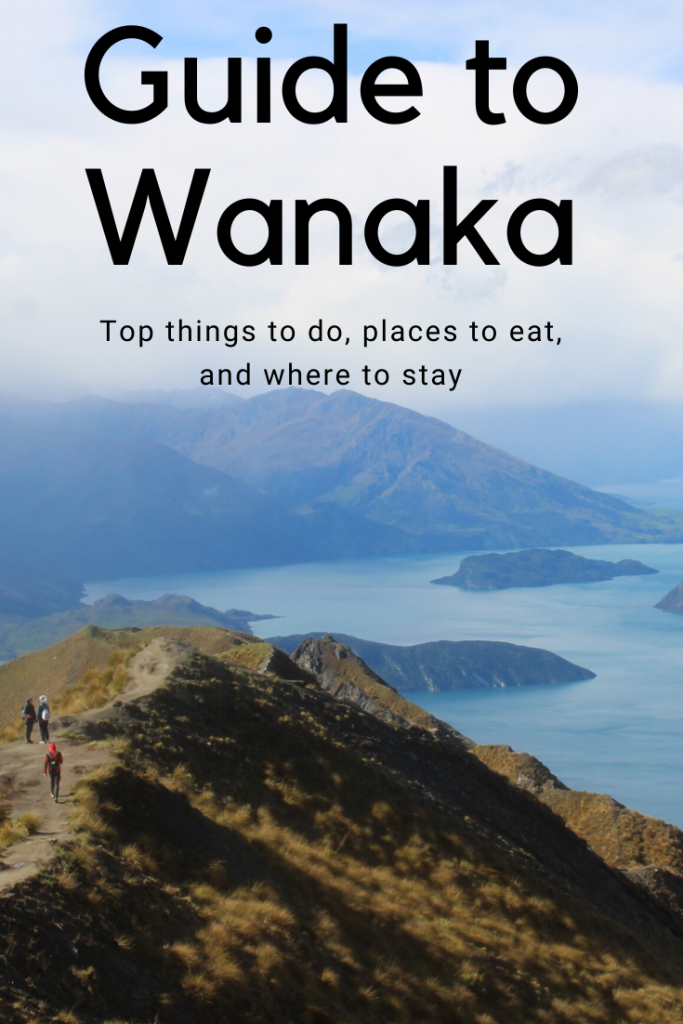
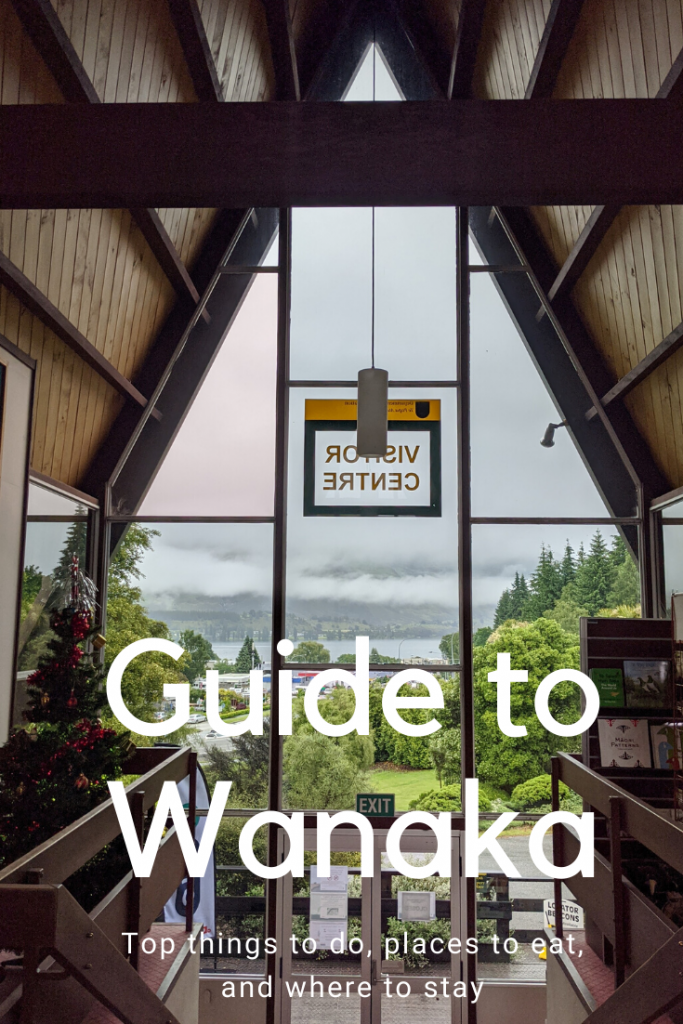
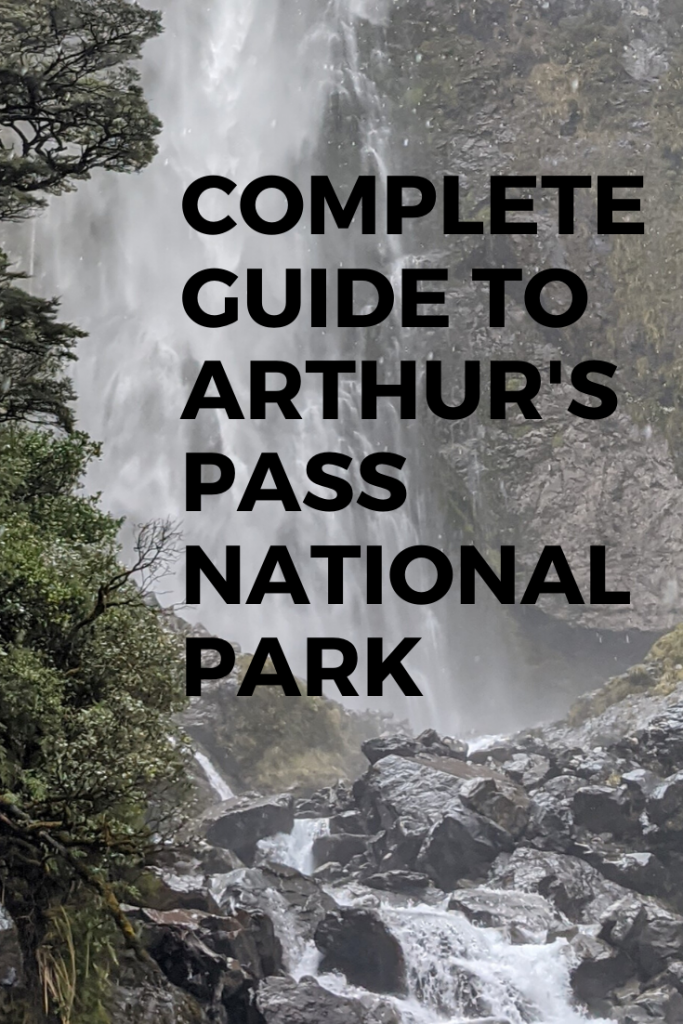
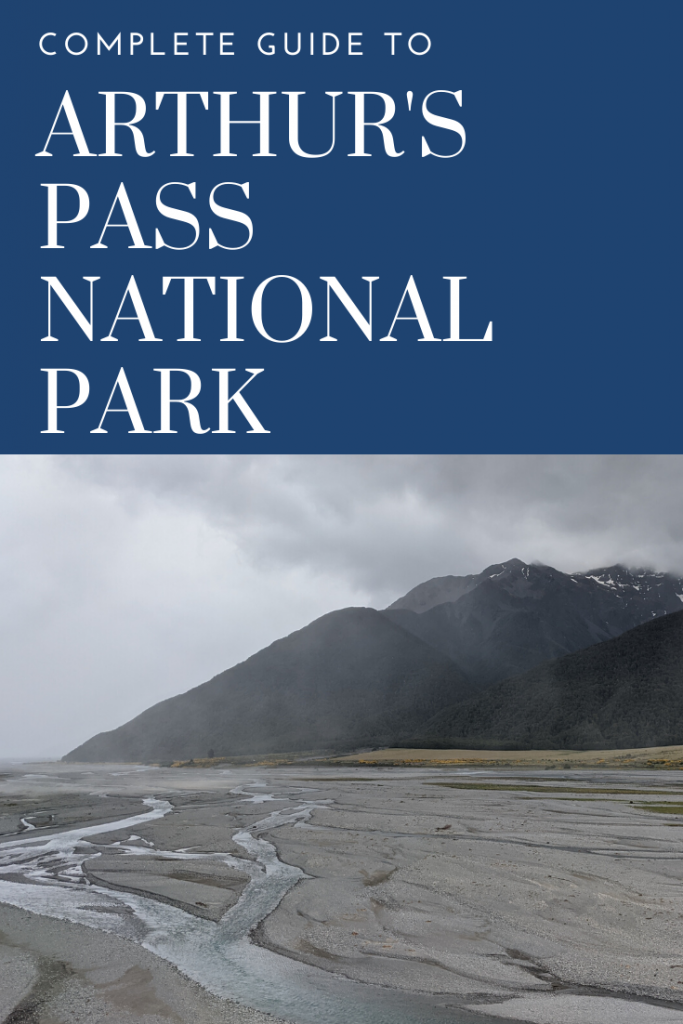
Guide to Milford Sound

The hike to Roy’s Peak

Pin me for later:

Tips for road tripping New Zealand

How to get a good deal on Car Rentals in New Zealand

  1. Make sure whenever you search for car rentals, that you search incognito mode. This is similar even to searching hotels and travel. I’ve tested this with all 3 forms of bookings, and all 3 hold true. It always pays to use Google Incognito. 
  2. LOOK AROUND. I use sites Expedia, Kayak, Priceline, Holiday Auto, and Rental Cars.com and compare them all. (some of them do that internally for you) and not one site always has the best deal. It varies quite a bit.
  3. Book with a travel rewards credit card that has built in rental insurance so you can decline the very expensive $11+ a day insurance at the counter.

Tips for driving on the North Island of New Zealand

Driving on the north island was unlike any where else I’ve ever A. traveled, and B. driven. You never drive more than hour before you’re crossing crazy mountain passes that have steep grades on both sides and make constant hair pin turns. It is positively nauseating. 

I can’t recommend enough that if you have experienced motion or car sickness at any time, pack some meds for driving on this island. And if you are especially prone, just plan on doing the driving. Braden and I split the driving about 50/50. Driving on the left side of the road is also a bit weird even for the passenger. So with that here/s my tips:

  1. Make sure to pack motion sickness meds.
  2. Plan A LOT of stops to help break up longer drives. It was much more tiring driving on the windy roads as well as opposite side of the car. 
  3. Don’t assume that because a town is on the map, that they will have a gas station. Fill up your car often when you have decently priced gas around. We missed a gas station and instead of just turning back like we should’ve, we finally found a gas station in the middle of no where while running on empty for 30 minutes. 
  4. Familiarize yourself with the street signs and their meanings, especially the right of way signs. The BIG red arrow means that direction has priority. 
  5. Pack a car charger and auxiliary cord for playing music. Our first car had a terrible radio connection and neither of our cars had bluetooth. The auxiliary cord saved us as far as having tunes. 
  6. Lastly make sure to have a couple back up credit cards or cash in case your first credit card doesn’t work at a petrol station. We never had any problems with my Chase Sapphire card but I’ve heard of others running into problems. 

Rental car company we used for the north island: Jucy 

This seems to be a major rental car service provider, especially for campervans. The rate was incredibly cheap at only $10 a day including unlimited miles and 2 drivers. The downside is this was definitely the worst rental car we’ve ever had in terms of luxury. It had the most road noise, a useless radio, no auxiliary or blue tooth hook ups, and no cigarette lighter or way to charge a phone. That being said- it got us around so it worked. 

Tips for driving on the South Island of New Zealand 

Luckily driving on the south island was much simpler than the north island, and thus less nauseating by a long shot. Google Maps was always pretty accurate for gauging the driving time and the roads were much longer and straighter with even the “challenging” Milford Sound Road being a piece of cake in comparison to the north island. So tips:

  1. If you’re worried about driving on the left side of the road, start with the south island. 
  2. Again familiarize yourself with the signs, particularly the right of way signs. 
  3. If you want to stay IN a city, book a place that includes parking. (some of the cities were pretty challenging to find parking in)

Rental car company we used for the south island: Drive NZ

Great pricing again on this vehicle at only $20 a day including unlimited miles and covering 2 drivers. It was also a mid size Toyota corolla with a good radio, phone hookups and cigarette lighter for charging. It was a spacious, smoother drive though the car was certainly a bit roughed up. The shuttle service to and from Christchurch airport was phenomenal. (We were running late on returning the car and we literally had 40 minutes from the time we dropped off until our flight DEPARTURE time, and they rallied and got our car checked in and us to the airport super fast) 

How to save money on gas in New Zealand

  1. If you saw my camper-van post than you know gas is a costly price for road tripping around New Zealand. The more you plan out where you will fill up, the more you will save on gas. Purchasing gas in larger areas is loads cheaper due to the demand. (for example, gas in Glenorchy was $1.50 NZD MORE than gas in Queenstown and it’s only a 46 km drive)
  2. Pick up an EXON Mobile rewards card at the start of your road trip. Exon stations were generally the baseline for price in the cities and with a rewards card you save $0.03 off each liter and once you accumulate enough points, you can cash in for $5, $10, $15 off your gas bill.

See related articles below:

Should you rent a camper-van in NZ

Top tips for a budget friendly trip to NZ

Pin me for later:

Top tips for a budget friendly trip to NZ

Most people think a trip to New Zealand is a costly affair- mostly due to impressions of how expensive it can be to fly there. However, New Zealand is actually one of cheaper places I’ve been with prices comparing to trips around the United States. There’s loads of ways you can economize and save money in New Zealand that are fairly unique to the country itself, so I’m writing down all the tips and tricks for you to budget your way to the dream trip you’ve been waiting for.

How to eat for cheap in New Zealand

  1. Download the app first table or bookmark their website. This instrumental site allows you to make a reservation for a wide range of eateries for about $10. Then you get 50% (based on the deal) off your entire order when you eat there. If you like fine dining and great restaurants, this is a killer way to save 50% or more off your bill. *Note that you have to make the reservation 1-3 days in advance depending on the popularity of the restaurant.
  2. Explore the grocery market options. We tried to minimize our eating out to only 1-2 meals a day and bought sandwich supplies, breakfast items, and other snacks at the markets. The grocery stores are easy to navigate and have lots of fun options. The 3 top markets for saving money on groceries are: Pac N Save (Costco-like), New World (our fave), and Count Down.
  3. Fast food. Forget Mcdonald’s- that place let us down this trip as far as pricing. However Dominos really rallied for us and it’s got multiple locations across the nation. In under 10 minutes you get your order, plus one large pizza is only $6 NZD or $3.50 USD ! That’s even cheaper than in the US, really fast, and super satisfying after a long day when you’re just ready to curl up in your Airbnb.
  4. Book airbnbs that include breakfast. 50% of our stays did and they were all amazing! I’ve never stayed in such generous places- they usually included toast with butter/ jam, breakfast cereals and milk, fruit, yogurt, and of course a selection of teas and coffee.
  5. Buy your alcohol at the liquor stores or grocery stores instead of drinking at restaurants. It’s much cheaper- particularly if you like cider which goes for practically the price of water some places.
    • Note: For purchasing alcohol at stores OR at bars/ restaurants you’ll be asked to present identification proving your age. For international visitors, the only identification they will accept is your PASSPORT.  

How to save money on activities in New Zealand

  1. When shopping for adrenaline activities and tours check with multiple operators to see if they combo with other tours you want to do. Many do offer combos and discount the rate of the 2nd activity. For example rafting the Kawaru River we found operators that combo’d a cruise on Milford Sound, and another that combo’d jet boat tours and the Queenstown Luge. The latter ended up actually saving us more money so that’s the combo and operator we chose to go with.
  2. Bookmark the site: Bookme for last minute tour discounts. If there’s any activities you’re interested in that you aren’t on a tight timeline for or worried about going with a specific operator (ie: biking tours, wine tours, film locations, or horse back riding tours) visit the site bookme to see what options are available. This site sells discounted tours to fill empty seats or drive business on slower days and usually offers 40-50% off and more in some cases. During our visit to Queenstown we booked a horseback riding tour at 40% off and admission to an Ice Bar for 50% off.  
  3. Do less costly activities and more FREE stuff! If you’re a LOTR fan, see my post here for a diy guide to filming locations across the country. Visit the National Park visitor centers to learn about the history and culture and find info about great hikes in the area. Road trip out to scenic spots and have a picnic! There’s lots of great ways to plan a do it yourself tour and save lots off the organized tour price.

How to save money on gas in New Zealand

  1. If you saw my camper-van post than you know gas is a costly price for road tripping around New Zealand. The more you plan out where you will fill up, the more you will save on gas. Purchasing gas in larger areas is loads cheaper due to the demand. (for example, gas in Glenorchy was $1.50 NZD MORE than gas in Queenstown and it’s only a 46 km drive)
  2. Pick up an EXON Mobile rewards card at the start of your road trip. Exon stations were generally the baseline for price in the cities and with a rewards card you save $0.03 off each liter and once you accumulate enough points, you can cash in for $5, $10, $15 off your gas bill.

And of course the easiest way to save money when travelling anywhere is to visit in the shoulder or off seasons. This will save you the most money on your lodging and car rental and usually impacts even the cost of activities.

See my other cost saving articles for NZ below:

My top 3 budget friendly airbnbs in NZ

My top tips for road tripping New Zealand

Should you rent a campervan in New Zealand

Pin me for later:

The top 3 budget friendly Airbnbs in NZ

If you’ve explored this website at all, you’ve probably seen that I love me some airbnbs. I spend hours pouring over lodging for each place I visit- reading reviews, looking through photos, and just visualizing how the location will affect my itinerary. I generally prioritze uniqueness and value so with that- here’s the top 3 amazing airbnbs in New Zealand that are all well under $100 US a night!

Best on the North Island

This may- in fact be the best airbnb experience we’ve ever had- anywhere in the world. The home is located about 15 minutes outside of National Park village on the north island of NZ in a prime spot for hiking the Tongariro Alpine Crossing. National Park village itself is really quite small with only a handful of lodges, restaurants, and a train station- so there’s really no reason to stay in town.

Amenities: This airbnb is a standalone apartment that does share the property with the owner’s home. It has its own entrance and doesn’t share any walls with the home, so it still feels very private. It comes with:

  1. a comfortable queen size bed
  2. wood burning stove for heating in the winter
  3. loft with an additional futon
  4. good sized kitchen and eating area and included toast, jams and butter, yogurt, milk, great coffee and tea, and several small sweets
  5. private bathroom
  6. private outside deck
  7. washer and dryer if needed
  8. 7 acres of beautiful farm land to explore including a hammock space, fruit trees, and several small creeks
  9. Smart TV with netflix hookups
  10. Best of all- it has its own private spa/ hot tub outside under the stars and they even have robes for you to use for going in and out

Honestly we spent 2 nights here and I could’ve stayed forever. The hosts were so friendly and accommodating. They even took us on a tour of the property and we got to meet their super friendly donkeys! You could see the tops of Tongariro National Park’s volcano peaks but the views of the surrounding ridge lines and fields were the amazing enough. For my drone footage of the property, click here.

To stay at this incredible airbnb, you can book here.

The best airbnb on the south island of NZ

This airbnb wins awards for having incredible architecture, wildlife, and views all wrapped up in one. It’s an easy 5-10 minute drive outside of Queenstown along the beautiful Glenorchy road and situated in some of the prettiest countryside in the area. The room itself has warm welcoming colors and is very comfortable. Amenities at this home include:

  1. a VERY comfortable queen bed with luxurious bed linens
  2. small breakfast necessities such as a mini fridge, coffees and teas, toaster, set of dishes
  3. Massive bathtub and gold headed shower in a bathroom with a skylight
  4. Did I mention how interesting the overall architecture of the place is?
  5. a paddock full of Disney level friendly deer right outside your room.

While the host was a little more aloof at this property, she did go over maps of nearby trails we could walk and other points of interest nearby. The property actually has 2 airbnbs available to rent (this room being the cheaper of the 2) and a home attached. We spent a very rainy 3 days in Queenstown and we loved being able to retreat to this mountain lodge. Feeding the deer was also a highlight of our entire trip.

To book this property, visit here

Bonus great airbnb for the north island:

As far as amenities and convenient location go, this airbnb doesn’t quite stack up to the previous 2, but what it does win at is insane views and wonderful hosts. It’s located in the very small seaside village of Whangapoua near New Chums Beach on the Coromandel, NZ. It’s about an hour drive from Cathedral Cove and hot water beach which are 2 much more thriving beach side towns. Its views however are unmatched and if you’ve ever wondered what staying in a shipping container would be like- here’s your chance.

The view from right outside the front door and from the communal kitchen

The airbnb includes:

  1. a full size outdoor covered kitchen
  2. private ensuite bathroom
  3. killer views from every angle
  4. an incredible beach less than 5 minutes drive away

To book a stay at this airbnb, visit here.

Pin me for later:

Should you rent a camper van in NZ?

If you’re planning a trip to NZ and plan on staying near a lot of the national parks and hiking, odds are you’ve considered renting a campervan. Camping in New Zealand is incredible and there are tons of brilliant campsites however while most people would think that it’s more flexible and cheaper to rent a camper van… but that’s actually NOT the case.

One of our fave airbnbs in Queenstown, NZ

Renting a camper van could cost you hundreds more than staying in comfortable Airbnb’s and at least double staying in dorm hostels/ tent camping. What’s more, if you supplement some of your Airbnb costs with tent camping, not only do you get the best of both worlds with nature and luxury, but you save a lot of money on the cost of the rental and gas.

In NZ you aren’t allowed to just park your rig and camp anywhere- you either need to find specific free campsites or pay to stay in a campground- making it less of a flexible option than you may have been thinking.

Here’s the breakdown:

New Zealand Campground Costs:

All paid NZ campgrounds come with some sort of toilet and water. Most also come with a cooking facility/ kitchen area. Below are the general costs of NZ campgrounds:

  1. DOC/ nonpowered and no shower sites run $8-$15 NZD per person
  2. Holiday parks with power and showers run $25 NZD per person

There are some free campgrounds around the country with no services at all. These aren’t however as conveniently located to sites you might want to see and will require lots of additional planning.

Visit this site here to see free campgrounds

Another amazing airbnb near New Chum’s Beach and Cathedral Cove

New Zealand Camper-van Costs:

*The below costs are based on a 10 night, 2100km/1300 mile road trip on the south island
*The avg cost of gas on our was trip: $7 USD/ gallon or $2.80 NZD/ liter

Rental Cost of the Camper:
$407/ $637 NZD for cheapest option of a camper-minivan
or
$617/ $966 NZD for next size up rig (sleeps only 3)

Gas costs:
The minivan rig gets 21mpg or 11L/100km so gas will cost $433
or the larger rig gets 12mpg- 19.6L/100km which would cost $758

Cost range for camper-vans: $840 to $1375 not factoring in campground or rental gear costs

Our non- campervan budget

*We tent camped 2 nights at Mount Cook NP. Otherwise we stayed in very nice Airbnbs

  1. Rental Cost of the economy car: $207 – we got a Toyota corolla
  2. Gas Cost: $257 -we got about 35 mpg or 8L/100 km
  3. Campground costs when tent camping: $60 for 2 nights
  4. Airbnb costs: $608 for the other 8 nights around the south island

Our total cost: $1,132 including showers, toilets, and most of the time kitchens with breakfast

Note: We could’ve saved even more by staying in hostels (Avg cost $30/bed) or tent camping more nights (Avg cost $30/night)

Our tent outside the Pouakai hut on Mount Taranaki

Conclusion

So in the end you could rent a camper-van and pay at least $840 with no showers, toilets, or bedding- where you have to pay at least another $300 in campground fees OR find free campgrounds.

OR you could pay around $1100 for amazing airbnbs and a decent car with awesome gas usage. Plus tent camp when you want to be in nature, OR even better stay in one of New Zealand’s crazy beautiful mountain huts like the Pouakai hut!

Thanks for coming to my TED talk! For more articles related to saving money in NZ, see below:

My top tips for a budget friendly trip to NZ

Tips for renting a car in New Zealand

Award worthy Airbnbs in New Zealand

Pin me for later:

Guide to Wanaka

Wanaka is like the little sister of nearby Queenstown- and I mean that in the best way. It offers a stunning lake that is in a parallel valley to Queenstown’s lake, tons of brilliant hiking, adventure sports, and great food- only it’s a quarter of the size. It’s easily walkable around the whole town and makes for a little more relaxing of a vacation compared to the larger city of Queenstown. We had originally only planned 1 day in Wanaka but got 3 due to extreme weather killing our plans in Mount Cook National Park. Needless to say, our 3 days there were a great blend of relaxing and adventuring and a nice way to take a break after 10 days on the move.

Top things to do in Wanaka:

Hike to Roys Peak

An iconic must-do hike for the adventure enthusiast visiting New Zealand’s South Island- Roys Peak is a fantastic but CHALLENGING hike. Wanaka is an excellent base as this trail is very popular in fine weather and you’ll want to hit the trail first thing to beat the crowds and the heat of the day. Read more about the hike here.

Hike to Rocky Mountain

The moderate version of Roys Peak with a quarter of the crowds- a hike to Rocky Mountain is a worthy hike for families or folks who don’t feel like climbing 4,000+ feet in under 5 miles. Instead this easier version still takes you too a great vista over Lake Wanaka and includes the bonus small Diamond Lakes as you meander along. It climbs a lot less elevation but it does still have a bit of a climb so hikers be prepared.

Check out a movie at Cinema Paradiso

While going to a movie is not usually at the top of my list when travelling internationally, I’m actually super stoked that we got to experience this theater. We visited on an incredibly rainy day when being outside was impossible and the warm cozy interior of Cinema Paradiso was the perfect escape. They have 2 main theater rooms and the seating is made up of couches and believe it or not- CARS. They’ve got a full service café, beers, and your standard movie fare to dine on during your visit. The best snack comes during the intermission (yes even only 90 minute films have one) when they have fresh baked cookies for purchase at around 3NZD. I also loved the intermission for my always necessary bathroom break.

*Tip: Call ahead to set aside tickets for your party and show up 20-30 minutes before your film to have the best chance of great seating.

Visit the Mount Aspiring Visitor Center

Yet another unexpected spot that we took refuge in from the never ending rain on our visit to Wanaka- the Visitor Center has a lot of fun information on the area. They have displays on the native wildlife and a cool exhibit of the discovery and exploration of climbing routes on Mount Aspiring. One of the most interesting exhibits to us was the walk that detailed how the New Zealand red deer were introduced, over populated, and then how they managed to get the population back under control. (They would literally capture deer from helicopters with specially designed net guns)

exhibits at the visitor center

I’d also recommend a visit here to plan your hikes and learn about the various tracks. For example we’d thought about venturing out in the rain on some more shorter hikes but learned almost everything near Wanaka was closed due to mud and flooding conditions.

Take a Wine Tour

Wanaka sits in the Central Otago region which is best known for 2 things- cycling and wine. It’s rolling dry hills, sunny weather, and slight alpine fields make for an excellent wine growing envinornment. The most fickle of grapes- Pinot Noir even excels here. If you are a wine connousieur, a wine tour shouldn’t be missed if visiting this region and there’s plenty of fantastic tours to choose from. Pick a tour that takes you to only boutique wineries not open to the general public, or goes by a more try all approach. There’s also a fantastic tour that combines Maori culture and wine – we met the creator of that tour who was fantastic.

My recommendations:

Boutique Wine Tour – Wanaka Wine Tours Reservations

Wanahaka Wine Tour

Where to stay in Wanaka:

Luxury: Lakeview Vista Appartment from $383/night

A stunning apartment capable of sleeping 8 people- each room boasts lakeside views and the deck is a dream sunset spot.

Glen Dene Station

A little outside town, this private cabin retreat has its own private walking trails and swimming beach and comes with a great breakfast.

Moderate: Cabin right in town from $64/night

*We stayed here one night. This was a small comfortable space with a great king size bed. It’s a small space but all the features are upgraded and clean. The key note here is it is RIGHT downtown walk-able to the lake front and restaurants within 5 minutes.

Cabbage Tree Cottage from $60/night

*We stayed here 2 nights. This small cabin is SO cozy and comfortable and just 10 minutes outside Wanaka. It generally runs cheaper even in the high tourist season which also really puts it on the map. It has all the kitchen gadgets for making breakfast and sandwiches.

Budget: YHA Wanaka from $25 /bed/night

When it comes to the hostel dorms in NZ, YHA continues to hold the highest rating in just about every city. If you’re a solo traveler on a budget, give them a try.

Where to eat in Wanaka:

Moderate/ Expensive:

Urban Grind– This place had a very hip atmosphere with easy ordering and delicious food. It’s great for pizza and drinks in the evening, or brekie/ lattes in the morning.

Speights Ale House– The original beer brewed in NZ makes this ale house a classic and if you’re craving pub fare- it’s a great spot to eat.

Wanaka Gourmet Kitchen– Lake front and a high rating- if you’re wanting to try local fare, check this place out.

Budget friendly:

Wanaka was heavily flooded while we were visiting but these budget spots below would be fantastic for picnics on the lake

Dominos– I know I know, not very adventurous but for only $6NZD ($3.50!) for a large FAST pizza, after a day out hiking in the rain, this was an easy choice for us.

The Doughbin Bakery– The meat/savory pies were amazing here and it’s right on the lake front. Grab some pies and pastries for dessert and have yourself a picnic in the park.

Erik’s Fish and Chips – Nothing fussy fish and chips stand on the main road through town. 

Pin me for later:

Guide to Te Anau

You don’t have to be planning an epic multi day walk into the backcountry of Fjordland National Park to plan some time in Te Anau! In fact, while it is the gateway to some amazing places, it’s a great little town to explore in its own right! Consider this: You can take cheap ferry cruises along Te Anau lake, see glow worm caves (great if you aren’t going to the North Island), check out amazing birds in a free sanctuary, learn about the geological and cultural history of Fjordland National Park, AND have great access to nearby Milford Sound without paying the premium of staying in Milford Sound Lodge.

Top things to do in Te Anau:

Te Anau Glow Worm Caves

Experience the twisting network of limestone passages filled with sculpted rock, whirlpools and a roaring underground waterfall topped off with the incredible bio-luminescent world of glow worm lights. The experience lasts just over 2 hours beginning with a sight seeing cruise across Te Anau lake, a walk through underground tunnels, and ending with the capstone of floating in an underground grotto under a canopy of glow worm “stars” before heading back to the light of above ground. The tours are kept to small groups (with a max of 14 people) and cost around 103 NZD ($67) per person. I would consider this a MUST do tour unless you plan on visiting Waitomo on the North Island. *Make advanced reservations here to ensure availability on your date.

source
Te Anau Bird Sactuary

Rain or shine, this is a great little nature park to walk around hosting several exotic and even endangered species of birds. We saw owls, parrots, parakeets, and the most incredible of all: the almost extinct Takahē, a flightless bird native to only NZ. When we were there, they had a recently hatched Takahē chick as well. It’s an easy place to walk around in 15 minutes or so depending on how long you admire the birds and get to know their personalities. If possible, try to go close to feeding times at 9:30 AM or 4:30 PM. Guided tours are also possible to be arranged through the Fjordland NP Visitor Center.

Directions: It’s an easy 10 minute walk along Te Anau Lakeshore from the Fjordland NP Visitor Center, or an easy 3 minute drive.

Hours: Dawn- Dusk

Cost: Free, but a 1-2 gold coin donations are appreciated

Te Anau lakeside Walk

There’s a trail that extends all around lake Te Anau to the start of the great walks like the Kepler Track. Walk as little or as much as you want to and if you have a full day but couldn’t get reservations for any of the overnight huts- the Luxmore hut is an excellent full day hike beginning in Te Anau. 

Fjordland National Park Visitor Center

A great stop that can be short or long depending on the weather. They had some great exhibits on the discovery and settling of Fjordland National park as well as exhibits on the wildlife that can be found throughout New Zealand.

Fjordland Cinema

Can’t afford a helicopter tour of Fjordland national park? Don’t sweat it! Playing every hour at Fjordland cinema is a documentary Birdseye view in IMAX of Fjordland National Park. Check with your hotel for a discounted ticket.

A Great Walk!

With 3 world famous multi-day treks in the area to choose from, the area is the perfect launch point. Make sure to check the reservation systems for these great walks as the huts book out very quickly when dates are released.

Milford Sound

Read my post specifically for driving the Milford Sound road and taking a Milford Sound Cruise. If there’s anything you do on the South Island, make sure this place is top of the list. From Te Anau, it is a 1.5-2 hours drive to Milford Sound without additional stops for hikes and short walks. Plan your time accordingly.

Where to stay in Te Anau:

Luxury: Fjordland Lakeview Motel & Apartments $265

For a room with a view on the lake, full studio, and adults only retreat- the Fjordland Lakeview is the highest rated hotel in Te Anau and as great amenities.

Midrange: Te Anau lakefront backpackers private rooms 123 NZD/ $80

*Where we stayed

We had a triple room with kitchenette and private bathroom. We loved staying here as the beds were comfortable and came with really soft blankets, the kitchenette in our room was helpful, and it was nice having a private bathroom. Everything was clean and comfortable and best of all- this hotel IS lakefront so walking around the lake, taking a boat tour, and checking out the visitor center are all an easy 5 minute walk away. 

Budget: Te Anau lakefront backpackers/ YHA Te Anau $24 pp

The cheapest options are to book a dorm bed here for $24/bed in a 6 bed mixed room. Both hostels are well rated and in convenient locations.

Where to eat in Te Anau:

The Fat Duck- For fancier fare, we really enjoyed eating at the Fat Duck. They have a nice range of menus for both meals and drinks. Their grilled lamb salad was particularly good.

Redcliff Restaurant &Bar – if you’re in the mood for a good burger or great pasta- this place was also delicious.

See my related articles for nearby action:

Complete Guide to Milford Sound

Complete Guide to Queenstown

Complete Guide to Wanaka

Pin me for later:

Luging at Skyline Queenstown

If you’re looking for a killer view of Queenstown without A. hiking or B. paying loads of money for a scenic flight- look no further than Skyline Queenstown. It’s right in town and makes for a fun outing any time of day. You can make reservations to dine in their restaurant, buy tickets for their insanely fun luge course, haul your bike up and mountain bike down, or just ride the gondola to the top for the best view of Queenstown and her lakes.

Queenstown Skyline Practical Information:

Gondola Hours: Open at 9AM daily. The last gondola down coincides with the restaurant hours.

Restaurant Hours: Lunch reservations are available from 11:30-1:30PM. Dinner reservations are from 4:30-8:45PM. All dining times are limited to 90 minutes.

Luge Hours: Open at 10AM daily. Closes from 6PM-8PM based on demand and sunset hours. Check their website for accurate closing time.

Gondola tickets: Adult- $28.50/44 NZD, child (ages 5-14) $16.80/26 NZD

Gondola+Dinner– from $64/99 NZD adult, $35/ 54 NZD children

Gondola +5 luge rides– Adults $43/67  NZD, child $31.50/ 49 NZD

Mountain biking: Adults $29/45 NZD, child $19.40/ 30 NZD

*Visit here for more deals and combo options as well as family ticket prices

*If you are thinking of doing bungee or white water activities- check to see if they offer combo tickets to get further discounts off these costs

*If you are in the area for several days, check the site First table (on your first day) for reservations and awesome discounts at the restaurant

*There are cheaper tickets for only 2 luge runs but trust me you want at least 5.

Our experience at Skyline Queenstown:

We unfortunately were not in the area early enough to catch reservations for the restaurant on First Table so I can’t attest to the food (although friends of mine went and said it was very good) we did however get to do the luge. Maybe it was the fact that half our tours in Queenstown were cancelled due to weather and we were happy just to do it, or maybe it’s because the luge really is the coolest cheap thrill you can find in Queenstown- either way I highly recommend it.

The gondola up itself is worth it (although you can hike for free). The ride is over in under 10 minutes and the views from the top are just insane. We were lucky to have a clearing in the week long rain and were up there close to sunset so the lighting was just brilliant.

The gondola spits you out like all rides in a gift shop. From there you can follow the path outside and down a slight hill to the start of  a short ski lift which you can ride (no tickets needed) even higher up the hill to the start of the luge courses. We grabbed some helmets for the luge and hopped on the lift which took another 10 minutes or less and had even better views than the gondola.

Riding the lift up over the luge hills

At the top of the lift station there are more toilets, a walking trail that has picnic tables along it if you choose to walk down, and the beginning of the luge course. For the first ride down you have to go in the left line where the explain the rules and working of the sleds and you start on an easier track. The line was about 5-10 minutes for explanations and we got released in small groups of 4 -6.

Luging at Skyline Queenstown

The ride is sort of a cross between go carting and an alpine slide if you’ve experienced one of those. It’s a wide cement track (perfect for passing slow pokes) with twists, tunnels, and a few short drops. The toboggan sled requires you to push forward to go forward and allows for steering which requires BOTH hands.* You can really go as fast or slow as you want just keeping mind that on tight turns if you feel the wheels lift up you might want to take it a little slower.

Depending on how fast you go, each run lasts between 1 minute to 3 minutes and there are 2 different runs you can take.

Video still from footage we took with a helmet mounted gopro

*Don’t plan on holding a camera or phone in your hands as it is impossible to operate at the same time. Instead if you have a gopro- make sure to bring your mount as there were several helmets that already had a gopro mount fitting for videos.

We did the slower track the first time through and then did the faster one the rest of our 4 rides. The line was never longer than 5-10 minutes and we had an absolute blast zipping down the track over and over again. Trust me, even 5 won’t feel like enough.

Once we’d finished our rides, we rode the lift up one last time in order to walk down to the gondola station and enjoy the views a little longer. Back at the station we got some gifts from the gift shop and hopped in the gondola for the ride back down.

All in all, the gondola and luge was a highlight of our trip to New Zealand and if you’re in Queenstown, it’s a must do. Everyone can go their own speeds so even the less thrill seeking members of your group can have an enjoyable ride.

Pin me:

Lake Tekapo- Worth they hype?

Absolutely, it is all the hype. A lot of the posts on Instagram in the spring/ early summer in New Zealand come from Lake Tekapo and its huge turquoise lake with lake shores bursting with purple flowers. It’s a photo shoot mecca for photographers and insta- stars alike, and what’s more- it’s an EASY stop on any road trip from Queenstown to Christchurch or vice versa as it is right in the middle of the 2 on the main highway.

About Lake Tekapo

Lake Tekapo is the 2nd largest of 3 parallel lakes in the Mackenzie Basin. It’s stunning milky-turquoise color comes from fine rock-flour suspended in the water. The water is glacier fed from the Southern Alps. Around the lake you’ll find the beautiful Church of the Good Shepherd which was built in 1935 for pioneer families and has windows framing the perfect view of mountain and lake.

Lake Tekapo is also located in a UNESCO Dark Sky reserve making it a fantastic spot for stargazing the southern sky. If you’re really into star peeping you can also visit the nearby Mount John Observatory where on a clear night- you have a decent chance of experiencing the southern lights.

Things to do at Lake Tekapo

  1. Frolic in the flowers
  2. Tekapo Hot Springs
  3. Tour the Mount John Observatory
  4. 4WD or horseback riding high country tours
  5. Check out Lake Pukaki and nearby Mount Cook National Park

Lake Tekapo flowers season

While these special purple flowers can bloom all spring and summer long in NZ, around Lake Tekapo their peak season is end of November through late December.

Our experience at Lake Tekapo

While we didn’t plan much time in the area, it was definitely on my must-stop list. We pulled in around noon and parked in the easy free- grass lots alongside the highway. From there you just cross the road and pick a path down to the lakeshore.

We weren’t there on a very sunny day unfortunately for photos, but I think it may have kept the crowds down somewhat and it was easy to wander among the flowers, get great photos, and just enjoy being by the lake. With purple being one of my favorite colors, I admit to being more than a little obsessed with all the flowers, and even Braden enjoyed using portrait mode on our new google pixels to photograph the beauties. After hanging out at the lake about an hour, we grabbed some lunch in Tekapo at the cheapest place we could find before hitting the road to continue to Mount Cook National Park.

Pin me:

Guide to Arthur’s Pass National Park

Arthur’s Pass is a small, but fantastic National Park along the West Coast road on the South Island in New Zealand. In only 2 hours from Christchurch you can find yourself surrounded by beautiful talus sloped peaks, bunches of wild yellow flowers, and wide braided rivers. There’s several short but worthy day hikes in the region and it’s a fascinating area to drive through and picture the historic highway/ railway that ran through it connecting the 2 different sides of the South Island. While hiking in the area be sure to keep an eye out for kea, the only alpine parrot in the world, that live in the mountains here.

Where to hike:

The Devils Punchbowl Waterfall

Distance: 2 km, time: 1 hour

A short and sweet hike that leads to one of New Zealand’s most spectacular waterfalls. It’s an easy-moderate trail with wooden steps, bridges, and beautiful beech forest. See my post here for more details.

Bealey Spur Track

Distance: 6 km, time: 4hours RT

Best done in fine weather, this track has beautiful views of beech forest, grasslands and subalpine scrub, and the nearby braided river. The most climatic part of this hike is at a cliff with dramatic views down on Bruce Stream. We were unfortunately rained out of this longer hike but if I was ever back in the area, it would be near the top of my list.

Castle Hill

Also known as Kura Tāwhiti Conservation Area, castle hill is an easy stop along the West Coast road from Christchurch. Its interesting landscape of limestone rock eroded into massive boulders makes for a photographer’s dream scale (tiny humans). It’s also great for comparing to film spots as nearby LOTR scenes were filmed as well as the Chronicles of Narnia. There’s no real track here so choose your track- make your own- hike, climb, be free.

Avalanche Peak

Distance: 3 miles/ 5km RT, Elevation: 3600 feet/ 1100 m, Time: 6-8 hours

Yet another hike that we lost to foul weather on our trip, Avalanche peak gives you astounding views of Arthur’s Pass as a whole- the surrounding peaks, the rivers- and you view it all from the top. It also gives you almost a sure fire meeting with Kea, but the drawbacks are this is a VERY challenging hike with steep exposed scrambles and should only be attempted by very experienced hikers.

Where to stay:

Luxury: The Wildnerness Lodge at Arthur’s Pass- from $290

Stunning mountain view rooms and the rate includes both dinner and full breakfast. The rate also includes free activities around the farm such as guided walks on the property and in depth explanation of sheep farming in New Zealand.

Midrange & Budget: YHA Arthur’s Pass– from $37/ bed in a dorm or $98 for a private double

The YHA hostels never fail around New Zealand and they provide a nice range for budgets. They also usually have full facilities for cooking and hanging around making for a fun atmosphere and cheaper eating budget.

Where we stayed: Mount Somers hut. $72 We opted to get a jump on our next day’s serious driving by staying in Mount Somers instead of Arthur’s Pass. It was so much cheaper and was a great little private hut for just the 2 of us. The bonus was the washing machine as well!

Where to eat in Arthur’s Pass:

Your options are limited in Arthur’s Pass National Park for food with only 2-3 cafes that mostly serve takeaways and all day breakfast. While the cost is reasonable for the demand in the area, I’d recommend stopping in at a grocery store in Christchurch before beginning your road trip out west. We bought sandwich supplies and made out own to save costs here but we couldn’t resist a coffee in the Wobbly Kea Café.

Pin me: