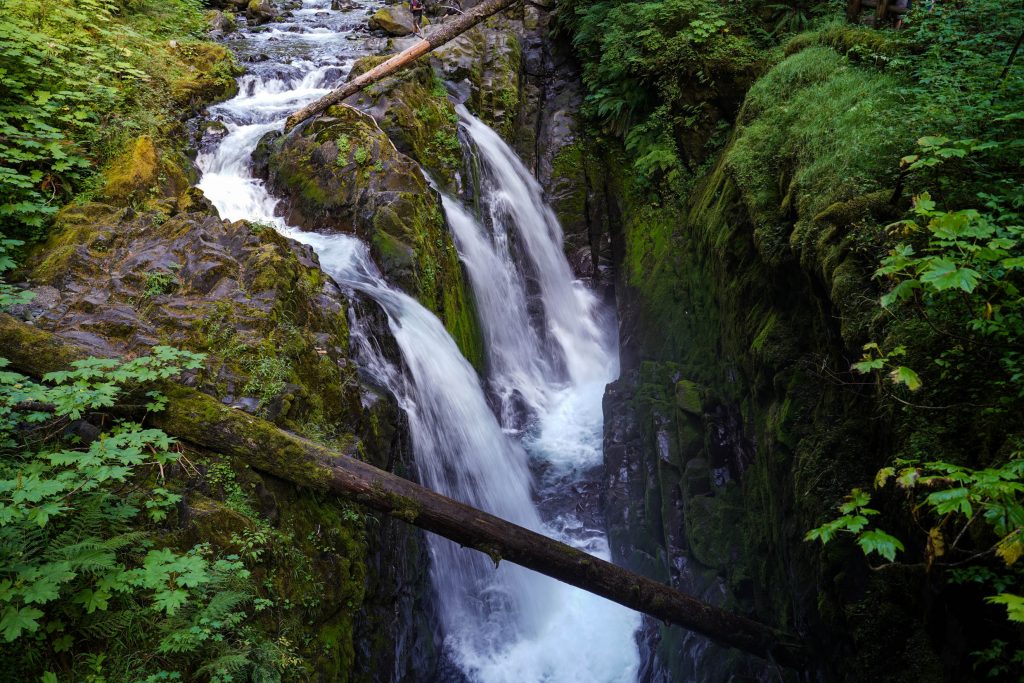
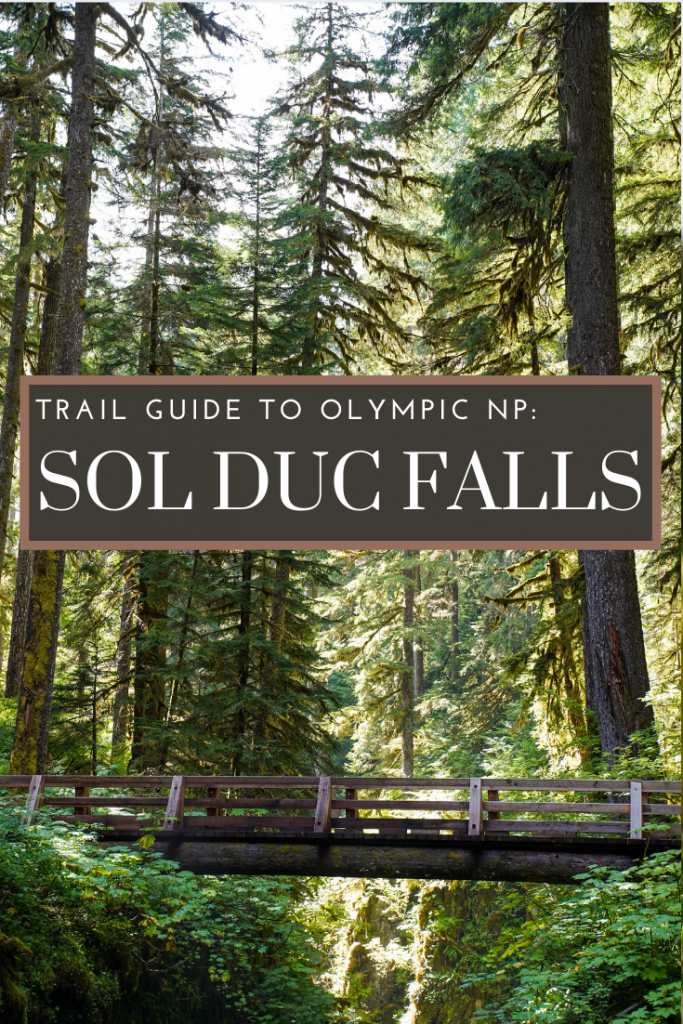
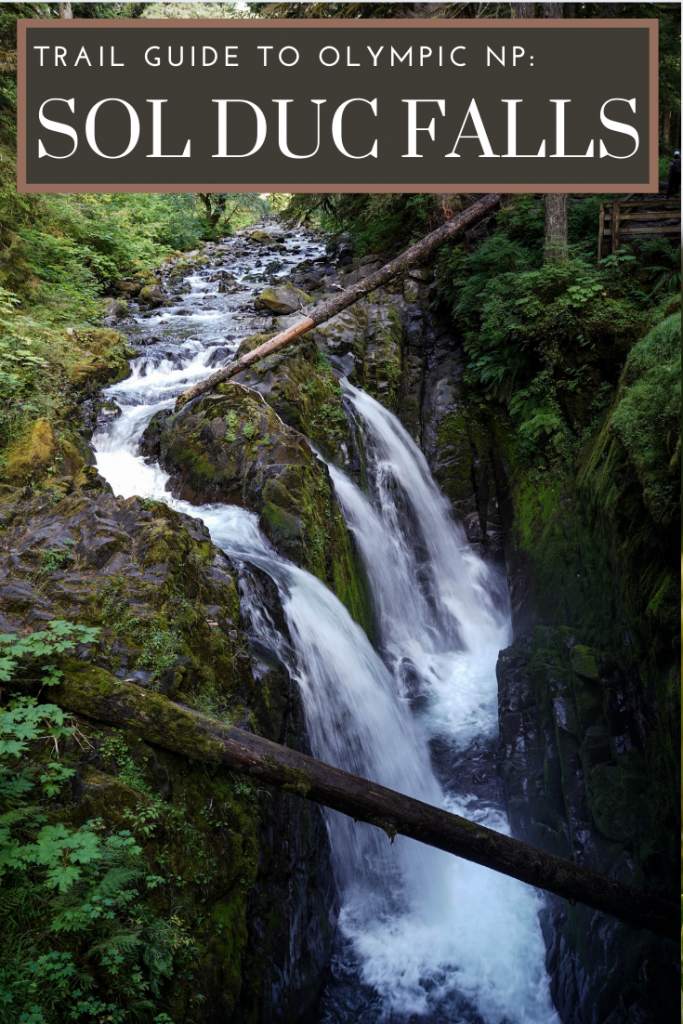
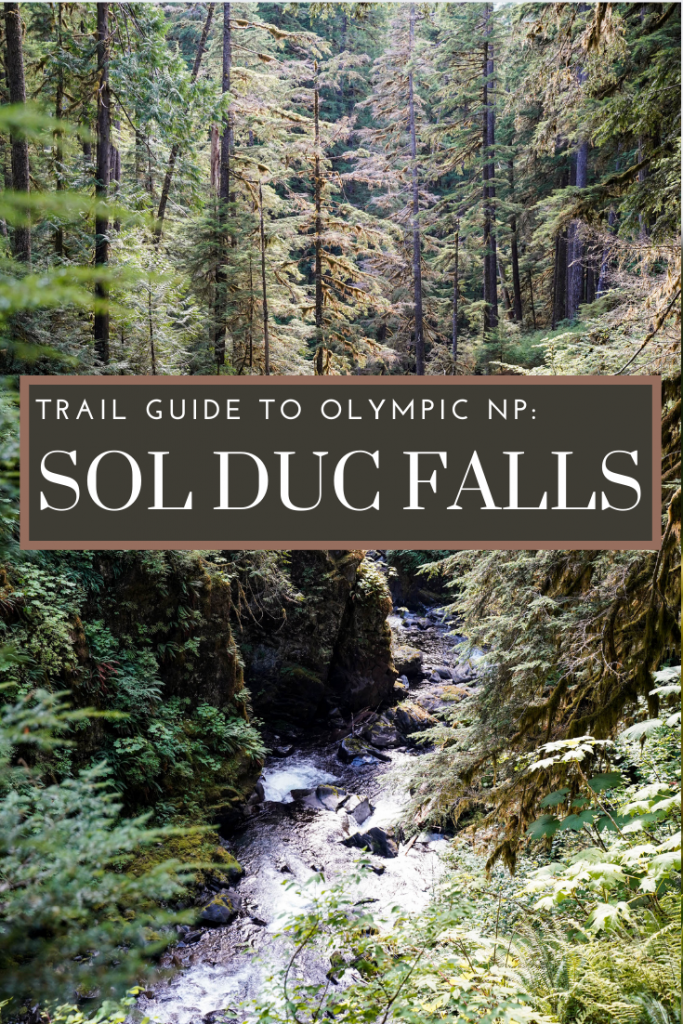
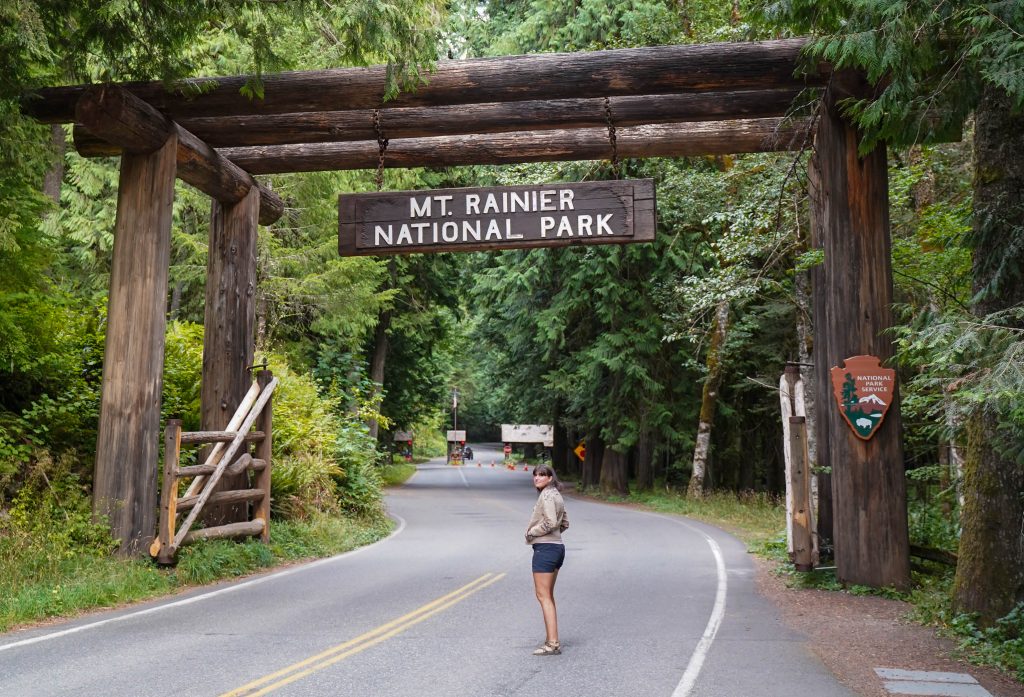
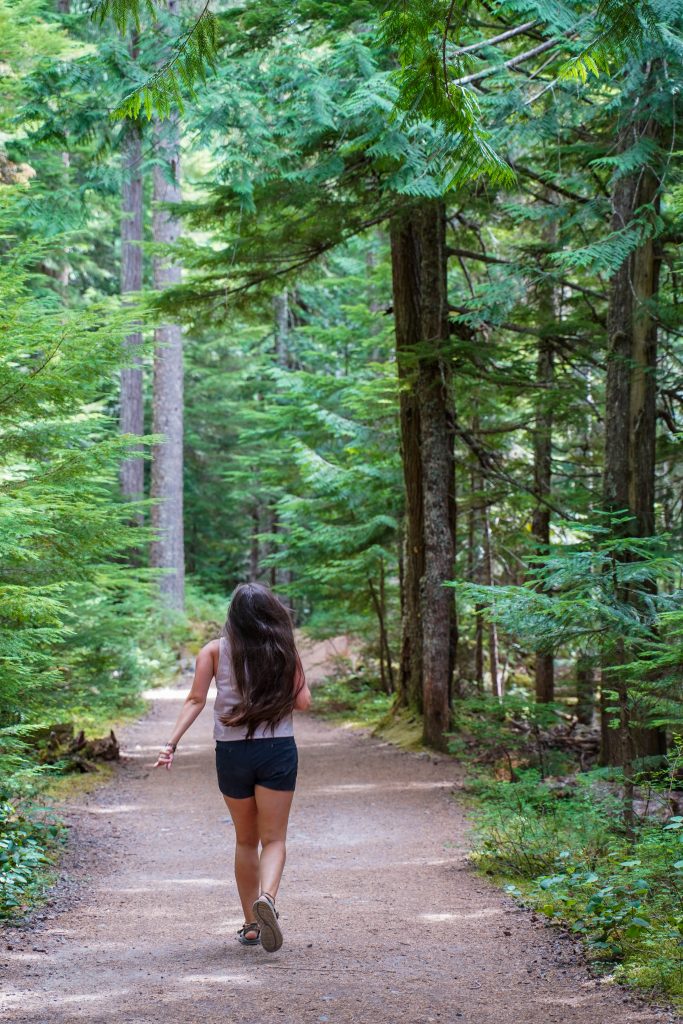
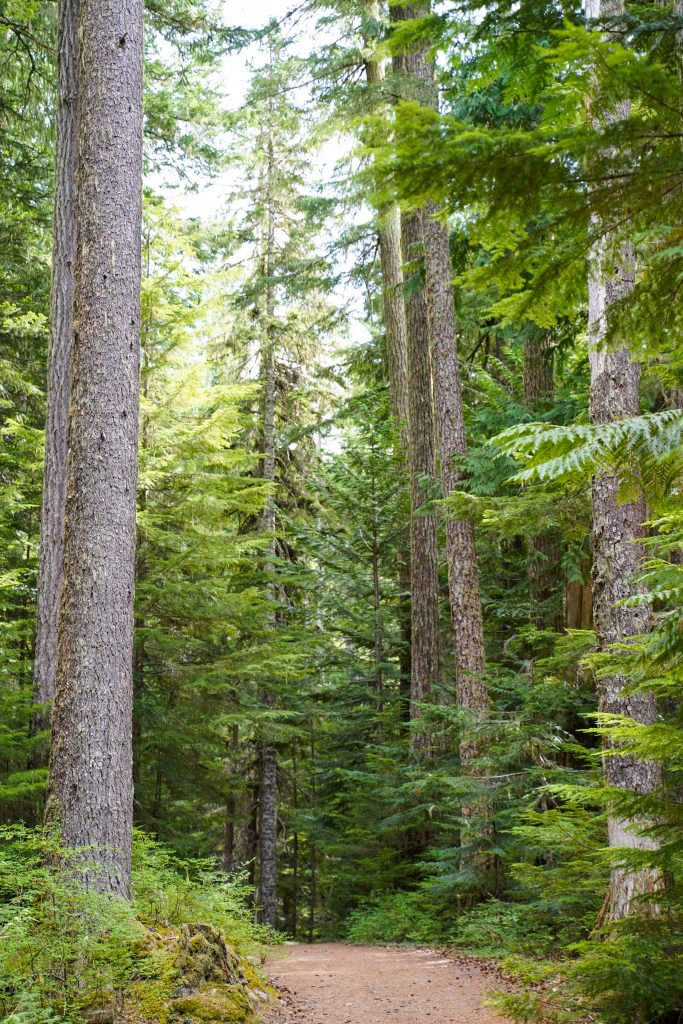
Olympic National Park is brimming with beautiful and accessible hikes with Sol Duc falls as the piece de resistance. It’s a short, relatively flat trail through the towering forests that the national park is well known for. The falls are thunderous and a beautiful. With a trail as easy as this one, families and adventurers alike will enjoy this trail making it a must do for anyone in the Lake Crescent/ Port Angeles area.
Sol Duc Falls Trail Details:
Distance: 1.85 miles RT Elevation Gain: 210 feet (easy) Time: 1 hour Fees: Sol Duc Falls is within the Sol Duc Valley fee area for Olympic National Park. A week pass to the park is $30 or included with a National Park pass.
Trailhead directions:
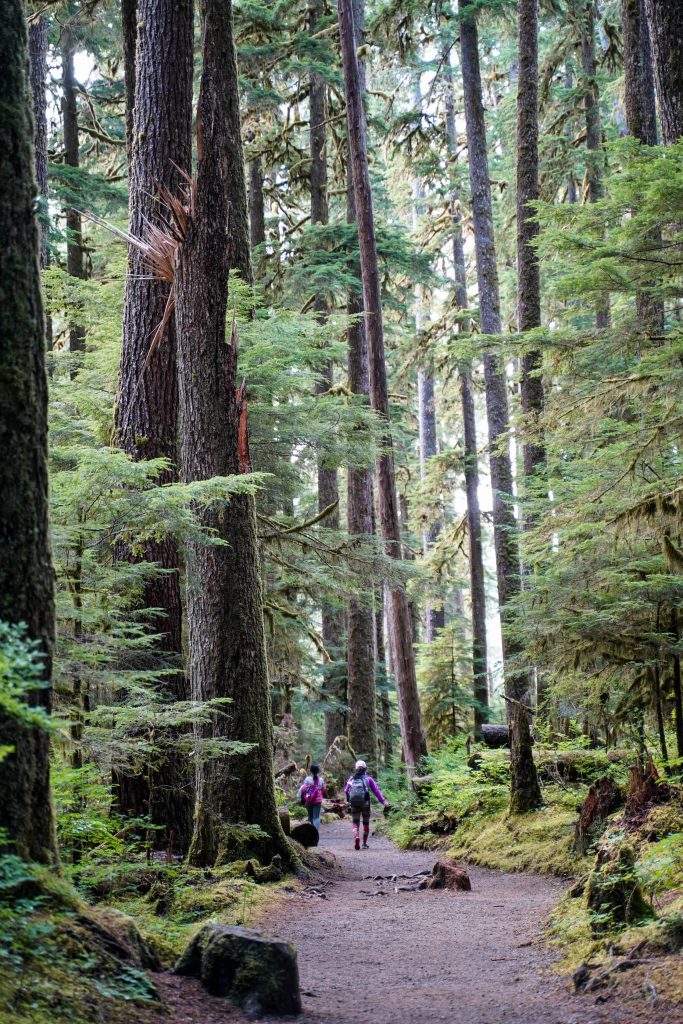
Take hwy 101 and turn left onto Sol Duc-Hot Springs Rd if coming from Port Angeles. Follow the road 13.8 miles passing the hot springs and Salmon run on the right until the road dead ends at the trailhead. The parking lot is huge and offers facilities/ trash. The trailhead also serves a number of other great trails in the area including Lover’s Lane which is a 6 mile loop that includes a stop at the falls.
Sol Duc Falls trail description:
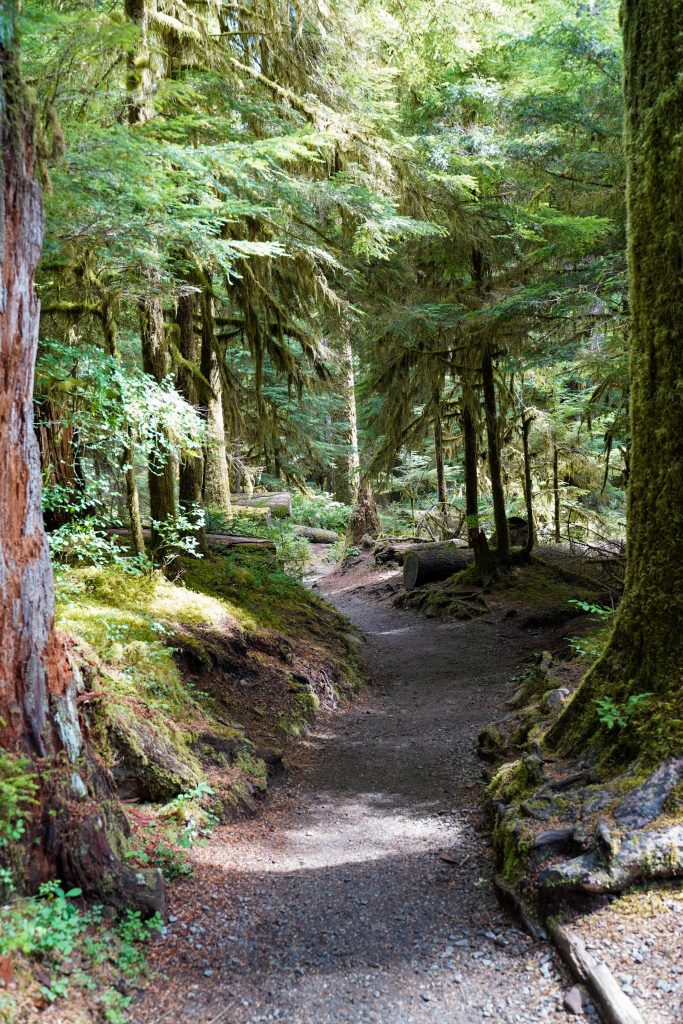
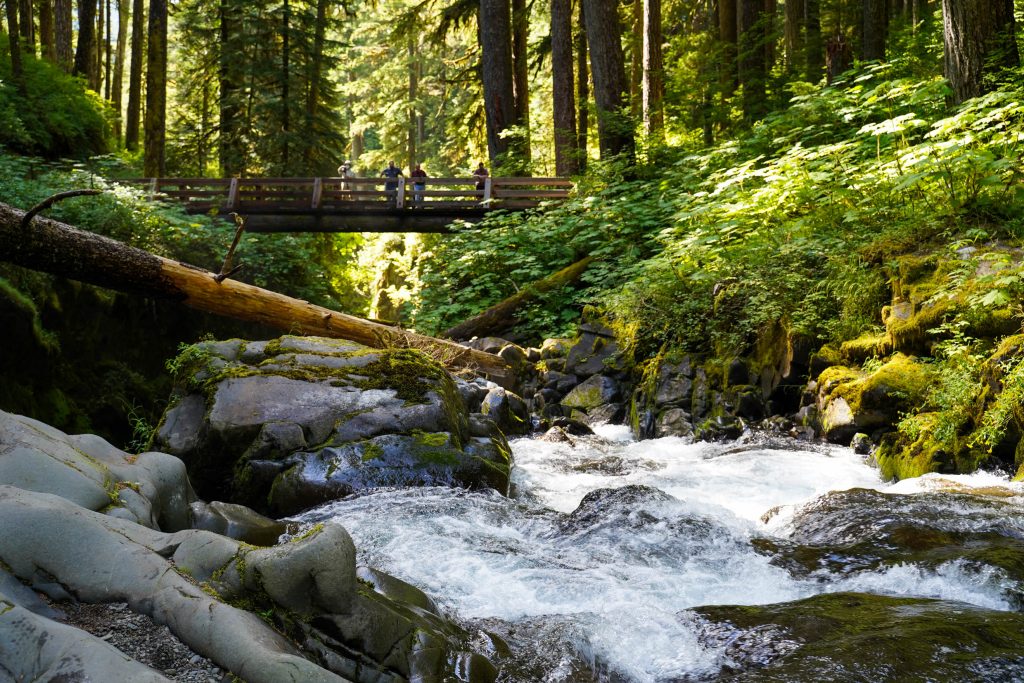
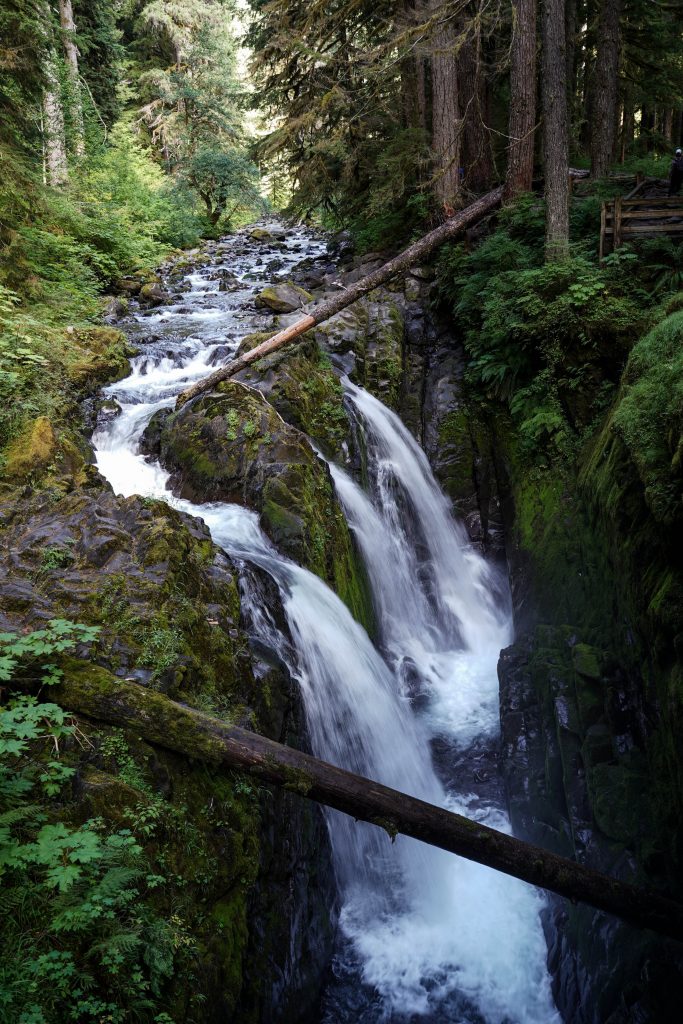
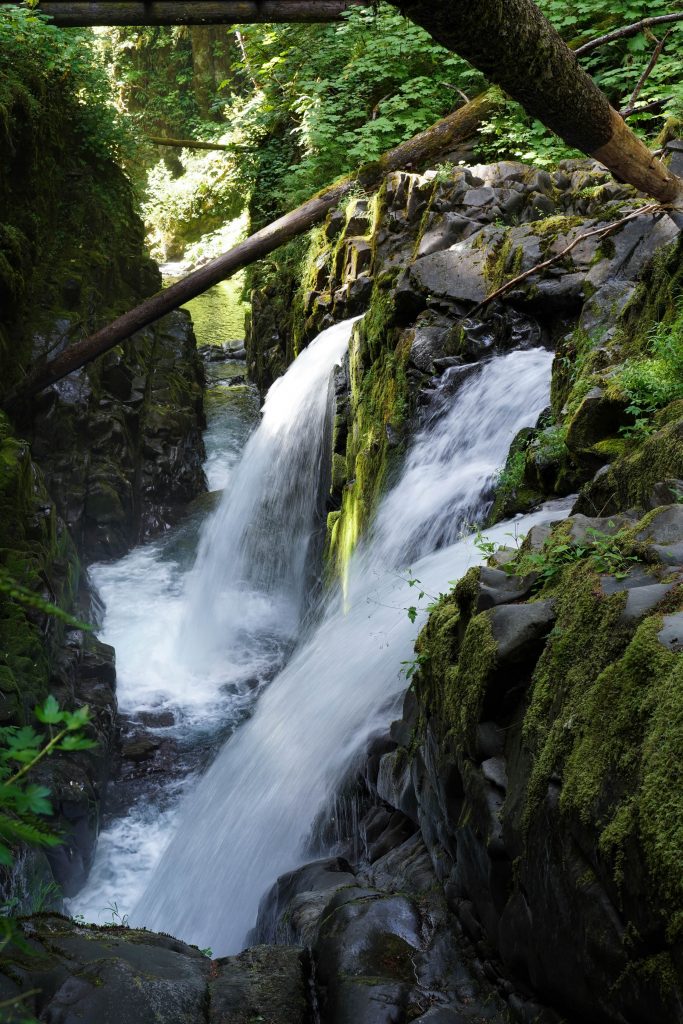
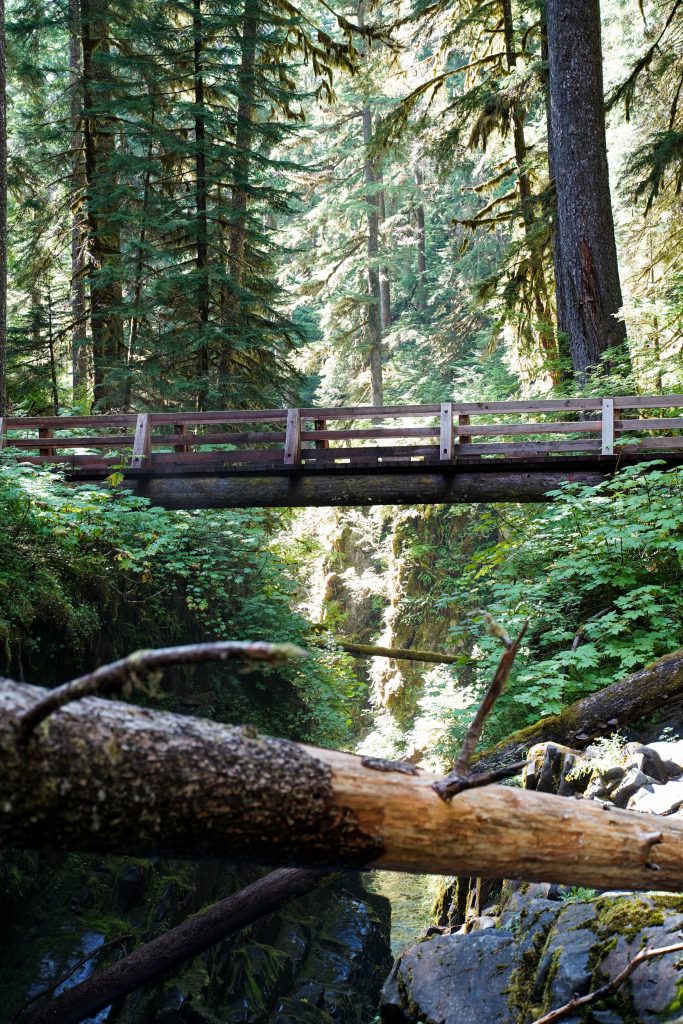
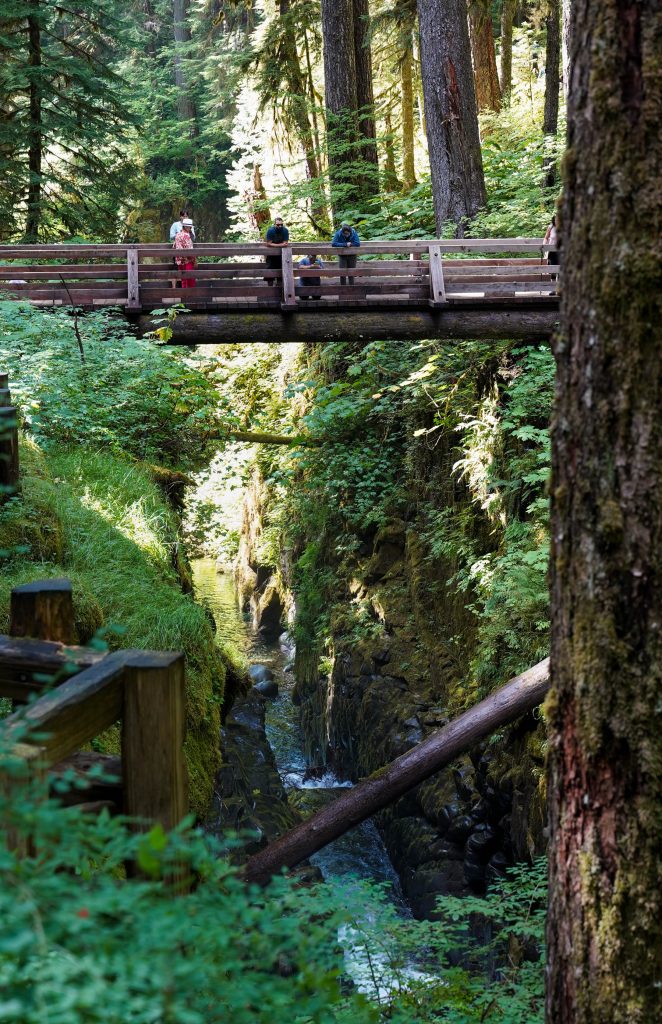
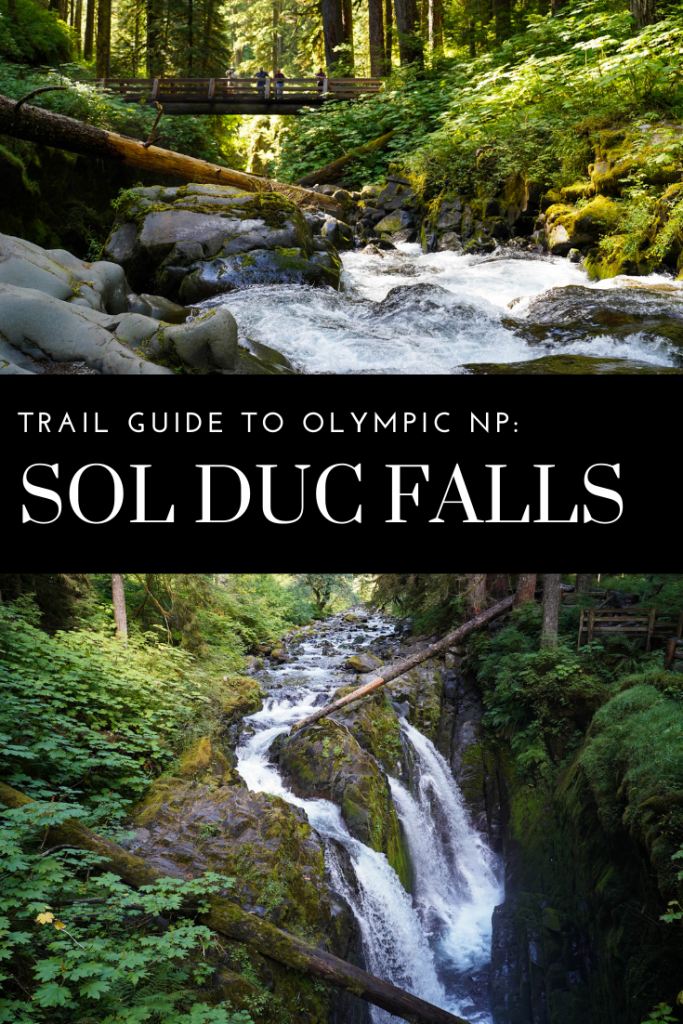
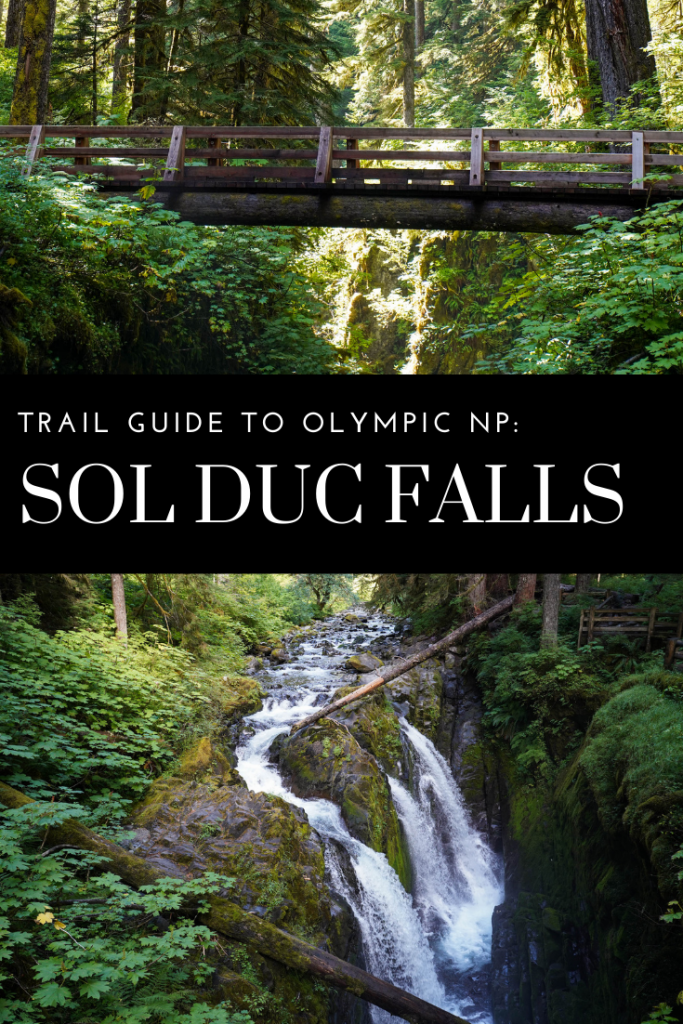
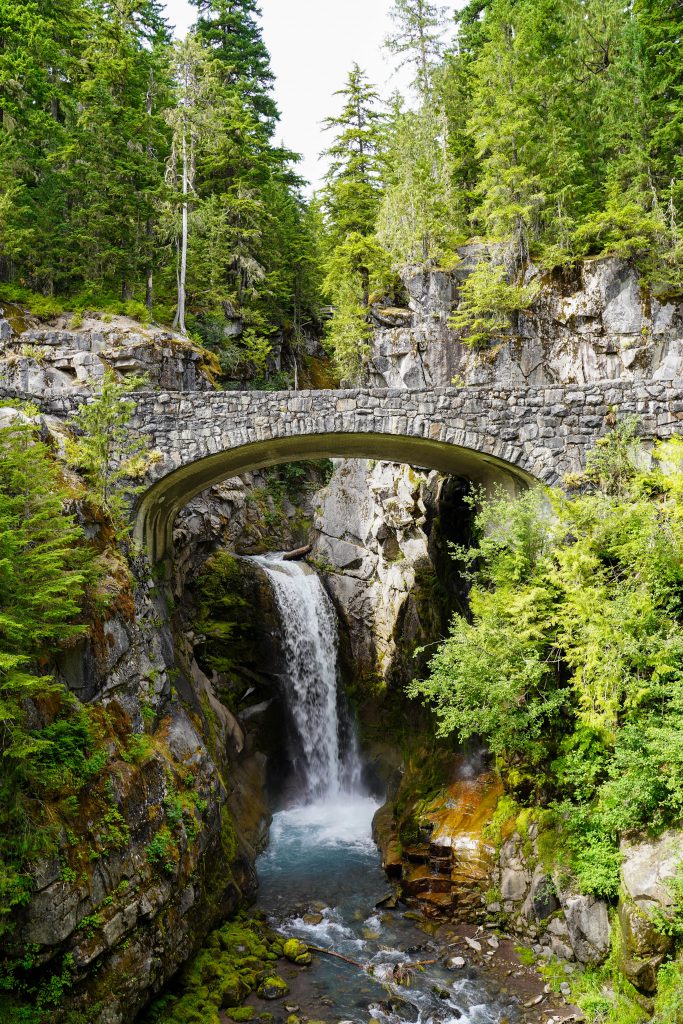
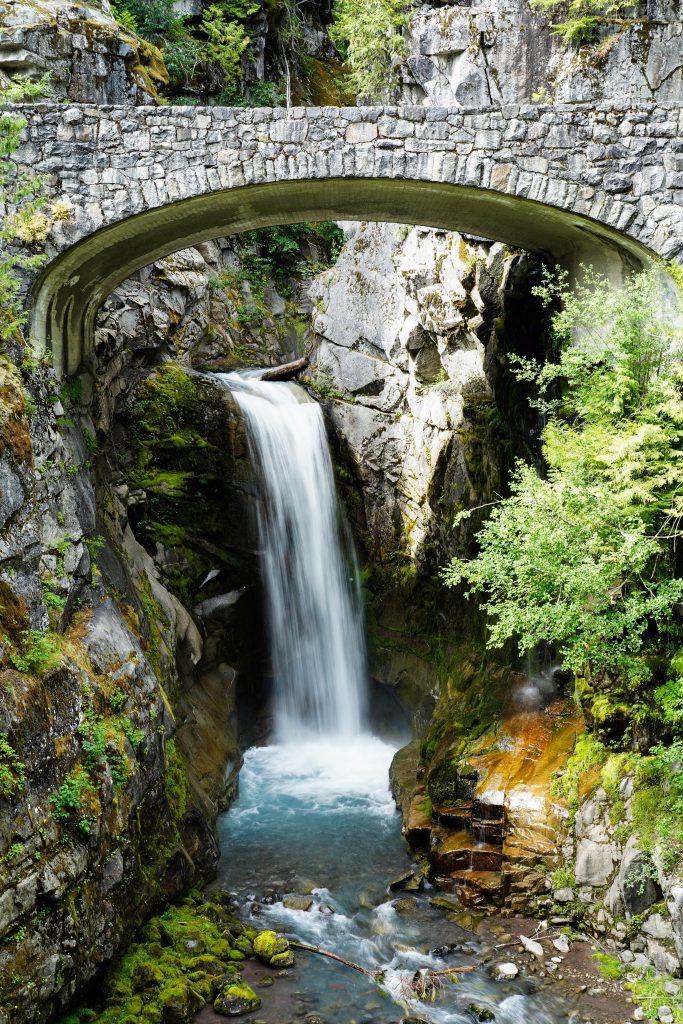
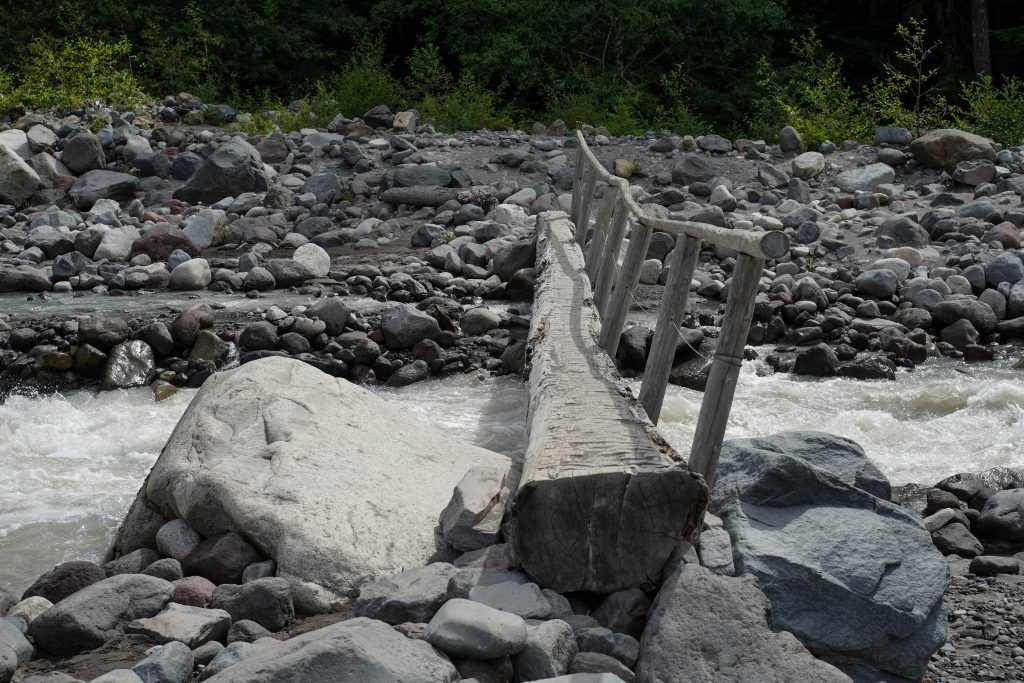
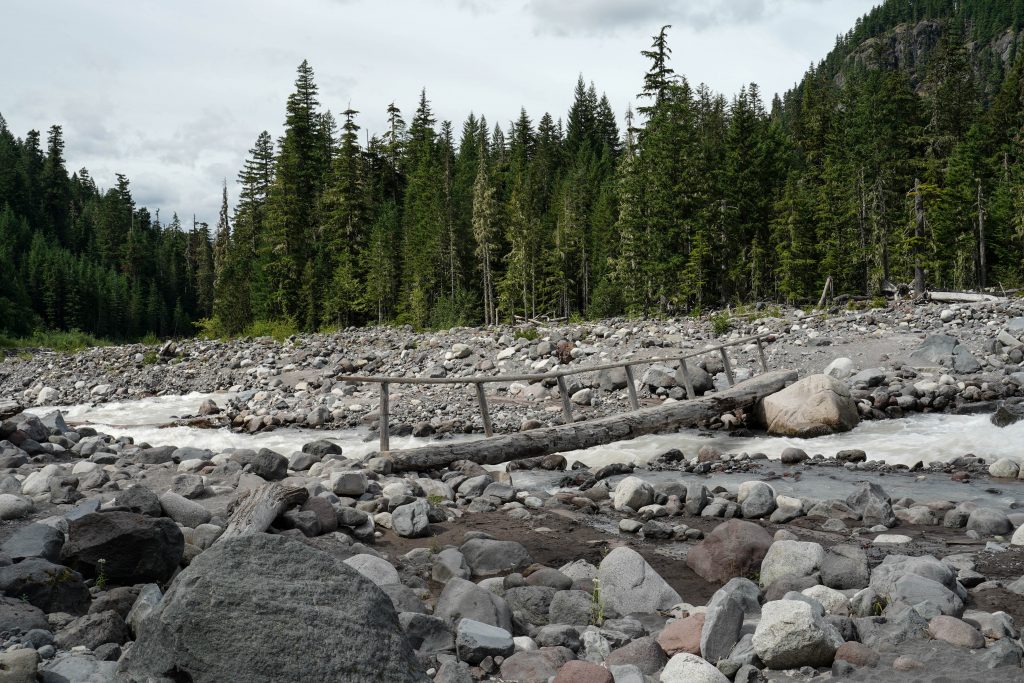
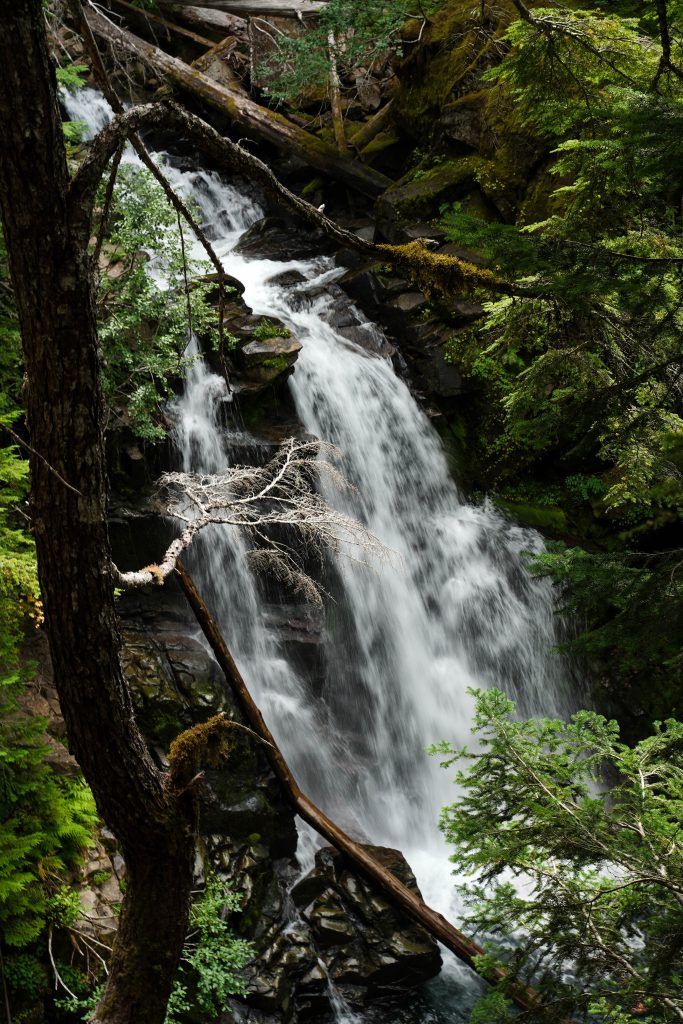
The trail starts at the far end of the parking lot from the road, straight from where you came in. Shortly after the trail starts, there is a trail split to the right, stay left (or straight in this case) following signs for Sol Duc Falls. Just before you reach the falls around 0.75 miles in there is another trail split. Keep right (again straight) and follow the trail as it crosses the bridge and gives you the best view of the falls.
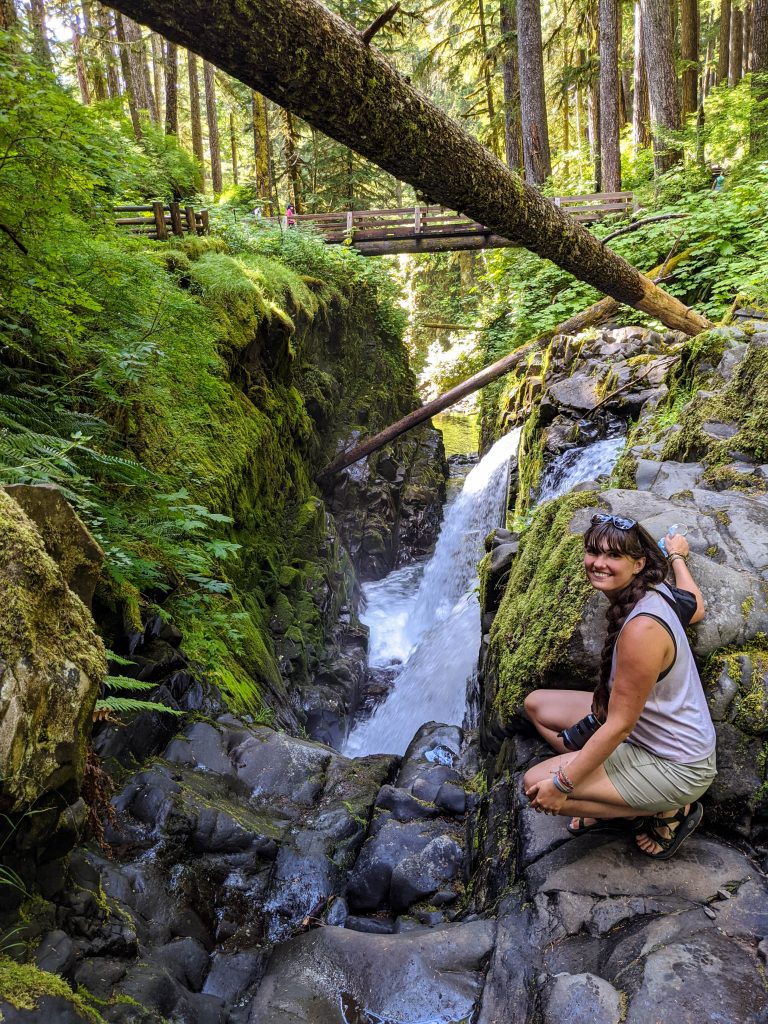
The best photos are from the bridge!
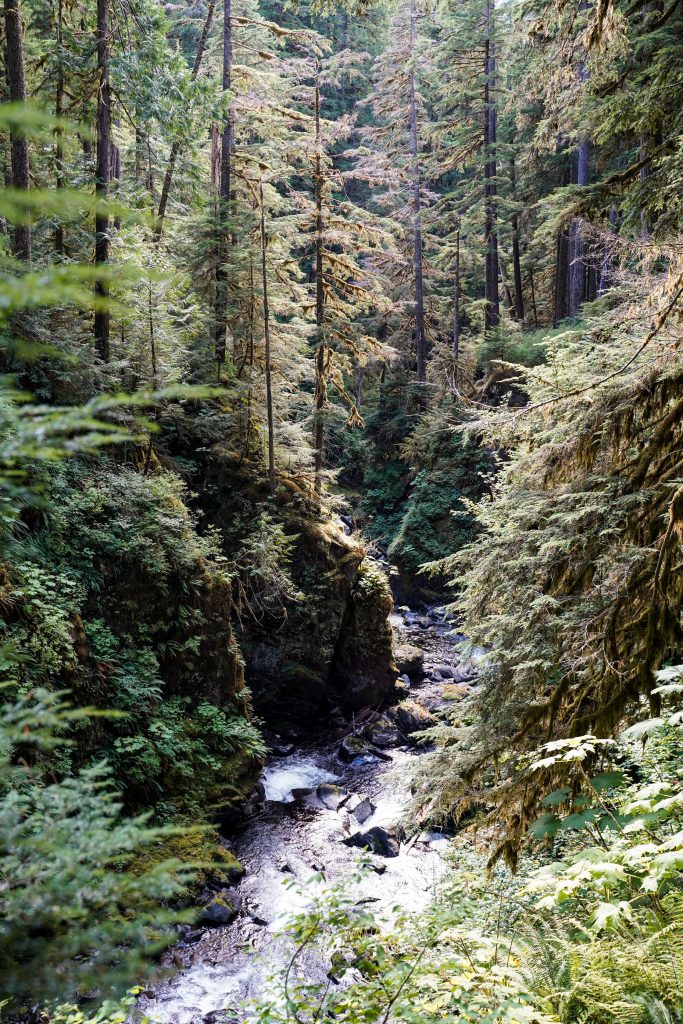
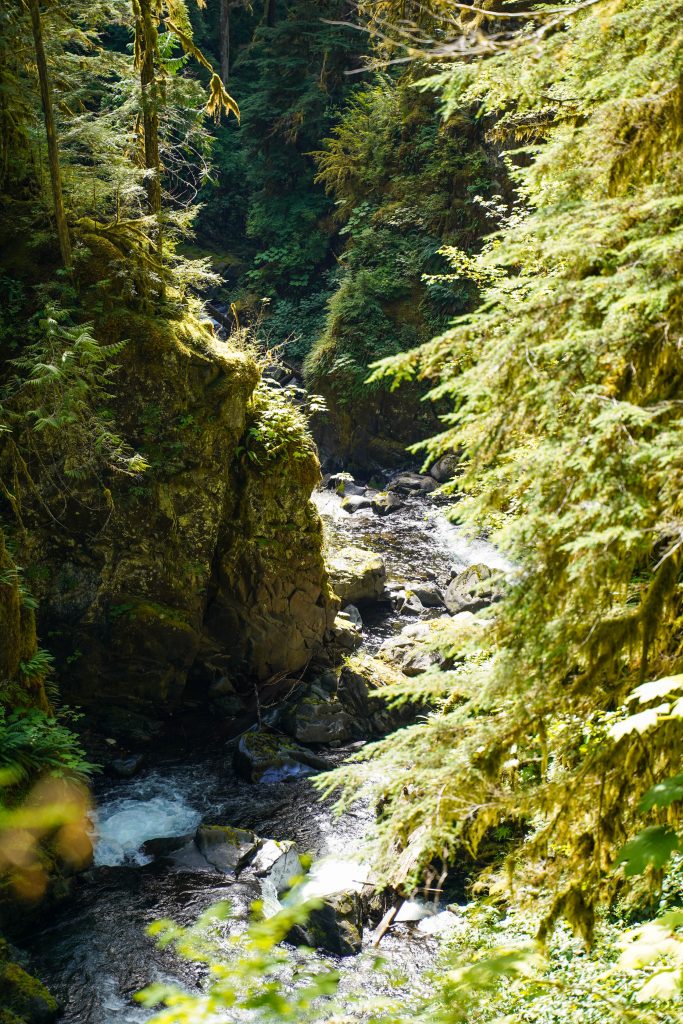
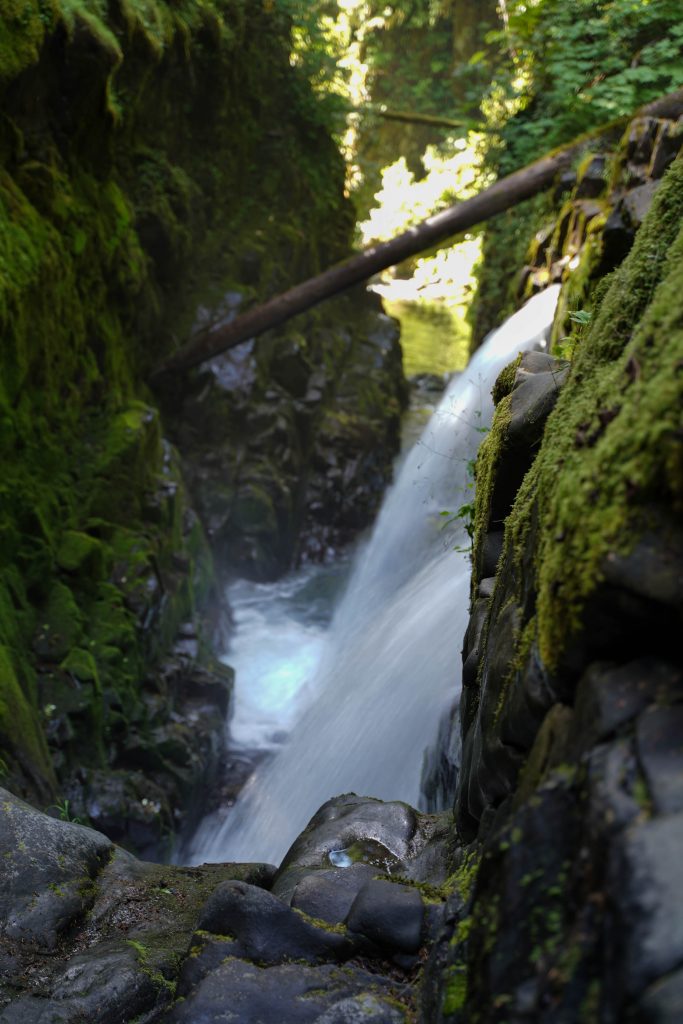
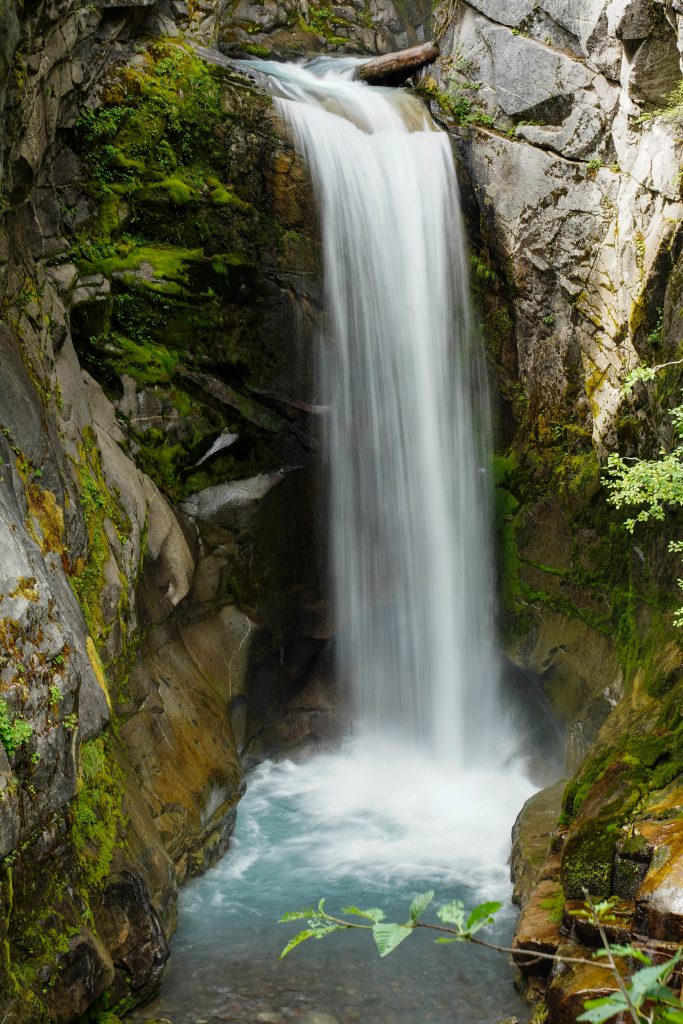
The falls are located in a deep scenic gorge which is unfortunately inaccessible at the bottom so you can only view the falls from above.
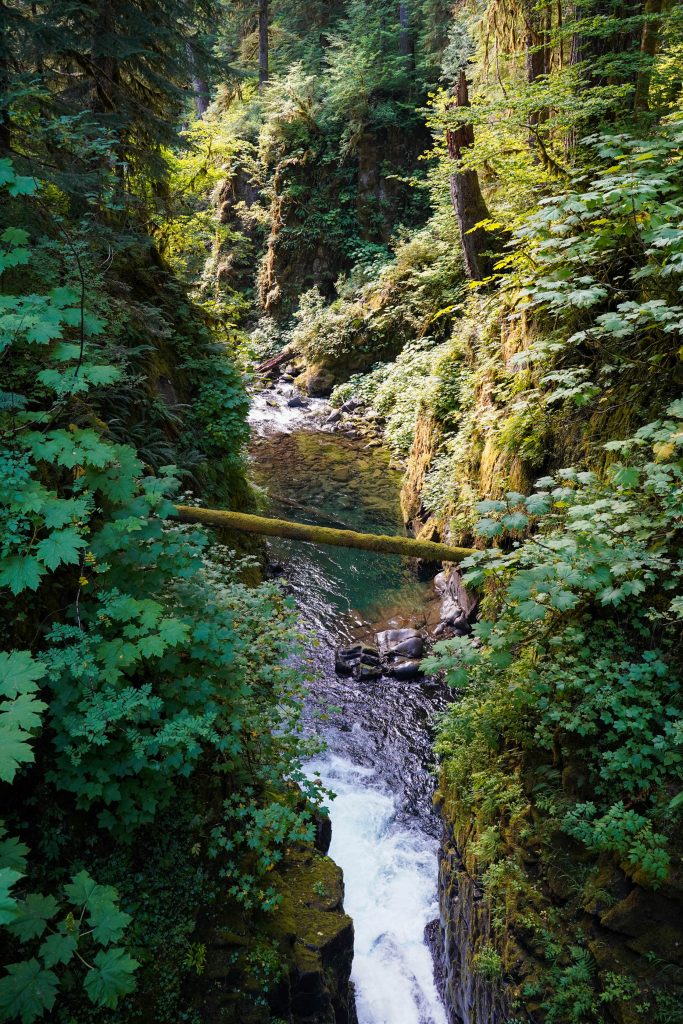
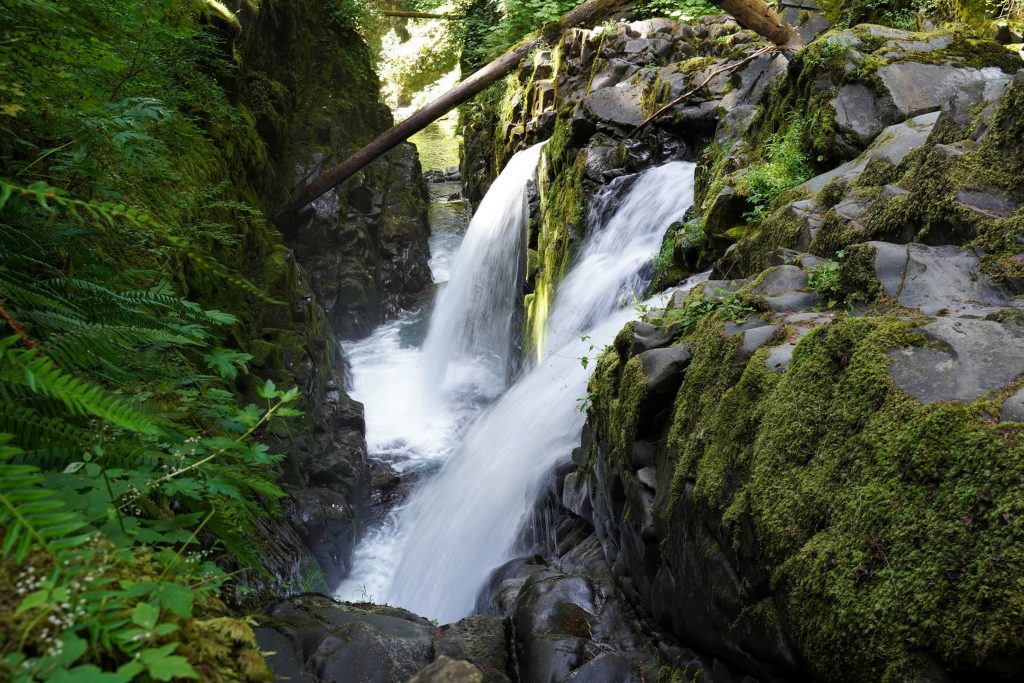
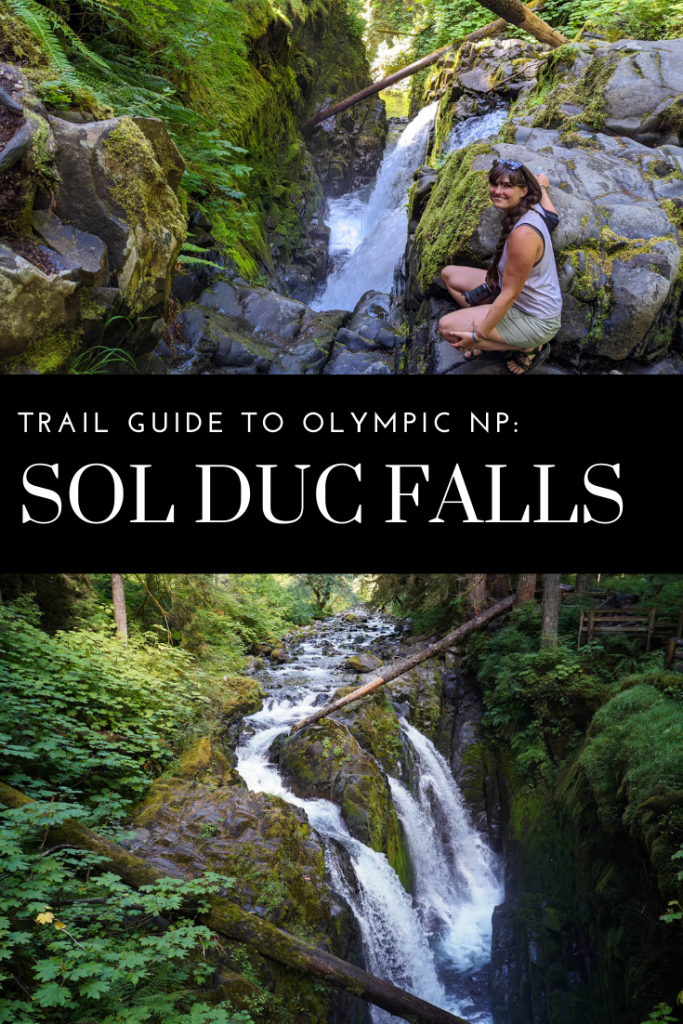
If you cross the bridge you will find many small paths down to the water to get different angles of the falls. Use caution especially as you near any edges of the falls.
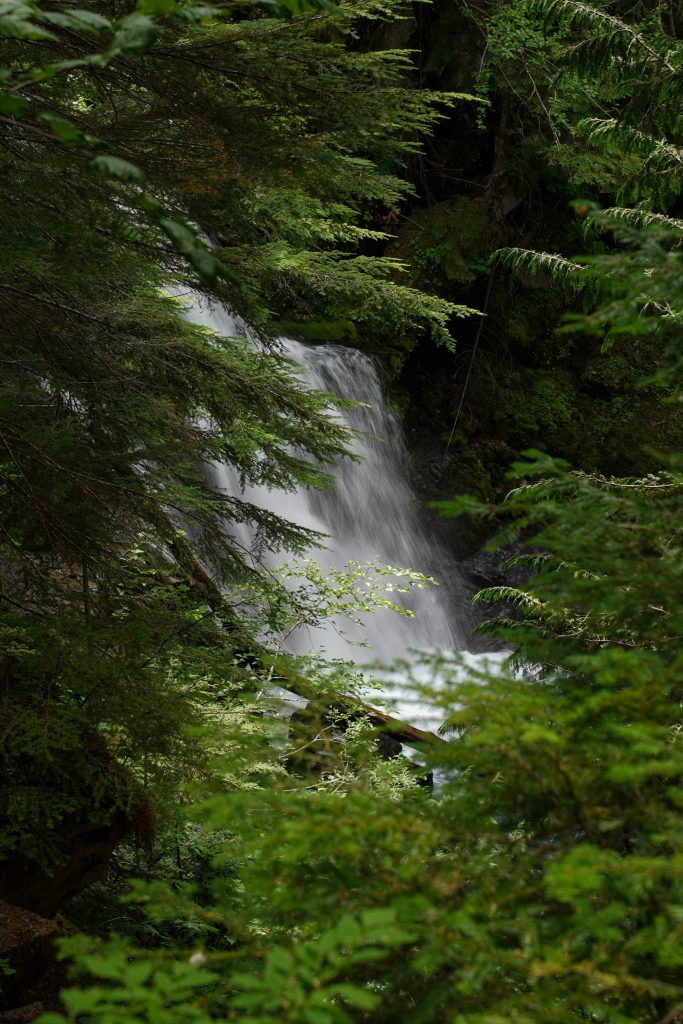
View of the falls from the other direction
Return back down the same trail for the short version or take the Lover’s Lane trail all the way down to the hot springs resort.
Beautiful views abound in all directions from the destination on this trail
Nearby: The Salmon run cascades
*Make sure to stop by the Salmon run cascades as well for a glimpse of salmon and trout swimming up river. The fall will bring more viewing possibilities, but even in August I watched at least 10 fish make the 6 foot jump up the cascades in about 30 minutes.
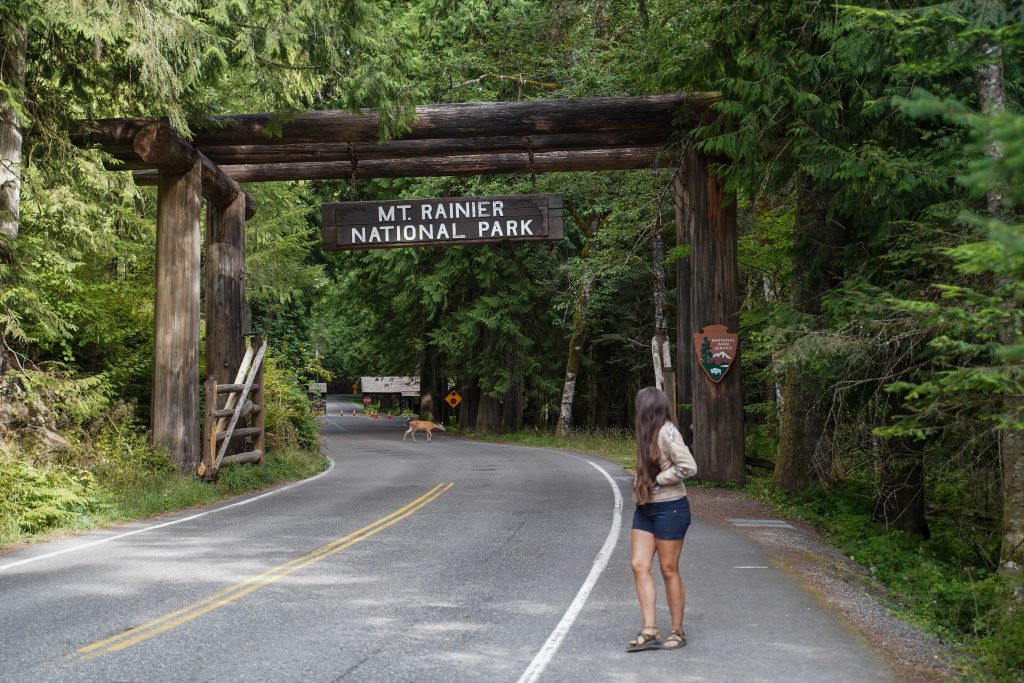
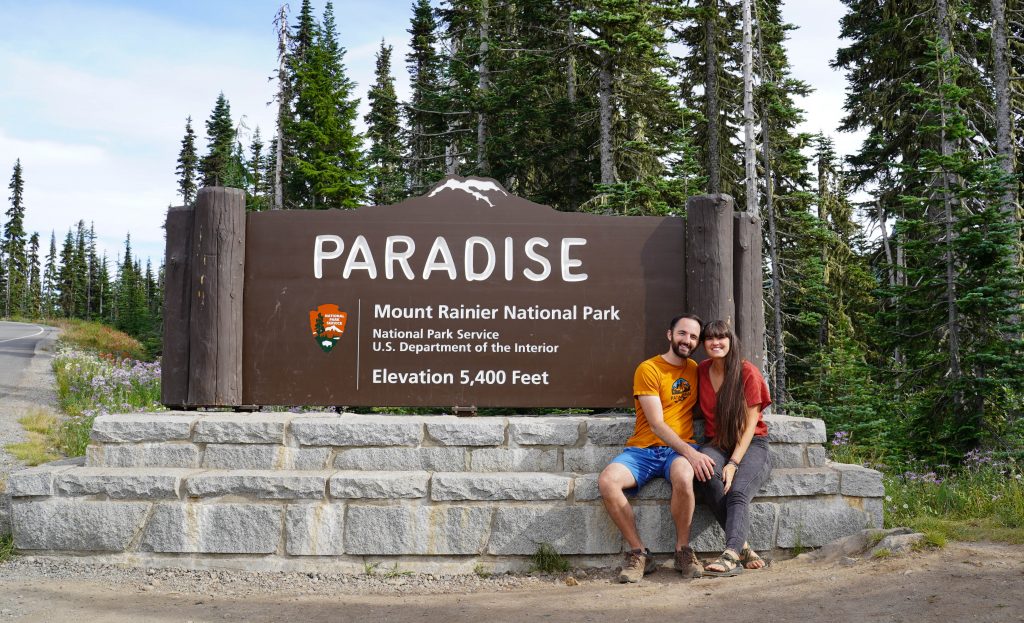
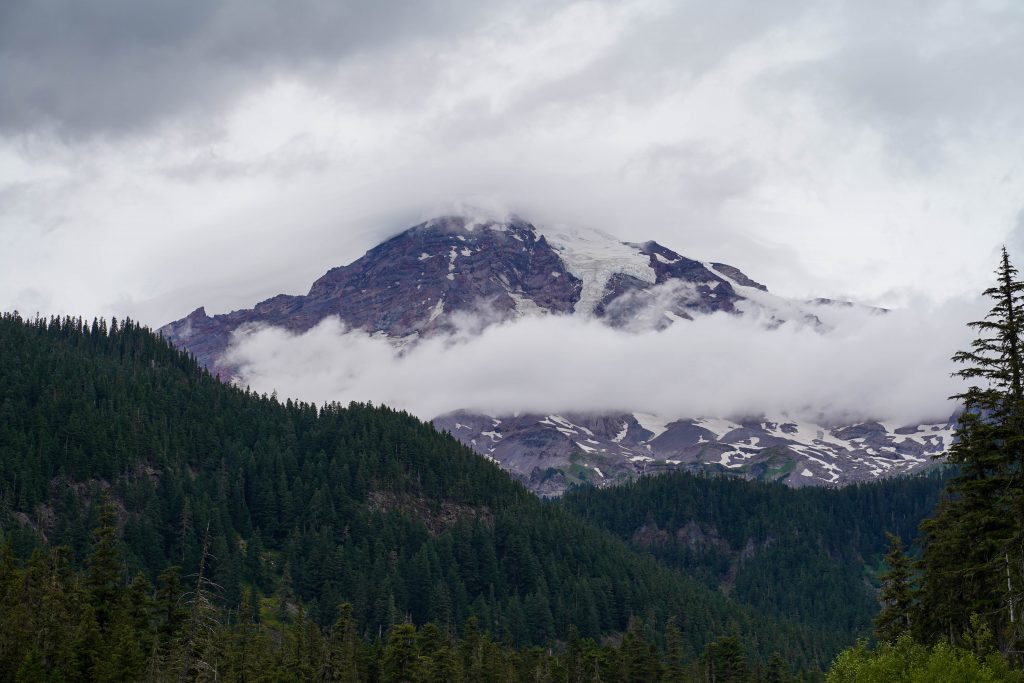
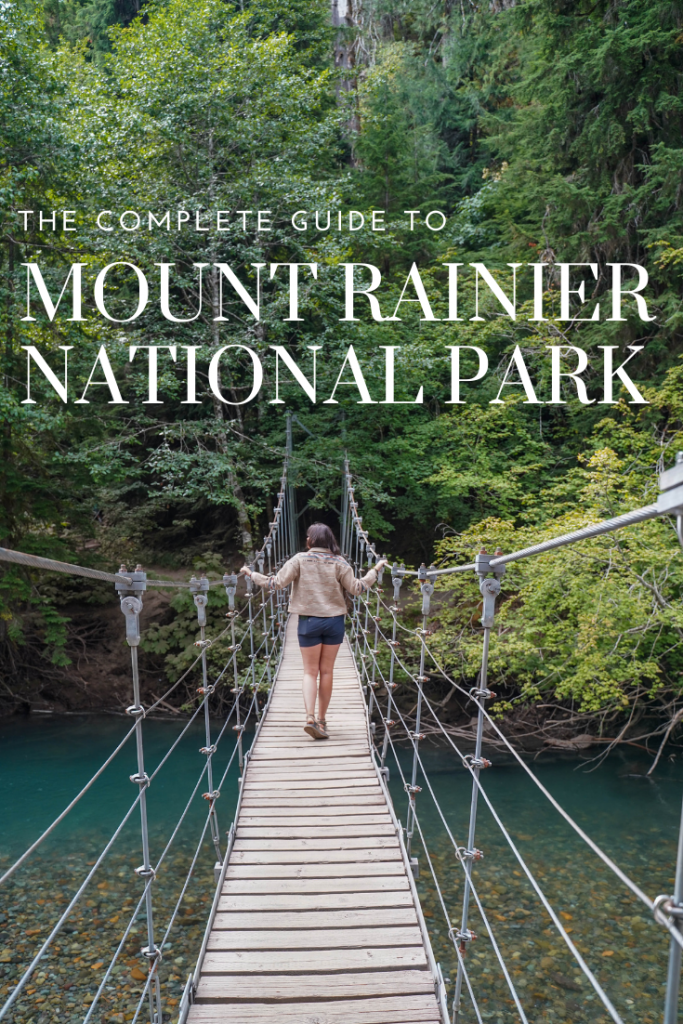
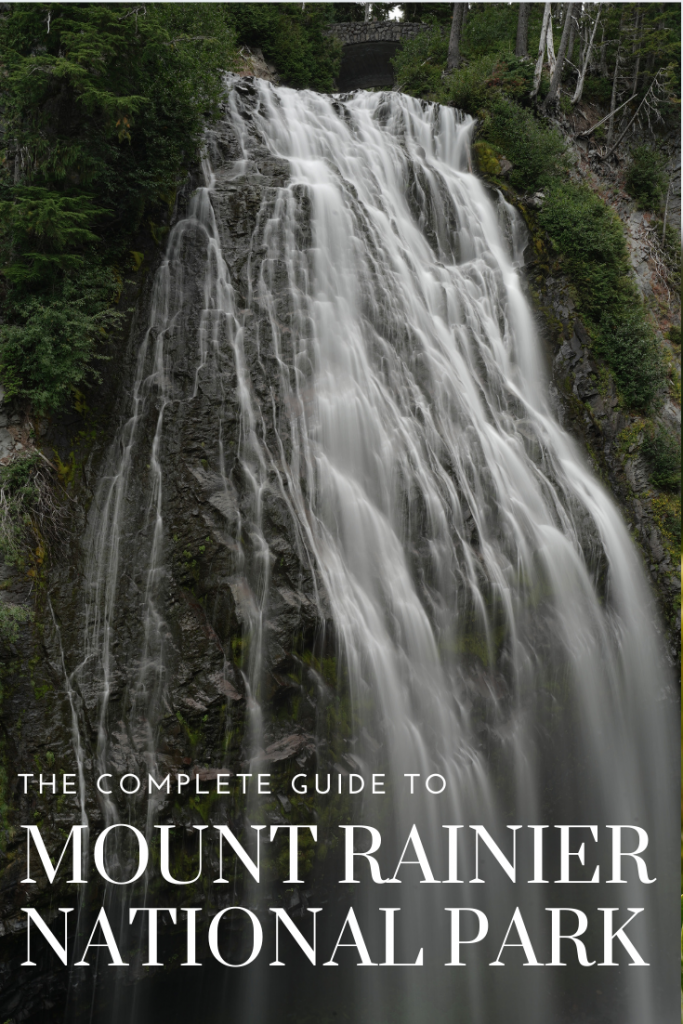
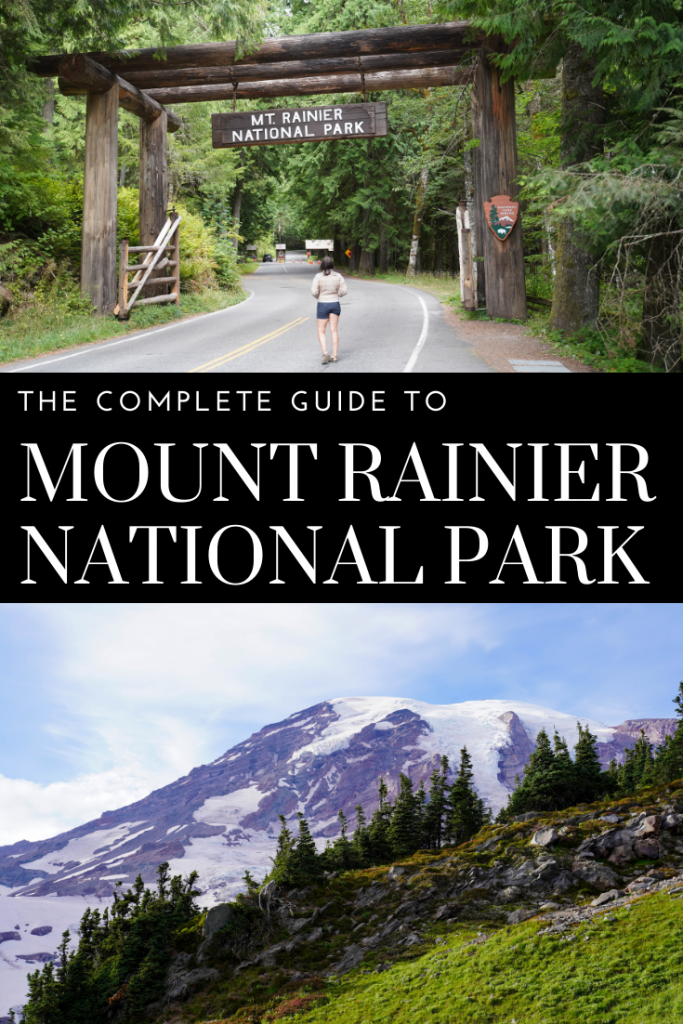
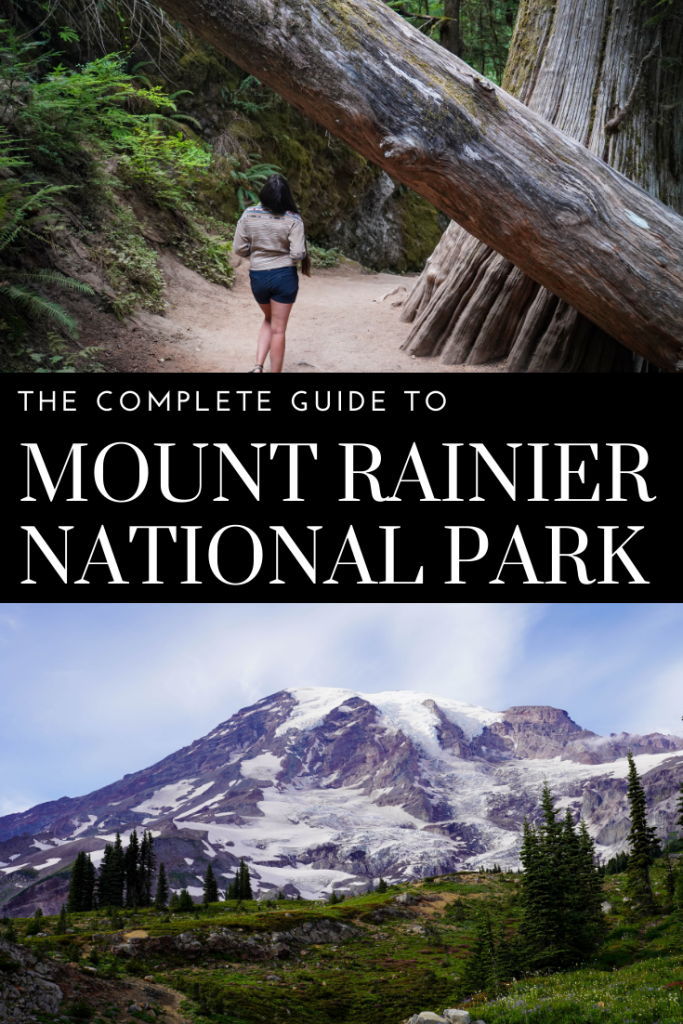
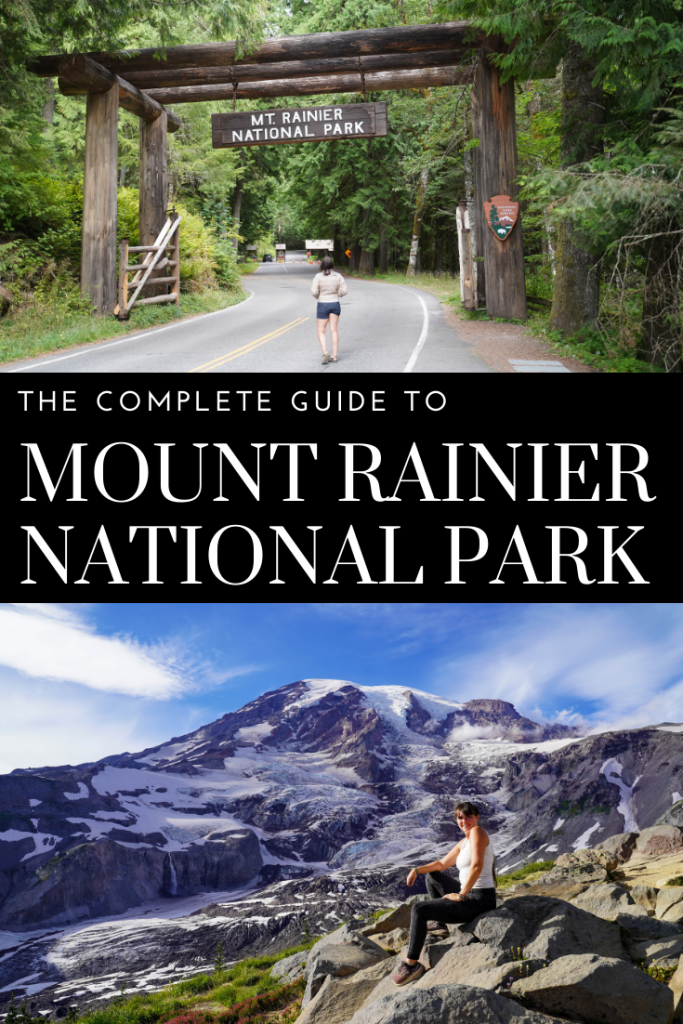
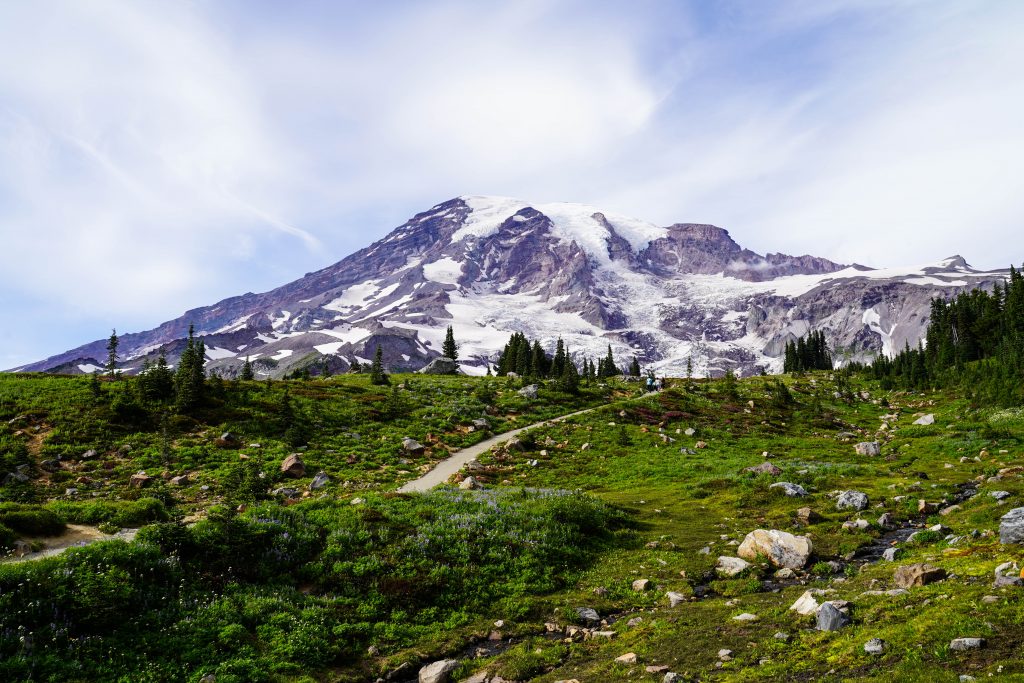
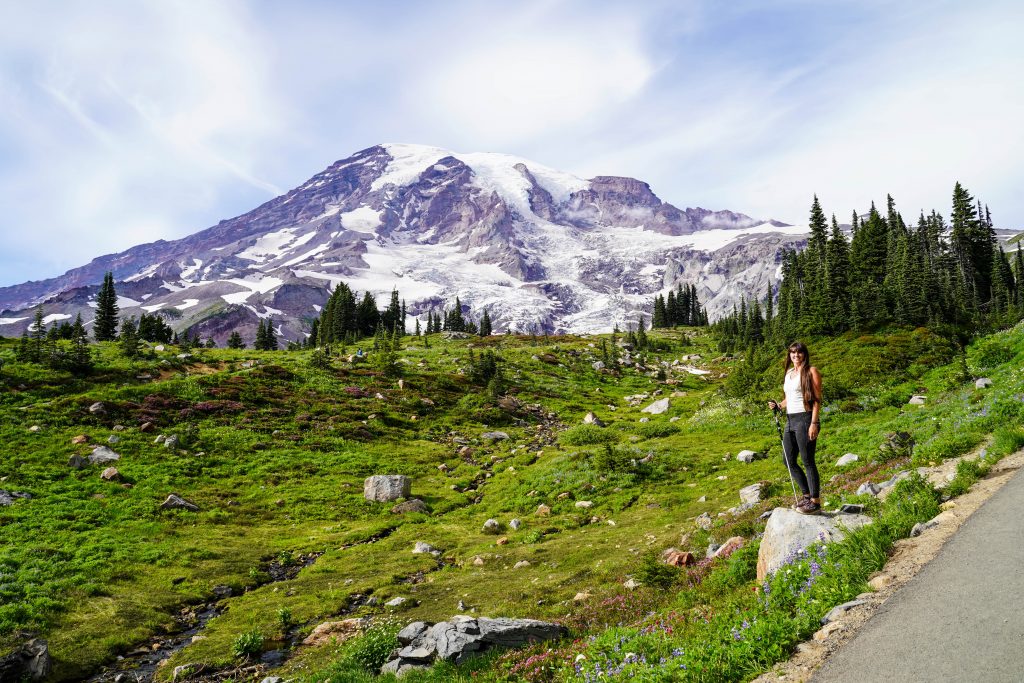
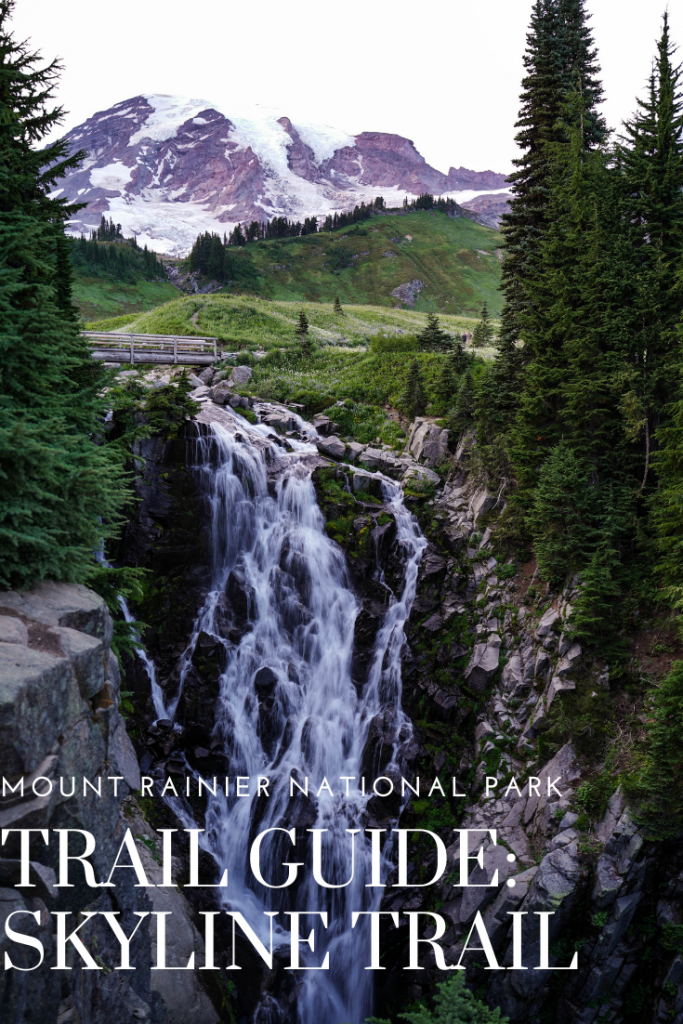
If I’m being honest, Mount Rainier National Park was a spot I felt we needed to visit more to “check the box” of national parks in Washington than out of any natural curiosity. I thought “eh it’s a mountain.” Boy was my mind blown. This national park is huge and diverse, and every bit as hype-able as the internet claims. Wildflowers and mountains as far as you can see, waterfalls around every bend in the road, a rich and dense forest with towering cedars and lush ferns- the real question is, “what is Mount Rainier missing?”
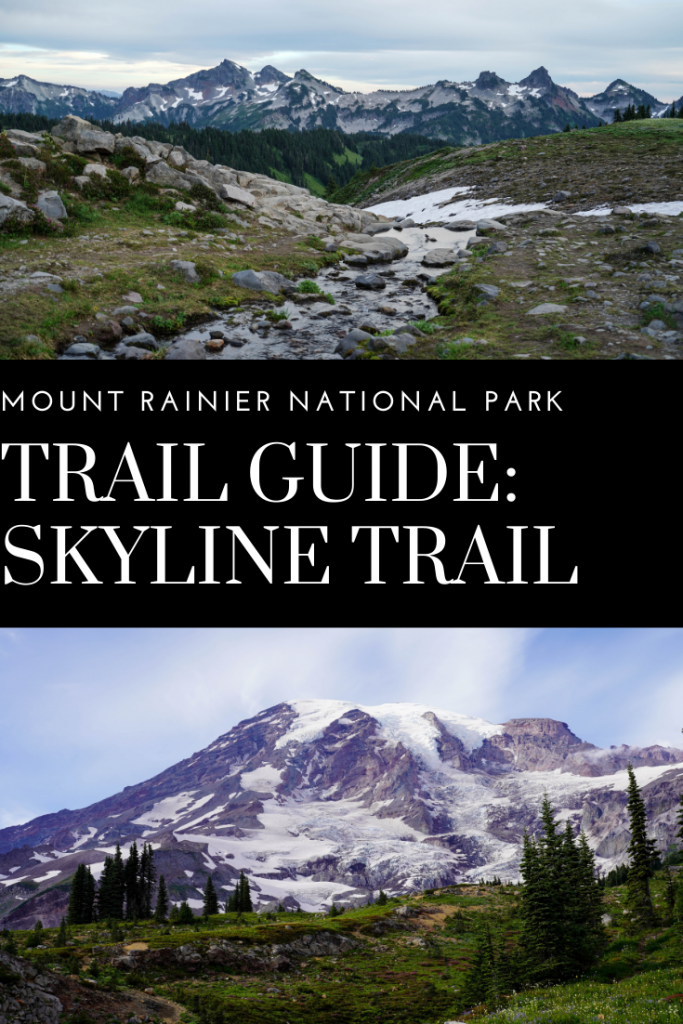
This is THE trail to do if you find yourself in Washington and near Mount Rainier National Park, but be warned it is only open for the entire loop from around the end of July through September and even in those months there may be snow on the trail.
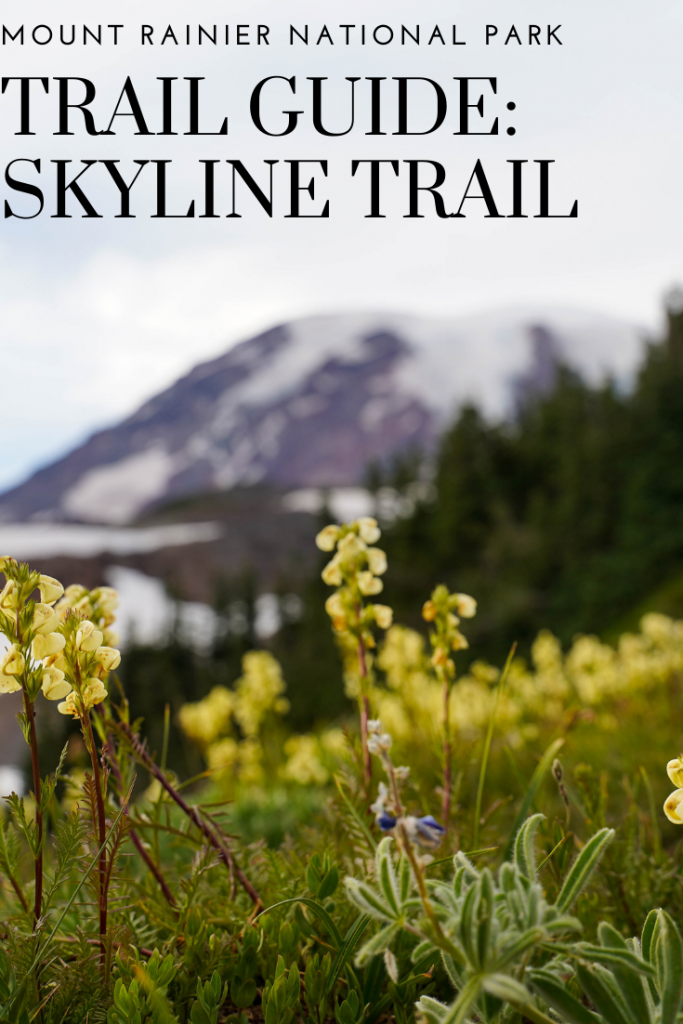
The wildflowers in mid August along the route are out of this world and the glacier views are also something to see. It’s moderate and could be considered difficult trail for some so use caution but if up for a little challenge, this is the trail to do. See my guide here for more details.
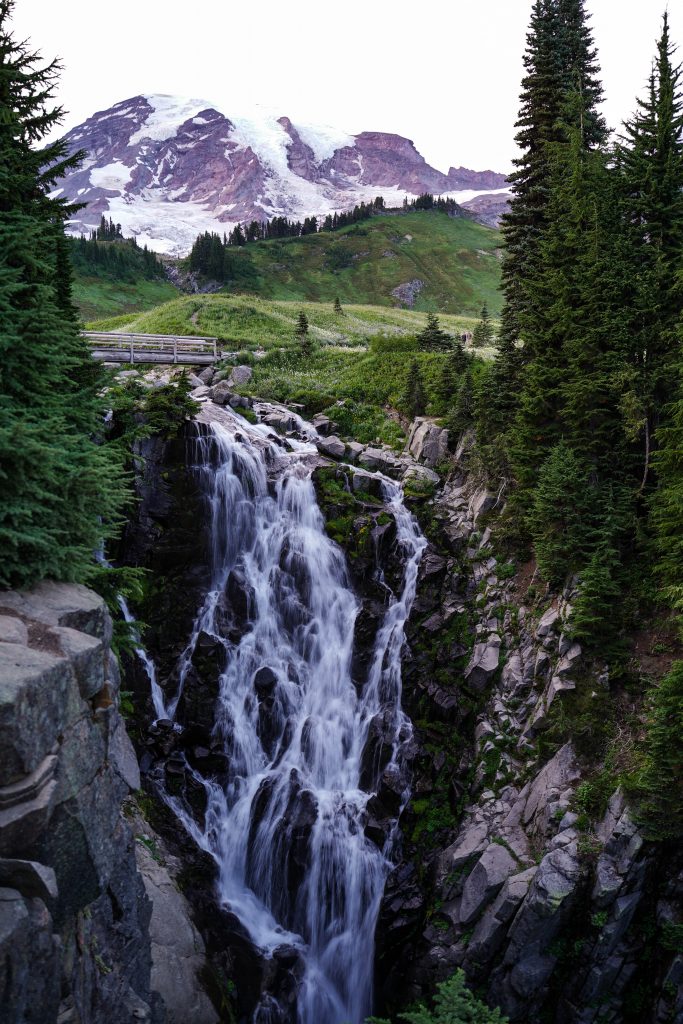
If you aren’t feeling up for the entire skyline trail, Myrtle falls is a short and sweet (paved) little adventure along part of the Skyline Trail. It offers nice views on clear days of the mountain and of course a really beautiful waterfall.
Directions: From the Paradise Visitor Center, go up the Muir quoted stairs and turn right on the paved trail. It will lead up on a moderate incline past the Paradise lodge. Continue straight on the trail until you reach the bridge and then there is a steep side trail that goes to an over look below the falls. The bridge is the top of the falls.
Glacier Vista Trail-
Another alternative for shorter hikes for those with less time but still wanting to see glaciers is the Skyline trail to Glacier Vista. (I would combine this trail with Myrtle Falls since they start in the same location) This trail gives you some of the best views of Mount Rainier up close without doing the entire Skyline Trail.
Directions: From the Paradise Visitor Center, go up the Muir quoted stairs and follow the paved trail straight (staying left) following the Skyline trail signs. This trail will very steeply gain elevation but is paved so easier footing. After a bit of climbing, you will come to signed intersections. Continue along the Skyline Trail after it rejoins with the Alta Vista trails (they come in on the right) and the Dead Horse Creek Trail which will merge on the left.
Shortly after the Dead Horse Creek trail merges, there will be another trail on the left that leads to the Glacier Vista or you can continue climbing along the Skyline trail when the Glacier Vista point comes obviously into view and a short trail descends down to it. Once you reach the overlook, enjoy the thunderous sound and sight of Wilson Falls before returning back down the same Skyline trail.
Best trails for families
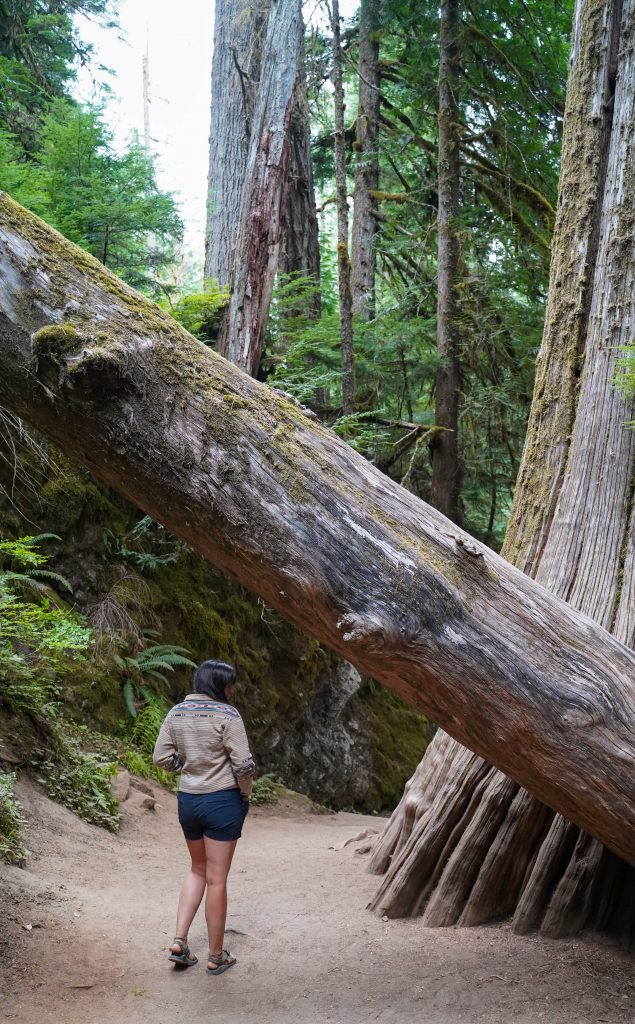
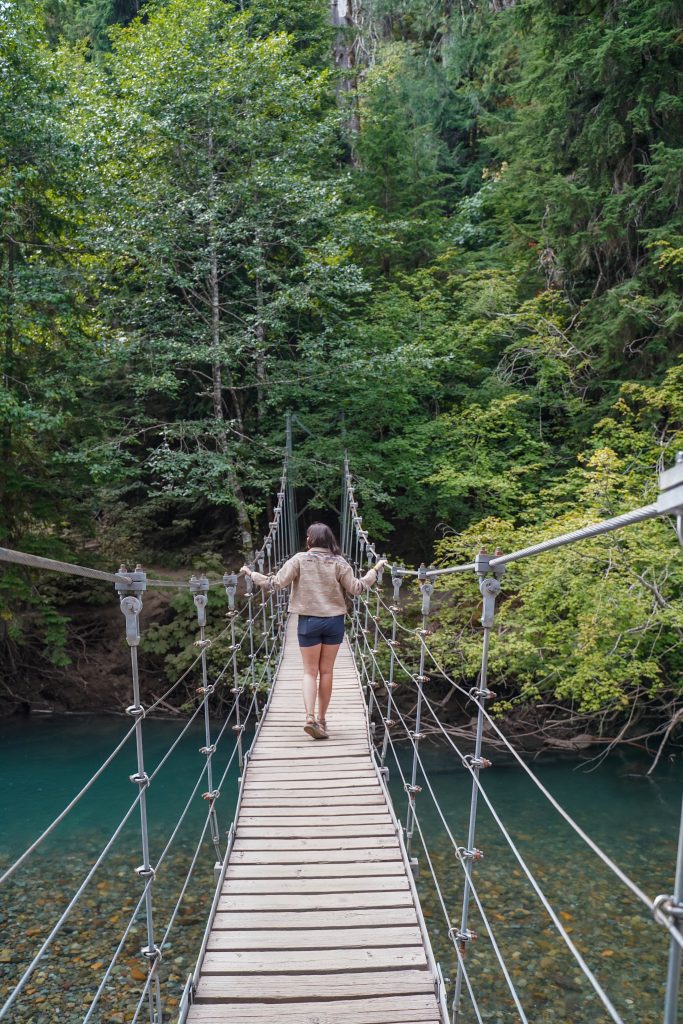
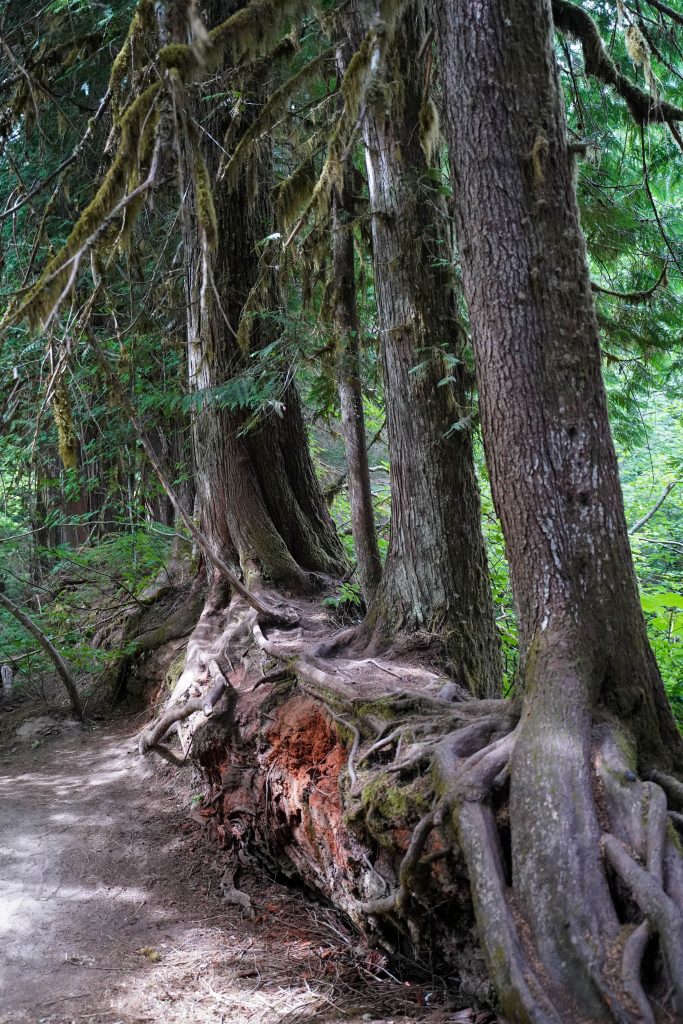
Grove of the Patriarchs –
Besides Myrtle Falls, this is probably the best trail in the park for families but it is a little bit of a drive from Paradise. The trail is short and relatively level making it an easy jaunt for all. Also shortly into the trail you get to cross a fun suspension bridge and then past the bridge you are surrounded by beautiful towering Cedars not unlike the Redwoods. I highly recommend this trail even on cloudy/ rainy days since views of Mount Rainier aren’t paramount in enjoying it.
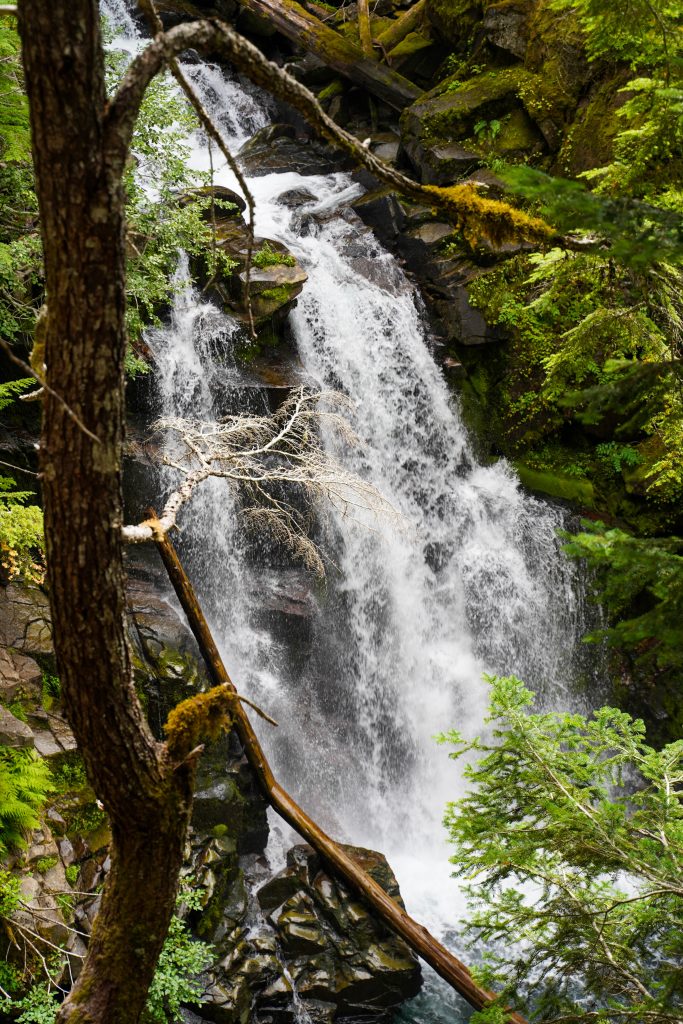
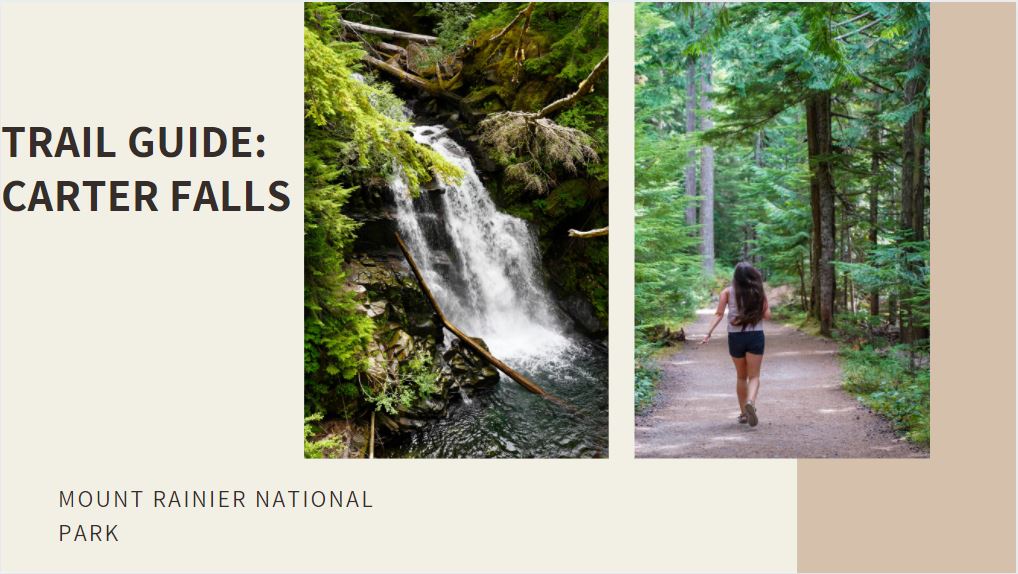
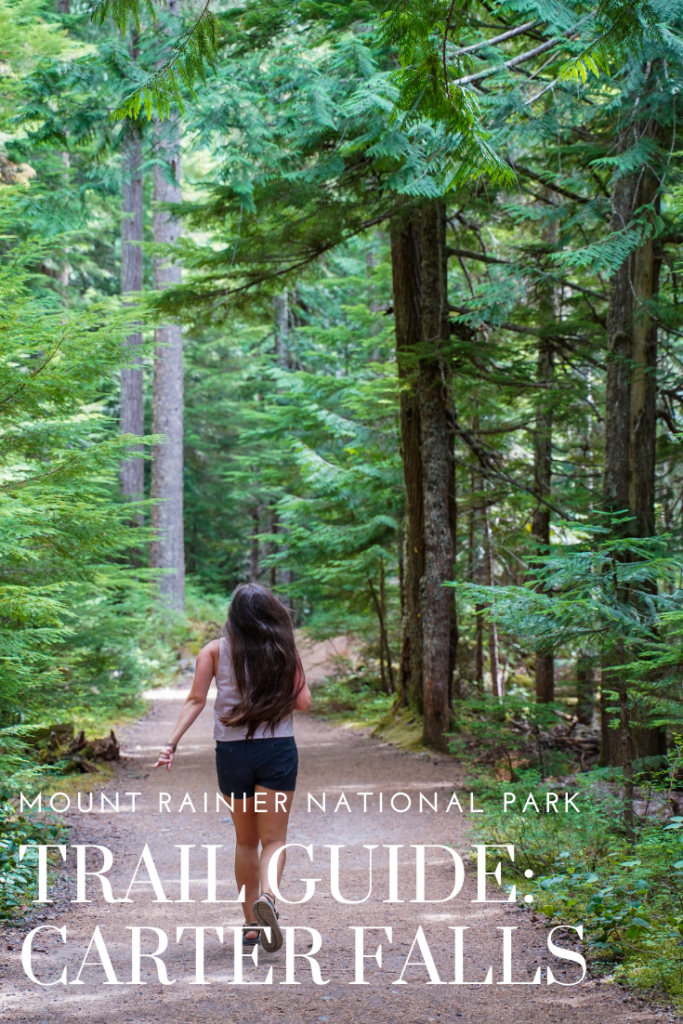
One of the least visited trails in the summer, Carter Falls is along a portion of the famous 93 mile Wonderland trail that encircles Mount Rainier. This trail is another great one for cloudy days where Mount Rainier is obscured and leads to a secret beautiful waterfall. It steadily climbs uphill but is never steep making it a great option for families.
This trail is actually outside of Mount Rainier National Park avoiding the park fees (but incurring the national forest fees so a pass is still helpful to avoid $5 at the parking). This is one of the best trails outside the park with beautiful views of mountain and surrounding cascades and offering a chance to view a cool historic lookout. This trail isn’t easy but it is on the shorter side. Beware in August the entire trail closes for maintenance for several weeks so check your dates before visiting.
Visit here for more info and recent updates on hiking this trail.
Summit Lake Trail –
The last trail on my list and another trail outside the national park, this one is very popular for backpackers (and those who are travelling with furry companions) It again offers great views of Mount Rainier with reflections in the lake if you are lucky. It isn’t close to Ashford or Paradise so a bit out of the way but another great area to visit if you have time.
Visit here for more info and recent updates on hiking this trail.
Best Views in Mt Rainier NP:
While most of the truly outstanding views are from the trails listed above, not everyone has access to them so here’s my list of the most accessible and best views in the park!
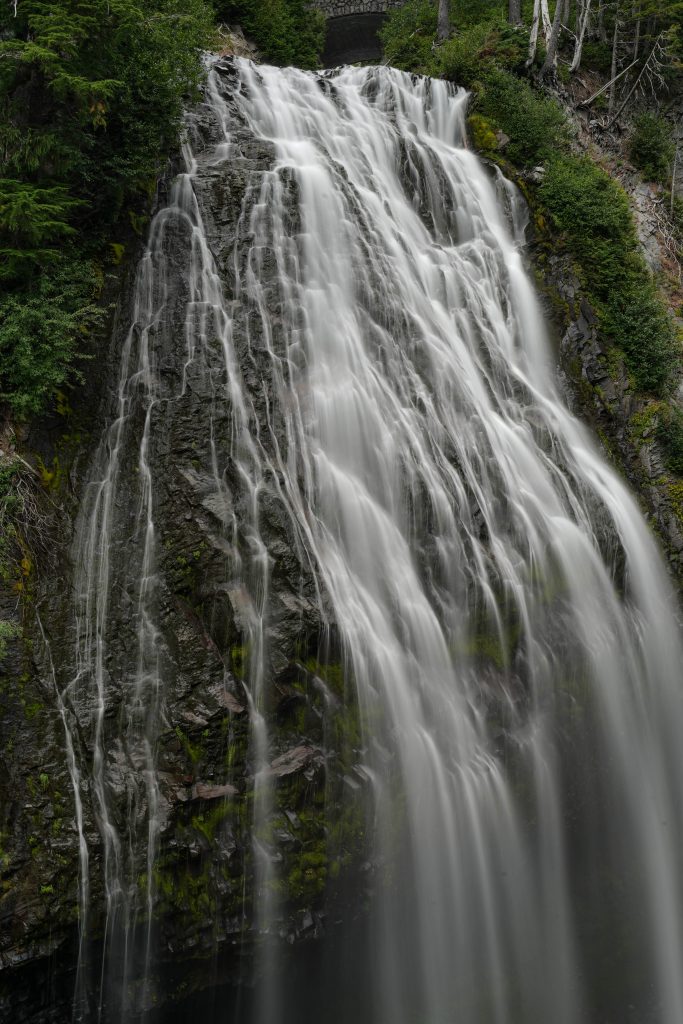
Left: Nerada Falls, Right: Myrtle Falls
Nerada Falls – This is an easy stop along the drive from Ashford to Paradise, WA. It offers views of one of probably the most impressive roadside waterfalls. It’s a steep trail to the bottom of the falls but paved and still a nice stop at the top if you don’t feel like venturing down.
Myrtle Falls- This one is a little more work (see information in Paradise trails above) than the other 3 listed but still on the doable paved path list and very worth the time!
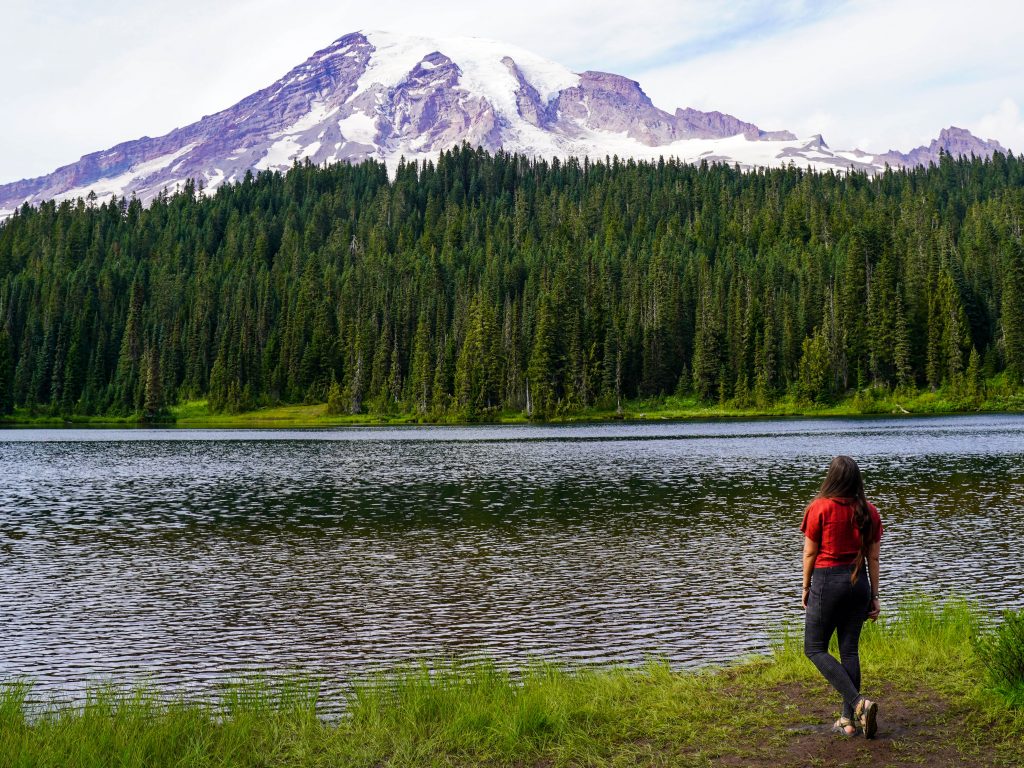
Reflection Lake – Another easy roadside stop, this time for awesome views of Mount Rainier is at Reflection Lake. The lake is only a short drive away from the Paradise Visitor center and great place to capture photos of the mountain without having to put hiking boots on.
Paradise Visitor Center – Of course the visitor center offers great views of the mountain as well along with great views of the surrounding “skyline” of mountains in the distance. The arch
Christine Falls Bridge- This is a small pullout about 2 miles past Cougar Rock Campground on your way to Paradise. There are a couple parking spots on either side of the bridge and it is definitely worth taking the short trail to view the falls under the bridge.
Left: Reflection Lake, Right: Paradise Visitor Center
Christine Falls Bridge
Best time to visit Mount Rainier National Park
I highly recommend visiting in Mid- August. It’s true it’s busier but it is worth it for the legions of wild flowers everywhere and to have more predictable weather (aka clearer views). Late July would also work (although the entire Skyline Trail may not be open by then) and into September is an ok shoulder season.
Park Fees:
The park has a $30 fee for week long access for a single vehicle. Entrance is free/include with the $80 America the Beautiful National Park Pass. (Worth it!)
Two Days in Mount Rainier National Park
Day 1 – Waterfalls and the Skyline Trail – Visit Nerada Falls- Visit the Paradise Visitor Center and hike the Skyline Trail or the 2 shorter/easier trails (plan for later afternoon/ early evening for less crowds and better lighting!) – Definitely visit Myrtle Falls Day 2 – Hike Carter Falls – Visit Reflection Lake – Hike the Grove of the Patriarchs Trail- Enjoy the scenic drive of Steven’s Canyon Road
* If you’re a hiking machine and really have 2 full, nice weather days to visit the park you could visit all the above places in a day and then still have a second day to do one of the other top trails in the area such as High Rock Lookout or the further away Summit Lake trail.
Lodging near Mount Rainier NP:
There are a couple of great small towns around the park that are perfect for launching your travels into the park. Ashord, WA is perhaps the most accessible and with the most reasonable values. Staying in the National Park lodge at Paradise would be an absolute dream if you can afford it and get a reservation. Otherwise here are my top picks:
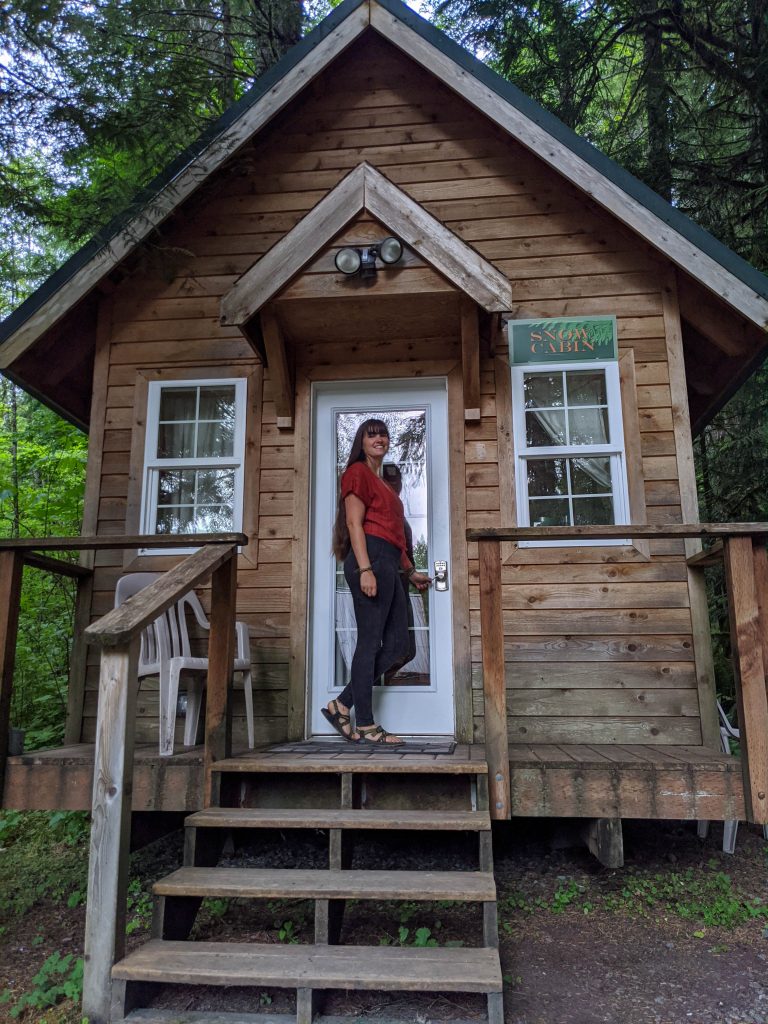
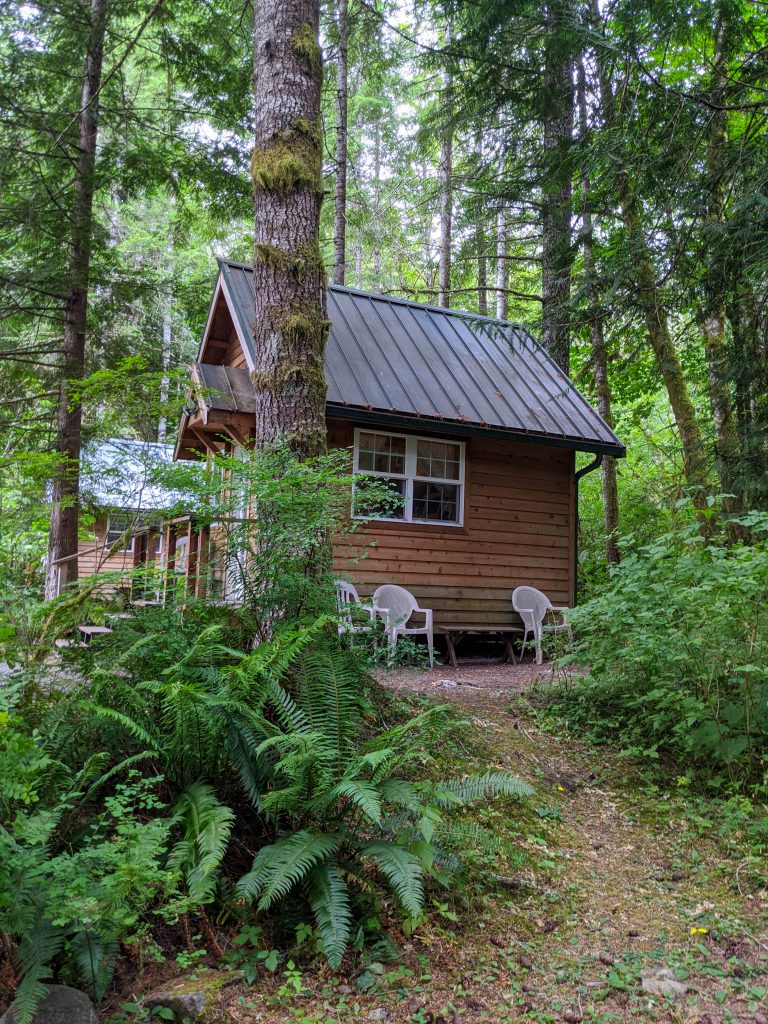
Copper Creek Inn: The Copper Creek Restaurant is the center of it all with a beautiful historic feel (considering it the longest continually operating restaurant in the area since 1965). The property is so authentic and in a great spot within town. The lodging options include 9 cabins and several suites with almost all having access to a hot tub. We stayed in one of the small 1 room cabins that have reserve times to a shared hot tub and it was great! The restaurant also had excellent food. Highly recommend although note you have to book 2 nights at this property which maybe less convenient for quick stop overs. Prices starting around $137/ night
Mountain Meadows Inn– Another nice option in Ashford at a great price is the Mountain Meadows Inn. Starting around $140 with breakfast and great amenities, I would book here if it is available for your trip but this place sells out quick.
Alexander’s Lodge – Another historic option at a great price and an iconic establishment as you drive into the park. This property has stunning views and small walks and offers pet friendly yurt options as well. No hot tub at this one though (and I’m rather a fan of hot tubbing personally). Rooms start around $150
Our little cabin retreat at the Copper Creek Inn
Campground options:
Camping is a super affordable way to visit any national park and experience the full abundance of nature in the area. Mt. Rainier NP is home to many a campground with most costing around $20/ night. The reservable sites go FAST so make sure to book as soon as you know your dates if you want to camp in the park. Visit here for more information on booking a campsite and to view the campground options within Mt Rainier NP.
***Cougar Rock is the campground most convenient for hiking in Paradise.
Where to eat near Paradise, Mount Rainier NP:
There are cheaper places to eat if you are staying in Elbe or don’t mind backtracking back to the main hwy but it is a bit of a trek from the National Park. I suggest picking up some groceries for breakfast/ lunch and eating on your own during the day and then trying the below restaurants for dinner.
Copper Creek Restaurant: Mid to high range prices, delicious food, super cozy atmosphere. (They also have a fantastic brunch on weekends)
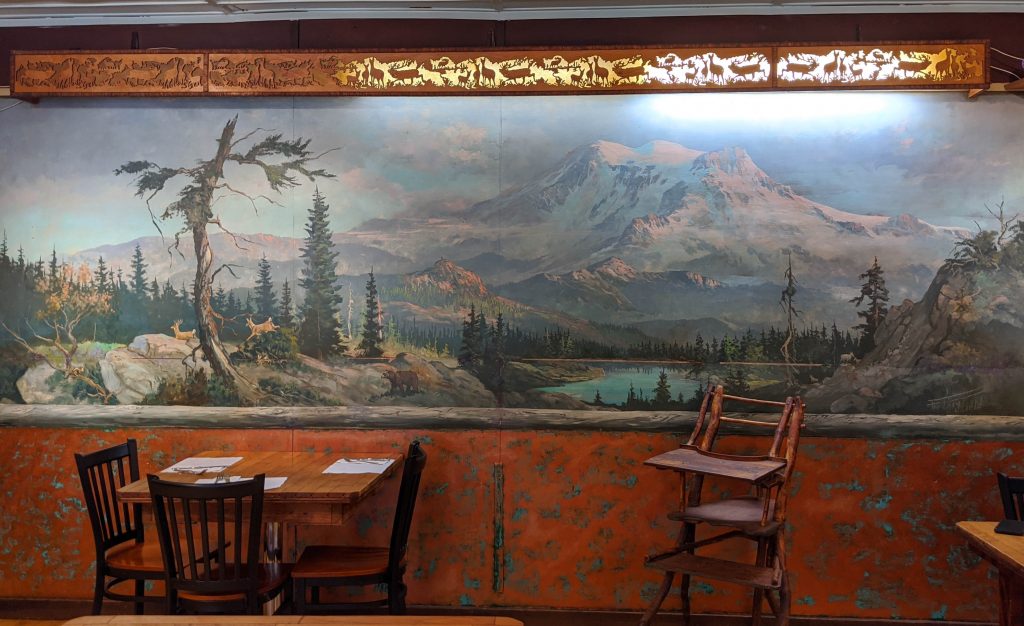
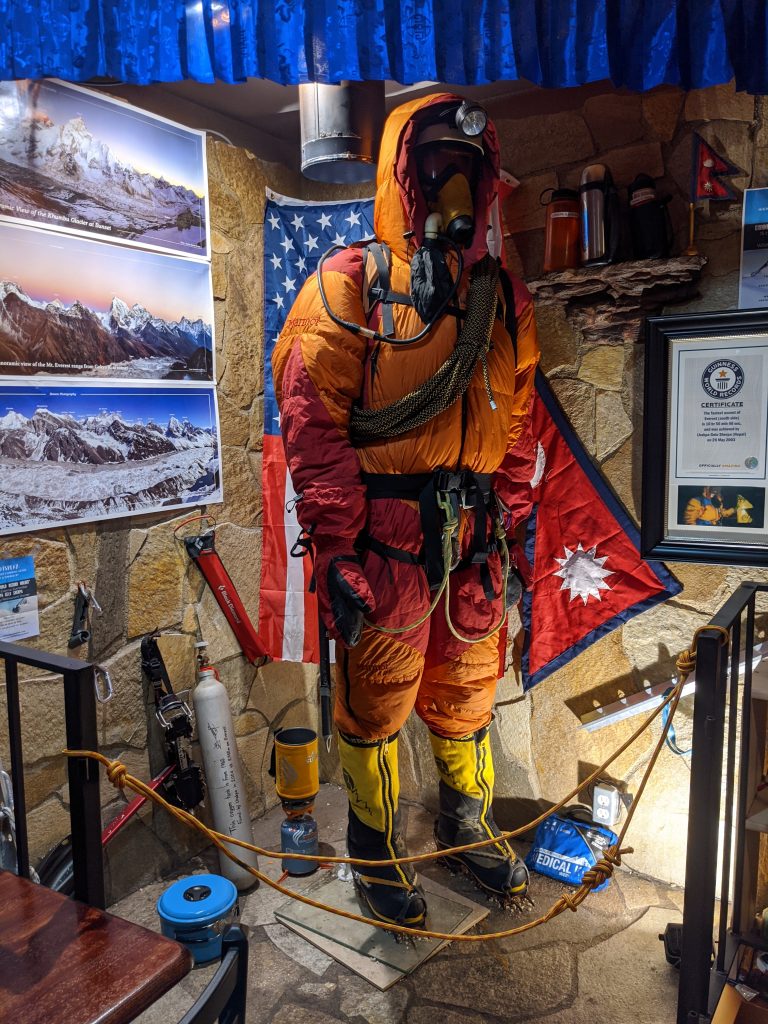
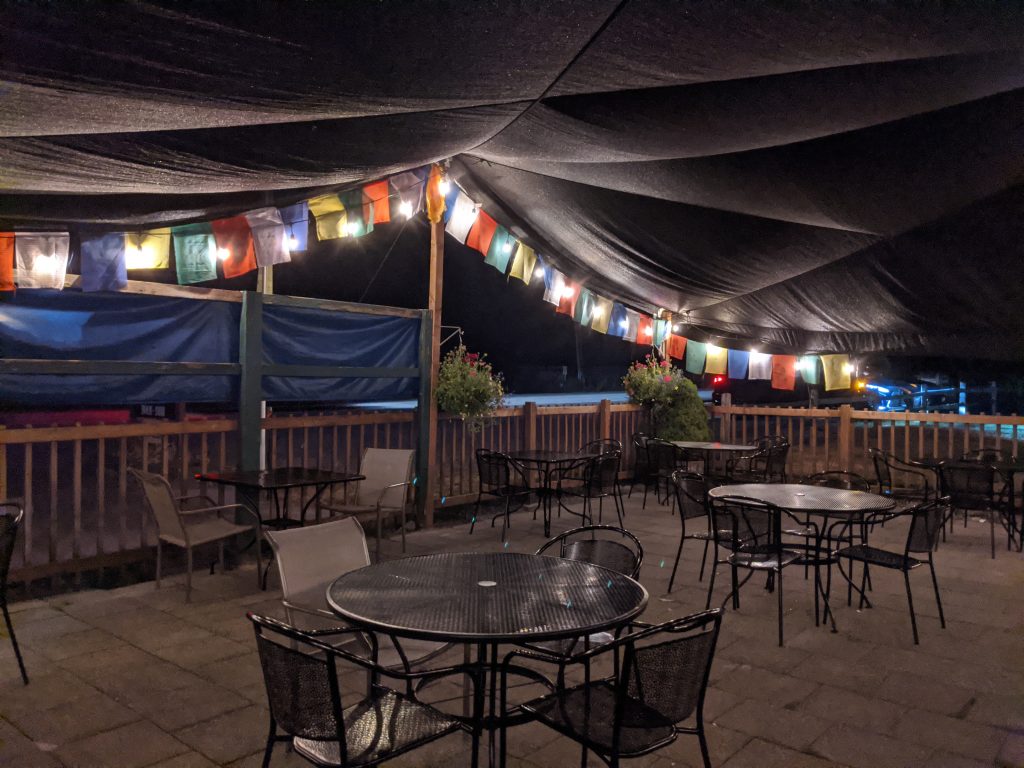
Wildberry Restaurant: Owned and operated by a former Mount Everest Sherpa, this restaurant is a gem! The decor is cool including the owner’s Everest climbing memorabilia and Nepalese flags. The outside eating area is fantastic and the food was great! They had traditional American food for the pickier eaters in your group and amazing Himalayan cuisine for those feeling more adventurous.
When we visited Mount Rainier we were certain we’d end up with at least a day or 2 of rain (after all, why would you name a place Rainier) and so I knew in order to see the Skyline trail in its full glory, I’d give it the best chance possible with… a couple days visit. It turned out that our first day driving down from North Cascades NP was the best weather we were going to get- So we hit the Skyline trail the very first evening in town. Our second day was rainy (not surprised) and overcast with almost no views of the mountain. So the challenge was- where to hike?
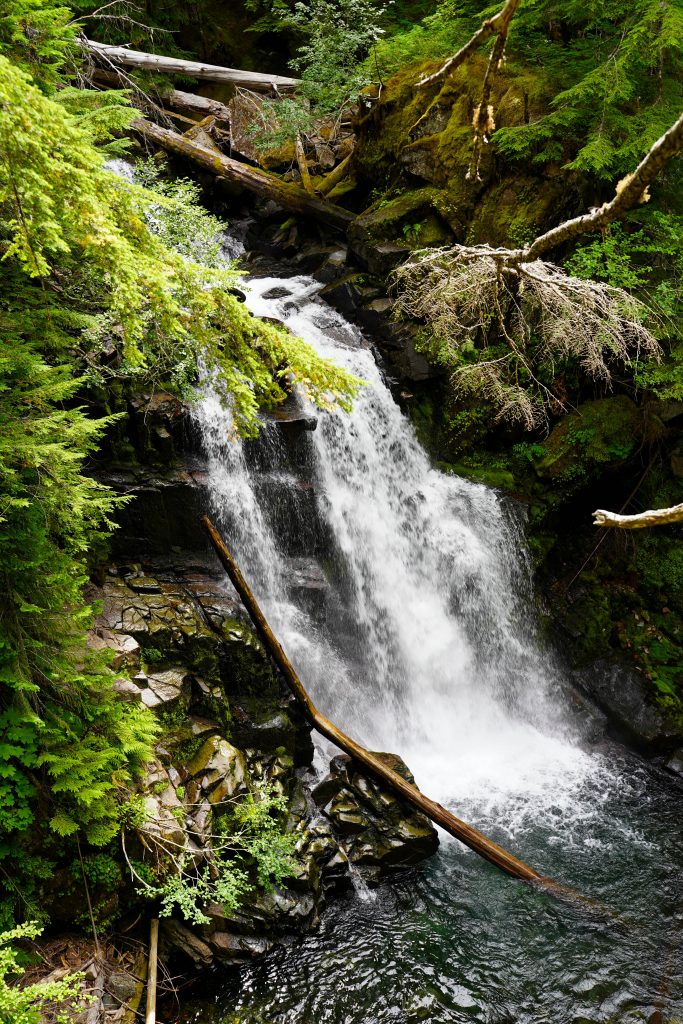
Mount Rainier has a number of amazing shorter day hikes and site seeing spots with the hike to Carter falls being just one of them. The hike was longer than we thought it would be but with almost an entire day to burn, we happily plodded along a winding trail through beautiful forest and ending at a secret cool little waterfall. Bonus points- we get to say we hiked a section of the famous 93 miles long Wonderland trail.
Fees: The trailhead is after the Mount Rainier NP fee booth. Fees for the park are $25/car or included with an American the Beautiful (National Park) Pass
Trailhead directions:
The trail starts from a large pullout on the right off the Paradise Road 8.4 miles from the Nisqually Entrance to Mount Rainier NP. The pullout is just before Cougar Rock Campground which will be on the left so if you see that campground you just missed it.
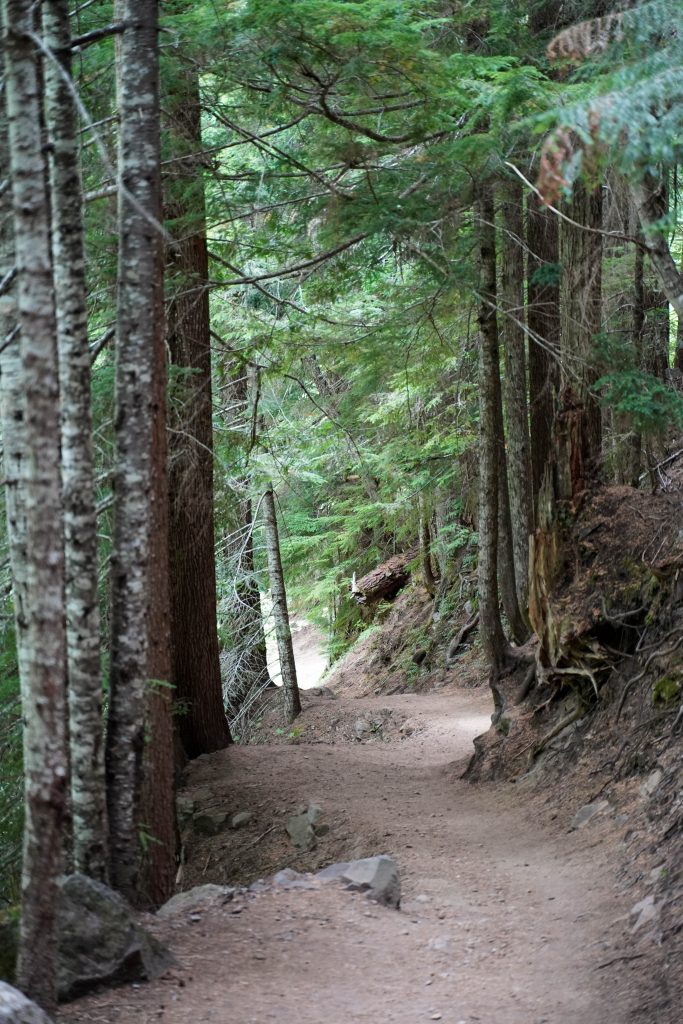
Trail description:
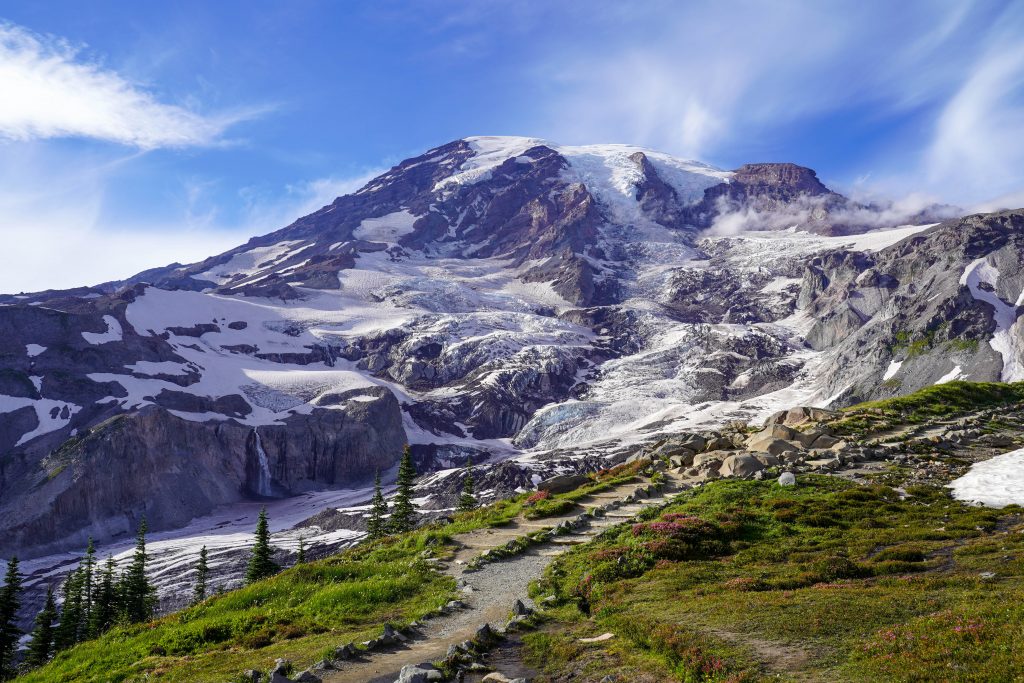
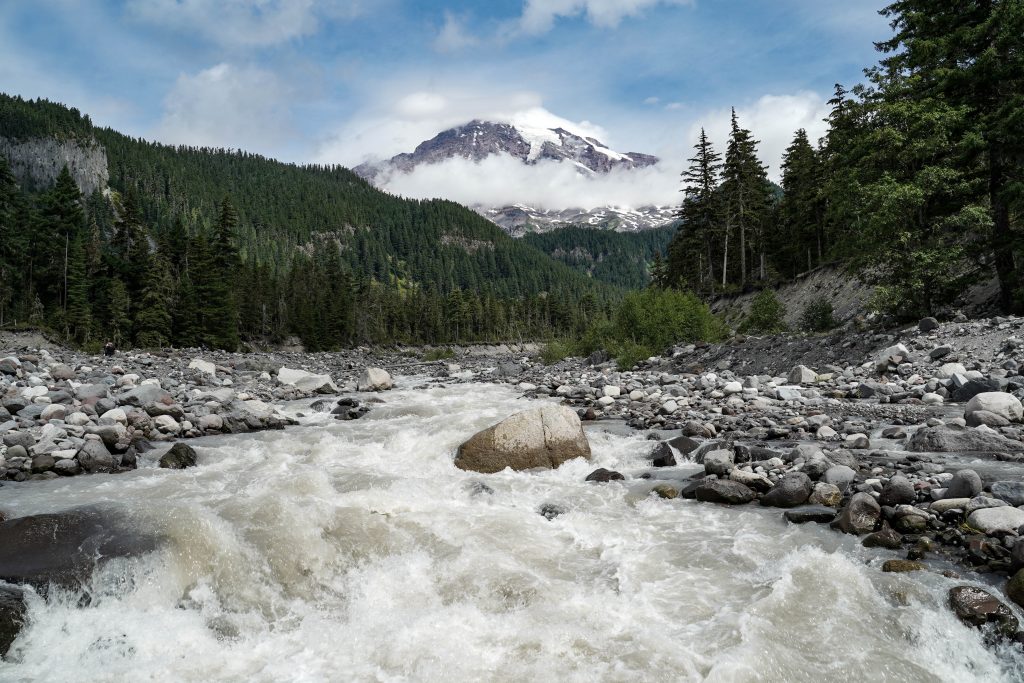
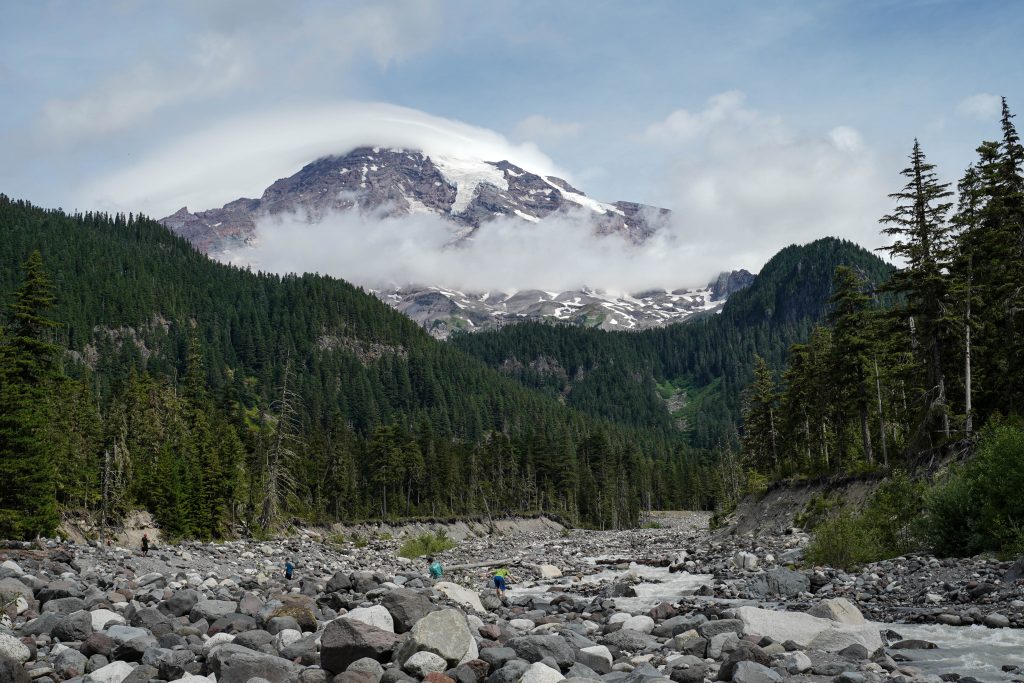
The trail starts from a pretty non-descript trailhead and descends down a steep bank onto the Nisqually River bed. Here is the best view of the mountain from the trail (if it isn’t overcast). Cross over the many small rocks and locate the bridge that will bring you across the water channel.
The trail continues along the famous Wonderland Trail route which is great bragging rights to say you hiked some of it.
After crossing the Nisqually river, the trail will start a slow climb up towards the falls. Most of the trail follows the Paradise River (smaller flow) with a few access points you could stop in to cool off on a hot day or let kids play. While the trail sign at the start claims only 1 mile each way, don’t be deceived. That 1 mile mark will come and go with no signs of getting any closer to the falls.
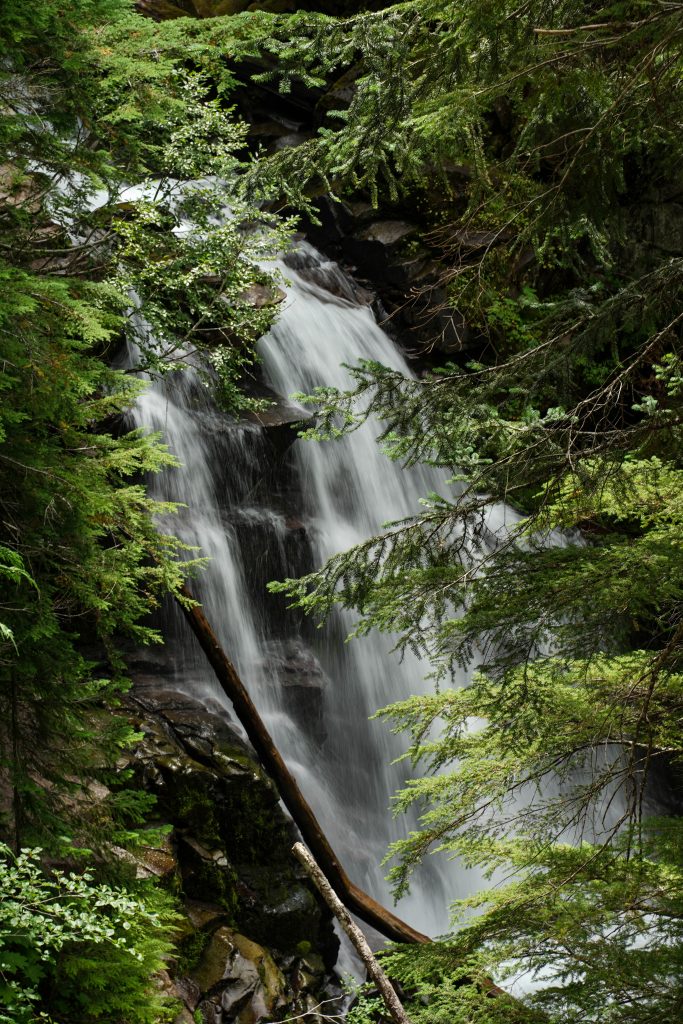
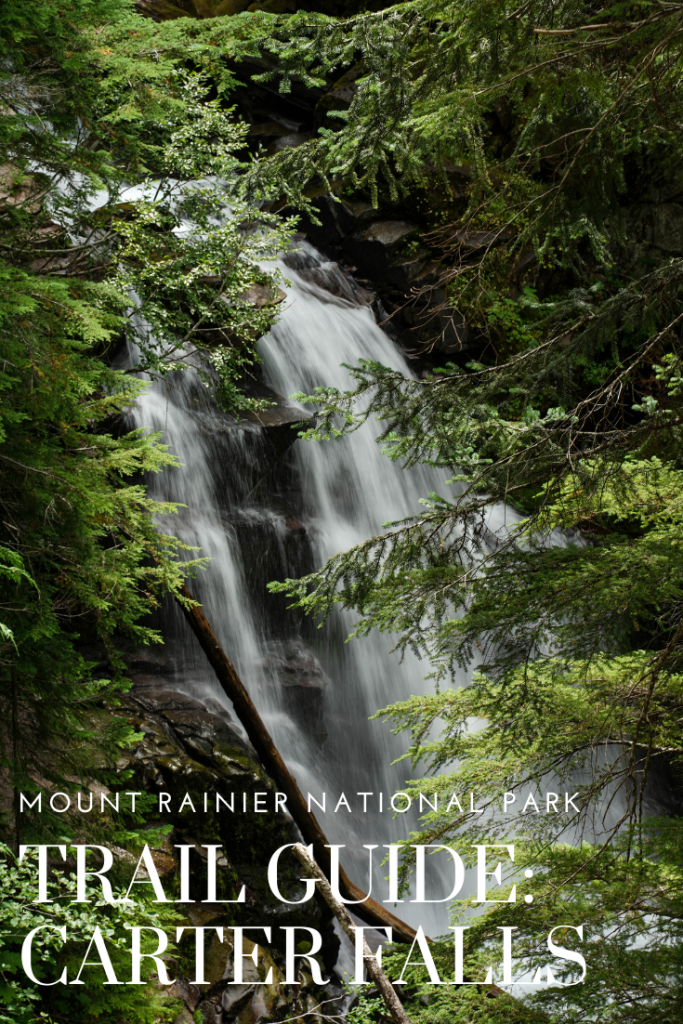
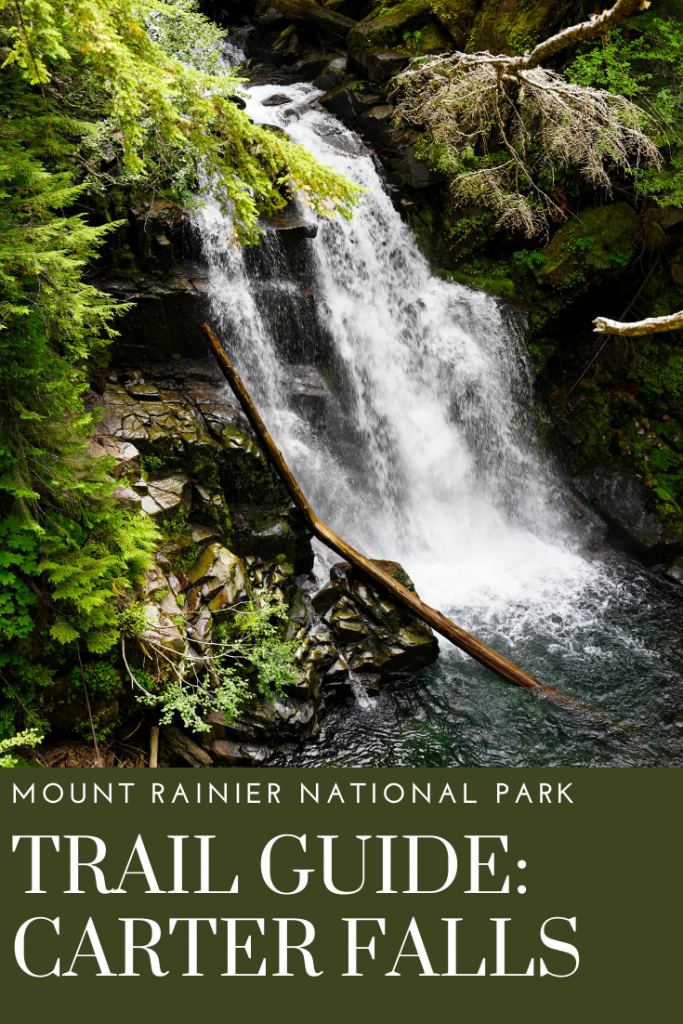
If you keep plodding along though as we did, there’s plenty to enjoy along the trail with beautiful flora and views of the Paradise River. Eventually you’ll hear the falls and arrive at a fenced overlook of them.
They are a little obscure to see but the lighting through the trees makes for great photos. While they aren’t the most impressive falls in Mount Rainier National Park they are far less visited even on a busy day and a great trek with less than amazing weather. After spending some time enjoying the falls, head back down the trail the same way you came or continue another 1.5 miles or so to Narada Falls.
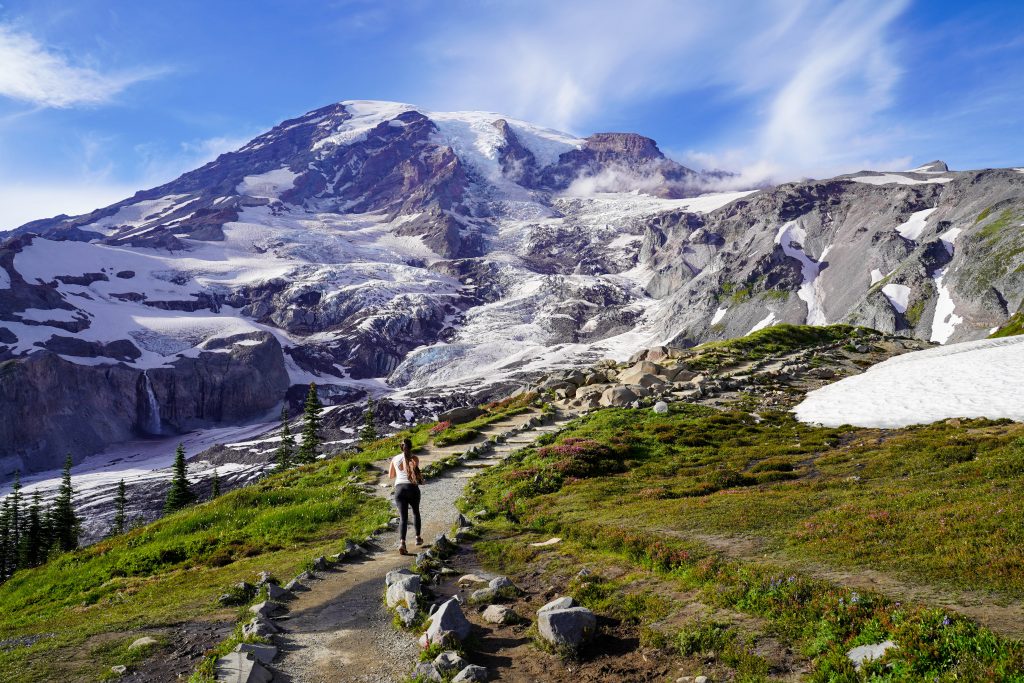
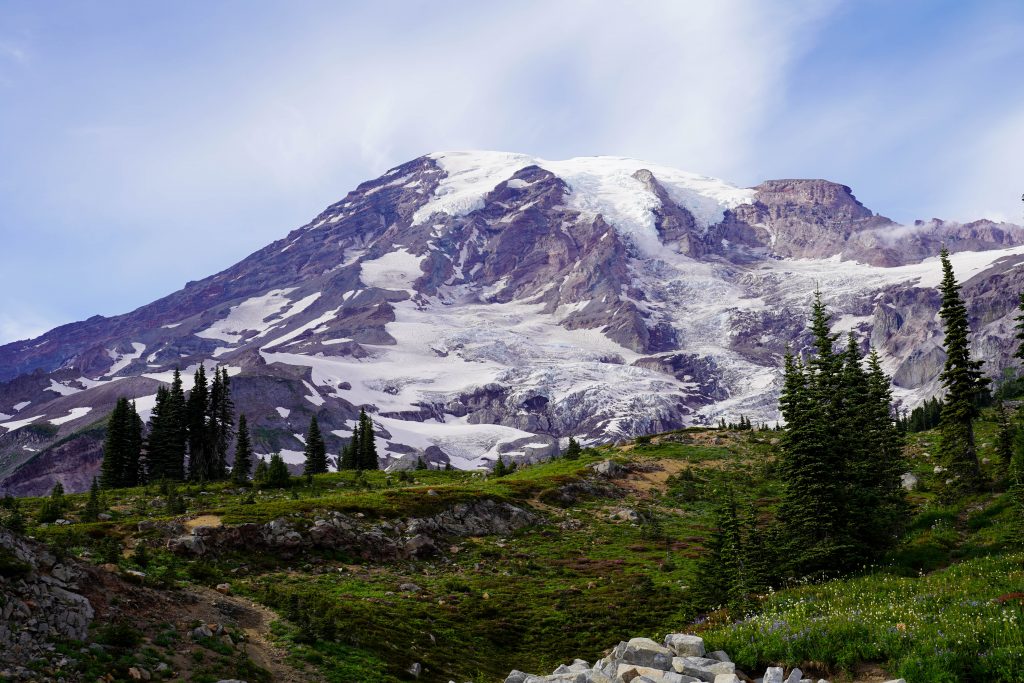
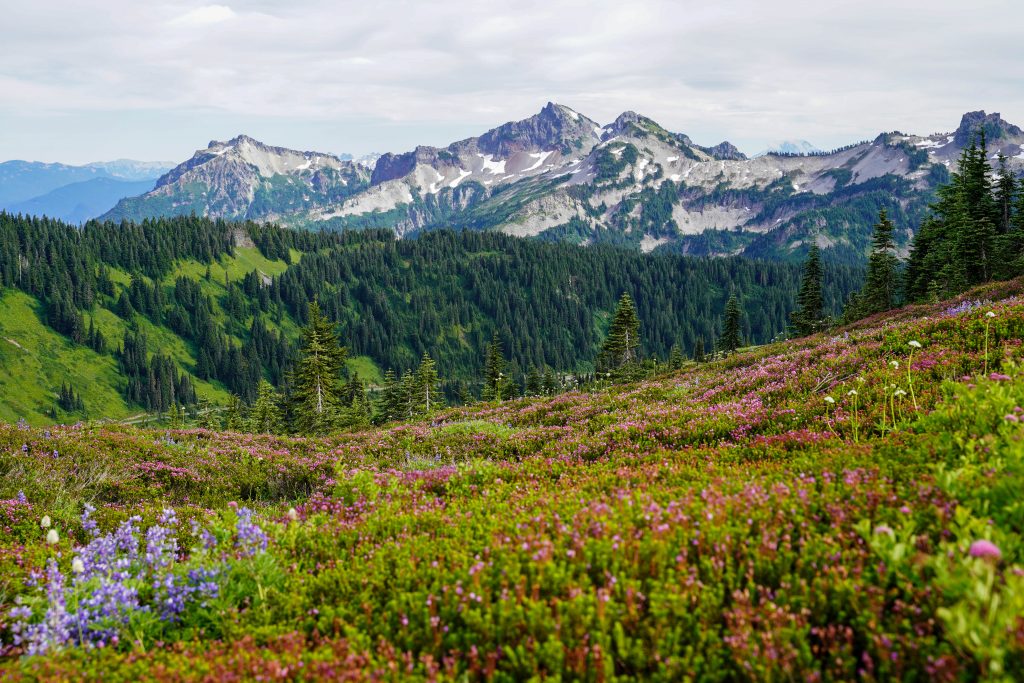
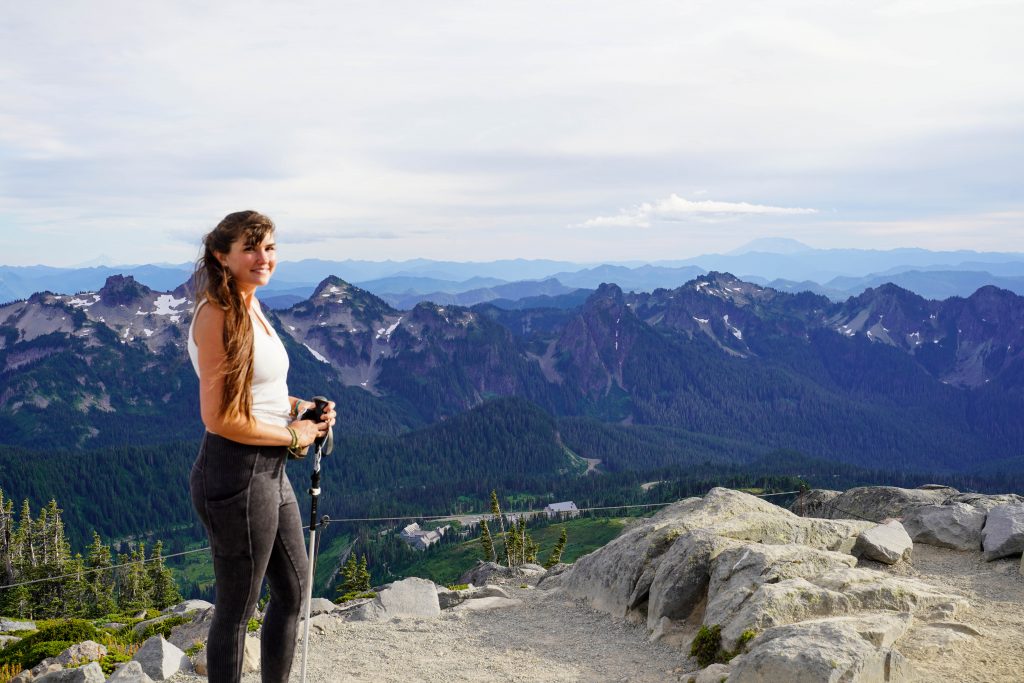
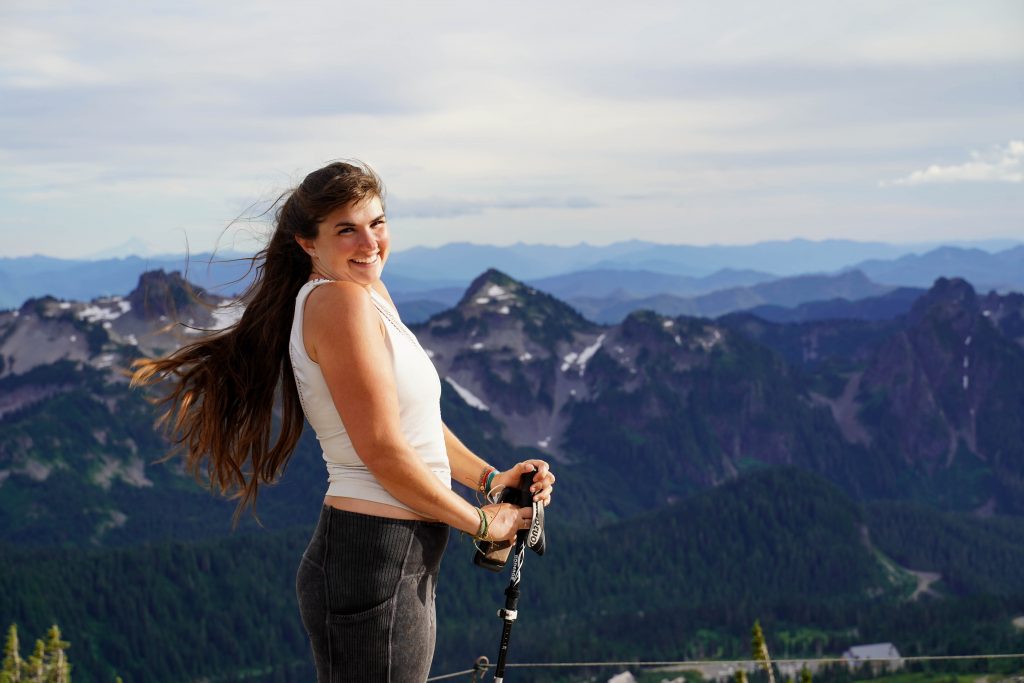
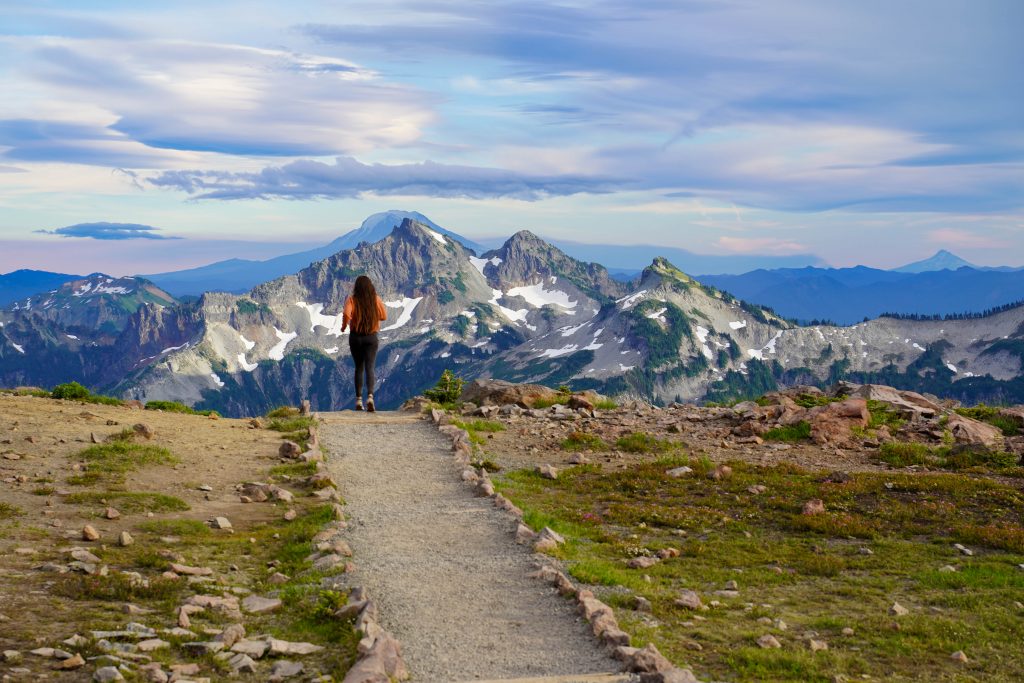
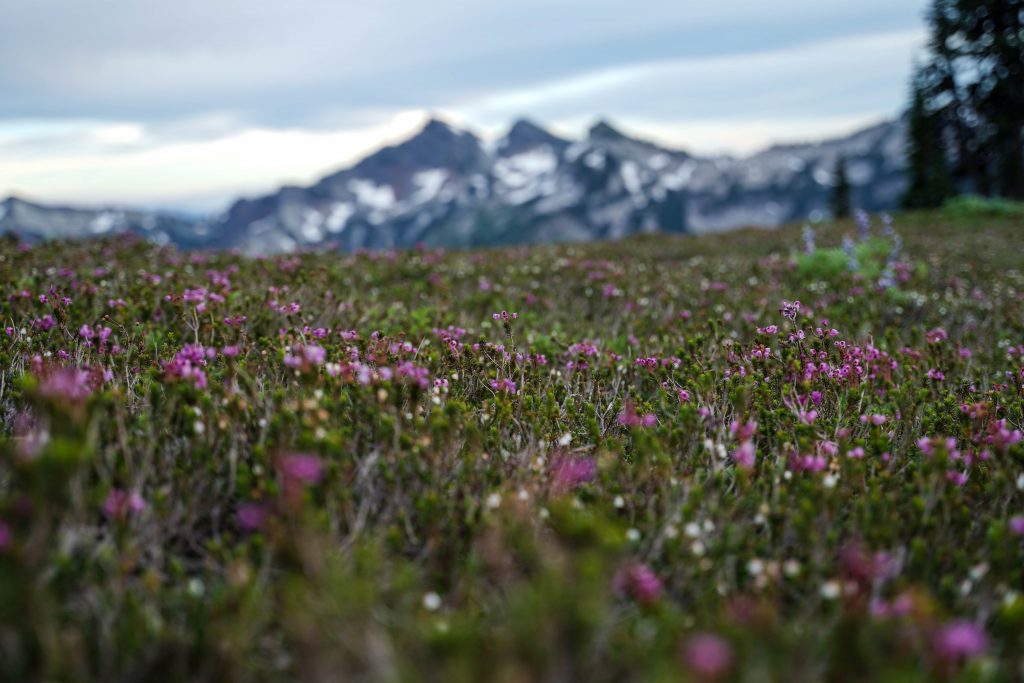
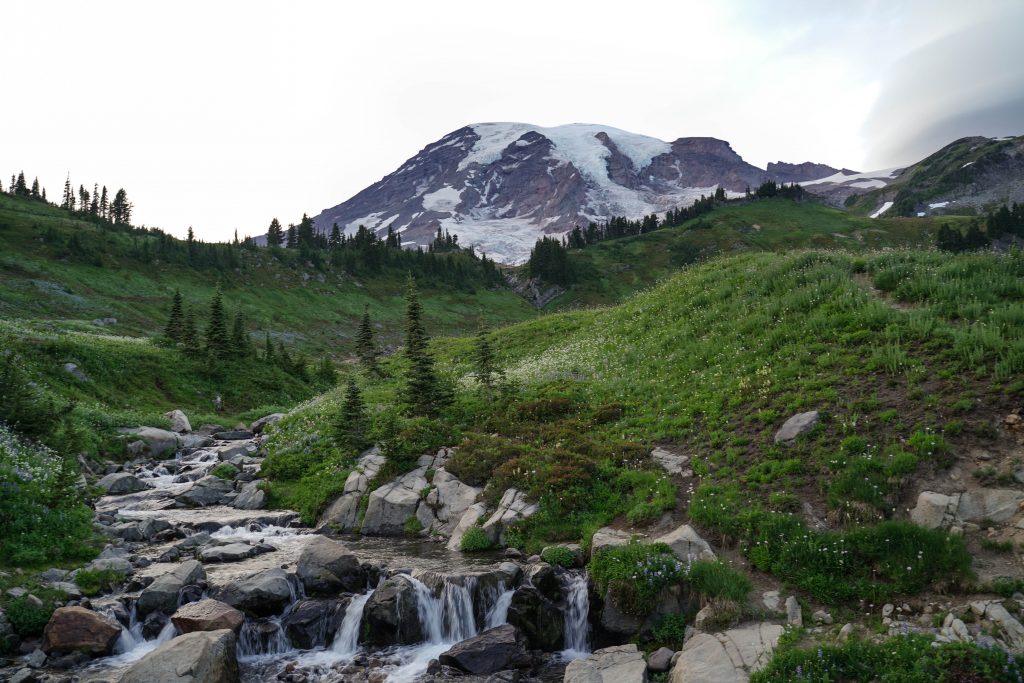
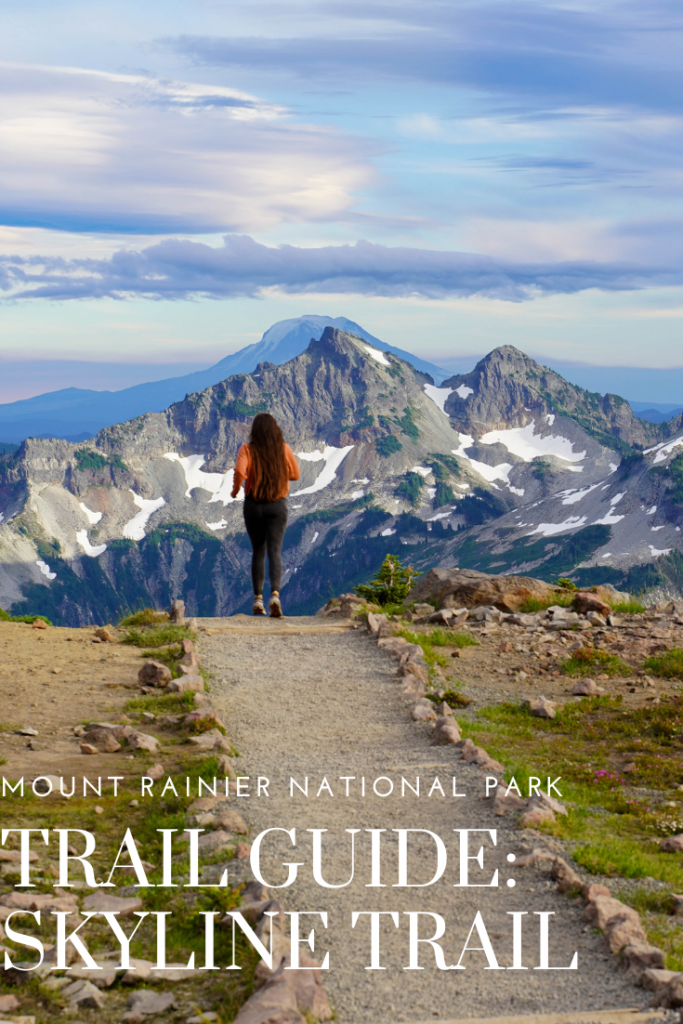
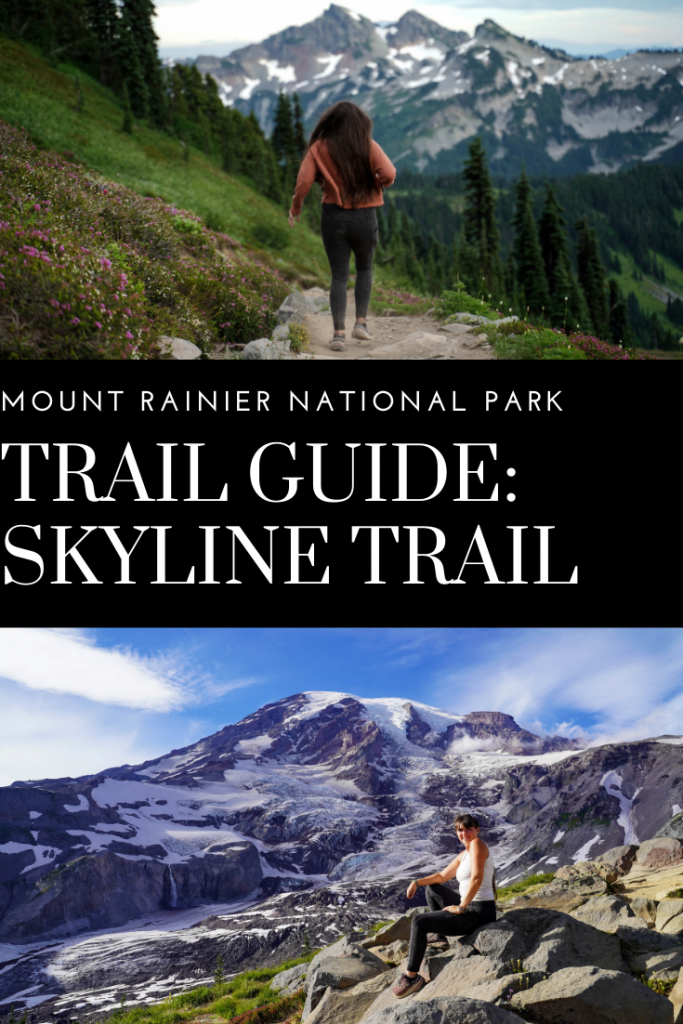
This trail is hands down the best trail we hiked in 2020 and one of the top trails I’d say I’ve ever hiked. Very few views bring tears to my eyes and this trail did just that. From 10 minutes into the hike until the very end I couldn’t believe my eyes. There were at least 5x more wildflowers covering this mountain side than I’ve seen anywhere even come close to, soaring mountain ridges and peaks as far as you can see, 300+ foot waterfalls gushing from glaciers, marmots for miles, and of course the imposing Mount Rainier itself looming over you as you climb. If you only have time for one hike in Rainier National Park or hell if you only do one hike in Washington state, go for this one.
Trail Details:
Distance: 5-6 mile loop Elevation gain: 1,680 feet Difficulty: moderate Time: 3 hours Fees: The fee for Mt. Ranier NP is $30 or included with a National Park Pass. Facilities: Bathrooms at the visitor center (at TH) and at Panorama Point
When to hike the Skyline Trail:
Early August through September/ early October. This trail takes a VERY long time to thaw and in fact the lower skyline trail was still closed due to sketchy ice crossings so we had to take the high skyline trail (not a problem anyways). If possible, plan your trip for August so that the entire loop is open and safe and the wildflowers are at their peak.
*Special tip: go in the evening for less crowds and absolutely stunning lighting. We started at around 4:30 PM and the beginning of the trail was a little crowded (still not bad for a NP) and there weren’t many people at all along the rest of the loop.
Trailhead directions:
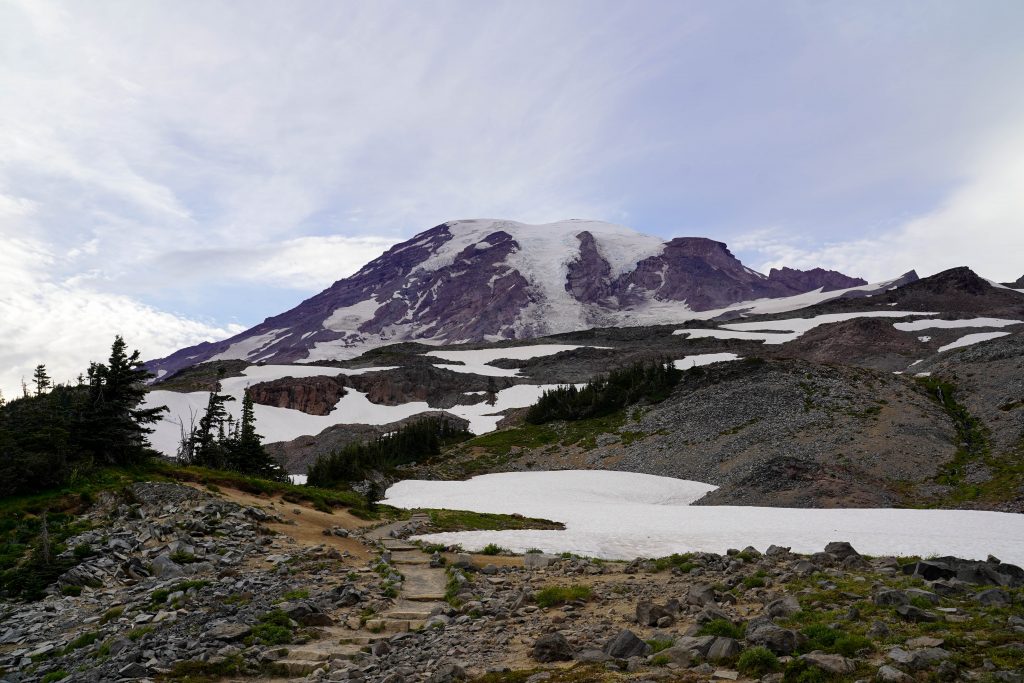
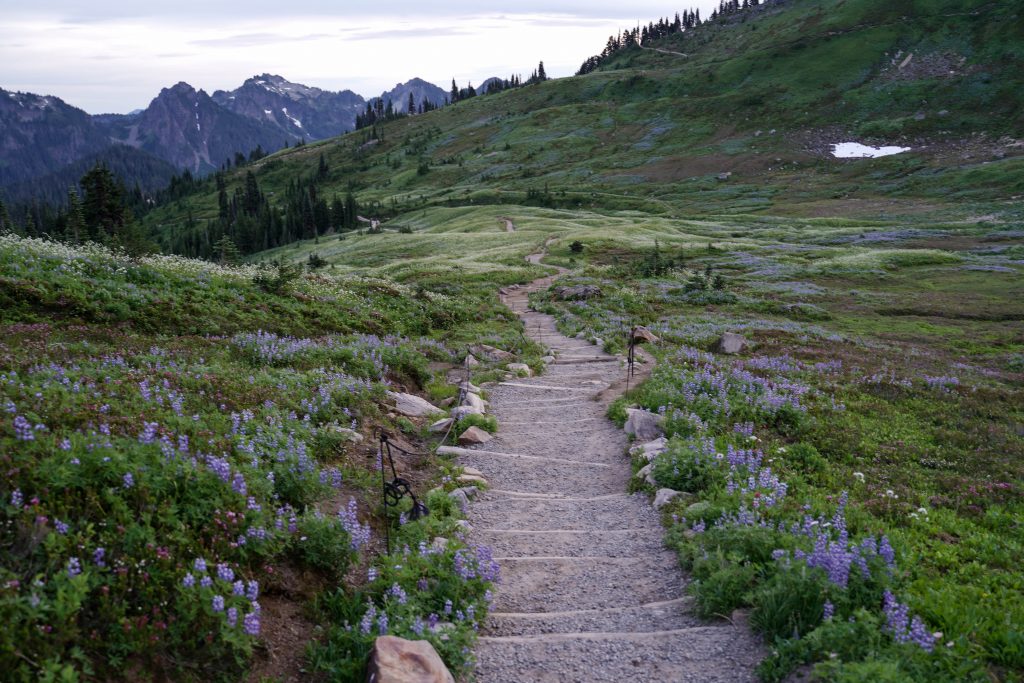
The trail starts behind the Paradise NP Visitor Center and is easy to find. From Ashford, WA, drive and park anywhere in the massive lot for the visitor center. Take the John Muir quoted stairs up and head to the left following signs for Skyline. I highly recommend hiking this loop in the clockwise direction so follow signs left instead of right. The first portion of the trail is STEEP but paved and is shared by multiple trails so don’t fret if it feels very busy.
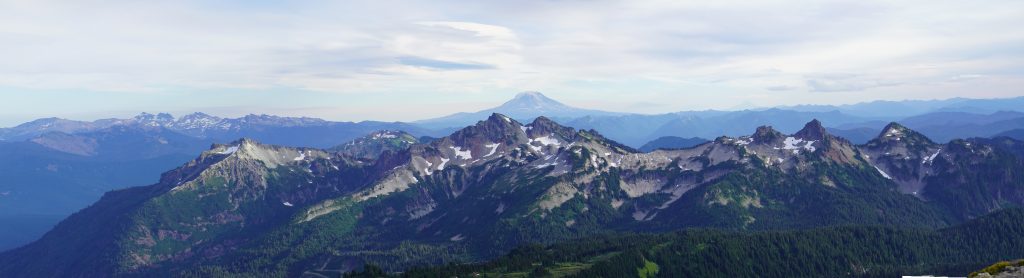
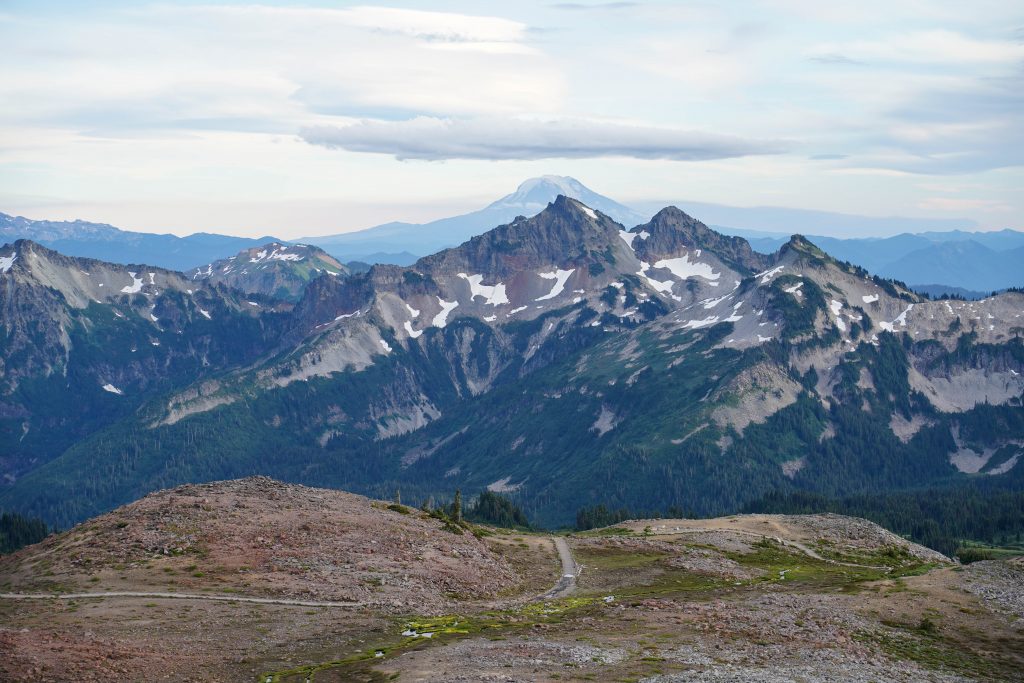
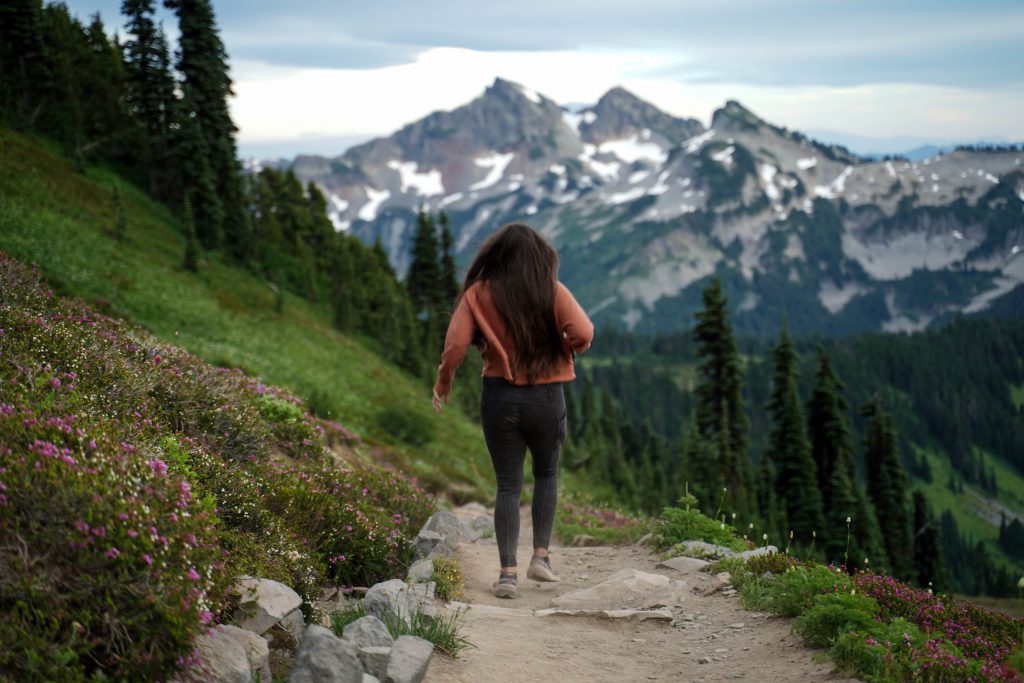
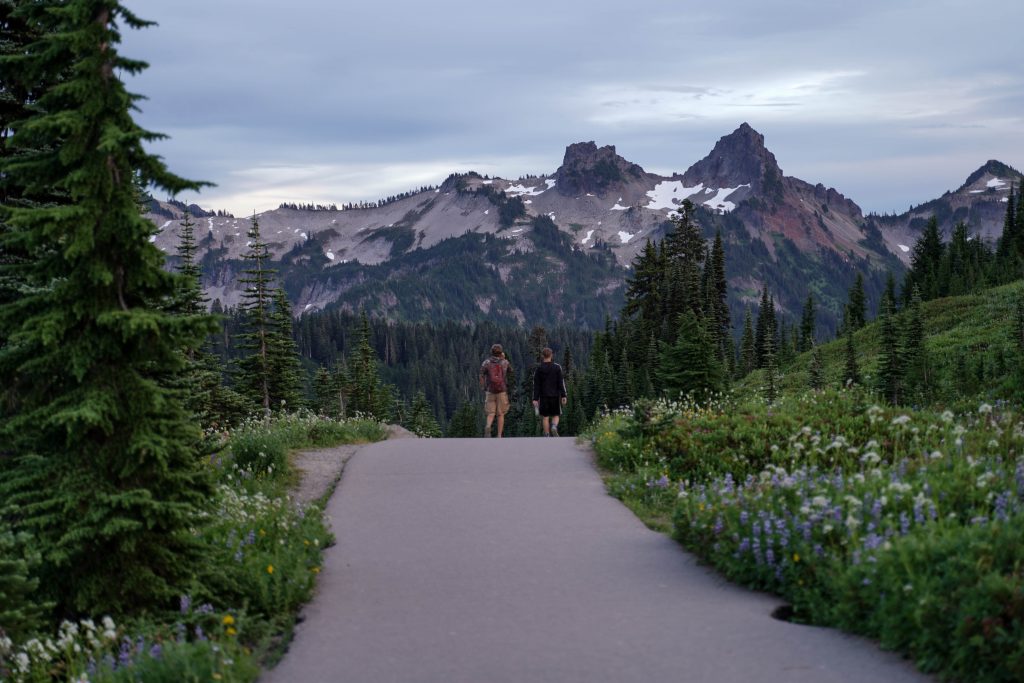
If you hike clockwise (recommended) you’ll be hiking towards the best views of Mount Rainier itself, with the mountain dramatically revealing itself with every foot of elevation you climb. Then on the hike down you get rewarded with astounding views of the surrounding mountain ranges and volcanic fields. Clockwise is best.
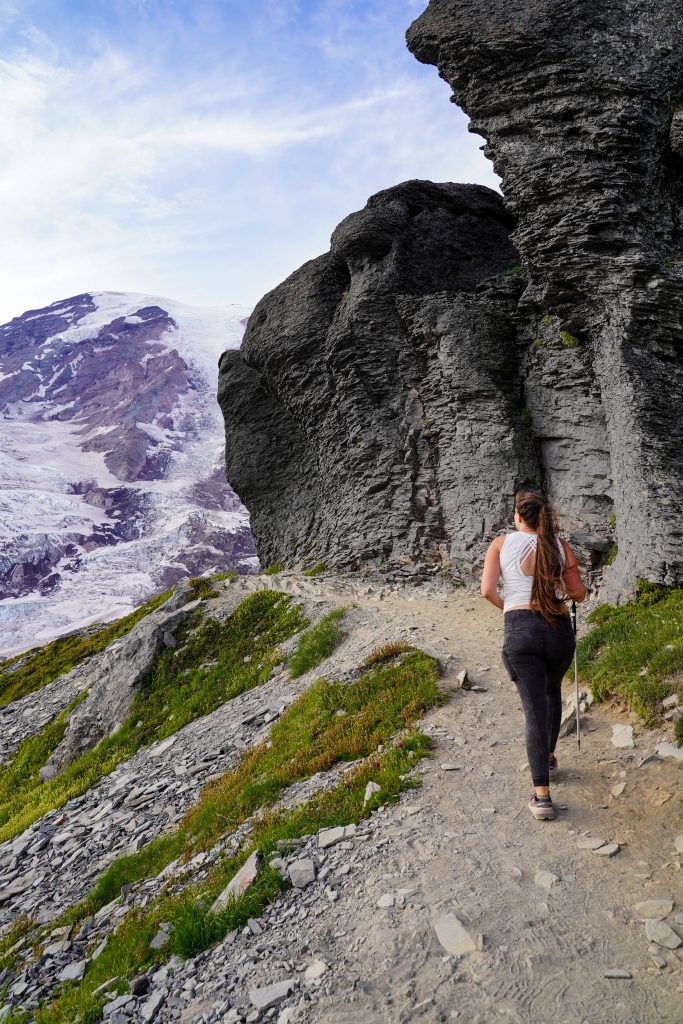
Skyline Trail description:
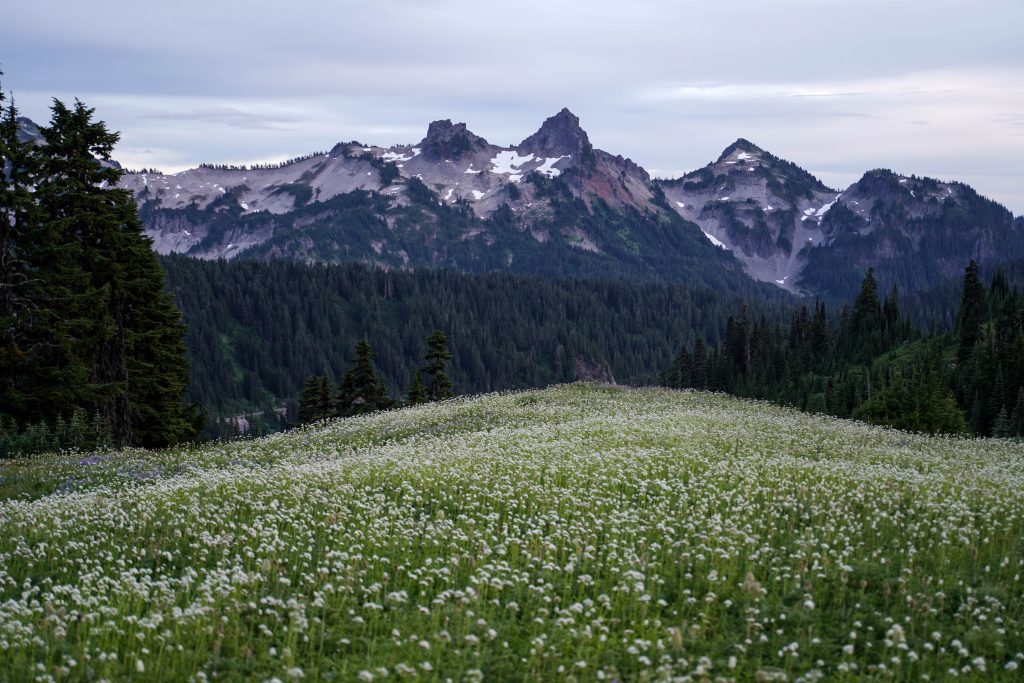
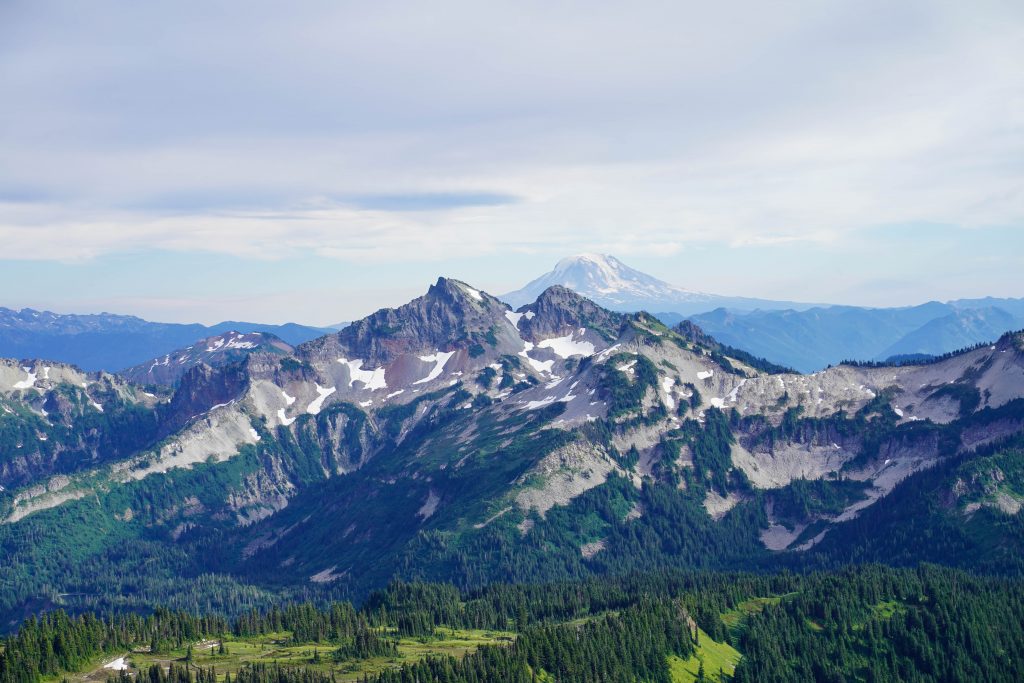
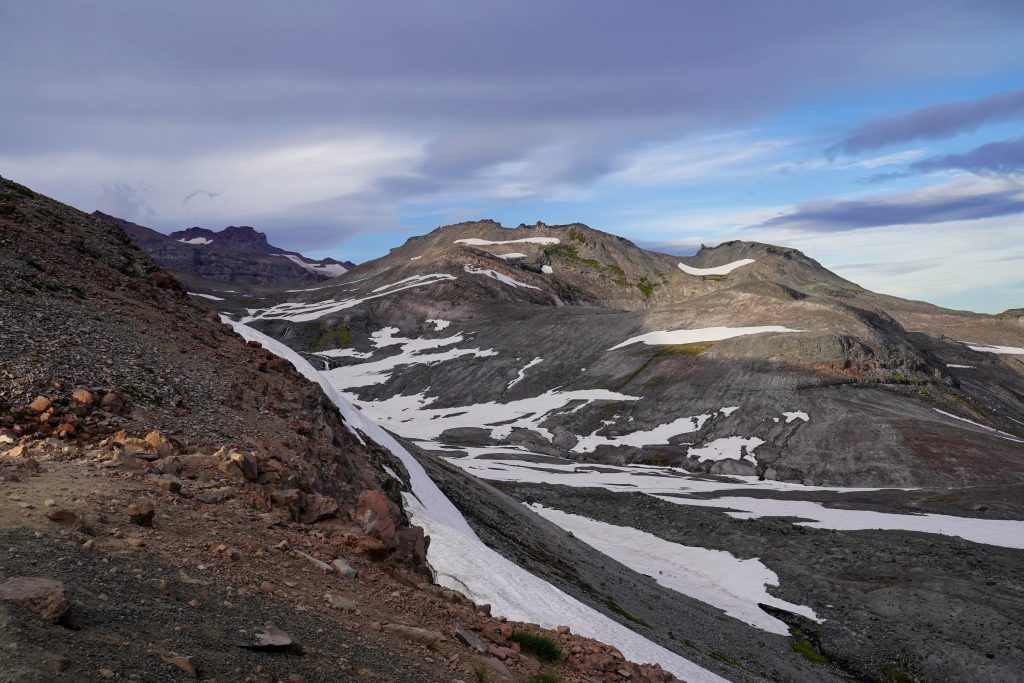
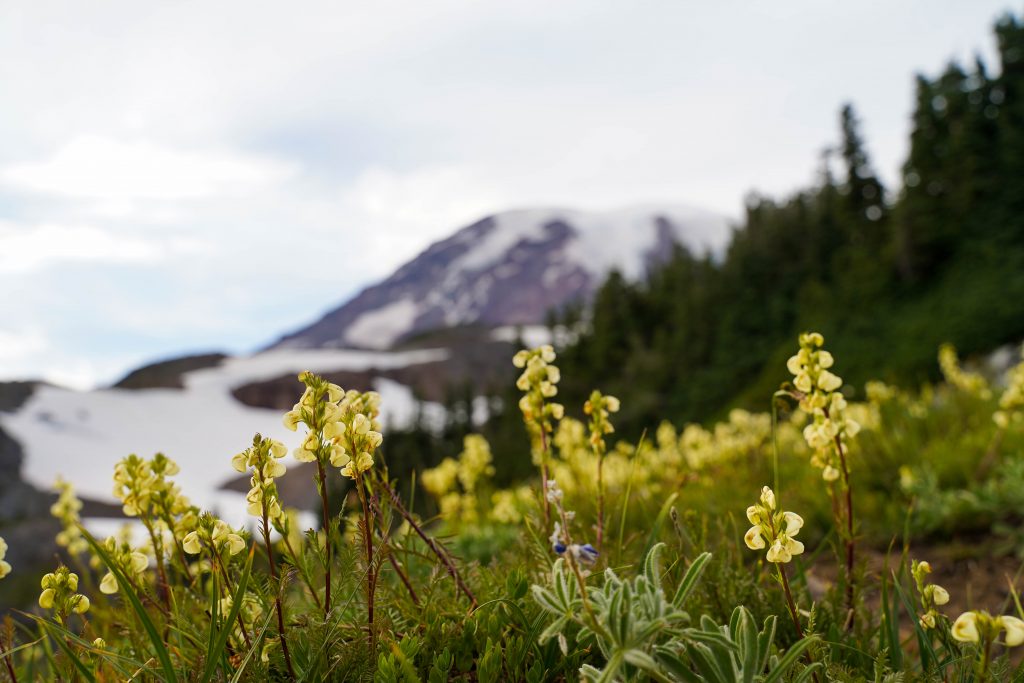
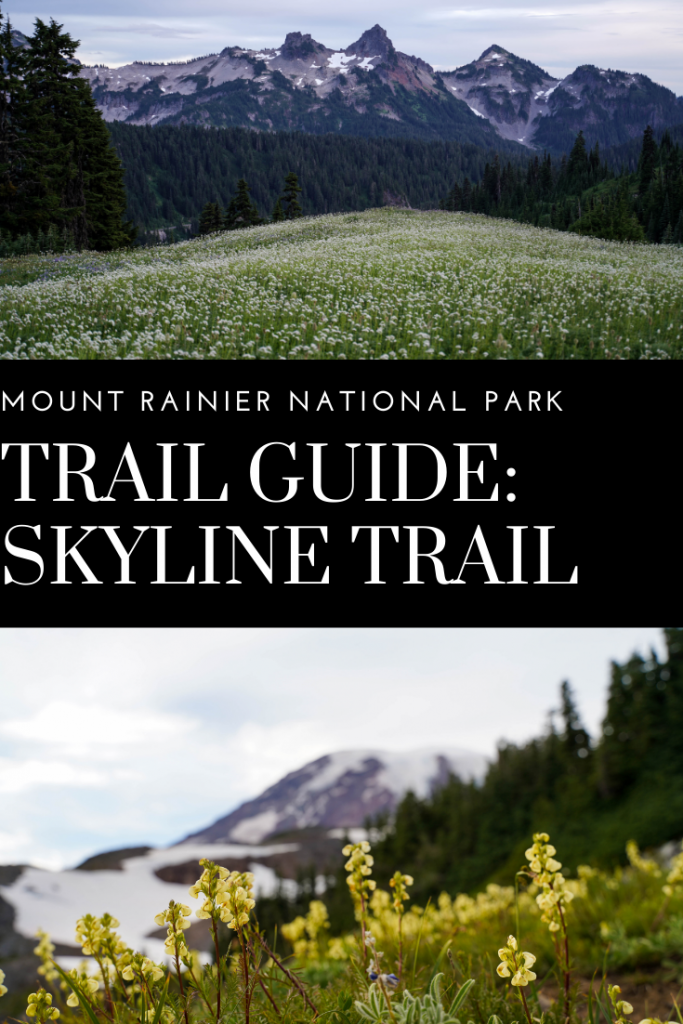
The first 0.5 mile or so is paved and steep. Don’t worry though. While your heart rate and sweat rate maybe high, you will be amazed at the blanket of wildflowers surrounding every trail bend and the views of Rainier only get more impressive as you climb. Eventually other trails like Glacier View will branch off to the left. Keep right and the pavement will turn to dirt as you start up the skyline trail. The wildflowers continue to amaze as you climb and you’ll start catching glimpses of dozens of waterfalls cascading from the glaciers on the mountain.
Top left if the the Nisqually Glacier view trail splitting off (keep right on the paved track). Make sure to take in the incredible fields of wildflowers as your climb but remember to stay on the path!
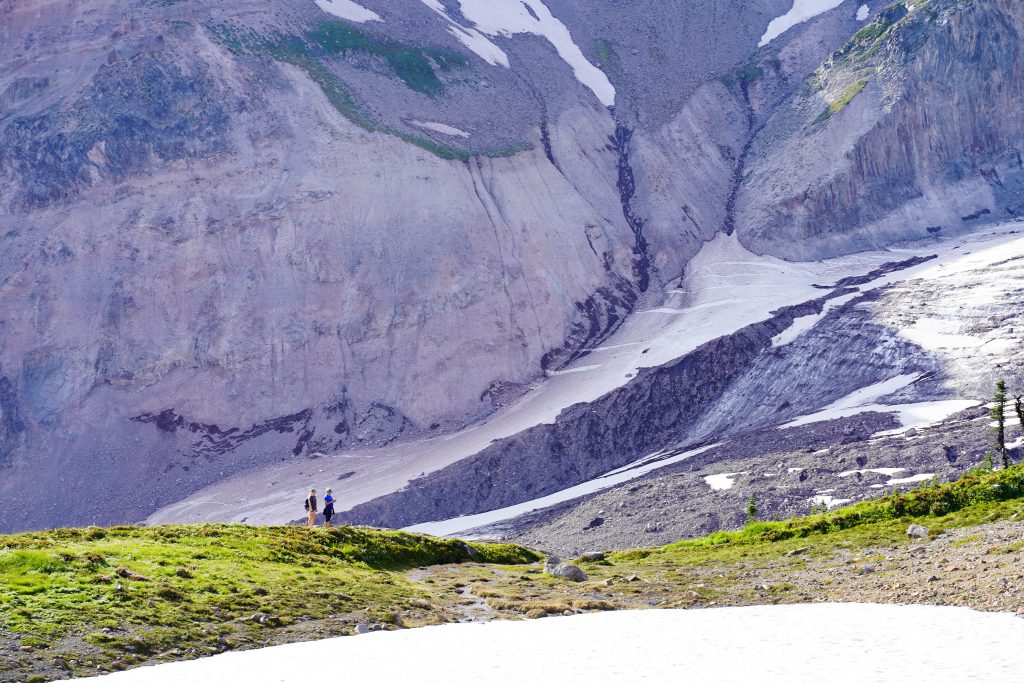
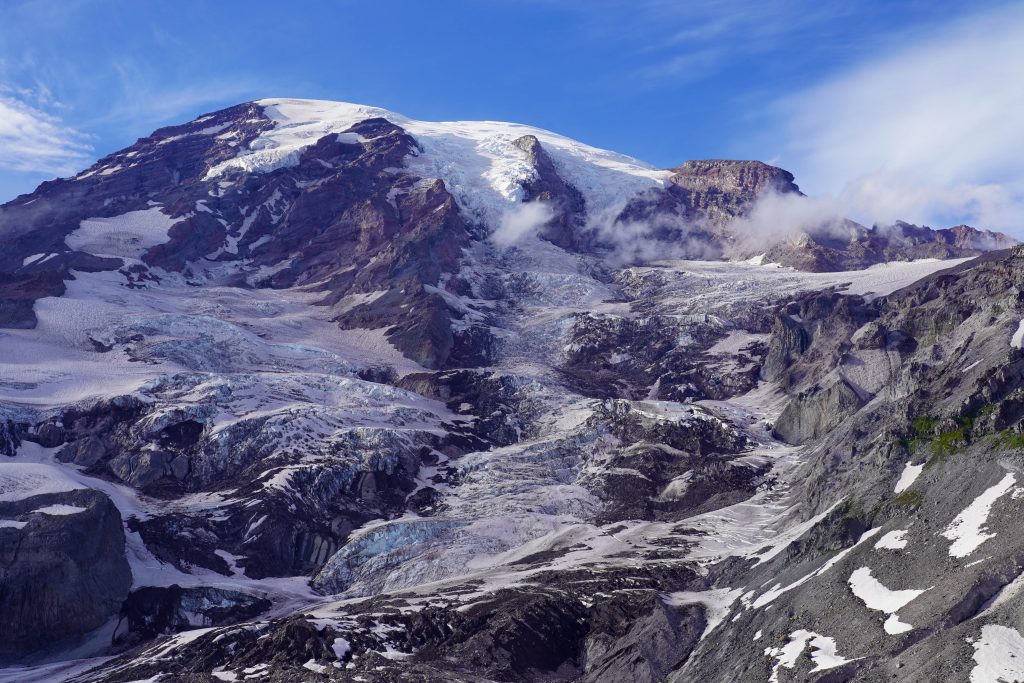
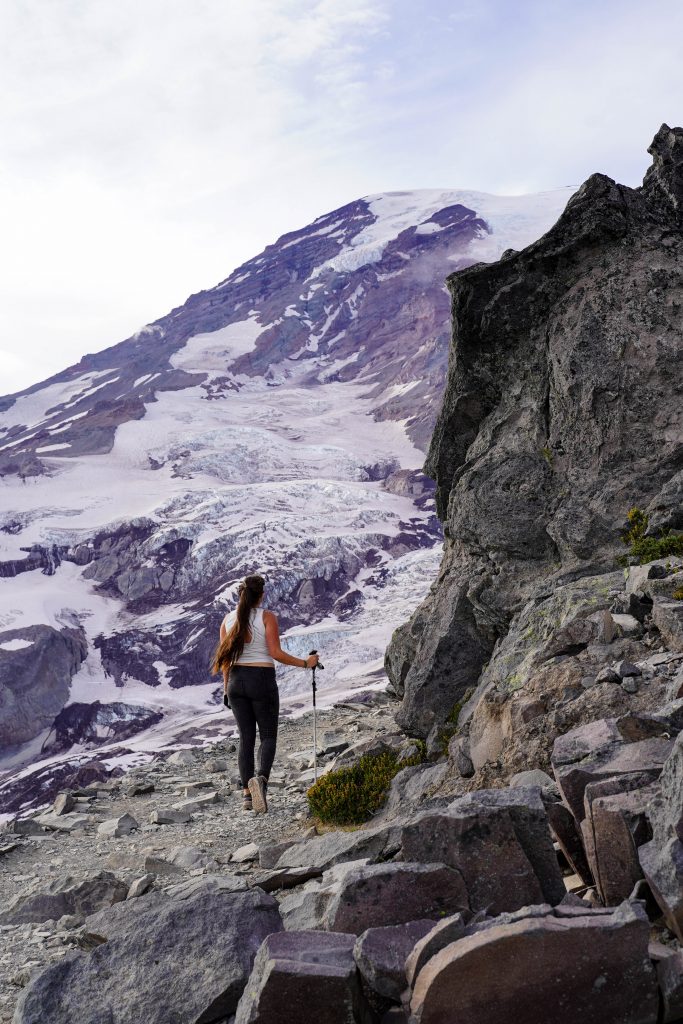
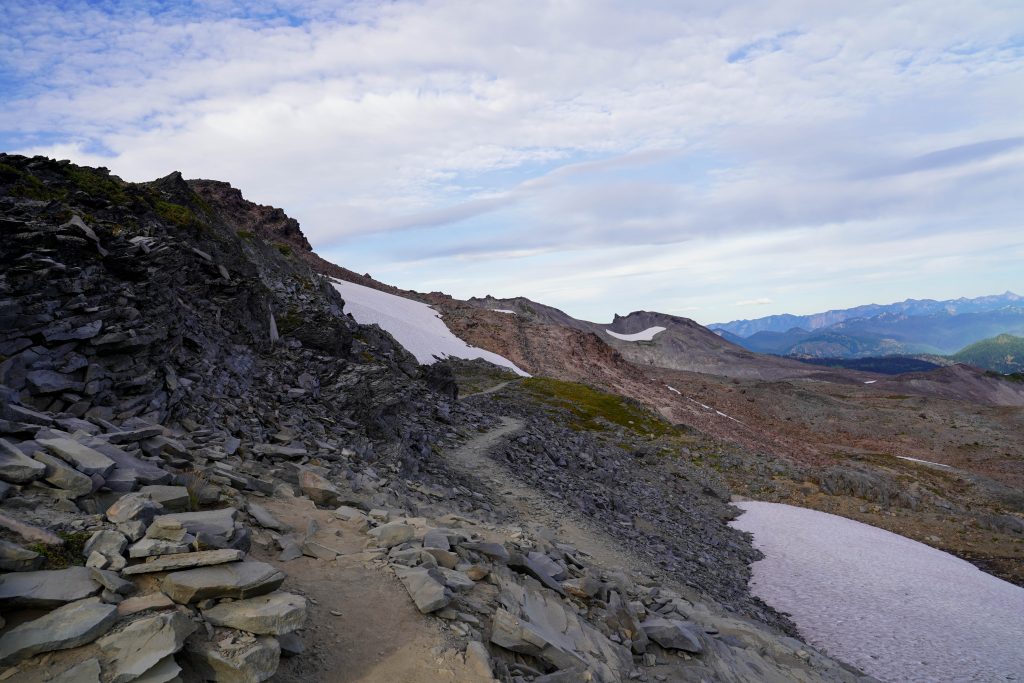
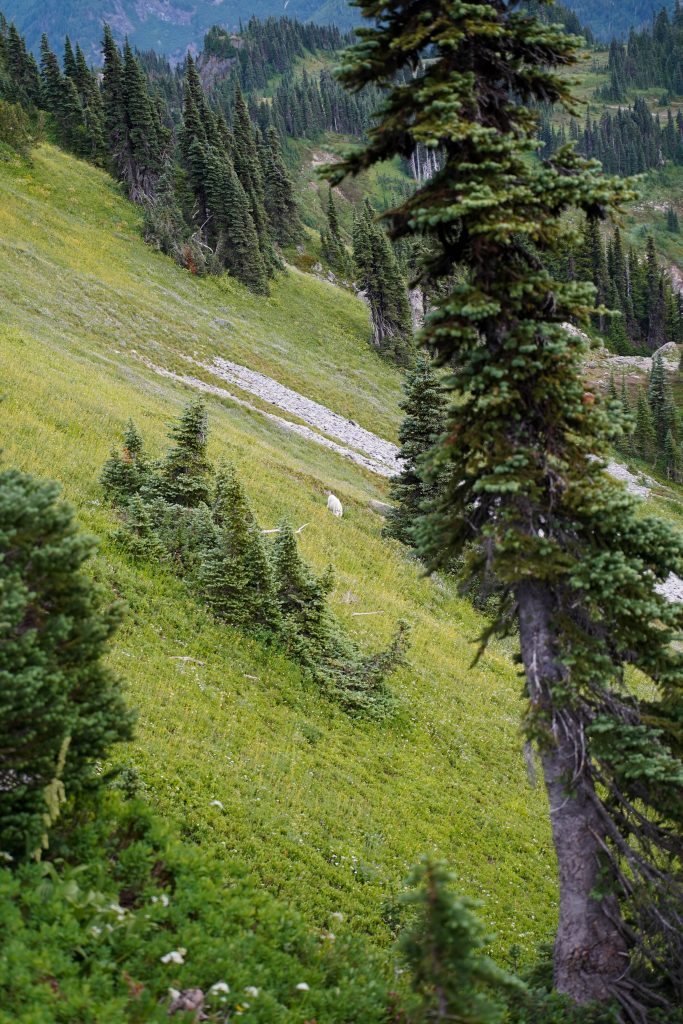
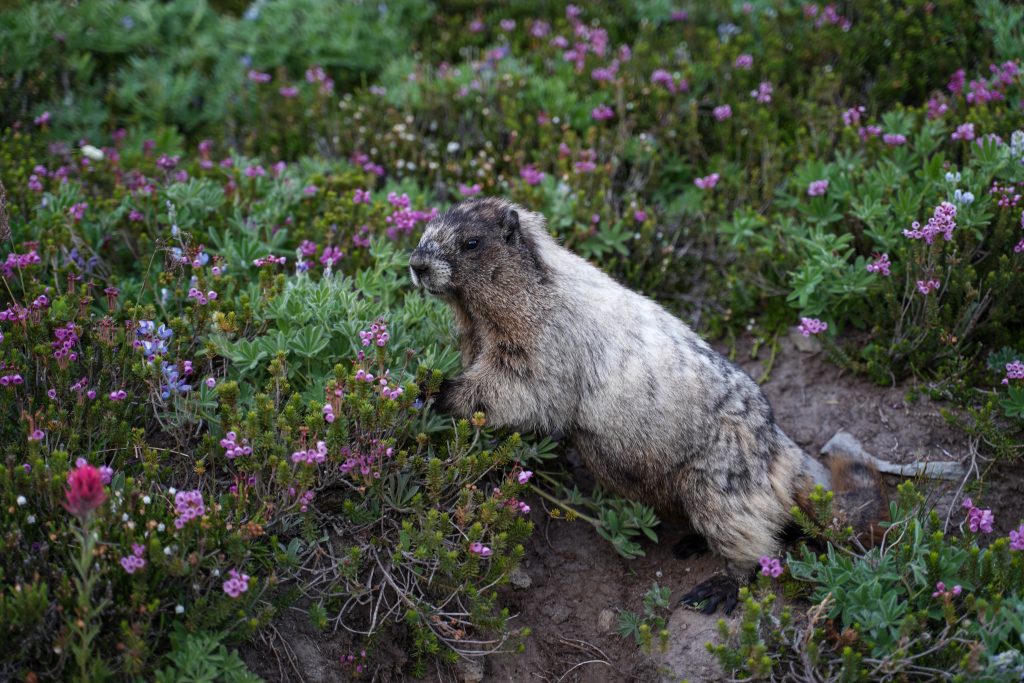
Keep an eye out as well for the mischievous marmot. They. were. everywhere. You’ll be able to see where the glacier view trail ends and the glacier begins as you readily climb above that glacier terminus. Here the views of the mountain are the most incredible. While all the glaciers we saw in the N. Cascades were undoubtedly impressive, nothing really compared to how close you come to the glaciers along the Skyline Trail.
The hike post Nisqually Glacier turn off
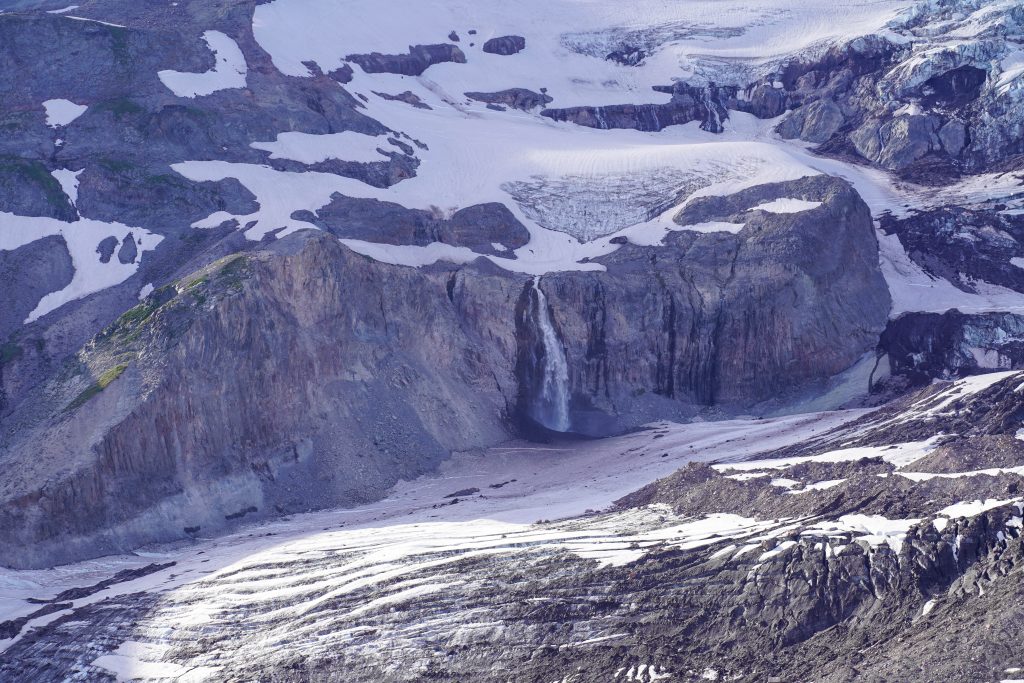
In the not so far distance you can see (and hear) the incredible Wilson Falls which are just over 300 feet tall falling from the glacier of the same name. The trail will give you a short break from the climb and turn you away from the mountain towards the other impressive view and what I actually think of as the skyline.
Nothing really compares to how close to the mountain you feel. It’s giant and incredible and yet there you are standing beneath it and feeling more and more empowered as you hike. There’s few hikes that really do that for me.
There are conical mountain peaks in all directions and incredible shaped ridges just across the way. A small trail will branch off on the left but continue straight as the trail takes a couple stairs and starts climbing again.
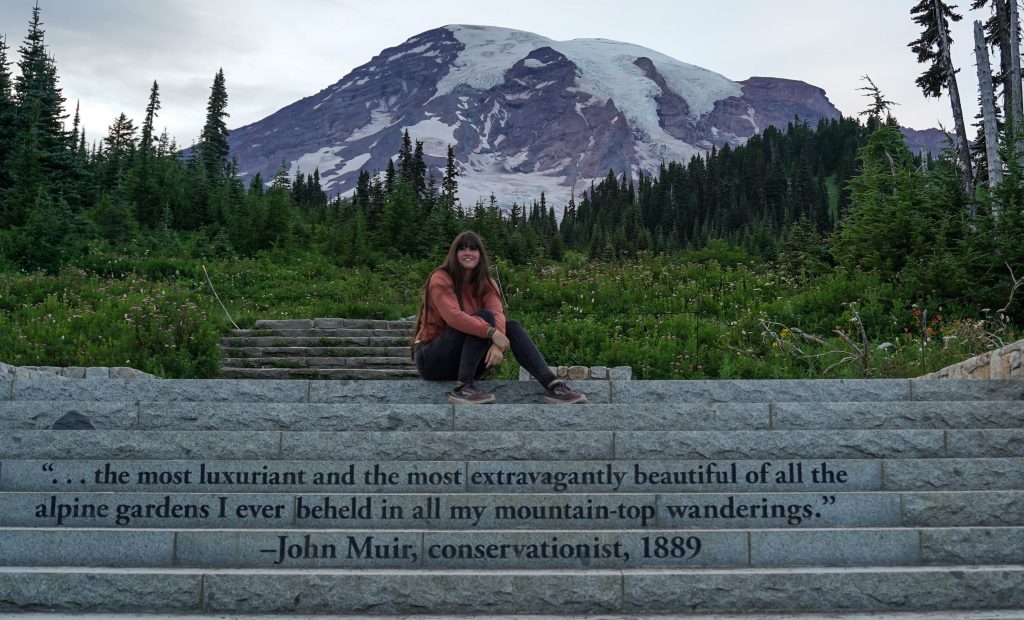
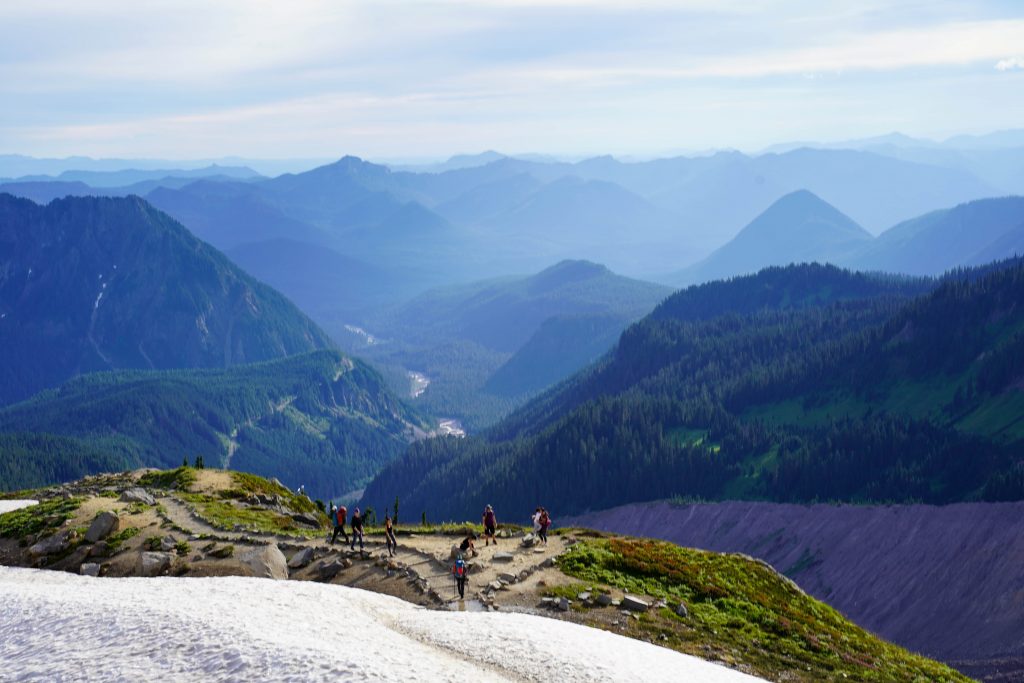
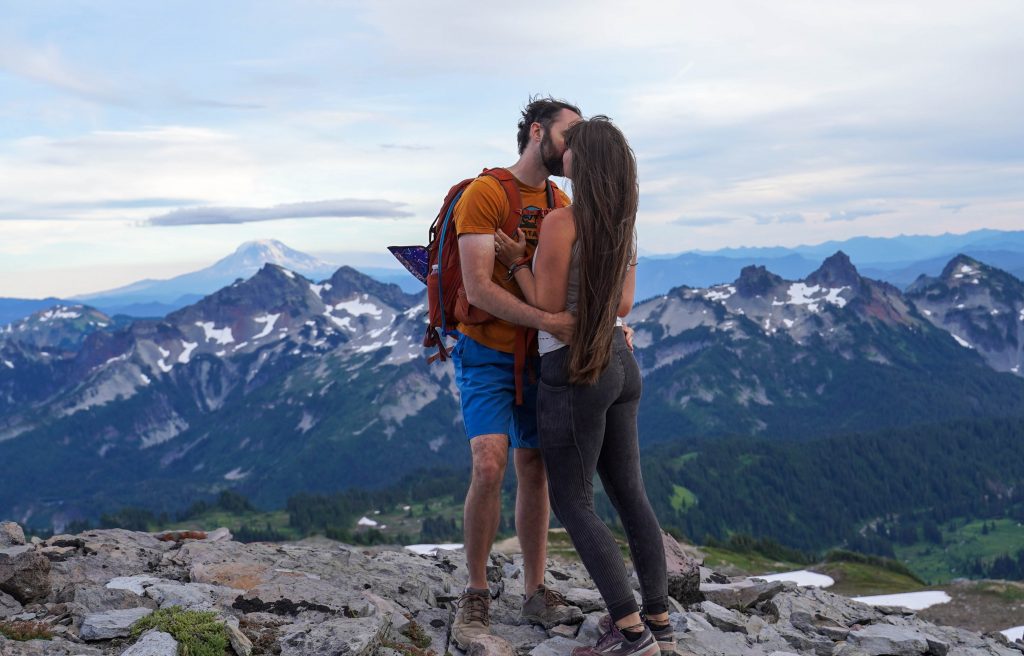
Just after the iconic (but short) stairs section of the hike you’ll reach Panorama Point. Again this is one of the most beautiful views I’ve ever seen in fact I may just have cried a little bit at this spot as I just couldn’t take it all in. (I’m pretty sure Braden got sick of hearing “I can’t handle this’ and “I can’t even”)
Panorama Point
Views like this, I mean come on! Photos below of me trying to handle my feelings about this hike.
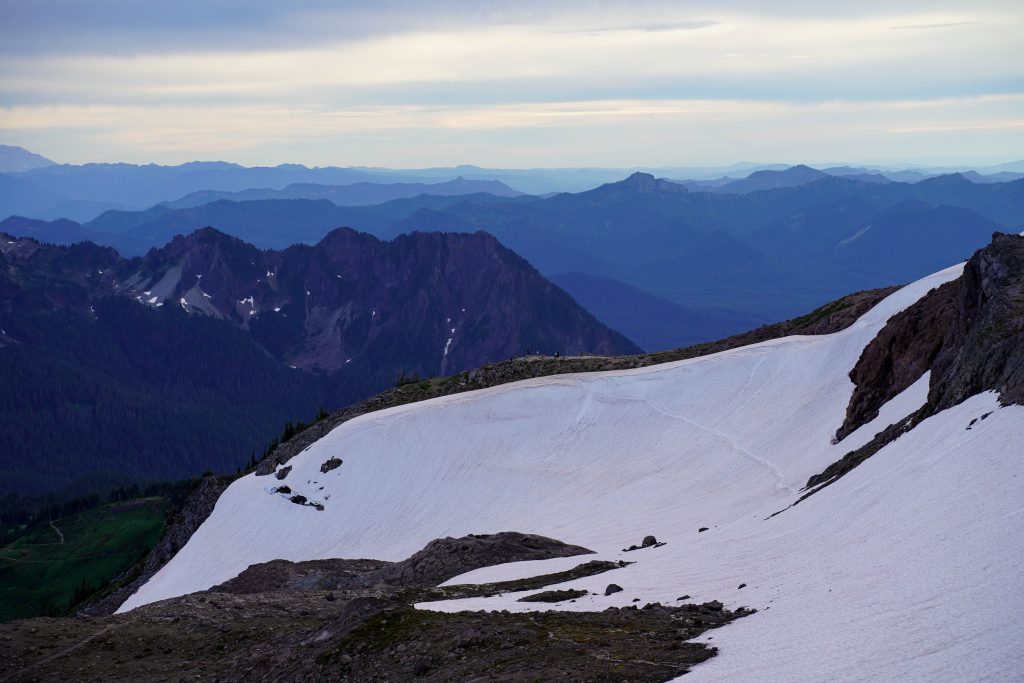
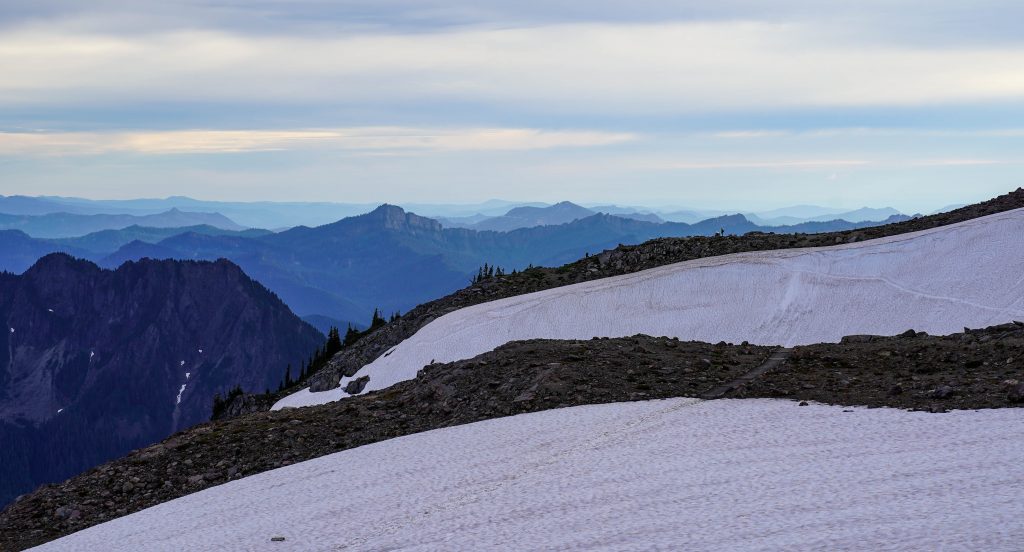
At panaroma point, you will sometimes have options. There is a trail that cuts right across to where you start descending; however this trail sometimes never thaws and the snowy trail can disguise many hazardous conditions such as unstable ice and glacier river ice bridges. If the trail says closed, believe it. It is only another 200-300 foot climb until you are done climbing and the next uphill section is pretty cool.
This is taken from the other side looking at Panorama Point and you can see a “trail” in the snow. It is very hazardous and should not be attempted in these conditions.
At this point you likewise “might not even” and could be skipping up the trail like I was….. so what is 300 more feet of climbing. In fact I never wanted to go down, instead I wanted to bask in the beauty that was 360 all around me.
The next little bit of climb also introduces you nicely to the volcanic terrain. The terrain becomes less dusty and dirty and turns to black rocks and cliffs (surrounded by ever present snow fields which make quite the contrast)
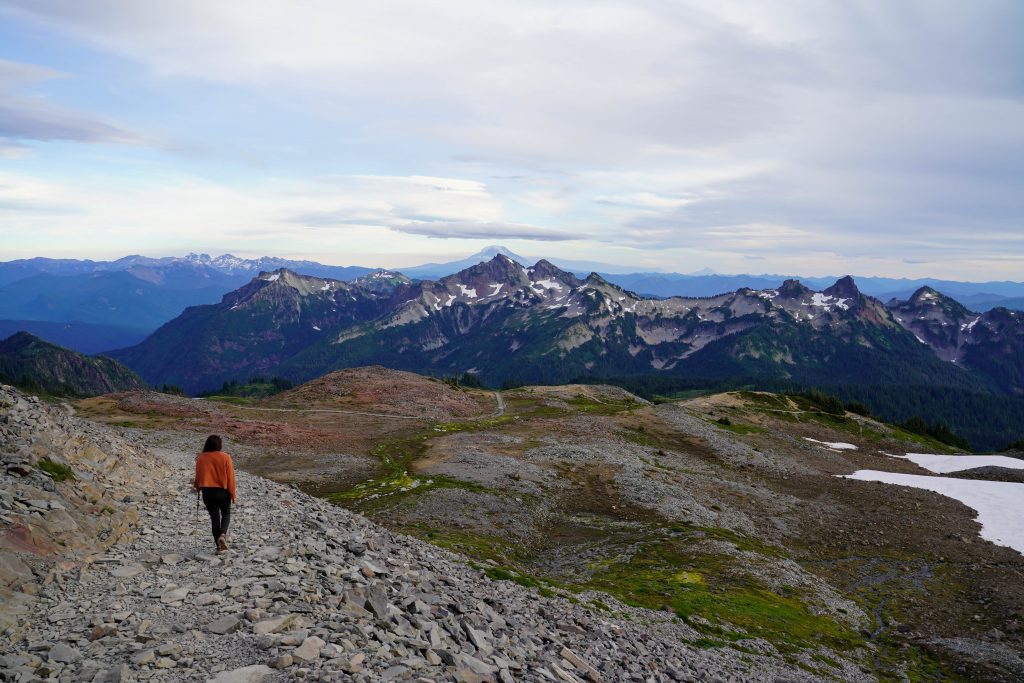
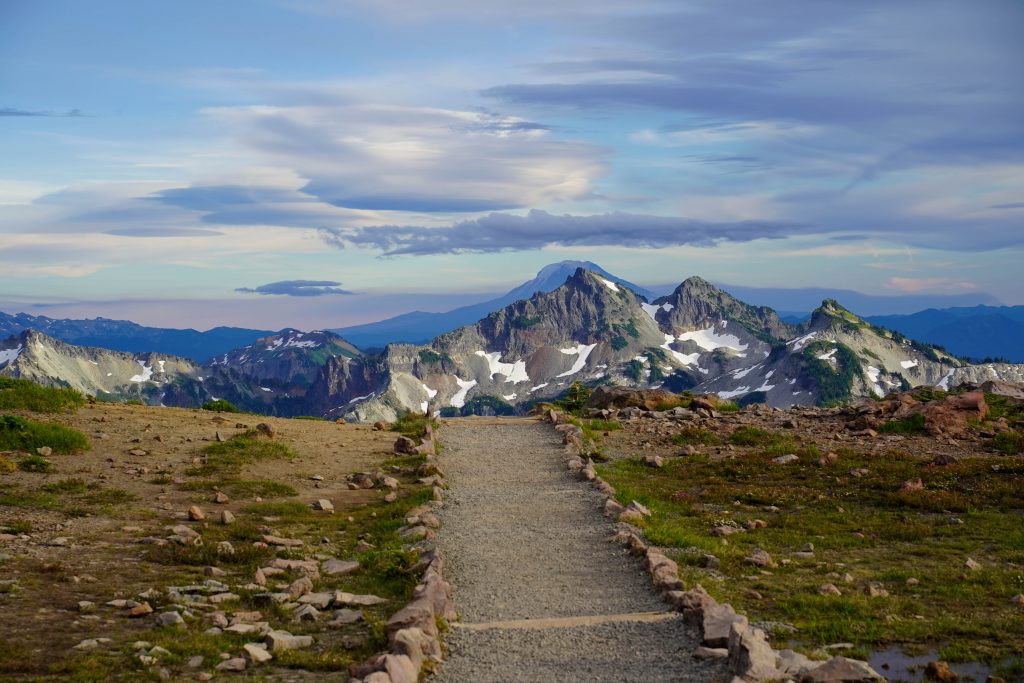
The return hike
Now you will have finally reached the end of the climb and can start descending. You can just about see the entire trail down from the vantage points up there. After 30 minutes or so of descent you’ll reach another trail option.
You can take the Golden Gate trail (a more direct and steep but beautiful trail.) Or you can take the full skyline route which goes near the Paradise Glacier hike turn off and adds about 1 mile. We were running out of daylight so we opted for the shorter Golden Gate trail. ZERO regrets.
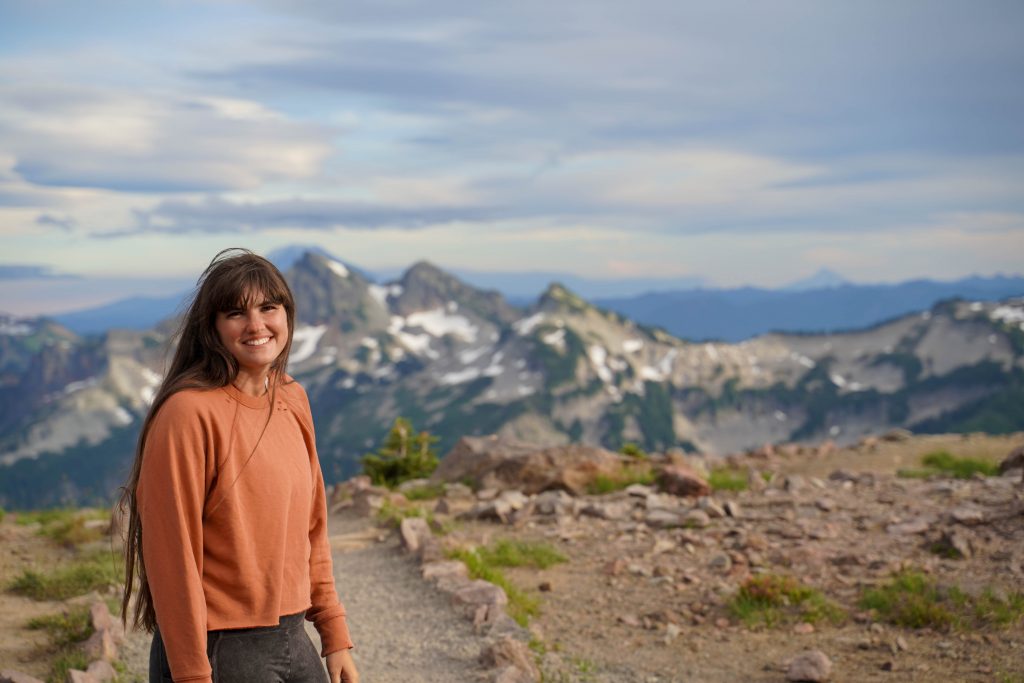
The Golden Gate Trail
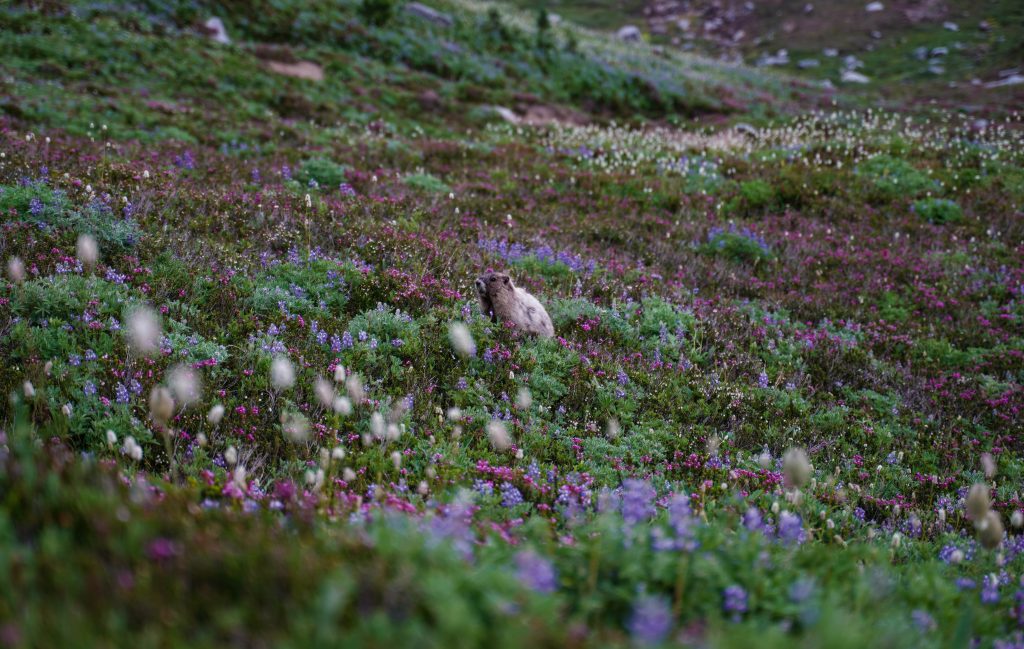
The trail switchbacks down in even more glorious series of wildflower meadows than you start out in and has 2-3 visible waterfalls the entire way. We only saw a few people but saw at least 20 marmots and 1 billy goat. It. was. glorious.
The marmots unfortunately target my favorite wild flower- Indian Paintbrush but there were still plenty of flowers to go around. Again I was positively skipping when normally at this point in a “moderate” trail I’d be ready to be done.
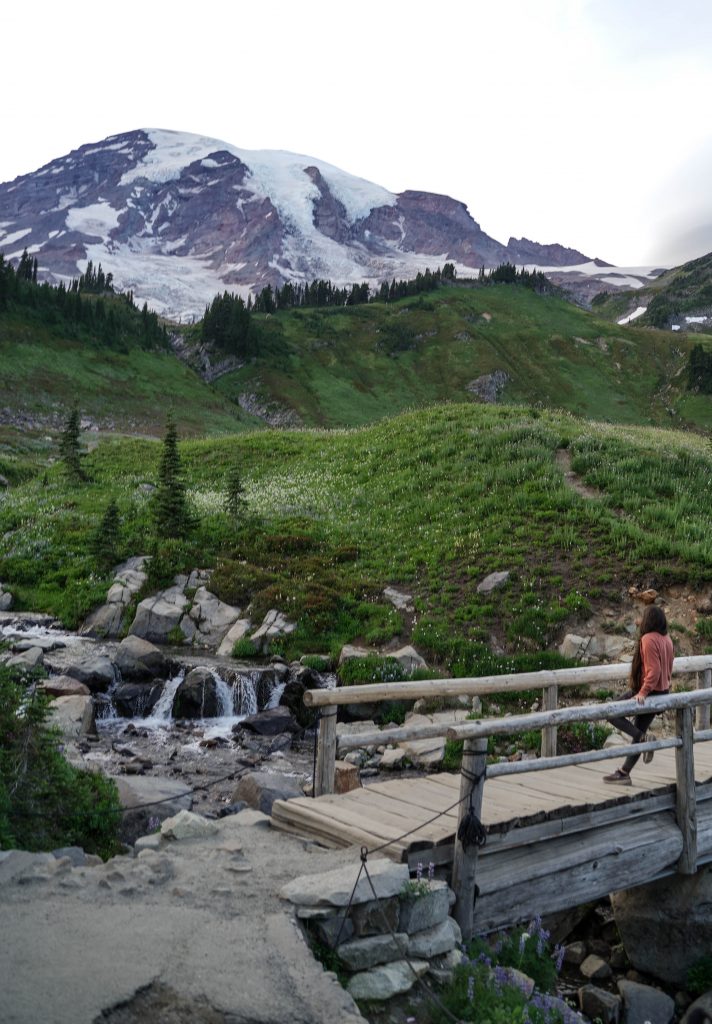
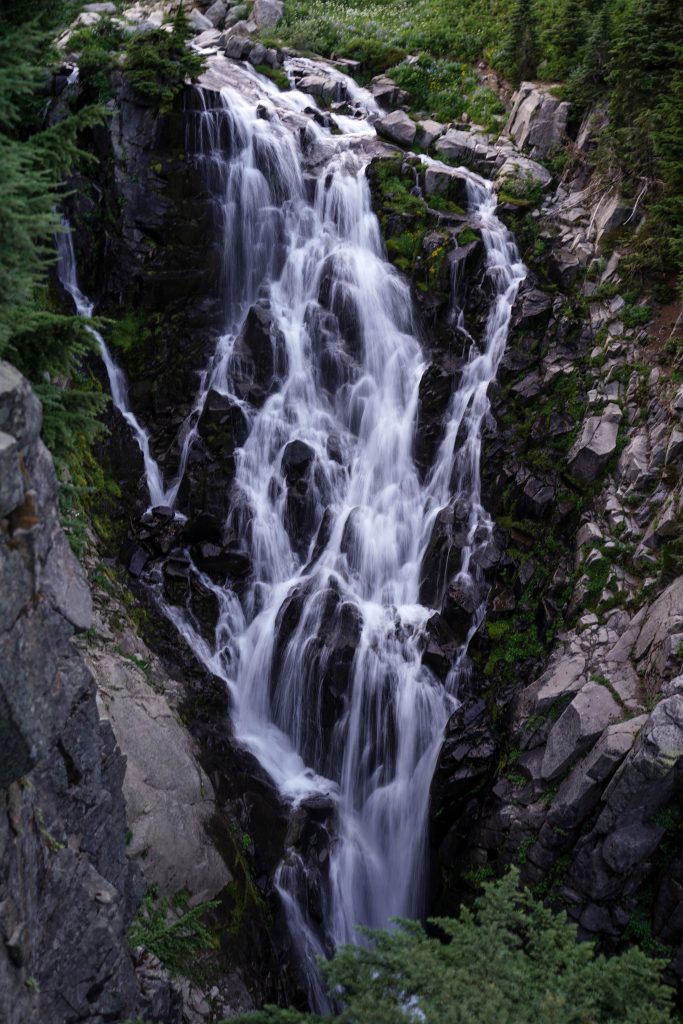
Myrtle Falls
I still wasn’t ready to be done and I maybe never will be. (take me back!) After the short switchbacks the trail mellows out and crosses a bridge which looks down on the stunning Myrtle Falls and UP at the incredible Mt. Rainier. The trail once again changes to pavement here and I highly recommend going down the short little detour to the Myrtle Falls overlook.
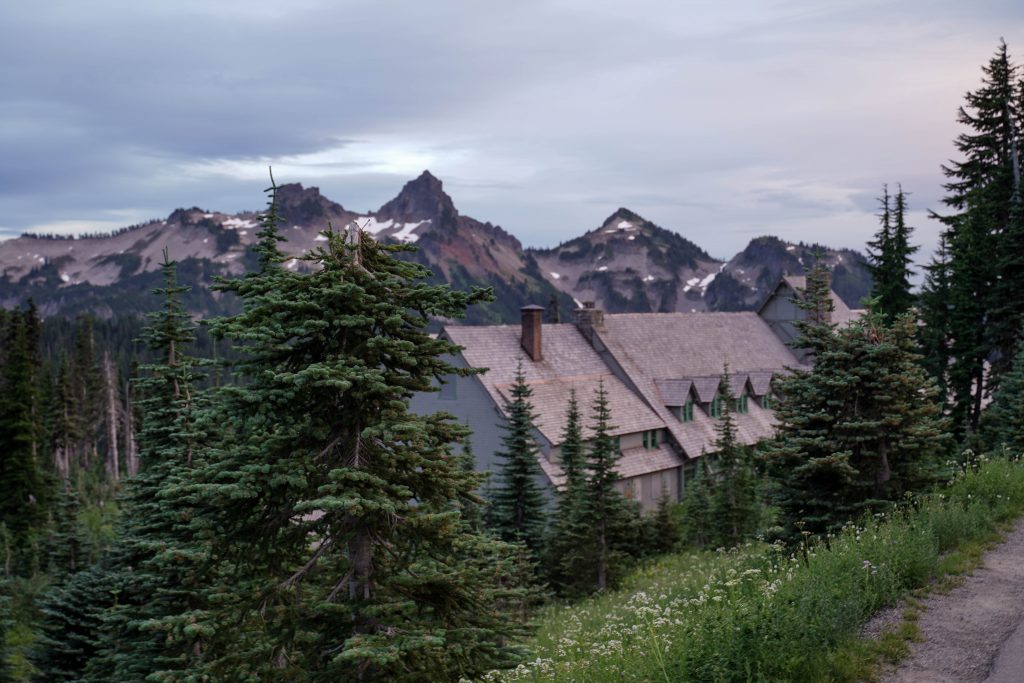
After the falls, you continue straight along the paved trail eventually catching glimpses of the National Park Inn and then the visitor center. The loop completes right at the same Muir stairs you started from.
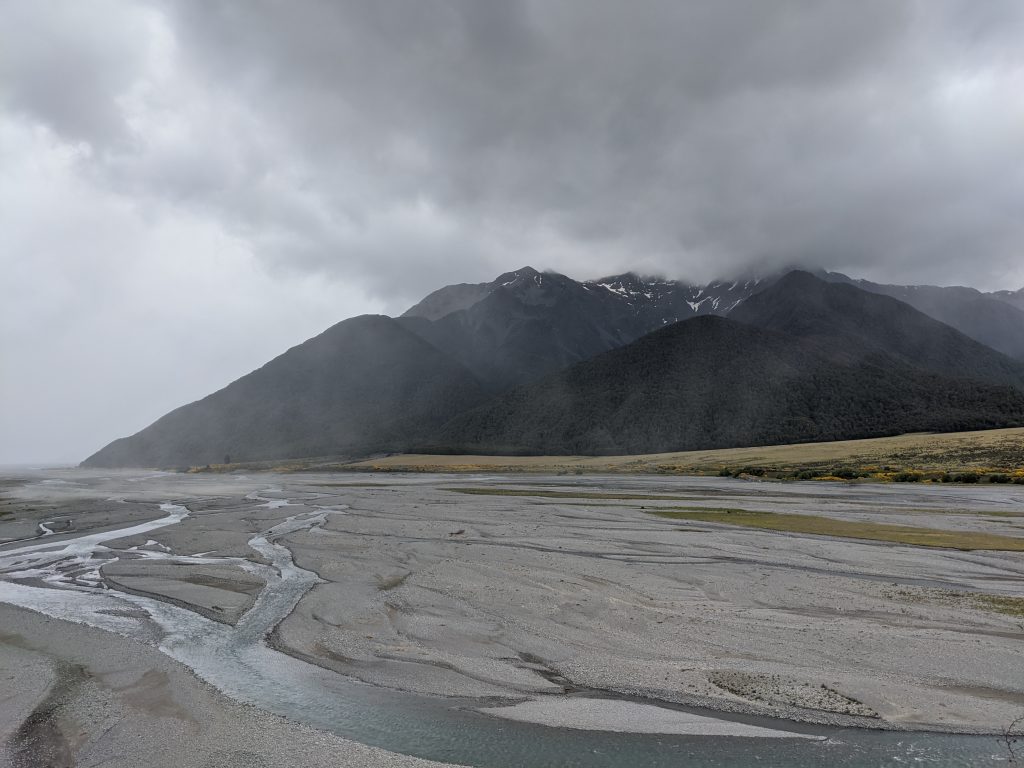
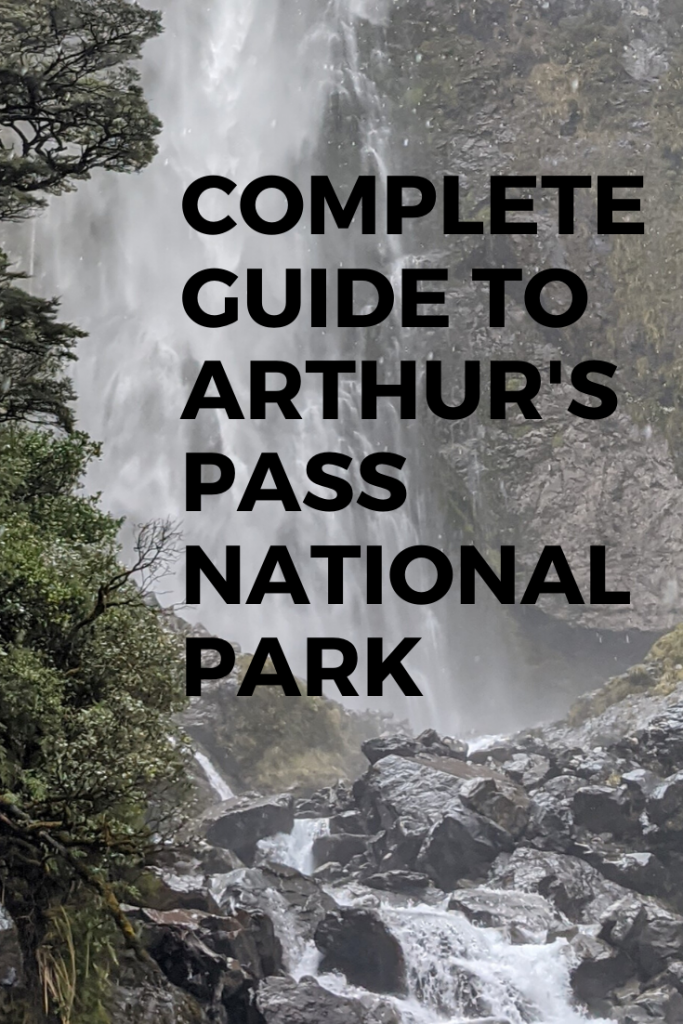
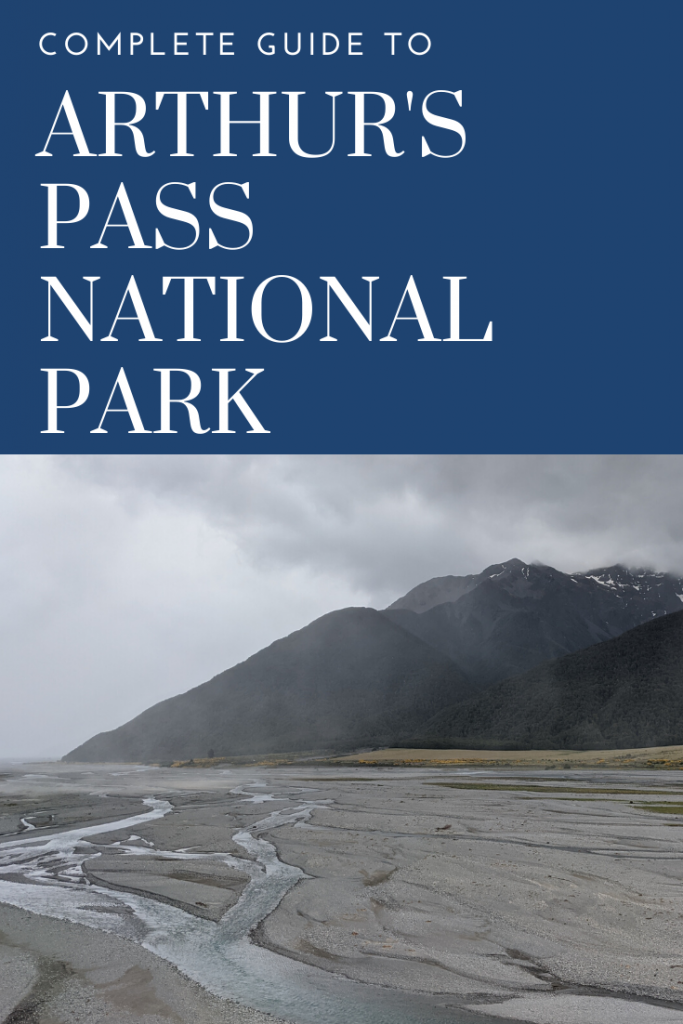
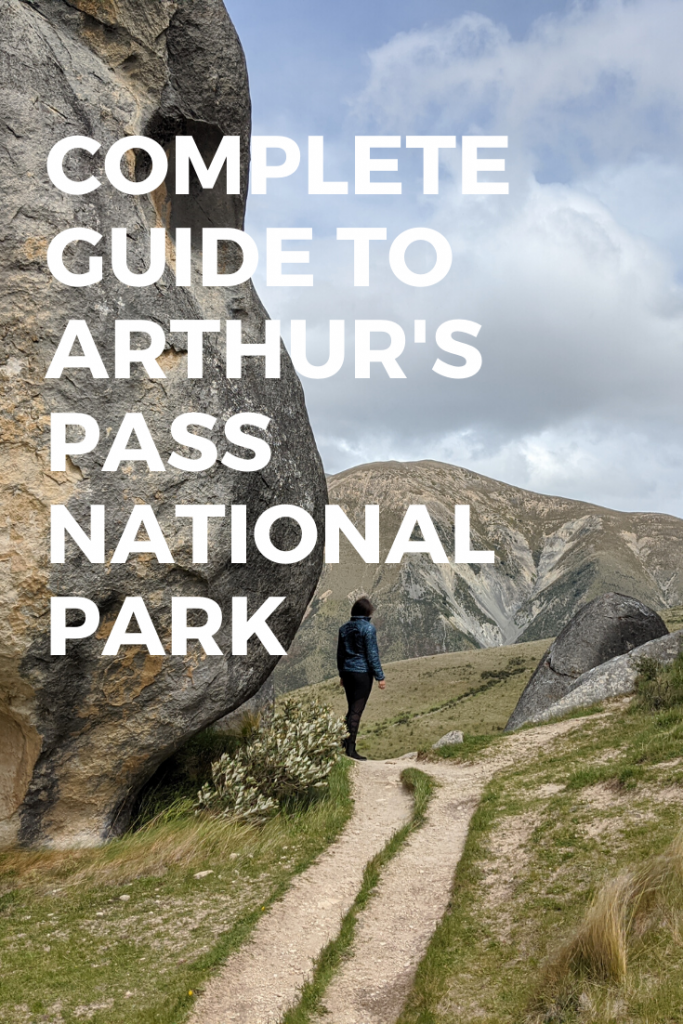
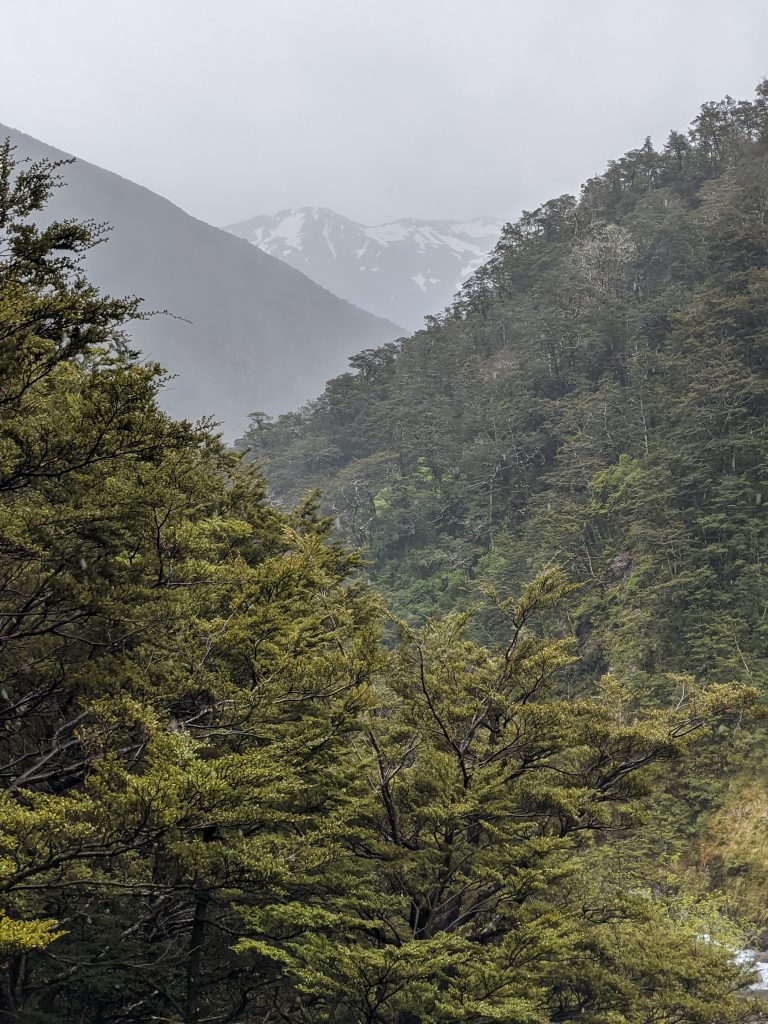
Arthur’s Pass is a small, but fantastic National Park along the West Coast road on the South Island in New Zealand. In only 2 hours from Christchurch you can find yourself surrounded by beautiful talus sloped peaks, bunches of wild yellow flowers, and wide braided rivers. There’s several short but worthy day hikes in the region and it’s a fascinating area to drive through and picture the historic highway/ railway that ran through it connecting the 2 different sides of the South Island. While hiking in the area be sure to keep an eye out for kea, the only alpine parrot in the world, that live in the mountains here.
Where to hike:
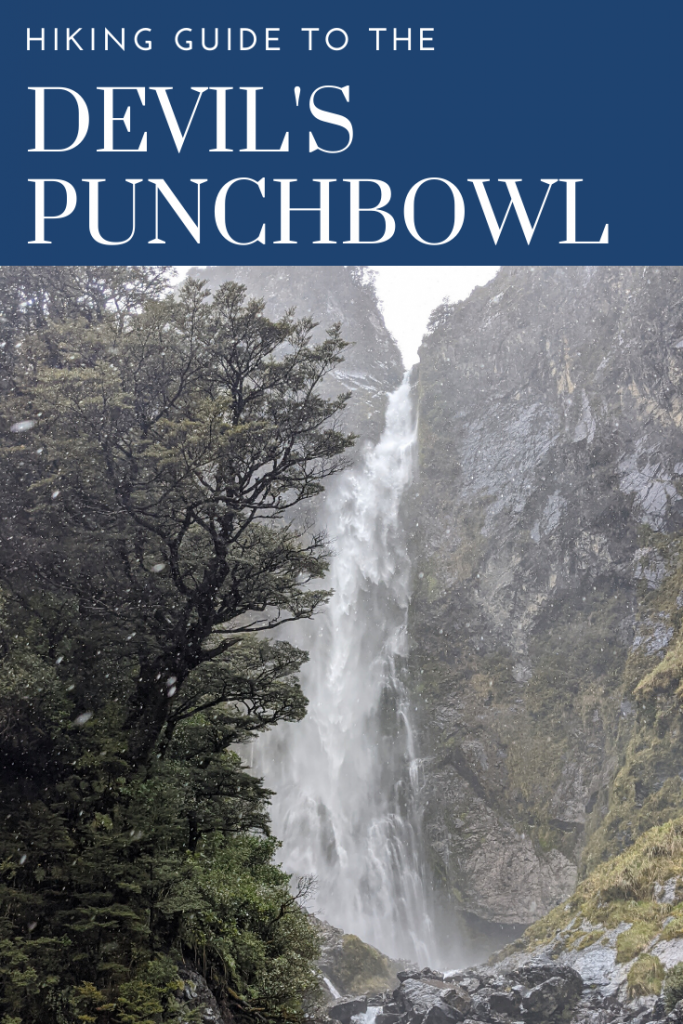
The Devils Punchbowl Waterfall
Distance: 2 km, time: 1 hour
A short and sweet hike that leads to one of New Zealand’s most spectacular waterfalls. It’s an easy-moderate trail with wooden steps, bridges, and beautiful beech forest. See my post here for more details.
Bealey Spur Track
Distance: 6 km, time: 4hours RT
Best done in fine weather, this track has beautiful views of beech forest, grasslands and subalpine scrub, and the nearby braided river. The most climatic part of this hike is at a cliff with dramatic views down on Bruce Stream. We were unfortunately rained out of this longer hike but if I was ever back in the area, it would be near the top of my list.
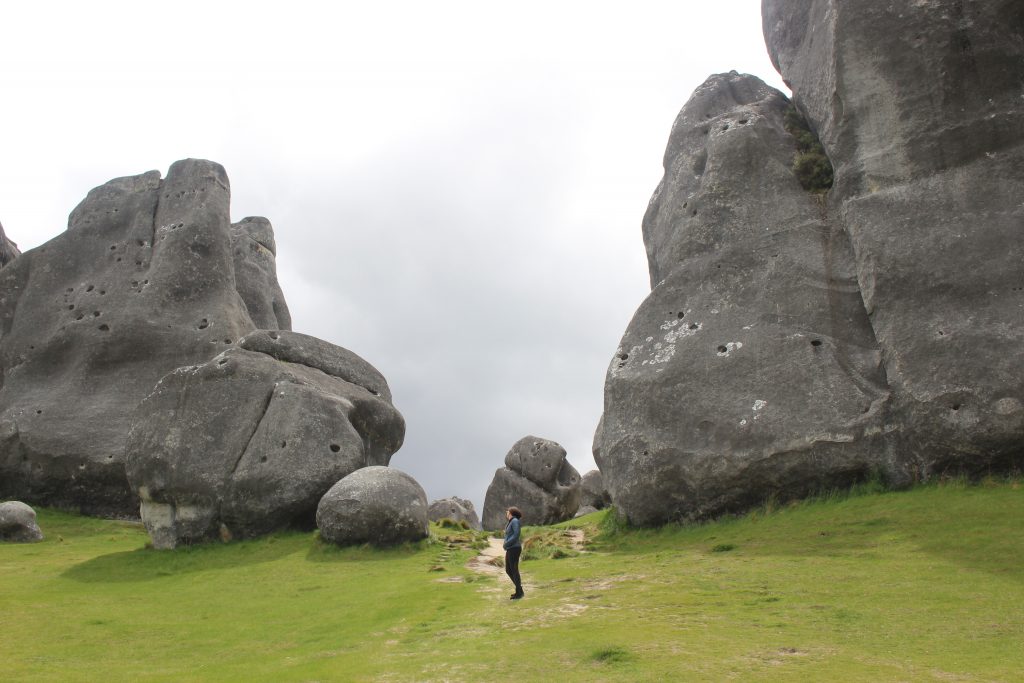
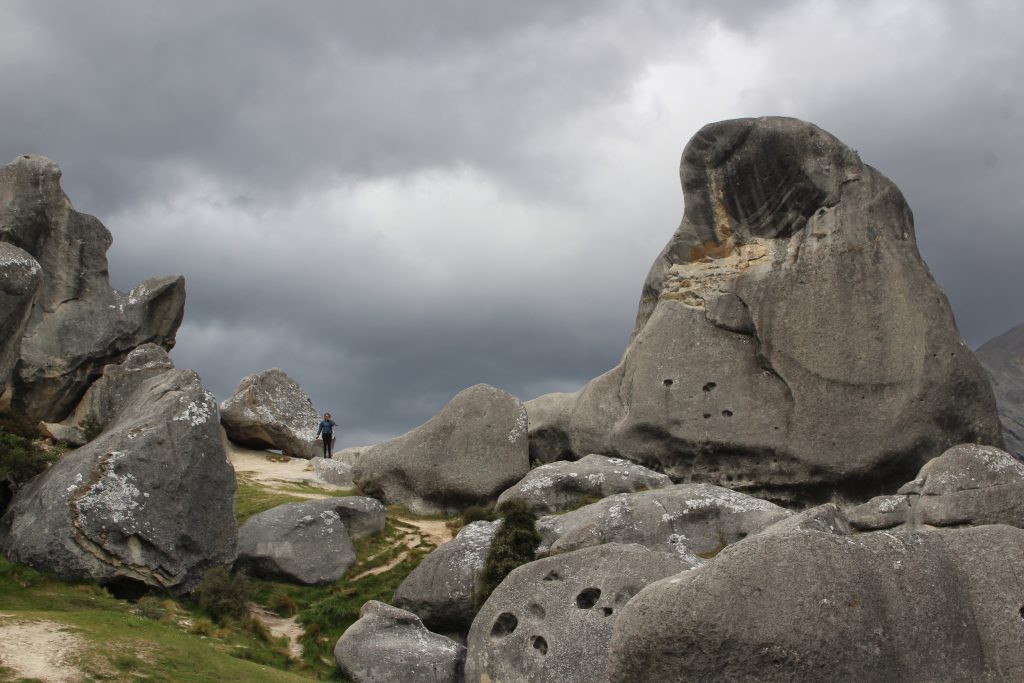
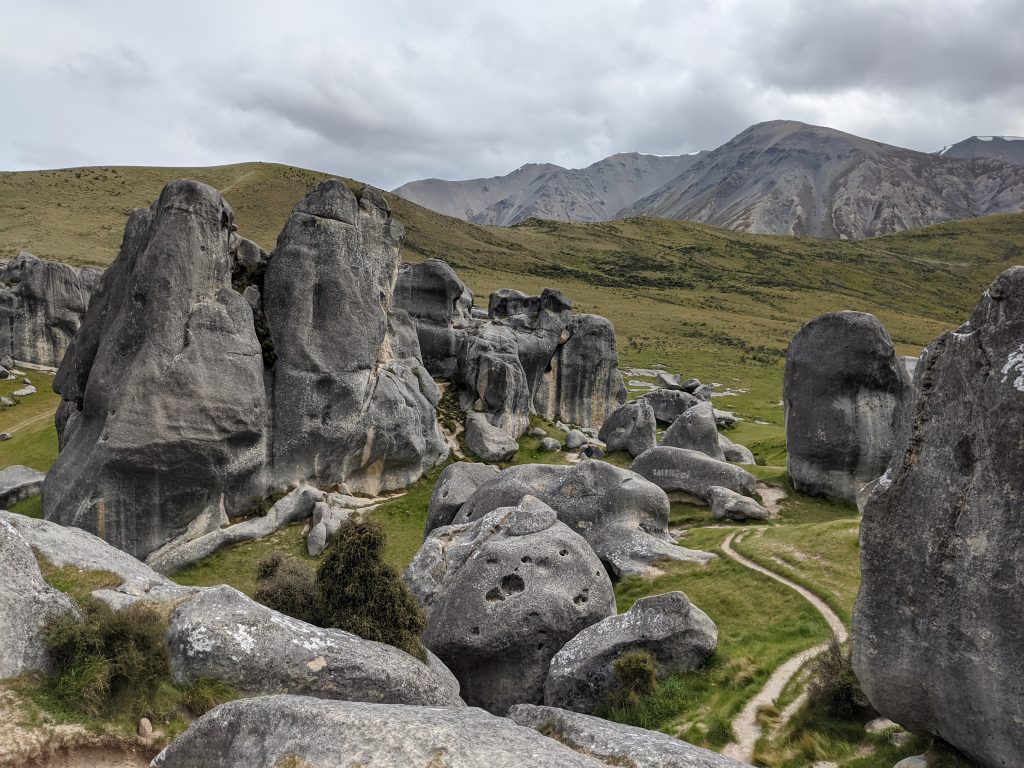
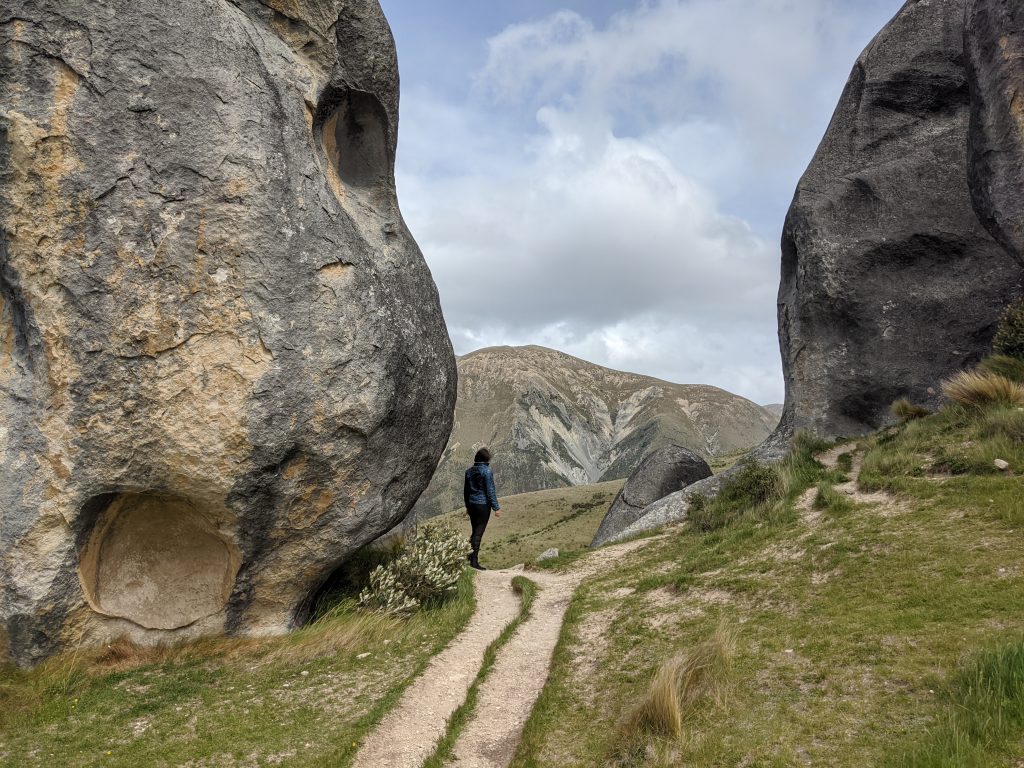
Castle Hill
Also known as Kura Tāwhiti Conservation Area, castle hill is an easy stop along the West Coast road from Christchurch. Its interesting landscape of limestone rock eroded into massive boulders makes for a photographer’s dream scale (tiny humans). It’s also great for comparing to film spots as nearby LOTR scenes were filmed as well as the Chronicles of Narnia. There’s no real track here so choose your track- make your own- hike, climb, be free.
Yet another hike that we lost to foul weather on our trip, Avalanche peak gives you astounding views of Arthur’s Pass as a whole- the surrounding peaks, the rivers- and you view it all from the top. It also gives you almost a sure fire meeting with Kea, but the drawbacks are this is a VERY challenging hike with steep exposed scrambles and should only be attempted by very experienced hikers.
Stunning mountain view rooms and the rate includes both dinner and full breakfast. The rate also includes free activities around the farm such as guided walks on the property and in depth explanation of sheep farming in New Zealand.
Midrange & Budget:YHA Arthur’s Pass– from $37/ bed in a dorm or $98 for a private double
The YHA hostels never fail around New Zealand and they provide a nice range for budgets. They also usually have full facilities for cooking and hanging around making for a fun atmosphere and cheaper eating budget.
Where we stayed:Mount Somers hut. $72 We opted to get a jump on our next day’s serious driving by staying in Mount Somers instead of Arthur’s Pass. It was so much cheaper and was a great little private hut for just the 2 of us. The bonus was the washing machine as well!
Where to eat in Arthur’s Pass:
Your options are limited in Arthur’s Pass National Park for food with only 2-3 cafes that mostly serve takeaways and all day breakfast. While the cost is reasonable for the demand in the area, I’d recommend stopping in at a grocery store in Christchurch before beginning your road trip out west. We bought sandwich supplies and made out own to save costs here but we couldn’t resist a coffee in the Wobbly Kea Café.
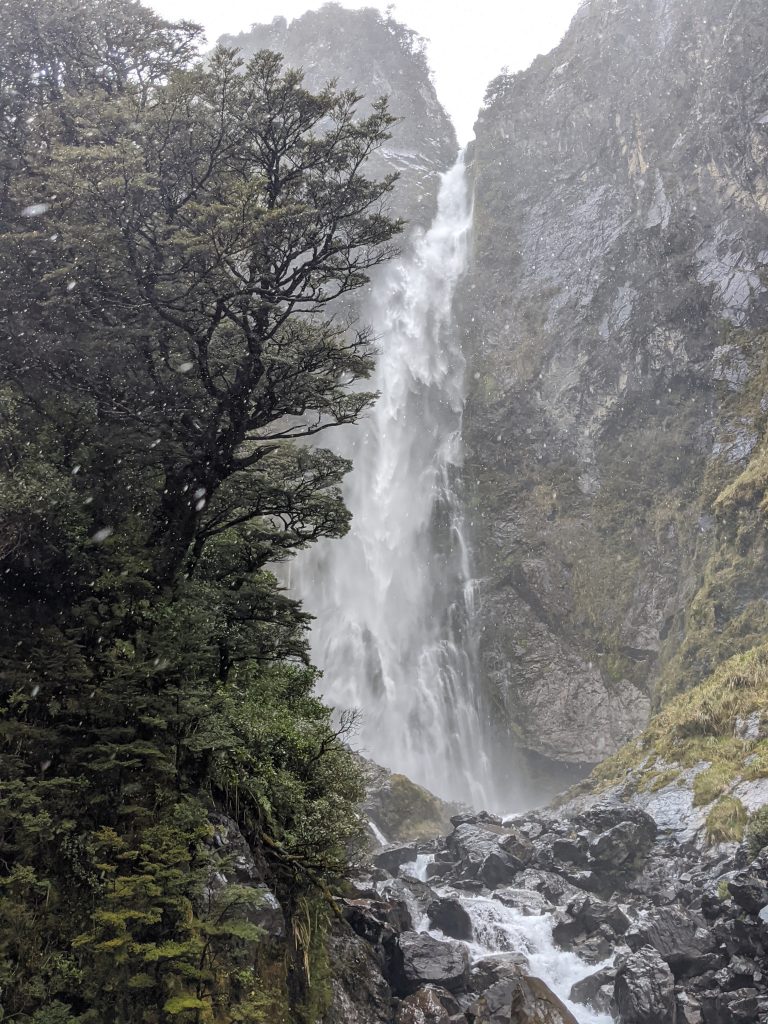
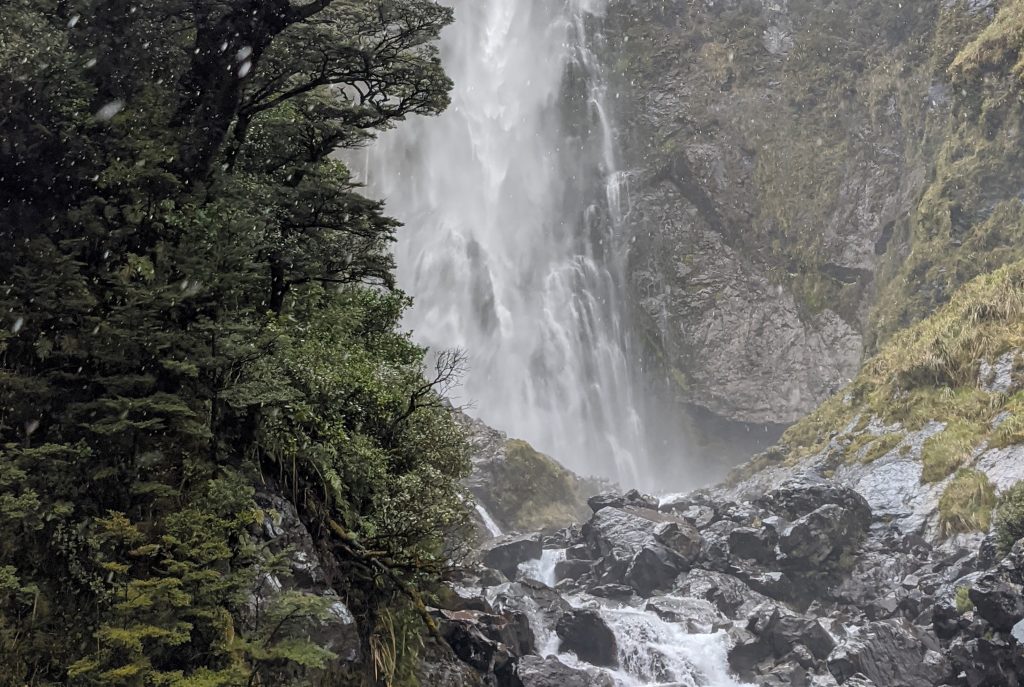
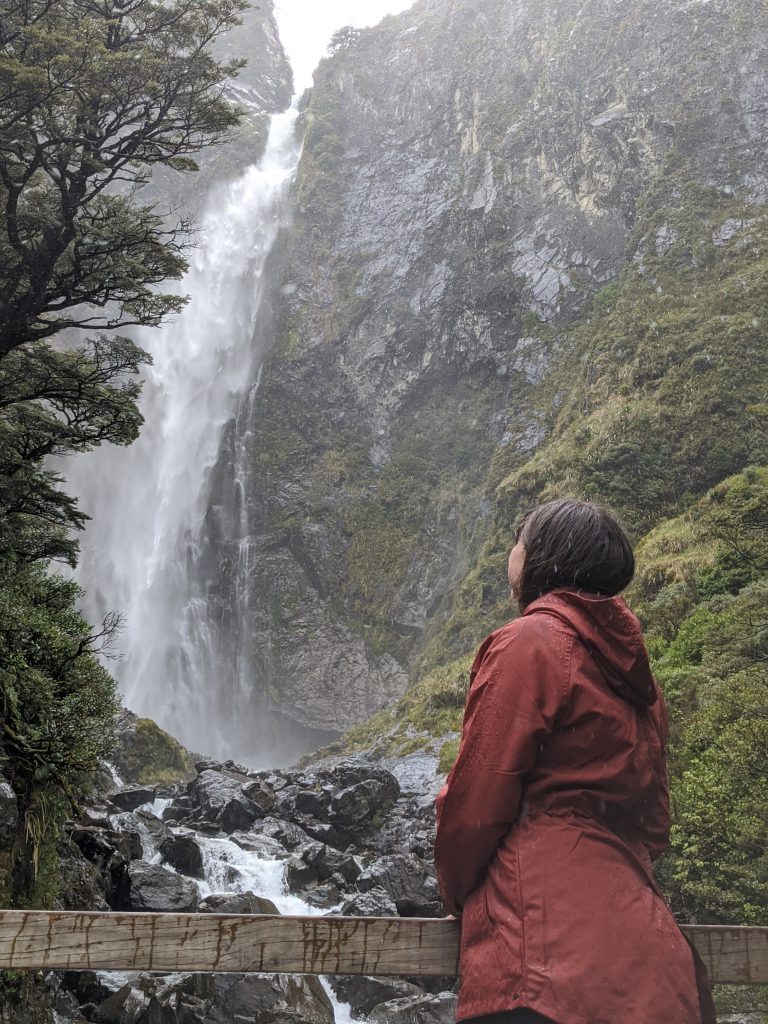
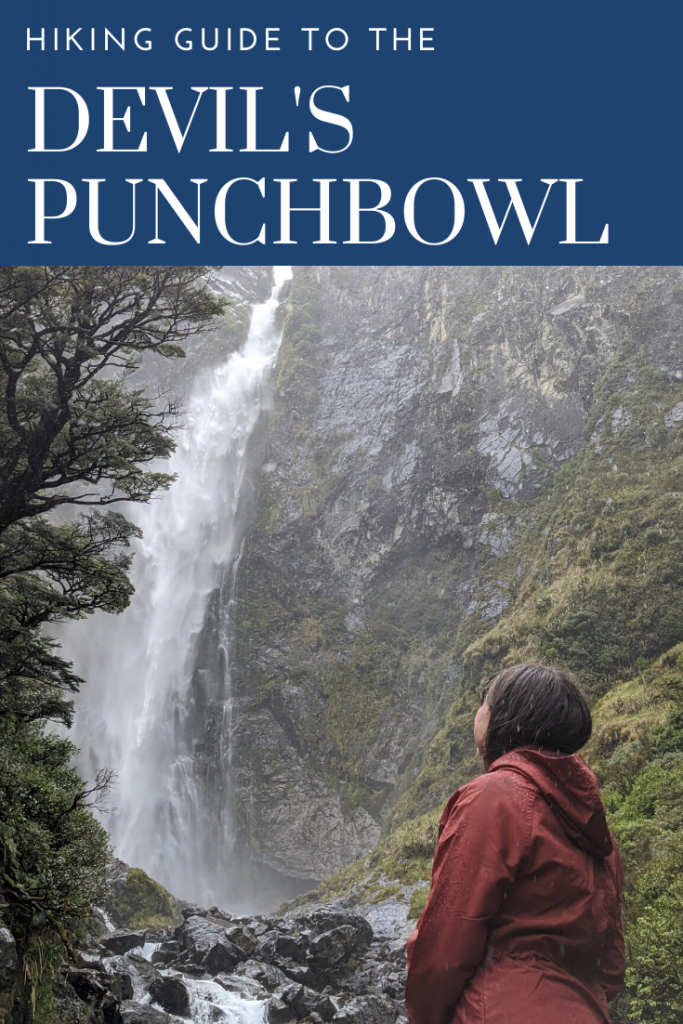
If you’re a fan of waterfalls, mountain passes, and Lord of the Rings, than the Devil’s Punchbowl hike is for you. It’s a shorter hike that leads to the base of a 430 foot (131 m) roaring waterfall and is situated right off the main road through Arthur’s Pass to the west coast. The hike itself will only take you 1-1.5 hours RT and will take you across 2 beautiful bridges and through lush vegetation. It’s a safe hike rain or shine with the steepness of the trail being negated by slip protected stairs.
The drive from Christchurch is a beautiful one. At only 2 hours, it packs in some beautiful farm lands, mountains, braided rivers, and interesting rocky hills (ie. Castle Hill). From Christchurch, take highway 73/76 (13.9km) until it turns right and becomes old West Coast Road. You’ll follow that all the way (133.5km). You’ll know you are getting close when you cross the long 1-way bridge across the Waimankariri River and the turn off will be on your right just on the other side of town. (Look for Punchbowl Road)
Don’t use google maps as it will take you just past the turn off for the actual parking lot (speaking from experience) At the trailhead there are some portapotties but otherwise no facilities. You’ll start out walking up river to a visible bridge. You’ll cross 2 long bridges in short succession and follow the trail from there as it heads up wooden boardwalks and multiple stairs. There aren’t any trail splits or conflicting signs making this a very easy trail to follow.
About our hike:
As we drove from Christchurch, we noticed clouds overhead and high winds in the area which deterred us from our longer hike of the day- the Bealey Spur track. However we were not deterred from hiking to the Devils Punchbowl since for one, it is considered inspiration for some of the waterfalls used to create Rivendell in the Lord of the Rings and for two, it’s just an incredible looking waterfall.
Once at the Trail head, we practically ran against strong winds to the crossing of the first bridge which has no wind protection. Aka it kind of sucked. Once we were across those bridges however the trees broke the wind for us making for an easy, albeit wet, hike. It only took us 30 minutes up and though thoroughly drenched at this point, we still took a few minutes to stand at its base and take it all in before a quick 30 minute jaunt back to the car.
I can only imagine how resplendent this waterfall is in the sun, but for now I’ll take our memories of running across bridges to find shelter from the wind, learning my rain jacket was not indeed water proof, and gazing up at the tallest waterfall of our trip.