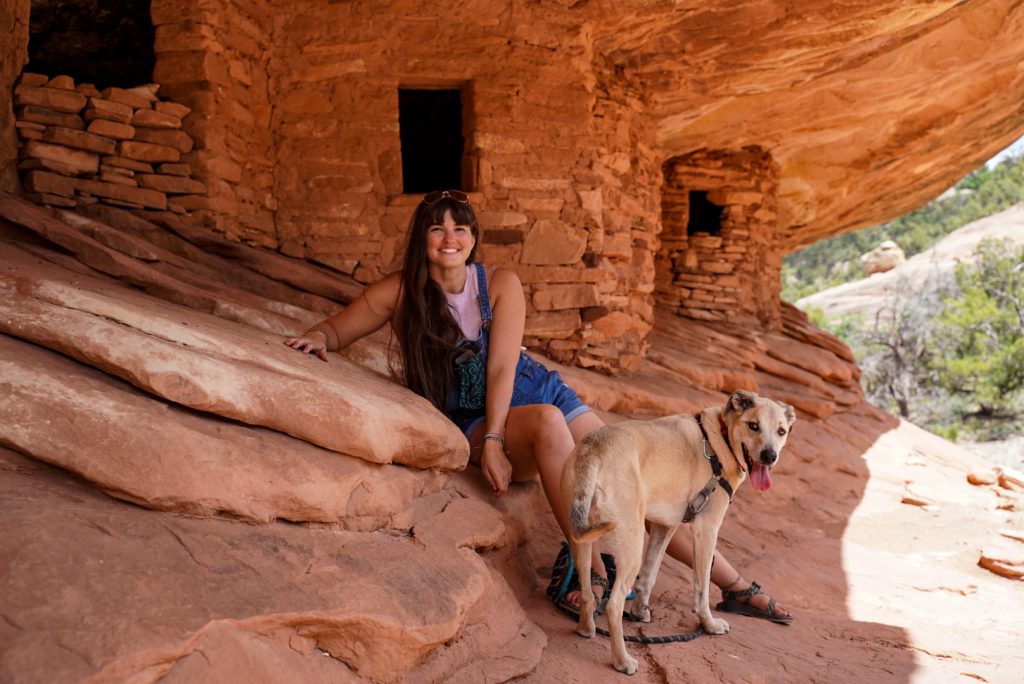
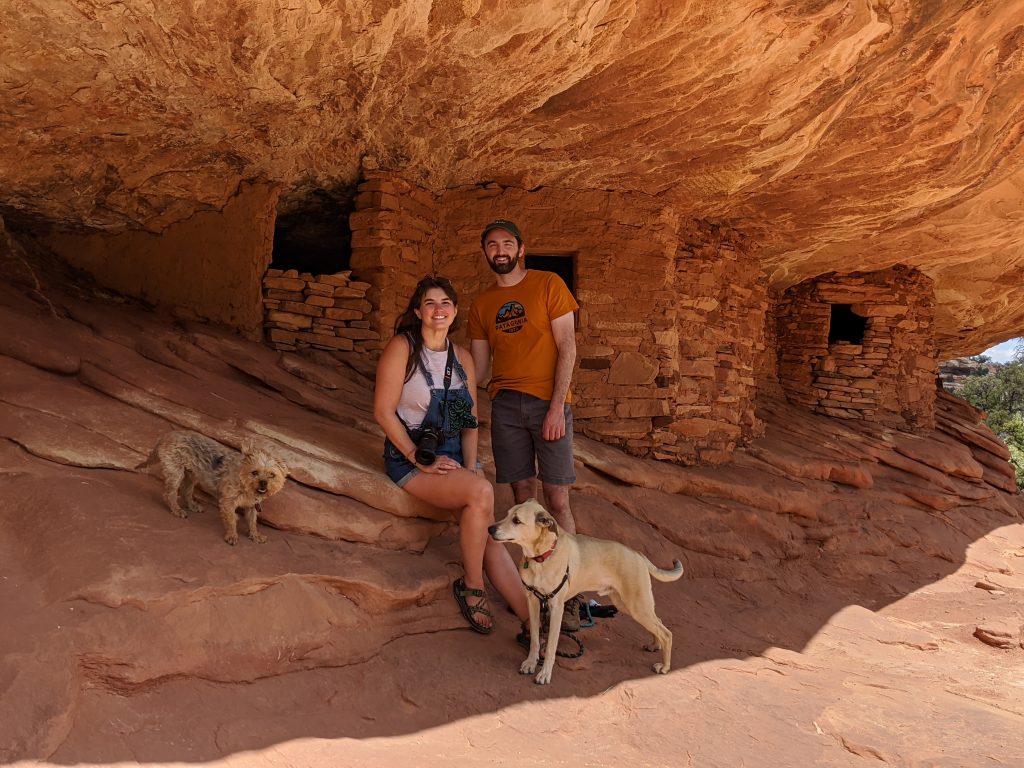
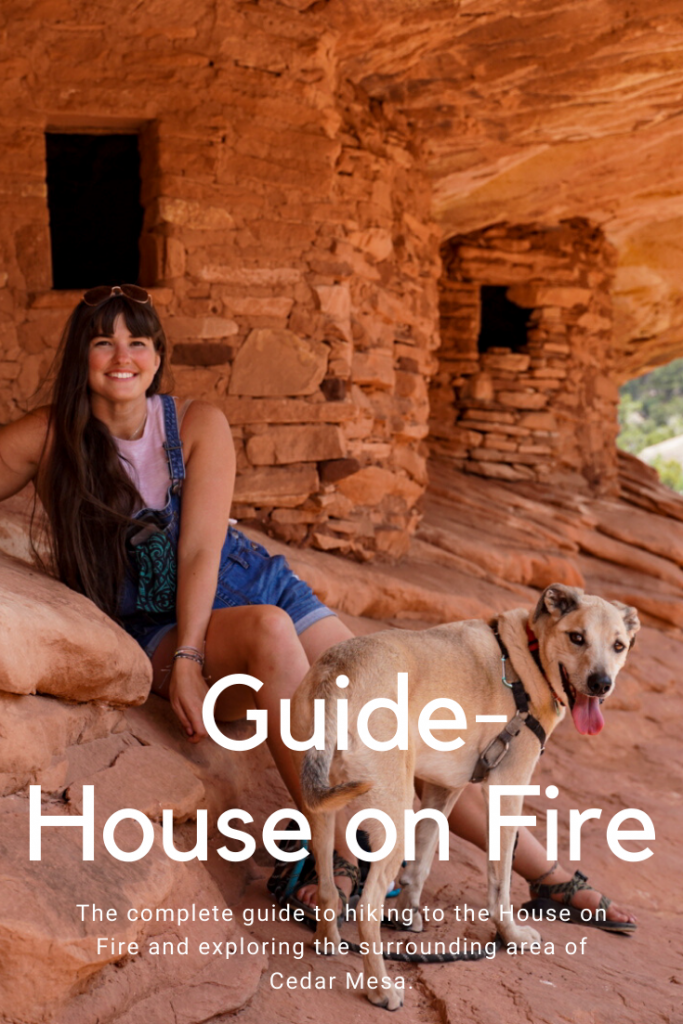
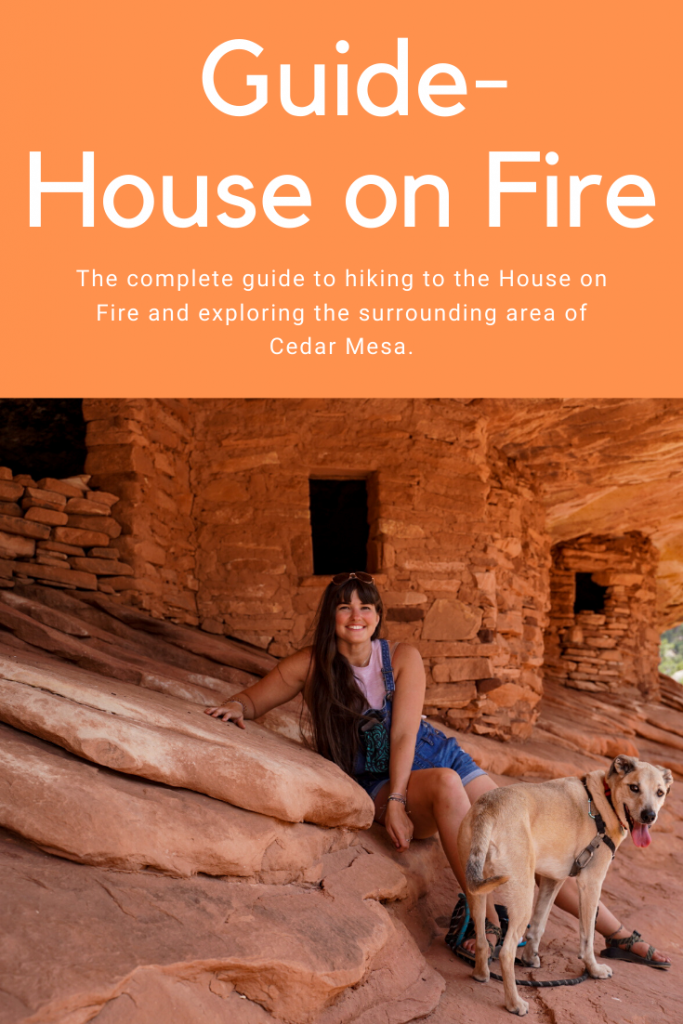
Memorial day 2020 we decided to make the most of our 3 day weekend and head to a new (to me) explored are of Utah- Cedar Mesa and Bears Ears. With how busy most outdoor spaces have become in the wake of Covid-19, we hoped going a little further from any cities would put some distance between us and the crowds and we were right. We started the trail to House on Fire around 2 in the afternoon and had the trail and ruins mostly to ourselves.
Hiking details:
Distance: 2 miles RT to the House on Fire ruins but continue down canyon as far as 8 miles RT and you’ll spot 6 more ruins along the way. Elevation: flat, albeit sandy Time: 1 hour (more if you want to see more ruins in this area) Fees: Bears Ears day use fees are $5pp/ day or pay $10pp for a week. (increased from $2 Jan 1,2020) Self-serve pay stations, bring cash. (Day hiking fees in this area are not covered by the National Park Pass) Dogs?: Dog friendly, but on leash
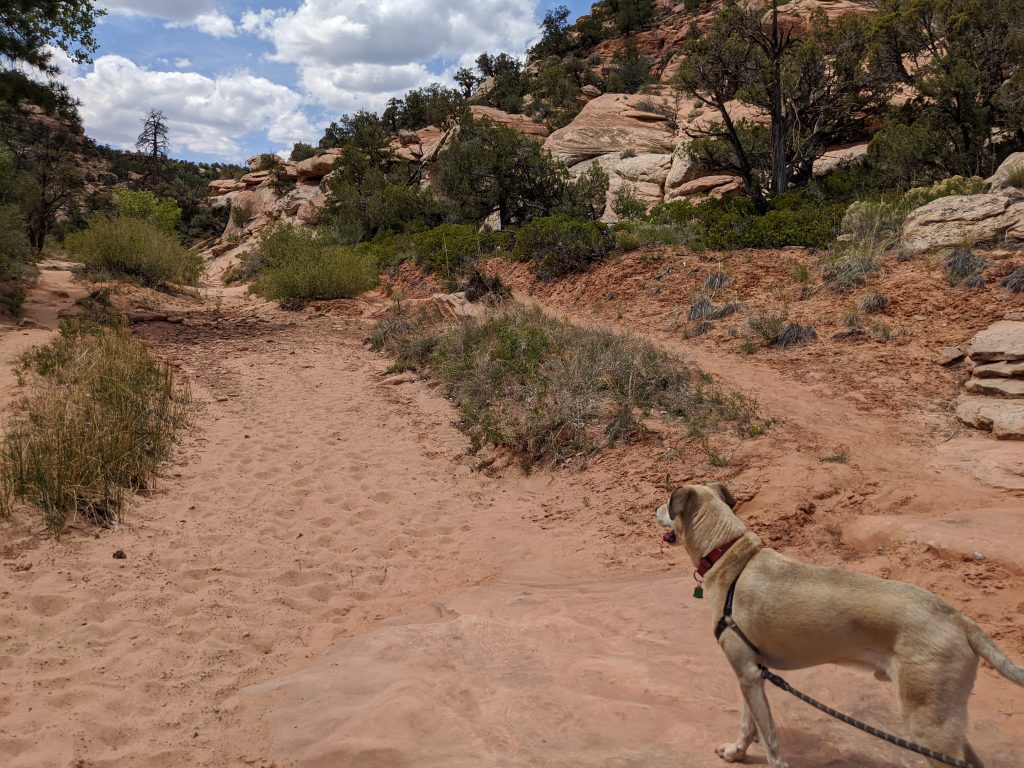
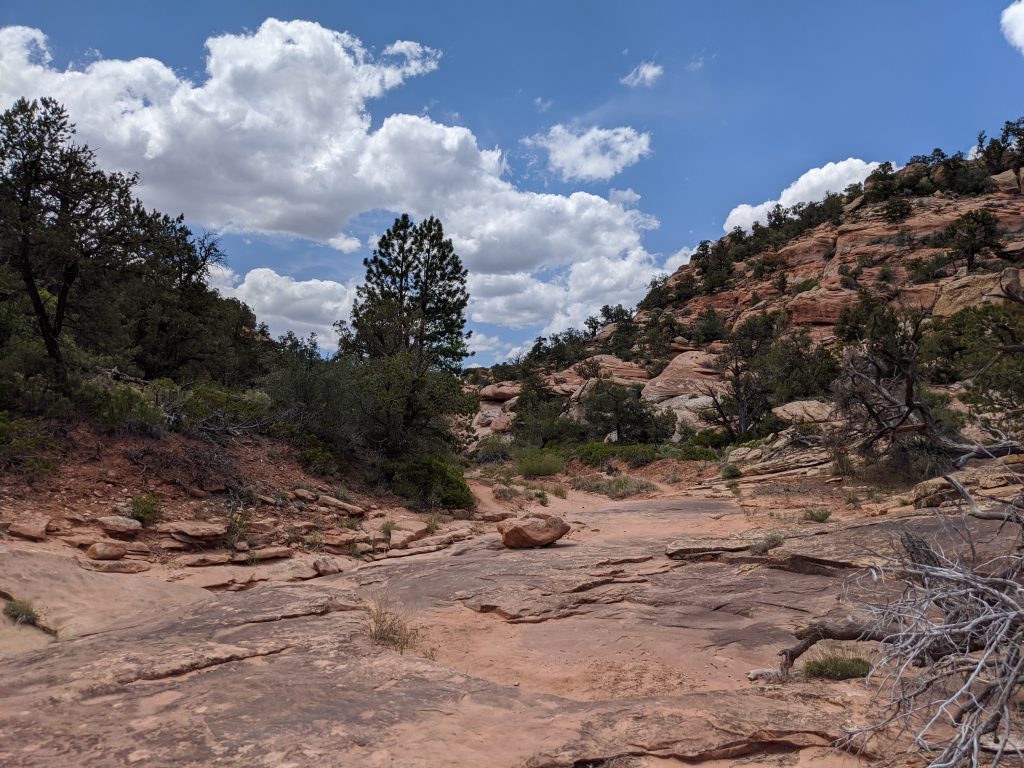
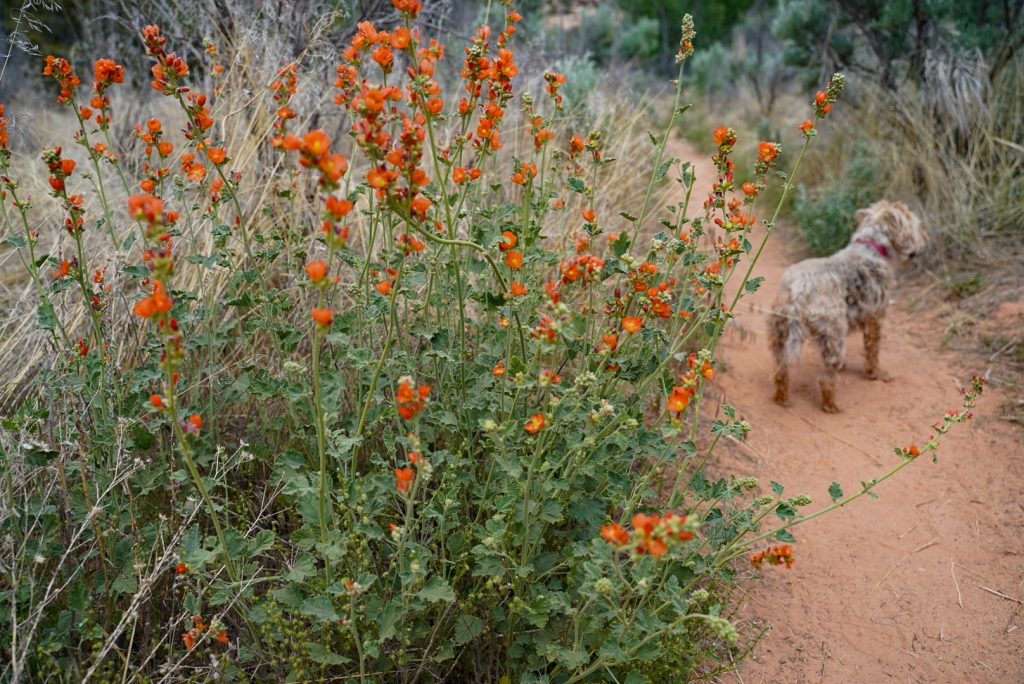
Photos along the trail. It’s mostly sand with a little rock thrown in there
Trailhead Directions: If travelling from hwy 191 through Blanding, take hwy 95 for 25 miles when you’ll see a road marked for Texas Flat Road. Drive down this road 0.3 miles to where a canyon appears on your left. This is the trail.
*Note: the fee box is at the beginning of the right turn off and you’ll want to display the receipt for paying your dues on your dash before hiking. A couple cars along the road had fee reminder notes/ tickets on them.
Park along this road and head down canyon to your left. At the bottom of the small hill you’ll find the trail sign and register.
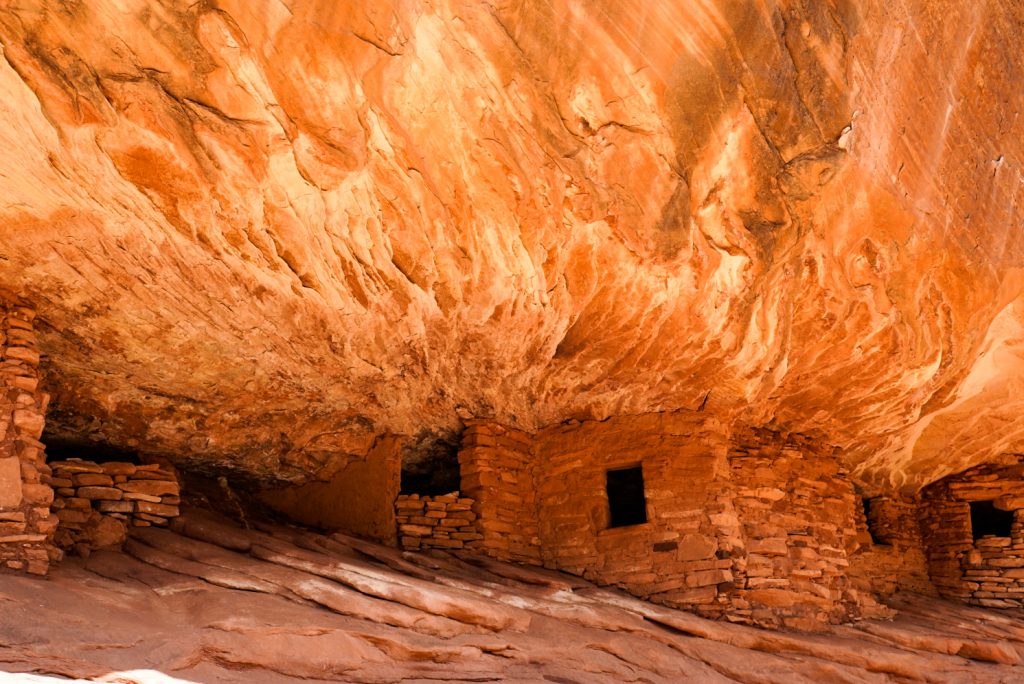
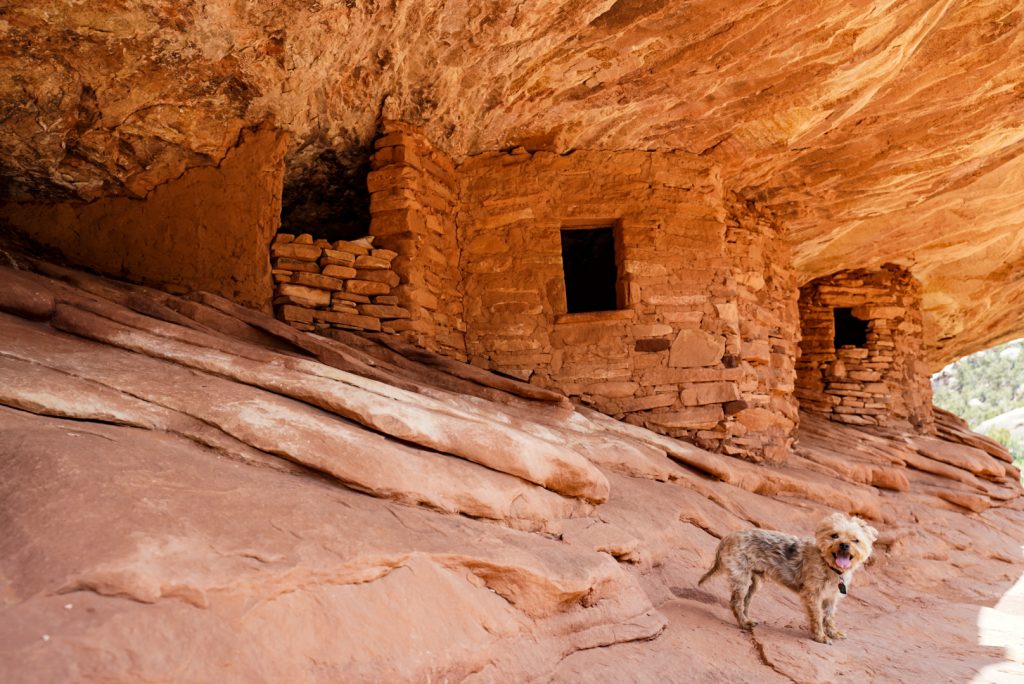
About the House on Fire:
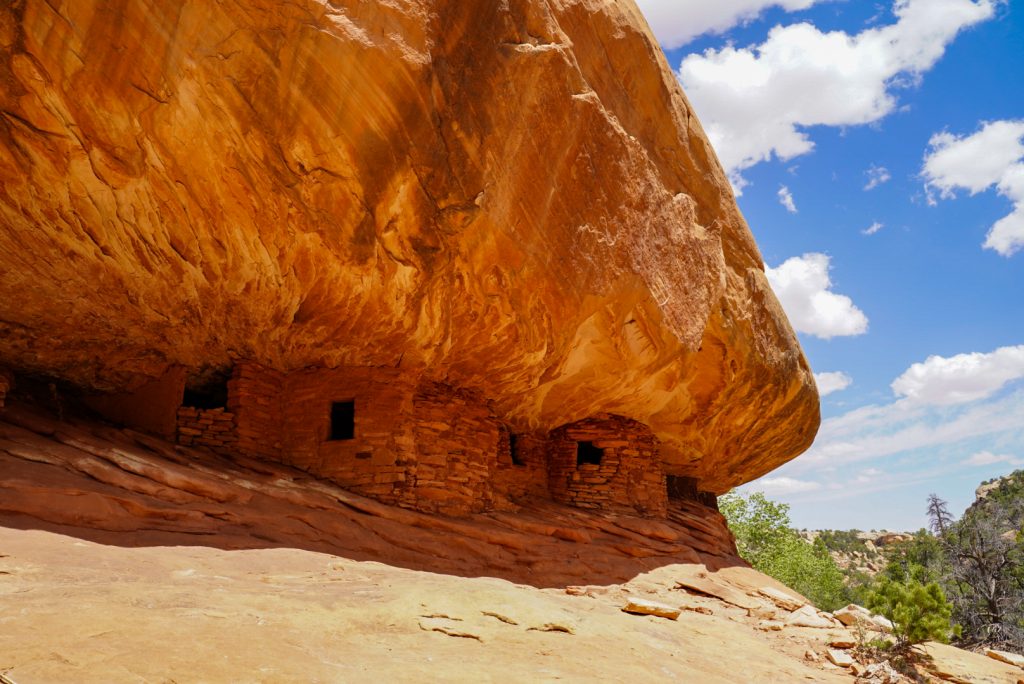
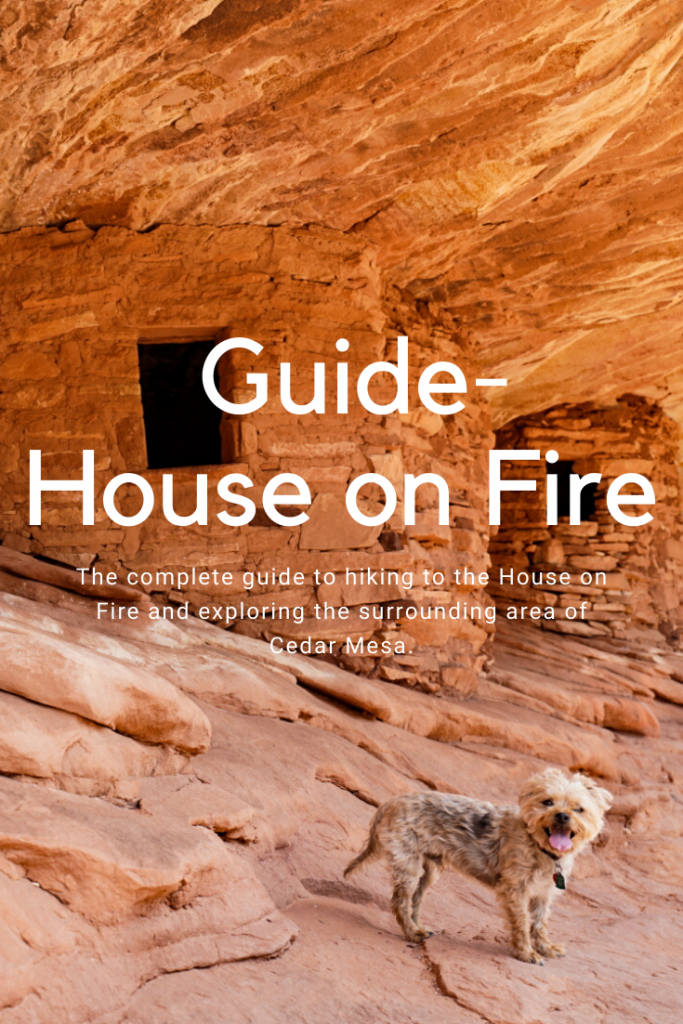
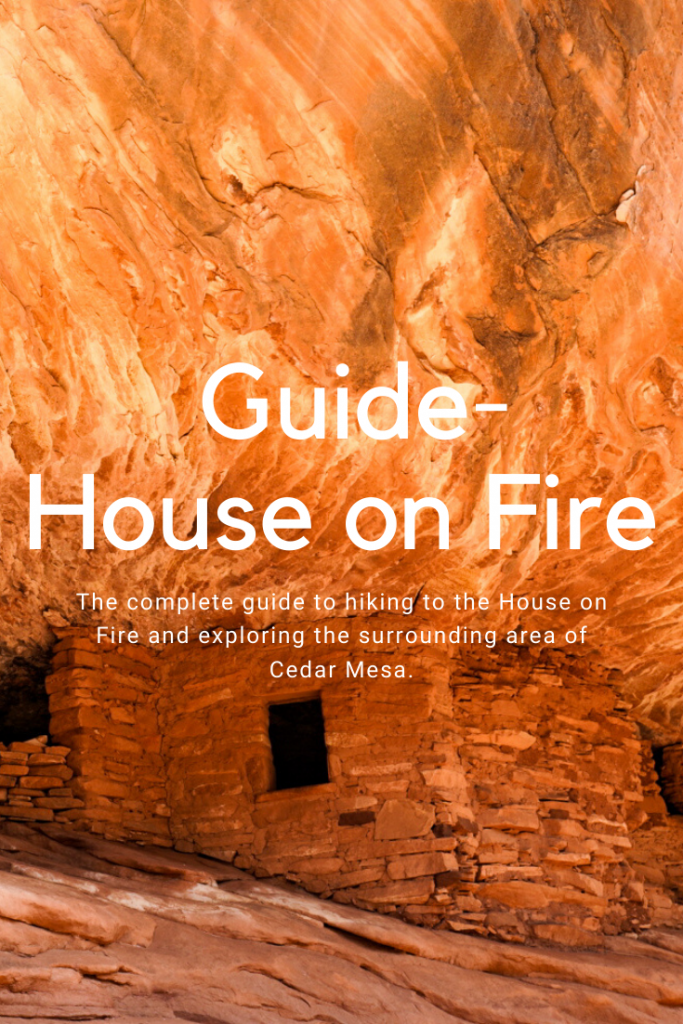
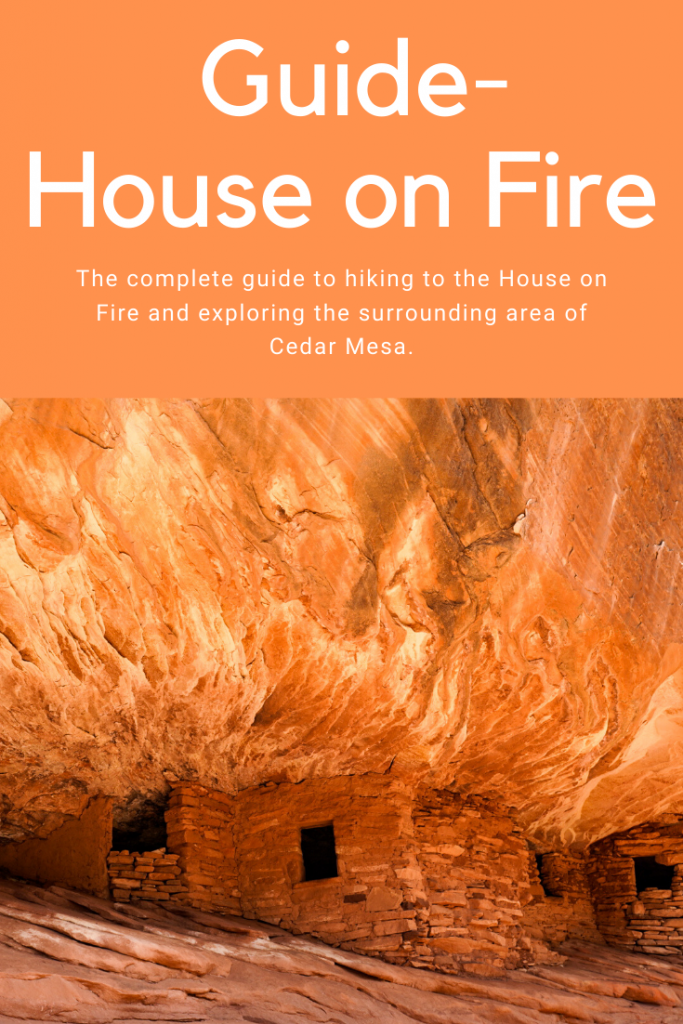
The House on Fire like the other cliff dwellings in the area were built between 700-2500 years ago by ancestral Puebloan tribes. The House on Fire isn’t actually a house at all and instead consists of five granaries built into Cedar Mesa sandstone. The granaries were used to store mostly corn which was a major food source then. The overhang that forms the ceiling has a unique, streaked pattern that resembles flames. The best time of day to photograph is around 10-11 when the sun is just over the canyon walls and bounces up to reflect off the ceiling.
Our experience with the hike:
We started about 2 and unlike our previous short hike where we didn’t bring water, we learned it was better to bring it as the dogs were getting very hot. While the trailhead was lined with cars, the only people we saw the entire time was an older couple right at the beginning and then a family at the ruins.
The hike only took us 25 minutes to get to the ruins which are on the right side marked by a small trail arrow. It would be easy to miss so I recommend downloading the all trails map or making frequent looks behind you once you’ve gone a mile.
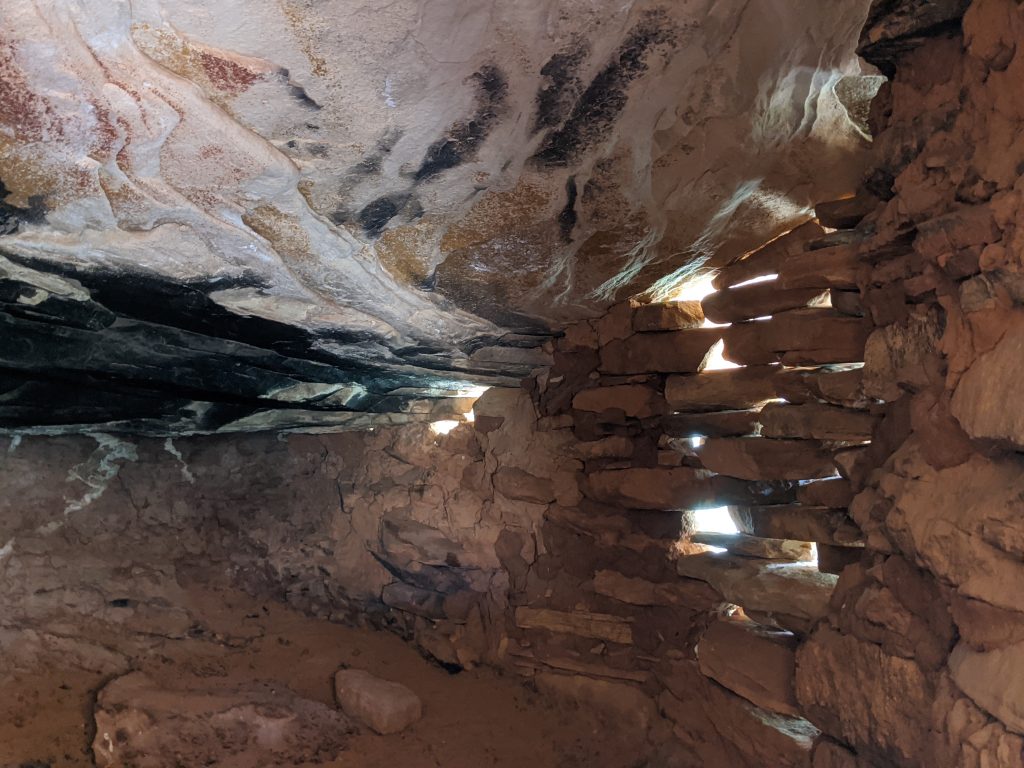
The family that was there before us finished their photos quickly and left us with the ruins all to ourselves. There are many signs indicating not to try to enter the ruins (please listen to these) I put my phone through one of the windows to capture a photo inside instead.
A photo inside one of the granaries taken by putting my phone through the opening. Reminder: It is illegal to enter these dwellings or even touch them.
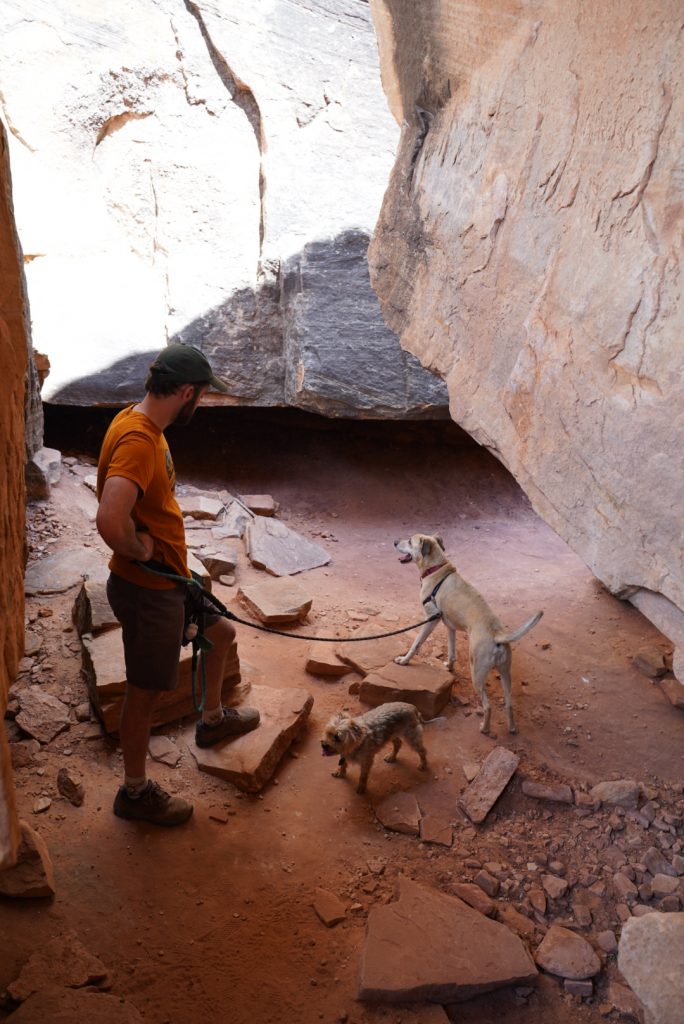
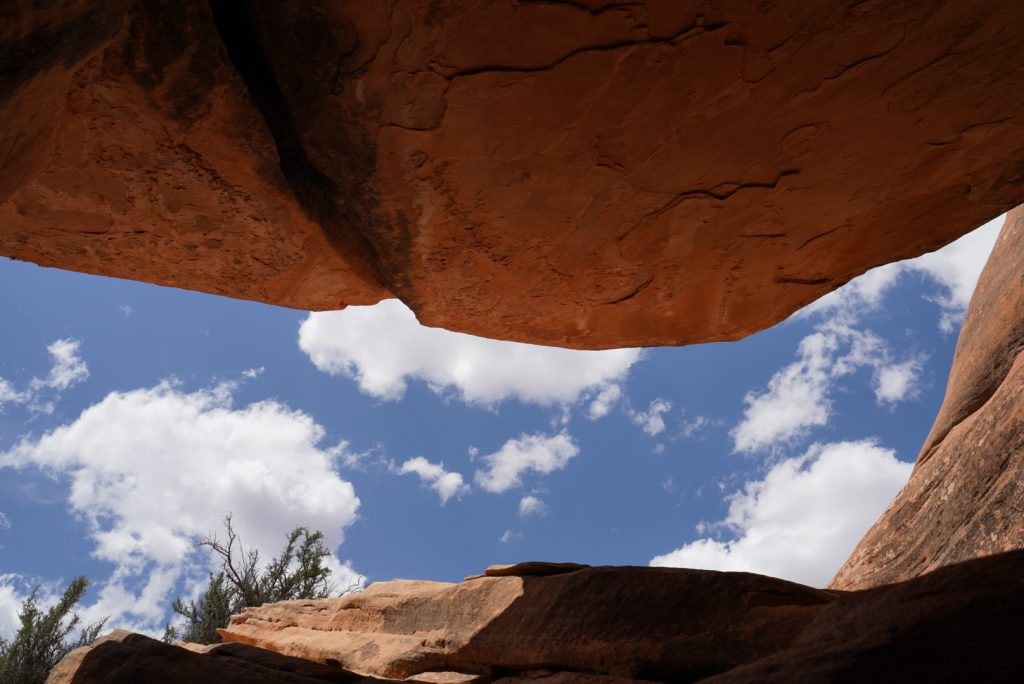
The area around the ruins is also a bit fun to explore as there is a cave like boulder area and spots where you can scramble up on top. We spent about 15 minutes exploring around and then walked back in another 25 minutes.
Photos inside the boulder cave like area
All in all this was a great little hike and I imagine there’s many fun ruins further down Mule canyon. If you are worried about finding your way, I recommend alltrails. It lead us straight and true on this one.
Photos of my little guy Monty on the trail and at the ruins
What to see nearby:
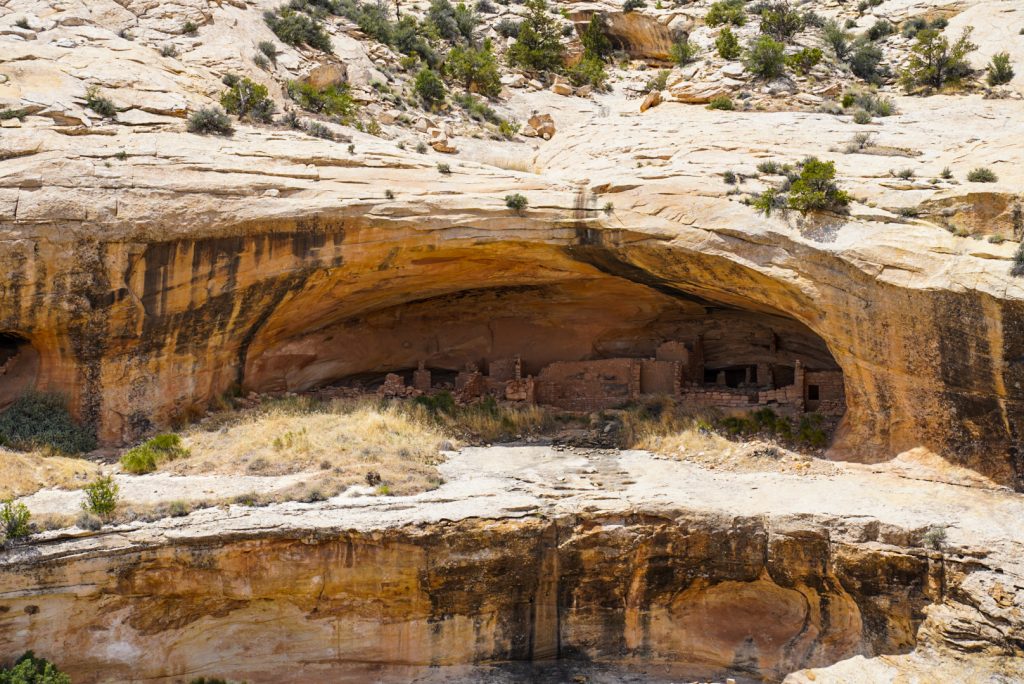
The Butler Wash Ruins
These are an easy stop on your way to or from Blanding and are only 1 mile RT. They lead to a scenic overlook so you cant get as close as with House on Fire but it is very cool to see the differences in architecture employed between the higher cliff dwellings and the boxier sites like House on Fire.
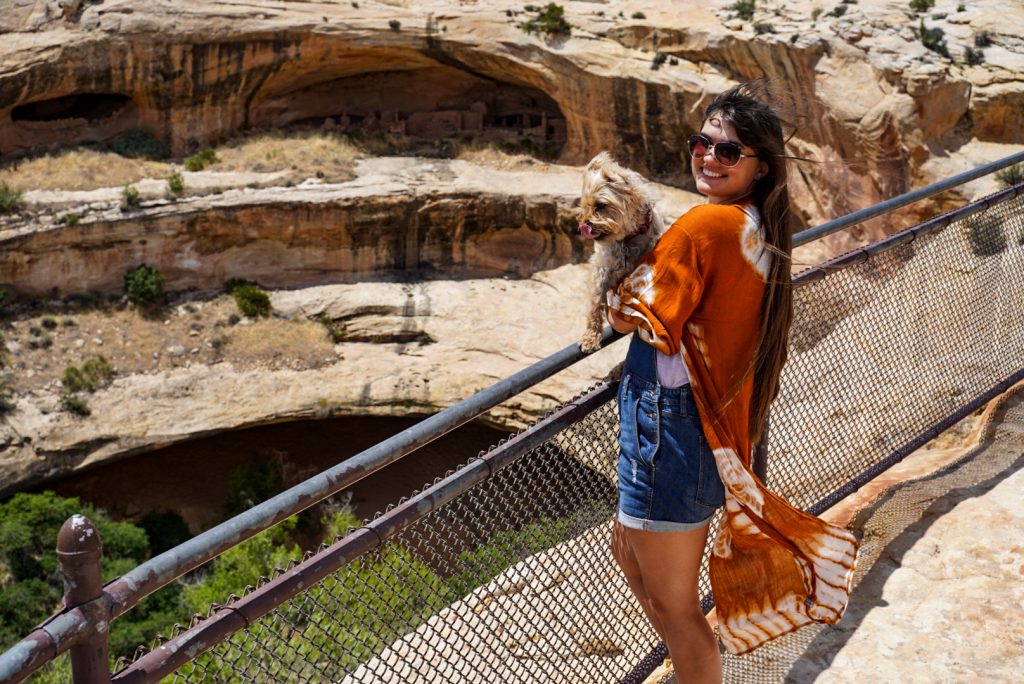
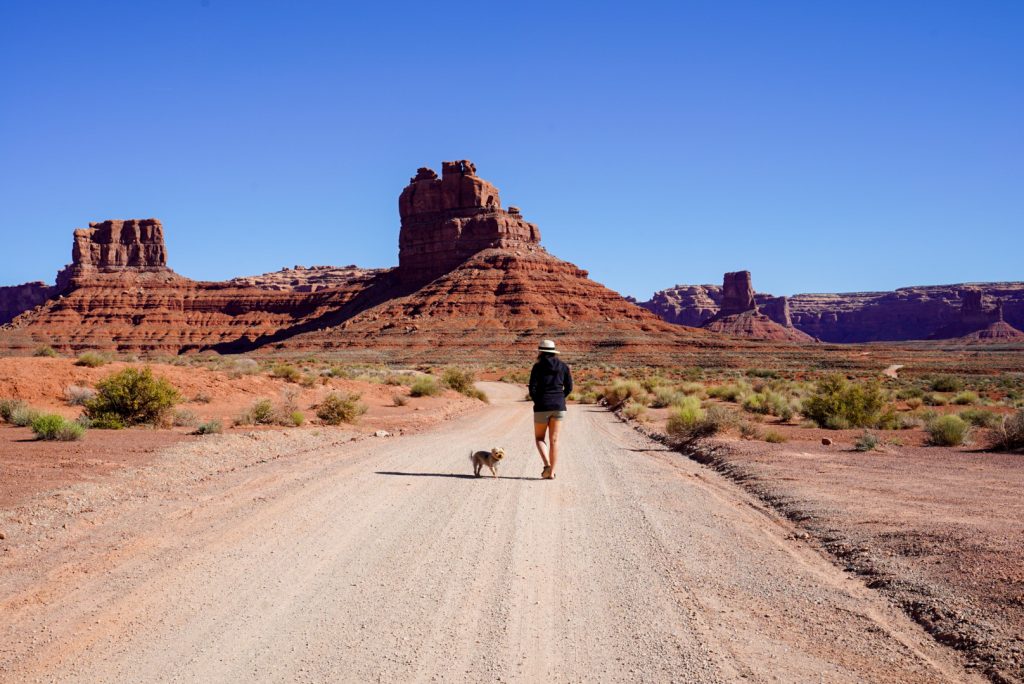
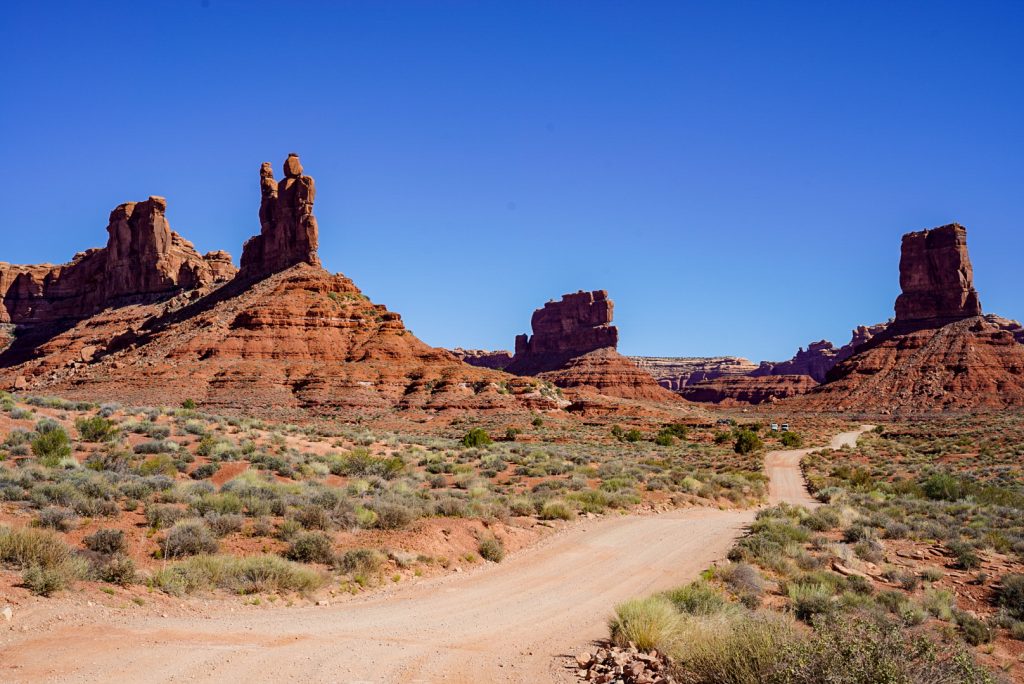
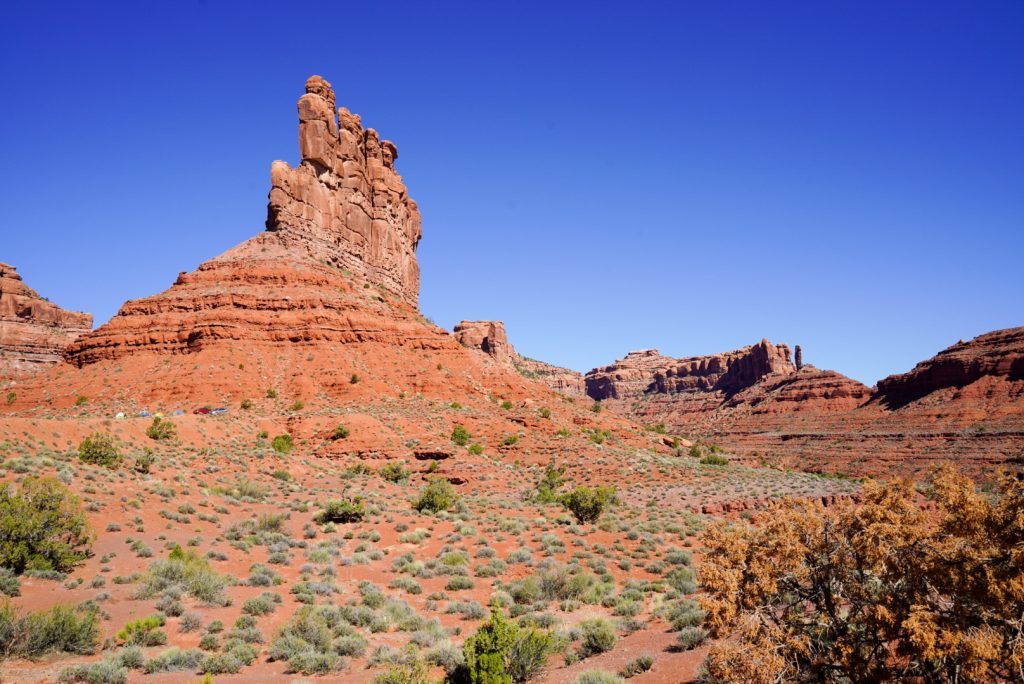
The Valley of the Gods
While not home to very many hiking adventures the Valley of the Gods is a beautiful scenic drive with lots of little spaces to explore and best of all- to camp. There are so many beautiful pullouts with expansive views that would make amazing camp spots. Just remember to pack out what you pack in (including human waste please) Combine with the Moqui Dugway for one hell of a driving experience. Don’t worry- the roads are gravel/ dirt but any car can make it.
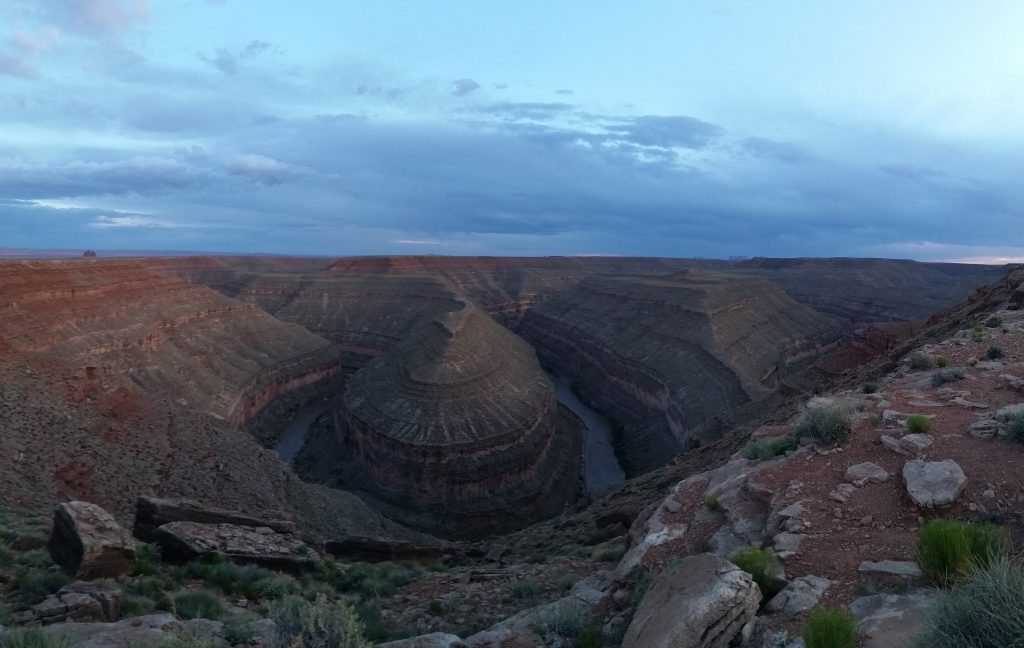
Goosenecks State Park
I visited here way back in 2016 and have always wanted to revisit. It’s a wild place with beauty that rivals views in Canyonlands and beyond and for a very moderate price. Pack your camping gear if you want to sleep in front of the most incredible view but be warned- the winds NEVER die down out there and you WILL have to put rocks in your tent so you dont lose it to the winds and canyon.
Fees: $5/ car day use. $10/ campsite. Likely self-self pay, make sure to have cash
Natural Bridges National Monument
Bonus 1: I haven’t been able to visit yet (although plans are in the works) but within Natural Bridges there are many more ruins to explore alongside 3 huge natural bridges (arches) which combined make for a really fun day. The trails weren’t very dog friendly so I’ve decided to visit here on a trip without my boys.
Fees: $20/ car day pass. Entrance included with an America the Beautiful National Park Pass OR South-Eastern Utah Pass that covers Arches, Canyonlands, and Hovenweep NM.
Edge of the Cedars State Park Museum
This is another bonus as I haven’t been able to stop here yet (not a dog friendly museum) but if you’re interested in seeing how the ancestral Puebloans lived with a fantastic recreation of the dwellings and villages this is for you. They even have a full scale kiva you can climb down in and the largest pottery on display in the Four Corners Region.
Fees: $5/adult. $3/ child. Children 5 and under are free.
Hours: Open Mon-Sat/ 10AM-4 PM. Closed on Sundays and most major holidays.
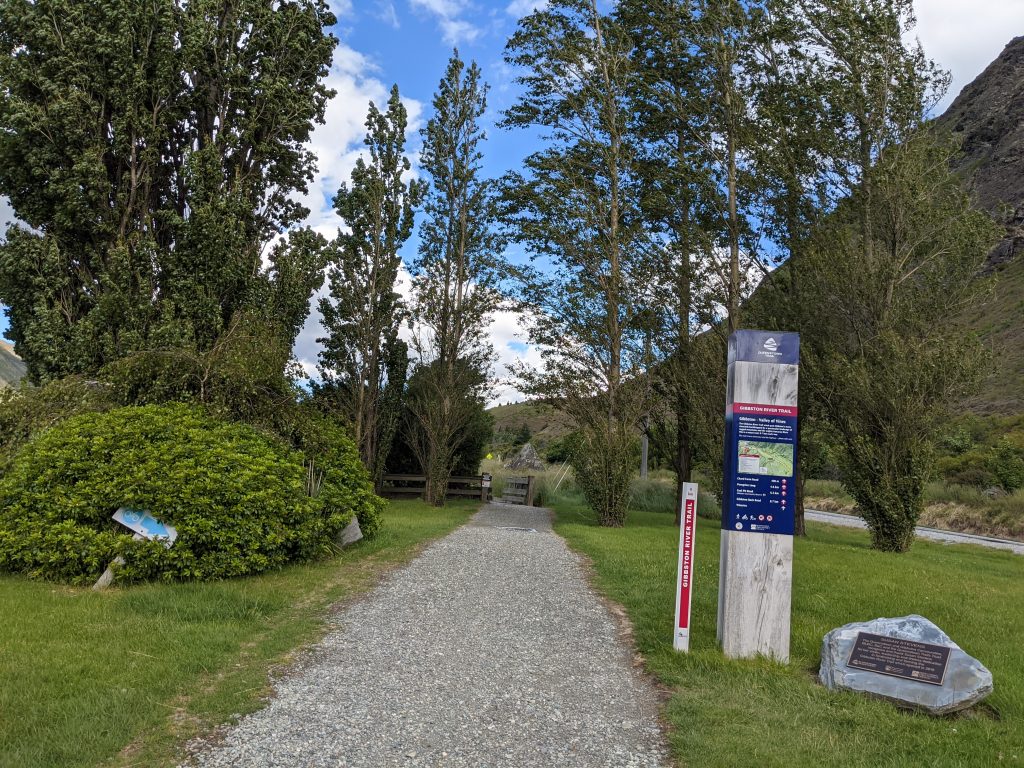
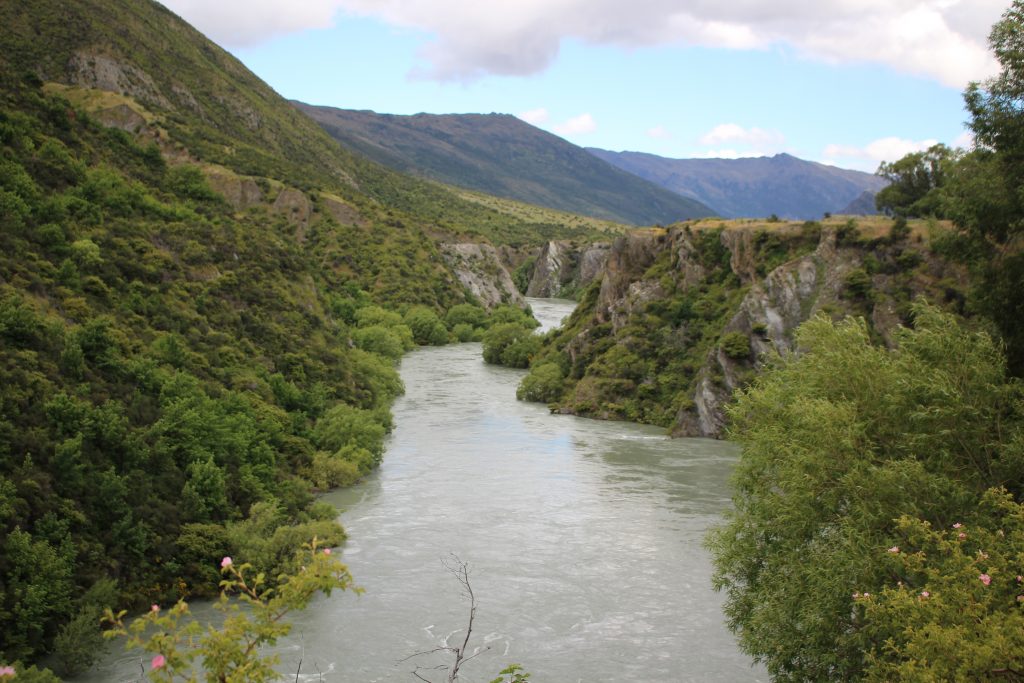
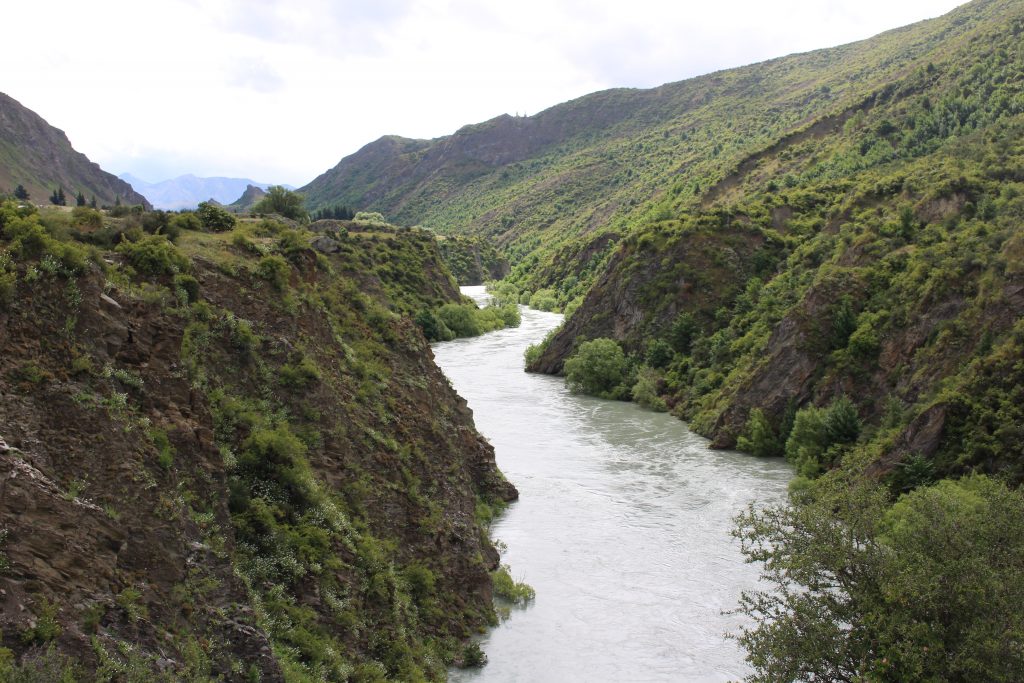
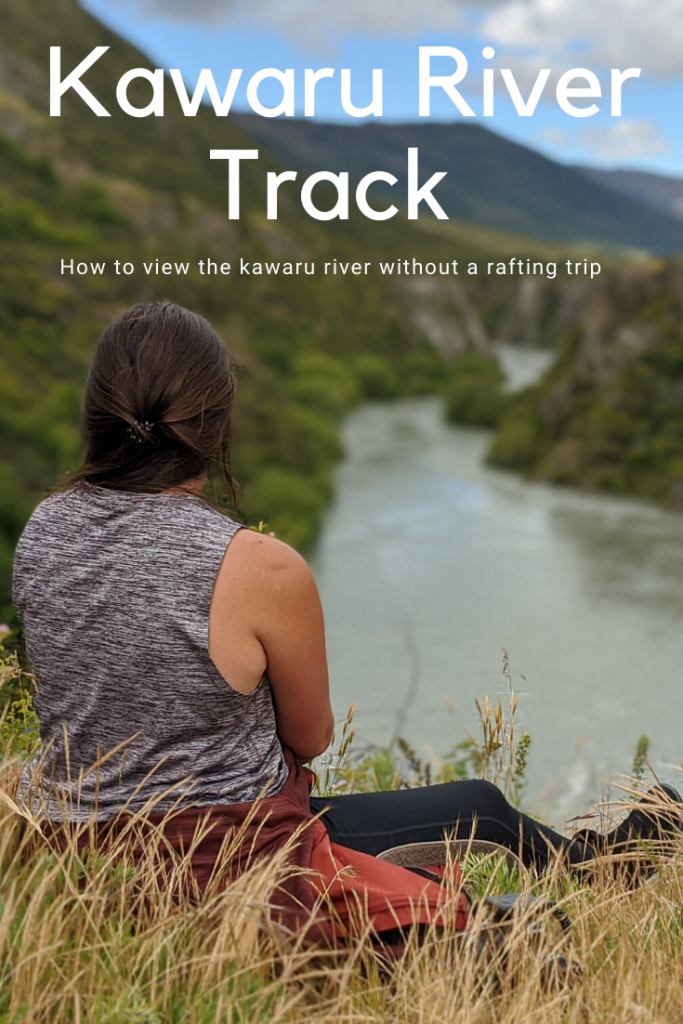
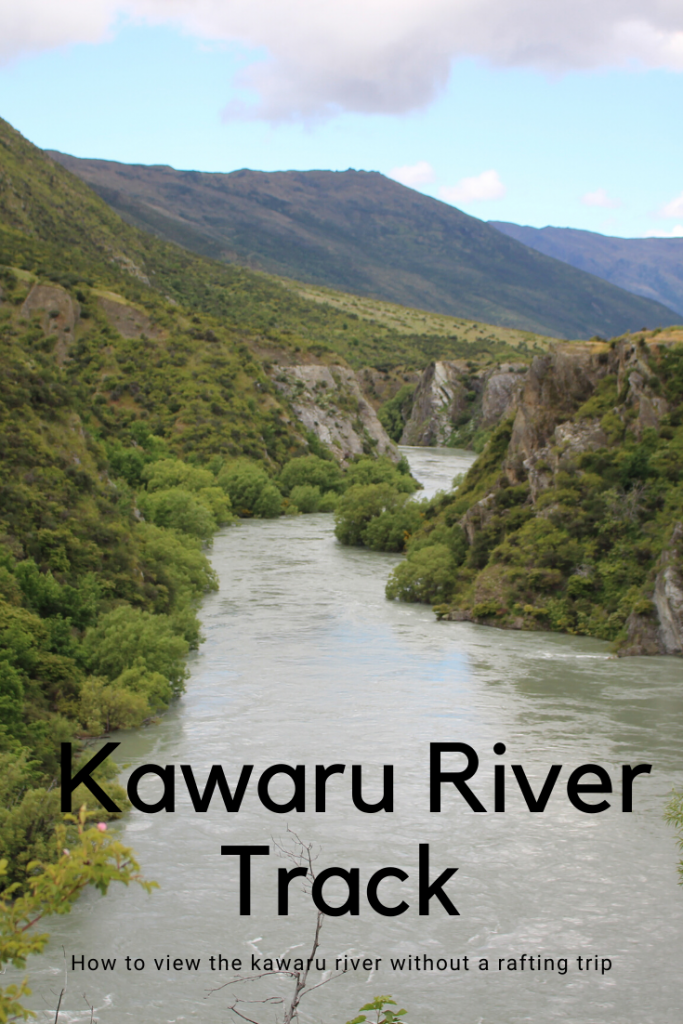
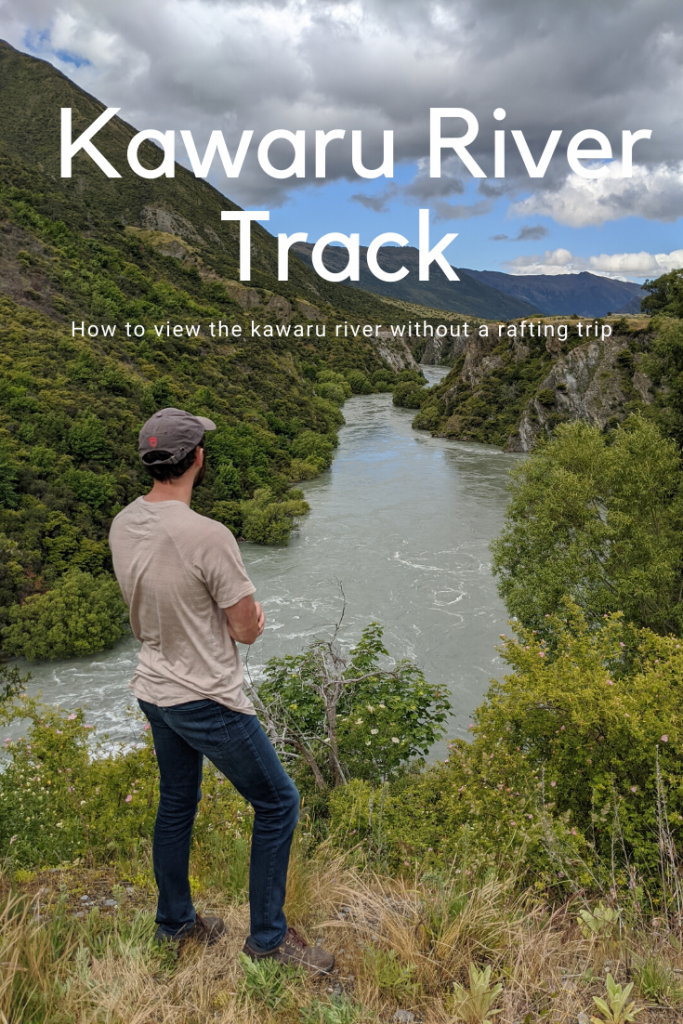
If you’re looking for a leisurely afternoon walk, a middle earth fan whose not up to white water rafting, or simply rained out of a white water trip like we were, fear not as I have a solution for you. Enter the Kawaru River pathway (aka Gibbston River Trail) which starts with views of people jumping off a bridge, passes through more than a couple wineries, and stops along several scenic picnic spots on the river rim. It’s a great shorter walk/ hike to get outside and admire the Kawaru river… without partaking in the rough house activity of rafting it.
Where to park for the Kawaru River trail:
Google maps AJ Hackett Bungy Kawarau Bungy Centre and park in the same lot as the bungy bridge.
The parking lot is just 20 minutes outside of Queenstown along hwy 6 (toward Wanaka). The turn off for the parking lot will be on your left just after passing over the kawaru river bridge. (~23 km along hwy 6)
Trail info:
Distance: 2.25 miles/ 3.6 km 1 way. Go as long as you like though
Difficulty: Easy, little to no hills
Time: Allow at least 1.5 hours
Kawaru River Trail Directions:
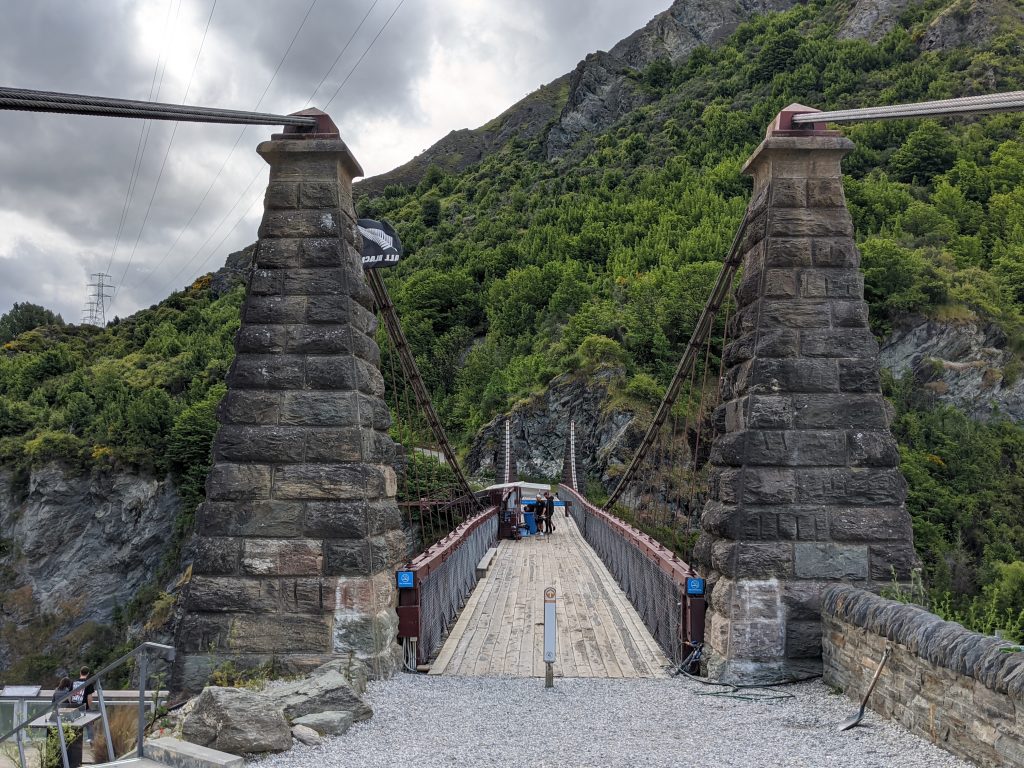
Once you park, go ahead and wander down to check out any jumpers from the bridge as they leap from the historic suspension bridge, get caught up by their ankles on the bungy, and rafted back to the river side. Sign yourself up if you’re feeling daring and make use of the facilities around the bungy center.
The Gibbston River trail goes both ways along the Kawaru river actually crossing over the historic suspension bridge- and both directions make for a scenic walk. HOWEVER if you want the specific views in this post and/ or Lord of the Rings filming locations, you’ll want to skip crossing the bridge and actually walk up the parking lot from where you parked, to the East side where you’ll see a drive way for the Winehouse and then signs for the Gibbston River Trail.
The start of the trail
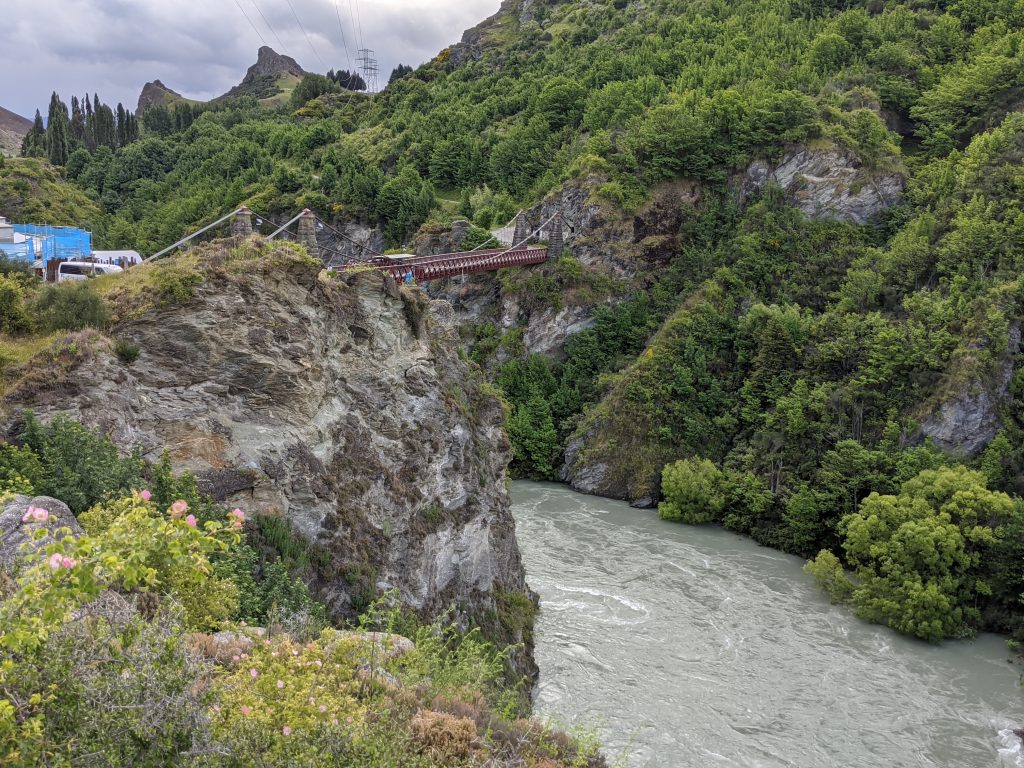
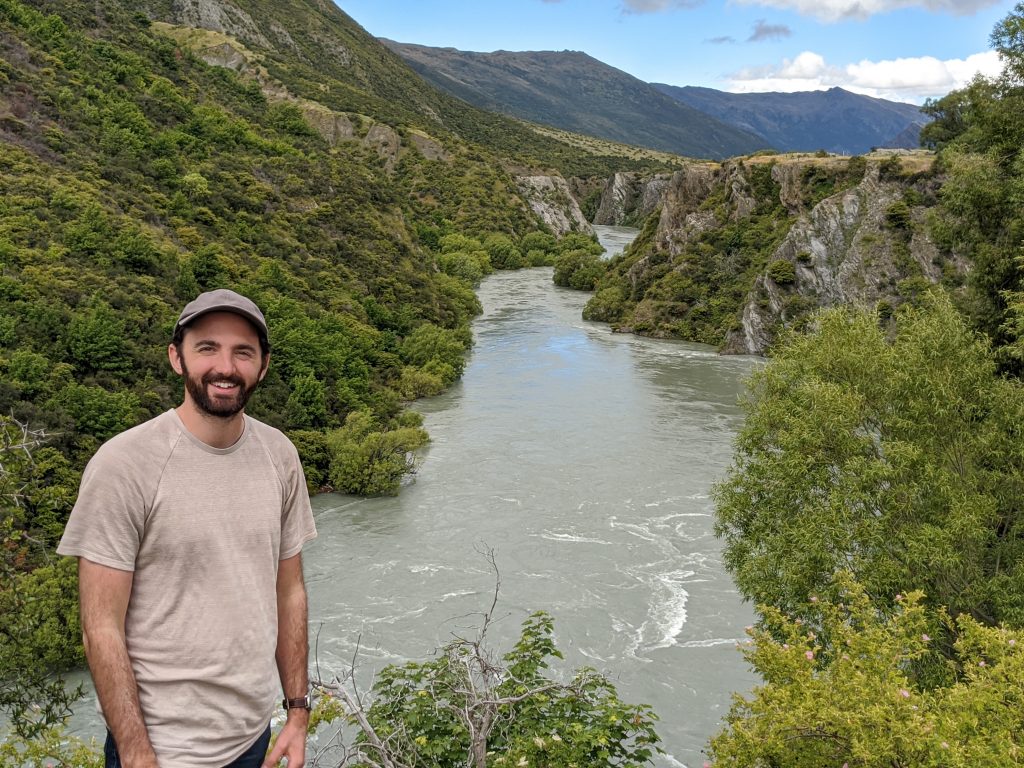
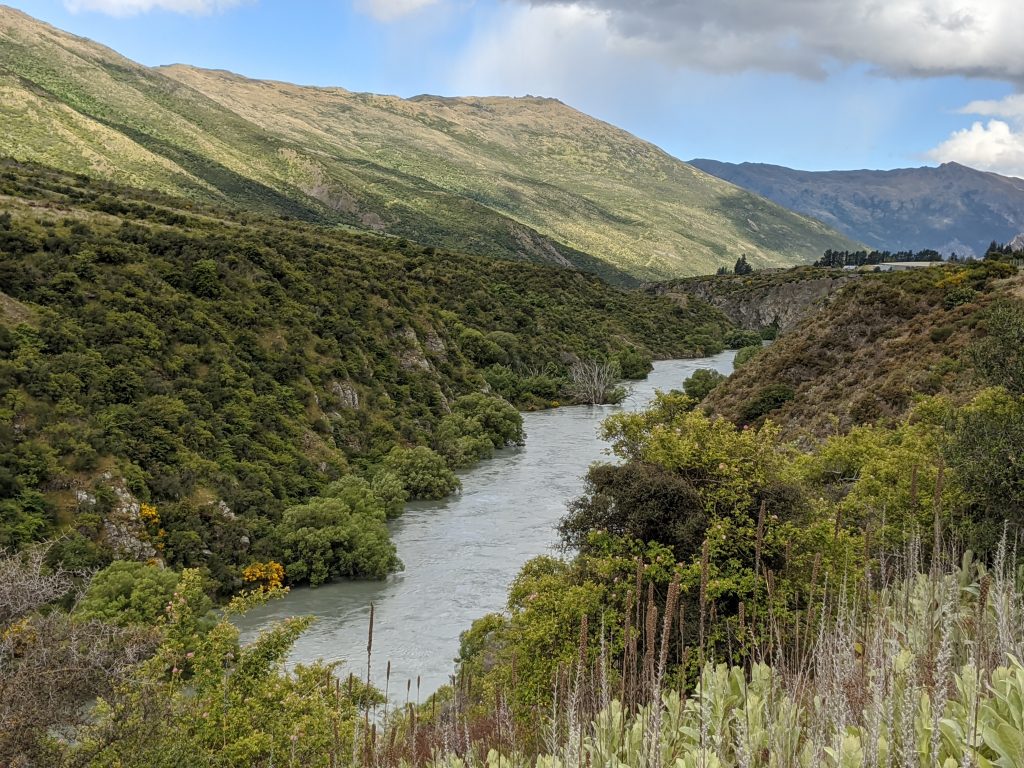
At first the trail is pretty close to the road but after a few minutes, it will turn off and cut down to the river’s rim. There it will meander along occasionally cutting away from the river before returning back to it. There’s a couple wineries you can stop at if interested, or even better do the wine & bike tour to see more of the river trail and more of the wines. Otherwise you’ll come across the first awesome view point (probably the best one) about 1 mile/1.7km in. There’s even a bench to mark the spot of a great view.
It was standing here that we were definitely able to see the scene at the end of the Fellowship where the party is rowing down the river Anduin and passes between the giant Argonath statues. (We were still disappointed as to not be able to raft ourselves down through the narrow canyon)
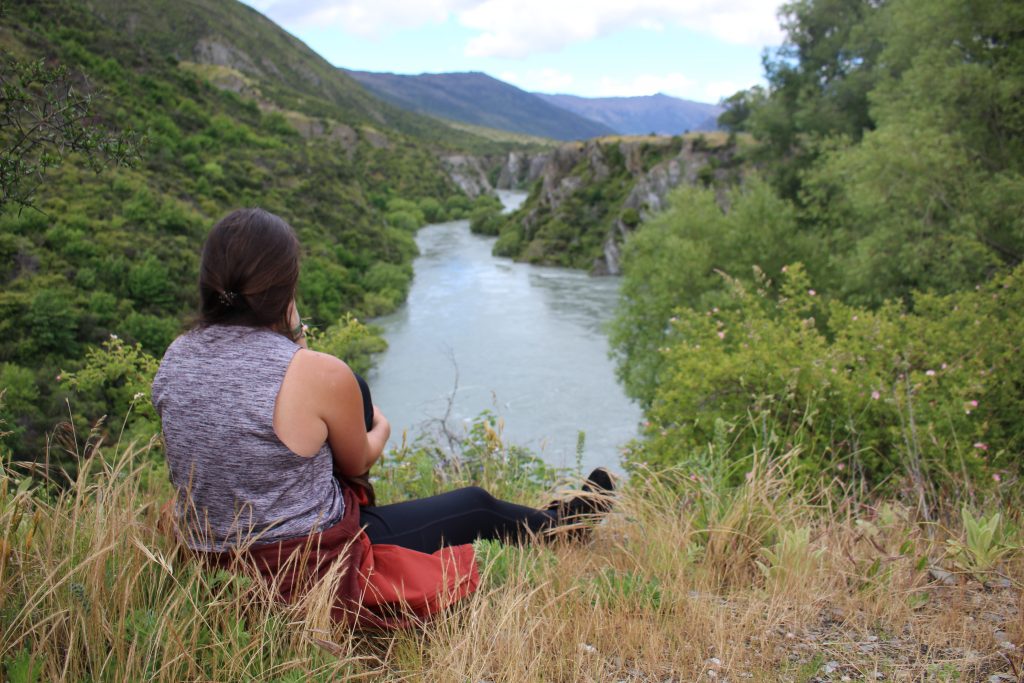
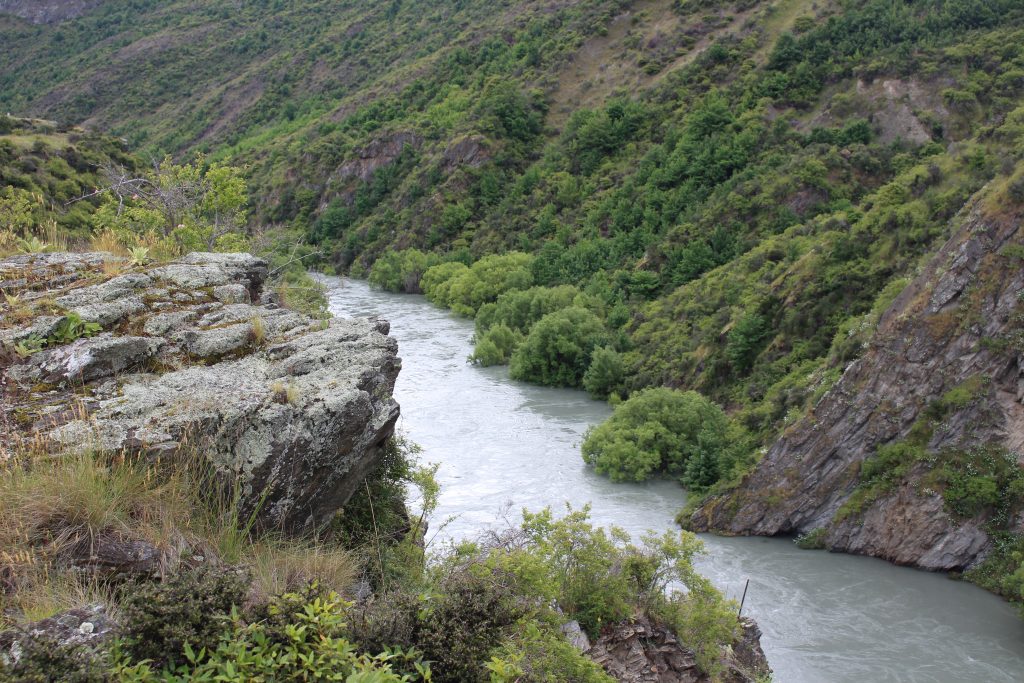
You can continue on for more views of the narrow river canyon with the next best view point being about mile 1.93/3km. Make sure to take the left trail junction (the one that says for advanced bikers only) to get to this view point. This section of trail is definitely the most interesting with a few little bridges here and there, loads of bunnies hopping about, and being some of the closest to the cliffs down to the river.
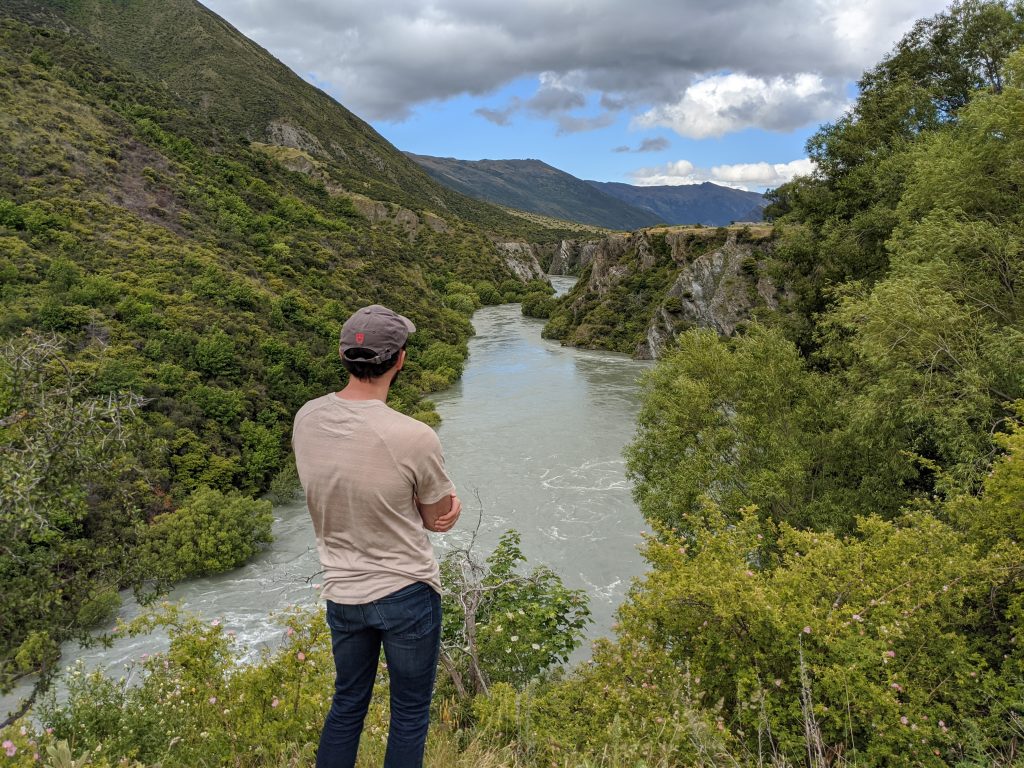
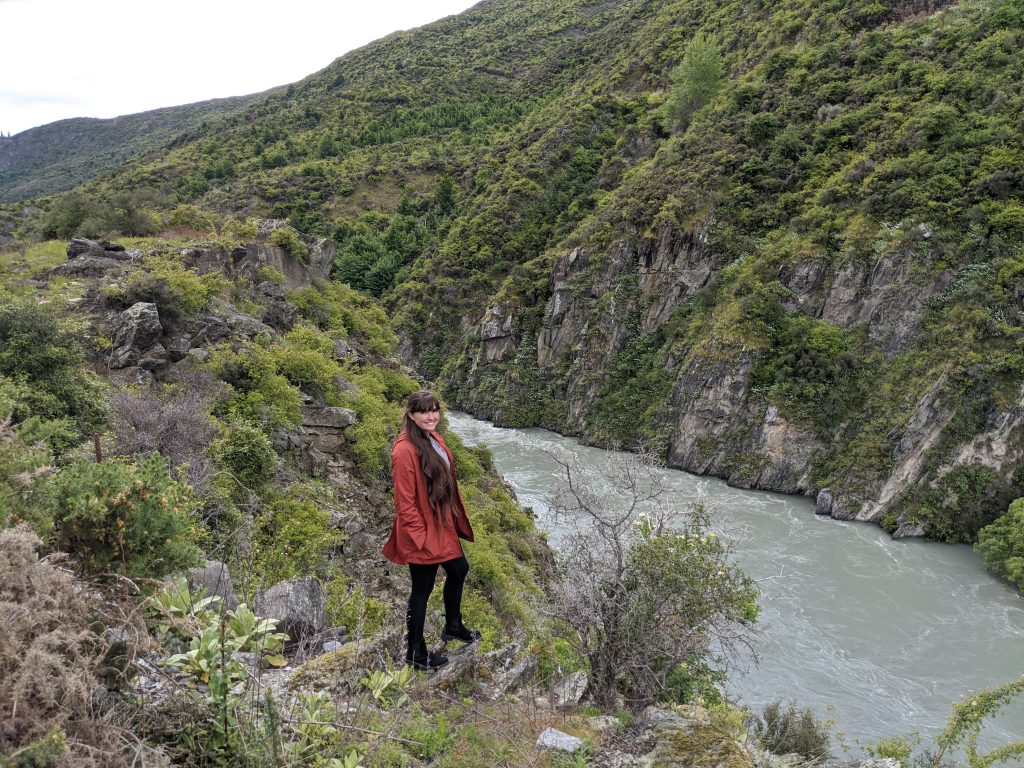
You can follow this trail for as long as you like, although we turned around once the canyon opened up about 2.25 miles into the trail. Overall it’s a flat easy trail with nice river and canyon views. We didn’t get a change to check out any of the wineries, but if I went back to Queenstown I’d definitely consider a biking trip down this river trail to see more of it and almost certainly be re-booking myself for the Kawaru white water rafting tour.
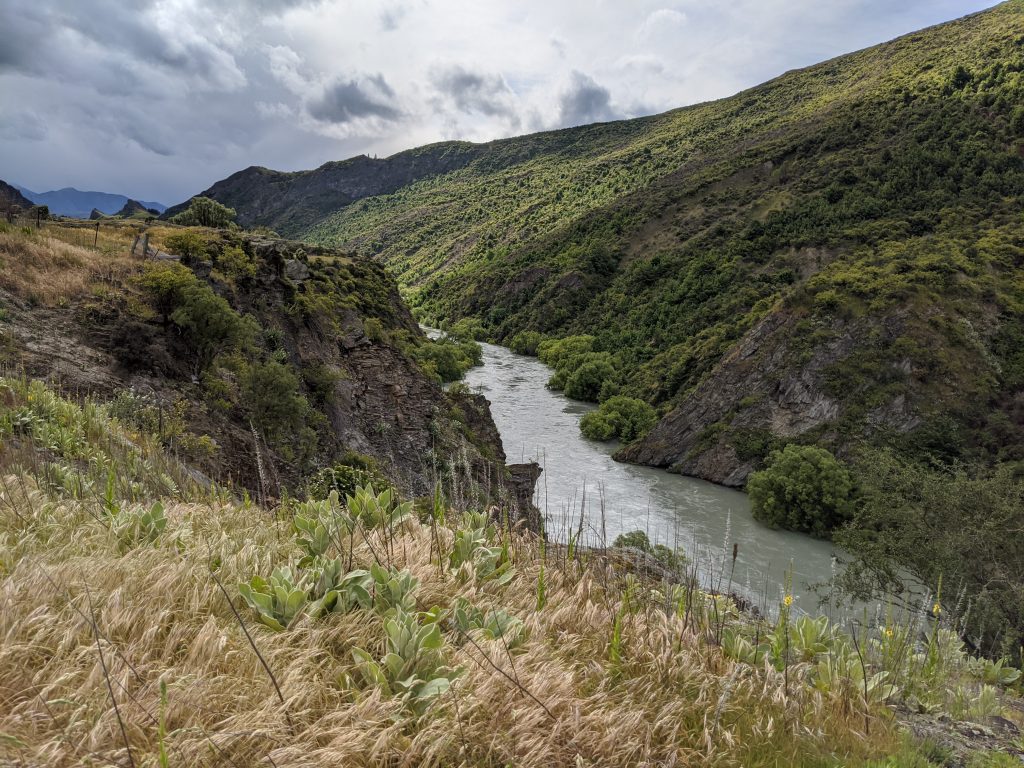
The last view we had before we turned back
Unless you have a ride sorted out for getting back, return on the trail from whence you came to the bungy bridge carpark.
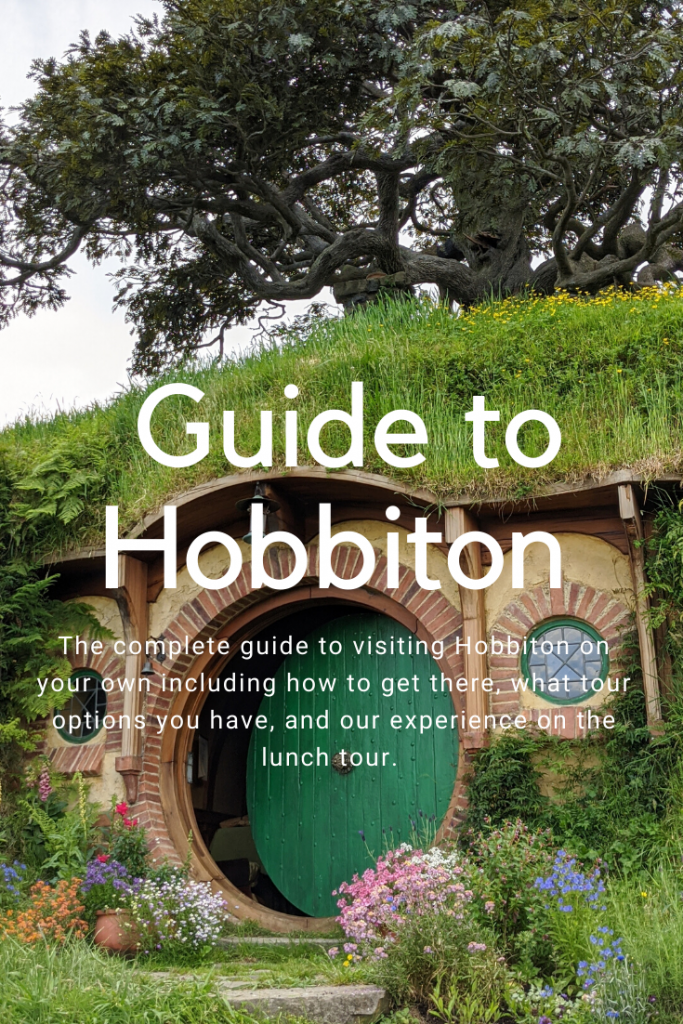
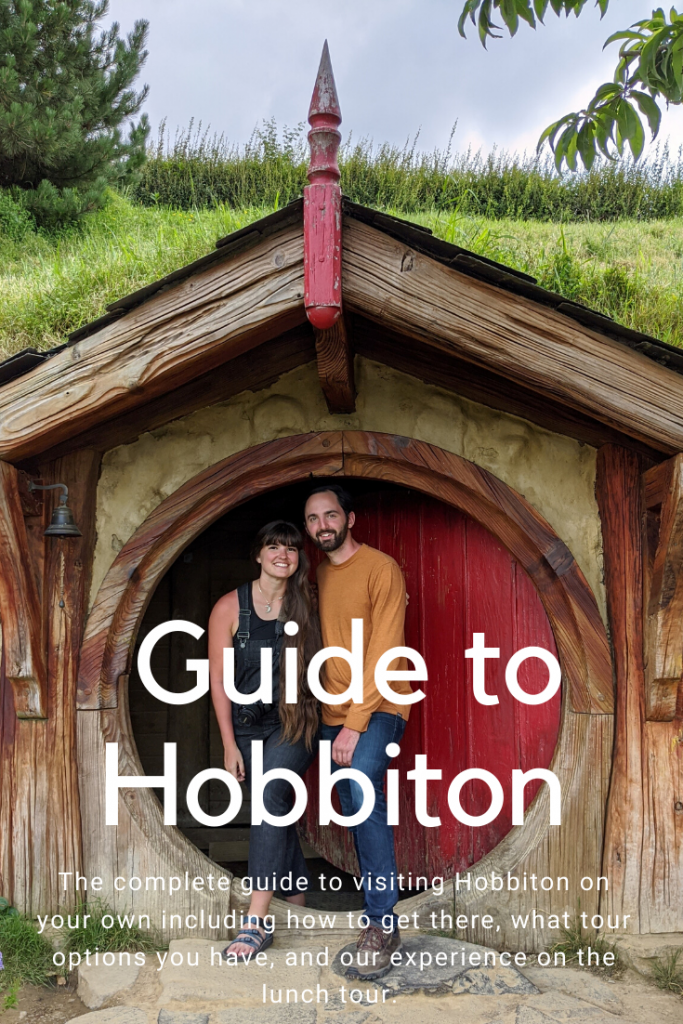
Something most people cannot miss when visiting New Zealand is Hobbiton, the movie set. It’s known worldwide so no matter where you go- when you tell people you visited New Zealand, you will get asked “Did you visit those Hobbit Holes?” by both fans and not fans alike. That being said, you should plan on whether a stop at Hobbiton is right for you or not. You SHOULD visit it you are
A fan of the books or movies
Interested in set design and/or the making of movies
Interested in a good beer and some likely photo ops.
You should NOT plan a trip here unless you at least fit the bill with 1 of those options. People who DON’T like crowds or on a strict budget may find it busy, touristy, and an expensive expenditure. *
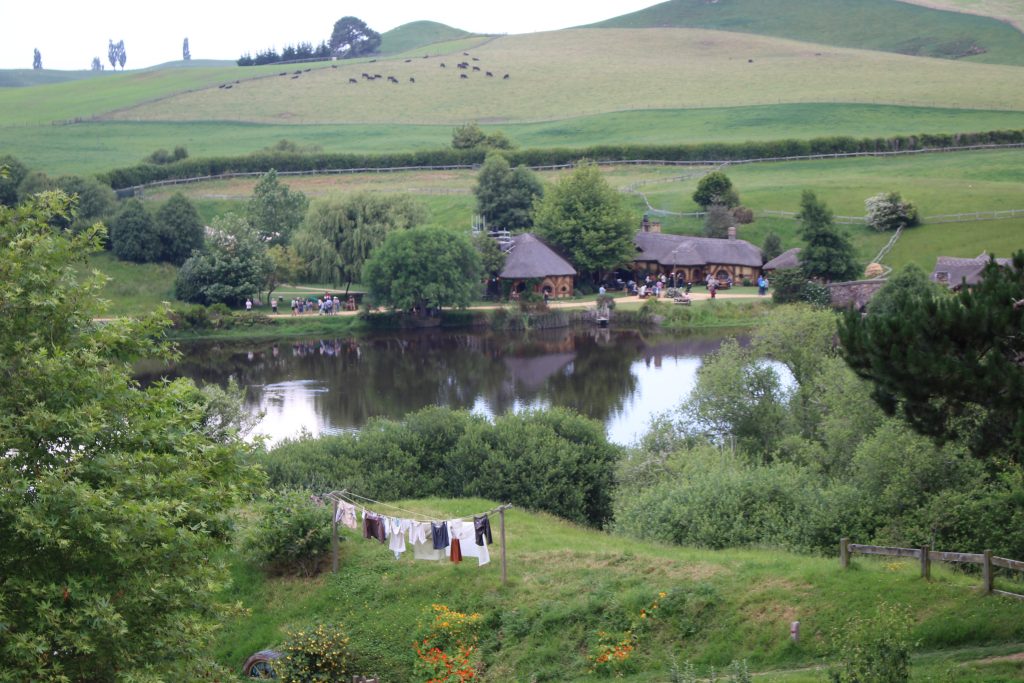
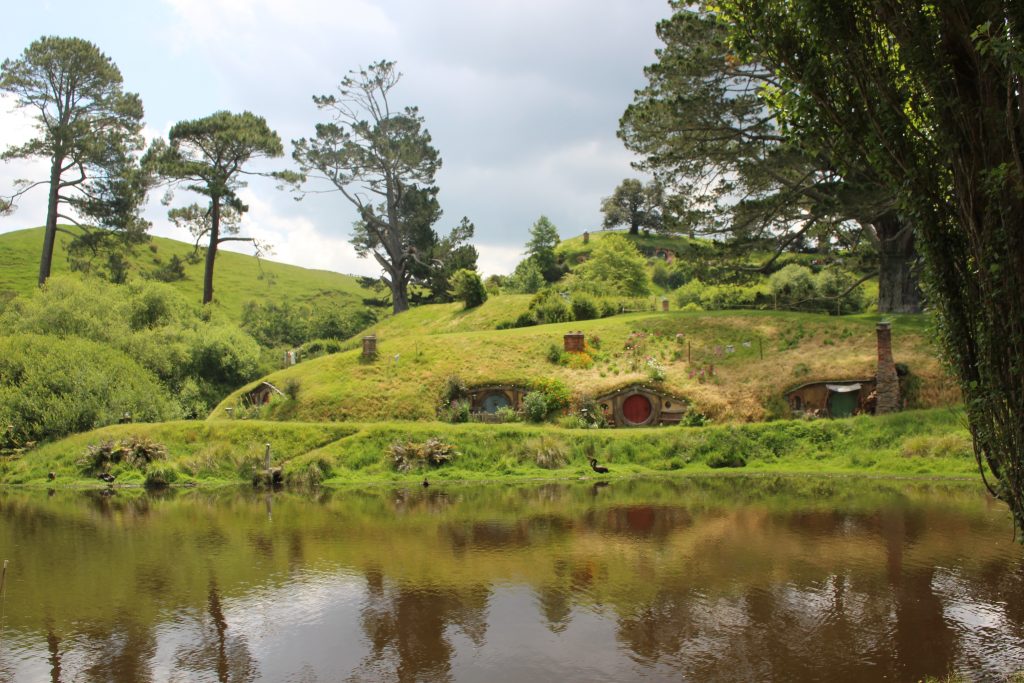
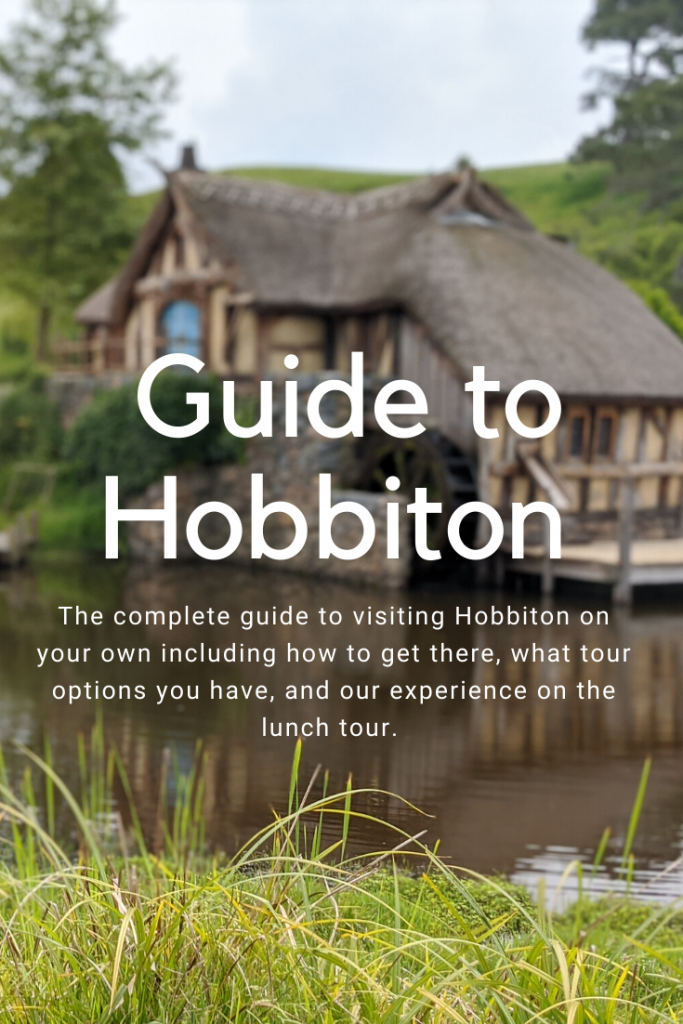
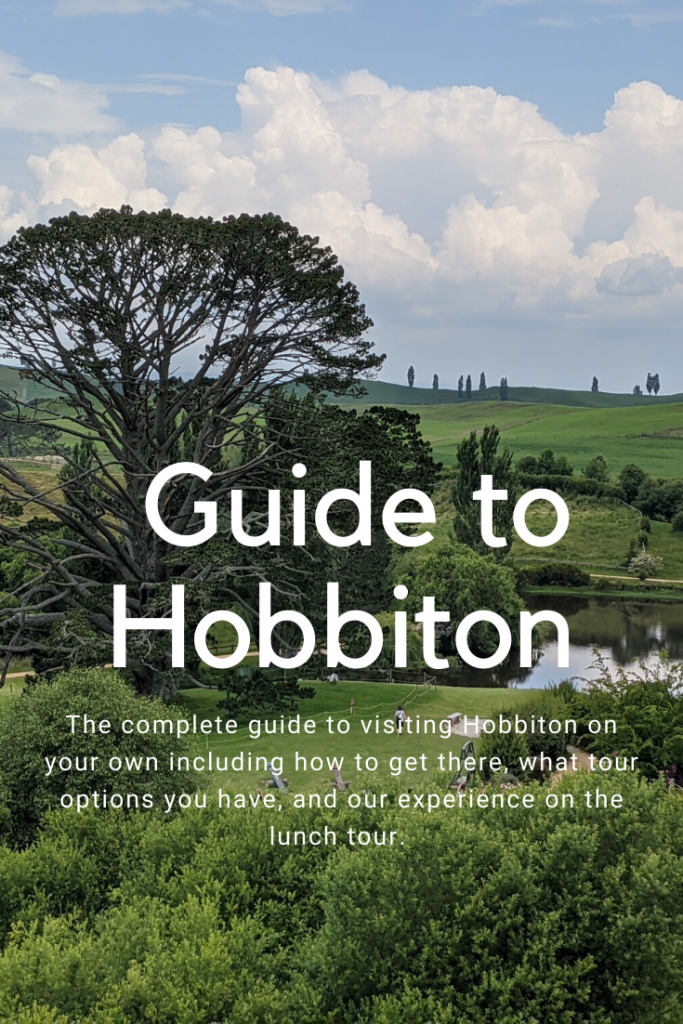
The “party tree” overlooking the pond and near a great hill played a major part in this site’s selection for the set
About the Hobbiton movie set:
“In 1998, Sir Peter Jackson’s team of location scouts were searching for the iconic rolling hills and lush green pastures of Hobbiton™. An aerial search led them to the Alexander farm, a stunning 1,250 acre sheep farm in the heart of the Waikato. They noted the area’s striking similarity to The Shire™, and quickly realized that the Hobbits™ had found a home.
In one particular part of the farm, there is a magnificent pine tree towering over a nearby lake, adjacent to a rising hill. Bag End now sits atop that hill, overlooking the Party Tree, as that pine would later be known. The surrounding areas were untouched; no power lines, no buildings and no roads in sight. This meant that Sir Peter Jackson could leave the 20th century behind, and fully submerge himself in the fantasy world of Middle-earth™.
In March 1999 the crew began the nine month quest to bring the ideas for Hobbiton to fruition; help was provided by the New Zealand Army, and soon 39 temporary Hobbit Holes™ were scattered across the 12 acre plot used for the set. Secrecy was key, and strict security measures were put in place by the production company throughout construction and filming. Filming commenced in December 1999, and it took around three months to get a wrap on The Shire.
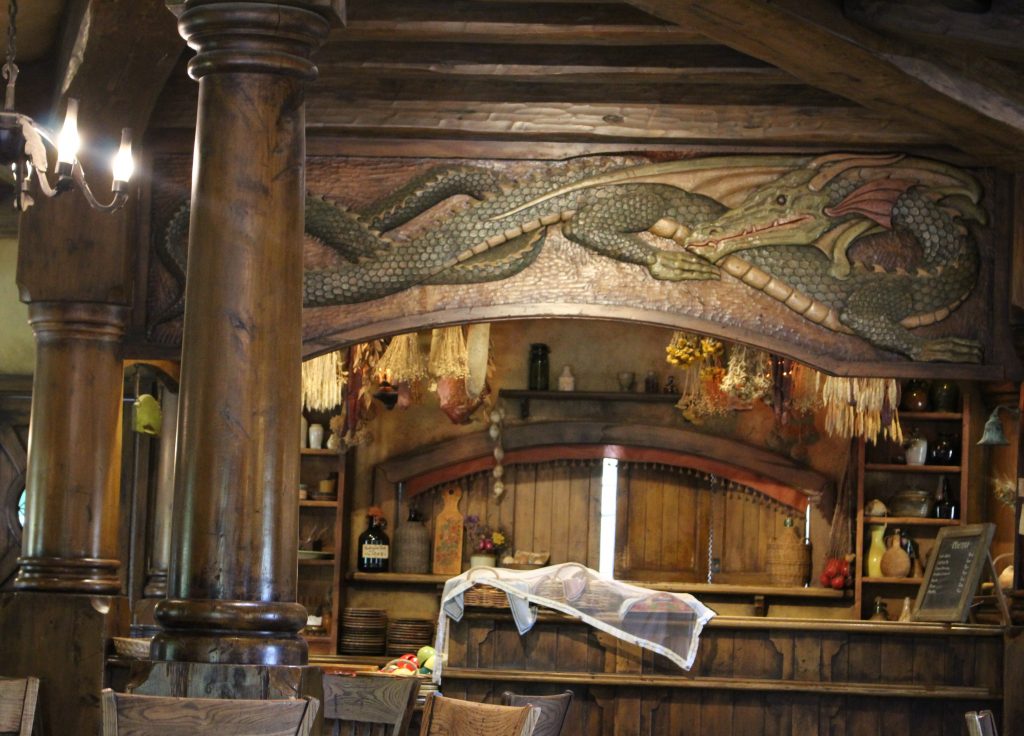
In 2009, Sir Peter Jackson returned to film The Hobbit trilogy, and he left behind the beautiful movie set you’ll see today; 44 permanently reconstructed Hobbit Holes, in the same fantastic detail seen in the movies. In 2012 The Green Dragon™ Inn was opened as the finale to the journey. Guests now finish their Hobbiton Movie Set experience with a refreshing beverage from the Hobbit™ Southfarthing™ Range. There’s an abundance of movie magic nestled inside the fully operational farm.”
Options for getting to Hobbiton:
Private car- Simplest option in my mind- the tour departures are cheapest if you can drive yourself to Hobbiton. It is just over a 2 hour drive from Auckland and very close to other popular destinations in Rotorua.
Take a bus from Auckland to Matamata where there are Hobbiton tour departures that can be booked as a combo with your Hobbiton entrance. (Bus fares are around $40- book in Intercity.com)
Book a tour within Auckalnd to transport you to your Hobbiton tour. (most expensive- least flexible option)
Since the absolute best way to get around New Zealand is driving yourself, this is the method I’d recommend. Once you get to Hobbiton you have still more options:
Hobbiton Set Tour booking options
A 2 hour movie set tour Adults (17years+) : $84/ Youth: $42 *
The 2 hour movie set tour+ lunch Adults: 120/ Youth: 78 *
The 2 hour movie set tour+ dinner+ lantern lit walk second tour (only offered select nights during the week) Adult: $192 Youth: 152.50 Child: $100
*All tours come with a complimentary drink and free time at the Green Dragon after your walk. There is also a café at Shire’s Rest where you park and where all the Hobbiton tours depart from.
*Children 8 and younger are free but must be accompanied by a paying adult and have a ticket
*You CANNOT see the Hobbit holes without booking a tour.
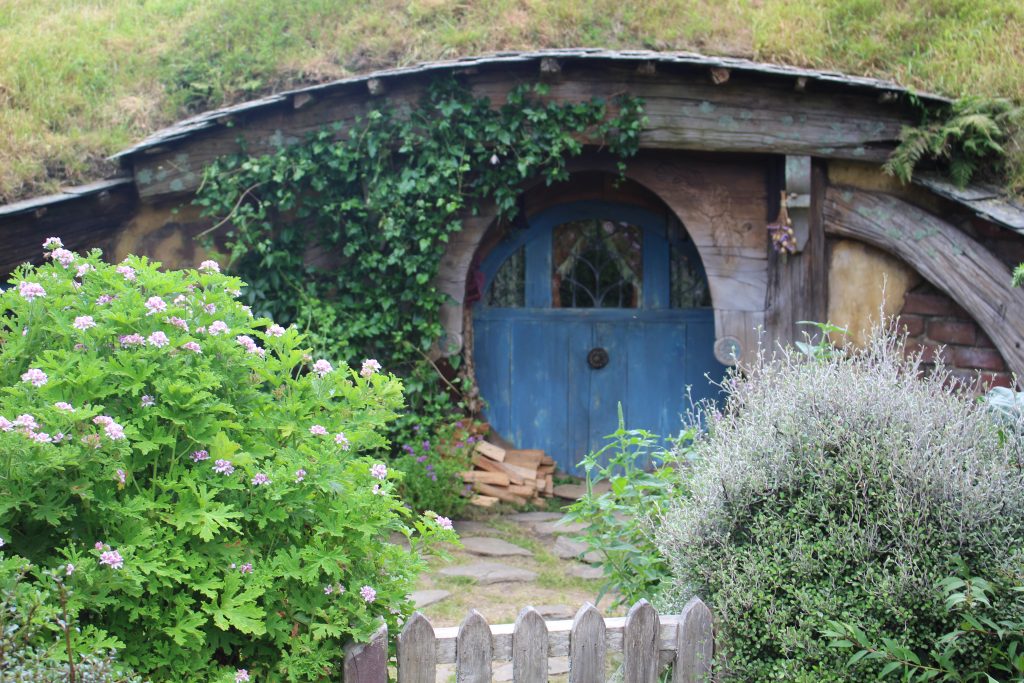
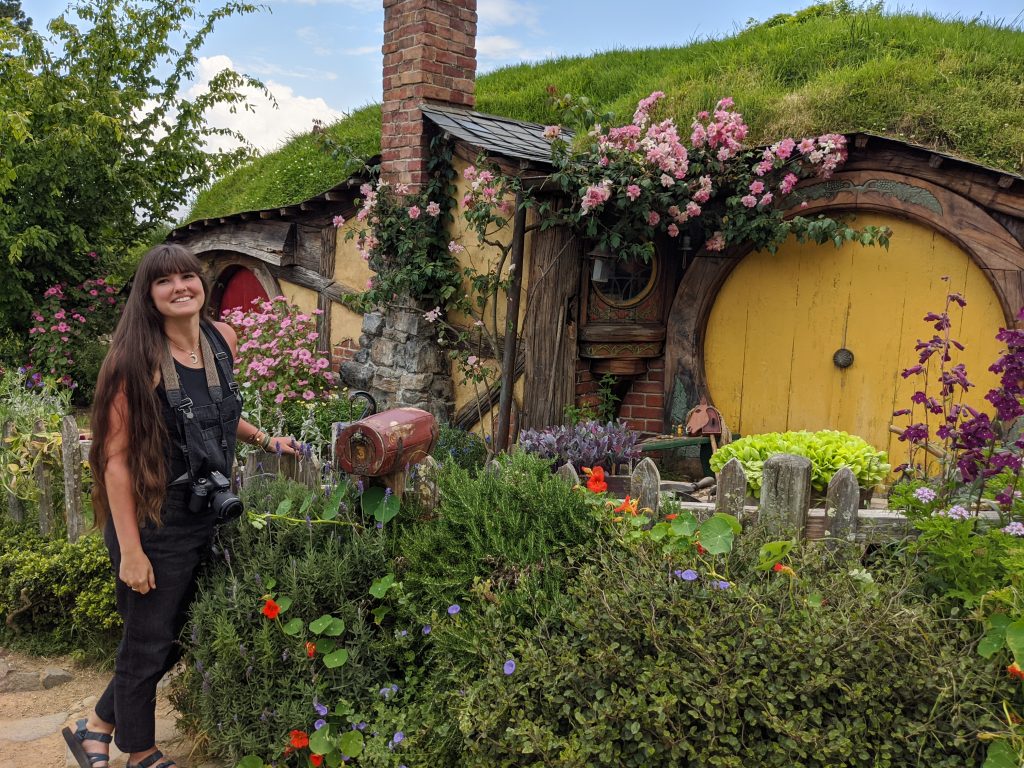
Your first view of the Hobbit holes
About our experience:
I did the simple 2 hour tour on my last visit 5 years ago so this time we spiced it up by booking the set tour+lunch combo. (I would’ve booked dinner but it was only available certain days of the week and didn’t align with our schedule)
We drove from Tongariro in the morning and got to the Shire’s Rest about 45 minutes before our departure. We checked in at one of the many kiosk desks to exchange our online vouchers for the physical tickets and then spent some time milling around the gift shop. About 10 minutes before our tour departure (1 PM) we lined up in our designated queue to be first on the bus and waited for our departure.
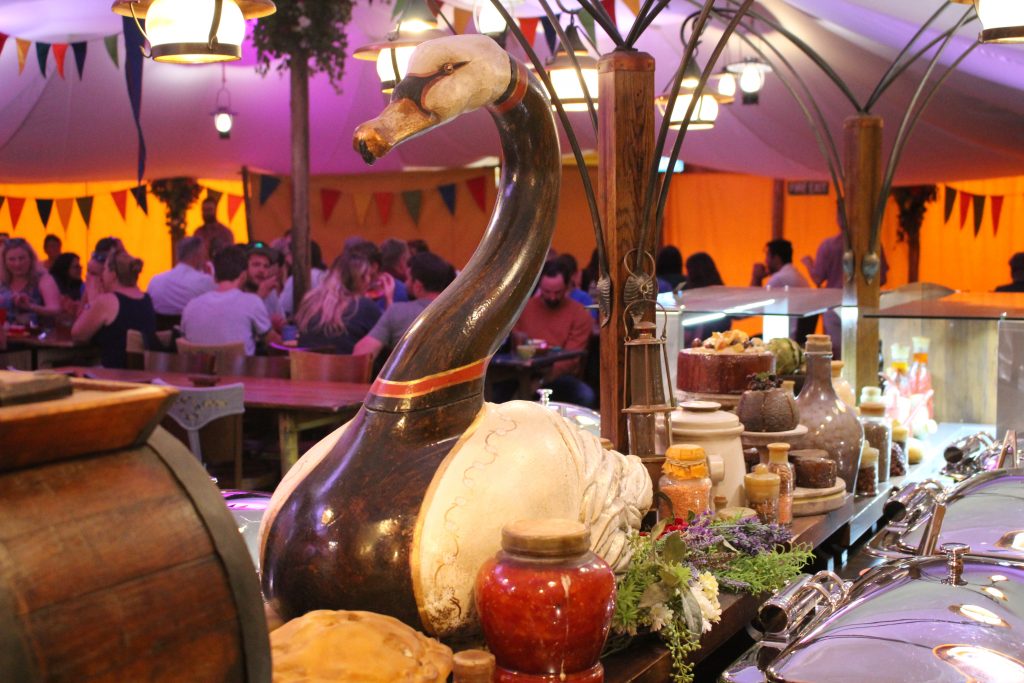
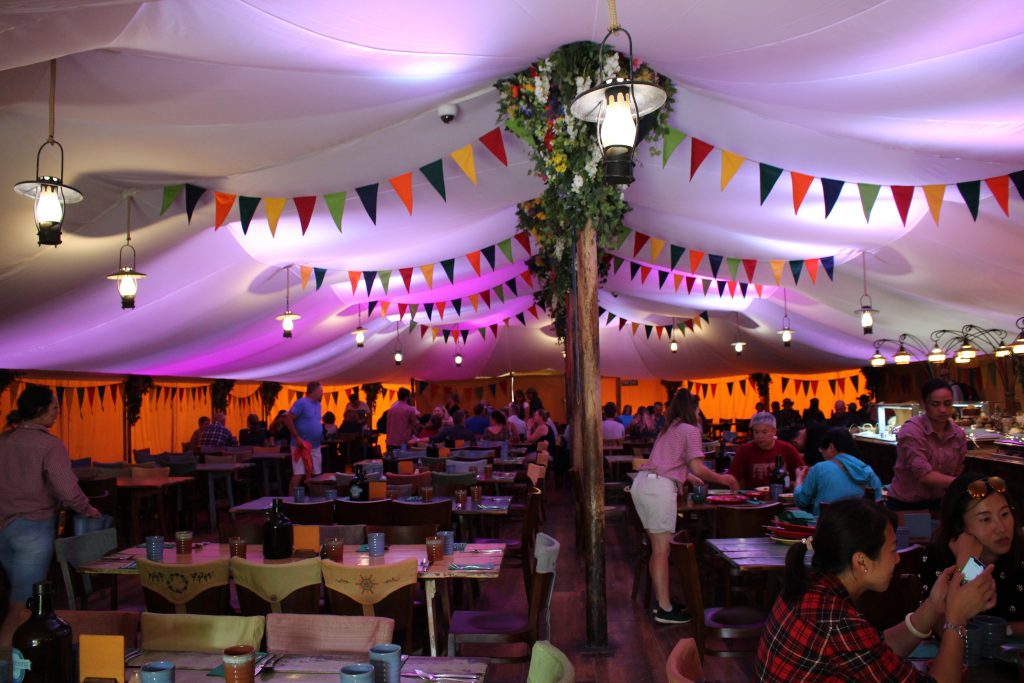
The lunch portion
Once you board the bus, it’s a quick 10 minute drive along a beautiful road to Hobbiton. For the lunch tour, they lead us down to their party tent (which is right near the Green Dragon Inn) and we were seated at our specific group tables. We had about 45 minutes to eat once seated and they designated an order to lining up to go down the buffet line which was all rather efficient. Once everyone was seated with their food, you were more than welcome to go back for seconds and there was plenty of food. The options were NUMEROUS but my favorite things were the roasted potatoes/ veggies with herbs, slow roasted beef, tomato and vegetable curry, and marinated chicken. They also had a selection of deserts, tea, and coffee available after the main courses. The only other beverage available during lunch is water.
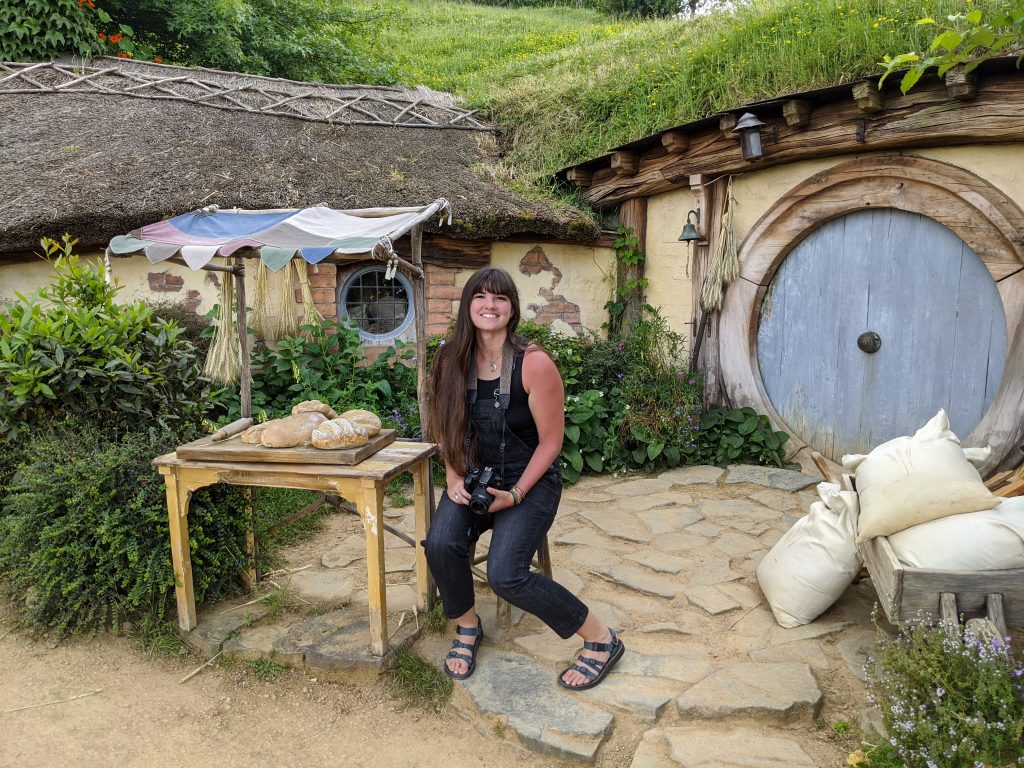
Delicious options pictured here include roasted veggies with herbs, slow roasted beef, tomato and vegetable curry, marinated chicken, salad, and fresh hearty bread
All in all, I’m a slow eater and so only having 45 minutes to eat semi stressed me out and once we had food, both Braden and I were 100% business at consuming as much food as quickly as possible. I am happy to report that everything was absolutely delicious and we have no regrets about spending a little more on lunch that day.
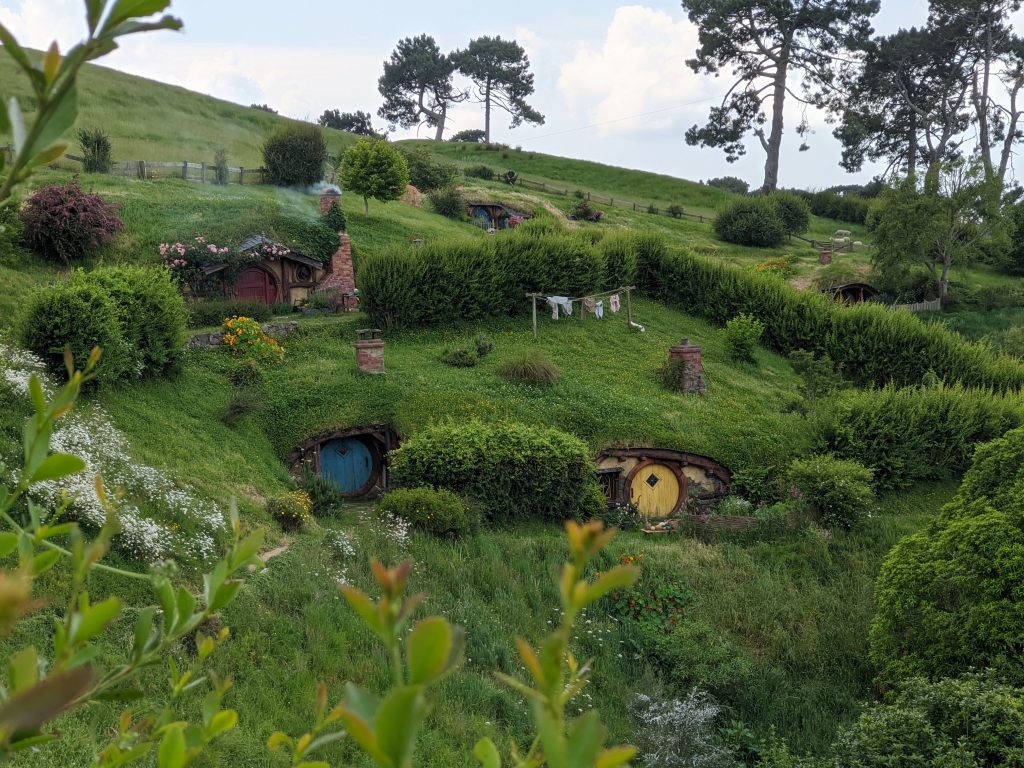
One of the first major stops is the community- most of the smaller holes are located here
The touring portion
After everyone was finished and we had all gathered outside, we began our walking tour! The tours seemed to be spaced about every 10-15 minutes and each tour group is easily around 30 people which makes for A LOT of people milling about. The guides are all very good at getting people to move along while still stopping at all the “must get the shot” spots. In general, we would stop and learn a few facts, take a few photos, and the guide would start slowly walking on. Then people would trickle after getting their own shots and we’d all be stopped where the guide stopped next.
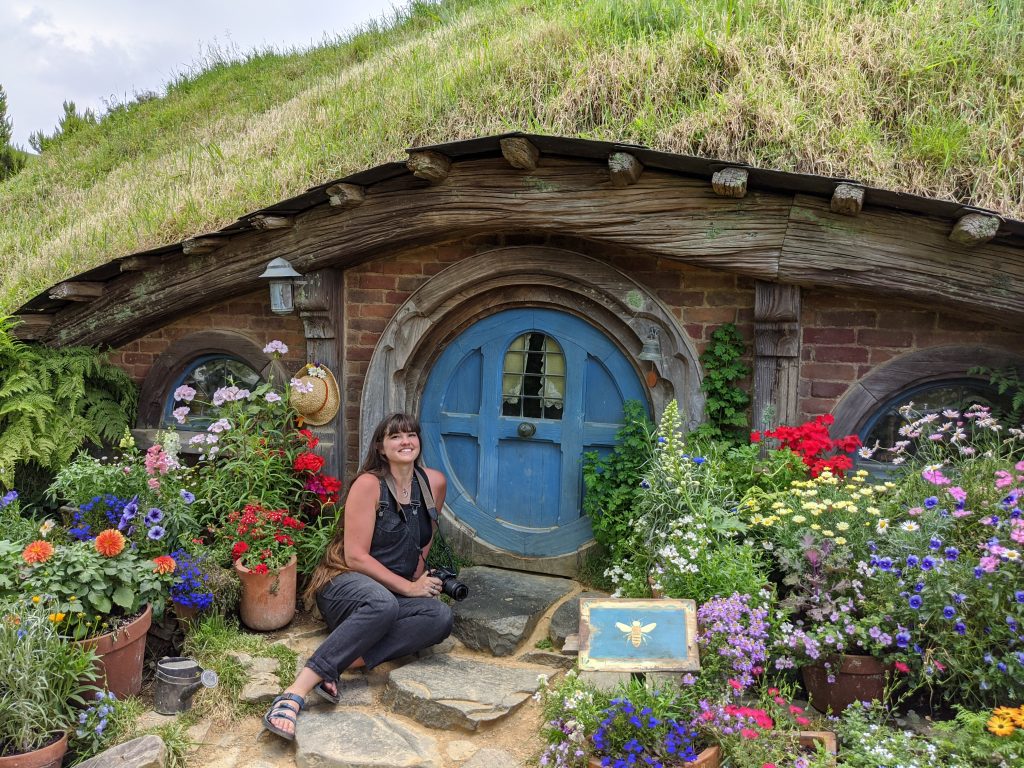
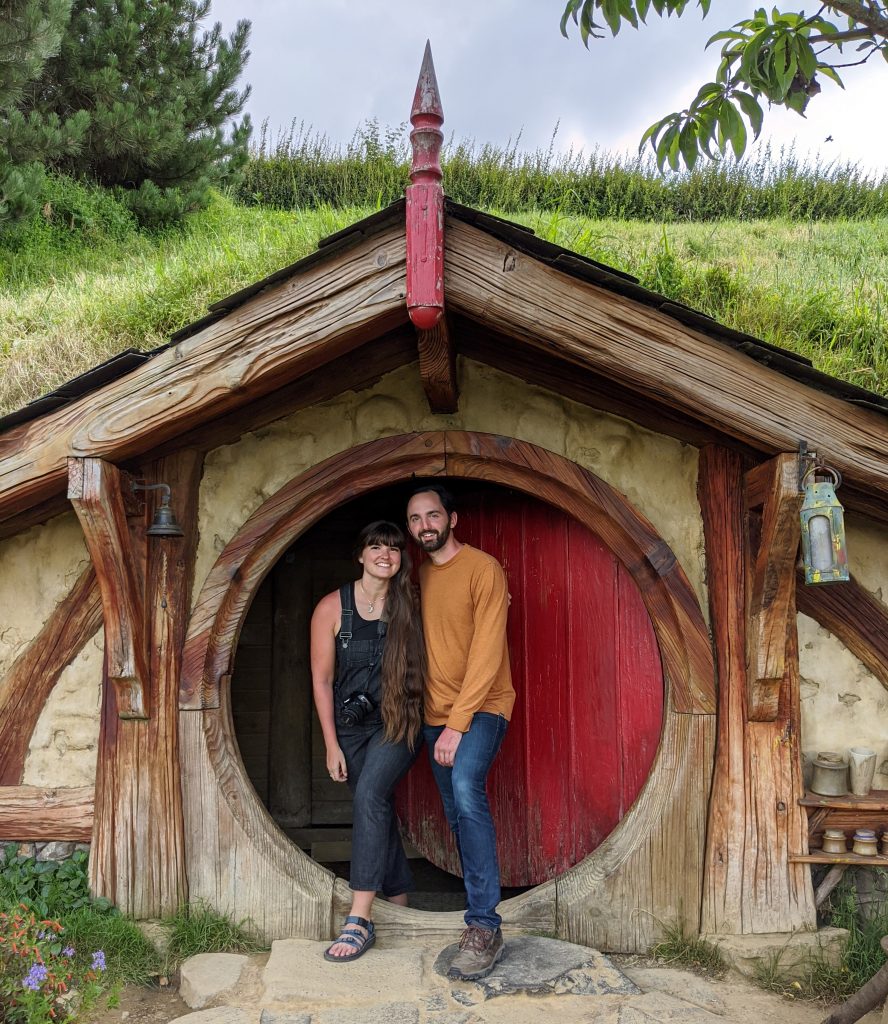
The red door Hobbit hole is the only one you can open and look inside of. They are just empty or used for storage anyways at this site.
It was actually quiet impressive how efficient the tours ran and all the guides seemed to be excellent at communicating and directing. There were 2 spots along the route that EVERYONE who wanted one got a photo (the guide offered to take the photos). These were at the red door (where you can actually open the door and peak inside) and Bag end. The rest of the walking tour the guides ask you to move along and not try to get a photo with every single Hobbit hole. (there are a LOT).
At each stop you learn about specific scenes filmed in that spot, some of the building process that went into the visible props, and some of the Hobbit characters that resided in each particular hole. You learned a little bit about the Hobbit’s lifestyle (as described in the books) which was great and I found everything to be on par (since I had just read the books again before leaving for our trip.)
My favorite details we learned about the site was how meticulously devoted to the tree on Bag End they were- it’s actually the only tree that is fake in the whole area. Each leaf was hand painted and attached to be as authentic as possible.
The finale
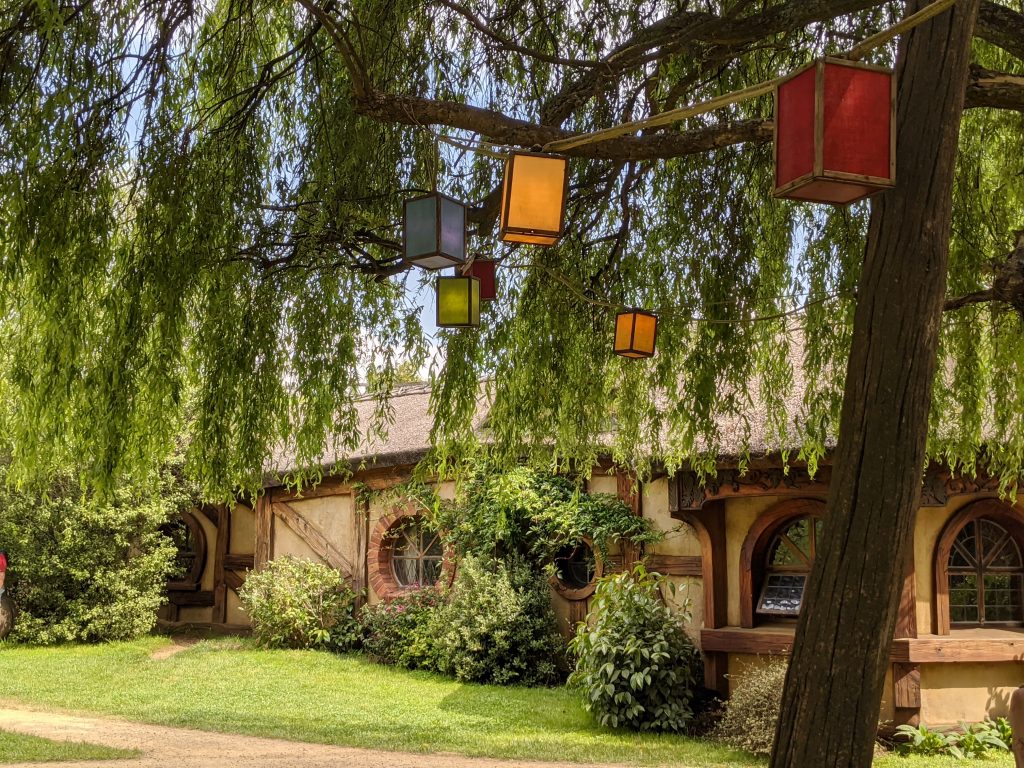
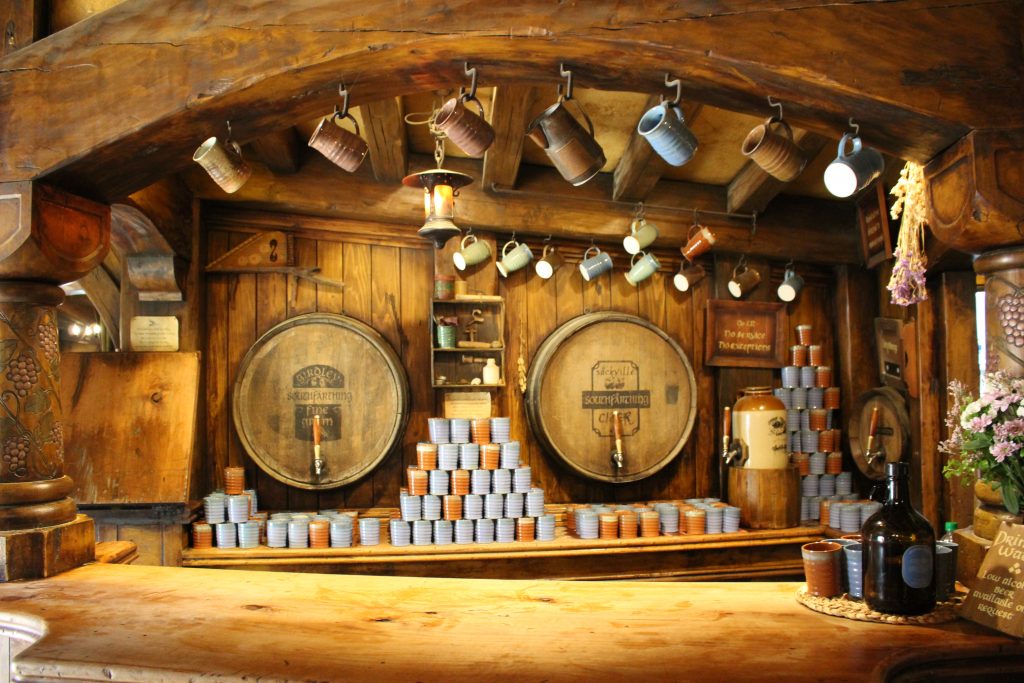
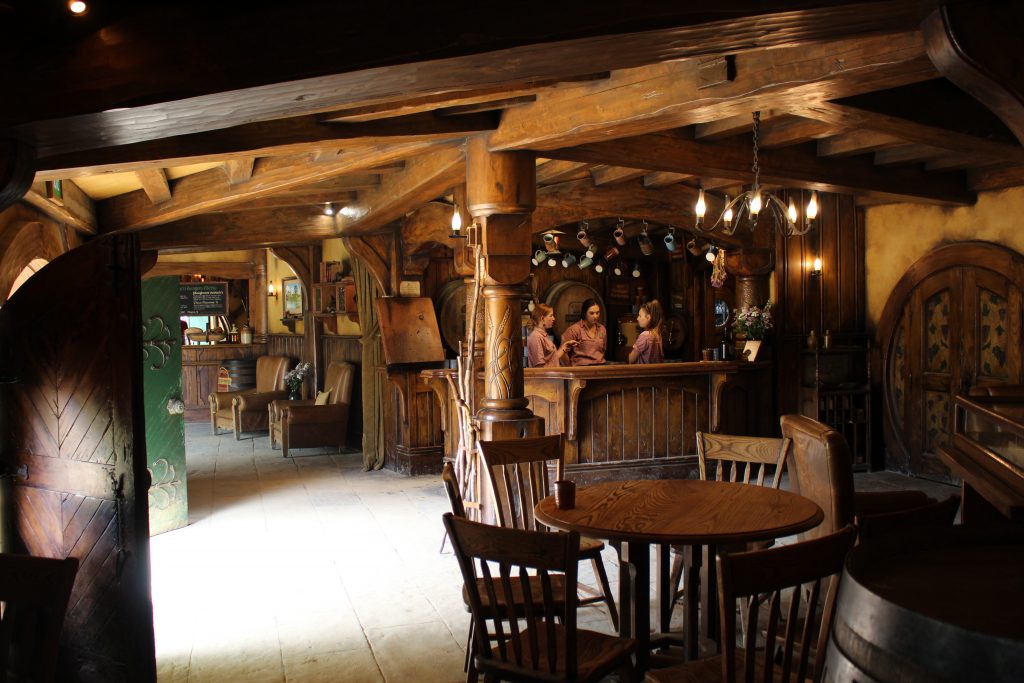
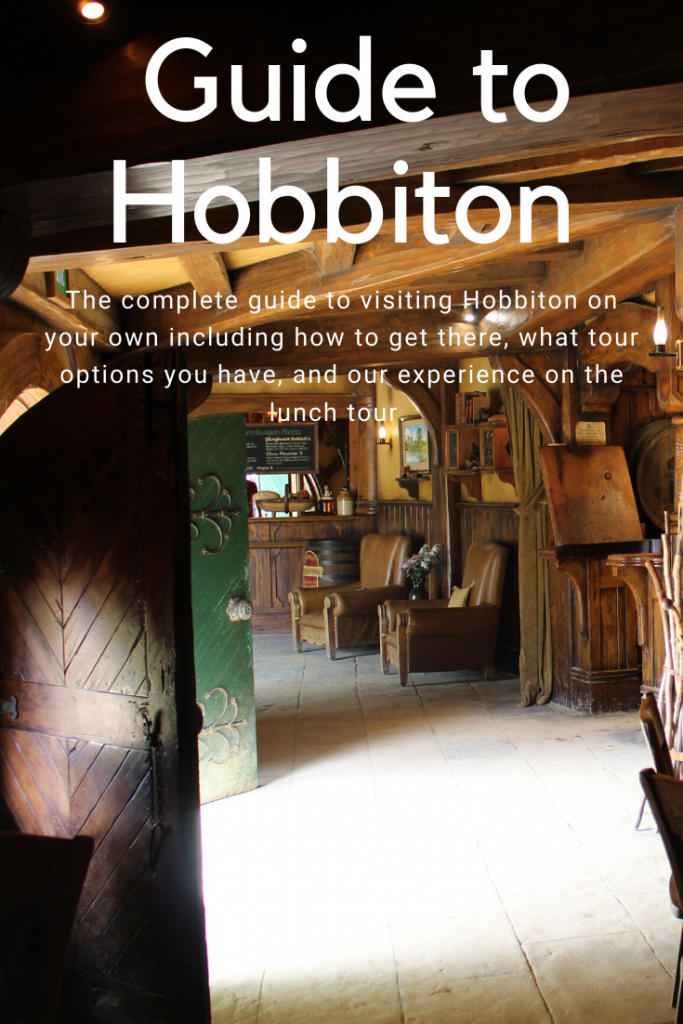
The other notable stops are at the bottom of the hill (in the “community”) and by the party tree. From there we walked a short 5 minutes or so through some pretty gardens and woods to the mill and Green Dragon. You’re rewarded then for making it through all that walking with your choice of 4 beverages and anywhere from 20-40 minutes to hang out. We had the latter so plenty of time to drink and admire the details that went into the Green Dragon and mill.
Hobbiton beverage options are:
Nonalcoholic Ginger Beer- tried on my first visit to Hobbiton and remember it being delightful
A traditional English Ale- haven’t tried but sounds good. It’s a roasted chocolatey sort of brew.
A Fine Grain Amber Ale- tried this round and it was QUITE good. The taste is light, malty, and sweet. Very little bitterness or hops.
The Sackville Cider- Excellent- tried this and both Braden and I agreed it was great. It’s a more tart and refreshing cider as opposed to a lot of the overly sweet ones you get at the store.
Great spaces to take photos, relax, and have a drink in after your tour around the Green Dragon
Note: There are 2 restrooms around the Green Dragon (one of which is IN the Green Dragon) so apart from when you are wandering around the Hobbit Holes (approx. 1.5 hours) you have access to facilities.
At a specified time you meet back up with your same tour guide just outside the Green Dragon and walk back to board the bus for a 10 minute ride back to the car park.
Wrapup
So in review, I would recommend doing the lunch or evening tour as I thought the food was great and it was fun having a little extra time around the site. Just visit without the meals if you are on a budget though and you’ll still have a great experience. If you are a fan of the fantasy and not of the crowds- fear not. While it is busy, they have these tours down to an efficiency that really impressed me and I never had to stress that much about getting the photo I want or having to wait for people to move. All in all- awesome experience, and a must do if you enjoy LOTR, movie making, and cool photos 😀
What do you think, does Hobbiton seem like a must do for your trip to New Zealand?
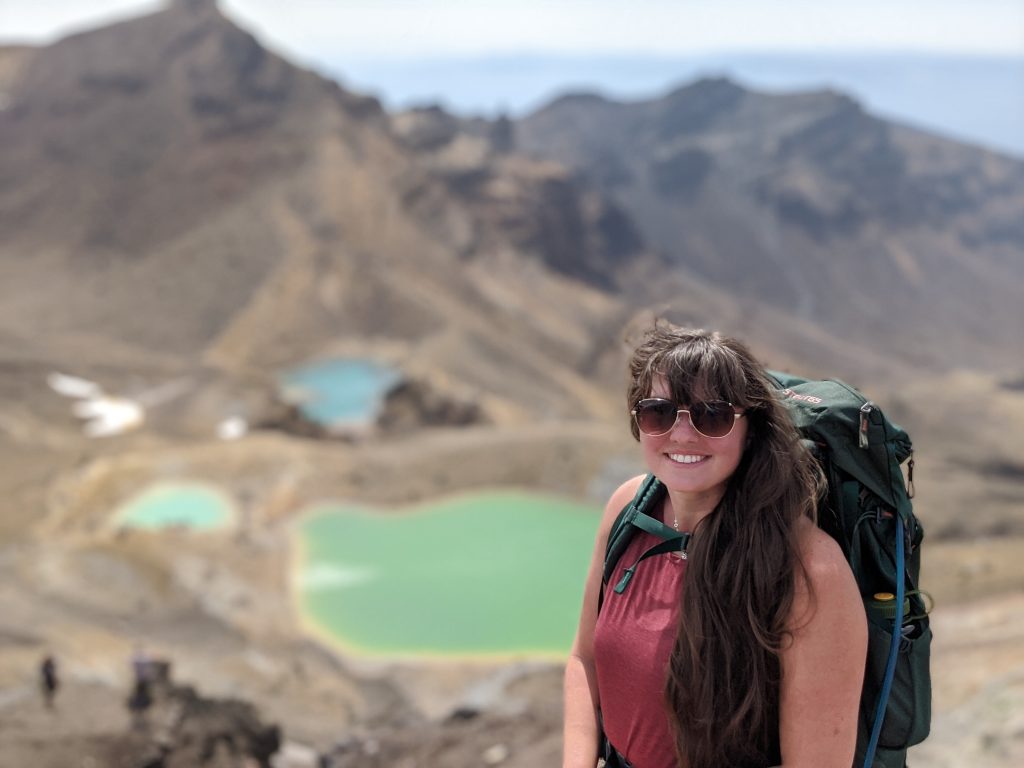
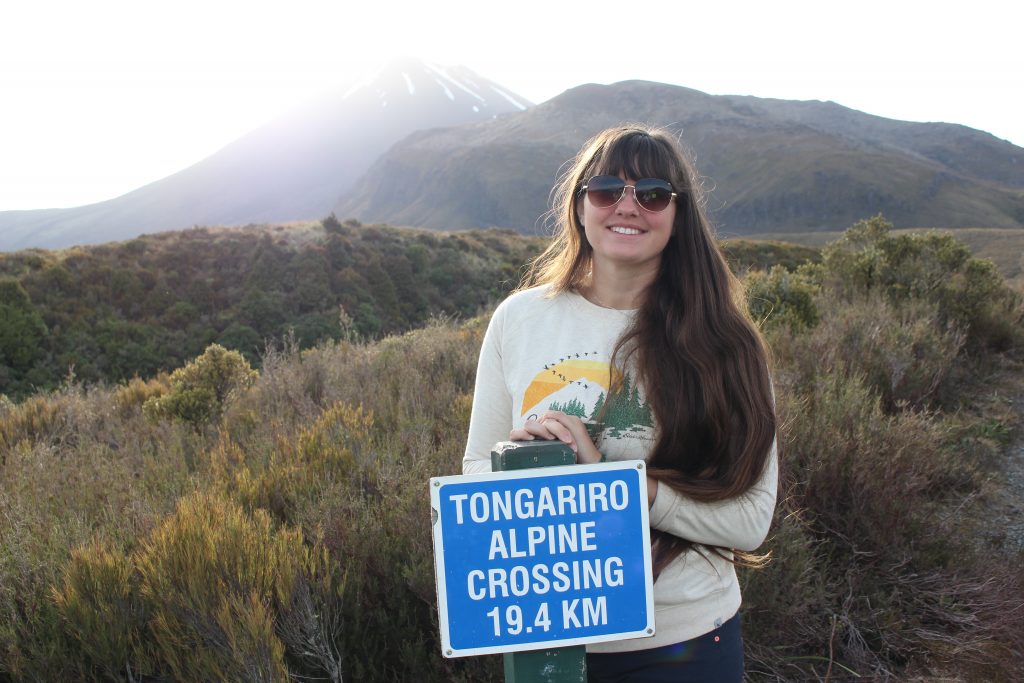
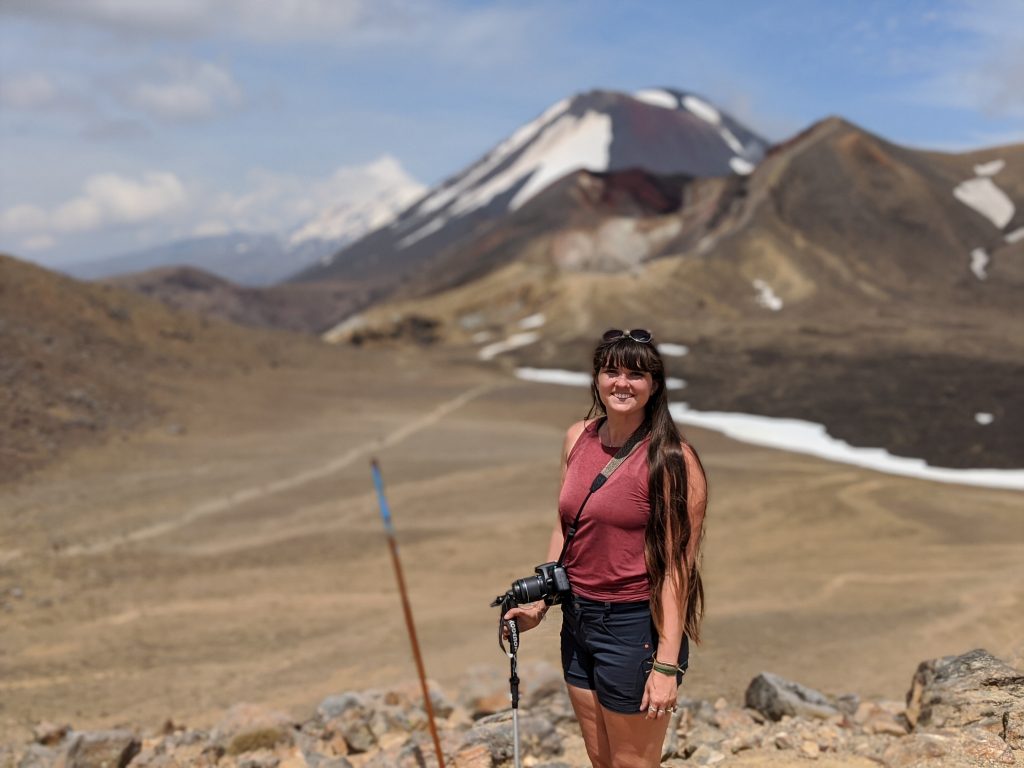
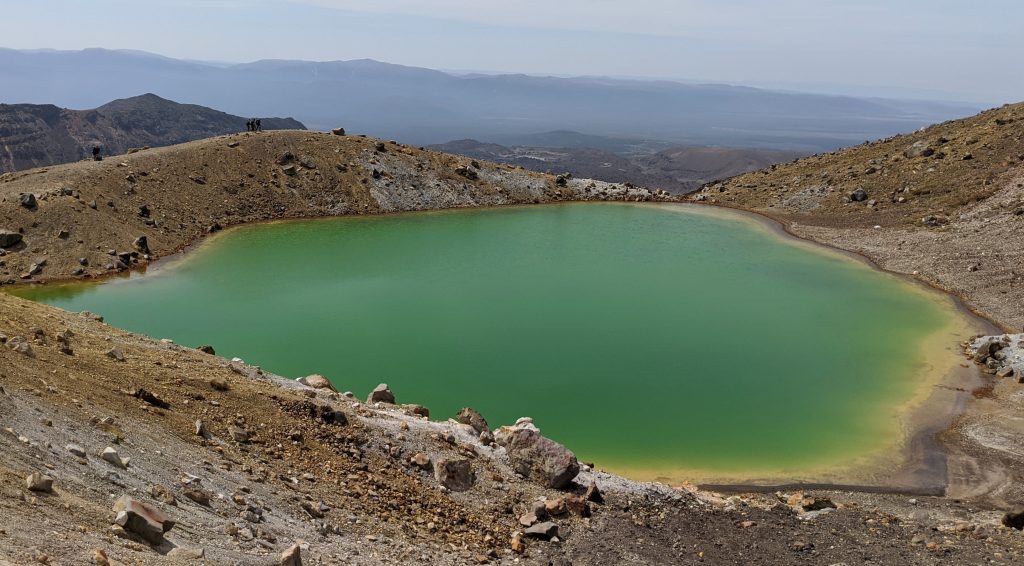
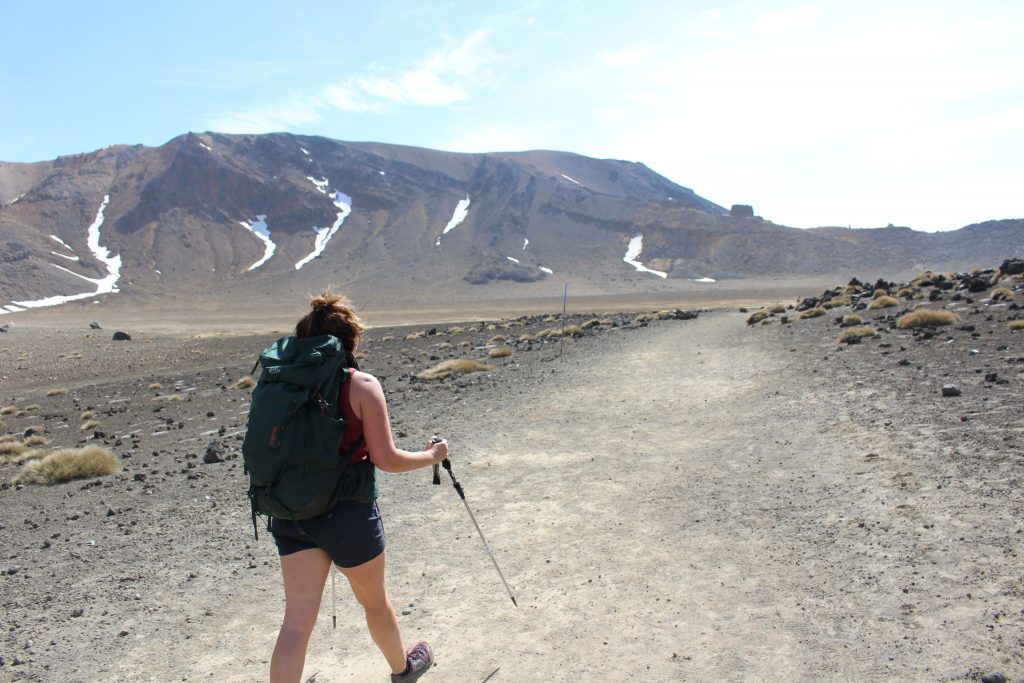
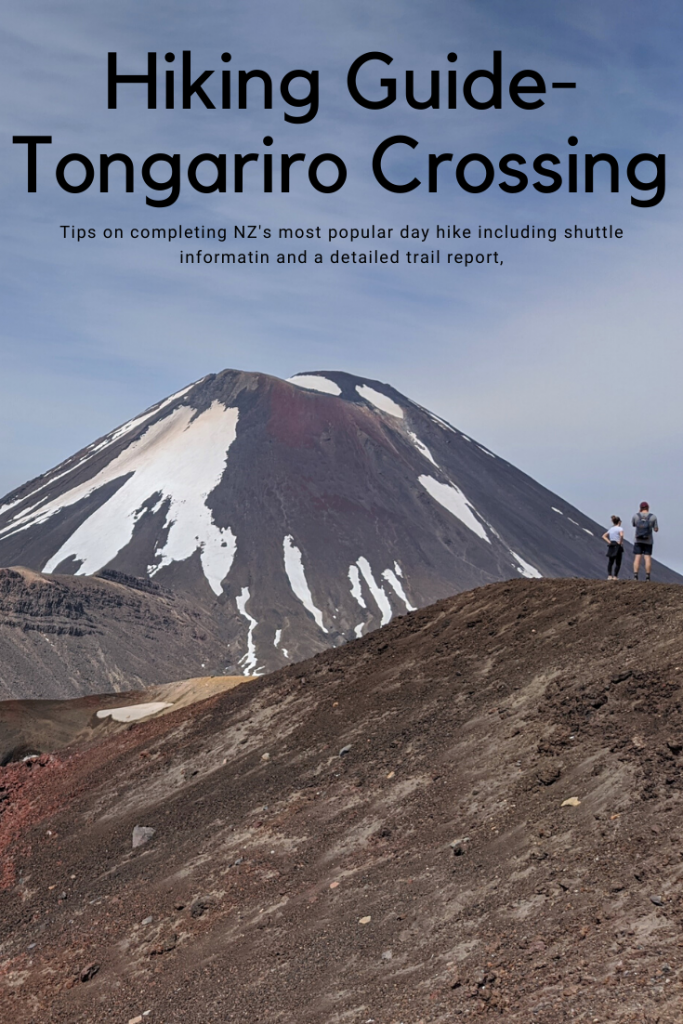
Rated New Zealand’s top day hike (and among the top 10 day hikes in the world) the Tongariro Alpine Crossing is considered a “must do” for any outdoor enthusiasts visiting New Zealand. It’s yet another track I missed on my first trip out there and I was determined not to miss it this time. The track provides incredible views across different kinds of (primarily volcanic) landscapes. From the desolate Mars-like landscape of the western face of mount Tongariro, to the glistening emerald lakes and vast lake views over Lake Rotoaira and Lake Taupo as you descend, this hike is really unlike any other I’ve experienced.
Distance: 19.4 km/ 12 miles point to point Elevation change: 2600 feet gain, 3700 feet/1126m loss Rating: Moderate- Hard (depending on weather conditions) Time: 6-9 hours Cost: The trail is free. The shuttles are 40 NZD/ $26.30* When to hike: Unless you have mountaineering skills with crampons and ice ax, plan on hiking during the late Spring- early Fall (Oct- April) and avoid this hike if any storms are predicted in the area.
Start of the trail
Shuttle information:
During the primary trekking months (mid Oct-April) parking at the main TH on Mangatepopo road is limited to 4 hours so you aren’t able to park your car there if you are doing the crossing. There are shuttle services from National Park village that cost 40 NZD pp or you can arrange your own pickup/ drop off. The shuttles pick up at multiple locations in town and at the Mangahuia Campground. There are a couple shuttle providers but all cost around the same, and TCS (Tongariro Crossing Shuttles) is the most frequent/ popular provider.
*YOU MUST BOOK AHEAD. You must book on their website or by calling their office BEFORE the day you plan to do the trek. Departures are scheduled on the hour from 7AM-10AM and the time slots DO sell out. The shuttle will then pick you up at the end of the trek starting at 1:30 and continuing every hour (2:30,3:30,etc) until 5:30. If you are late for the shuttle, they have a phone you can call that will send a van out to pick you up but you will incur additional charges at that point.
*The shuttle will also pick you up free of charge at the beginning of the hike any time during the day if you decide to turn around.
Tips for completing the Tongariro Alpine Crossing:
Be Prepared. People have DIED doing this trail and hikers are rescued at least twice a month, don’t let that be you!
Wear good shoes with durable, thick soles. The volcanic terrain is VERY sharp and hard on shoes.
Bring SUNSCREEN. The track is 90% exposed with no cover until the last 10% of the track. (We failed in this respect and ended up with horrible sunburns on the 4th day of our 2 week trip)
Bring layers! The conditions can and DO change rapidly in the alpine environment. While it can be hot and sunny when you start, clouds and winds blow in quickly making for very extreme conditions. And again with no cover up there, you don’t want to be caught without layers.
Bring lots of snacks and water- at least 2.5-3 liters per person.
Watch the weather reports. The shuttle services will make sure you are aware and prepared for the weather conditions that day when they pick you up. It’s important to know if bad weather could be rolling in, whether you are prepared with layers or not, and how familiar you are with the route. The route is not always obvious, the rock is VERY loose and crumbly, and there are extreme drop offs, active steam vents, and high acidity pools. You don’t want to be caught up there with no idea which direction to go and no visibility due to weather.
Hike with a buddy/ group and do NOT wander off alone. EVER.
Pack Toilet paper! There are many toilets along the route but none of them provide TP. If you want it, make sure you pack it.
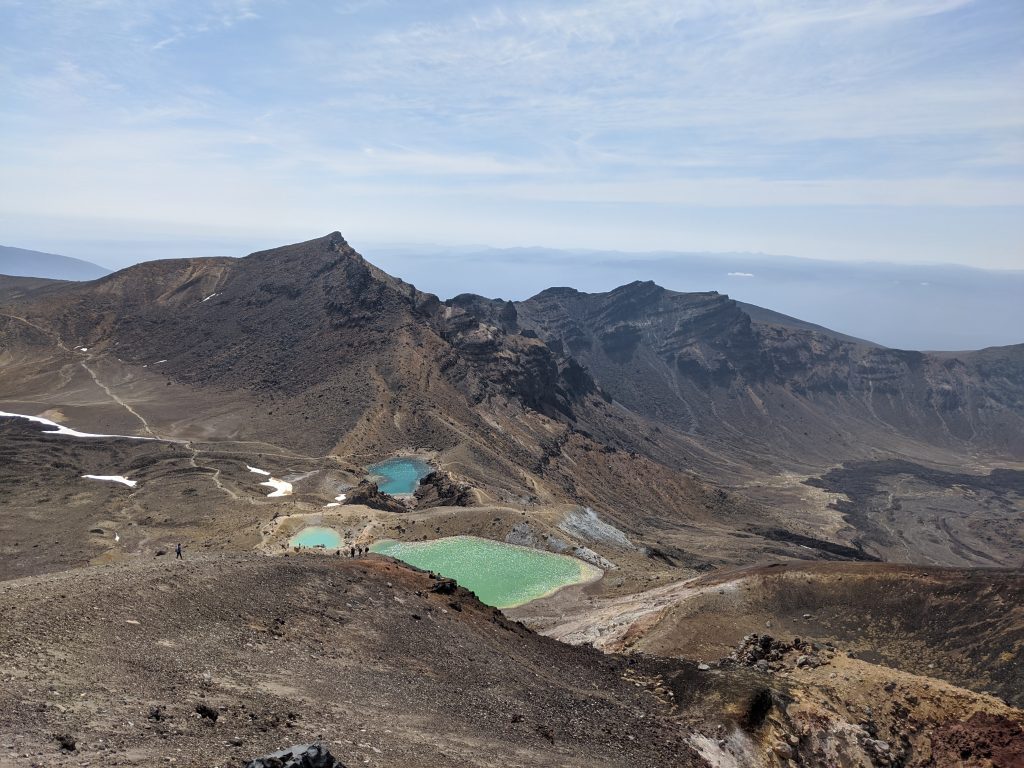
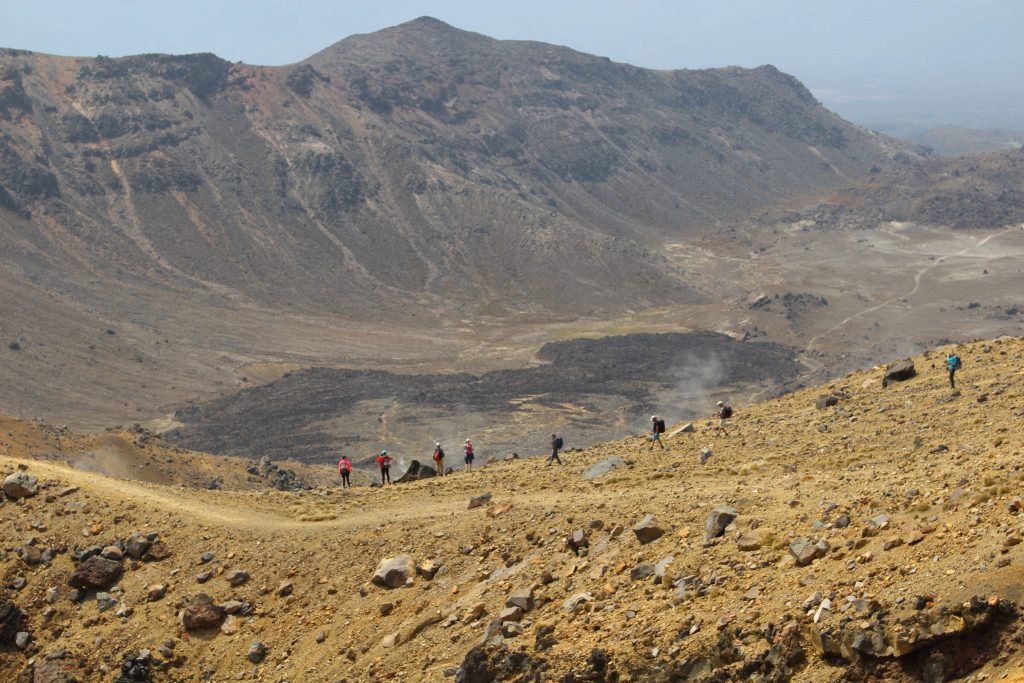
View from near Blue Lake looking across the central crater towards Red Crater
Schedule for either the first or second start times with the shuttle. In the summer (even early summer) It got HOT fast. We started at 7AM and wished we’d started at 6. Starting earlier also gives you the opportunity to share the trail with less people as it gets busy quickly.
Familiarize yourself with the route. We thought we were much closer to being done than we actually were. The more you know, the more you can plan and pace yourself.
Use trekking poles and/or do some prep hikes. I discounted this as a fairly easy day as I’ve done far worse hikes than 2600 feet of gain but that gain is RAPID and steep. The loss at times is even worse, with one section that had NO solid footing at all… It was like skiing down loose rock. The trekking poles will help you keep your balance when you slide.
History of the National Park
It was designated Tongariro National Park on the 23 September 1887, due to the importance of the area for its outstanding natural features and the cultural importance that the peaks and rivers represent to local Maori. In 1990 the park was recognized as a World Heritage Site for its nature and in 1993, the park became the first place in the world to be listed as a World Heritage Site for the spiritual and cultural values the landscape possesses for the indigenous people in the area.
Volcanic history of Tongariro
The Tongariro land mass was formed by a multitude of eruptions from at least six different cones which all share the same alignment with the oldest lava flow dated to about 275,000 years ago.
The eruptions continued for the next 200,000 years until the Ice Age. As the ice retreated, it carved out valleys from the mountains. Red Crater and Mt Ngauruhoe are the most recently formed features on the Tongariro Alpine Crossing (which makes sense as they are also 2 of the active hazards zone… more on that later)
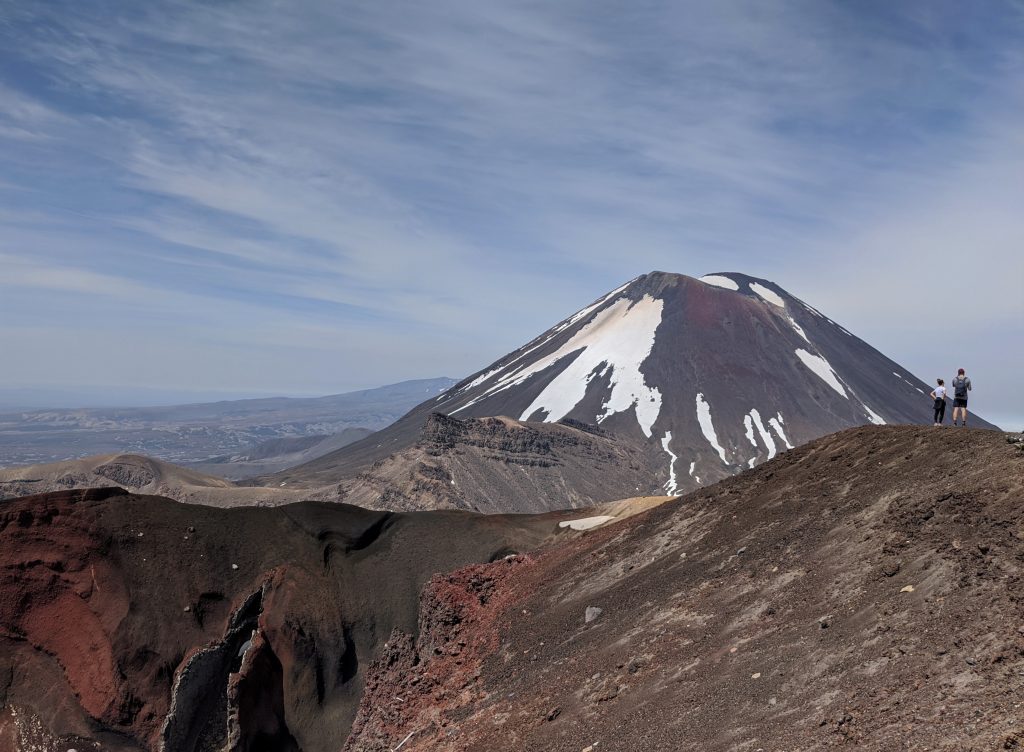
Red Crater was formed about 3000 years ago. It lies within a scoria cone which rests on top of the older Tongariro lava flows. The most recent confirmed volcanic activity from Red Crater was reported between 1855 and 1890. The dike on the Southern Wall has been exposed by erosion. Lava would have flowed through this dike and poured into the valley below. (pictures of this further down)
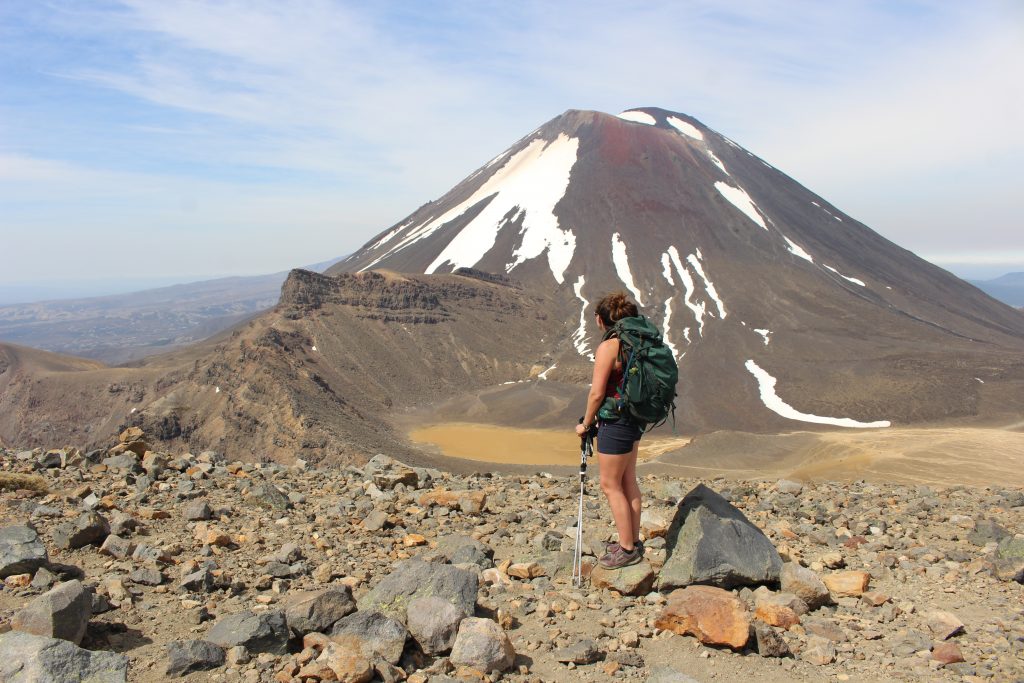
Mt Ngauruhoe (Mount Doom) is the youngest volcano in the area having begun to form about 2,500 years ago. It is the most active vent in the Tongariro area with its last eruption recorded in 1975 and the flows from that eruption are easily visible at the beginning of your hike when you hike up to the south crater. (the first big uphill move)
Photo of an active steam vent along the track
Volcano Awareness
The Tongariro Alpine Crossing and Tongariro Northern Circuit both pass through hazard zones. Tongariro Volcanic Hazard Zones include: Te Maari, Red Crater and Ngāuruhoe. All of these vents have been active within the last 100 years. The most recent eruptions occurred from Te Maari in 2012 and Ngāuruhoe in 1975. Flying rocks and burning ash clouds are the main volcanic phenomena that can affect the tracks on and around Tongariro.
Even when the tracks are open, volcanic risk is present as volcanic eruptions can occur with little or no warning. Volcanic monitoring systems in the Park monitor volcanic activity and mitigate volcanic risk, but won’t ensure your personal safety. Hike at your own risk. To check the alert level of the Tongariro area, visit GEONET the day before/ on the day or your trek.
About our experience:
*If you want an incredibly detailed write up of what this hike will entail along with a few more tips, read on.
The beginning:
Because our Airbnb was 20 minutes North of National Park village, we decided to book the 7AM departure to make it easier on ourselves in the morning. Probably best too since we barely made that time slot. We arranged for pick up at the station/ Park & Ride which as it turns out is the first on the route. (bad because we were a little late, great because the driver waited for us) The bus definitely filled up quickly with the major stops being the ski shop and YHA. It was about 30 minutes drive with additional pickups meaning we started our hike right around 7:40 AM.
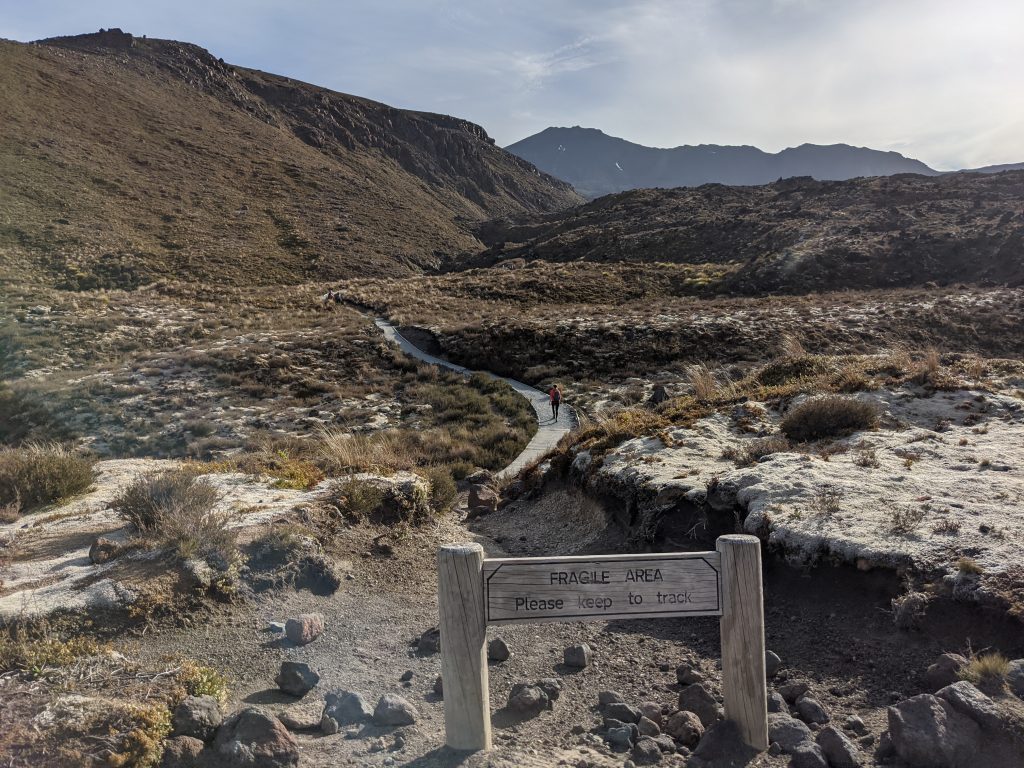
A flat couple miles on boardwalks through lava fields to start
The trailhead was BUSY- between our bus load of people, previous 6 AM drop offs, and other shuttle services- it was crowded. We headed out immediately instead of dilly dallying with all the people.
*TIP If you have to use the restroom, just WAIT as literally 20-30 minutes down the trail there are toilets at the Mangatepopo Hut that were empty. There’s toilets every 1-2 hours after that.
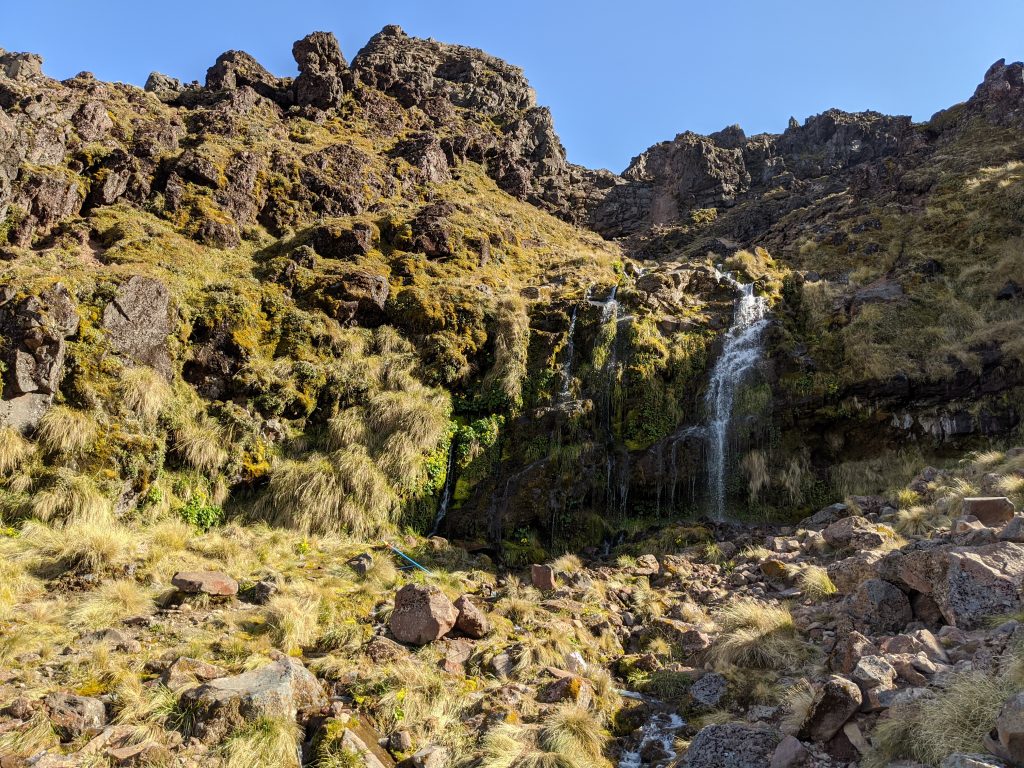
After 3 miles (around an hour) of flat easy hiking, a small track will veer off to the visible Soda Springs Waterfall. It’s maybe a 15 minute detour and a cool little waterfall to see up close.
Soda Springs Waterfall
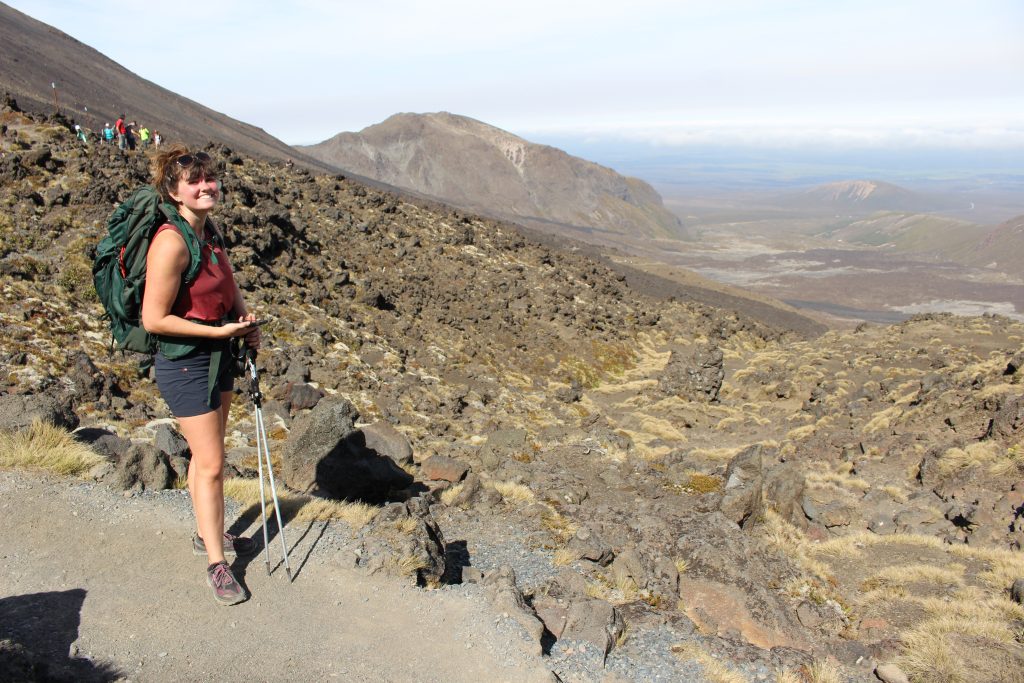
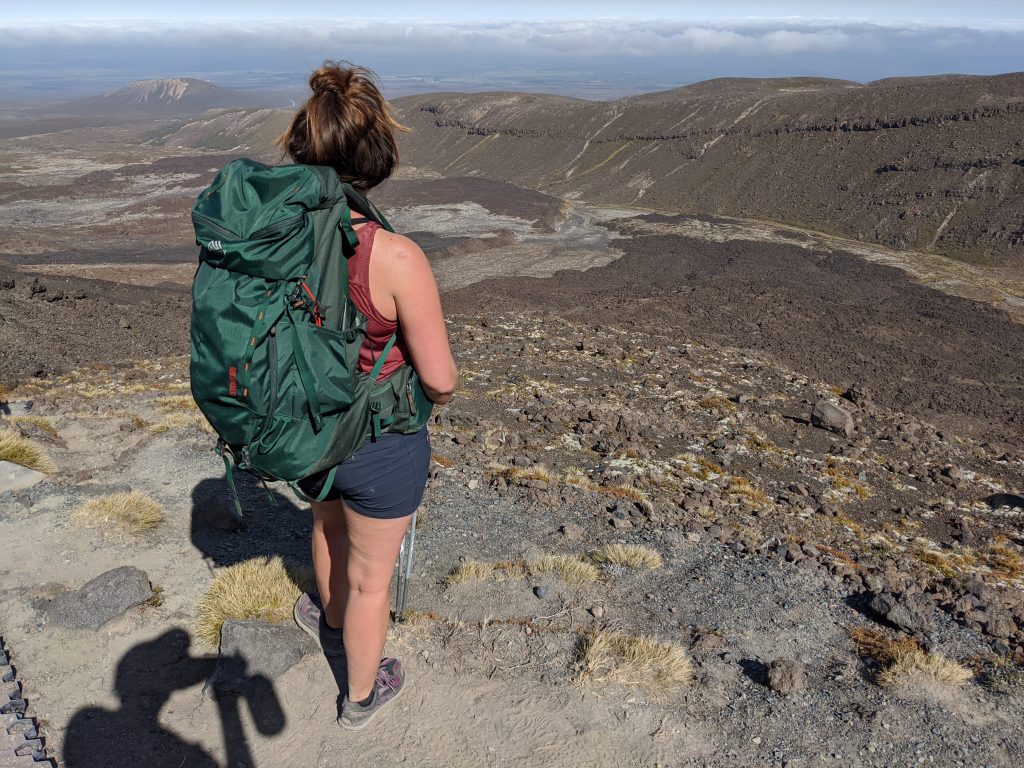
The uphill through lava fields:
From the waterfall/ Soda Springs toilet area, the trail finally starts to really take off- gaining almost all the elevation over the next 3 miles. We had decided to just pack one bag between the 2 of us and trade off every 3 miles which meant I got to carry the pack up the hills. The track here is made up of more boardwalks and stairs (easier than lose rock) and you get some pretty cool views down the valley and on a clear day even out all the way to Taranaki. (we weren’t so lucky) The immediate slopes are all ancient lava flows which vary between flat to dotted with massive lava rocks. If you are a Lord of the Rings fan, you will definitely feel like you are trekking through Mordor here, which is great since this is where it was filmed! Mt. Ngauruhoe even provides a lot of the Mount Doom backdrops.
A short break to take in the view halfway up the first hill
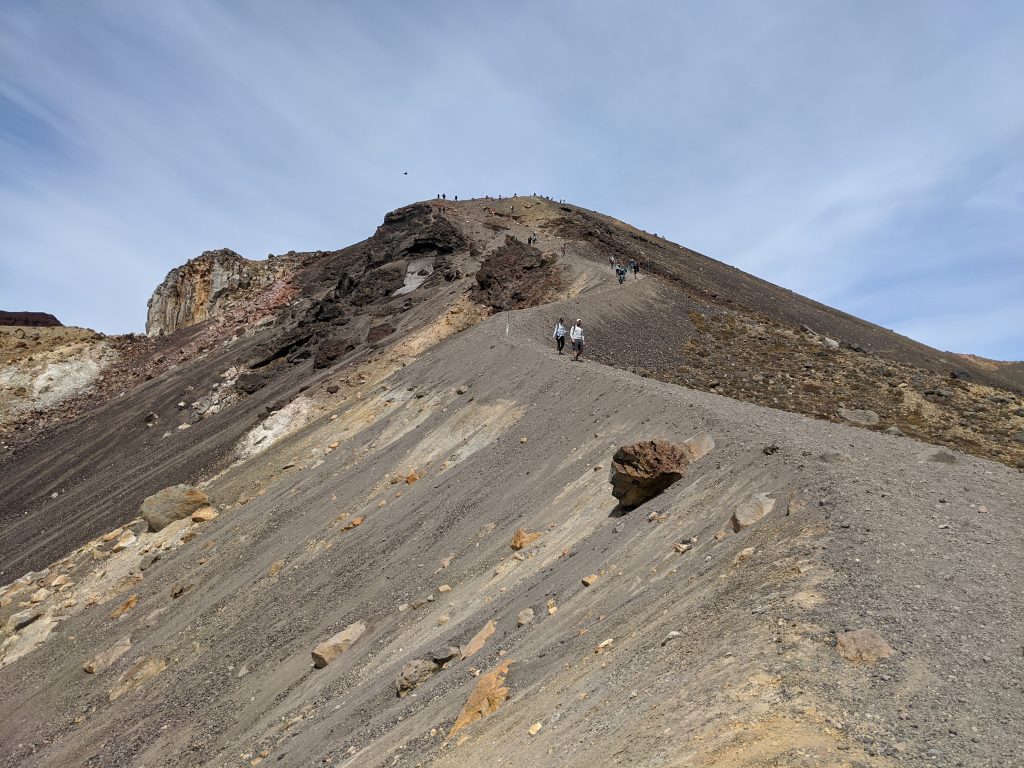
Climbing to the top of Red Crater
After 30-45 minutes of climbing you reach the top of one ridge and are now in what is called the South Crater. Walking through south crater gives you a respite from the climb since it is the flattest part of the whole trek, and it definitely feels a bit like walking on Mars.
The flat walk across South Crater. The highpoint on the left is the the next goal.
Then you’re greeted with another uphill climb (30 minutes) to the rim of red crater. This was the steepest angle of the whole trek and after being pampered with stairs before, this uphill section definitely feels challenging. Luckily you are rewarded at the top of this rim with really cool views of red crater with Mt Ngauruhoe’s red rim directly behind it. You can also start to feel good about being *mostly done with uphill climbs. It’s just 5 minutes more uphill to where you will be able to see down to the emerald pools.
Standing at the rim of Red Crater looking over at Mt Ngauruhoe with views of South Crater. Another 15 minutes up to the next spot.Another 15 minutes up and you have a cool view of the massive Red Crater Vent that lava actively flowed through
The downhill from Hell
Now begins the MOST CHALLENGING section of this entire hike. The slope down to the emerald pools is along a fairly narrow spine with your only footing- loose scoria. It is STEEP and it is SLIPPERY. We watched many people slip and fall- some multiple times! On this downhill section. The trick is to A. bring hiking poles to help maintain your balance and B. to go down side ways.
Turn to the side, step one foot down letting it slide (which it will) until it settles due to the rocks bunched up under it or a more solid rock underneath. Then move your uphill foot down to join it and continue switching leading sides as needed and moving slightly in a zigzag pattern as you search for better footing. The WORST footing is actually where it looks smoother but is covered in small pebble rocks. Aim for the bigger rocks and you will slide less. I promise.
Rewarding views of the beautiful lakes as you slip and slide your way down. The hill in question
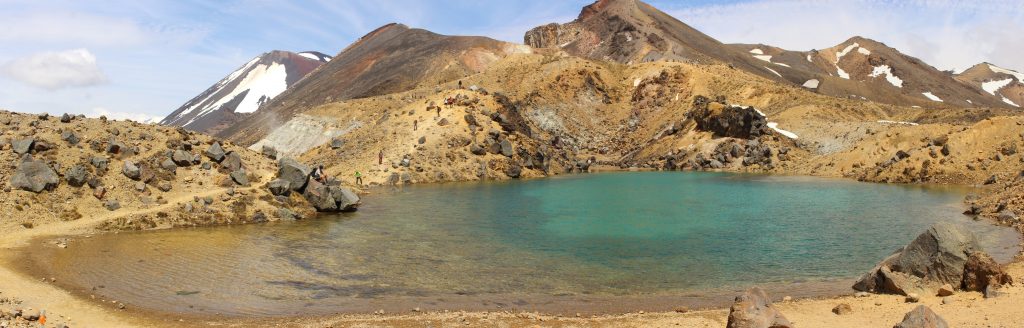
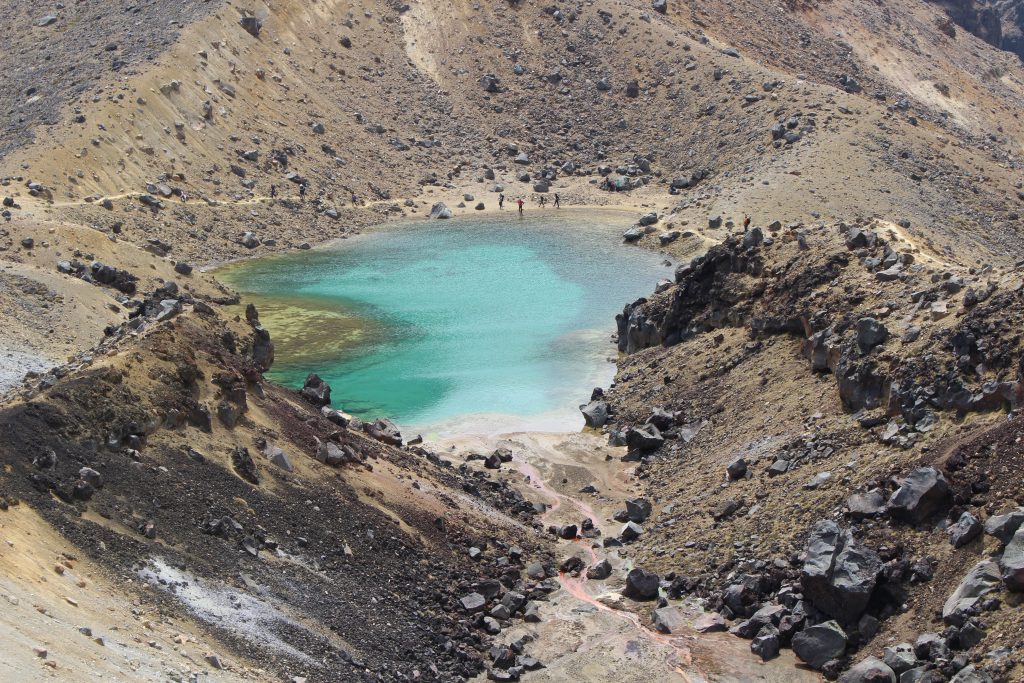
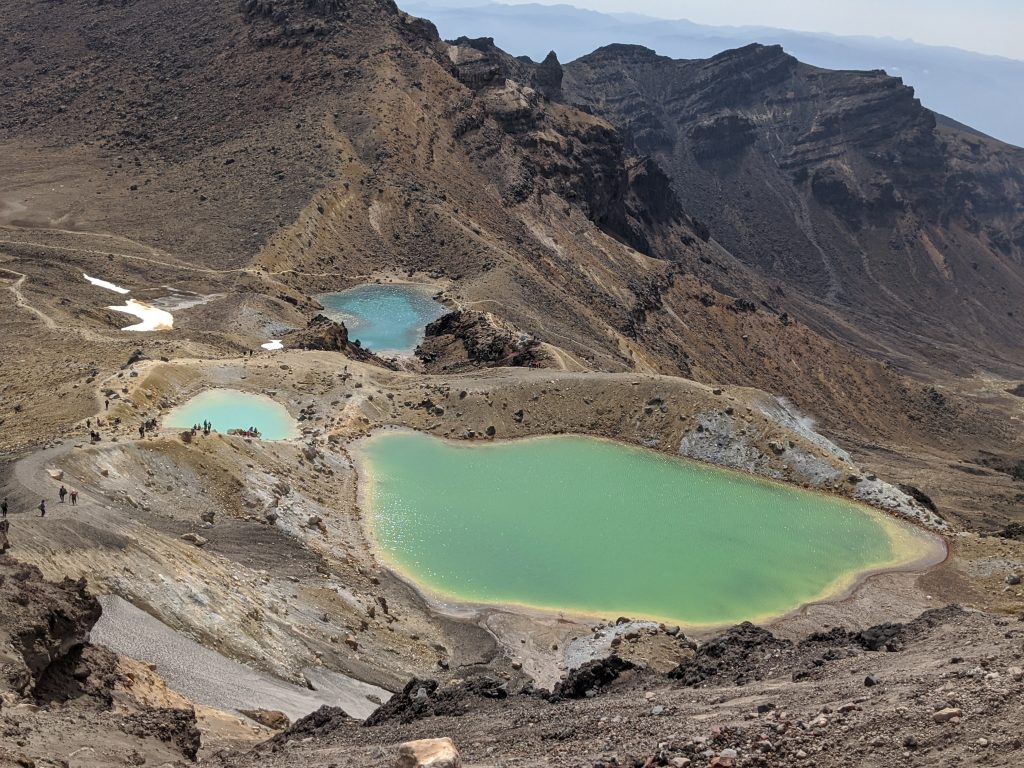
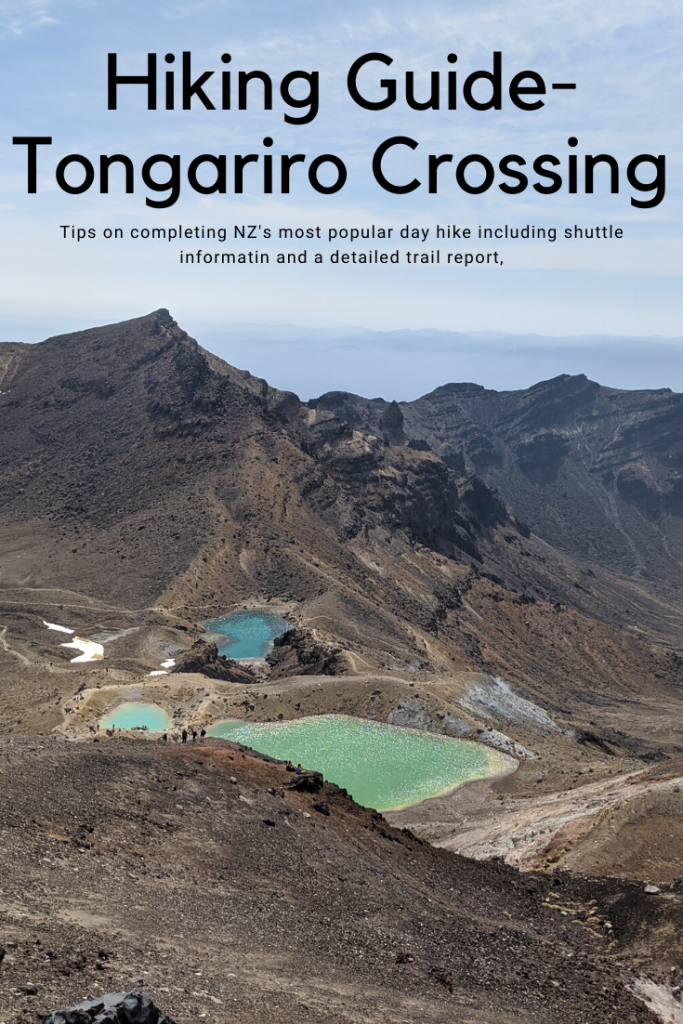
The Emerald Lakes to Blue Lake
Once down at the emerald lakes breathe a huge sigh of relief at making it down the hill from hell and take in the expansive views. Not only are the lakes a beautiful sight with their varying 3 colors of green/blue, but along one side are multiple cool steam vents that release visible steam clouds. Make your way down along the right side of the lowest lake to get a good view of the vents, but you’ll want to continue to the left at the bottom to meet back up with the track. *The trail that descends down to the right is part of the longer 3-day Tongariro Northern Circuit.
After the emerald pools, it’s a 15 minute walk across central crater with one last uphill section (easy in comparison) to the massive blue lake. In contrast to the emerald lakes, blue lake is an acidic COLD lake and is considered sacred to Maori culture. Because of this it is considered disrespectful to touch the lake, or eat around its shores. Since we considered the emerald lakes so cool, we snacked there and only paused a moment to admire the views from blue lake.
Now this is the important part, at blue lake we thought we were over halfway done with our distance (because endomondo was wack) but in reality, this is the DISTANCE halfway point which ended up having a big impact on the rest of our hiking pace. There’s toilets just around the corner from blue lake, but otherwise- gear up for some serious descent.
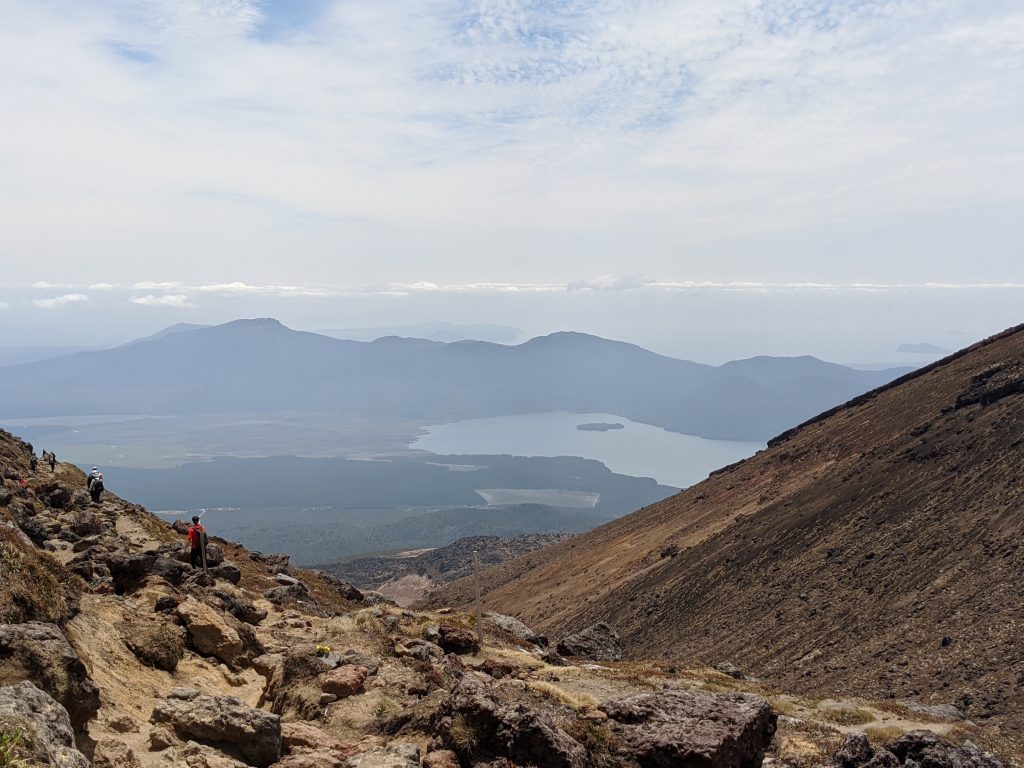
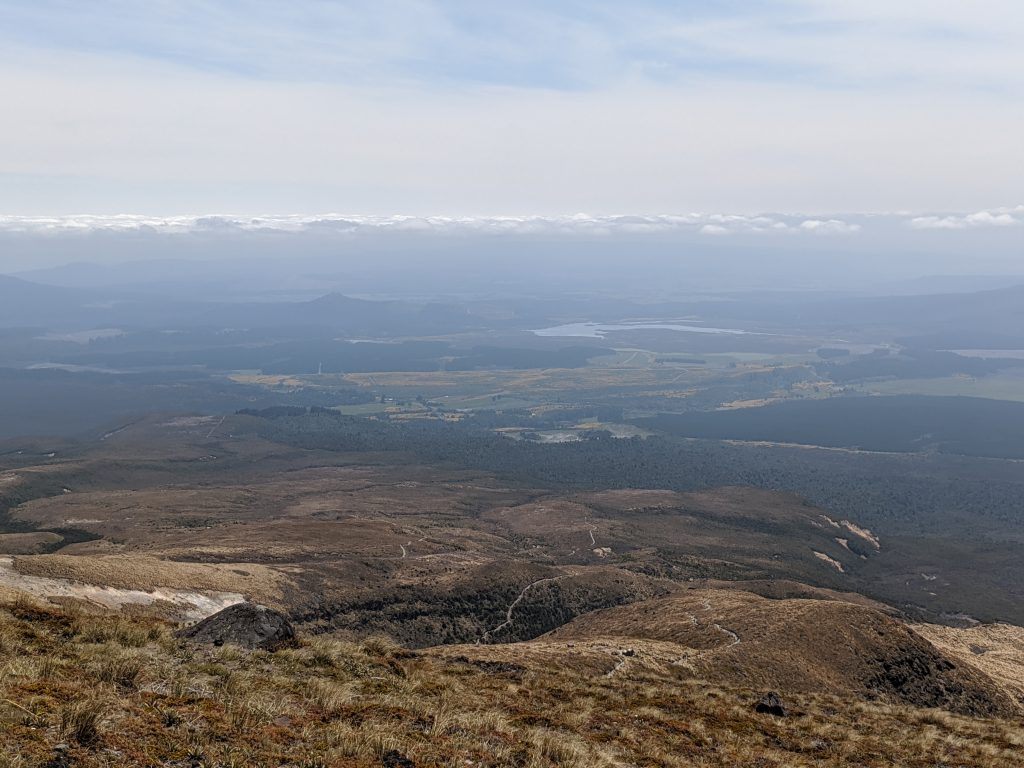
The Descent
The second half of this hike basically descends the same slope in dozens upon dozens of switchbacks so your view won’t change much. However, the view is REALLY something and when you see photos of the rest of the alpine crossing, nobody really mentions just how cool this part of the view is. On a clear day (or even not on a very clear day) you can see for miles. Those miles encompass Lake Rotoaira divided by a small ridge from what only looks like the ocean at first. But is in fact, the largest surface area lake in New Zealand. Extending in the other direction are rolling green hills dotted with stunning yellow flowers that even on a hazy day we could make out.
As you descend you’ll also pass more steam vents, many dotting the hillside bringing “fire on the mountain” to mind. Eventually you’ll get to the last toilet stop of the trek before the end- at Ketetahi Shelter. At this point it really seems like you are nearing the end but in reality, you still have 2 hours at a normal hiking pace to go. At this point we’d noticed just how sun burned we were getting and were ready to be DONE so our aim was to finish in time for the 2:30 shuttle. According to the distance I had on endomondo, it seemed very doable if we moved at a consistent pace.
The yellow flowers were popping everywhere end of November.
Sometime after the Ketetahi Shelter, we came to another sign estimating still 45 minutes (we only had 20 minutes until the shuttle) and at this point if we missed the 2:30 shuttle, we’d have to wait until 3:30 to be picked up…. I’ve never been so tired and yet hiked so fast. We practically ran those last kms through the bush line literally bursting out of the trees into the carpark at 2:32 as the bus was closing its doors. Thankfully, they paused to let us get on a VERY packed bus taking the last available seats.
Luckily the guys around us were friendly and talkative making the 30 minute (HOT) bus ride back to our car a little less painless. Since our Airbnb was so far out of town, we decided on an early dinner so we wouldn’t have to drive back IN to town and we opted for the Station Café where we parked. Then following the a very satisfactory meat pie with chips, we drove back to the Airbnb to nurse my sunburn and get some R&R.
Conclusion
All in all, if you show up prepared and have nice weather, the Tongariro Alpine Crossing is an amazing and unique hike that you just won’t get anywhere else. It is a busy trail, and it is a long day, but if you’re an outdoor enthusiast visiting the North Island of New Zealand, I’m not sure how you’ll be able to resist it.